1HCL 1.0 closed loop controller
-
@supertb1 try uploading the RRF 3.4 release zip file again.
-
@dc42 Is Symbols-RepRapFirmware-Duet3_MB6HC different from the RRF 3.4, I reinstalled it and again got the same error when I tried to install the Duet3Firmware_MB6HC. Is there another place to find "RRF 3.4"?
-
@supertb1 The symbols file is not the firmware. Use Duet2and3firmware-3.4.0.zip. That's the first file on the release page.
The firmwares all have firmware in the filename.
-
-
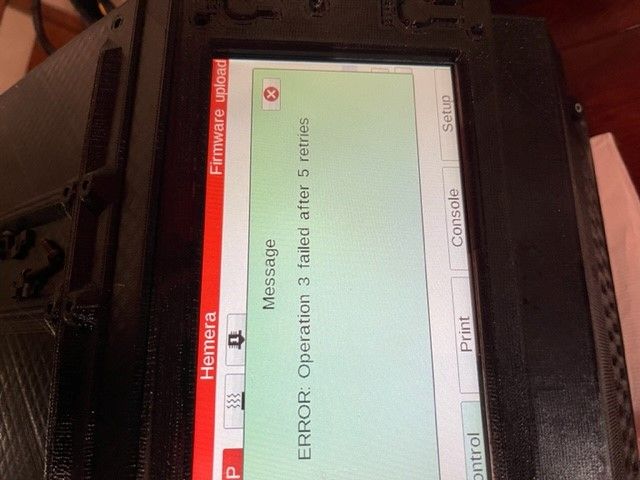
@dc42 So I did the Duet2and3Firmware-3.4.0 that took ,and then I did the Duet3Firmware_MB6HC which yielded :


and it basically bricked the controller, I can't get on the DWC and I can't make it do anything from the touch screen... I hope a reset will fix this and nothing permanent has been done. any help would be great. -
If you send M115 on the paneldue does it respond?
You can use this method to flash the desired firmware directly to the 6HC.
https://docs.duet3d.com/en/User_manual/RepRapFirmware/Updating_firmware
Can you also check what firmware version you have running on the PanelDue in the setup page? You should probably update it as well using USB and similar procedure.
https://docs.duet3d.com/en/User_manual/RepRapFirmware/Updating_PanelDue
-
@phaedrux

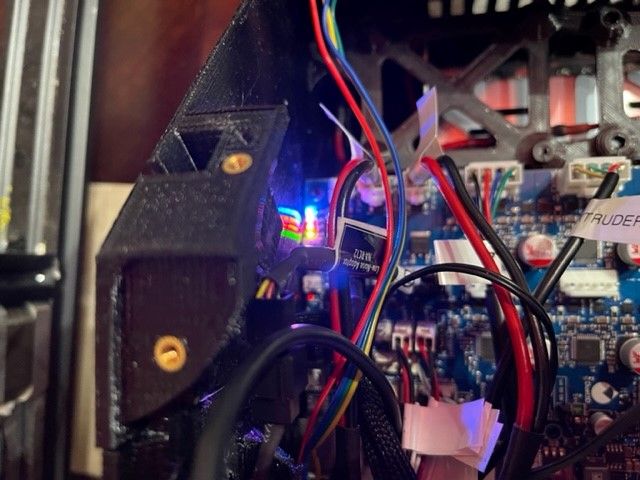
No response, and to boot the status light on the main board is dimly lit, the status on the 1HLC boards are flashing red....so at this point is my best coarse of action to connect my computer directly to the Main Board and use BOSSA to flash the firmware? or am I someplace else?
what is the correct board sequence to flash? What have I done to this thing? so exciting to have messed this thing up and now I get to learn how to fix it


-
@phaedrux one last thing, while using BOSSA what is the correct order to install the software?
-
@supertb1 said in 1HCL 1.0 closed loop controller:
@phaedrux one last thing, while using BOSSA what is the correct order to install the software?
I'm not sure what you mean by correct order. Have you looked at this link yet? https://docs.duet3d.com/en/User_manual/RepRapFirmware/Updating_firmware
-
@phaedrux Have you guys made a video someplace demonstrating a BOSSA or other method of erasure through firmware install... this is making me a little nervous never having done this before
-
It's pretty straightforward.
https://docs.duet3d.com/en/User_manual/RepRapFirmware/Updating_firmware#fallback-procedure-2
Fit the erase jumper, power it up, remove the jumper. The firmware is erased and will show up as a bossa port.
Select the port in Bossa, select the firmware file, select the options to match those shown in the picture and flash and verify.You can't damage the board with a firmware update even if it fails in the middle.
-
@phaedrux is the diagnostic light rite next to the micro USB port?
-
@phaedrux
 OK I used BOSSA to install Duet3Firmware_MB6HC... not Duet2and3Firmware-3.4.0 and it worked... I have access to DWC... so is it at this point I can install Duet2and3Firmware-3.4.0 or is there something else I should do to make sure I don't have another system lock up.
 -
If you now have access to DWC you can upload the full 3.4 zip file to ensure you have all the right files in place for future updates.
https://github.com/Duet3D/RepRapFirmware/releases/download/3.4.0/Duet2and3Firmware-3.4.0.zip
Upload that zip file as is to the system tab in DWC. Don't extract it first. Once done, check the firmware version again with M115. It may prompt to update any attached expansion boards as well. You can check those with M115 B# where # is the CAN bus address of the expansion board.
-
Same errors as before, it is Duet2and3Firmware-3.4.0 causing the system to lock up, I'm going to start over here, this next time I will record and post a youtube video of the update as it happens. Hopefully I can glean some idea as to why or when exactly the fail happens. unless you have a better idea?
-
@phaedrux do you think it would help to disconnect everything from the board except the panel Due?
-
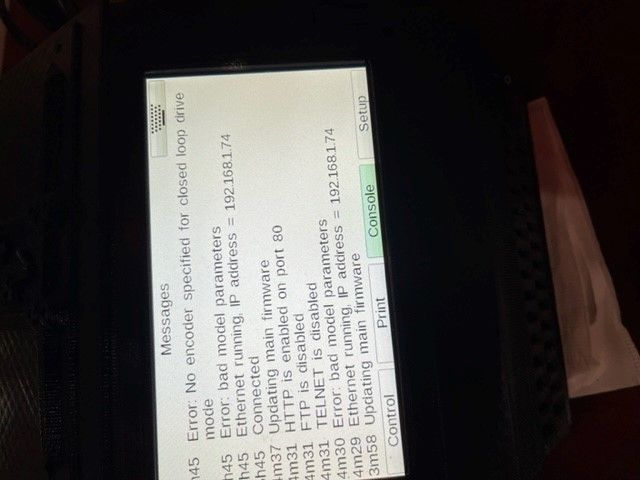
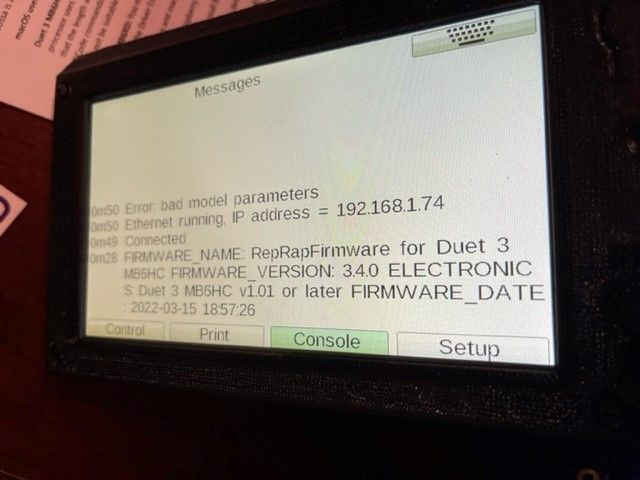
@phaedrux I erased the board again and then used BOSSA to re-install Duet3Firmware_MB6HC.bin. At startup the first error I get on my panel due is "ERROR Bad model parameters". Then it posts the IP address and then it posts connected.
-
@supertb1 said in 1HCL 1.0 closed loop controller:
At startup the first error I get on my panel due is "ERROR Bad model parameters".
That suggests a problem with one of your M307 commands in config.g, or a missing M307 command.
-
@dc42 ; General preferences
M575 P1 S1 B57600 ; enable support for PanelDue
G90 ; send absolute coordinates...
M83 ; ...but relative extruder moves
M550 P"Hemera" ; set printer name; Network
M552 P192.168.1.74 S1 ; enable network and acquire dynamic address via DHCP
M586 P0 S1 ; enable HTTP
M586 P1 S0 ; disable FTP
M586 P2 S0 ; disable Telnet; Drives
G4 S1 ;wait for expansion boards to start
M569.1 P50.0 T2 C5 E5:10 ; Configure the 1HCL board at CAN address 50 with a quadrature encoder on the motor shaft that has 20 steps per motor full step.
M569.1 P51.0 T2 C5 E5:10 ; Configure the 1HCL board at CAN address 51 with a quadrature encoder on the motor shaft that has 20 steps per motor full step.
M569 P50.0 D4 S1 ; Configure the motor on the 1HCL at can address 50 as being in closed-loop drive mode (D4), Open loop (D2) and not reversed (S1) X axis
M569 P51.0 D4 S1 ; Configure the motor on the 1HCL at can address 51 as being in closed-loop drive mode (D4), Open loop (D2) and not reversed (S1) Y axis
M569 P0.0 S1 ; physical drive 0.0 goes forwards
M569 P0.1 S1 ; physical drive 0.1 goes forwards
M584 X50.0 Y51.0 Z0.0 E0.1 ; set drive mapping
M350 X16 Y16 Z16 E16 I1 ; configure microstepping with interpolation
M92 X106.50 Y106.50 Z400.00 E420.00 ; set steps per mm
M566 X900.00 Y900.00 Z60.00 E120.00 ; set maximum instantaneous speed changes (mm/min)
M203 X6000.00 Y6000.00 Z180.00 E1200.00 ; set maximum speeds (mm/min)
M201 X500.00 Y500.00 Z20.00 E250.00 ; set accelerations (mm/s^2)
M906 X1000 Y1000 Z800 E800 I30 ; set motor currents (mA) and motor idle factor in per cent
M84 S30 ; Set idle timeout
M917 X10 Y10 ; Set the closed loop axes to have a holding current of zero; Axis Limits
M208 X0 Y0 Z0 S1 ; set axis minima
M208 X235 Y235 Z235 S0 ; set axis maxima; Endstops
M574 X1 S1 P"io1.in" ; configure active-high endstop for low end on X via pin !^io1.in
M574 Y1 S1 P"io2.in" ; configure active-high endstop for low end on Y via pin !^io2.in
M574 Z1 S2 ; configure Z-probe endstop for low end on Z
M591 D0 P7 C"io5.in" L7 R55:150 E22 S1 ;Bigtree smart filament moniter v2 set to moniter between 55%-150% of 7 counts over a distance of 22mm; Z-Probe
M950 S0 C"io7.out" ; create servo pin 0 for BLTouch
M558 P9 C"io7.in" H5 F120 T6000 ; set Z probe type to bltouch and the dive height + speeds
G31 P500 X60 Y0 Z2.5 ; set Z probe trigger value, offset and trigger height
M557 X15:200 Y15:200 S20 ; define mesh grid; Heaters
M308 S0 P"temp0" Y"thermistor" T100000 B4138 ; configure sensor 0 as thermistor on pin temp0 Bed Heater
M950 H0 C"out1" T0 ; create bed heater output on out1 and map it to sensor 0
M307 H0 B1 S5.00 ; enable bang-bang mode for the bed heater and set PWM limit
M140 H0 ; map heated bed to heater 0
M143 H0 S120 ; set temperature limit for heater 0 to 120C
M308 S1 P"temp1" Y"thermistor" T100000 B4138 ; configure sensor 1 as thermistor on pin temp1
M950 H1 C"out2" T1 ; create nozzle heater output on out2 and map it to sensor 1
M307 H1 B0 S1.00 ; disable bang-bang mode for heater and set PWM limit
M143 H1 S280 ; set temperature limit for heater 1 to 280C; Fans
M950 F0 C"out8" Q500 ; create fan 0 on pin out8 and set its frequency
M106 P0 C"Tool Fan" S0 H-1 ; set fan 0 name and value. Thermostatic control is turned off
;M950 F1 C"out6" Q500 ; create fan 1 on pin out6 and set its frequency
M950 F1 C"!out6+out6.tach" ; Fan 1 uses out6, but we are using a PWM fan so the output needs to be inverted, and using out6.tach as a tacho input
M950 F2 C"out7" Q500 ; create fan 2 on pin out7 and set its frequency
M106 P1 C"Extruder" S1 H1 T50 ; set fan 1 name and value. Thermostatic control is turned on; Tools
M563 P0 D0 H1 F0 ; define tool 0
G10 P0 X0 Y0 Z0 ; set tool 0 axis offsets
G10 P0 R0 S0 ; set initial tool 0 active and standby temperatures to 0C; Custom settings are not defined
; Miscellaneous
M911 S10 R11 P"M913 X0 Y0 G91 M83 G1 Z3 E-5 F1000" ; set voltage thresholds and actions to run on power loss -
@supertb1 looks like you haven't run M303 heater tuning on either of your heaters, so you have incomplete M307 commands.
