Prints are warping
-
Hello, 6 hours into my print, my parts start warping. I am printing at 200C on the Hotend, and 60C on the bed. My cooling fan is 0% for the first layer. How do I fix this?
-
THIS PAGE discusses a lot of reasons prints can warp.
HERE is another page that might help.
Since we know nothing about your printer, hot end, filament, GCODE, config settings or any other useful information it will be difficult to give anything other than general help.
If you want to describe a lot more about what's going on, what printer you're using, what filament, post your config.g, post your GCODE and some photographs of the problem, lots of people can give detailed advice.
-
@alankilian I am using an Ender 5 Plus, modified with a Hemera Direct Drive. Printing PLA from GST3D. Forgot to post the pictures last time:


Config.g:
; Configuration file for Duet WiFi (firmware version 3.3) ; executed by the firmware on start-up ; ; generated by RepRapFirmware Configuration Tool v3.3.10 on Thu Apr 21 2022 23:00:27 GMT-0700 (Pacific Daylight Time) ; General preferences M575 P1 S1 B57600 ; enable support for PanelDue G90 ; send absolute coordinates... M83 ; ...but relative extruder moves M550 P"Ender 5 Plus" ; set printer name M669 K0 ; set printer kinematics to Cartesian M671 X310:310:22:22 Y22:284:22:284 P0.5 ; adjusting screw locations, thread pitch 0.5mm ; Network M552 S1 ; enable network M586 P0 S1 ; enable HTTP M586 P1 S0 ; disable FTP M586 P2 S0 ; disable Telnet ; Drives M569 P0 S1 ; physical drive 0 goes backwards M569 P1 S1 ; physical drive 1 goes backwards M569 P2 S0 ; physical drive 2 goes forwards M569 P3 S0 ; physical drive 3 goes forwards M584 X0 Y1 Z2 E3 ; set drive mapping M350 X16 Y16 Z16 E16 I1 ; configure microstepping with interpolation M92 X80.00 Y80.00 Z800.00 E409.00 ; set steps per mm M566 X600.00 Y600.00 Z30.00 E1200.00 ; set maximum instantaneous speed changes (mm/min) M203 X8750.00 Y8750.00 Z725.00 E7175.00 ; set maximum speeds (mm/min) M201 X1250.00 Y1250.00 Z100.00 E5500.00 ; set accelerations (mm/s^2) M906 X800 Y800 Z800 E1100 I30 ; set motor currents (mA) and motor idle factor in per cent M84 S30 ; Set idle timeout ; Axis Limits M208 X20 Y20 Z0 S1 ; set axis minima M208 X320 Y320 Z350 S0 ; set axis maxima ; Endstops M574 X2 S1 P"xstop" ; configure switch-type (e.g. microswitch) endstop for high end on X via pin xstop M574 Y2 S1 P"ystop" ; configure switch-type (e.g. microswitch) endstop for high end on Y via pin ystop ; Filament Sensor M591 P3 C"e0stop" S1 D0 E5 R50:140; filament monitor connected to E0 endstop M591 D0 ; display filament sensor parameters for extruder drive 0 ; Z-Probe M950 S0 C"exp.heater3" ; create servo pin 0 for BLTouch M558 P9 C"^zprobe.in" H5 F1800 T12000 ; set Z probe type to bltouch and the dive height + speeds G31 P500 X-41 Y-2 Z2.265 ; set Z probe trigger value, offset and trigger height, 1.7 for 0.6mm Nozzle, M557 X35:275 Y35:295 S50 ; define mesh grid ; Heaters M308 S0 P"bedtemp" Y"thermistor" T100000 B4725 ; configure sensor 0 as thermistor on pin bedtemp M950 H0 C"bedheat" T0 ; create bed heater output on bedheat and map it to sensor 0 M307 H0 B0 S1.00 ; disable bang-bang mode for the bed heater and set PWM limit M140 H0 ; map heated bed to heater 0 M143 H0 S100 ; set temperature limit for heater 0 to 100C M308 S1 P"e0temp" Y"thermistor" T100000 B4725 C7.06e-8 ; configure sensor 1 as thermistor on pin e0temp M950 H1 C"e0heat" T1 ; create nozzle heater output on e0heat and map it to sensor 1 M307 H1 B0 S1.00 ; disable bang-bang mode for heater and set PWM limit M143 H1 S300 ; set temperature limit for heater 1 to 300C ; Fans M950 F0 C"fan0" Q500 ; create fan 0 on pin fan0 and set its frequency M106 P0 S0 H-1 ; set fan 0 value. Thermostatic control is turned off M950 F1 C"fan1" Q500 ; create fan 1 on pin fan1 and set its frequency M106 P1 S255 H1 T45:150 ; set fan 1 value. Thermostatic control is turned on ; Tools M563 S"Nozzle" P0 D0 H1 F0 ; tool 0 uses extruder drive 0, heater 1 and fan 0 (part cooling fan) G10 P0 X0 Y0 Z0 ; set tool 0 axis offsets G10 P0 R0 S0 ; set initial tool 0 active and standby temperatures to 0C ; Custom settings are not defined ; Miscellaneous M501 ; load saved parameters from non-volatile memory -
OK, you're getting peeling up from the build plate.
I've done several things in the past to help with that:
- More "squoosh" on the first layer. (Lower first layer height)
- Elmers glue on the build plate.
- Blue tape on the build plate.
- Add a brim around the edge of the part.
- PEI sheet applied to the build plate.
The thing that worked best was when I added the PEI sheet. That works for 99% of my prints and when I have problems, I add glue, then I add a brim if necessary.
https://www.microcenter.com/product/629546/creality-ender-5-plus-pei-magnetic-build-plate
What have you tried so far?
-
@alankilian My initial layer layer height is 0.3, what should I change it to. I am using a 0.4mm nozzle, with a .25 layer height on the rest of the layers.
-
This post is deleted! -
I use 0.3mm as my layer height also, but I use the "Z babystep" function to lower the printhead until I get the first layer really squooshed into the bed. I don't know what the actual height is.
So the printer is extruding as though the print head is 0.3mm away from the bed, but I'm maybe 0.15 or 0.1mm away, so it squooshes out and really attaches to the bed.
Also, it makes an "elephant foot" which doesn't bother me if I can get the print to stop peeling.
I only use this for prints that are not behaving well and are peeling.
SeemeCNC Rostock Max V3 converted to V3.2 with a Duet2 Ethernet Firmware 3.2 and SE300
-
@alankilian OK, thank you I will go pick up the PEI plate from Microcenter today and let you know if it works.
-
@tratoon first thing i always do when prints dont want to stick is wash the bed with hot water and dawn dish soap
-
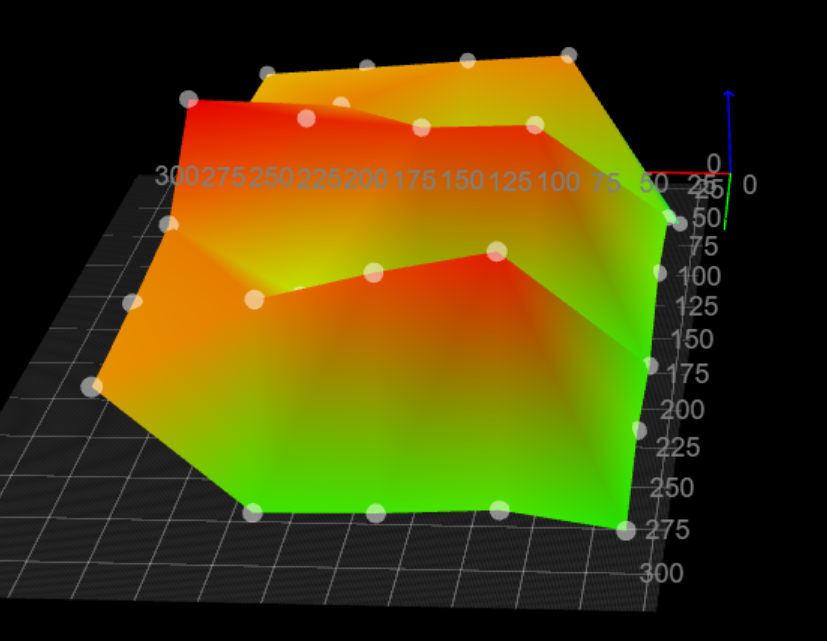
@alankilian I installed the PEI Sheet, but the bed is very unlevel and adjusting crews won't cut it. Therefore, my Z-Offset varies and I get under extrusion and over extrusion, which causes problems with my filament sensor and clogs my extruder. I will attach a height map.
-
@tratoon One thing that may help, your build surface looks rather thick in the pictures. I assume it is either a piece of glass or something similar. I'm also assuming it is sitting on the stock heatbed. If your parts are beginning to peel up at the corners, I would highly suggest increasing your bed temperature. I know you said you were printing at 60C heatbed, but if my assumptions are correct that temperature is underneath your build surface at the heated bed itself. Your build plate surface is probably not at 60C due to heat loss. Generally speaking, your heatbed should be at or near the glass transition temperature of the material you are printing. Depending on the brand of PLA, sometimes this is 60C others are higher. I have found 70C works very well when I use eSun PLA+. So I would recommend you increase your heatbed to 70C or even 75C to compensate for the thick build plate and see if you see any improvements.
Personally, I detest using any sort of glue or hairspray or brim when most times a clean build plate and a hot build plate will make for great bed adhesion assuming you don't have external factors cooling stuff off before the print is finished.
-
@pdbeal Thank you I never thought of that
-
I will attach a height map.
Is this a plot of the Swiss alps? You use a grid with about 30 probing points - use a narrow mesh with 300 - 400 points instead. Maybe you have to lower the probing speed, too (that is the F parameter of your
M591GCode). -
@tratoon
Oh you fat egg... that's extreme.
On one of the photos the tip of the BLTouch looks a bit bent, does the BLTouch work correctly or does it sometimes get stuck?You have 25 measuring points, I have 36.
In my opinion, more measuring points will not bring you to your goal, because there must be a problem here that should be eliminated.
Is it a magnetic pressure plate?
The BLTouch works with a HAL sensor that reacts to magnetic fields.A good tip posted here is to slow down the speed of the BLTouch.
0.9° stepper motors also make the BLTouch a little more accurate, which I could clearly see from the measurement data on my printer.
For several years I have mounted the Duet3D IR Probe, which has a more accurate measurement repetition.I would be interested in a photo of your new printing plate and the ; Z Probe Part of your config.g file.
And a bit more of the heightmap screenshot would have been good to see the determined values next to the image.Google Translate
----- Original Text -----Ach Du dickes Ei... das ist ja mal extrem.
Auf einem der Fotos sieht die Spitze des BLTouch etwas verbogen aus, funktioniert der BLTouch Fehlerfrei oder bleibt er manches mal stecken ?Du hast 25 Messpunkte, bei mir sind es 36.
Mehr Messpunkte werden Dich meiner Meinung nach nicht ans Ziel bringen, denn hier muss ein Problem vorliegen welches beseitigt werden sollte.
Ist es eine magnetische Druckplatte ?
Der BLTouch funktioniert mit einem HAL-Sensor der auf Magnetfelder reagiert.Ein guter Tipp der hier gepostet wurde ist die Geschwindigkeit des BLTouch zu verringern.
0,9° Stepper Motoren machen den BLTouch auch noch etwas genauer, dass konnte ich bei meinem Drucker anhand der Messdaten deutlich erkennen.
Seit einigen Jahren habe ich den Duet3D IR Probe montiert, der nochmal eine genauere Messwiederholung hat.Ein Foto Deiner neuen Druckplatte würde mich interessieren und den ; Z Probe Teil Deiner config.g Datei.
Und etwas mehr vom Heightmap Screenshot wäre gut gewesen um die ermittelten Werte zu sehen die neben dem Bild stehen.DDA5X... 0.9° Stepper... Linearrails... Duet 2 Wifi... PT100 Board... Duet IR-Probe... Dyze Pro Kit up to 500°C.. etc
Thingiverse -
@günter-jibben I fixed the bent BL Touch and this height map is after the replacement tip. Also, I just installed a magnetic PEI sheet and the height map for the PEI sheet and Glass plate look similar. MY Z-Probe config:
M950 S0 C"exp.heater3" ; create servo pin 0 for BLTouch M558 P9 C"^zprobe.in" H5 F1800 T12000 ; set Z probe type to bltouch and the dive height + speeds G31 P500 X-41 Y-2 Z.64 ; set Z probe trigger value, offset and trigger height, 1.7 for 0.6mm Nozzle, 2,32,0.631 M557 X35:275 Y35:295 S50 -
@infiniteloop I don't think I have enough space for 300-400 points.
-
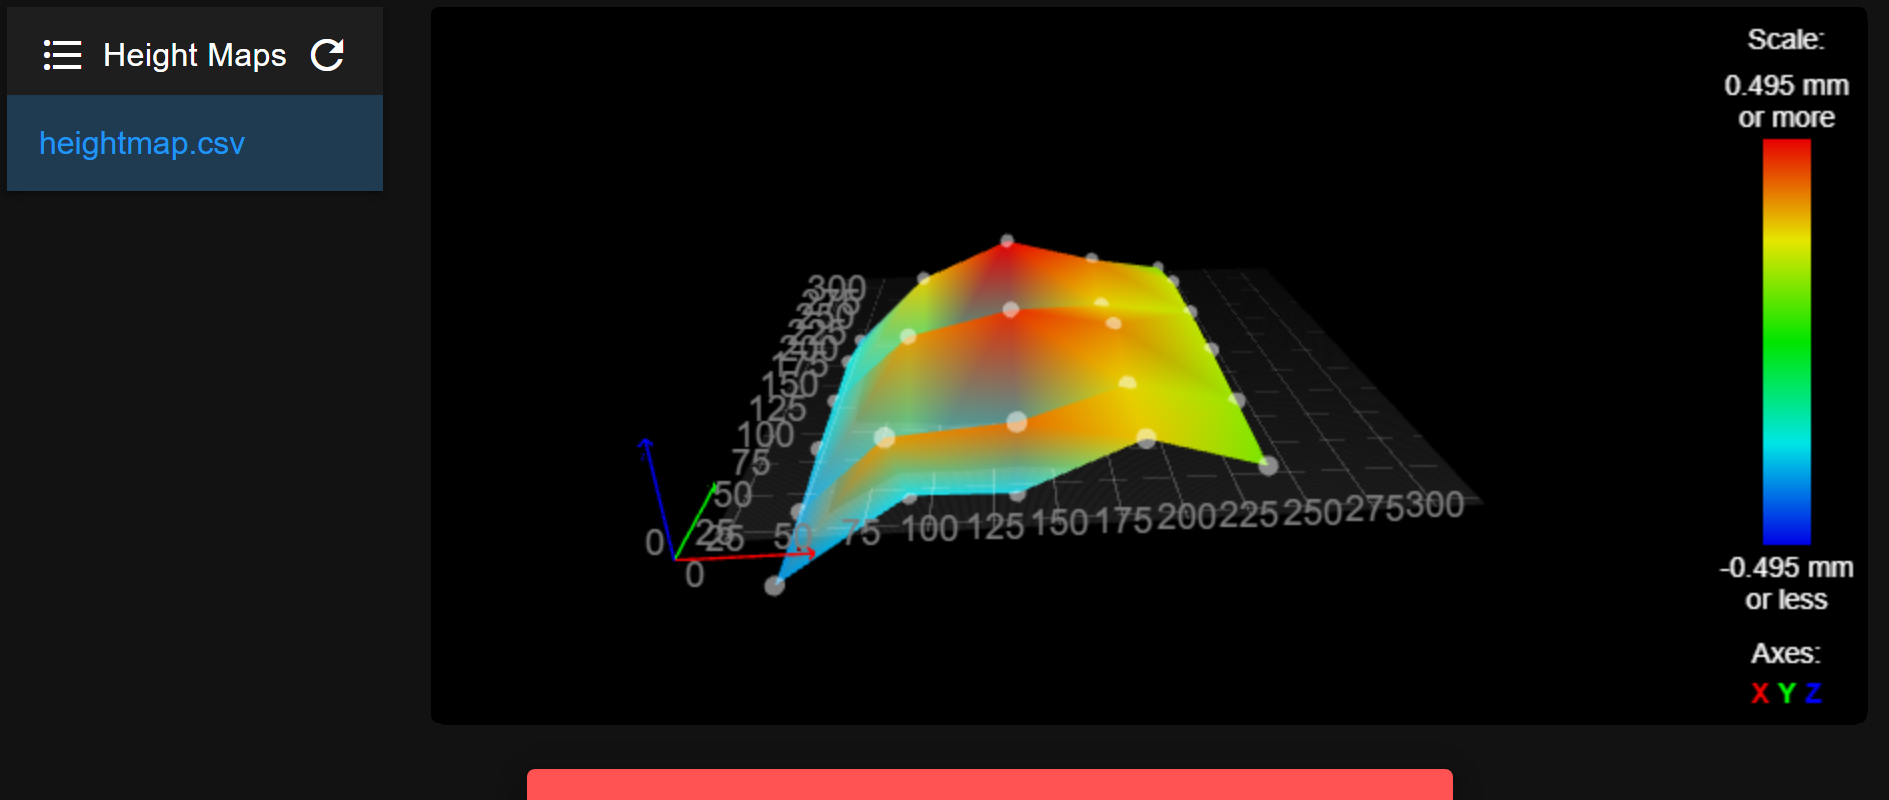
@infiniteloop @Günter-Jibben Updated height map, where I changed the F parameter to 600 instead of 1800
-
@tratoon Reduced probing points

-
@tratoon Keep in mind my build plate used to be level before I installed a magnetic sheet and PEI Sheet, so maybe the magnetic sheet cuased issues? I'm not sure.
-
@tratoon Increased number of probe points:
