setting Z probe offset
-
Board: Duet 2 Ethernet (2Ethernet)
Firmware: RepRapFirmware for Duet 2 WiFi/Ethernet 3.4.2 (2022-09-13)I have followed this document to the letter (https://docs.duet3d.com/en/User_manual/Connecting_hardware/Z_probe_testing) , numerous times and my print nozzle still keeps digging into the bed whenever i start a print. What am I missing ?
; Z-Probe
M558 P5 C"!zprobe.in" H5 F120 T6000 ; set Z probe type to unmodulated and the dive height + speeds
G31 P500 X28 Y8.2 Z2.5 ; set Z probe trigger value, offset and trigger height
M557 X15:285 Y15:285 S50 ; define mesh grid -
What type of probe?
Also post your homing files, start.g and start gcode from a print -
@owend inductive probe, I'll post when I get back to work Monday. I use this machine at work.
-
@mlbuxbaum123 I just start with a very high conservative Z offset, run a test print and slowly change the Z offset until its reasonable. Its better than going to exact Z value and crashing the nozzle. try setting your Z to zero to start off, and see where that lands.
-
@owend I dont see a start.g file in the Duet System files.
here is my starting script from S3D
G28 ; home all axes
G29 ; run auto bed leveling routine
G1 X0 Y00 Z0.3 F3000 ; get ready to prime
M109 S[extruder0_temperature] ; heat the extruder
G92 E0 ; reset extrusion distance
G1 X200 E20 F600 ; prime nozzleHOMEZ.G
; homez.g
; called to home the Z axis
;
; generated by RepRapFirmware Configuration Tool v3.3.13 on Thu Sep 22 2022 07:04:13 GMT-0400 (Eastern Daylight Time)
G91 ; relative positioning
G1 H2 Z5 F6000 ; lift Z relative to current position
G90 ; absolute positioning
G1 X15 Y15 F6000 ; go to first probe point
G30 ; home Z by probing the bedHOMEALL.G
homeall.g
; called to home all axes
;
; generated by RepRapFirmware Configuration Tool v3.3.13 on Thu Sep 22 2022 07:04:13 GMT-0400 (Eastern Daylight Time)
G91 ; relative positioning
G1 H2 Z5 F6000 ; lift Z relative to current position
G1 H1 X-305 Y-305 F1800 ; move quickly to X or Y endstop and stop there (first pass)
G1 H1 X-305 ; home X axis
G1 H1 Y-305 ; home Y axis
G1 X5 Y5 F6000 ; go back a few mm
G1 H1 X-305 F360 ; move slowly to X axis endstop once more (second pass)
G1 H1 Y-305 ; then move slowly to Y axis endstop
G90 ; absolute positioning
G1 X15 Y15 F6000 ; go to first bed probe point and home Z
G30 ; home Z by probing the bed -
Can you post your full config please?
How much baby stepping do you have to use to keep it from digging in?
Your probe offset indicates that it is located to the right and behind the nozzle. Is that correct?
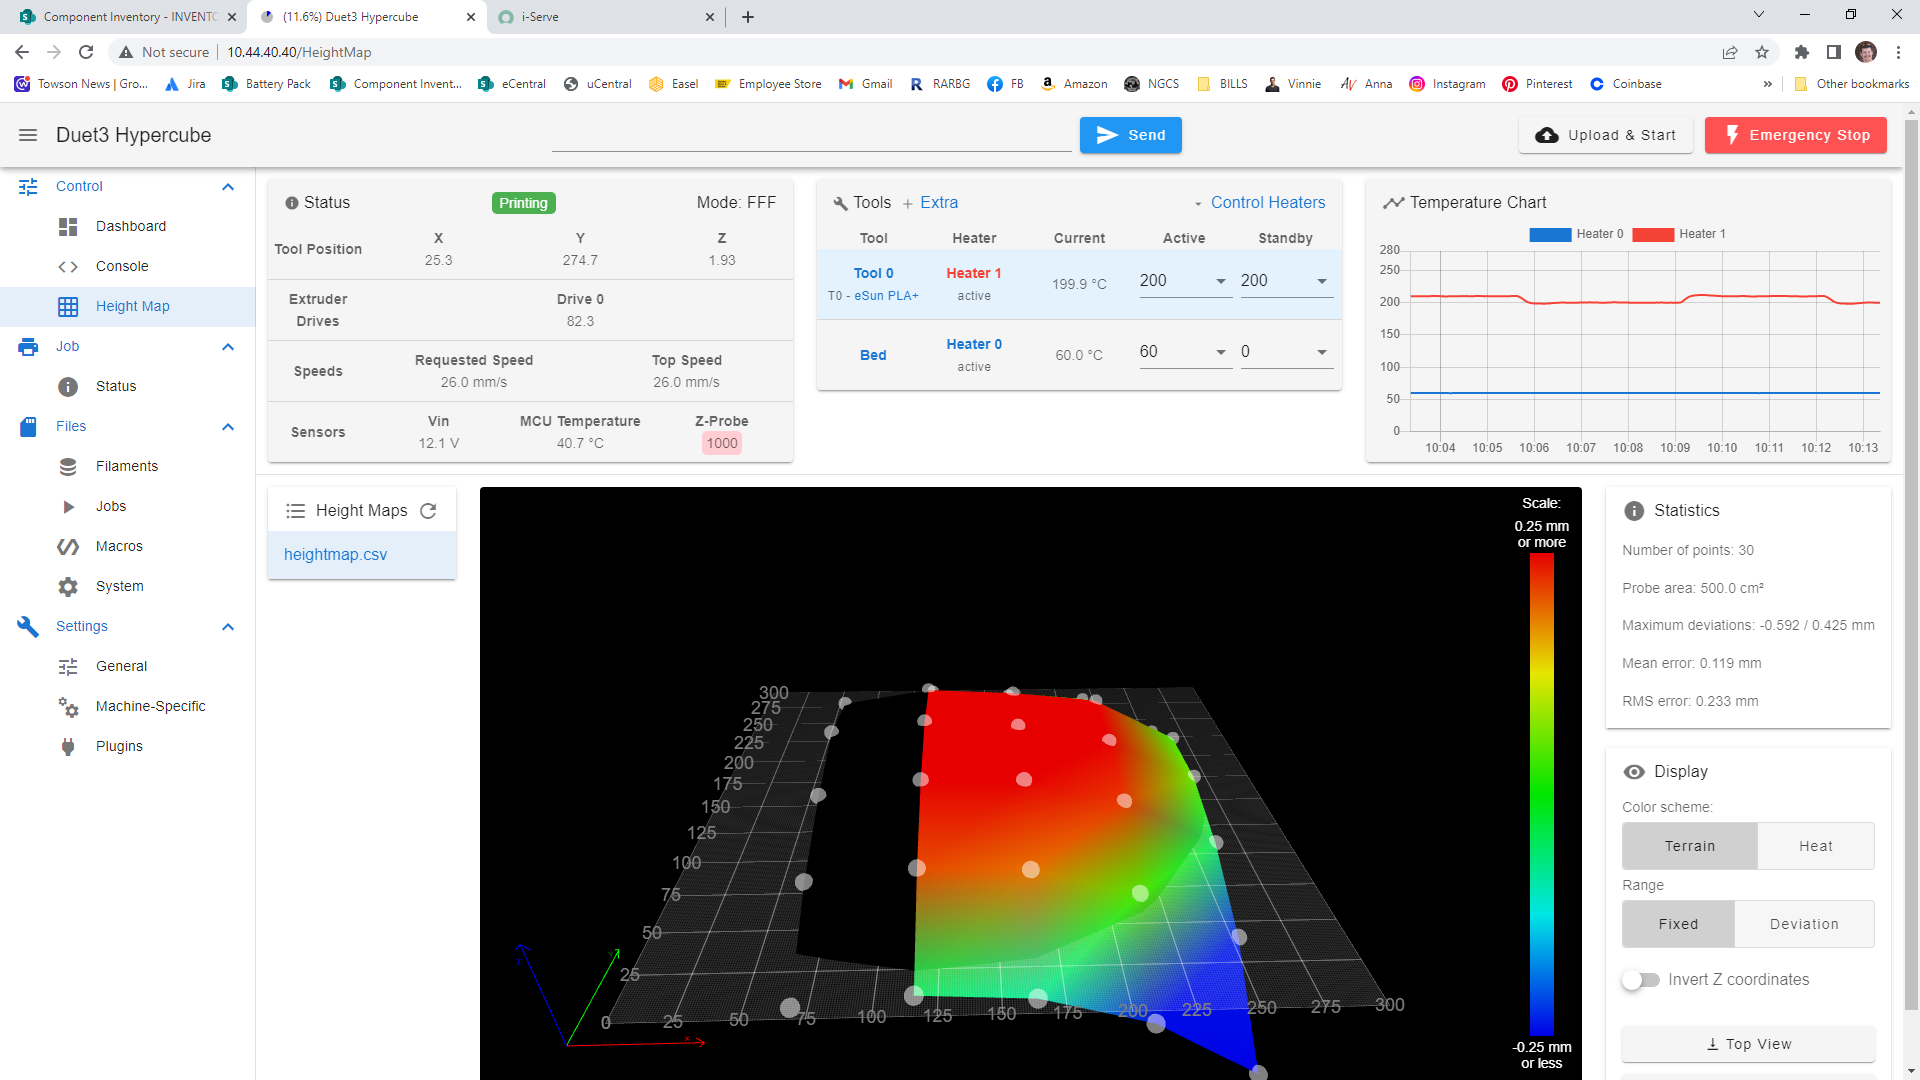
Can you take a screenshot of your height map displayed in DWC and post as well?
Where on the bed surface are you taking the trigger height measurement? Your homing files are placing the probe in the corner of the bed. Ideally your probe should home at the same location you measure the offset. Usually this would be the center of the bed.
When you measure the trigger height are both the nozzle and bed at printing temperature?
-
@phaedrux
; Configuration file for Duet WiFi (firmware version 3.3)
; executed by the firmware on start-up
;
; generated by RepRapFirmware Configuration Tool v3.3.13 on Thu Sep 22 2022 07:04:13 GMT-0400 (Eastern Daylight Time); General preferences
M575 P1 S1 B57600 ; enable support for PanelDue
G90 ; send absolute coordinates...
M83 ; ...but relative extruder moves
M550 P"Duet3 Hypercube" ; set printer name
M669 K1 ; select CoreXY mode; Network
M552 P0.0.0.0 S1 ; enable network and acquire dynamic address via DHCP
M586 P0 S1 ; enable HTTP
M586 P1 S0 ; disable FTP
M586 P2 S0 ; disable Telnet; Drives
M569 P0 S0 ; physical drive 0 (X AXIS) goes S0=backwards, S1=forwards
M569 P1 S0 ; physical drive 1 (Y AXIS) goes S0=backwards, S1=forwards
M569 P2 S0 ; physical drive 2 (Z AXIS) goes S0=backwards, S1=forwards
M569 P3 S1 ; physical drive 3 (extruder)goes S0=backwards, S1=forwards
M584 X0 Y1 Z2 E3 ; set drive mapping
M350 X16 Y16 Z16 E16 I1 ; configure microstepping with interpolation
M92 X80.00 Y80.00 Z400.00 E420.00 ; set steps per mm
M566 X900.00 Y900.00 Z60.00 E120.00 ; set maximum instantaneous speed changes (mm/min)
M203 X6000.00 Y6000.00 Z180.00 E1200.00 ; set maximum speeds (mm/min)
M201 X500.00 Y500.00 Z20.00 E250.00 ; set accelerations (mm/s^2)
M906 X800 Y800 Z800 E800 I30 ; set motor currents (mA) and motor idle factor in per cent
M84 S30 ; Set idle timeout; Axis Limits
M208 X0 Y0 Z0 S1 ; set axis minima
M208 X300 Y300 Z285 S0 ; set axis maxima; Endstops
M574 X1 S1 P"!xstop" ; configure switch-type (e.g. microswitch) endstop for low end on X via pin xstop
M574 Y1 S1 P"!ystop" ; configure switch-type (e.g. microswitch) endstop for low end on Y via pin ystop
M574 Z1 S2 ; configure Z-probe endstop for low end on Z; Z-Probe
M558 P5 C"!zprobe.in" H5 F120 T6000 ; set Z probe type to unmodulated and the dive height + speeds
G31 P500 X28 Y8.2 Z2.5 ; set Z probe trigger value, offset and trigger height
M557 X15:285 Y15:285 S50 ; define mesh grid; Heaters
M308 S0 P"bedtemp" Y"thermistor" T100000 B4138 ; configure sensor 0 as thermistor on pin bedtemp
M950 H0 C"bedheat" T0 ; create bed heater output on bedheat and map it to sensor 0
M307 H0 R0.168 K0.302:0.000 D2.11 E1.35 S1.00 B0 ; disable bang-bang mode for the bed heater and set PWM limit
M140 H0 ; map heated bed to heater 0
M143 H0 S120 ; set temperature limit for heater 0 to 120C
M308 S1 P"e0temp" Y"thermistor" T100000 B4138 ; configure sensor 1 as thermistor on pin e0temp
M950 H1 C"e0heat" T1 ; create nozzle heater output on e0heat and map it to sensor 1
M307 H1 R2.148 K0.388:0.000 D6.07 E1.35 S1.00 B0 V12.0 ; disable bang-bang mode for heater and set PWM limit
M143 H1 S280 ; set temperature limit for heater 1 to 280C; Fans
M950 F0 C"fan0" Q500 ; create fan 0 on pin fan0 and set its frequency
M106 P0 S0 H-1 ; set fan 0 value. Thermostatic control is turned off
M950 F1 C"fan1" Q500 ; create fan 1 on pin fan1 and set its frequency
M106 P1 S1 H1 T45 ; set fan 1 value. Thermostatic control is turned on; Tools
M563 P0 D0 H1 F0 ; define tool 0
G10 P0 X0 Y0 Z0 ; set tool 0 axis offsets
G10 P0 R0 S0 ; set initial tool 0 active and standby temperatures to 0C; Custom settings are not defined
; Miscellaneous
M501 ; load saved parameters from non-volatile memory
M911 S10 R11 P"M913 X0 Y0 G91 M83 G1 Z3 E-5 F1000" ; set voltage thresholds and actions to run on power loss
T02- have been playing with baby steps all morning, i think i have it near where it needs to be. Running a simple 1 layer print to see where i need to adjust things.
3- correct
4-
5-yes left hand corner, but I can use the middle of the bed and try again
6- took measurements with both at printing temp.
i have changed several things in the stl file i am using in S3D and it is printing decent. Bed is not trammed 100%. I am using precision parallels from my machine shop to set the z axis rails when they are at the front of the bed and when they are at the rear of the bed, but havent gotten them spot on yet. Thanks for the input and help
-
may have found an issue. One of the Y axis brackets is broken. The left rear bracket was damaged when it was moved i guess. Well time to get someone else around here to print a replacement for me.