height map off set to negative ?
-
+x moves to the left from the end stop which is 0
+y moves to the front from the end stop which is 0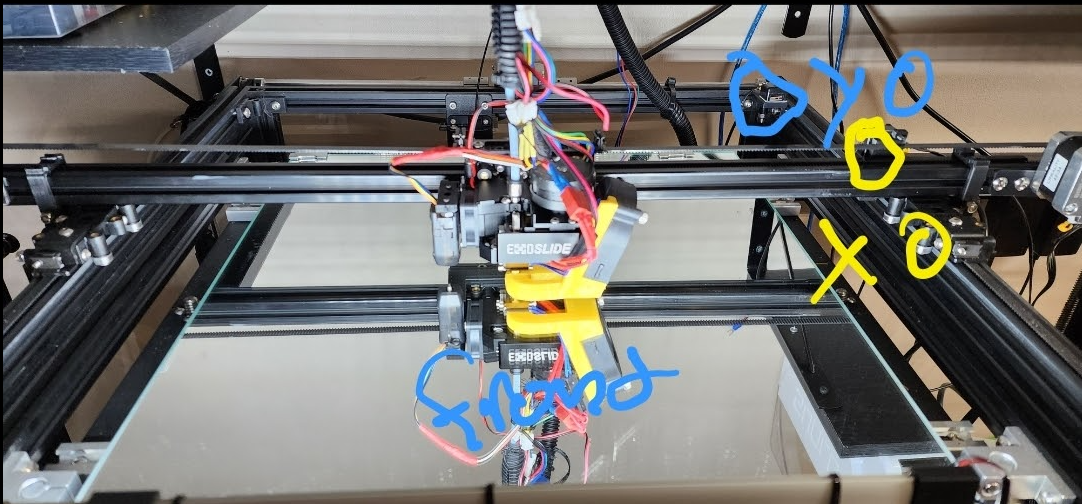
here's my config
; Configuration file for Duet WiFi (firmware version 3)
; executed by the firmware on start-up
;
; generated by RepRapFirmware Configuration Tool v3.2.3 on Fri Apr 16 2021 19:18:05 GMT-0400 (Eastern Daylight Time); General preferences
G90 ; send absolute coordinates...
M83 ; ...but relative extruder moves
M550 P"E5" ; set printer name;MCU temp
M912 P0 S21 - 26; Network
M552 S1 ; enable network
M586 P0 S1 ; enable HTTP
M586 P1 S0 ; disable FTP
M586 P2 S0 ; disable Telnet; Drives
M569 P0 S1 ; physical drive 0 goes forwards
M569 P1 S1 ; physical drive 1 goes forwards
M569 P2 S0 ; physical drive 2 goes backwards
M569 P3 S0 ; physical drive 3 goes backwards
M584 X0 Y1 Z2 E3 ; set drive mapping
M350 X16 Y16 Z16 E16 I1 ; configure microstepping with interpolation
M92 X80.00 Y80.00 Z800.00 E486.584 ; set steps per mm
M566 X900.00 Y900.00 Z12.00 E120.00 ; set maximum instantaneous speed changes (mm/min)
M203 X6000.00 Y6000.00 Z300.00 E1200.00 ; set maximum speeds (mm/min)
M201 X500.00 Y500.00 Z20.00 E500.00 ; set accelerations (mm/s^2)
M906 X800 Y800 Z800 E1000 I30 ;Y800 Z800 E900 I30 ; set motor currents (mA) and motor idle factor in per cent
M84 S30 ; Set idle timeout; Axis Limits
M208 X0 Y0 Z0 S1 ; set axis minima
M208 X355 Y343 Z400 S0 ; set axis maxima x350 M208 X350 Y350 Z400 S0 <- hemera; Endstops
M574 X1 S1 P"xstop" ; configure active-high endstop for low end on X via pin xstop
M574 Y1 S1 P"ystop" ; configure active-high endstop for low end on Y via pin ystop
M574 Z0 ; configure Z-probe endstop on Z
M591 P1 C"e0stop" S1 D0; Z-Probe
M950 S0 C"exp.heater3" ; create servo pin 0 for BLTouch
M558 P9 C"^zprobe.in" H2.5 F180 T6000 ; set Z probe type to bltouch and the dive height + speeds H2.5
G31 P25 X-41 Y9.44 Z2.121 ; set Z probe trigger value, offset and trigger height
M557 X-41:280 Y20:340 S38 ; define mesh grid; Heaters
;M308 S0 P"bedtemp" Y"thermistor" T100000 B4138 ; configure sensor 0 as thermistor on pin bedtemp
;M950 H0 C"bedheat" T0 ; create bed heater output on bedheat and map it to sensor 0
;M307 H0 B0 S1.00 ; disable bang-bang mode for the bed heater and set PWM limit
;M140 H0 ; map heated bed to heater 0
;M143 H0 S120 ; set temperature limit for heater 0 to 120C
;M308 S1 P"e0temp" Y"thermistor" T100000 B4138 ; configure sensor 1 as thermistor on pin e0temp
;M950 H1 C"e0heat" T1 ; create nozzle heater output on e0heat and map it to sensor 1
;M307 H1 B0 S1.00 ; disable bang-bang mode for heater and set PWM limit
;M143 H1 S280 ; set temperature limit for heater 1 to 280C; Heaters
M308 S0 P"bedtemp" Y"thermistor" T100000 B4138 ; configure sensor 0 as thermistor on pin bedtemp
M950 H0 C"bedheat" T0 ; create bed heater output on bedheat and map it to sensor 0
;M307 H0 B1 S1.00 ; enable bang-bang mode for the bed heater and set PWM limit
M140 H0 ; map heated bed to heater 0
M143 H0 S120 ; set temperature limit for heater 0 to 120C
M308 S1 P"e0temp" Y"thermistor" A"Hotend" T100000 B4725 C7.06e-8 ;M308 S1 P"e0temp" Y"thermistor" T100000 B4138 ; configure sensor 1 as thermistor on pin e0temp
M950 H1 C"e0heat" T1 ; create nozzle heater output on e0heat and map it to sensor 1
;M307 H1 B0 S1.00 ; disable bang-bang mode for heater and set PWM limit
M143 H1 S300 ; set temperature limit for heater 1 to 300C; Fans
M950 F0 C"fan0" Q500 ; create fan 0 on pin fan0 and set its frequency
M106 P0 S1 H-1 ; set fan 0 value. Thermostatic control is turned off
M950 F1 C"fan1" Q500 ; create fan 1 on pin fan1 and set its frequency
M106 P1 S1 H1 T45 ; set fan 1 value. Thermostatic control is turned on; Tools
M563 P0 D0 H1 F0 ; define tool 0
G10 P0 X0 Y0 Z0 ; set tool 0 axis offsets
G10 P0 R0 S0 ; set initial tool 0 active and standby temperatures to 0C; Custom settings
;591 D0 P2 C3 S1 ; Filament Run out sensor; Miscellaneous
M575 P1 S1 B57600 ; enable support for PanelDue
M501 ; load saved parameters from non-volatile memory
M911 S10 R11 P"M913 X0 Y0 G91 M83 G1 Z3 E-5 F1000" ; set voltage thresholds and actions to run on power loss
M307 H1 R2.896 C205.2:122.7 D7.66 S1.00 V24.2here's my homeall
; homeall.g
; called to home all axes
;
; generated by RepRapFirmware Configuration Tool v3.2.3 on Fri Apr 16 2021 19:18:06 GMT-0400 (Eastern Daylight Time)
G91 ; relative positioning
G1 H2 Z2.5 F6000 ; lift Z relative to current position
G1 H1 X-360.5 Y-355 F3000 ; move quickly to X and Y axis endstops and stop there (first pass)
G1 H2 X5 Y5 F6000 ; go back a few mm
G1 H1 X-360.5 Y-355 F360 ; move slowly to X and Y axis endstops once more (second pass)
;G1 H1 Z-405 F360 ; move Z down stopping at the endstop
;G90 ; absolute positioning
;G92 Z0 ; set Z position to axis minimum (you may want to adjust this)
;G1 X220 Y175 F4000 ; Move probe to middle of bed
G1 X140 Y160 F6000 ; go to first probe point
M558 F500 A1 ; probe once quickly
G30
M558 F120 A10 ; detailed probe
G30Thank You
-
@ap742 said in height map off set to negative ?:
+x moves to the left from the end stop which is 0
+y moves to the front from the end stop which is 0Ok that's fine. That just means your coordinates are rotated 180 degrees from standard, which isn't going to cause problems, though you may notice your prints coming out rotated from how the slicer preview shows.
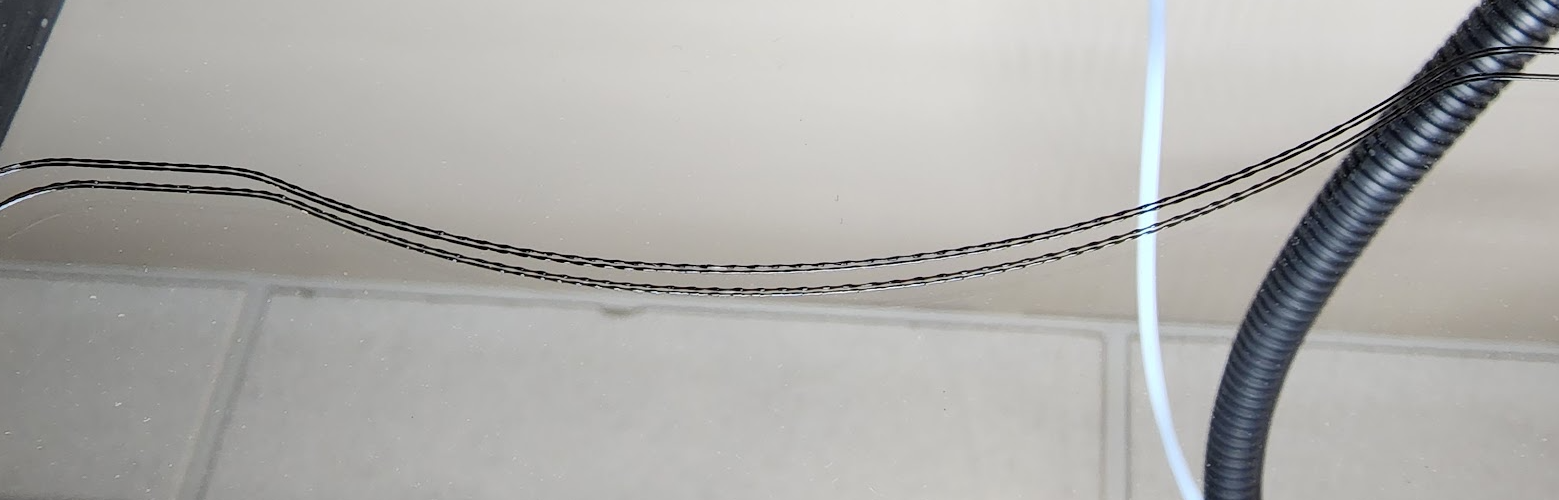
From your photo it looks like your probe offsets are reversed though.
G31 P25 X-41 Y9.44 Z2.121
X-41 would mean the probe is closer to the low end of the axis to the right of the nozzle. Your photo shows the probe to the left, which in your case would be X+41. This would cause the heightmap to be incorrect.
I can't quite tell if the probe is in front or behind the nozzle though. But the same rule applies, if it's closer to the low end, the value would be negative.
-
Thank You for that
so I got that changed
G31 P25 X41 Y-9.44 Z2.121
how about define the mesh
M557 X41:280 Y20:340 S38 if I do this it doesn't probe high end all the way
-
@ap742 said in height map off set to negative ?:
M557 X41:280 Y20:340 S38
That's because you're telling it to only probe between x41 and x280.
The easiest way to define the heightmap size is just to make it equal to your actual bed size. Then it will use the probe offsets in G31 to only probe the areas it can actually reach. Just make sure your G31 offsets are correct first.
-
@Phaedrux
Thank you")
so I'm going to lean towards mechanical stuff . because its doing exactly the same thing as it did beforemy starting gcode loads G29 S1 - assuming it should compensate
M106 S0 ; turn off cooling fan
G28
G29 S1
G92 E0 ; Reset Extruder
G1 Z10.0 F3000 ; Move Z Axis up little to prevent scratching of Heat Bed
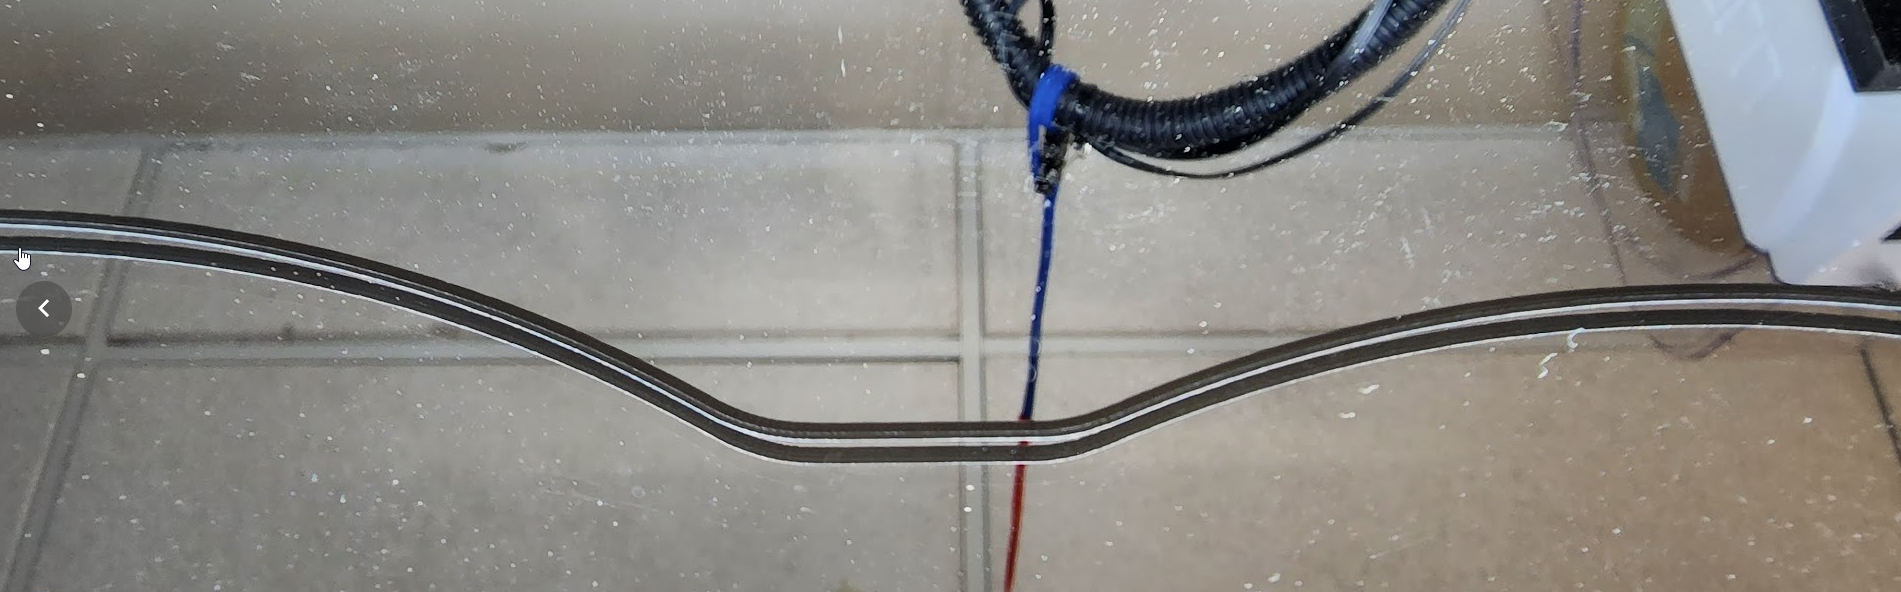
G1 X344.5 Y300 Z0.28 F5000.0 ;Move to start position
G1 X344.5 Y90.0 Z0.28 F1500.0 E15 ;Draw the first line
G1 X344.7 Y90.0 Z0.28 F5000.0 ;Move to side a little
G1 X344.7 Y300 Z0.28 F1500.0 E30 ;Draw the second lineG92 E0 ; reset extrusion distance
G1 Z15.0 F6000 ;Move the nozzle up 15mm
G92 E0 ; Reset the extruder's origin -
What does your heightmap look like now?
What does the resulting print look like?
If the heightmap isn't correcting as expected, that usually means there is some tilt or the print head that changes at different XY positions, or there is some skew in the XY motion plane.
-
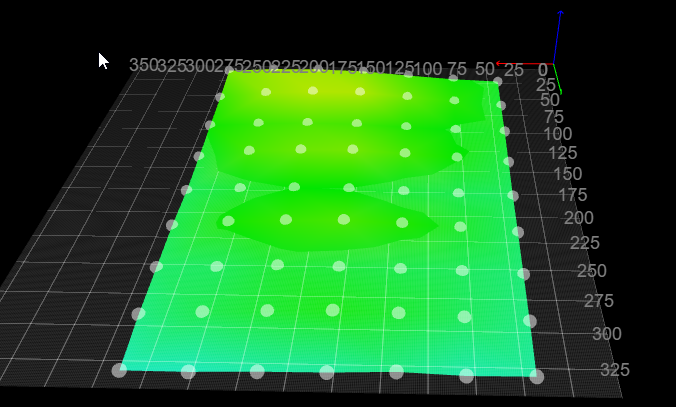
so before I tear down and re check all the bearings and stuff " all new but we all know there's always chance "
here's what map looks like not perfect but.....
this is the front of the bed between 275 & 300
this one is the back between 50 and 75
Thank You
-
Can you describe your Z axis?
Do you do automatic or manual bed leveling?
Do you use bed.g?
-
Z is typical ender 5 plus config nothing really changed there.
its 2mm pitch 4mm lead
10mm linear rods all lubed with synthetic lube
z is pretty smoothdriven by two steppers 0.8A 1.8 degree
here's my bed config
; bed.g
; called to perform automatic bed compensation via G32
;
; generated by RepRapFirmware Configuration Tool v3.2.3 on Fri Apr 16 2021 19:18:05 GMT-0400 (Eastern Daylight Time)
M561 ; clear any bed transform
G29 ; probe the bed and enable compensationso the way do it is
home all use 0.1 mm spacer to to get nozzle down to bed.
and repeat all this few times around all corners and centerthan I run G31 S-1 few times to get average number for G31
after that I run G29
-
I have run into this before myself with portions being in the negative. what I did was basically try and home (if probing) to the low spot on the bed. making that area = 0 and the rest is just higher.
not a fix really but it worked for me lol
-
@Adamfilip
what do you mean make that area 0? how?did you just edit heghtmap.csv and correct the numbers?
-
@ap742 no. for example
if i do a mesh, and an area at X50 and Y50 is reading the lowest point at Z-1
I will set my Z probe to home at X50 and Y50, that way it will set the lowest part of the bed to be the zero point and everything else should be higher, when I remeasure the mesh -
@Adamfilip It shouldn't really matter since the compensation can go up or down, but it can help to match the Z homing G30 point to one of the probe points of the mesh.