Software bundle 3.5.0-beta.3 now available
-
Pressure advance / corners have been vastly improved! Corners are crisp and infill lines are strong even with input shaping enabled.
Edit:
I take my below reporting back. The printer was behaving very odd today. The extruder changed it's direction and changed it back after pausing. I decided to format the SD card + Reset the board with the button + Flashed the firmware via the boot loader / mounted the board directly to the PC.
Now the printer is behaving as expected and the extrusion issue is also gone. I don't know what went wrong there. Maybe the countless flashes with RRF and Klipper I did in the past did leave some left overs.
I had something similar back in the Duet 2 days after several beta flashes where I also had a bug which I could not reproduce after resetting the board.But another thing is new and I've just checked my e-steps to rule that out: My slicer extrusion multiplier decreased from 0.91 to 0.89 for PLA.
Is anyone else noticing that? As long as PA is working fine I can live with that but it's odd that after the update I had to re-calibrate my EM.Edit:
I've had to decrease EM to 0.868 in order to have a mechanical fit of two parts without much friction.
But you can see that the layers have gaps which indicates under extrusion. My old calibrated EM was 0.91.
Something seems off I guess? -
You shouldn't be tuning flow rate to achieve a fitment.
Tune flow rate to achieve proper bonding of adjacent lines. Then tune X/Y steps, and CAD geometry for fit.
-
Worked flawlessly for the past 6 years on several printers.
-
That doesn't mean it is the correct approach.
Flow has a very direct relationship to under/over extrusion and much less effect on part size. So, tuning flow to adjust part size and causing under/over extrusion should be no surprise.
Tuning XY steps or shrinkage/scale in your slicer has a perfectly direct relationship on part size and no effect on extrusion accuracy.
So, first get your flow tuned right.
Second, get your parts printing geometrically accurately.
Third, tune your CAD clearance/allowance for the fit you want.
-
Thanks but Flow is tuned right but it won’t work this this beta release. Flashing to previous build or Klipper and the problem is gone.
-
@dc42 Is there a scanning z probe that you have tried or could recommend?
-
@lparnell34 I am looking at two scanning Z probe solutions. One is a version of our IR sensor, with modified firmware to produce an output related to the height of the sensor above the bed plate. This may work if we can find a suitable consistent surface to use with the sensor. Some of the modern flex plates may be suitable. The second is a small inductive sensor add-on to our tool board.
-
@dc42 said in Software bundle 3.5.0-beta.3 now available:
The second is a small inductive sensor add-on to our tool board.
This sounds very good in my ears as I can not get Smart Effector to work properly.
Been planing to do this on my Big Delta. -
@tecno said in Software bundle 3.5.0-beta.3 now available:
This sounds very good in my ears as I can not get Smart Effector to work properly.
Which version Smart Effector do you have, and what is the problem you are having?
-
It is 3.0
Not same sensitivity on print area that is approx 450mm in diameter = No reliable mesh.
Also I suspect the mounting of the extruder /adapter may cause issues as well.
-
@tecno if the extruder is clamped tightly to the effector, that may affect the sensitivity. Can you try adding 3 nylon washers between the printed part and the effector, and 3 nylon washers under the nuts or screw heads on the underside too?
-
I will try that.
Question: best way how to connect this inductive sensor to Effector or directly to Mini5+?

This if I can not get Effctor sensityvity to act as it should.
-
@tecno said in Software bundle 3.5.0-beta.3 now available:
It is 3.0
Not same sensitivity on print area that is approx 450mm in diameter = No reliable mesh.
Also I suspect the mounting of the extruder /adapter may cause issues as well.
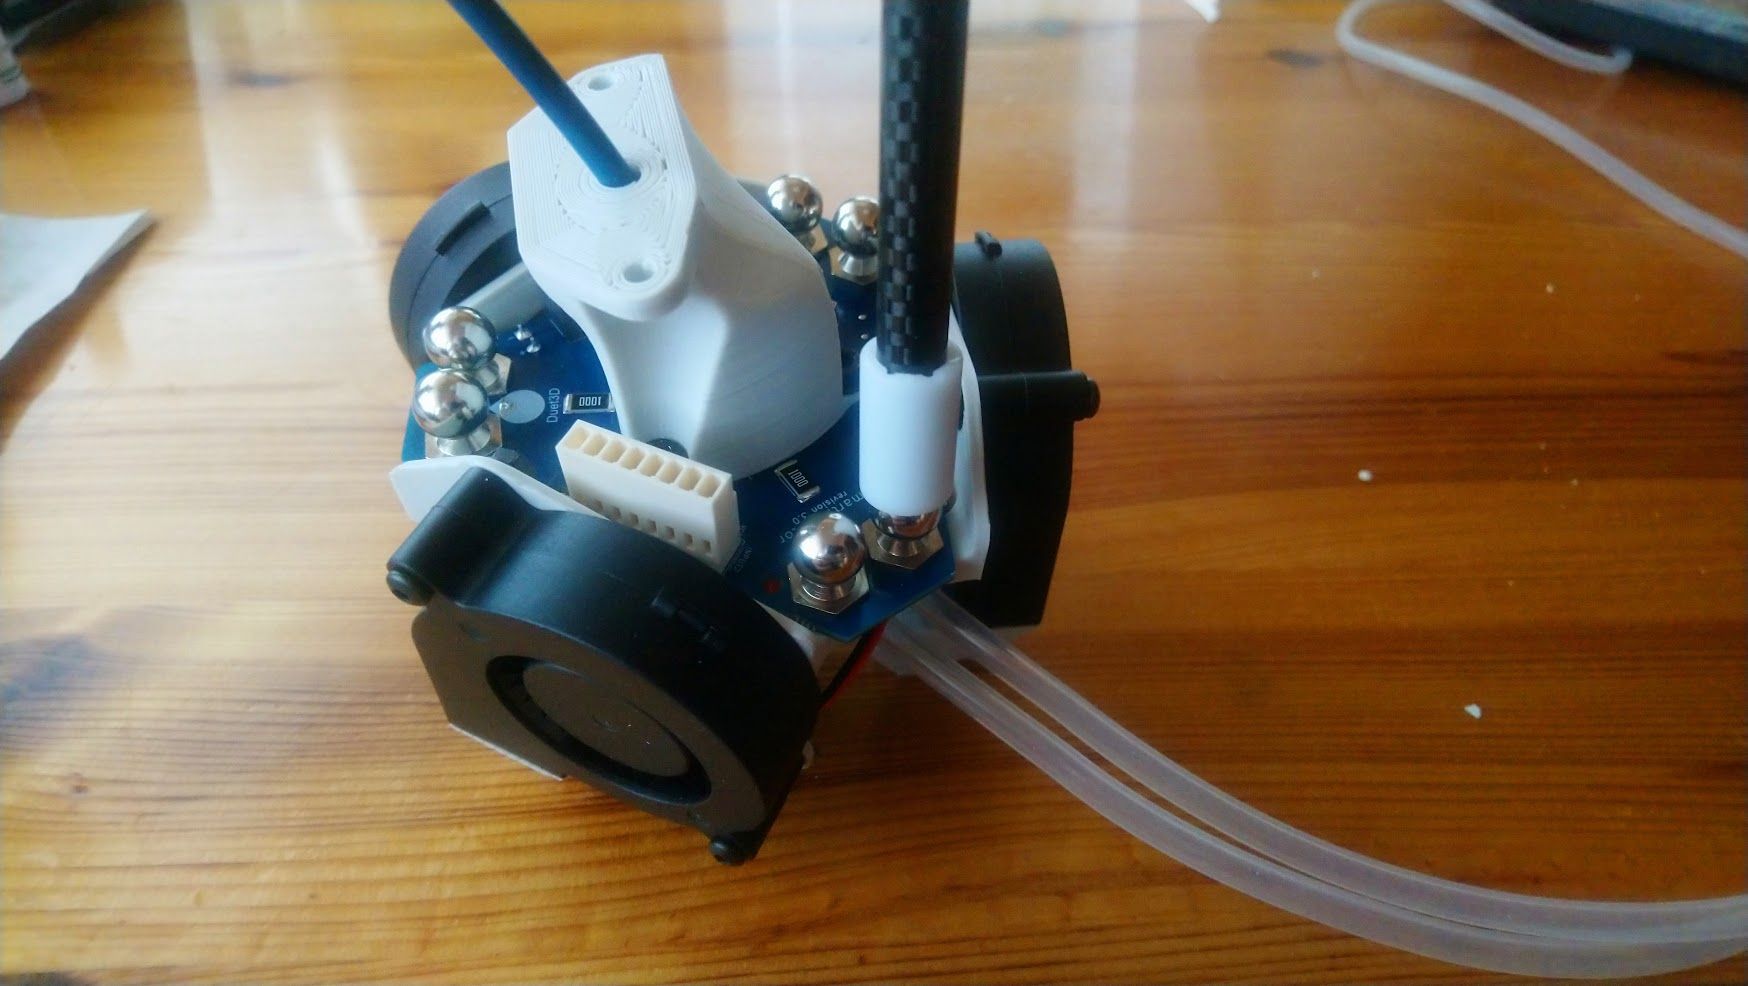
i remember when i designed the mount for lgx lite for my smart effector the first 3 iterrations of the mount was just like that and never had a good probe because the mount interfere with the strain gauge of the effector...and then i decided to raise it a bit and that sorted out...this is how it looks righ now

i added some spacers to the mount to raise it from the smart effector then i integrate them on the final deign

-
@tecno my first advice is: always choose a NPN sensor, not a PNP sensor.
You can connect a PNP sensor to either the Duet or the tool board using two resistors. See the wiki page on connecting a Z probe.
-
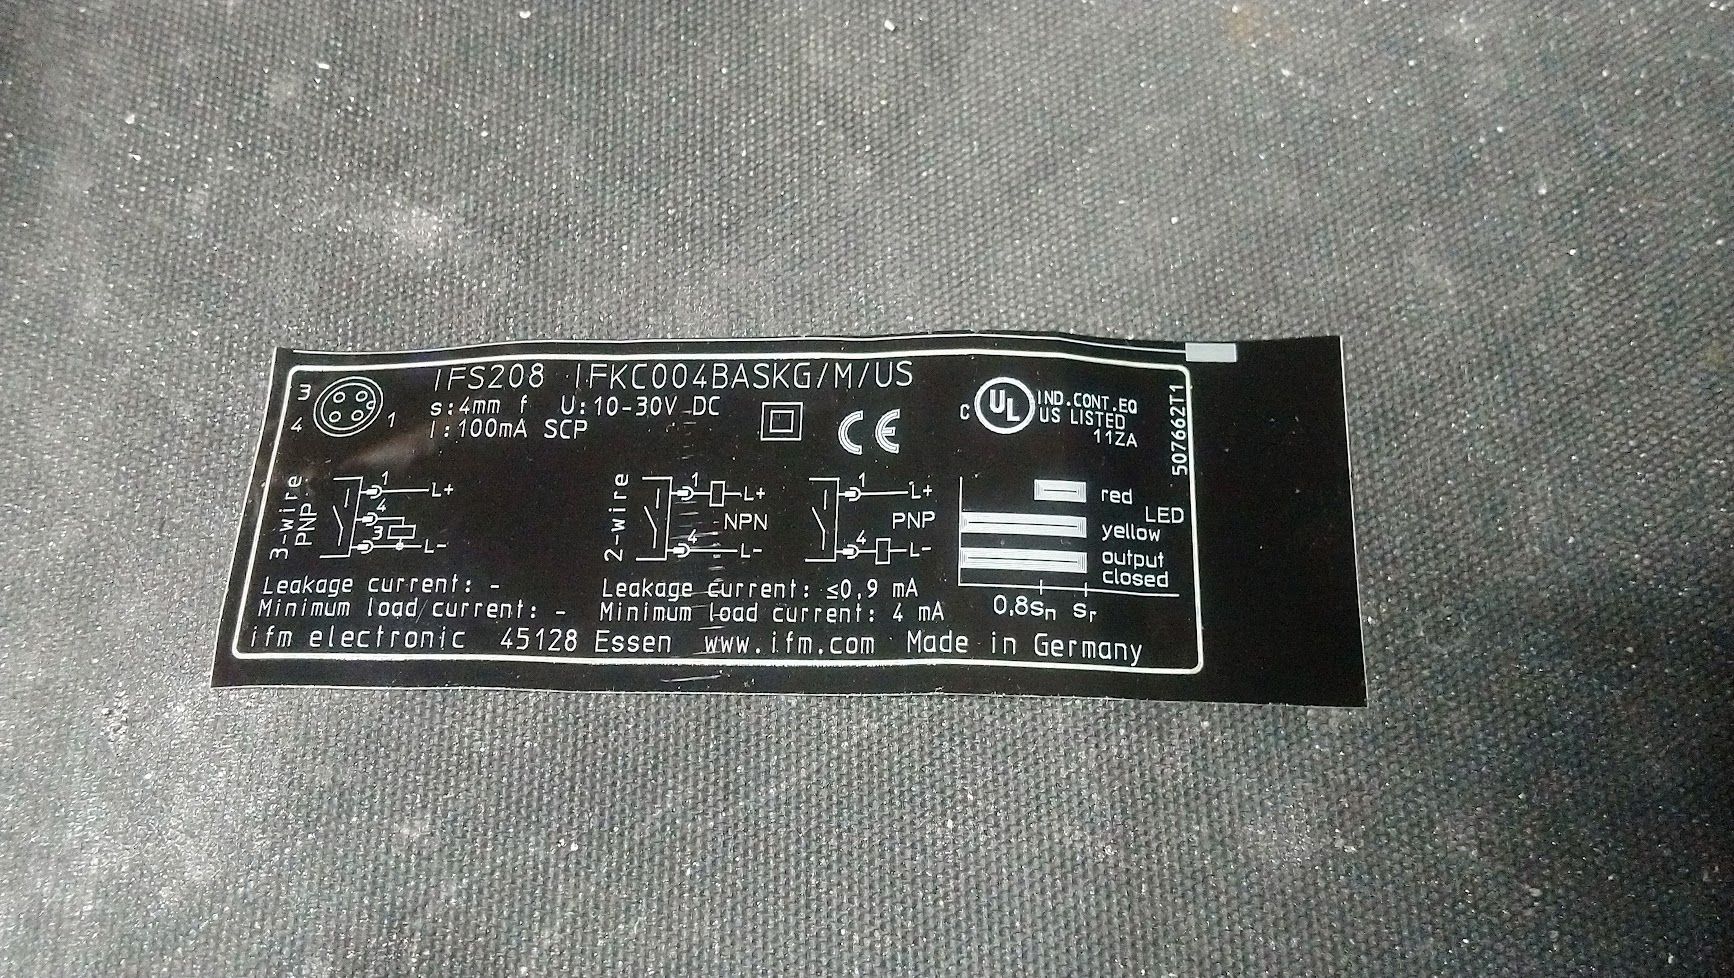
In 2-wire mode NPN or PNP for this sensor
-
@tecno you would need to use a pullup resistor between the output and voltage source of 10V or more to use it in NPN mode. The resistor would have to be chosen so that the 0.9mA leakage didn't trigger the Duet, but when triggered the load was at least 4mA. For example, a 3K or lower resistor to +12V, or a 6K or lower resistor to +24V. If you go this route, do the sums to ensure that the resistor can dissipate the required power. There will almost certainly be a voltage drop when triggered, and this may be too much for the Duet to recognise it as triggered.
-
@dc42
In 3 wire mode yesBut how about 2-wire mode?
-
@tecno as I indicated in my previous response, to use 2-wire mode you would need to add a pullup resistor to +10V or greater to meet the minimum voltage and current requirements, and even then it might not work because the voltage drop when triggered in 2-wire mode has not been specified.