Duet3D Logo Duet3D
    • Tags
    • Documentation
    • Order
    • Register
    • Login

    How to install the Duet Accelerometer on Voron 2.4 with Revo?

    Scheduled Pinned Locked Moved Solved
    General Discussion
    4
    12
    573
    Loading More Posts
    • Oldest to Newest
    • Newest to Oldest
    • Most Votes
    Reply
    • Reply as topic
    Log in to reply
    This topic has been deleted. Only users with topic management privileges can see it.
    • zaptaundefined
      zapta
      last edited by

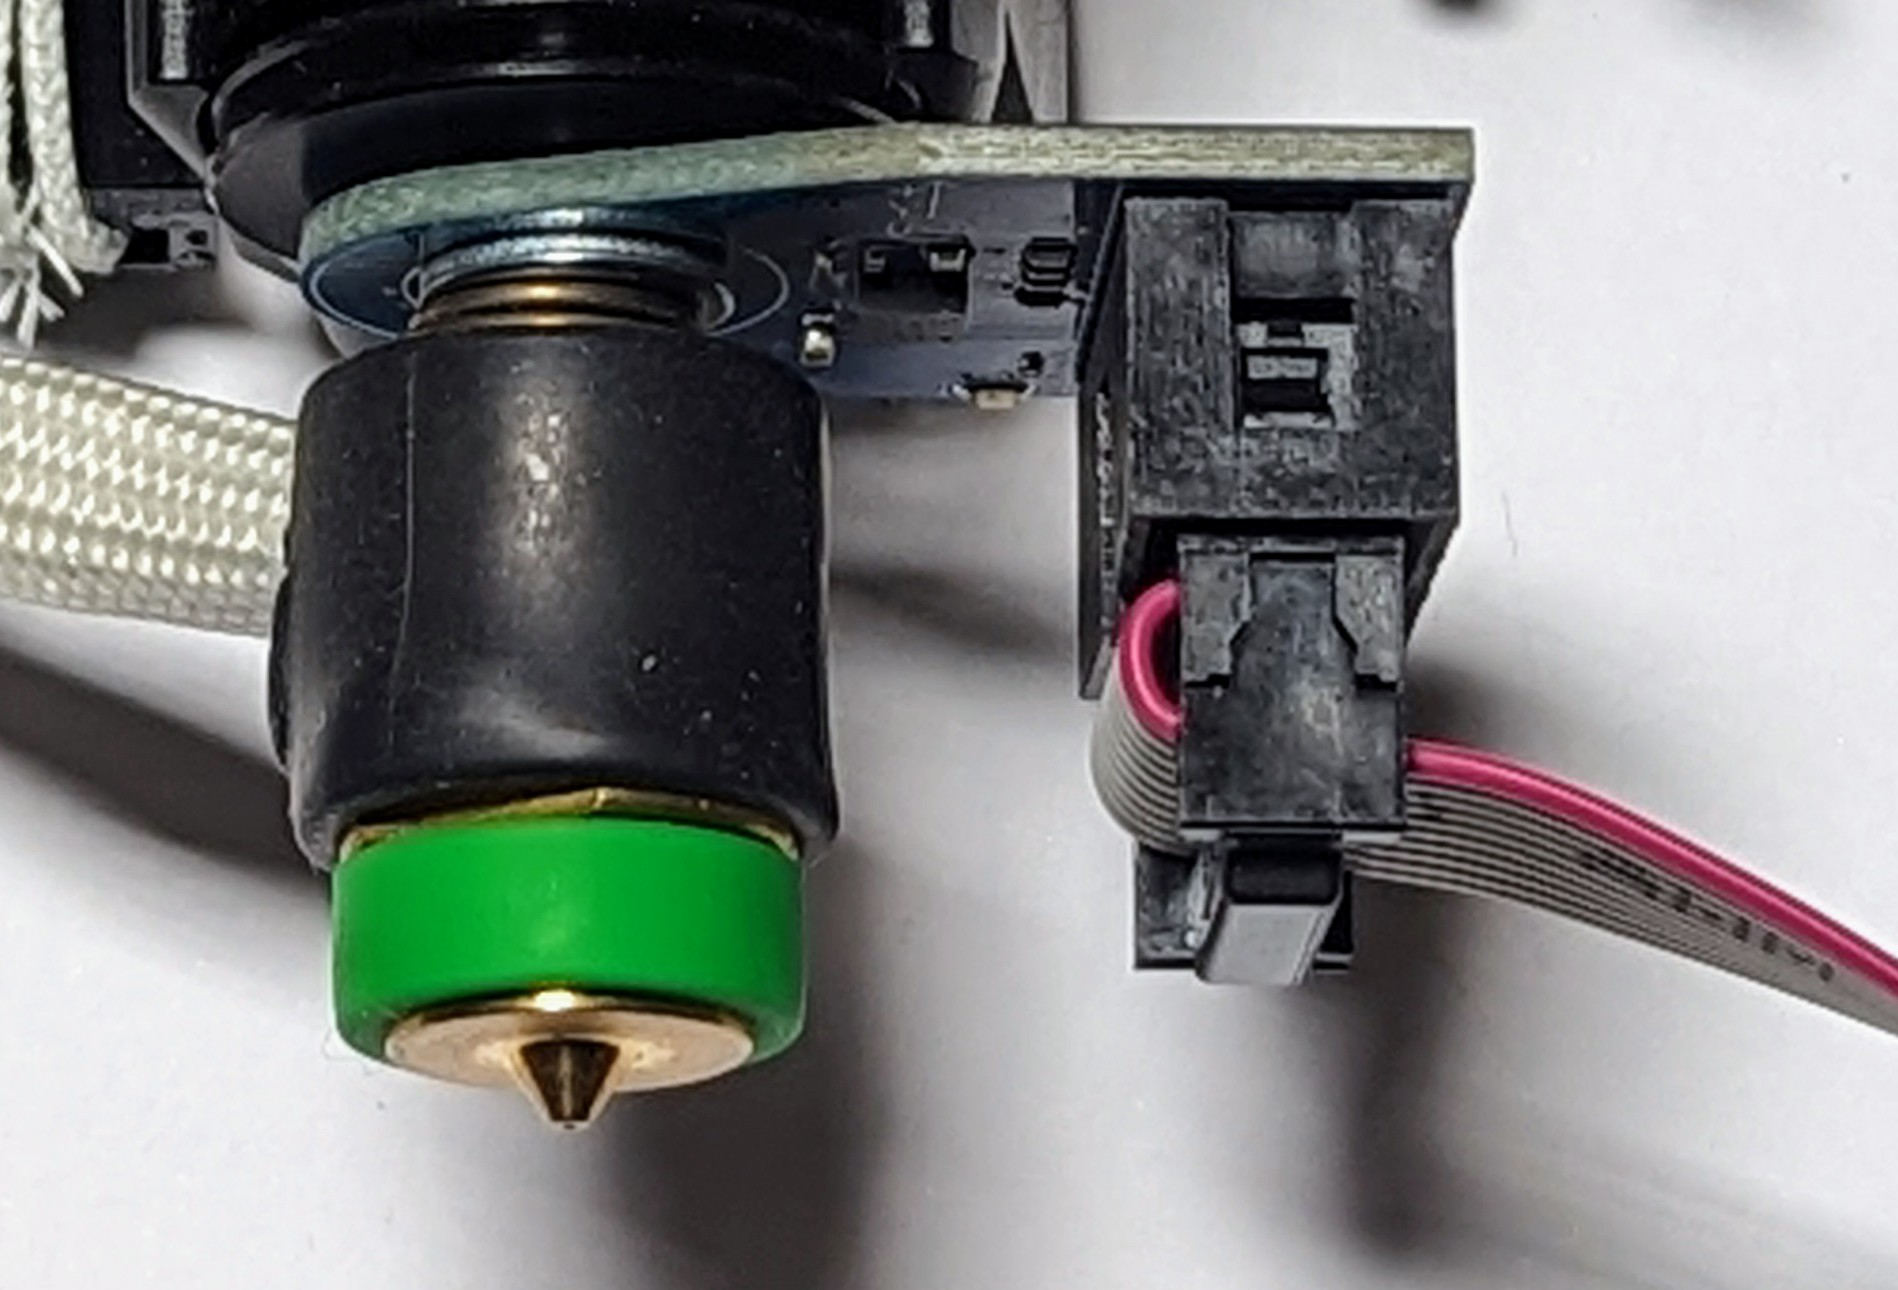
      I placed an order for a Duet Accelerometer but then realized that it may not fit my Voron 2.4 / Revo. The pictures below show the recommended way to install on Revo and the bottom of my hotend, with the nozzle removed.

      1. Is the accelerometer supposed to fit there, above the heater? Do I need to remove the front panel with the two fans or anything else?

      2. If not, can it be fitted below the heater where I have more clearance on the sides?

      BTW, It seems to be a well designed product at a good price, especially with almost zero hassle installation on a Revo hotend, if it will just work.

      6fd18247-f30a-4df3-88ca-1969c24cf812-image.png

      22e9eb63-0df4-4484-a9d6-76390024e398-image.png

      jay_s_ukundefined 1 Reply Last reply Reply Quote 0
      • jay_s_ukundefined
        jay_s_uk @zapta
        last edited by

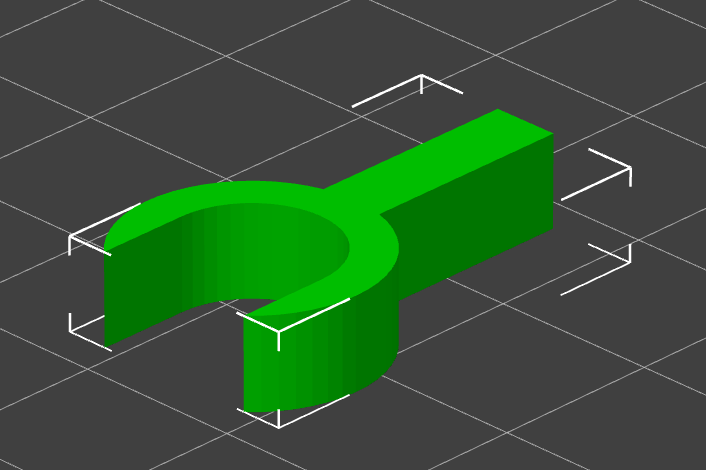
        @zapta I created a little spacer that can slide between the top of the heater core and the underside of the heatsink, allowing the accelerometer to be installed between the nozzle and the heater core. Seems to work fine
        Revo Accelerometer Spacer.STL

        Owns various duet boards and is the main wiki maintainer for the Teamgloomy LPC/STM32 port of RRF. Assume I'm running whatever the latest beta/stable build is

        zaptaundefined 1 Reply Last reply Reply Quote 1
        • zaptaundefined
          zapta @jay_s_uk
          last edited by

          Thanks @jay_s_uk. This is very useful.

          1. What is the purpose of the spacer, preventing the spring from compressing?

          2. Did you use any washers above or below the board?

          3. How did you orient the board?

          jay_s_ukundefined 1 Reply Last reply Reply Quote 0
          • jay_s_ukundefined
            jay_s_uk @zapta
            last edited by

            @zapta

            1. Yep, to make it solid.
            2. No washers
            3. I did it on a dragon burner hotend and mounted the board with the connector at the front and the connector facing down

            Owns various duet boards and is the main wiki maintainer for the Teamgloomy LPC/STM32 port of RRF. Assume I'm running whatever the latest beta/stable build is

            zaptaundefined 3 Replies Last reply Reply Quote 0
            • zaptaundefined
              zapta @jay_s_uk
              last edited by

              Thanks @jay_s_uk, I will give it a try once the accelerometer arrives.

              zaptaundefined 1 Reply Last reply Reply Quote 1
              • zaptaundefined
                zapta @zapta
                last edited by

                For the record, this is the spacer that @jay_s_uk posted.

                eca439a7-6db0-410a-80e9-bcb01ac948c2-image.png

                1 Reply Last reply Reply Quote 1
                • zaptaundefined
                  zapta @jay_s_uk
                  last edited by

                  This post is deleted!
                  1 Reply Last reply Reply Quote 0
                  • zaptaundefined zapta marked this topic as a question
                  • zaptaundefined zapta has marked this topic as solved
                  • zaptaundefined
                    zapta @jay_s_uk
                    last edited by zapta

                    @dc42, Is it possible to run the x/ input shaping plugin in X/Y directions while homing only in X/Y ?

                    It will make it easier to install the accelerometer on my 'stock' V2.4 without having the Revo nozzle heating the bed before the Clicky sensor.

                    zaptaundefined 1 Reply Last reply Reply Quote 0
                    • zaptaundefined zapta has marked this topic as unsolved
                    • zaptaundefined
                      zapta @zapta
                      last edited by

                      Since I have hard time to fit the accelerometer while still homing in Z, I removed the connector to have stuffiest clearance. That connector is bulky and increase significantly the free volume necessary to fit the accelerometer.

                      ea601c26-b10a-48e5-a792-84b1fe0a7802-image.png

                      T3P3Tonyundefined 1 Reply Last reply Reply Quote 1
                      • T3P3Tonyundefined
                        T3P3Tony administrators @zapta
                        last edited by

                        @zapta thanks for the feedback. We used that connector to match the other end on the board. Can you show it mounted on you printer?

                        www.duet3d.com

                        zaptaundefined 1 Reply Last reply Reply Quote 0
                        • zaptaundefined
                          zapta @T3P3Tony
                          last edited by

                          Hi @T3P3Tony,

                          Thoughts in random order...

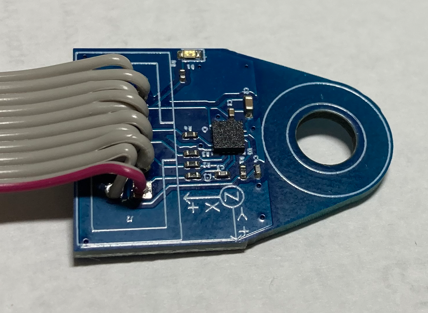
                          1. I presume that the intention behind the Duet3d accelerator is to measure directly the vibrations at the nozzle so I made sure that the board doesn't touch the plastic housing. Is it so?

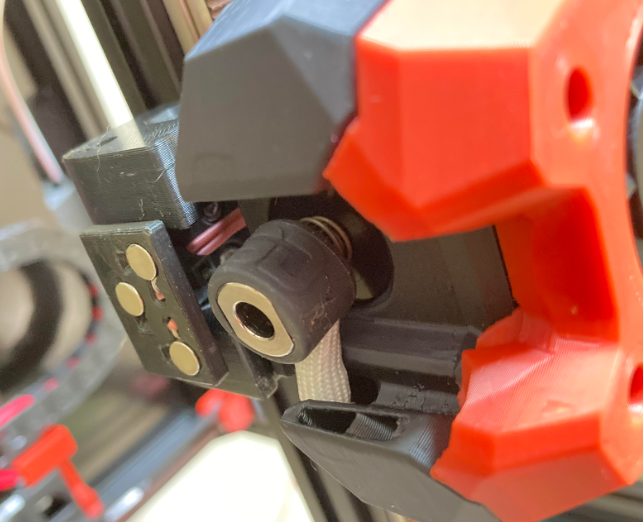
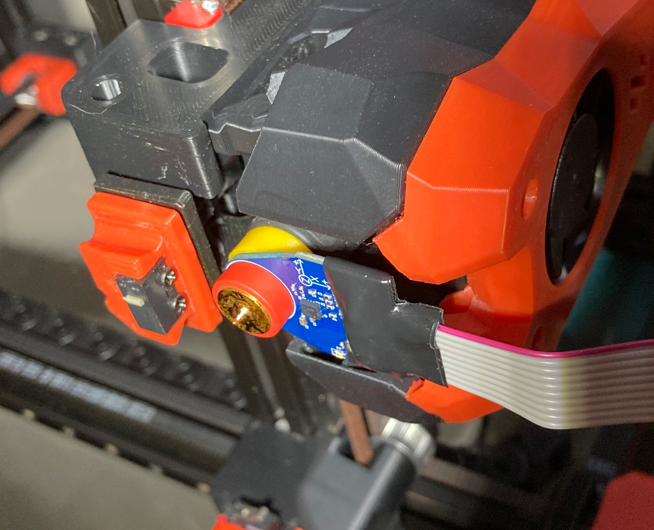
                          2. I used a plastic spacer between the heater and the board as you can see in the picture.

                          3. The input shaping plugin forces Z homing even though it's not really needed for X/Y movements. Without it, I could install the stock accelerometer board, with the large connector facing down, below the line of the Clicky sensor.

                          4. There are a few input shaping boards for Kliper and Voron 2.4 and they are installed at the front of the printing head with longer screws. If this attachment method provides good enough results, it may be easier than the nozzle method since it doesn't interferer with the Z homing and is just as easy to install. E.g.

                          https://www.amazon.com/Upgraded-Printer-Accelerometer-Portable-Printer/dp/B0BLNX1SF1

                          https://www.aliexpress.us/item/3256804788296496.html

                          Tony, if you have further questions please let me know.

                          Installation with a plastic spacer between the Revo heater and the board.
                          995d1e06-f20e-4306-b9f8-5d292b6e7a27-image.png

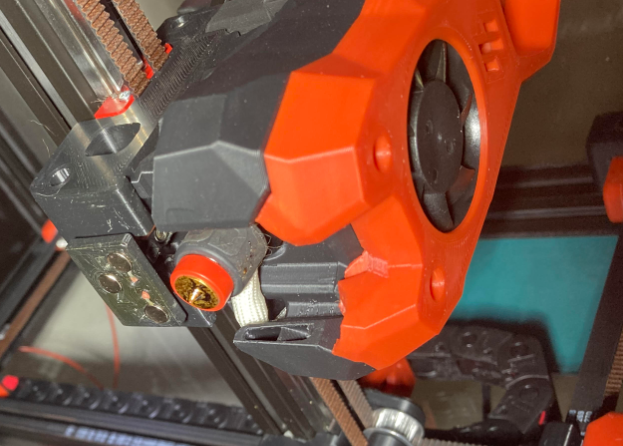
                          The printing head without the accelerometer.
                          3f4d3c4d-6208-4551-90d2-dd08f0d1b76b-image.png

                          dc42undefined 1 Reply Last reply Reply Quote 0
                          • dc42undefined
                            dc42 administrators @zapta
                            last edited by dc42

                            @zapta you could get round the Z homing issue by homing X and Y and then sending G92 Z0. But I take your point, the connector is too deep for the accelerometer to fit the right way up on some hot end assemblies.

                            Duet WiFi hardware designer and firmware engineer
                            Please do not ask me for Duet support via PM or email, use the forum
                            http://www.escher3d.com, https://miscsolutions.wordpress.com

                            1 Reply Last reply Reply Quote 1
                            • zaptaundefined zapta has marked this topic as solved
                            • First post
                              Last post
                            Unless otherwise noted, all forum content is licensed under CC-BY-SA