S3D Extrusion Multiplier
-
I've struggled with this for years...
I have calibrated my extruders meticulously always. Esteps followed by extrusion multiplier test.
If I use the "thin walled cube" method and adjust the EM to get that perfect wall thickness, then my surfaces are all under extruded. I have to take the EM much higher to get surfaces.
I've gotten some results slowing the "solid infill" right down, but I still have to raise the EM quite a bit after the thin wall test.
Wouldn't it be nice if S3D added a "solid infill extrusion %" option? They've already got it for the loose infill, so it must be possible.
Anyone got any secret sauce tips for getting nice surfaces and correct wall thicknesses together?
-
look at this site: https://duet3d.dozuki.com/Guide/Ender+3+Pro+and+Duet+Maestro+Guide+Part+4:+Calibration/40#s165 its for the ender but usable for every other printer.
or on this page : http://www.desiquintans.com/flowrate?fbclid=IwAR1HNFfzi4IPzcK7NhxqPF217hyDldl8NCErkMKNyOol4RZaYaU6f60cL0U -
@SIam said in S3D Extrusion Multiplier:
look at this site: https://duet3d.dozuki.com/Guide/Ender+3+Pro+and+Duet+Maestro+Guide+Part+4:+Calibration/40#s165 its for the ender but usable for every other printer.
or on this page : http://www.desiquintans.com/flowrate?fbclid=IwAR1HNFfzi4IPzcK7NhxqPF217hyDldl8NCErkMKNyOol4RZaYaU6f60cL0UActually those are the methods I use religiously, but I have measured the entire wall, not the top couple of layers. It seems that's where the under extrusion might come from. I've been chasing that exact number over the whole wall (averaged over 4 points).
To be honest I like the look of adjusting flow until the 2 walls just stick together and can't have a blade forced between them. That looks like a more practical "rule of thumb".
Thanks very much for the links. I've seen both of them before and even used to communicate with Trhuster years ago when we both had Zortrax's, but it's good to revisit these things sometimes with fresh eyes.
-
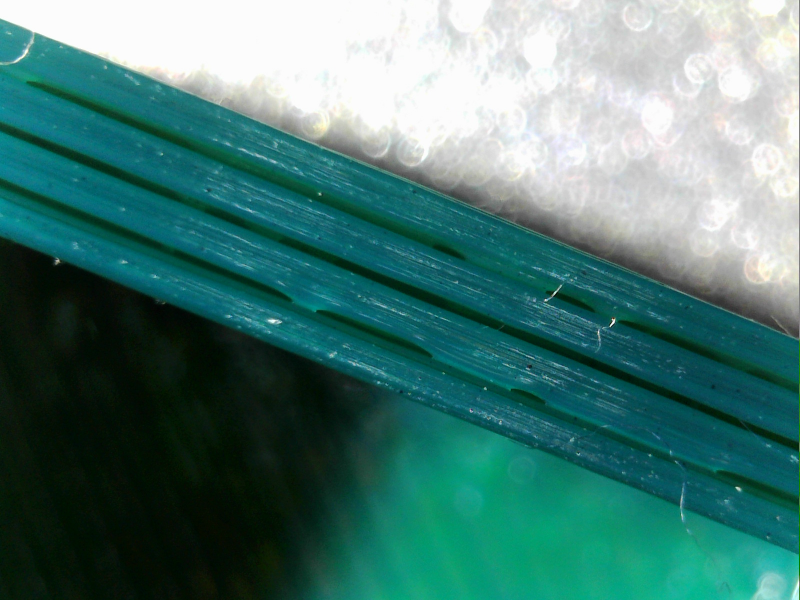
@Corexy the idea to measure only top few layers is to avoid issues with Z wobble or imprecise XY positioning making layers not be layed ideally one on top of the other so that you can measure really only the width of the line and not the additional wobble. I myself use the cheap usb microscope and 4 wall cube to do the calibration. I setup the steps/mm by the mechanics of the extruder and then adjust infill multiplier (or whatever is called in each slicer) to compensate for the depth teeth bite into filament changing the "effective diameter of the hobb"
PLA, 1.0 multiplier
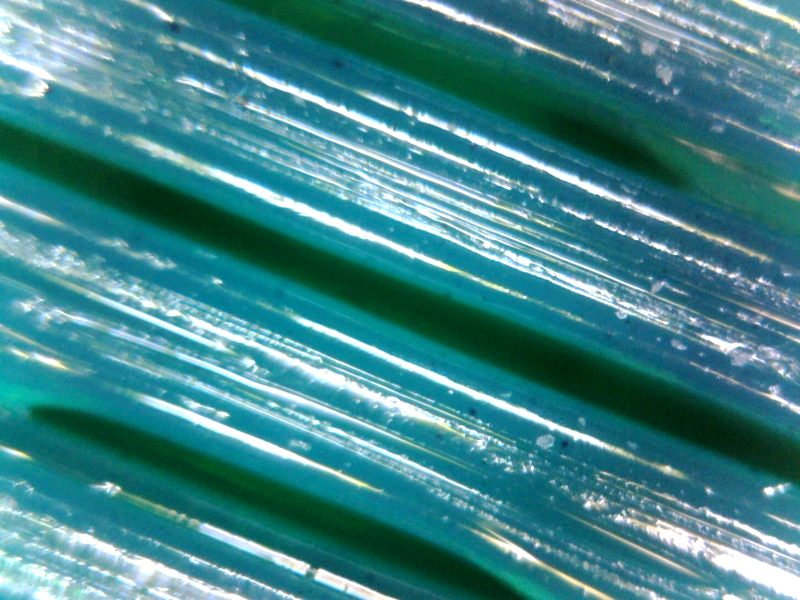
Upp it to 1.05:
that's 10-20$ usb microscope imaging .. as you see on the second picture with 1.05 the overlap exist so ideally it should be tad below 1.05 but I stopped here as this was "good enough" but you could tune it even better
-
Yes mate, my old eyes could use some assistance too! I'm on my first set of reading glasses.
I've got it about the variation due to Z wobble etc, but to be honest I'm not convinced a set of hobby verniers squeezing a couple of tiny layers will give an accurate reading. You can get varying results just pushing the verniers a little more firmly.
It's funny that you got 1.05 when S3D would suggest 0.9 for PLA, but I just ran it at 1.0 myself with the esteps calibrated correctly.
I just pulled out a roll of ABS that I've really had tuned in and used Trhuster's method/models, and the line between walls just disappears at 0.99. Now I'm printing his second model at 100% infill as he suggests, and I might be wanting to drop 1% more possibly, but I'll wait till the print finishes.
I've seen a few reviews where they criticized the use of verniers (including Toms guide), and I'm incline to think that while they would be fine on dimensional models like cubes, a micrometer (on the top couple of layers) would be more accurate with its flat/larger surfaces.
I never have any problems with vertical layers, my machine is very finely adjusted mechanically. It's just top surfaces that I'd like to look better.
Mind you I am pretty fussy.
What's that black fleck through your PLA?? Is that meant to be there? I'm wondering if you don't need a bit of a hot end clean?