Another Predator
-
Hello all,
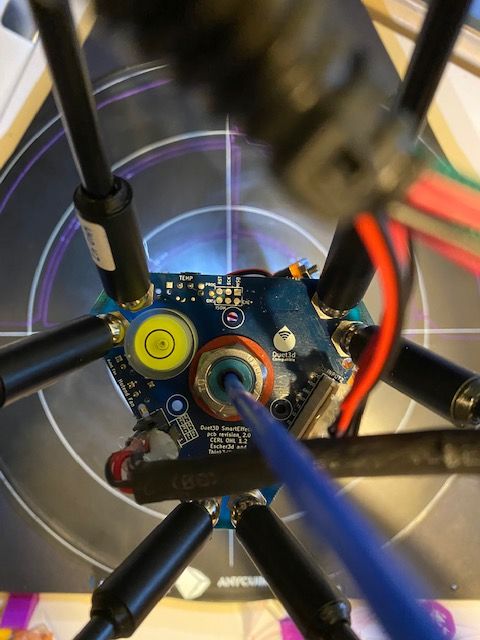
I've gone the same way as a few on these forums and got my self a AC predator.. I've had a duet 2 Ethernet along with a smart effector and PT100 daughter board and PT100 for a while it was for a linear plus but lacked time and thought good place to store it would be the in the predator the install and setup uneventful following the documentation and delta calibration guide more than once (cough 50 to 60 times) everything seems to function as I think it should ...except the printing part.
when I installed the board I installed version 3 firmware and had the no print with that now on,
FIRMWARE_NAME: RepRapFirmware for Duet 2 WiFi/Ethernet FIRMWARE_VERSION: 3.01-RC3 ELECTRONICS: Duet Ethernet 1.02 or later FIRMWARE_DATE: 2020-02-29b4
with no solution to my woe's ..I've tried a few configs i.e. Jays being one NexxCats config modified for my hardware along with the RepRap config tool initially and I am stumped now the only print I did with the original Predator was the calibration print supplied and waited for the rods to arrive from Haydn then finished the build with them being 440.47mm in length any ideas would be much appreciated ..don't get me wrong its a lot of fun sat in a room tinkering for hours and days and weeks but at some point you gotta get something back as this relationship is all take take take.config is below along with my last (of hundred that all look the same) mesh
; executed by the firmware on start-up
;
; generated by RepRapFirmware Configuration Tool v2 on Tue Feb 26 2019 21:31:01 GMT+0000 (Greenwich Mean Time); General preferences
G90 ; Send absolute coordinates...
M83 ; ...but relative extruder moves; Delta Settings
M665 L440.470 R232.088 H420.498 B185.0 X0.000 Y0.000 Z0.000 ; Set delta radius, diagonal rod length, printable radius and homed height
M666 X0.000 Y0.000 Z0.000 A0.000 B0.000 ; Put your endstop adjustments here, or let auto calibration find them; Network
M550 P"Street Predator" ; Set machine name
M551 P"" ; Set password
M552 P192.168.0.25 S1 ; Enable network and acquire dynamic address via DHCP
M586 P0 S1 ; Enable HTTP
M586 P1 S0 ; Disable FTP
M586 P2 S0 ; Disable Telnet; Drives
M569 P0 S1 ; Drive 0 goes forwards
M569 P1 S1 ; Drive 1 goes forwards
M569 P2 S1 ; Drive 2 goes forwards
M569 P3 S0 ; Drive 3 goes backwards
M584 X0 Y1 Z2 E3 ; set drive mapping
M350 X16 Y16 Z16 E16 I1 ; Configure microstepping with interpolation
M92 X80.00 Y80.00 Z80.00 E434 ; Set steps per mm
M566 X3000 Y3000 Z3000 E40 ; Set maximum instantaneous speed changes (mm/min)
M203 X12000.00 Y12000.00 Z12000.00 E446 ; Set maximum speeds (mm/min)
M201 X9000.00 Y9000.00 Z9000.00 E9000.00 ; Set accelerations (mm/s^2)
M906 X1400.00 Y1400.00 Z1400.00 E1400.00 I35 ; Set motor currents (mA) and motor idle factor in per cent
M84 S30 ; Set idle timeout; Retraction
M207 S0.8 F350 R0.1 T1200 Z0.2 ; Firmware retraction; Axis Limits
M208 Z0 S1 ; Set minimum Z; Endstops
M574 X2 S1 P"xstop" ; configure active-high endstop for high end on X via pin xstop
M574 Y2 S1 P"ystop" ; configure active-high endstop for high end on Y via pin ystop
M574 Z2 S1 P"zstop" ; configure active-high endstop for high end on Z via pin zstop; Z-Probe
M558 P8 R0.6 F800 H20 T1200 C"zprobe.in+zprobe.mod" ; Set Z probe type to switch and the dive height + speeds
G31 P50 X0 Y0 Z-0.1 ; Set Z probe trigger value, offset and trigger height
M557 R175 S16 -0.15 ; Define mesh grid;Bed Heater
M308 S0 P"bed_temp" Y"thermistor" T100000 B3950 ; define bed temperature sensor
M950 H0 C"bed_heat" Q100 T0 ; heater 0 uses the bed_heat pin, sensor 0, PWM frequency 100Hz
M143 H0 S120 ; set temperature limit for heater 0 to 120C
M307 H0 B0 S1.00 ; disable bang-bang mode for the bed heater and set PWM limit
M140 H0 ; map heated bed to heater 0
;Hotend
M308 S1 P"spi.cs1" Y"rtd-max31865" R395 F50 ; configure sensor 1 as PT100 on daughter board
M950 H1 C"e0_heat" T1 ; create nozzle heater output on e1heat and map it to sensor 1
M143 H1 S320 ; set temperature limit for heater 1 to 320C
M307 H1 B0 S1.00; Fans
M950 F0 C"fan0" Q500 ; create fan 0 on pin fan0 and set its frequency
M106 P0 S0 H-1 ; set fan 0 value. Thermostatic control is turned off
M950 F1 C"fan1" Q500 ; create part cooling fan 1 on pin fan1 and set its frequency
M106 P1 S1 H1 T45 ; set fan 1 value. Thermostatic control is turned on; Tools
M563 P0 D0 H1 ; Define tool 0
G10 P0 X0 Y0 Z0 ; Set tool 0 axis offsets
G10 P0 R0 S0 ; Set initial tool 0 active and standby temperatures to 0C; Automatic saving after power loss is not enabled
; Custom settings are not configured
;M591 D0 P2 C4 S1 ; Activate filament sensor
M404 N1.75 D0.4 ; Set for print monitor; Miscellaneous
M501 ; Load saved parameters from non-volatile memory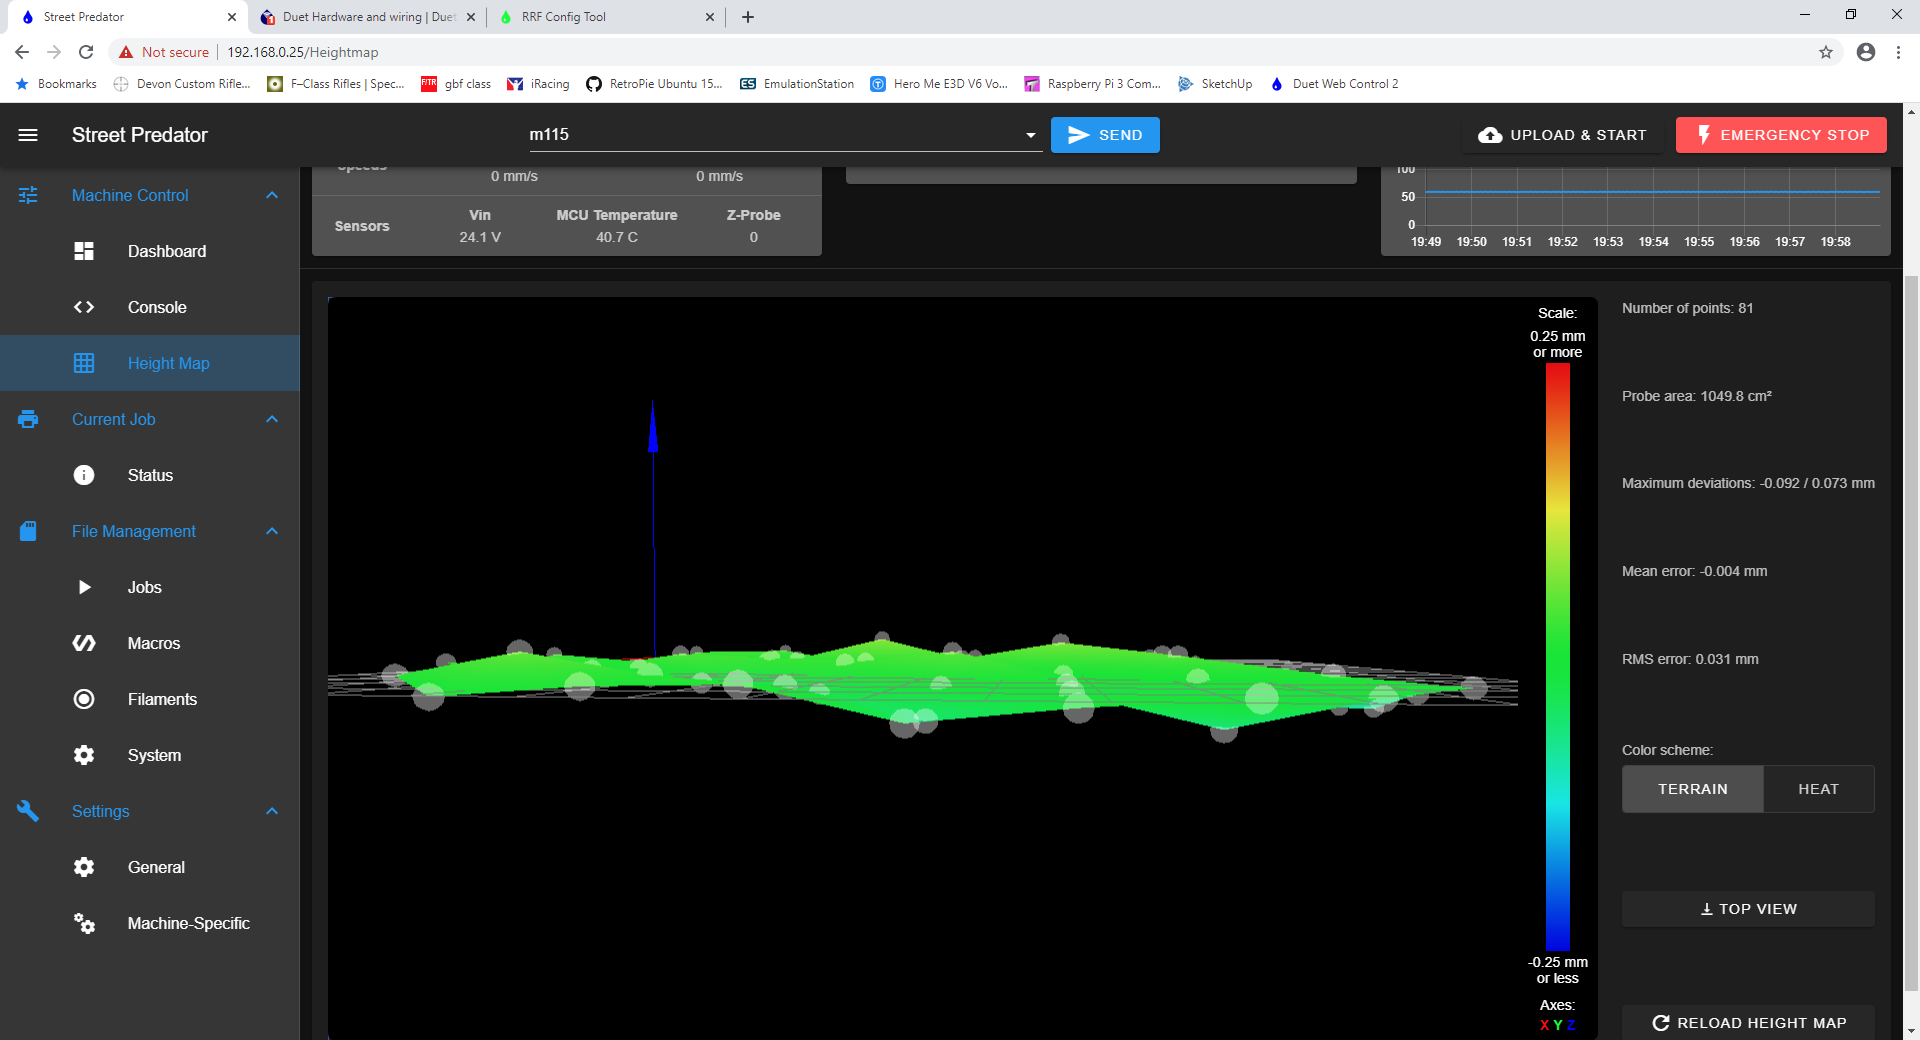
Any Ideas ? hopefully I can look like a complete moron and be simple setting i'd be cool with being tagged a moron
")
-
with no solution to my woe's
What exactly is the problem you're having?
Perhaps it would be best to switch to firmware 2.05.1 for the time being?
-
Nothing stands out as being wrong with your config.
As Phaedrux said, what's actually wrong?
I've just upgraded my predator to RC3 and I'm printing ok. I've even incorporated dc42s conditional code for the bed file. -
Hi Phaedrux ,Jay
Cannot get a first layer down it actually looks like the effector is being lifted and motion is odd in its not smooth
but I've check all carriages belts motors uprights lubed magnets and balls
I have the bulls eye level that came with the effector and its bang on ! and alllll the Delta calibration complete without issue
I've tried the G92 Z0 before Calibration and after calibration then run mesh and without all versions of Calibration
always the same result
I've changed the probe trigger height always the sameAnd that PLA I struggle to get off my ender3 on a bare bed

-
That's with the attempted print previously below
-
Try updating you M558 command to
M558 P8 C"zprobe.in+zprobe.mod" H4 F1000 T12000 R0.2 S0.02 A5I had issues at one point with my probe speed being on the slow side and getting inconsistent readings.
-
@jay_s_uk
Hi Jay,That’s the last iteration of config those speeds have been set to yours previously and lowered and increased at 100 increments in between and still no change ..I’ve taken off the boden and filament from my E3D Titan also removed my v2 nimble and put the Titan back on in case it was adding false probe positives still no change.
Appreciate you looking mate great blog btw.
-
Had a quick try this morning with the suggested settings FROM jay above
Its hard to explain but its like a learner driver is at the wheel of this thing sort of gas on gas off as its printing probing and manual movements are fine ..But during these testing prints it will accelerate during a move slow and accelerate again in the same print move so during one of the arcs move its noticeably odd non linear if that even the right context to use linear its like its not understanding what its been told or it simply cant read a map and won't ask for directions .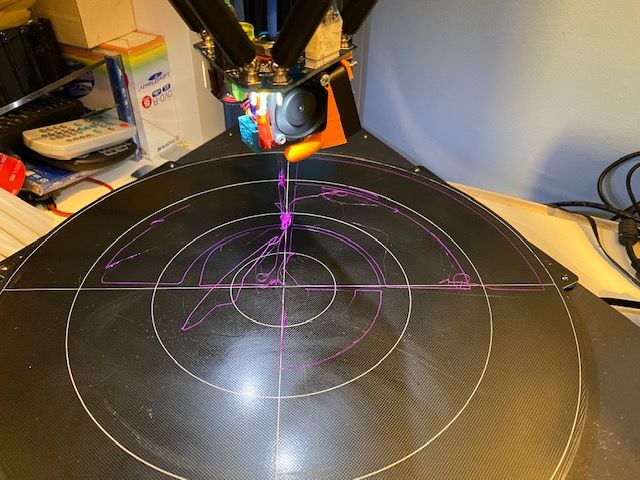
I have printed a scaled version of the same file on my ender and my linear kossel and they print as this machine did on the only print to come off it in its original state which was fine to rule out the print file also sliced in 4 slicers to rule that out.
oh and tried it with 2 carriage setups NexxCats currently and the v2 stand off with the supplied pcbs as per your blog no difference at all. -
Installed
@Phaedrux said in Another Predator:
Perhaps it would be best to switch to firmware 2.05.1 for the time being?
M115
FIRMWARE_NAME: RepRapFirmware for Duet 2 WiFi/Ethernet FIRMWARE_VERSION: 2.05.1 ELECTRONICS: Duet Ethernet 1.02 or later FIRMWARE_DATE: 2020-02-09b1backdated the applicable setting as per the distructions and G92 Z0 on a fresh piece of paper calibrated well
I'm quids in if Disney want to make a weird psychedelic lady and the tramp lots of spaghetti here.
and I have tried lots of filaments mostly Fillamentum and a little form and the anycubic that came with it which actually prints rather nice
Also went back to 3.0 in case some strange install issue which I'm not qualified to see be aware of.
Not sure where to go here.
Divorce time ? -
If you can wait a couple of days I'll be able to give you some help. Currently in Ireland away from my machine
-
Thanks Jay appreciate it ...Ahh Ireland wonderful place!
Read on return..
honestly I think the board has an issue as nothing else seems amiss
Also you have already helped ! -
I'm not a delta user, so I'm limited in what to suggest, but I do often see problems like this being solved by finding a mechanical issue. Loose carriage, stuck wheel, wire pulling taught, stuff like that. In the absence of better advice, might be a good time to go over it with a fine toothed comb.
-
Thanks,
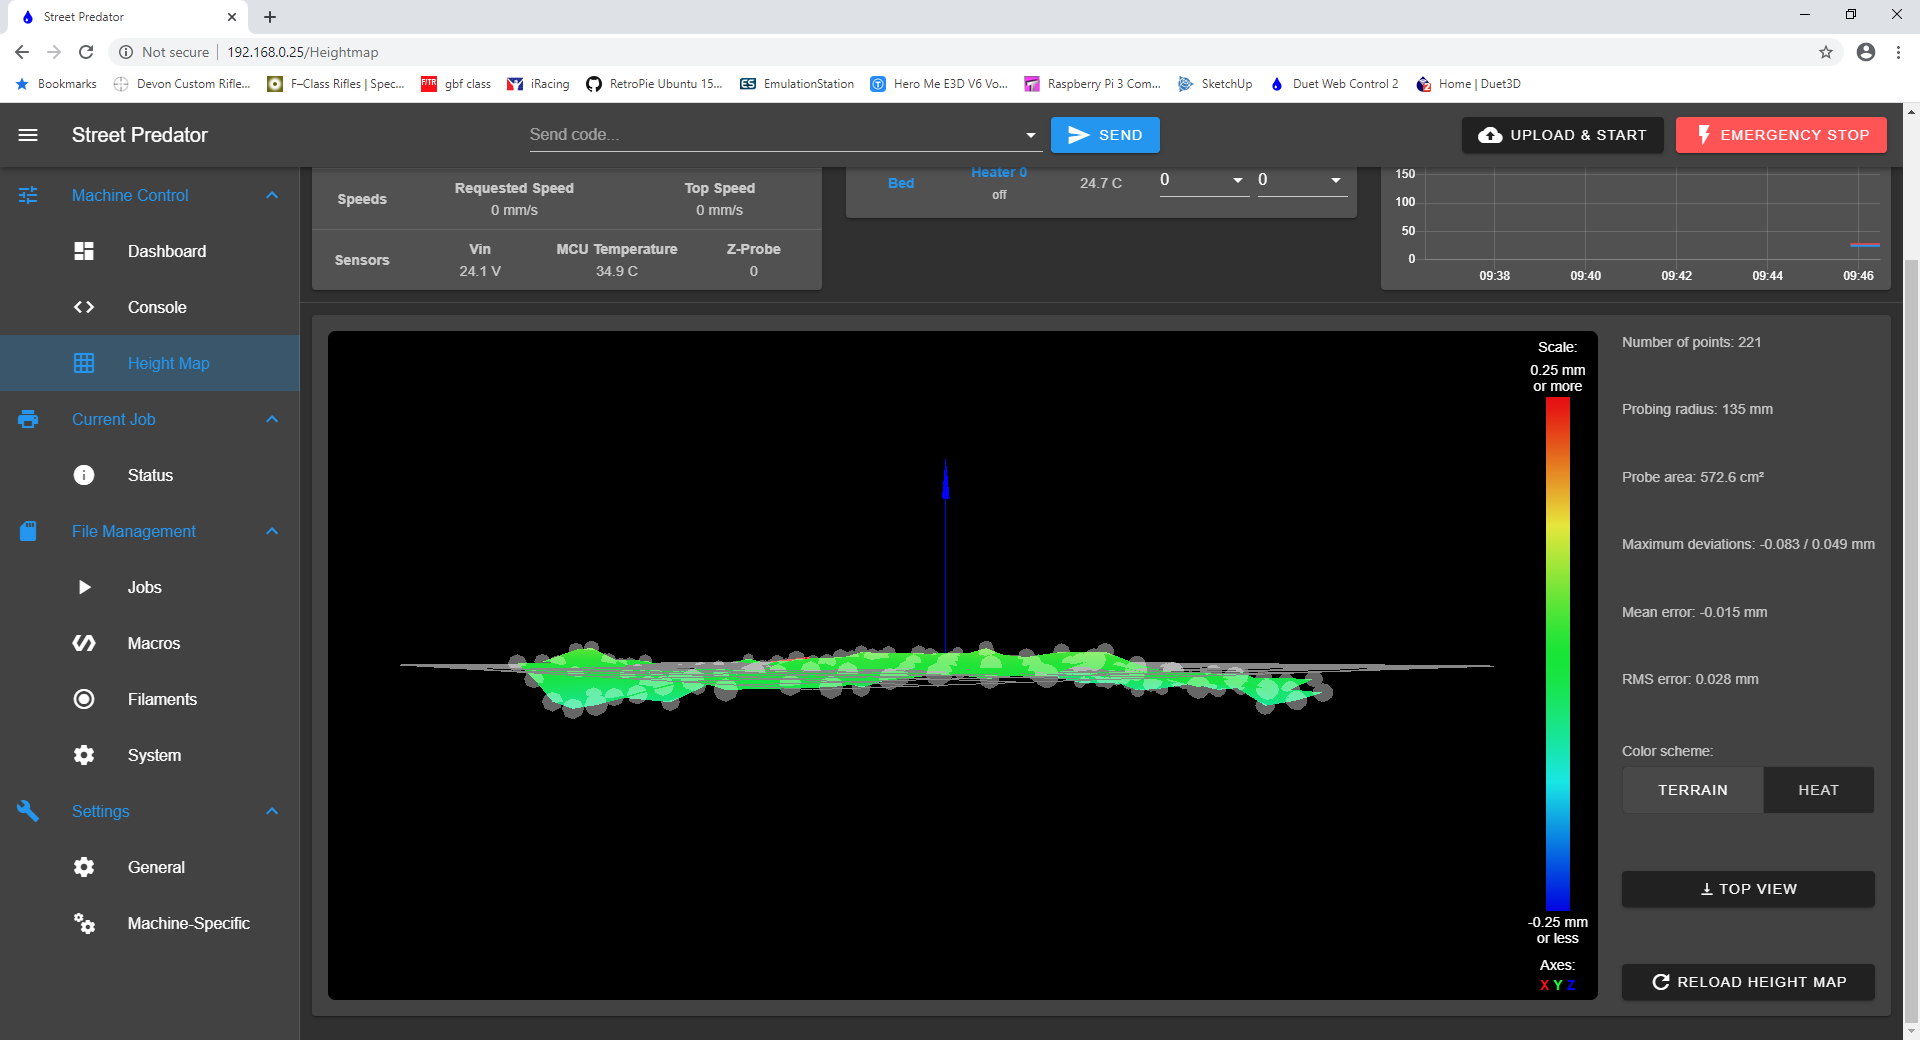
I'm no expert either but this things been gone over more time than a Williams F1 car surely there would be an indication in the mesh if there is movement ? dimensional issues this was done a few mins ago I get one map being ok ish luckily but all of them looking very similar as I said i'm not even experienced in 3d printing ..maybe I've been lucky until now maybe i'll just revert it back to the original configuration. -
rather than the csv, can you post a picture of the resulting heightmap?
-
-
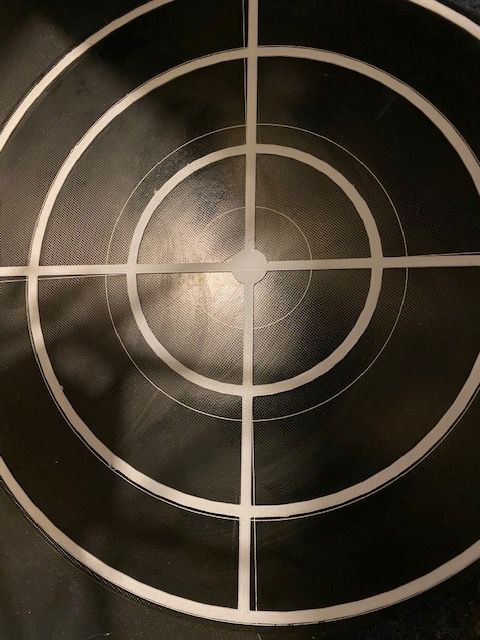
So I thought I'd throw the original board back in and test for dimensional issues or mechanical issues as suggested
and well found nothing except it print fine in fact its better than the print I got off it previously no stringing at all granted my testing is not substantial or very scientific even but it does suggest the actual dimensional built is good enough to get an actual print and that's not stock literally did one z probe and using printed effector adapter ends for the magballs and rods from Haydn.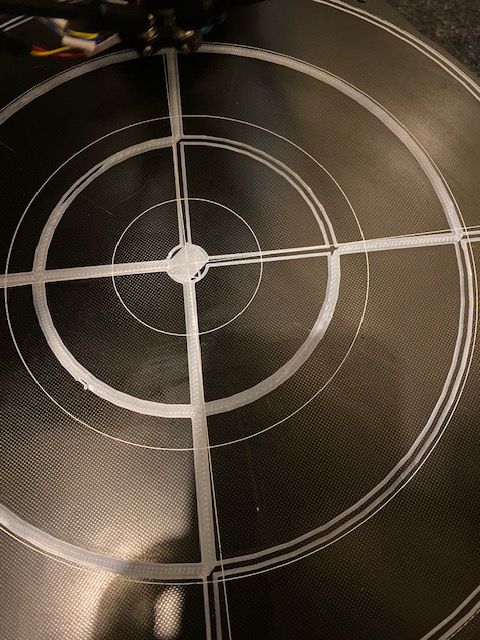
Any ideas ?
Cheers
-
Please share your bed.g file.
Have you measured the trigger height of the strain gauge sensor? It's set to -0.1mm in your config.g file, but if the bed is soft then you might need to change it to a more negative value.
When you run auto calibration, what deviation does it report at the end?
For best results, use this sequence:
- Home the printer
- Heat the printer (bed and extruder) up to operating temperature, or close to it
- Run auto calibration (and don't re-home at the end of it)
- Start the print without homing it again
A well-built delta printer using the Smart Effector and a flat bed doesn't need mesh bed compensation. If you do use mesh bed compensation by loading a pre-made height map using G29 S1, do a single G30 probe at bed centre after loading the height map.
Duet WiFi hardware designer and firmware engineer
Please do not ask me for Duet support via PM or email, use the forum
http://www.escher3d.com, https://miscsolutions.wordpress.com -
I have tried all of that
I always pre heat
My config is set to 0.1 when starting a test again
Generally it returns .12 which I’ve set it to in the config on the G30 single probe
Not set it and left it at 0.1
I don’t home after a single probe or delta calibration
Have tried with mesh and without
Home ,G30 Z0 then probe
Home probe then G30 Z0
I’m not sure there is a way I have not tried
I’ve slowed my FR down
Sped it up reduced my travel speed sped it upThe maps look right though do they as I don’t know if the are?
I follow the guides and suggestions from the good people here
I’ve used other config as a starting point as well configured from scratchAlways with the same result exactly the same.
So it is either something I am doing every single time and we are talking hundreds of time
Or it’s a constant issue that doesn’t appear with the original controller.
So would suggest not mechanical.Cheers
-
You haven't answered some of my questions:
Have you measured the trigger height of the strain gauge sensor? it looks to me that you are starting printing too high, which suggests that your trigger height isn't set correctly.
Please share your bed.g file.
-
Hi,
Bed.g
; bed.g file for RepRapFirmware, generated by Escher3D calculator
; 10 points, 6 factors, probing radius: 175, probe offset (0, 0)
G30 P0 X0.00 Y175.00 Z-99999 H0
G30 P1 X151.55 Y87.50 Z-99999 H0
G30 P2 X151.55 Y-87.50 Z-99999 H0
G30 P3 X0.00 Y-175.00 Z-99999 H0
G30 P4 X-151.55 Y-87.50 Z-99999 H0
G30 P5 X-151.55 Y87.50 Z-99999 H0
G30 P6 X0.00 Y87.50 Z-99999 H0
G30 P7 X75.78 Y-43.75 Z-99999 H0
G30 P8 X-75.78 Y-43.75 Z-99999 H0
G30 P9 X0 Y0 Z-99999 S6I've tried a few trigger heights as per documentation initially stating higher until calibration is done
trigger height of the strain gauge sensor? is that not -.12 ?
Glass build plate as far as I know
I have tried it with as far as -.2 even though on the single probe indicates -0.12 although I do appear to have a pit forming at the center now.Cheers