BL-Touch and problems
-
Hello Sorry i know i have read a lot of Help messages about the BLTouch. Well here is Mine. I am working on upgrading my cr10s pro and the old board went bad. I got the new DUET Ethernet with the 7" screen .. seem to take me no time getting thee system running and all back on line. At the same time i get the new board and had them send me BLTouch . Well there is where the problems start, as you can see i just got the new system and i might be missing something .. i have tried a lot of the forum reading and still can't get the #$%^&* working
Board: Duet 2 Ethernet (2Ethernet)
Firmware:
RepRapFirmware for Duet 2 WiFi/Ethernet 3.1.1(2020-05-19b2)
Duet 2 Ethermet v1.04cI think i am using PIN#31 on the Expansion plug
I have checked the wires and plugs with a multimeter. I know the connections are good i used my own wire so the colors are off. And again i checked like them 20 time Over and Over.
I tried
HEATER 3 pin8
HEATER 4 pin13
HEATER 7 pin 31Before you ask i used blank plugs as place holders so that i could not put it on the wrong pin, never changed anything with power on! I am thinking that The BLTouch is BAD???

Cinfig.g;
; executed by the firmware on start-up
;
; generated by RepRapFirmware Configuration Tool v3.1.4 on Tue Aug 25 2020 21:43:23 GMT-0400 (Eastern Daylight Time)

; General preferences
G90                                            ; send absolute coordinates...
M83                                            ; ...but relative extruder moves
M550 P"CR10s_Pro"                              ; set printer name
M918 P1 E4 F2000000                            ; configure direct-connect display

; Network
M551 P"n3ovo3"                                 ; set password
M552 P192.168.1.66 S1                          ; enable network and set IP address
M553 P255.255.255.0                            ; set netmask
M554 P192.168.1.1                              ; set gateway
M586 P0 S1                                     ; enable HTTP
M586 P1 S1                                     ; enable FTP
M586 P2 S1                                     ; enable Telnet

; Drives
M569 P0 S0                                     ; physical drive 0 goes backwards
M569 P1 S1                                     ; physical drive 1 goes forwards
M569 P2 S1                                     ; physical drive 2 goes forwards
M569 P3 S0                                     ; physical drive 3 goes backwards
M584 X0 Y1 Z2 E3                               ; set drive mapping
M350 X16 Y16 Z16 E16 I1                        ; configure microstepping with interpolation
M92 X80.00 Y80.00 Z400.00 E93.00               ; set steps per mm
M566 X1200.00 Y1200.00 Z24.00 E300.00          ; set maximum instantaneous speed changes (mm/min)
M203 X9000.00 Y9000.00 Z180.00 E6000.00        ; set maximum speeds (mm/min)
M201 X500.00 Y500.00 Z100.00 E5000.00          ; set accelerations (mm/s^2)
M906 X800 Y800 Z800 E1000 I50                  ; set motor currents (mA) and motor idle factor in per cent
M84 S300                                       ; Set idle timeout

; Axis Limits
M208 X-5.5 Y-10 Z0 S                           ; set axis minima
M208 X300 Y300 Z400 S0                         ; set axis maxima

; Endstops
M574 X1 S1 P"xstop"                            ; configure active-high endstop for low end on X via pin xstop
M574 Y1 S1 P"ystop"                            ; configure active-high endstop for low end on Y via pin ystop
M574 Z1 S2                                     ; configure Z-probe endstop for low end on Z

; Z-Probe
; BLTouch - via exp.heater7
M307 H7 A-1 C-1 D-1                             ; Disable the 7th Heater to free up PWM channel 5 on the Duex board.
M558 P9 C"^zprobe.in" H5 R0.2 F500 T4000 X0 Y0 Z1; Set Z probe type/mode 9. H=Dive Height. F=Speed the bed
M950 S0 C"exp.heater7"                          ;
G31 P25 X11.5 Y-10 Z2.15                        ; Z probe trigger value, offset in relation to nozzle. And trigger height adjustment
M557 X80:400 Y80:400 P5:5                       ; Define mesh grid

; Heaters
M308 S0 P"bedtemp" Y"thermistor" T100000 B4092 ; configure sensor 0 as thermistor on pin bedtemp
M950 H0 C"bedheat" T0                          ; create bed heater output on bedheat and map it to sensor 0
M307 H0 B0 S1.00                               ; disable bang-bang mode for the bed heater and set PWM limit
M140 H0                                        ; map heated bed to heater 0
M143 H0 S150                                   ; set temperature limit for heater 0 to 150C
M308 S1 P"e0temp" Y"thermistor" T100000 B4092  ; configure sensor 1 as thermistor on pin e0temp
M950 H1 C"e0heat" T1                           ; create nozzle heater output on e0heat and map it to sensor 1
M307 H1 B0 S1.00                               ; disable bang-bang mode for heater  and set PWM limit

; Fans
M950 F0 C"fan0" Q500                           ; create fan 0 on pin fan0 and set its frequency
M106 P0 S0 H-1                                 ; set fan 0 value. Thermostatic control is turned off
M950 F1 C"fan1" Q600                           ; create fan 1 on pin fan1 and set its frequency
M106 P1 S1 H-1                                 ; set fan 1 value. Thermostatic control is turned off
M950 F2 C"fan2" Q500                           ; create fan 2 on pin fan2 and set its frequency
M106 P2 S1 H1:0 T45                            ; set fan 2 value. Thermostatic control is turned on

; Tools
M563 P0 D0 H1 F0                               ; define tool 0
G10 P0 X0 Y0 Z0                                ; set tool 0 axis offsets
G10 P0 R0 S0                                   ; set initial tool 0 active and standby temperatures to 0C

; Custom settings are not defined
M591 D0 C3 P1 E1 S1				               ; Turn on functionality for a filament run-out switch

; Miscellaneous
M575 P1 S1 B57600                              ; enable support for PanelDue
M911 S10 R11 P"M913 X0 Y0 G91 M83 G1 Z3 E-5 F1000" ; set voltage thresholds and actions to run on power loss
401 and 402 do nothing ... when i turn the printer it cyclus 2 time probe go out a back in .. Stays read looks like it ready to go .. but nothing happens.. (Might also say i have never had a BLTouch so i am not sure what it should DO)
I will include my retractprobe.g & deployprobe.g & Reset BLTouch & Test BLTouch
; deployprobe.g
; called to deploy a physical Z probe
;
; generated by RepRapFirmware Configuration Tool v3.1.4 on Tue Aug 25 2020 21:43:23 GMT-0400 (Eastern Daylight Time)
M280 P7 S10 I1 ; deploy BLTouch
; retractprobe.g ; called to retract a physical Z probe ; ; generated by RepRapFirmware Configuration Tool v3.1.4 on Tue Aug 25 2020 21:43:23 GMT-0400 (Eastern Daylight Time) M280 P7 S90 I1 ; retract BLTouch;0:/macros/Fix Errors/1_Reset BLTouch M280 P7 S160 I1;0:/macros/Fix Errors/0_Test BLTouch M280 P9 S120 I1I know someone will look at this and say i know what you did wrong ... beats me .. I love the lay out i gotten good at the program and love being able to edit files from the SYSTEM DIR...Very Very Cool. now if I can just get the BLtouch thing working

I am going to Upload my Config.zip if that might help:
Thanks for a great Board and Software
John G (N3OVO)
I'm not afraid to die,i just don't want to be there
when it happens
-
@n3ovo said in BL-Touch and problems:
401 and 402 do nothing
You mean M401 and M402 I presume?
M307 H7 A-1 C-1 D-1 ; Disable the 7th Heater to free up PWM channel 5 on the Duex board.
Remove that line from config.g. It's needed for RRF2 but not for RRF3.
M280 P7 S10 I1 ; deploy BLTouch
Remove the I1 parameter and use P0 not P7. Likewise in retractprobe.g. Again, this is because you are using RRF3 not RRF2.
HTH David
-
@n3ovo said in BL-Touch and problems:
M280 P7 S10 I1
try a
M280 P0 S10 I1because you mapped the PWM Channel with the M950 Command to GPIO 0
for example (taken from the wiki)
M950 S0 C"exp.heater3" ; assign GPIO port 0 to heater3 on expansion connector, servo mode ... M280 P0 S80 ; set 80deg servo position on GPIO port 0 -
@n3ovo said in BL-Touch and problems:
Does the BLTouch do a self test at power on? This checks that it's getting power. Probably not, because...
M950 S0 C"exp.heater7"
Servo "0" has pin defined on heater 7, so should be on pin 31. This is the tenth pin from the top in your picture. A little hard to tell, but it looks like you're on the ninth pin. Move it down one. See https://d17kynu4zpq5hy.cloudfront.net/igi/duet3d/vqBUAZPsxMC5tRgt.huge
As @dc42 says, deployprobe.g and retractprobe.g are set up for RRF2, as are your test BLTouch macros. Use
M280 P0rather than P7, and no 'I1'. For more info, see https://duet3d.dozuki.com/Wiki/Connecting_a_Z_probe#Section_Software_setup_RepRapFirmware_Num_3 for correct format.Ian
-
If it helps - I was setting up a BLT a week or so ago and (with help from this forum) ... here is the relevant section from my config.g
; Endstops
M574 X1 S1 P"xstop"                           ; configure active-high endstop for low end on X via pin xstop
M574 Y1 S1 P"ystop"                           ; configure active-high endstop for low end on Y via pin ystop
M574 Z1 S2                                    ; configure Z-probe endstop for low end on Z

; Z-Probe
M950 S0 C"exp.heater3"                        ; create servo pin 0 for BLTouch
M558 P9 C"^zprobe.in" H5 F120 T6000           ; set Z probe type to bltouch and the dive height + speeds
G31 P500 X42 Y5 Z2.21                         ; set Z probe trigger value, offset and trigger height
M557 X45:220 Y10:220 S20                      ; define mesh grid
In my case - exp.heater3 is pin8 (fourth pin from "bottom left").
In your case - exp.heater3 is pin31 (as stated - 10th pin from "top left"). -
Edit to above post
In your case - exp.heater3 is pin31 (as stated - 10th pin from "top left").
In your case - exp.heater3 is pin31 (as stated - 10th pin from "top right"). -
Hello Again ... I would like to THANK all who helped. I now have a working BL-Touch ... My wife and I Me where shocked, How fast you all answered me with help .. I does pay to get in a great group of people. It was on the wrong pin and I was was using the wrong commands for the wrong port .. so I am a happy camper..(I'm A HAPPY man)

But as always one steep forward 2 steps in #$%^... i got it probing and it is doing good but i can not get it to start probing from the center of the bed for z-homing ( homeall or homez) Keeps wanting to home and the X-0 and Y-0 witch puts if off the bed and that will not work. I come to the wizards once again with G-Code In Hand
Ps if you would look over the CODE real quick and see if i made any more boo boos. thanks
; Configuration file for Duet WiFi (firmware version 3)
; executed by the firmware on start-up
;
; generated by RepRapFirmware Configuration Tool v3.1.4 on Tue Aug 25 2020 21:43:23 GMT-0400 (Eastern Daylight Time)

; General preferences
G90                                            ; send absolute coordinates...
M83                                            ; ...but relative extruder moves
M550 P"CR10s_Pro"                              ; set printer name
M918 P1 E4 F2000000                            ; configure direct-connect display

; Network
M551 P"n3ovo3"                                 ; set password
M552 P192.168.1.66 S1                          ; enable network and set IP address
M553 P255.255.255.0                            ; set netmask
M554 P192.168.1.1                              ; set gateway
M586 P0 S1                                     ; enable HTTP
M586 P1 S1                                     ; enable FTP
M586 P2 S1                                     ; enable Telnet

; Drives
M569 P0 S0                                     ; physical drive 0 goes backwards
M569 P1 S1                                     ; physical drive 1 goes forwards
M569 P2 S1                                     ; physical drive 2 goes forwards
M569 P3 S0                                     ; physical drive 3 goes backwards
M584 X0 Y1 Z2 E3                               ; set drive mapping
M350 X16 Y16 Z16 E16 I1                        ; configure microstepping with interpolation
M92 X80.00 Y80.00 Z400.00 E93.00               ; set steps per mm
M566 X1200.00 Y1200.00 Z24.00 E300.00          ; set maximum instantaneous speed changes (mm/min)
M203 X9000.00 Y9000.00 Z180.00 E6000.00        ; set maximum speeds (mm/min)
M201 X500.00 Y500.00 Z100.00 E5000.00          ; set accelerations (mm/s^2)
M906 X800 Y800 Z800 E1000 I50                  ; set motor currents (mA) and motor idle factor in per cent
M84 S300                                       ; Set idle timeout

; Axis Limits
M208 X40 Y-40 Z0 S                             ; set axis minima
M208 X375 Y375 Z400 S0                         ; set axis maxima

; Endstops
M574 X1 S1 P"xstop"                            ; configure active-high endstop for low end on X via pin xstop
M574 Y1 S1 P"ystop"                            ; configure active-high endstop for low end on Y via pin ystop
M574 Z1 S2                                     ; configure Z-probe endstop for low end on Z

; Z-Probe
; BLTouch - via exp.heater7
M307 H7 A-1 C-1 D-1                            ; Disable the 7th Heater to free up PWM channel 5 on the Duex board.
M558 P9 C"^zprobe.in" H4 R0.2 F1000 T4000 X200 Y220 Z1; Set Z probe type/mode 9. H=Dive Height. F=Speed the bed
M950 S0 C"exp.heater7"                         ;
G31 P25 X25 Y5 Z3.15                           ; Z probe trigger value, offset in relation to nozzle. And trigger height adjustment
M557 X45:310 Y25:310 P6:6                      ; Define mesh grid

; Heaters
M308 S0 P"bedtemp" Y"thermistor" T100000 B4092 ; configure sensor 0 as thermistor on pin bedtemp
M950 H0 C"bedheat" T0                          ; create bed heater output on bedheat and map it to sensor 0
M307 H0 B0 S1.00                               ; disable bang-bang mode for the bed heater and set PWM limit
M140 H0                                        ; map heated bed to heater 0
M143 H0 S150                                   ; set temperature limit for heater 0 to 150C
M308 S1 P"e0temp" Y"thermistor" T100000 B4092  ; configure sensor 1 as thermistor on pin e0temp
M950 H1 C"e0heat" T1                           ; create nozzle heater output on e0heat and map it to sensor 1
M307 H1 B0 S1.00                               ; disable bang-bang mode for heater  and set PWM limit

; Fans
M950 F0 C"fan0" Q500                           ; create fan 0 on pin fan0 and set its frequency
M106 P0 S0 H-1                                 ; set fan 0 value. Thermostatic control is turned off
M950 F1 C"fan1" Q600                           ; create fan 1 on pin fan1 and set its frequency
M106 P1 S1 H-1                                 ; set fan 1 value. Thermostatic control is turned off
M950 F2 C"fan2" Q500                           ; create fan 2 on pin fan2 and set its frequency
M106 P2 S1 H1:0 T45                            ; set fan 2 value. Thermostatic control is turned on

; Tools
M563 P0 D0 H1 F0                               ; define tool 0
G10 P0 X0 Y0 Z0                                ; set tool 0 axis offsets
G10 P0 R0 S0                                   ; set initial tool 0 active and standby temperatures to 0C

; Custom settings are not defined
M591 D0 C3 P1 E1 S1				               ; Turn on functionality for a filament run-out switch

; Miscellaneous
M575 P1 S1 B57600                              ; enable support for PanelDue
M911 S10 R11 P"M913 X0 Y0 G91 M83 G1 Z3 E-5 F1000" ; set voltage thresholds and actions to run on power loss
; deployprobe.g ; called to deploy a physical Z probe ; ; generated by RepRapFirmware Configuration Tool v3.1.4 on Tue Aug 25 2020 21:43:23 GMT-0400 (Eastern Daylight Time) ; M280 P0 S10 ; deploy BLTouch; homeall.g ; called to home all axes ; ; generated by RepRapFirmware Configuration Tool v3.1.4 on Tue Aug 25 2020 21:43:23 GMT-0400 (Eastern Daylight Time) G91 ; relative positioning G1 H2 Z7 F6000 ; lift Z relative to current position G1 H1 X-305 Y-305 F3000 ; move quickly to X and Y axis endstops and stop there (first pass) G1 H2 X5 Y5 F6000 ; go back a few mm G1 H1 X-305 Y-305 F240 ; move slowly to X and Y axis endstops once more (second pass) G90 ; absolute positioning G1 X-150 Y-150 F6000 ; go to first bed probe point and home Z G30 ; home Z by probing the bed ; Uncomment the following lines to lift Z after probing G91 ; relative positioning G1 Z7 F100 ; lift Z relative to current position G90 ; absolute positioning; homez.g ; called to home the Z axis ; ; generated by RepRapFirmware Configuration Tool v3.1.4 on Tue Aug 25 2020 21:43:23 GMT-0400 (Eastern Daylight Time) G91 ; relative positioning G1 H2 Z7 F6000 ; lift Z relative to current position G90 ; absolute positioning G1 X-150 Y-150 F6000 ; go to first probe point G30 ; home Z by probing the bed ; Uncomment the following lines to lift Z after probing G91 ; relative positioning G1 Z7 F100 ; lift Z relative to current position G90 ; absolute positioningAs Always Thanks again
John Out (n3ovo) -
@n3ovo said in BL-Touch and problems:
G31 P25 X25 Y5 Z3.15
If the offset is set correct, you have to calculate the center by subtracting the values from the center.
As an example
When you bed is 335x335 (375-40, set by the limits in config.g)335/2-25= 142.5
Change that line
G1 X-150 Y-150 F6000
to
G1 X 142 Y 142 F6000Edit: In homeall.g and in homez.g
-
oK THANKS Just fixed both all and z .. tried to do a mesh and i get error g29 "zprobe was not triggered during probing move"
this is because it homed to X and Y no problem but did not move back to the table before going down for first??What did i do Now

Ho and thanks ...
-
@n3ovo
I'm not shure if I got you...
But the machine has to be homed completely before executing a G29
So run a G28 first -
One thing I would suggest is to set your Axis Limits like this
M208 X0 Y0 Z0 S1                            ; set axis minima
M208 X375 Y375 Z400 S0                ; set axis maxima
I suspect your current settings are confounding the situation.
Then take a look at your z-probe offset as measured in your G31 command. The distance from the nozzle to the probe in your case is 25mm in the X axis. The cr10s-pro looks to be (more-or-less) the same setup as on my Ender 5. Probe to the left of the nozzle when viewed from the front. It could be the mount but for reference - I have a 42 mm offset.
You can then play with the M557 command to keep the probing inside the bed. Lastly you may try this form of M557 - it probes in a grid pattern starting at the min X and Y positions with a distance specified by the S parameter (in mm). In this way there is no need (or advantage) to start probing from the middle of the bed. You could start with S40 to make it quicker (also helps with initial leveling using the bed leveling screws).
M557 X45:220 Y10:220 S20Remember to add something like this in your slicer pre-print code. Note that the G29 S1 makes sure that the results of the last bed-leveling (G29) are recalled. Personally - I do not do a G29 for each print - maybe once a week or if I am going to print something in fine detail.
M117 Homing G28 ; home all without mesh bed level G30 ; Do a single probe just to be sure ;Optional Bed leveling - enable G29 when needed M117 Leveling Bed ;G29 ; uncomment to re-probe the bed G29 S1 ; enable mesh -
Hello Again ... back with more questions and as alway the last answers help all of my past problems
- how big can the sd-card 64 ? 128?
- I would like to add a camera to the system. is there just a wifi/wired small camera i can use for monitoring the printer at will get me a JPEG picture like it's neededs ( thought I see something before but forgot you look closer now i just forgot.
Now on to my next problem ... i have been working on my printer bed all this time as soon as i got the Bed Mash Compensation working ( and man was my bed messed up )
i got it all working but when i go to print it will not move down to the set height of printing nozzle. Stays at the bl-touch hight. ??? tried and tried. Worked all night on it and just can't get is to working . I know that it is something i have (Again) mist!I am Sending my code but i don't think this will show anything. Also sending what i have tried to follow
; Configuration file for Duet WiFi (firmware version 3) ; executed by the firmware on start-up ; ; generated by RepRapFirmware Configuration Tool v3.1.4 on Tue Aug 25 2020 21:43:23 GMT-0400 (Eastern Daylight Time) ; General preferences M29 S1 ; Load height map from file, activate bed compensation default name 0:/sys/heightmap.csv G90 ; send absolute coordinates... M83 ; ...but relative extruder moves M550 P"CR10s_Pro" ; set printer name M918 P1 E4 F2000000 ; configure direct-connect display ; Network M551 P"n3ovo3" ; set password M552 P192.168.1.66 S1 ; enable network and set IP address M553 P255.255.255.0 ; set netmask M554 P192.168.1.1 ; set gateway M586 P0 S1 ; enable HTTP M586 P1 S1 ; enable FTP M586 P2 S1 ; enable Telnet ; Drives M569 P0 S0 ; physical drive 0 goes backwards M569 P1 S1 ; physical drive 1 goes forwards M569 P2 S1 ; physical drive 2 goes forwards M569 P3 S0 ; physical drive 3 goes backwards M584 X0 Y1 Z2 E3 ; set drive mapping M350 X16 Y16 Z16 E16 I1 ; configure microstepping with interpolation M92 X80.00 Y80.00 Z400.00 E136.00 ; set steps per mm started at 93 M566 X1200.00 Y1200.00 Z24.00 E300.00 ; set maximum instantaneous speed changes (mm/min) M203 X9000.00 Y9000.00 Z180.00 E6000.00 ; set maximum speeds (mm/min) M201 X500.00 Y500.00 Z100.00 E5000.00 ; set accelerations (mm/s^2) M906 X800 Y800 Z800 E1000 I50 ; set motor currents (mA) and motor idle factor in per cent M84 S100 ; Set idle timeout ; Axis Limits M208 X50 Y-25 Z0 S ; set axis minima M208 X290 Y290 Z400 S0 ; set axis maxima ; Endstops M574 X1 S1 P"xstop" ; configure active-high endstop for low end on X via pin xstop M574 Y1 S1 P"ystop" ; configure active-high endstop for low end on Y via pin ystop M574 Z1 S2 ; configure Z-probe endstop for low end on Z ; Z-Probe ; BLTouch - via exp.heater7 M307 H7 A-1 C-1 D-1 ; Disable the 7th Heater to free up PWM channel 5 on the Duex board. M558 P9 C"^zprobe.in" H4 R0.2 F1000 T4000 X200 Y220 Z1; Set Z probe type/mode 9. H=Dive Height. F=Speed the bed M950 S0 C"exp.heater7" ; G31 P45 X25 Y5 Z-2.90 ; Z probe trigger value, offset in relation to nozzle. And trigger height adjustment M557 X55:290 Y25:290 P6:16 ; Define mesh grid ; Heaters M308 S0 P"bedtemp" Y"thermistor" T100000 B4092 ; configure sensor 0 as thermistor on pin bedtemp M950 H0 C"bedheat" T0 ; create bed heater output on bedheat and map it to sensor 0 M307 H0 B0 S1.00 ; disable bang-bang mode for the bed heater and set PWM limit M140 H0 ; map heated bed to heater 0 M143 H0 S150 ; set temperature limit for heater 0 to 150C M308 S1 P"e0temp" Y"thermistor" T100000 B4092 ; configure sensor 1 as thermistor on pin e0temp M950 H1 C"e0heat" T1 ; create nozzle heater output on e0heat and map it to sensor 1 M307 H1 B0 S1.00 ; disable bang-bang mode for heater and set PWM limit ; Fans M950 F0 C"fan0" Q500 ; create fan 0 on pin fan0 and set its frequency M106 P0 S0 H-1 ; set fan 0 value. Thermostatic control is turned off M950 F1 C"fan1" Q600 ; create fan 1 on pin fan1 and set its frequency M106 P1 S1 H-1 ; set fan 1 value. Thermostatic control is turned off M950 F2 C"fan2" Q500 ; create fan 2 on pin fan2 and set its frequency M106 P2 S1 H1:0 T45 ; set fan 2 value. Thermostatic control is turned on ; Tools M563 P0 D0 H1 F0 ; define tool 0 G10 P0 X45 Y0 Z0 ; set tool 0 axis offsets G10 P0 R0 S0 ; set initial tool 0 active and standby temperatures to 0C ; Custom settings are not defined M591 D0 C3 P1 E1 S1 ; Turn on functionality for a filament run-out switch ; Miscellaneous M575 P1 S1 B57600 ; enable support for PanelDue M501 ; M501: Read all stored parameters ;M911 S10 R11 P"M913 X0 Y0 G91 M83 G1 Z3 E-5 F1000" ; set voltage thresholds and actions to run on power loss-
list itemCalibrate the Z probe trigger height
Make sure the dynamic test is successful (Z probe stops when it senses the bed) before doing this.
Cancel any currently active mesh compensation with M561
Use the X and Y jog buttons to position the nozzle over the centre of the bed
Jog the nozzle down until it is just touching the bed or just gripping a sheet of paper. If the firmware doesn't let you jog it down far enough, send M564 S0 to disable axis limits.
Once you have the nozzle touching the bed, send command G92 Z0 to tell the firmware that the head is at Z=0
Jog the head up by 5 to 10mm
Send command G30 S-1. The nozzle will descend or the bed rise until the probe triggers and the Z height at which the probe stopped will be reported. If you are using a nozzle-contact Z probe, the trigger height will be slightly negative. For any other type of Z probe where the probe triggers before the nozzle contacts the bed, it will be positive.
Repeat from step 5 two or three times to make sure that the trigger height is consistent.
In Duet Web Control, go to Settings -> System Editor and edit the config.g file. Set the Z parameter in the G31 command to the trigger height that was reported. Save the file.
Open config-override.g and check that there are no G31 commands in it. If you find any, delete those lines and save the file.
To apply the new trigger height, restart the Duet by sending M999 or pressing Emergency Stop.
I'm not afraid to die,i just don't want to be there
when it happens
-
Your trigger height should be a positive value, not a negative value.
ChangeG31 P45 X25 Y5 Z-2.90to
G31 P45 X25 Y5 Z2.90Wyze cam v2 https://wyze.com/wyze-cam.html can be used to transmit the required video for printer monitoring.
-
@n3ovo said in BL-Touch and problems:
how big can the sd-card 64 ? 128?
See https://duet3d.dozuki.com/Wiki/SD_Card#Section_Specification
Spoiler: up to 32GB capacity, formatted as FAT32See @jay_s_uk's reply for your Z height issue.
Ian
-
@n3ovo said in BL-Touch and problems:
; Z-Probe ; BLTouch - via exp.heater7
M307 H7 A-1 C-1 D-1 ; Disable the 7th Heater to free up PWM channel 5 on the Duex board.
M558 P9 C"^zprobe.in" H4 R0.2 F1000 T4000 X200 Y220 Z1; Set Z probe type/mode 9. H=Dive Height. F=Speed the bedRemove the M307 line entirely. It's not used in RRF3.
And remove the
X200 Y220 Z1from your M558 line, those values are not used there at all.M208 X50 Y-25 Z0 S ; set axis minima
Does your X axis endstop really trigger when the nozzle is 50mm inside the printable area?
You're S parameter is missing the 1 there as well.
-
@n3ovo -- The gcode that I posted a few days ago should pretty much "just work" for you. Given the similarity between your Ender and mine.... Z offset will be different and you are using a different pin but other than that .....
I'm still suspicious of your X axis offset. Can you include a picture taken from the front that shows the nozzle and the probe? It's hard for me to see that 25mm is correct given how most BLTs mount relative the the stock ender hotend. Having said that, anything is possible - but worth double
checking. -
Thanks All, I Did my FIRST Print ( I will show Pictures Below ) All your help was just Wonderful to a newcomer. Don't be worried I will have more question .. hope that i can pass on to someone my help like you all did for me.
I think I have fixed all errors in my config.g ( don't yell if i missed some there were a lot!
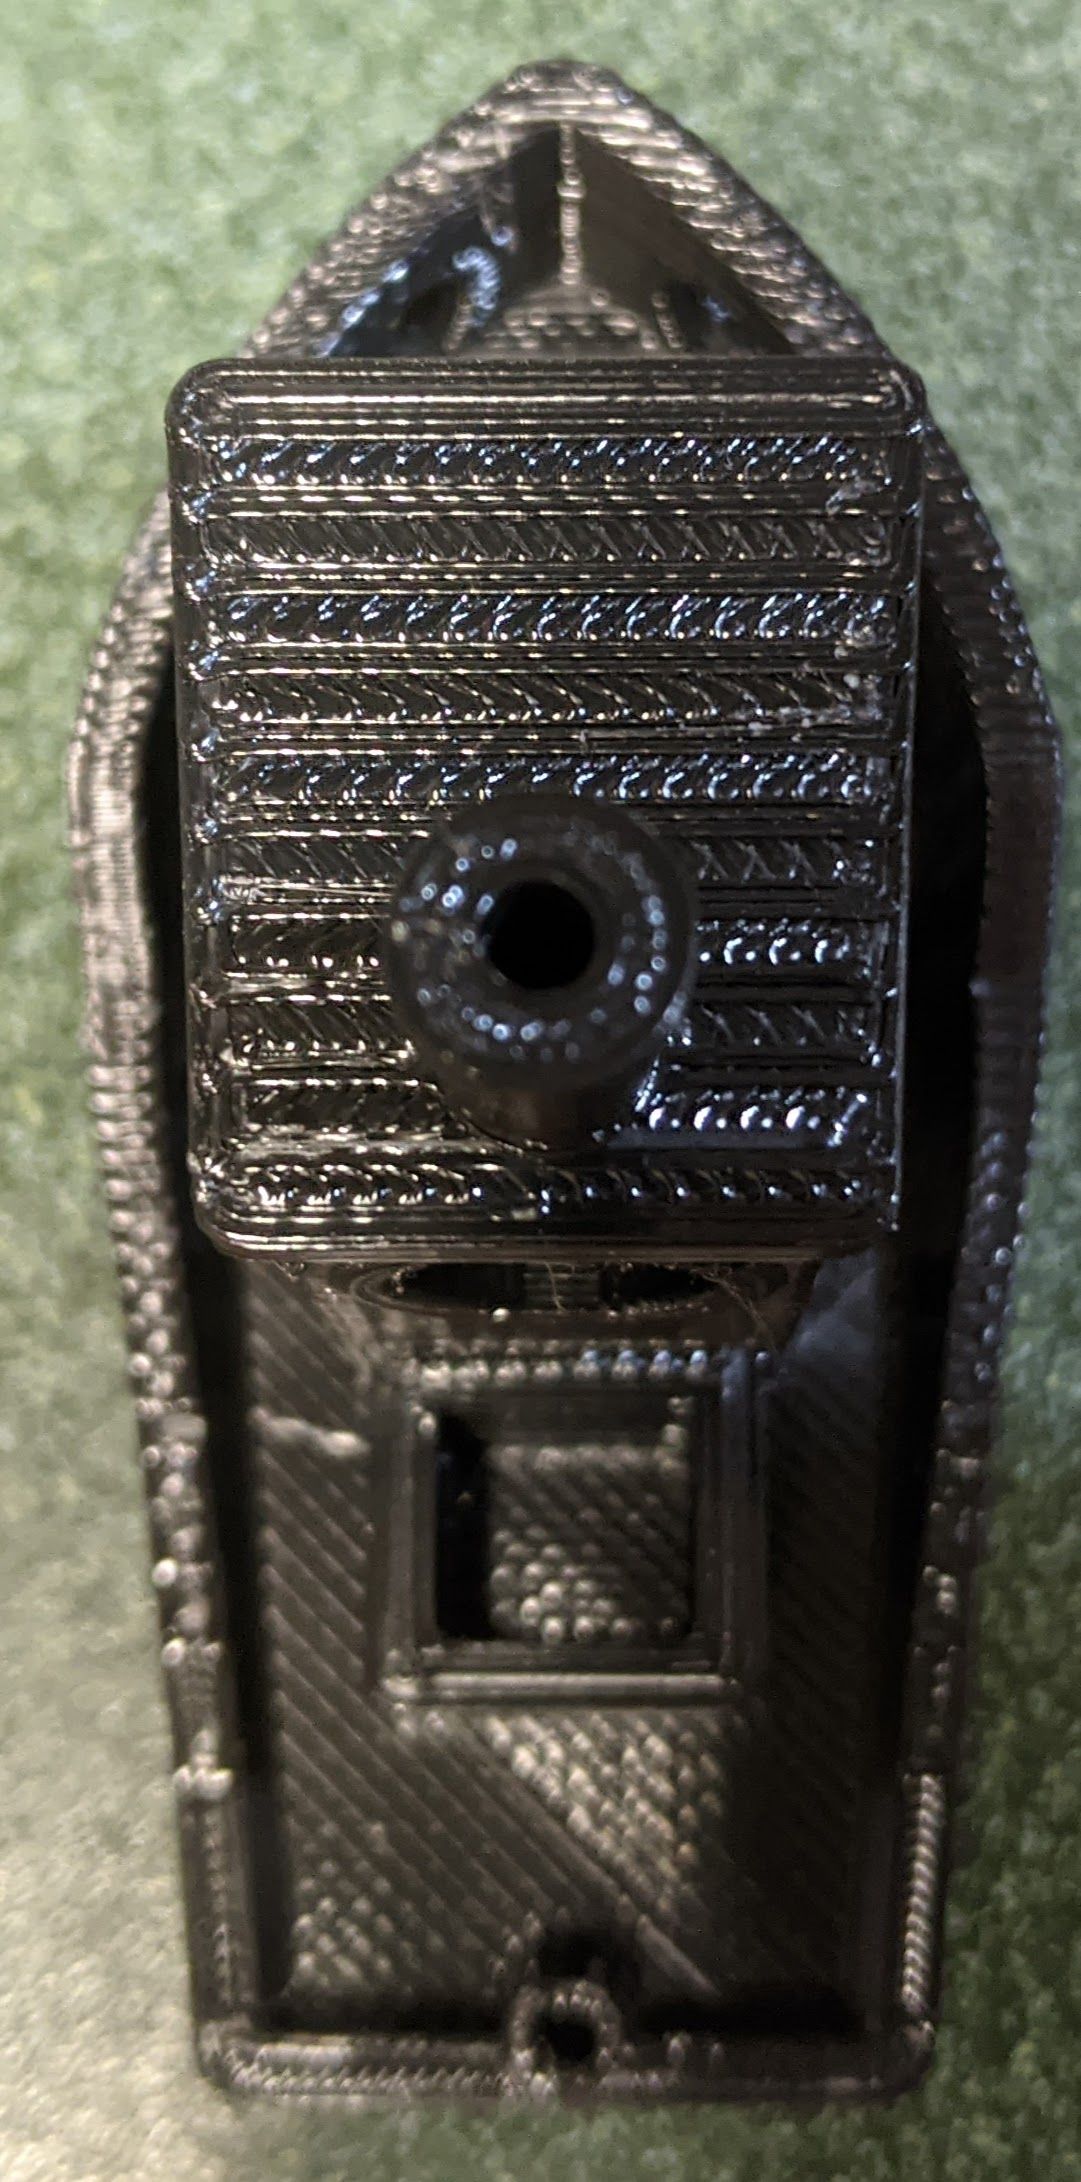


I know i can do better.but no to bad for the first print.
sending my config.g just to see if i got it all worked out; Configuration file for Duet WiFi (firmware version 3) ; executed by the firmware on start-up ; ; generated by RepRapFirmware Configuration Tool v3.1.4 on Tue Aug 25 2020 21:43:23 GMT-0400 (Eastern Daylight Time) ; General preferences M29 S1 ; Load height map from file, activate bed compensation default name 0:/sys/heightmap.csv G90 ; send absolute coordinates... M83 ; ...but relative extruder moves M550 P"CR10s_Pro" ; set printer name M918 P1 E4 F2000000 ; configure direct-connect display ; Network M551 P"n3ovo3" ; set password M552 P192.168.1.66 S1 ; enable network and set IP address M553 P255.255.255.0 ; set netmask M554 P192.168.1.1 ; set gateway M586 P0 S1 ; enable HTTP M586 P1 S1 ; enable FTP M586 P2 S1 ; enable Telnet ; Drives M569 P0 S0 ; physical drive 0 goes backwards M569 P1 S1 ; physical drive 1 goes forwards M569 P2 S1 ; physical drive 2 goes forwards M569 P3 S0 ; physical drive 3 goes backwards M584 X0 Y1 Z2 E3 ; set drive mapping M350 X16 Y16 Z16 E16 I1 ; configure microstepping with interpolation M92 X80.00 Y80.00 Z400.00 E136.00 ; set steps per mm started at 93 M566 X1200.00 Y1200.00 Z24.00 E300.00 ; set maximum instantaneous speed changes (mm/min) M203 X9000.00 Y9000.00 Z180.00 E6000.00 ; set maximum speeds (mm/min) M201 X500.00 Y500.00 Z100.00 E5000.00 ; set accelerations (mm/s^2) M906 X800 Y800 Z800 E1000 I50 ; set motor currents (mA) and motor idle factor in per cent M84 S100 ; Set idle timeout ; Axis Limits M208 X0 Y0 Z0 S 1 ; set axis minima M208 X290 Y290 Z390 S0 ; set axis maxima ; Endstops M574 X1 S1 P"xstop" ; configure active-high endstop for low end on X via pin xstop M574 Y1 S1 P"ystop" ; configure active-high endstop for low end on Y via pin ystop M574 Z1 S2 ; configure Z-probe endstop for low end on Z ; Z-Probe ; BLTouch - via exp.heater7 M558 P9 C"^zprobe.in" H4 R0.2 F1000 T4000 ; Set Z probe type/mode 9. H=Dive Height. F=Speed the bed M950 S0 C"exp.heater7" ; G31 P45 X25 Y5 Z3.22 ; Z probe trigger value, offset in relation to nozzle. And trigger height adjustment M557 X55:290 Y25:290 P6:16 ; Define mesh grid ; Heaters M308 S0 P"bedtemp" Y"thermistor" T100000 B4092 ; configure sensor 0 as thermistor on pin bedtemp M950 H0 C"bedheat" T0 ; create bed heater output on bedheat and map it to sensor 0 M140 H0 ; map heated bed to heater 0 M143 H0 S150 ; set temperature limit for heater 0 to 150C M308 S1 P"e0temp" Y"thermistor" T100000 B4092 ; configure sensor 1 as thermistor on pin e0temp M950 H1 C"e0heat" T1 ; create nozzle heater output on e0heat and map it to sensor 1 ; Fans M950 F0 C"fan0" Q500 ; create fan 0 on pin fan0 and set its frequency M106 P0 S0 H-1 ; set fan 0 value. Thermostatic control is turned off M950 F1 C"fan1" Q600 ; create fan 1 on pin fan1 and set its frequency M106 P1 S1 H-1 ; set fan 1 value. Thermostatic control is turned off M950 F2 C"fan2" Q500 ; create fan 2 on pin fan2 and set its frequency M106 P2 S1 H1:0 T45 ; set fan 2 value. Thermostatic control is turned on ; Tools M563 P0 D0 H1 ; define tool 0 G10 P0 X45 Y0 Z0 ; set tool 0 axis offsets G10 P0 R0 S0 ; set initial tool 0 active and standby temperatures to 0C ; Custom settings are not defined M591 D0 C3 P1 E1 S1 ; Turn on functionality for a filament run-out switch ; Miscellaneous M575 P1 S1 B57600 ; enable support for PanelDue M501 ; M501: Read all stored parameters ;M911 S10 R11 P"M913 X0 Y0 G91 M83 G1 Z3 E-5 F1000" ; set voltage thresholds and actions to run on power lossThanks John G N3OVO
I'm not afraid to die,i just don't want to be there
when it happens
-
Congratulations on your first print - doesn't it feel great when that happens !!
A couple of observations.
I think your line for the axis minima may have an error (space between S and 1). I'm not sure if its an error but its not clear if to me how the interpreter will see it. i.e. I believe it needs to be
M208 X0 Y0 Z0 S1 ; set axis minimaAlso - Its not clear that you have the correct form for your M557 line. The documentation is a little vague - but it does suggest the form you have is deprecated. Does your bed leveling actually happen ? The new form is to just define the bed limits and the probe interval.
https://duet3d.dozuki.com/Wiki/Gcode#Section_M557_Set_Z_probe_point_or_define_probing_grid
Good luck moving forward
")
-
@stuartofmt said in BL-Touch and problems:
Also - Its not clear that you have the correct form for your M557 line.
The M557 command he has in there is perfectly fine.
-
@n3ovo said in BL-Touch and problems:
I know i can do better.but no to bad for the first print.
It looks pretty good for a first print!
Now that you have everything functional it's time to do some calibration. Mainly the extruder and all that entails. This guide might help you along.
https://duet3d.dozuki.com/Guide/Ender+3+Pro+and+Duet+Maestro+Guide+Part+4:+Calibration/40
Then you may want to look into tuning pressure advance once the extruder is calibrated.
https://duet3d.dozuki.com/Wiki/Pressure_advance
After that it's all a matter of learning the slicer settings.