New heated enclosure printer
-
@coseng you may want to use ASA at least your uv stability will stand the test of time alot of ABS will fade split sag from the UV rays you have a much better chance long term UV exposure with ASA they run very close to the same with the avg density of around 1.07 and abs 1.05-1.12 SG and is the same price
-
ASA is better than ABS in every way, except cost.
-
For production motorcycles these parts are injection molded in ABS, so figure matching that is the path of least resistance.
Chris
Cosentino Engineering -
@phaedrux from a resin stand point Sabic vs sabic ASA is $2.28/KG cdn 1600 lbs gayloads min loads ABS MG 94 is 2.12/KG or 96cent/lbs so a delta of like .05$ a lbs from asa to abs is not really diffrent your talking the brand influances asa can be had as cheap as abs and vise versa but makers like to inflate the underdogs due to tru put like 3dxtech asa is way overpriced at 60$/roll vs others at 25$/roll my point is asa or abs is not a real diffrence in price but the end seller or brand maybe apples to apples they are only 0.05$/Lbs away from each other at a resin stand point the rest is nike shoes! its sabics resin not 3dxtech or VM but SABIC they set the pricing the rest is inflated less L and O labor and overhead!
but both are very similar in cost -
@coseng
it would be the path of least resistance yes would you build one specific or source the run out? -
@rexx said in New heated enclosure printer:
it would be the path of least resistance yes would you build one specific or source the run out?
Not sure what you mean.
Truckload pricing in pellet form is not really relevant to a small quantity user like myself. ABS filament seems more generally available than ASA. Pushplastic.com has 10kg spools in many colors in stock. The 10kg spool size really helps with these big parts.
If I have temp issues with parts near the exhaust melting, I can give the ASA a try. Otherwise if it ain't broke, I don't have time to fix it!
")
-
@coseng i was just saying to the comment before asa vs abs cost $$ is not relavent good abs and good asa is priced very similar and it is what it is. as for the 10 kg spools if you want to run will be hard to beat normally the larger rolls are only found 4-5 lbs or 2-2.2KG
-
Win a few, lose a few.
I tried running a thinnish part standing up with minimal slicer supports but thought decent CAD bracing and got an area with a failure similar to the initial thin part print failures where the end got all wiggly.

I also had an issue with the one of the chamber heaters blowing on the part and causing some sagging and warping. I tried to heat and bend it back, but it was not working good enough to make it a usable part, so back to the printer.

I had run this part previously laying down and got a bunch of bad finish areas on the inside under the support structure, but the other areas ran fine. With this print I made a CAD error on the wall thickness so some of the part has one pass for each wall and a small hollow space in between. The result is quite flimsy, otherwise I would have used it. I could imagine 130mph wind blowing a hole through it.

For the next print I will go back to the laydown orientation and tweak the support roof settings a little.
-
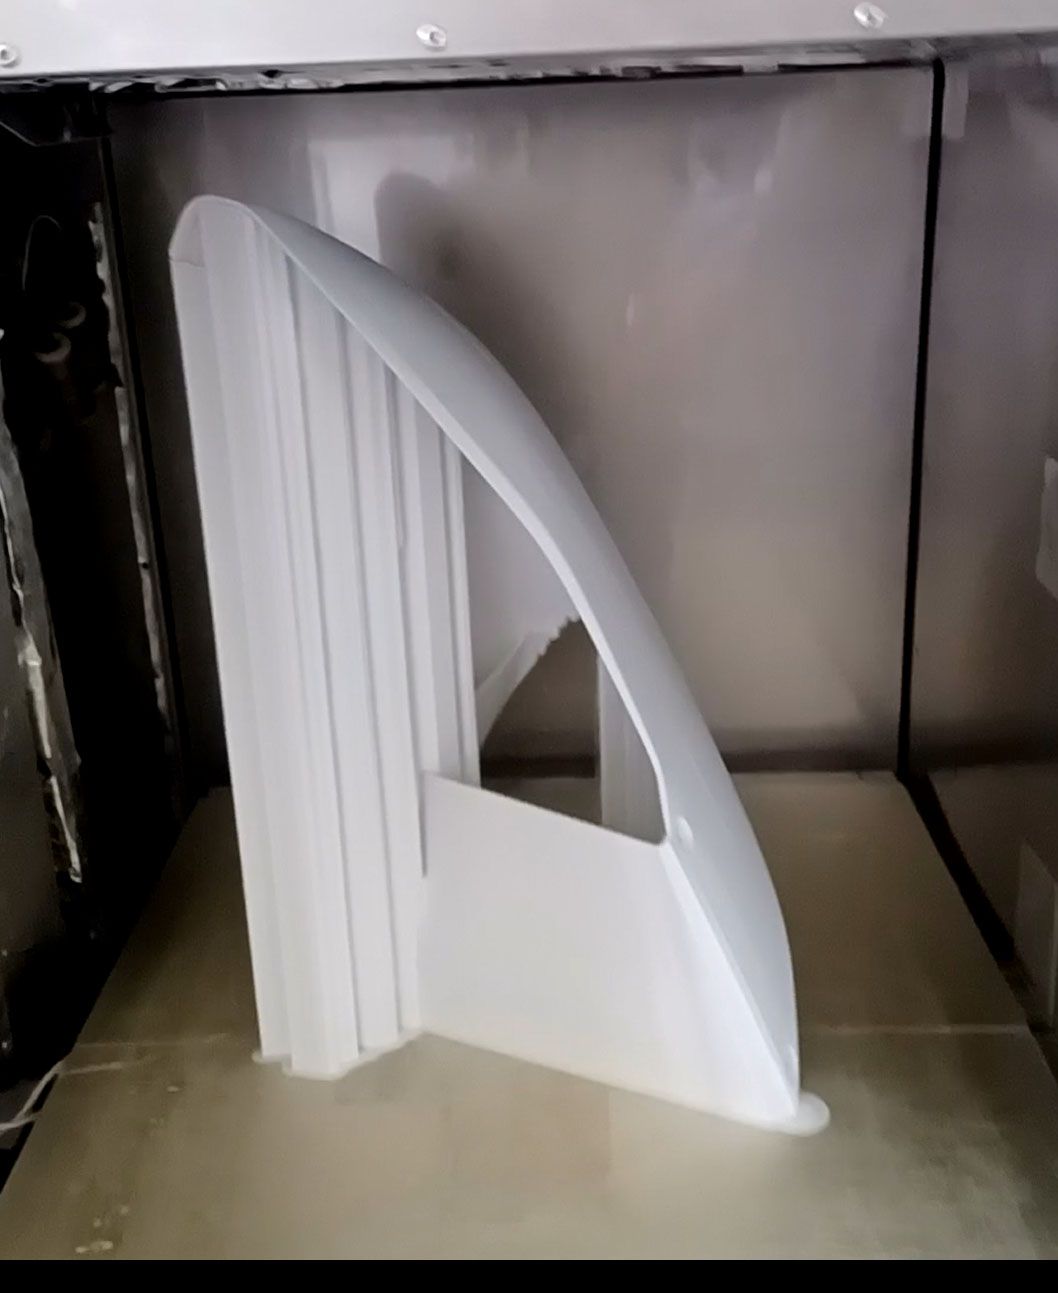
Happy 4th of July everybody.
Those laydown prints of the front upper sides worked well. Here's a pic of the nearly finished product. All the red, white, and blue body panels were printed out. And the black seat 'pads'.

I'm going to keep refining the slicer settings and printing more parts as I make updates to the design, but for now can consider this a completely successful printer build project.
Thanks to the forum for all the suggestions and to the Duet3D crew for such an excellent product line.
-
In the search for a little more print speed (I'm a racer for a reason.....) I did a little beta testing for the people making the print nozzle with a PCD insert tip, ChampionX.
https://www.championx.com/products-and-solutions/drilling-technologies/diamondback-nozzles/
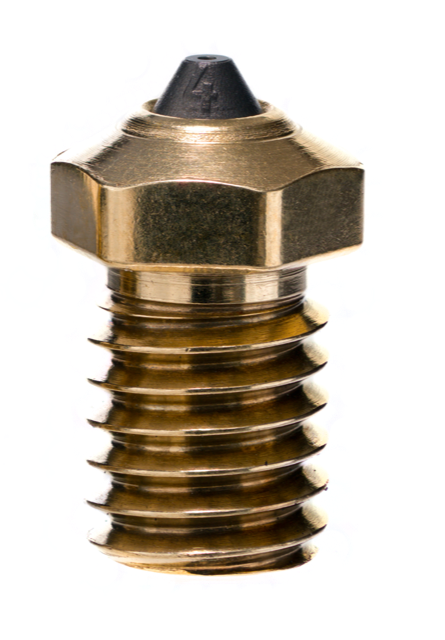
It is not a coating, but a little chunk of industrial PCD that is inserted in the tip. It is hard as a natural diamond, but black. It also has a very high thermal conductivity, so will keep the filament as hot as possible right up to the nozzle exit. That is secondary though, as diamond's low friction properties for me are the main point of interest to reduce the effort needed to push melted filament out of the orifice. Less friction leaves more stepper torque available to put to use pushing filament out, which results in higher print speeds.
The company advertises the nozzle as resistant to abrasion with CF or glass filled or otherwise abrasive filaments. I did not test any of that, but considering it is diamond, would think it would last for a printer's life. They also mirror polish the flat tip so that the tops of prints come out really smooth. The visible parts of my prints are mostly the sides of the extrusion, so also did not test this aspect.
They have products for a bunch of nozzles and are coming out with a Volcano version, but not yet for a Supervolcano, so a bit of lathe work was needed to do a retrofit.
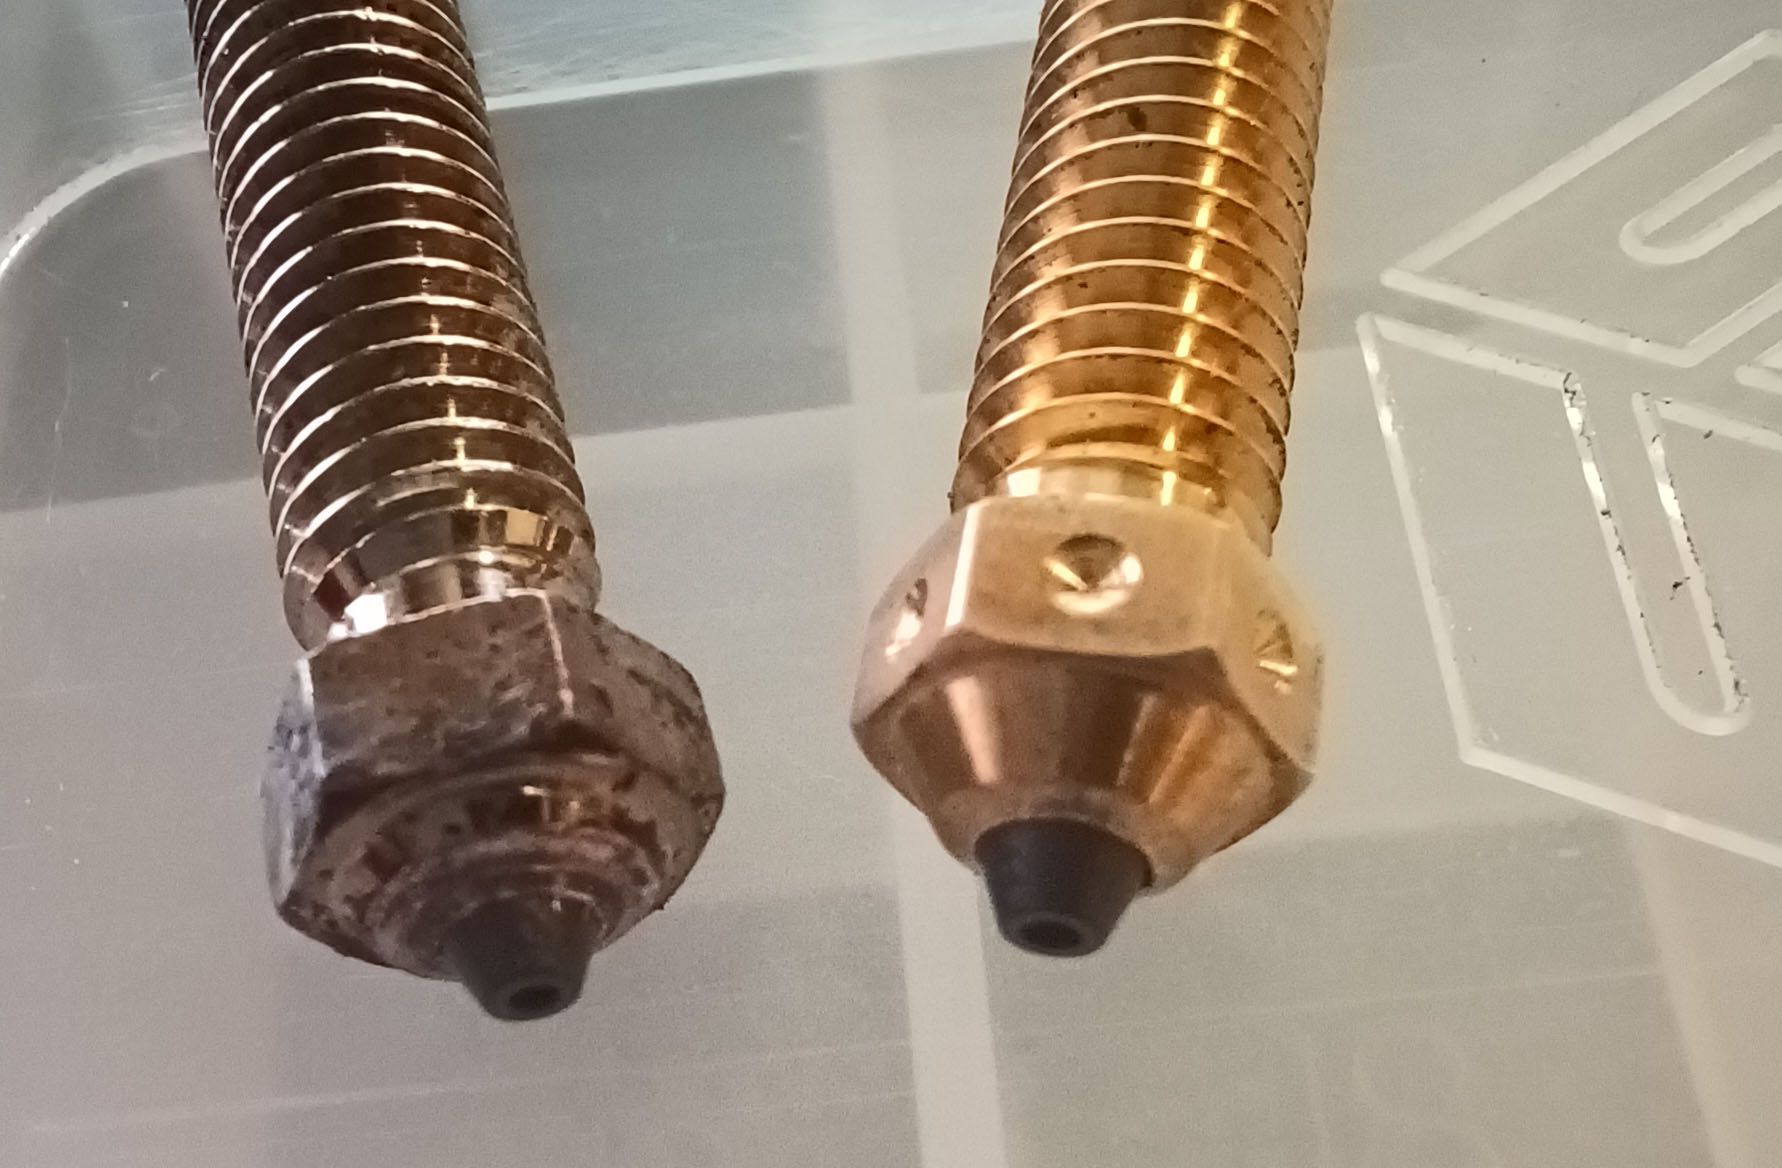
The brass nozzle on the right was used to verify the modifications before doing it to the more expensive copper nozzle on the left.
I tested at 240C printhead temp, which is my current ABS print temp. I lowered the bed to the bottom of travel and just ran the extruder using a G1 E200 FXXXX command.
Using the existing E3D copper/nickel plate supervolcano 0.8mm nozzle I normally run prints with a max extruder speed of 1200mm/min (150mm/sec print speed) which gives very consistent results with no filament dust on the hobbed drive wheel after 12hr prints. At 1500mm/min I start to get sporadic filament slippage but it still extrudes successfully. At 1800mm/min it will not start to extrude and just slips at the hobbed drive wheel.
With the Diamondback 0.8mm tip inserted in a copper nozzle I was able to get consistent extrusion with no filament grinding up to 1800mm/min. At 2000mm/min it would not start to extrude at all and sometimes got stepper stuttering, but at that speed it may also be bumping up against the stepper’s speed limits.
So the quick takeaway is that there is definitely a significant reduction in the force needed to extrude. Combined with essentially no wear, I think it is a no-brainer upgrade. I have no financial interest in this product.
I’ll keep the nozzle in there for the next series of prints and see if I can bump the print speed from 150mm/sec to 180-200mm/sec. Possibly faster for the support printing, as a little loss in quality there is a non-issue. Even a 10% or so speed increase would be great, and considering that the printer is essentially a 6000W heater, the PCD nozzle is also an energy/cost saver.
-
 undefined coseng referenced this topic
-
undefined coseng referenced this topic
-
Just starting another round of prints and was having some serious first layer adhestion problems that was traced back to the 8mm thick aluminum build plate developing a slight droop to it. The center of the bed is X0Y0 and X0 is still level from Y- to Y+, but both the entire Xmax and Xmin edges are drooping by about 0.25mm so the edges are low and the middle is high. I guess all the heat cycles have induced this dimensional change. Just after installation I had manually scanned it with a dial indicator and it was flat to a TIR of about .08mm with no obvious directionality to it.
I'm also having some issues with my BLTouch not being repeatable, so I manually created a 5x3 bed mesh compensation file and not it seems to work as it was. When I try to scan with the BL touch I get over well 1mm of variance, which is not backed up by a mechanical scan. Also, sometimes the BLtouch won't initialize properly. I have a 75mm extension on the probe, so the solenoid has a little extra mass to move, so instead of really debugging it I manually set Z using a G28 and not turn the printer off much.
-
@phaedrux Here it is! New restock on dhm-online.com
Come and find your duet 3 new products: duet 3 6xd and more https://www.dhm-online.com/brand/14-duet3d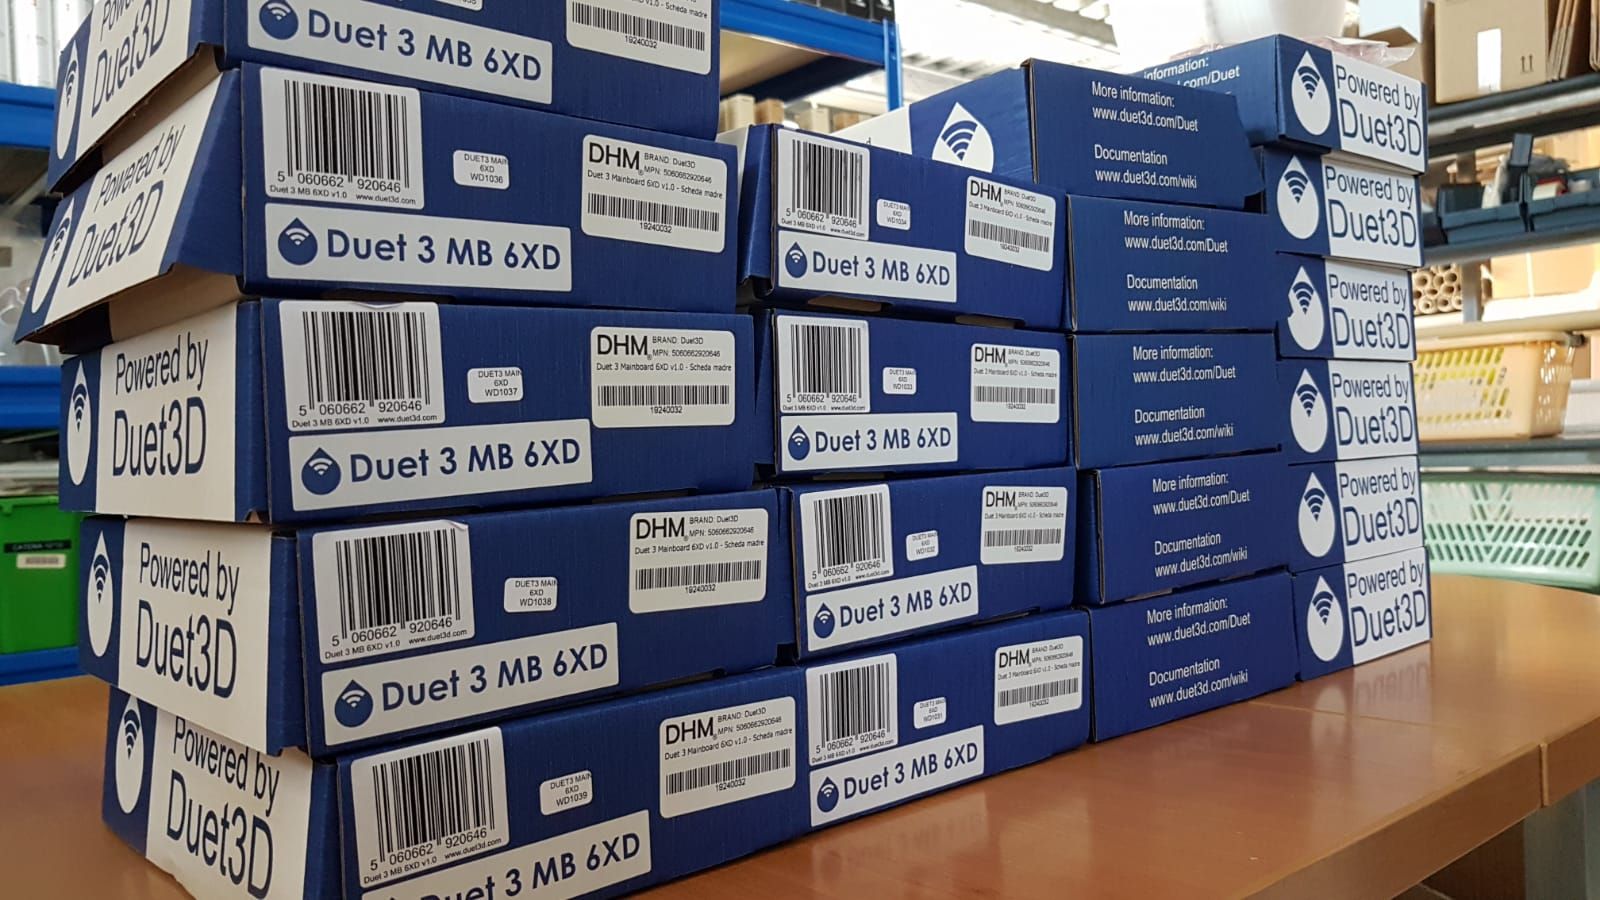
-
Heaven to hell!

After the first round of printing I left the printer off for a couple of months, and now have some revisions to print.
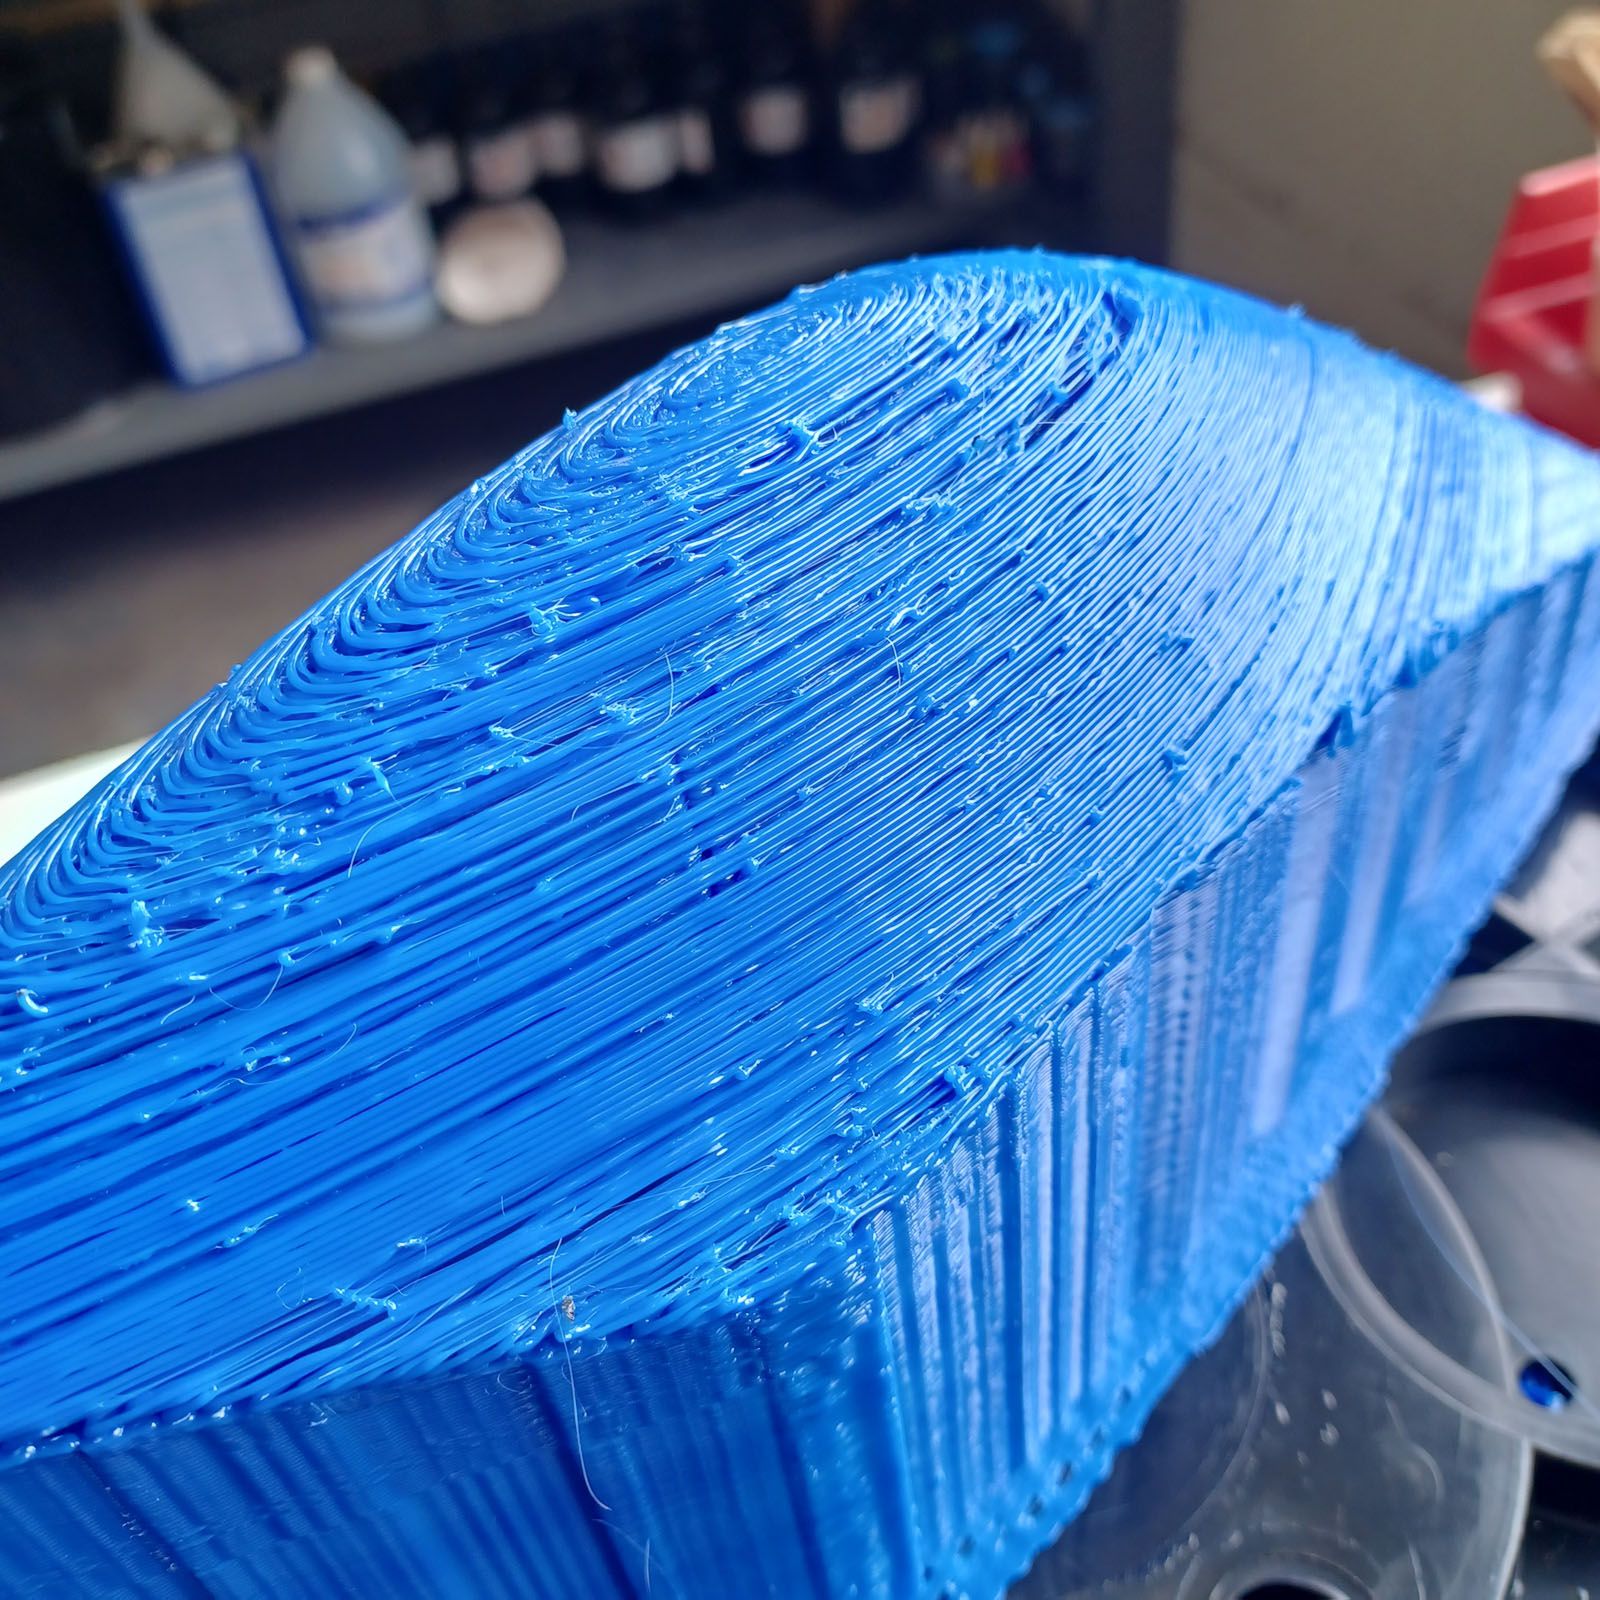
Not sure what happened, but quality has taken a nosedive from previous results. Suspecting the PCD nozzle was an issue, I swapped back to the all copper but the results were the same. The blue parts were from an old spool. After a couple of bad ones, I baked it for a few hours at 65C but that did not improve things. I then tried a new spool of white and got a little better but still far from acceptable parts. I was using the same settings and for the blue parts tried importing the settings from the .gcode file of a previously successfully printed part. I even reran an old file with the same substandard results.

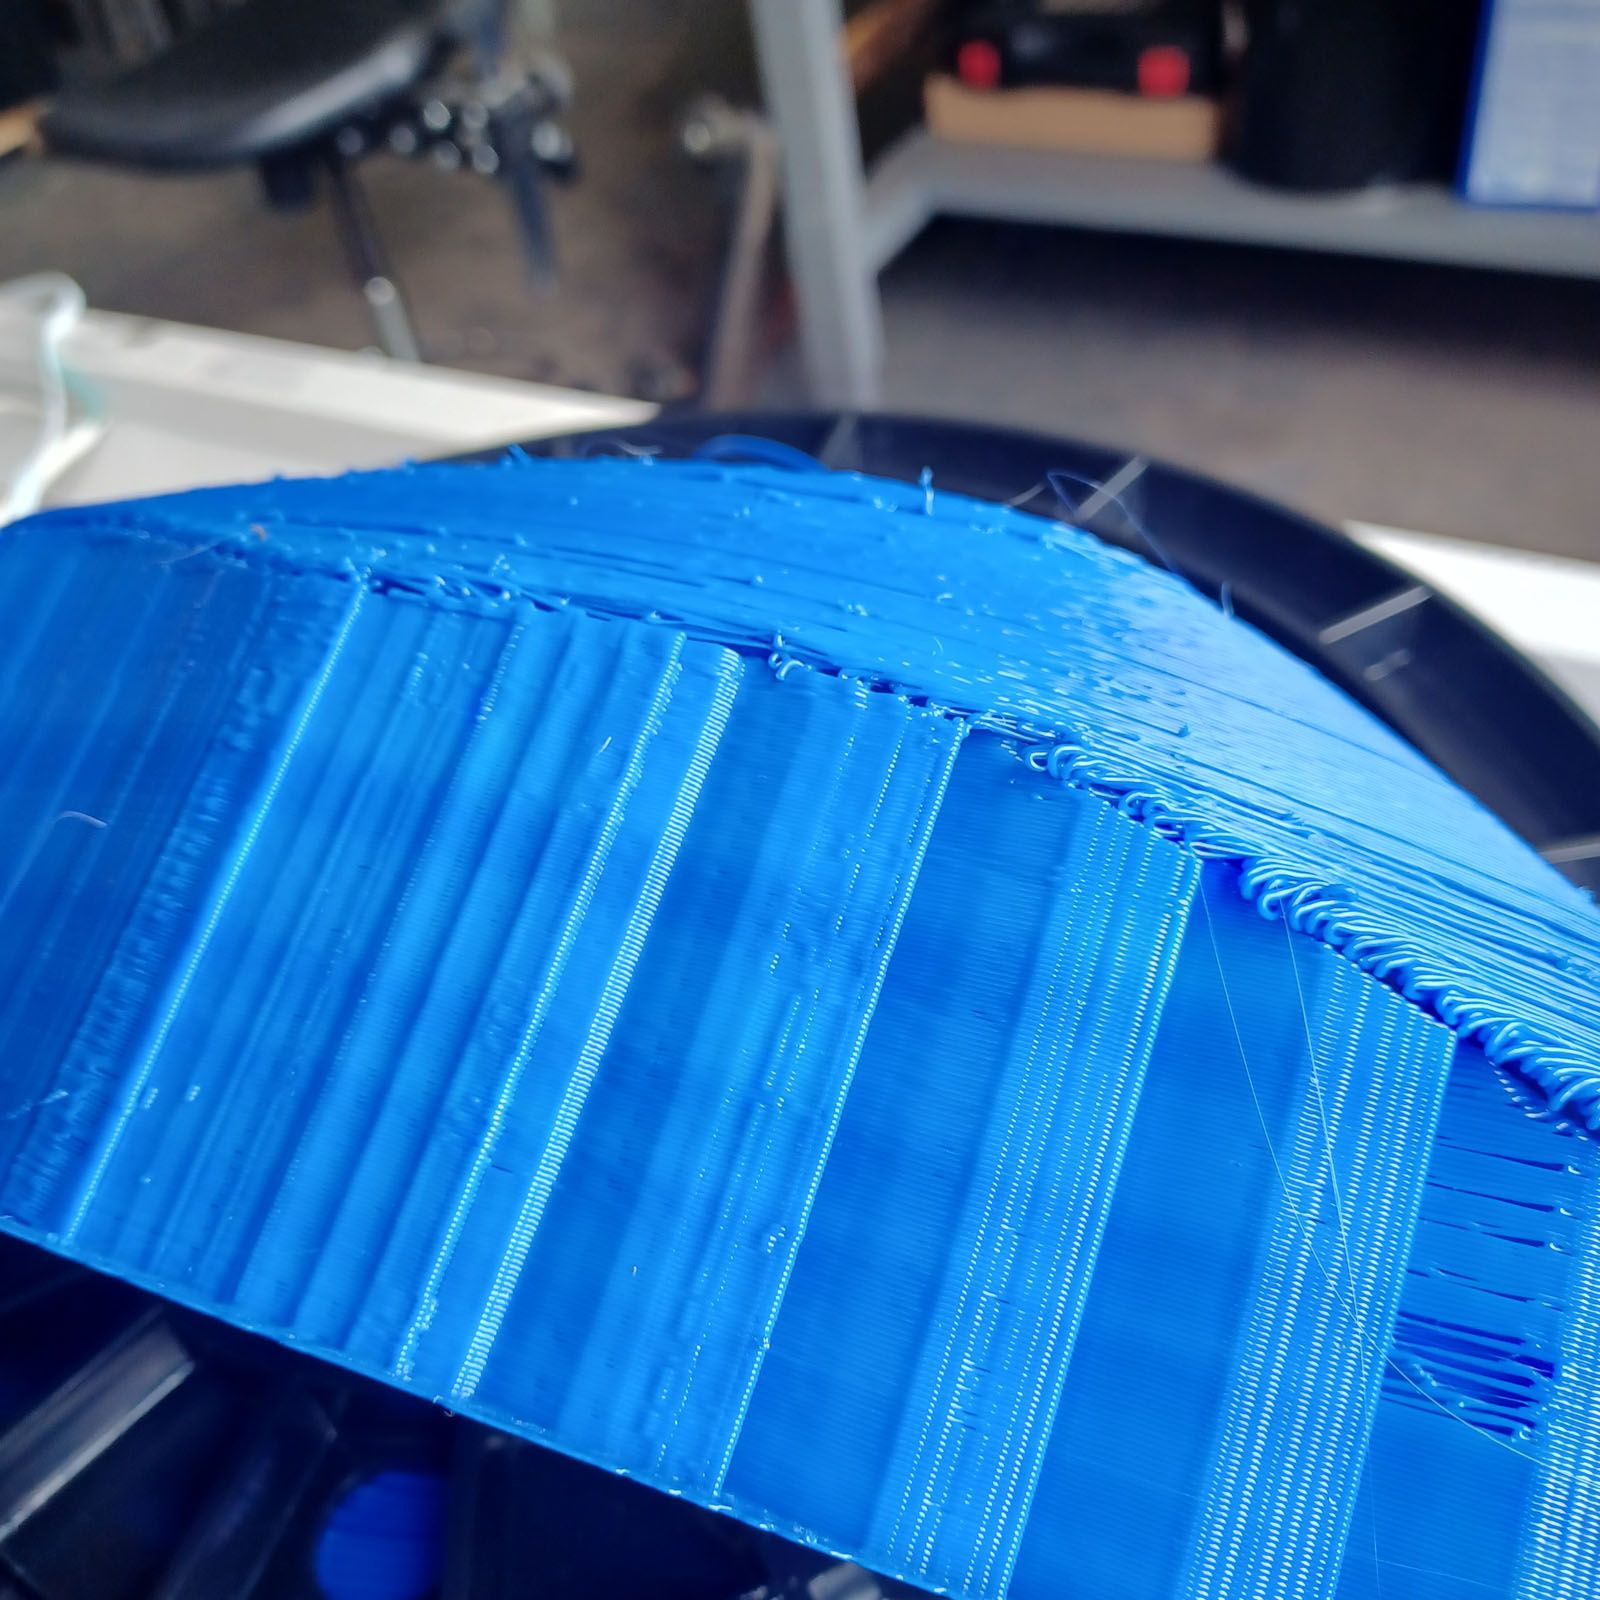
Any ideas on what could be going on? All the mechanicals seem to be tight. At the end of the 22hr white print (or any other print) there was no filament dust or shards at the pinch roller.
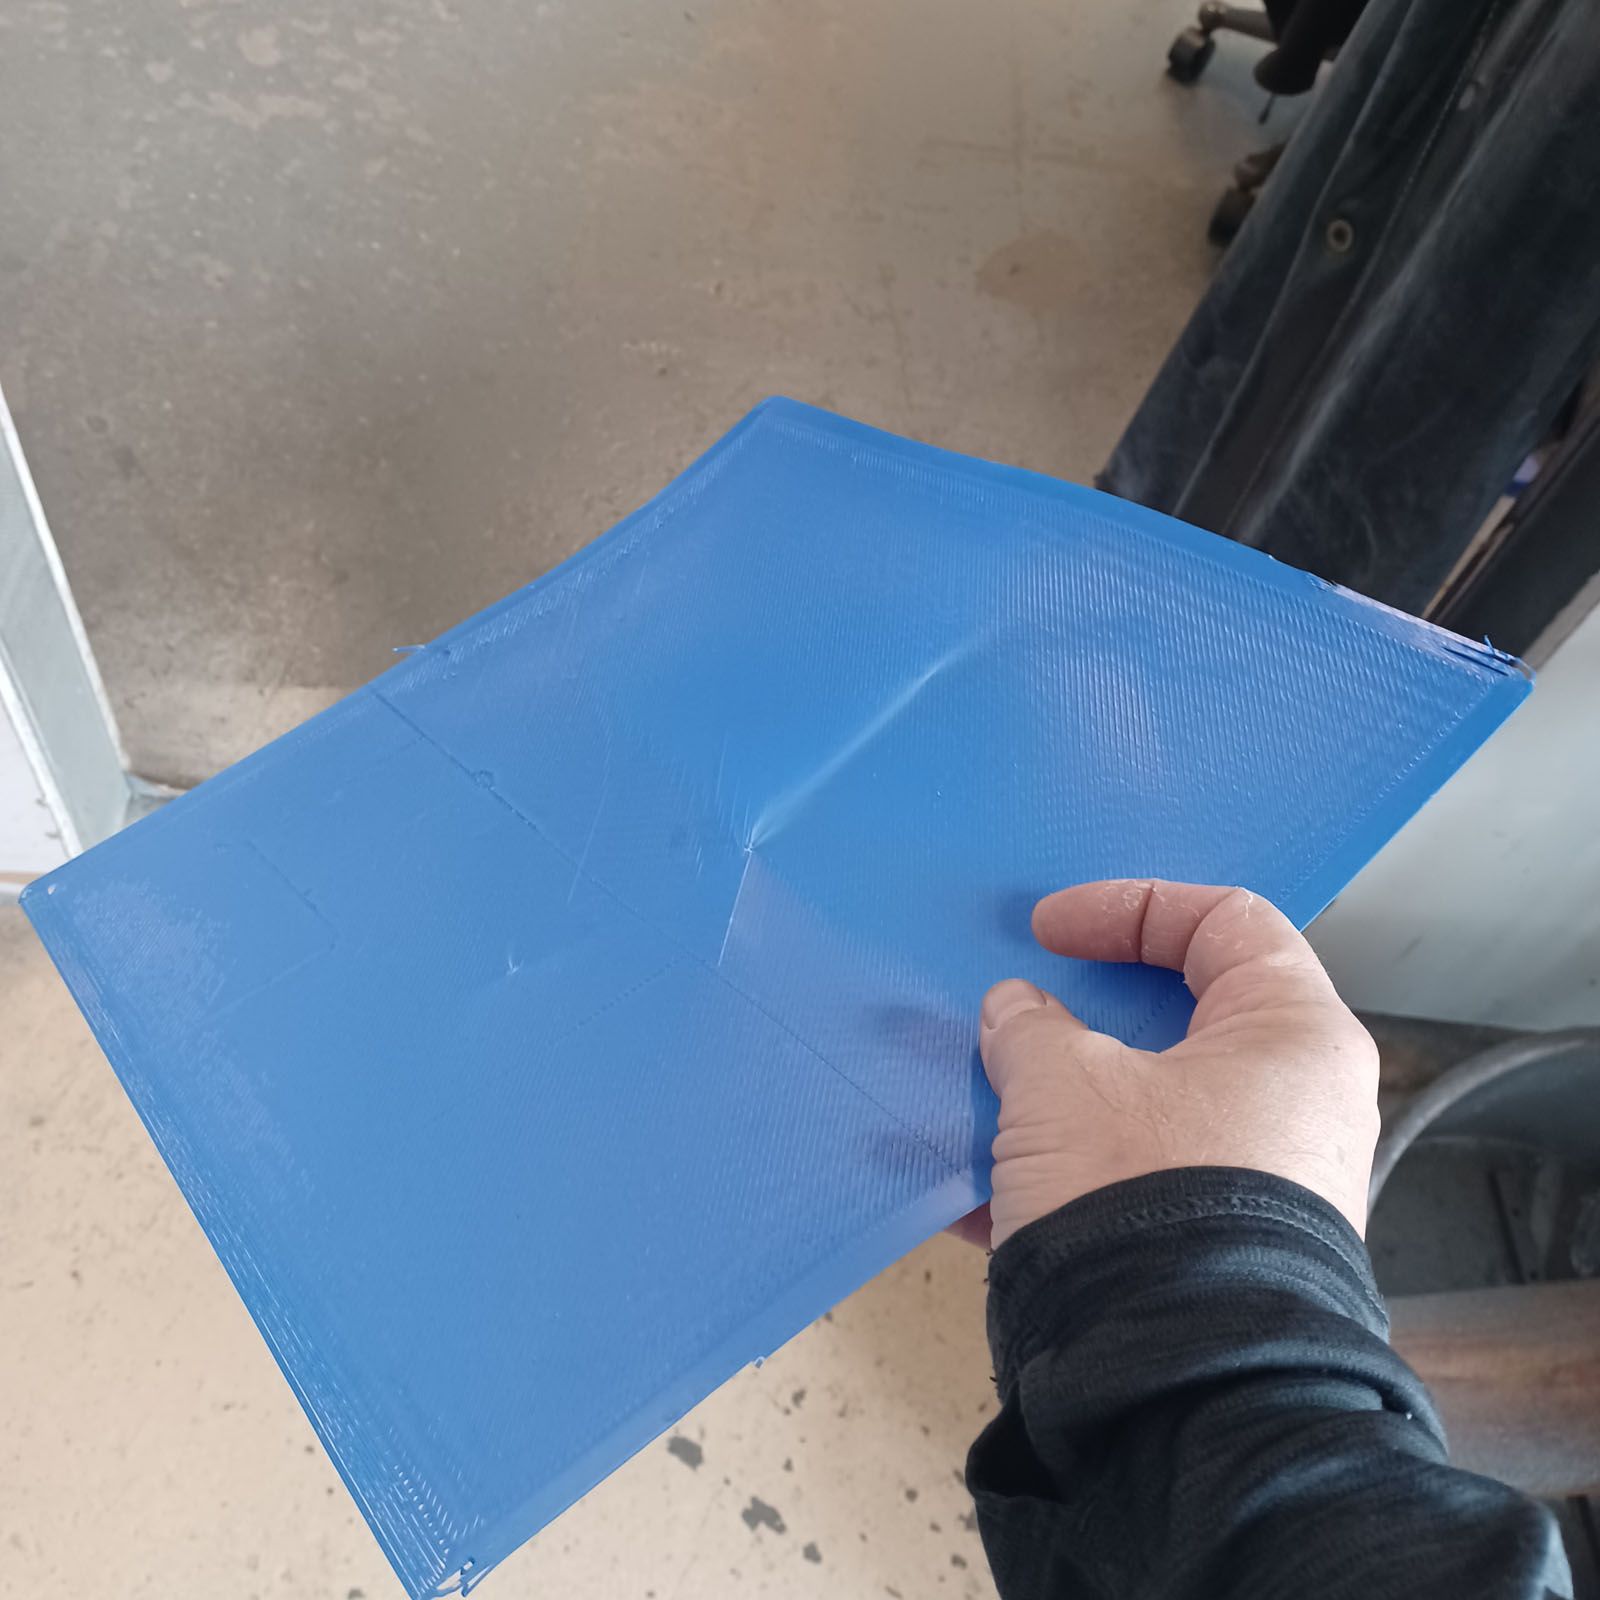
A single layer flat part prints fine.
I'm at a loss and tired of wasting filament.
-
Seems like pretty bad under extrusion.
-
@phaedrux Ugh. I wonder why. Well, have to leave it as-is until next week and have some time to debug it.
-
@Phaedrux said in New heated enclosure printer:
Seems like pretty bad under extrusion.
Yup, modified the extrusion steps/mm on a small print until it came out good. About 20% more. All the other settings remained the same. Not sure how this happened but I guess sloppy setting management is the most likely culprit.


The overall finish is decent, but I feel could be improved. The taller parts suffer from some sway during printhead rapid moves acceleration, which is a bit surprising as the overall printer is pretty heavy. The waviness is pretty minimal in the lower sections and becomes more noticable as you get taller in Z. Maybe I can stick some chunks of steel in the base and see if it reduces sway. I also think my attachment of the very rigid Z axis linear way/leadscrew assembly to the overall chassis could use more stiffness, but am a bit reluctant to dig into mechanicals as the parts are quite useable as-is. Just a good lesson to be learned (again) that in a 'machine tool', stiffness everywhere is important.
Another option could be to reduce the acceleration rate, as lots of these moves are long, so a small increase in acceleration time won't add that much to overall print time. That is a tough route to go, as I'm a racer at heart.
-
And also now that it seems to be stable and printing well, I'll try to get to adding the second printhead soon. Immediately it could be used to embed a colored logo to the parts.
Mirrors and duplicates would be nice for several of the fairing parts. Any recommendations on a slicer that handles CoreXYUV?
Chris
Cosentino Engineering -
@coseng said in New heated enclosure printer:
Any recommendations on a slicer that handles CoreXYUV?
I think most will as is. What do you use now?
-
@coseng said in New heated enclosure printer:
Mirrors and duplicates would be nice for several of the fairing parts. Any recommendations on a slicer that handles CoreXYUV?
That depends on what you want to do. CoreXYUV will allow you to home XYU and V indepently but slicers don't generate UV moves, only XY. So there are two options, both of which I use. Firstly, and by far the simplest, is to map the U and V motors to the X and Y axes. Effectively making the machine one which has two Alpha motors and two Beta motors serving the XY gantry. The second method is to write as script to post process the slicer gcode file to add the U and V moves to the end of the G1 Xn Yn En moves and don't combine the axes after homing. I use the latter more often than not because my UV gantry sits above the XY gantry and carries the 6 extruders. So I don't want this UV gantry to exactly mimic the XY gantry, but rather to follow it within an allowable tolerance. So for example, the extruder gantry will "park" in the centre of a smallish cylindrical feature, while the hot end gantry does the necessary moves to print that feature.
-
@Phaedrux I am using Cura 4.13 now. Maybe it is time to check out the 5.2 as they also have another thin part slicing update to simulate injection molded parts, which is what my parts are (should be) like.