A comparison between a PT1000 and a "normal" NTC thermistor
-
@deckingman Yes, you can stack the PT100 and thermocouple boards on most mainboards, though the Mini 5+ and Maestro only support one board. Both PT100 and thermocouples don't use the onboard ADC, as far as I understand; the temperature daughterboards have their own chip for reading the resistance of the sensor and converting that to temperature, which is passed on to the Duet. The PT100 in particular, is supposed to have a high degree of precision, especially when wired in 4-wire configuration. See https://docs.duet3d.com/User_manual/Connecting_hardware/Temperature_connecting_thermocouples and https://docs.duet3d.com/User_manual/Connecting_hardware/Temperature_connecting_PT100
If you're using a 6HC, you may want to calibrate the temperature ADCs, see https://docs.duet3d.com/User_manual/Connecting_hardware/Temperature_connecting_thermistors_PT1000#temperature-calibration-and-adc-tuning (though I think you may already know about this and have done it).PM me your address and I'll send the boards and sensors that I have. I don't need them at the moment, but will probably need them back at some point.
Ian
-
@deckingman those are interesting results!
A few notes:
-
The parameters we suggest for the E3D thermistor are based on selecting three temperatures and fitting the B and C parameters to those temperatures, using the values of resistance published by the manufacturer at those temperatures. I think the temperatures I used were 25C, 150C and 250C. If the intention was to run at higher temperatures then it would be better to use 25C, 200C and 300C instead.
-
At high temperatures the resistance of the thermistor will be small compared to the 2K2 series resistor, so the reading accuracy will be poor and the ADC offset error will be critical. The ADC offset error is tuned out by the M308 L parameter. The default value for this is set when the thermistor calibration procedure is run. Unless the 6HC board you are using is quite old, this will have been run during production testing of the board. Still, it might be a good idea to check what the current value is (by sending M308 Snn) and then re-run the procedure to see if the value stays the same.
-
-
@dc42 I actually thought that the results for the Semitec were surprising close to the PT1000. Especially at 400 - 500 deg C and given that the data sheet only specifies a temperature range up to 300.
For info, the board I used was the 6HC main board you sent me to use as an expansion board - so I'd imagine not all that old.
Rummaging around in my collection of bits, I did come across a brand new, unused Slice Engineering thermistor, which is claimed to be good for up to 450 deg C. Now that might be a interesting comparison to make .........!
Ian (drofarts) has said that he'll lend me his daughter boards, a PT100 and a thermocouple to test. So maybe what I'll do is make a 4 sensor heater block and compare a "standard" Semitec thermistor, a PT100, a thermocouple and the Slice high temp thermistor. A 5 way block to accommodate the PT1000 as well whilst keeping all the sensors the same distance from the heater would be a bit too tricky to make with the equipment I have to hand.
Or perhaps, because the standard thermistor is only claimed to be good for up to 300 deg C, a better bet would be to compare the high temperature Slice thermistor, the PT100, the PT1000 and the thermocouple.
Does anyone know of any filament that needs >500 deg C? It seemed like a good maximum temperature to me.
-
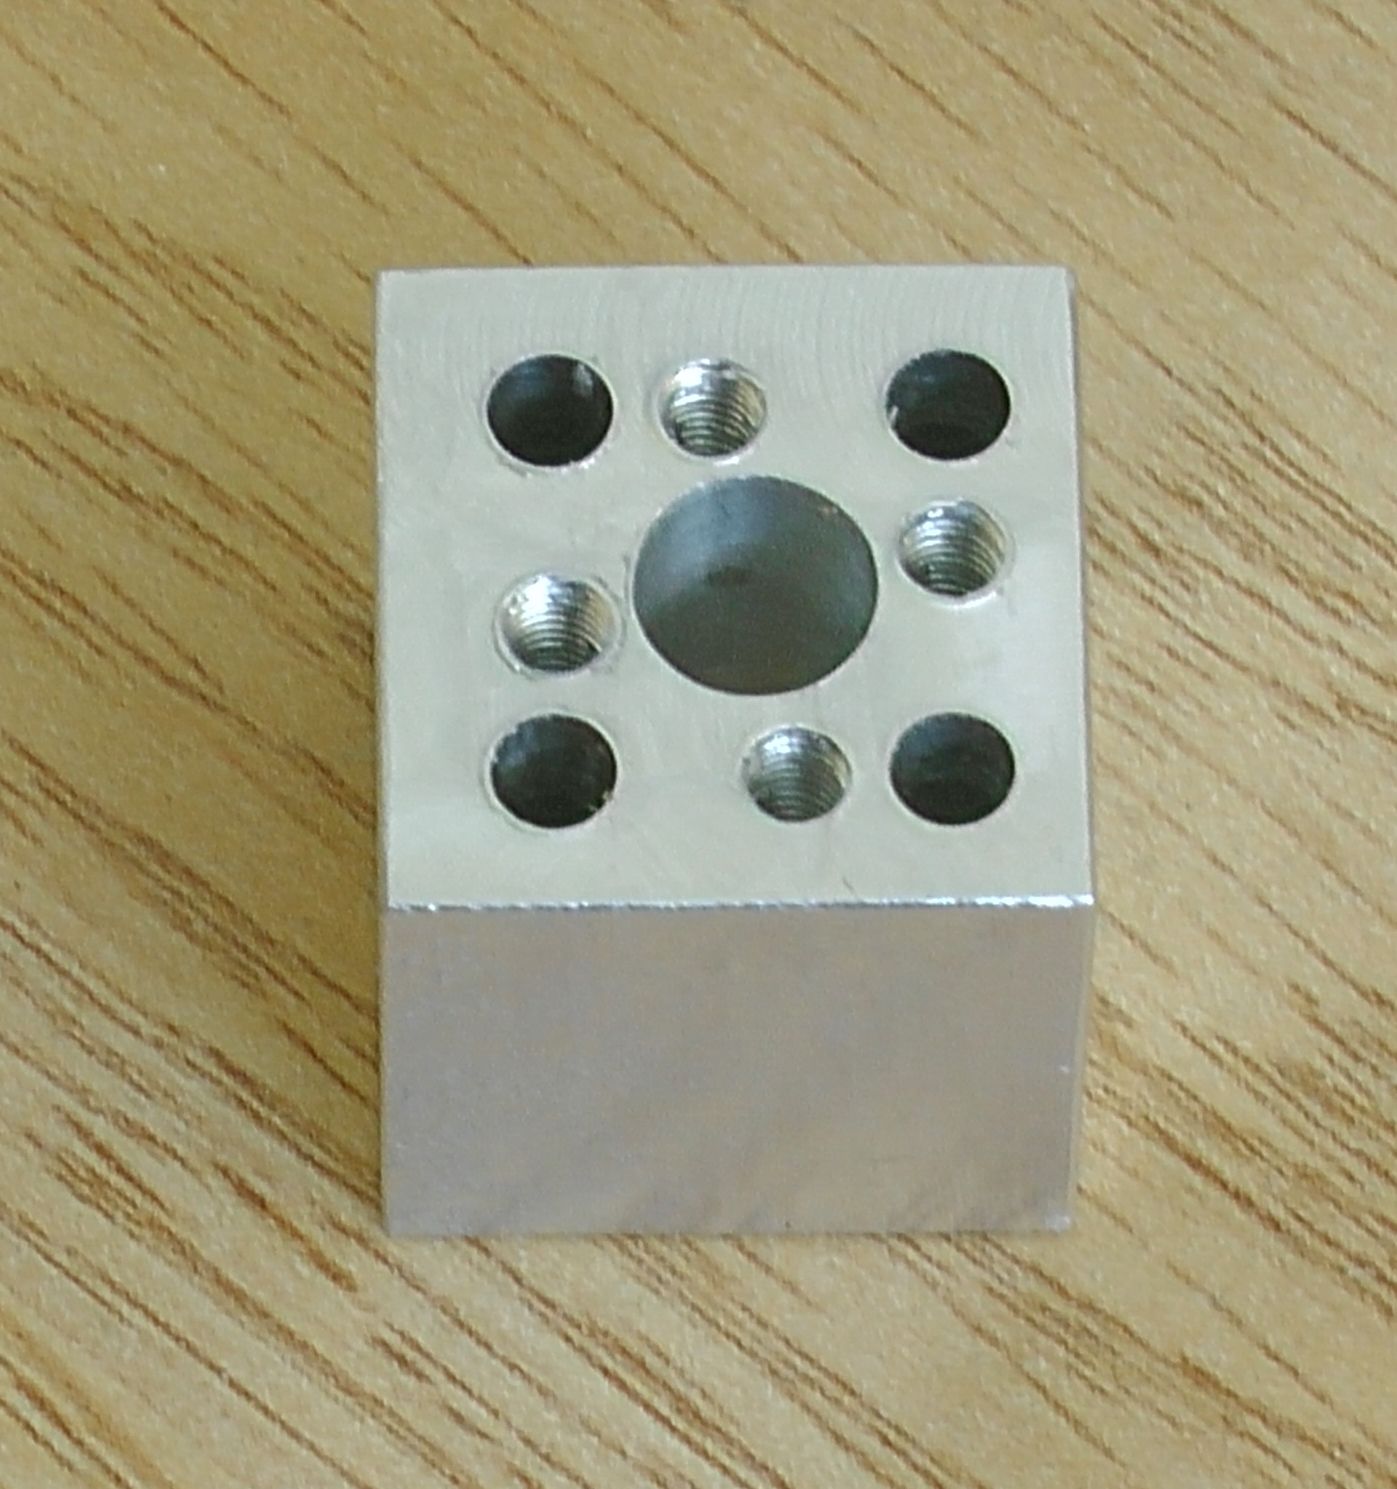
@droftarts For info, I just made this..........

So when your sensors arrive, I'll fit the heater in the centre 6mm hole, then a PT1000, a Slice Engineering High Temp thermistor, your PT100 and your Thermocouple in the 3mm holes. Then we'll see how those 4 high temp sensors compare. (The tapped holes are for M3 button head screws which will stop the sensors and heater falling out when I hang the assembly by it's leads - although the Boron Nitride paste should do that job).
-
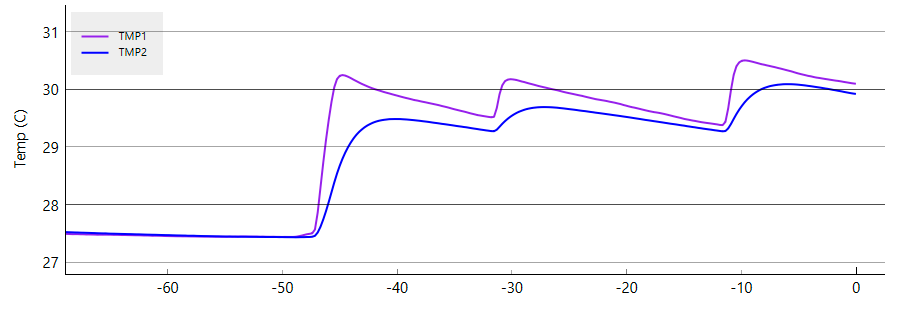
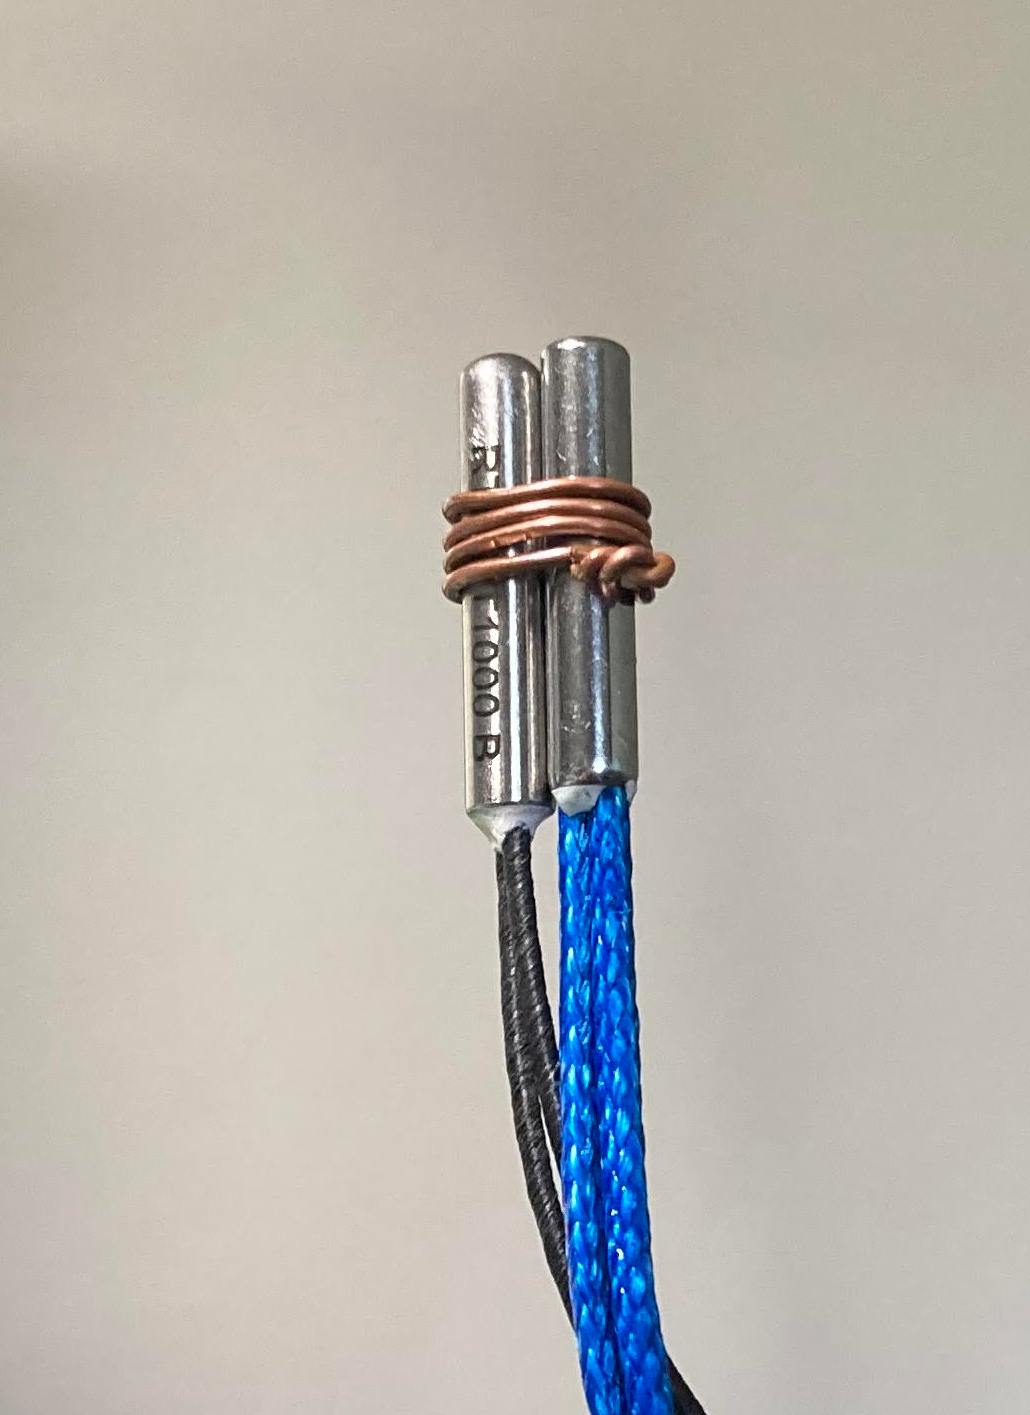
I was playing recently with temperature sensors and compared the E3D thermistor to Slice Engineering PT1000. Here is for example comparison of their respective response times. I tested by coupling them thermally and applying a temperature increase by 'pinching' them with two fingers. The thermistor (temp1) is significantly faster than (temp2).
Both sensors are measured by sampling their resistance at about 4Hz and applying the respective resistance to temperature functions, with no filtering whatsoever.
I read somewhere that RTDs are slower than thermistors because of their 'higher mass'. Don't know if PT100 are faster than PT1000 because they have lower mass. Also don't know if a faster sensor will result in more stable heather temperature (assuming PID tuning was performed).
Temp C vs time in secs. Temp1 = E3D thermistor. Temp2 = Slice Engineering PT1000.


-
@dc42 said in A comparison between a PT1000 and a "normal" NTC thermistor:
At high temperatures the resistance of the thermistor will be small compared to the 2K2 series resistor, so the reading accuracy will be poor and the ADC offset error will be critical.
Thermistors has max power spec so if reducing the resistor, may required reducing voltage. I presume that this is also to avoid the power affecting the thermistor's temperature.
If I got it correctly, with 3.3V, 2.2K, and thermistor at 200 ohms, it gets to ~4.5mw which is already above the 4mw spec of the NT104.
-
@zapta I never did get around to comparing those other Sensors but I still have that heater block pictured above kicking around on my desk. It has a 6mm hole in the centre for a heater, and four 3mm holes, equidistantly spaced to take sensors. Depending on where you are in the world, I could post it to you if it would be of any use.
-
Thanks @deckingman. I am not in the UK or Europe so will try to replicate it here. Did you use set screws to hold the sensors or is the thermal paste sufficient?
-
@zapta said in A comparison between a PT1000 and a "normal" NTC thermistor:
Thanks @deckingman. I am not in the UK or Europe so will try to replicate it here. Did you use set screws to hold the sensors or is the thermal paste sufficient?
If you look at the block, you'll see 4 tapped holes. These are M3 and arranged such that the bolt heads and/or washers partially cover the sensor and heater holes, thus preventing them from falling out without any danger of crushing the cartridges. I used Boron Nitride past as well but that was more to ensure good thermal conductivity.
-
I see. Good idea, thanks.