Problems with input shaping
-
@Lee I finally got my Ender 5 Plus back up and running today with new E3D 0.9 degree stepper motors (trying to get rid of my VFAs!). I will have to do a full recalibration so I will do some Input Shaping tests and see if I can come up with something of help to you.
-
@Lee I did some tests.
I now have the E3D 0.9 degree motors for X and Y. This has changed a lot for me so I have to do a full recalibration of the printer. For these tests I used my original values though and enabled only input shaping using my new center frequency of 39 Hz. So Acceleration of 1400 and Jerk max of 900. M593 P"EI3" F39.0 S0.0.
I used PrusaSlicer 2.6.0 with the following custom g-code in Printer Settings>After Layer Change G-Code:
;Try Input Shapers
{if layer_z >= 0.2}M593 P"none"{endif}
{if layer_z >= 5.0}M593 P"mzv" F39 S0.0{endif}
{if layer_z >= 10.0}M593 P"zvd" F39 S0.0{endif}
{if layer_z >= 15.0}M593 P"zvdd" F39 S0.0{endif}
{if layer_z >= 20.0}M593 P"zvddd" F39 S0.0{endif}
{if layer_z >= 25.0}M593 P"ei2" F39 S0.0{endif}
{if layer_z >= 30.0}M593 P"ei3" F39 S0.0{endif}Using the Klipper Ringing_Tower.stl as you did the above code chooses another Input Shaper at each new scallop.
So first sample, Acceleration 1400, Jerk 900, speed 50mm/s, no PA. I apologize in advance for my photography. Not great.
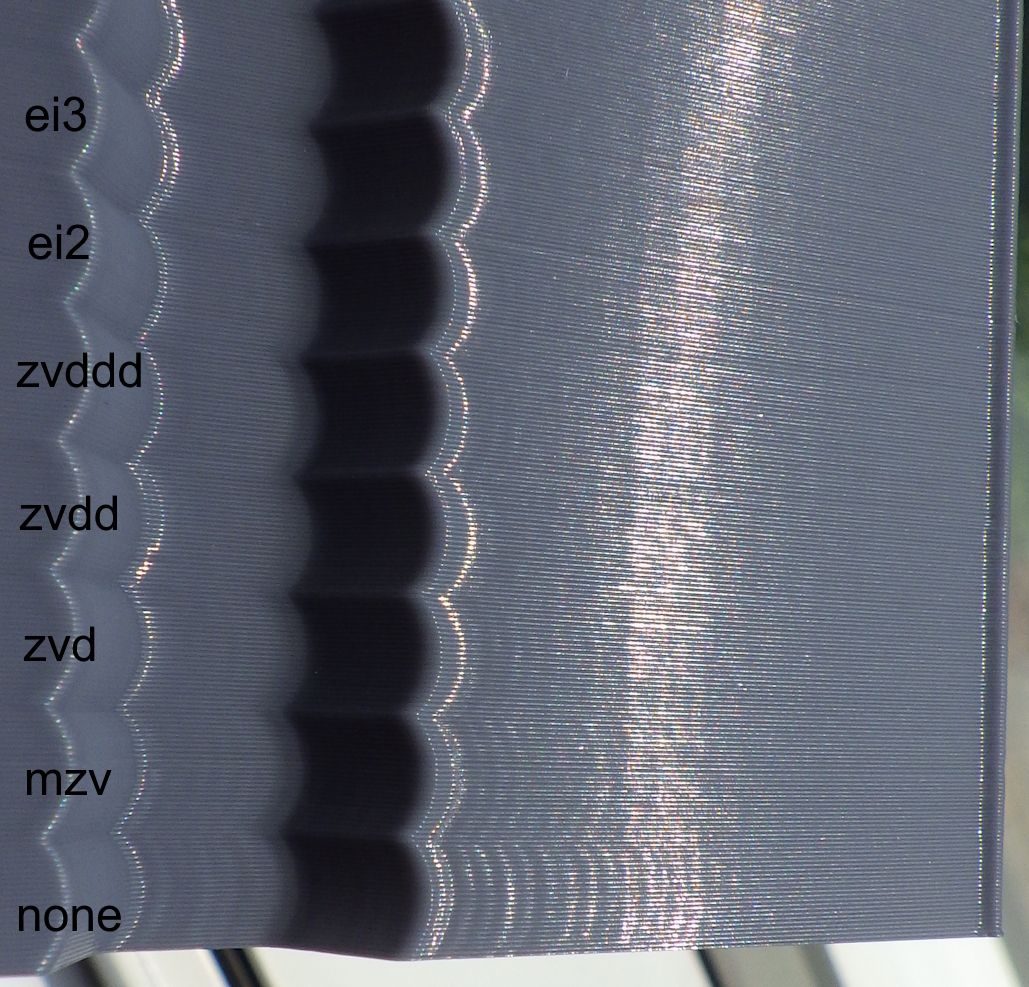
There is a slight difference at each corner for the different input shapers. This does not show up in my photos. For some shapers the start side of the corner looks better, for others the end side. For 'none' there is prolonged ringing and varying (but much less ringing) for the input shapers.
For the second sample I changed Jerk to 100 from 900. On the last three scallops at the top I doubled the speed to 100mm/s. A shallow wave appeared at that speed. Jerk gives worse ringing at 100 with no input shaper because the 1400 acceleration worked best with 900 jerk (and my old motors). However the lower jerk looks much better with input shaping. There is definitely less ringing.
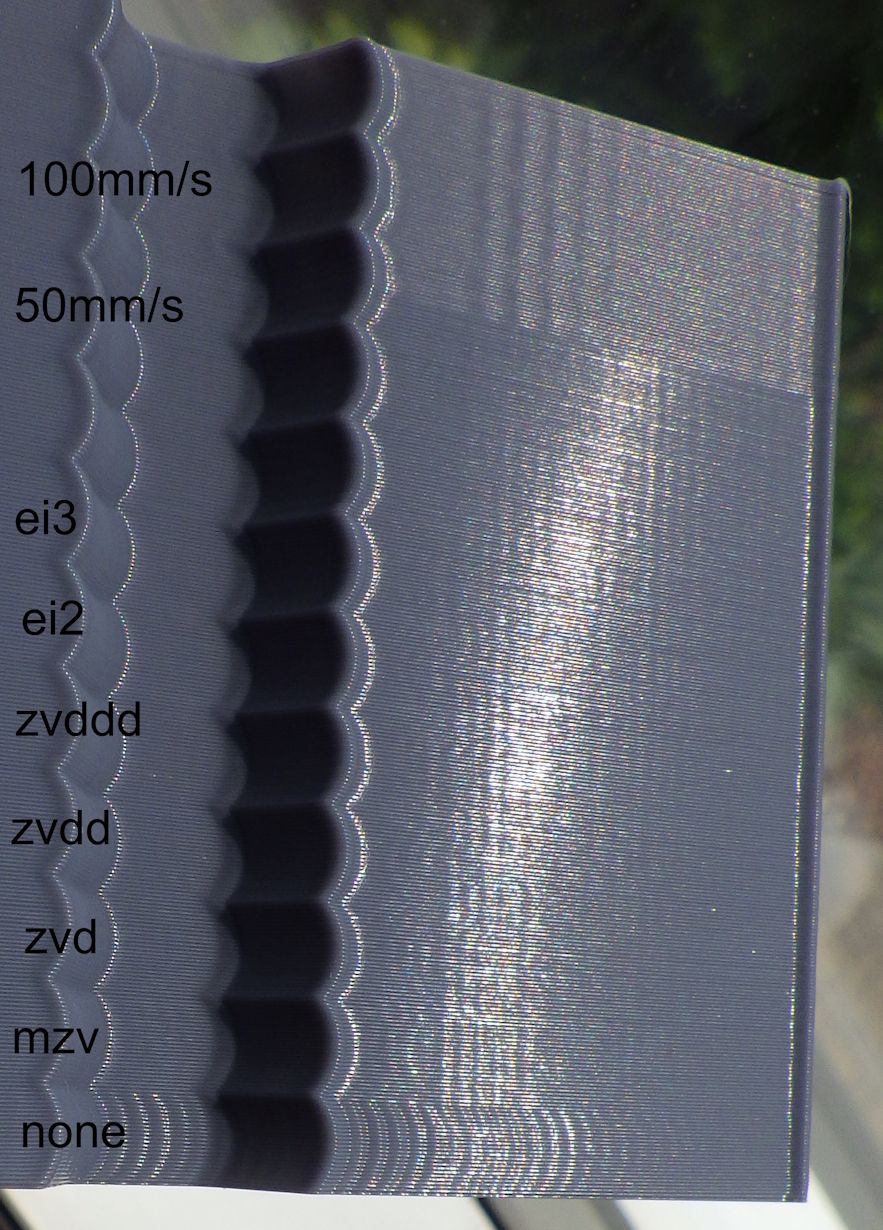 .
.You should definitely see a difference with input shaping enabled.
-
@Lee As others have said the resonance frequency you are targeting (19.5Hz in the above is very low) and my understanding is that input shaping does not work well below approx 25Hz. This is a comment from the Klipper documentation:
Another consideration is that if a resonance frequency is too low (below 20-25 Hz), it might be a good idea to increase the printer stiffness or reduce the moving mass. Otherwise, acceleration and printing speed may be limited due too much smoothing now instead of ringing. -
@gloomyandy but what frequency should i use than? No matter what I do the results are almost identical every time
-
@tas I also have the e3d 0.9 degree motor i will try printing with the g code modifiers you used
-
@Lee can you show how you are mounting the accelerometer?
-
@jay_s_uk There us a picture above it is mounted at the back of the tool head
-
@Lee you may need to improve the mounting to make it more fixed
-
@jay_s_uk I will try tighteing the screw that holding the accelerometer.
-
@Lee you probably need more than just 1 screw
-
@jay_s_uk ok than i will design a new holder
-
@Lee Looking at the test print you did I'm not actually seeing much ringing on it at all (you may be able to see more than we can in a photo). If you can see ringing on the print I'd ignore the accelerometer and just use the manual way of estimating the frequency by measuring the peaks of the ringing, see: https://www.klipper3d.org/Resonance_Compensation.html
-
@gloomyandy I think manually turning it may be my best option becasue i dont think it a mounting issue
-
@gloomyandy I am now confused as heck. I have tried the manual tuning around 15 times and none of my test were consistent, and the last one was the one that confused me the most. I had both input shaping and pressure advanced off. And it had next to no ringing. But the test before that with the exact same settings and gcode had a hell of a lot of ringing. WTF is going on?
And the frequencies I calculated are all around 34 Hz and from what I heard here that seems to low
I am running a direct drive extruder, which makes the tool head heavier but dose more weight lead to lower frequency?
-
@Lee Being confused is a part of 3D printing in my experience.
34 Hz is not too low.
The extruder on my Ender 5+ (heavily modified, I call it Printenstein) is heavy. It is an original Hermes (Hemera) direct drive extruder with Volcano block and two 2015 fans. I made a custom backing plate to mount it to the Creality carriage.
It gets roughly the same frequencies as my Ender 5 Pro (heavily modified also) which has a relatively light weight E3D V6 with LGX lite direct drive extruder.
If you are not getting consistent results maybe go over everything and check for loose bolts. Sorry I can't be of more help.
-
@tas I will check all the bolts again and tighten my belts up even more again and try to run something other than the ringing test, but thanks for your help anyway.
-
@Lee No Problem. I find it helpful to disconnect the motors and move all axes to look for stiff spots/bad bearings. That can be very difficult to detect with motors still connected.
Good luck.
-
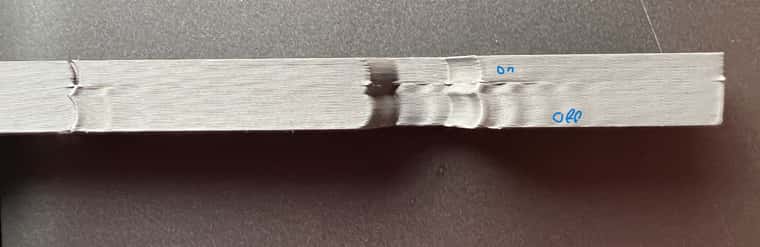
@tas Thanks for the tip, I will definitely try that. I just finished running a test which looks promising. What I ended up doing was taking an average of the frequencies I calculated and used that as my shaper frequency and I think it looks good.
This was Printed at 100 mm/s.
-
@Lee Much better.
If you pick EI3 as the shaper just to try it I believe it covers the widest frequency band. So hopefully even if you don't get the frequency exactly right it will still be ok.
Once you get it working make sure to print some actual parts to see if there are issues with corners etc.
-
 undefined tas referenced this topic