Duet3D Logo Duet3D
    • Tags
    • Documentation
    • Order
    • Register
    • Login

    Sovol SV08 Multiple Motion System Upgrade.

    Scheduled Pinned Locked Moved
    My Duet controlled machine
    8
    232
    25.4k
    Loading More Posts
    • Oldest to Newest
    • Newest to Oldest
    • Most Votes
    Reply
    • Reply as topic
    Log in to reply
    This topic has been deleted. Only users with topic management privileges can see it.
    • dwuk3dundefined
      dwuk3d @dwuk3d
      last edited by

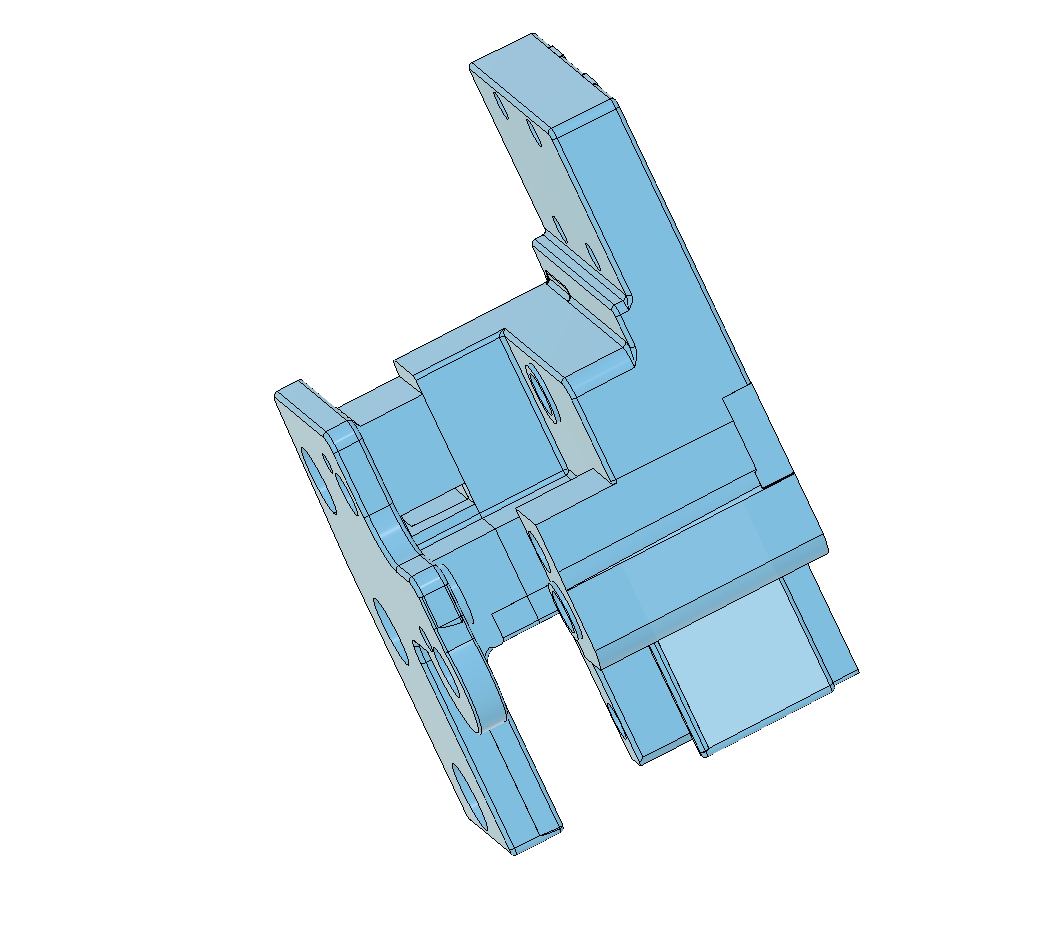
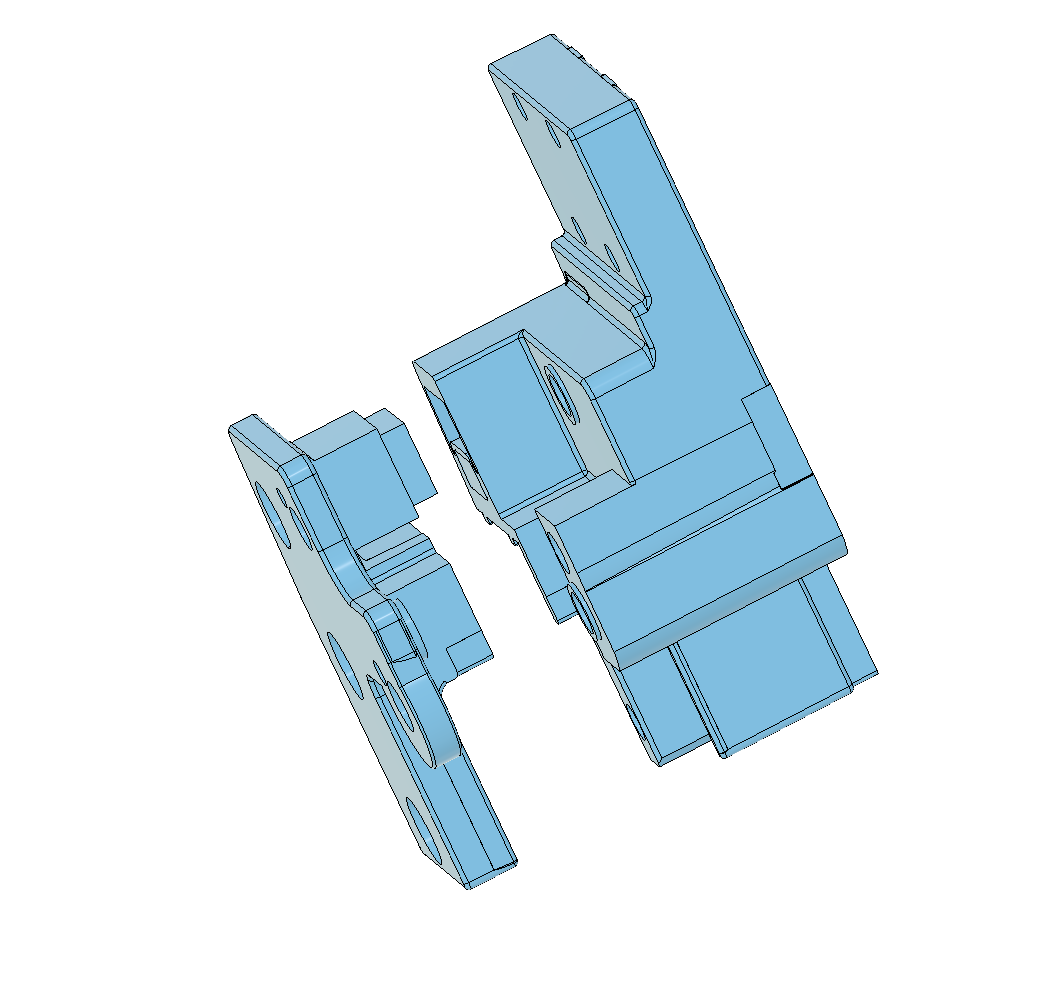
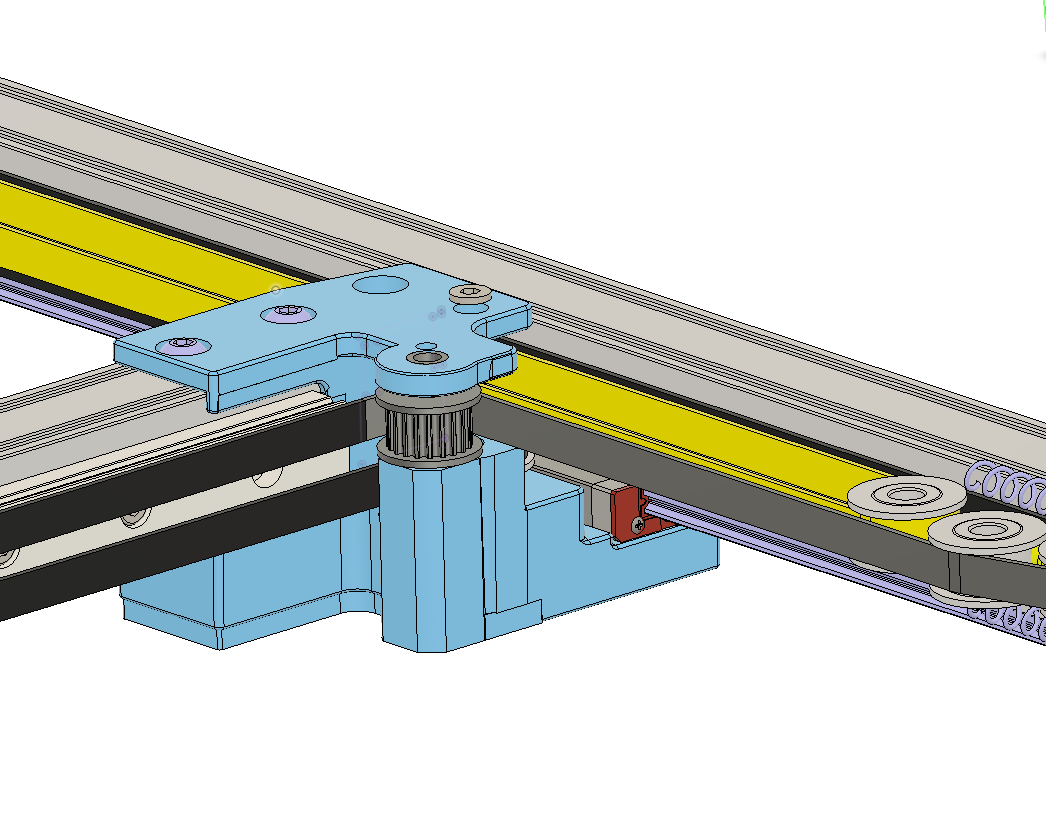
      @dwuk Modelling for first re-modelled part now complete - existing gantry move of cogged pulley, plus making space for extra belts. - ready to test print tomorrow.

      Split part into two for printing - as existing part injection moulded.
      B6691821-7897-489A-B63E-8300C7920206.png Screenshot 2025-01-10 at 22.15.13.png 3EA0497C-20CC-47DC-8CF9-649FA943F299.png

      1 Reply Last reply Reply Quote 0
      • o_lampeundefined
        o_lampe @dwuk3d
        last edited by o_lampe

        @dwuk said in Sovol SV08 Multiple Motion System Upgrade.:

        about the excenter bearings

        They aren't available off the shelf, you just have to use regular bearings and make an offcenter shaft for it.
        When the shaft rotates (max 180°) , the bearings translate the offset to the housing where they are pressed in.
        That's a much easier task than to overcome the stiktion of linear bearings.

        I have a vision of a planetary gear with three planets and a rotating orbit. This would give you a compact, yet powerful setup with a NEMA14 pancake stepper (they often come with a pinion, like the orbiter motors)

        1 Reply Last reply Reply Quote 1
        • dwuk3dundefined
          dwuk3d
          last edited by

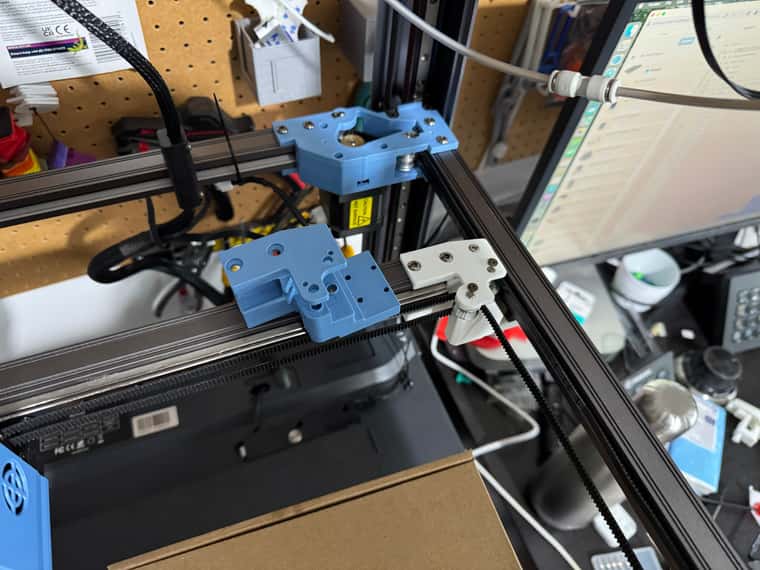
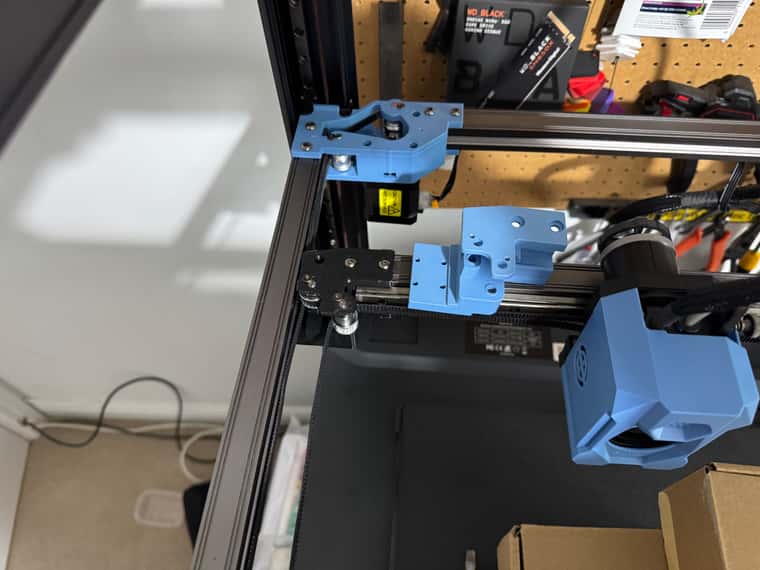
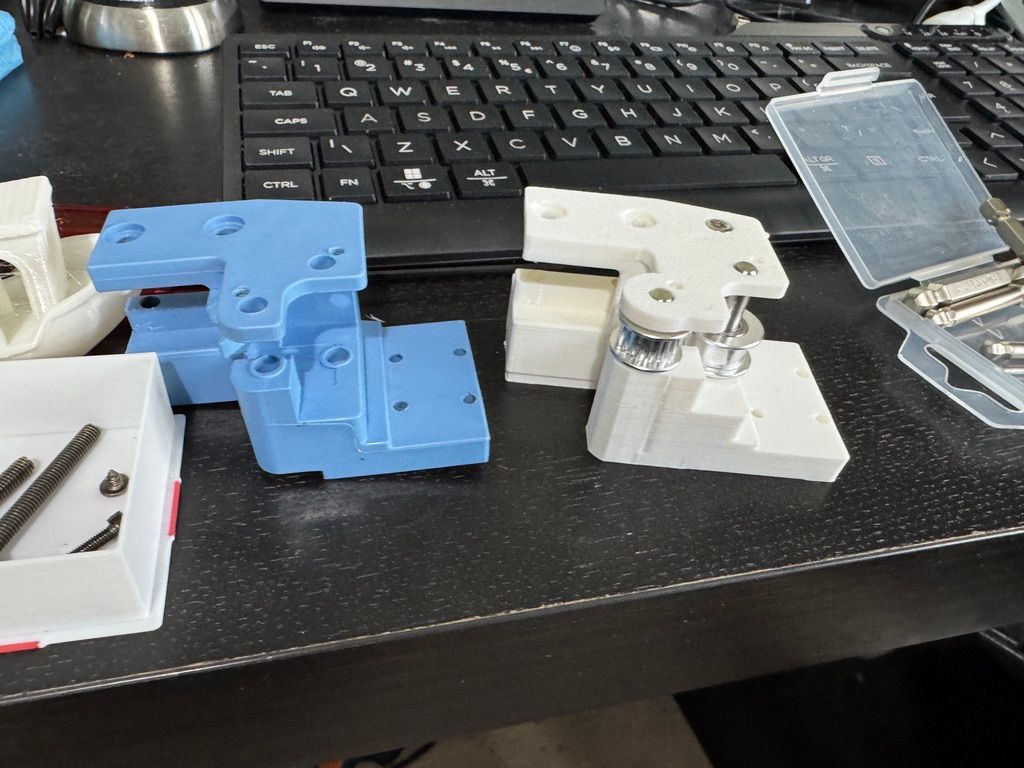
          New parts progressing - original gantry pulley repositioning done.
          0824B38A-5717-4491-846D-0EEA94E70C94_1_105_c.jpeg 03D19F0D-02D3-4C7E-B616-6639F0D9F831.jpeg DE5D6672-FCEA-44D1-BF12-DAAA373B3E10.jpeg

          dwuk3dundefined 1 Reply Last reply Reply Quote 0
          • dwuk3dundefined
            dwuk3d @dwuk3d
            last edited by dwuk3d

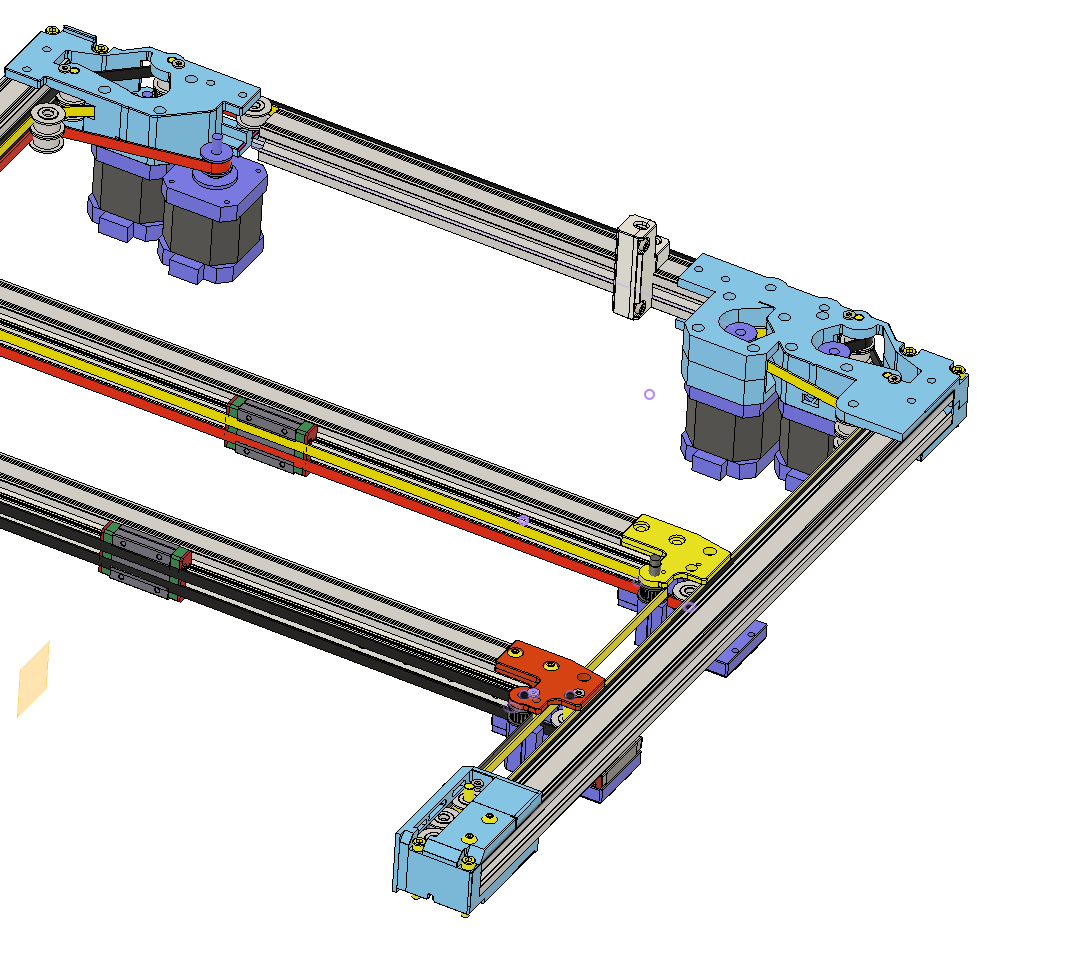
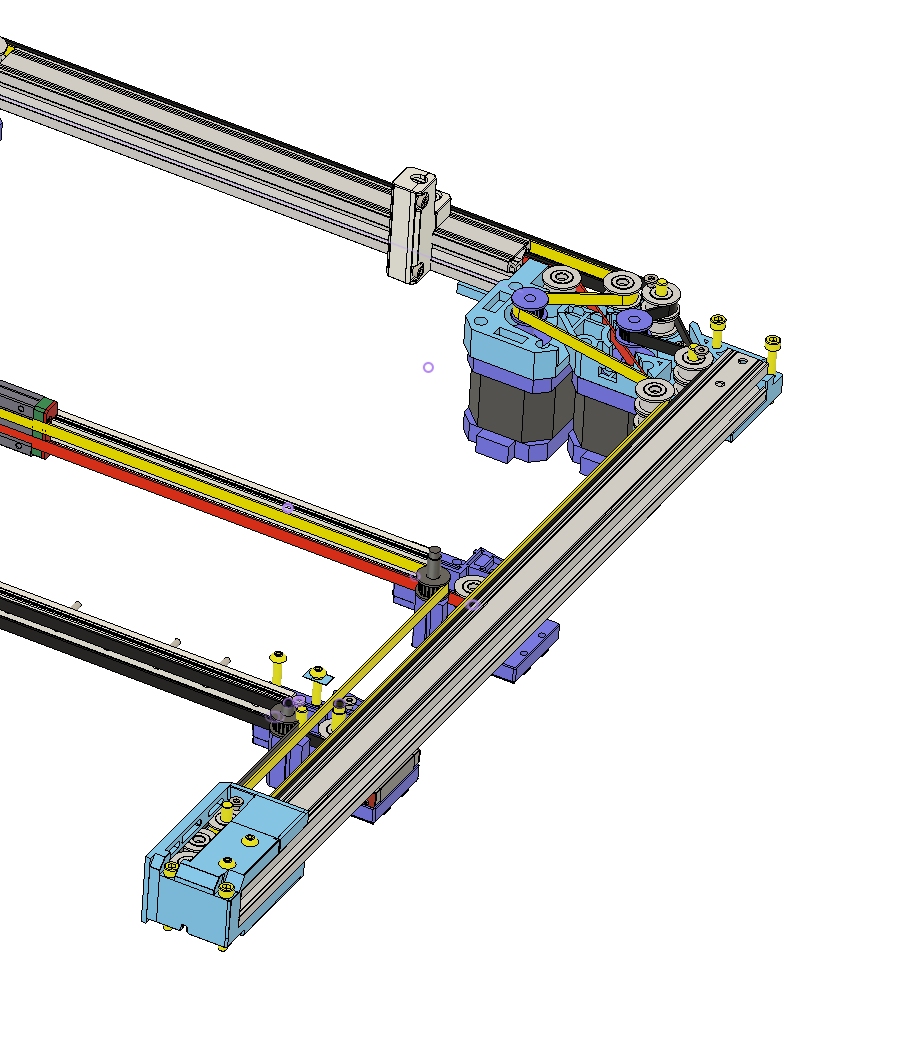
            @dwuk Designs for all parts on right hand side now completed - and printing underway. Left hand side fairly easy to derive as is mostly a mirror copy - with some height changes.

            Biggest issue is losing about 25mm build volume at front due to idler and about 15mm at the back. Will need to address these two issues at some point.

            Also had to remove the tensioner spring part to save a bit of space - so will need to so how well the tensioning works with just the side bolts.
            BCF2222A-8907-4D1B-B570-2CE56E070C7F.png 3A2031CF-734D-491E-A740-7C51432C062F.png

            o_lampeundefined 1 Reply Last reply Reply Quote 0
            • o_lampeundefined
              o_lampe @dwuk3d
              last edited by

              @dwuk Equal belt tension is a critical part for a CoreXY. I hope you are still able to adjust all belts individually.

              dwuk3dundefined 1 Reply Last reply Reply Quote 0
              • dwuk3dundefined
                dwuk3d @o_lampe
                last edited by

                @o_lampe thanks. Yes tensioning will still be possible. In the factory design there are bolts that pull against springs to adjust the tension from the back, which are then locked off from the side.

                I've removed the bolts and springs for space reasons - will try to add them back in - but probably coming in from the front.

                All three pulleys at the front still have about 10mm of independent movement.

                I think I will also try removing most of the lost build area too by repositioning the pulleys before I go much further.

                dwuk3dundefined 1 Reply Last reply Reply Quote 0
                • dwuk3dundefined
                  dwuk3d @dwuk3d
                  last edited by

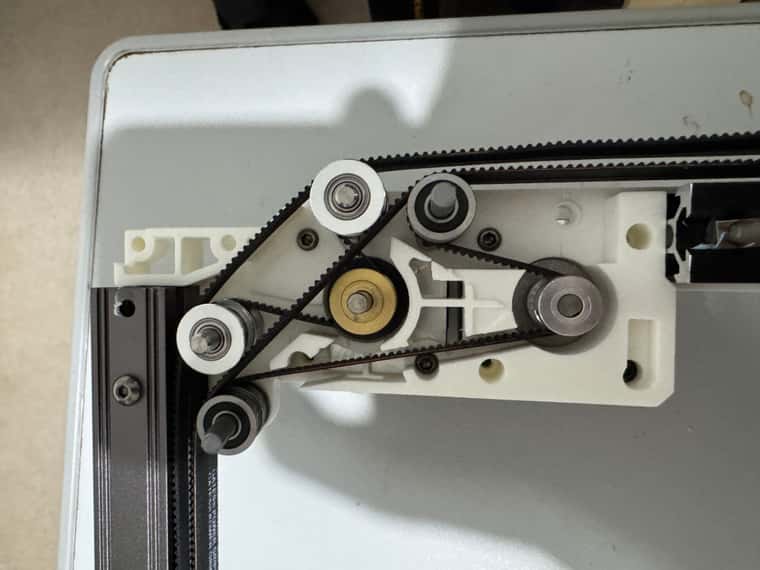
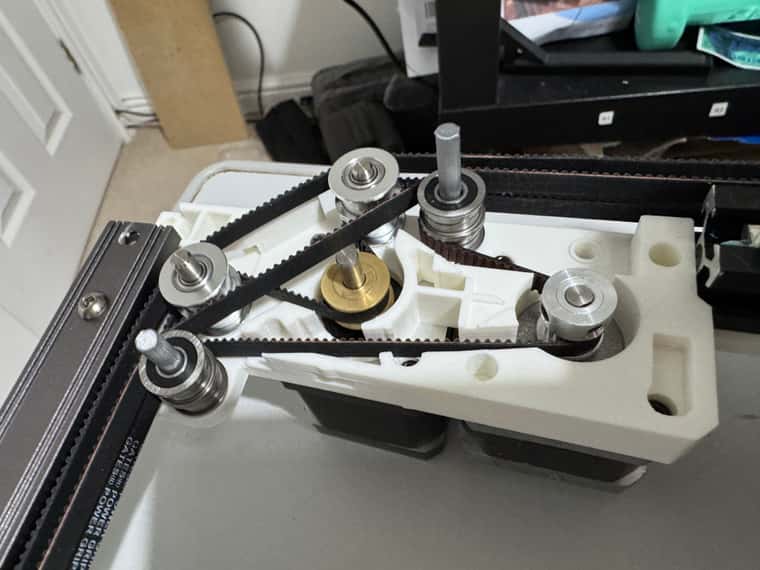
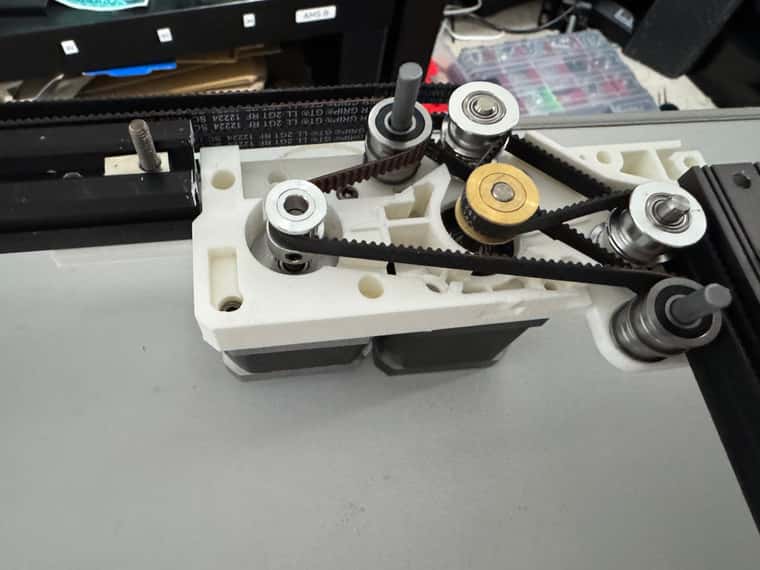
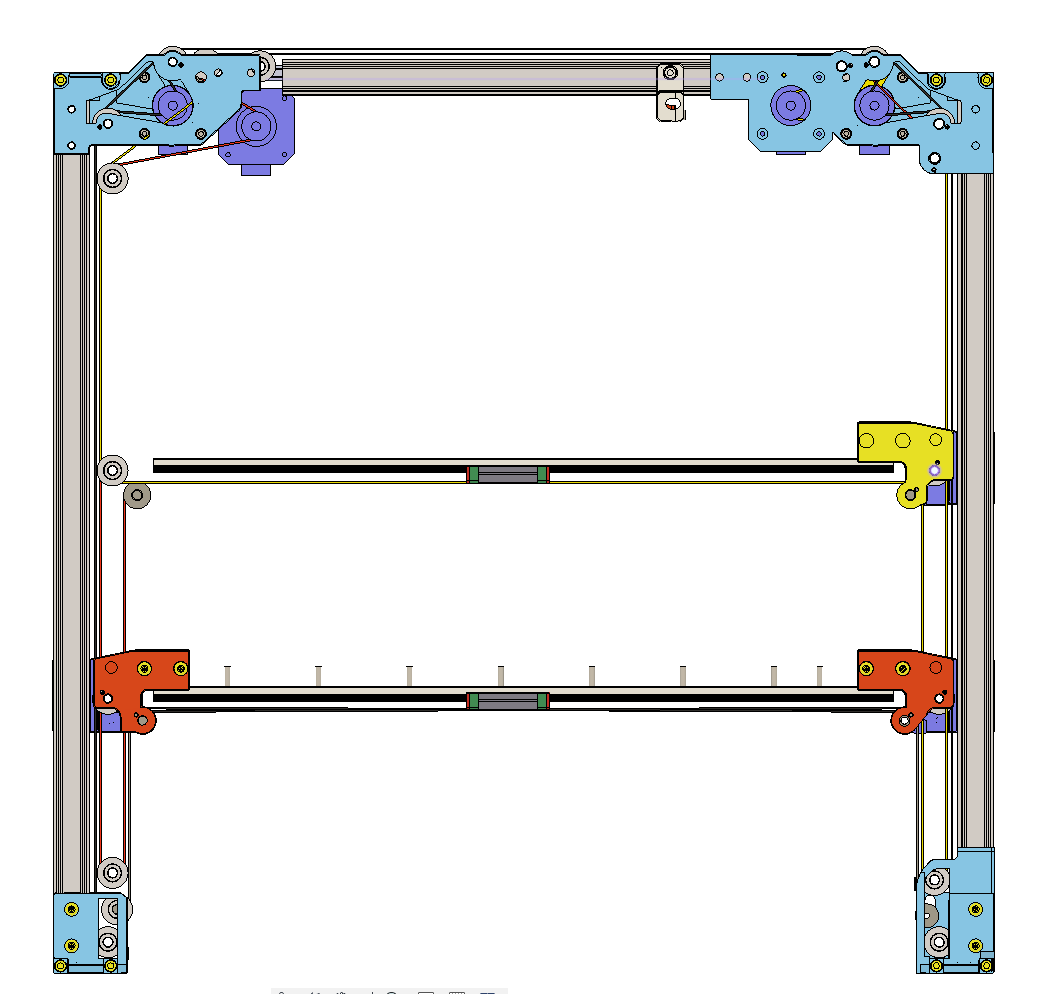
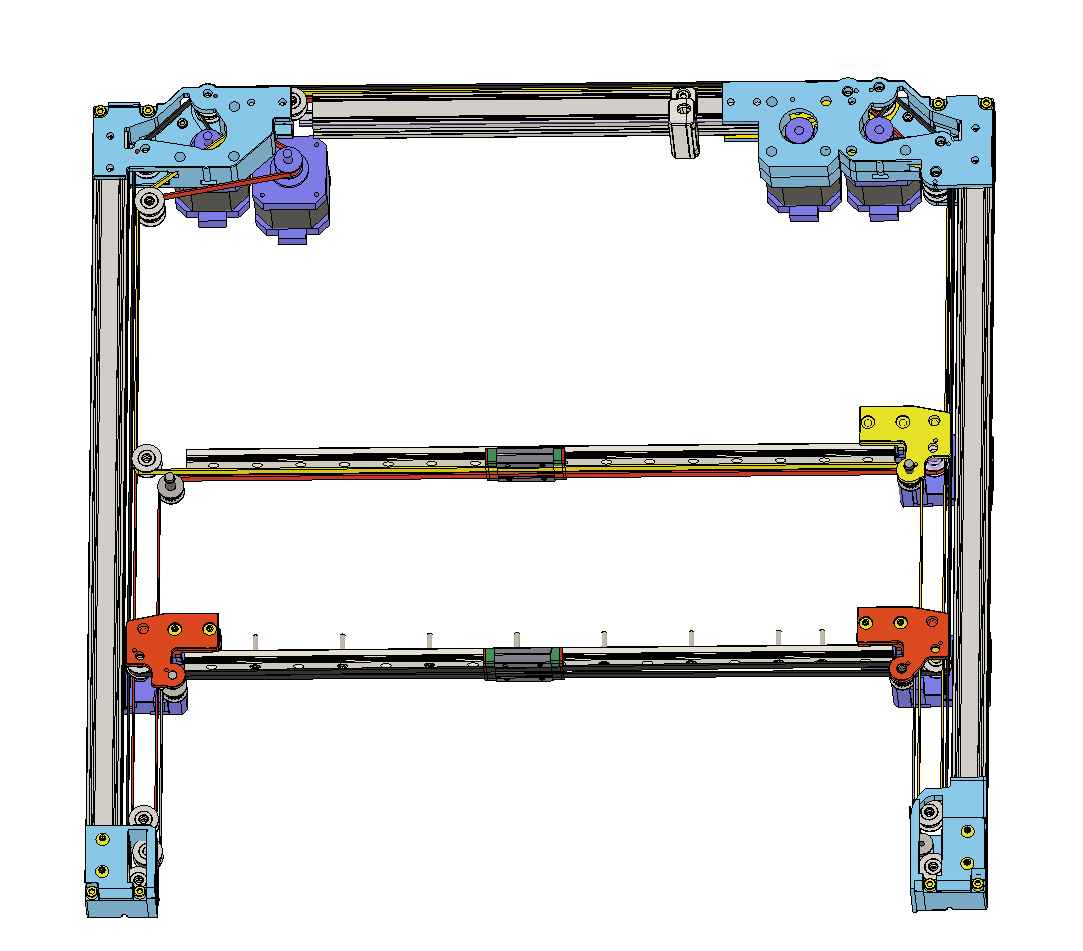
                  @dwuk Reworked the design of the right hand parts and belt paths - to make to routing more compact - so a lot less build plate now lost.

                  These screenshots show the factory single gantry front and rear part on the left - with the new double gantry parts on the right.
                  Screenshot 2025-01-14 at 13.37.11.png Screenshot 2025-01-14 at 13.37.26.png

                  Improved more compact belt routing on right hand side
                  Screenshot 2025-01-14 at 13.41.18.png

                  1 Reply Last reply Reply Quote 0
                  • dwuk3dundefined
                    dwuk3d
                    last edited by

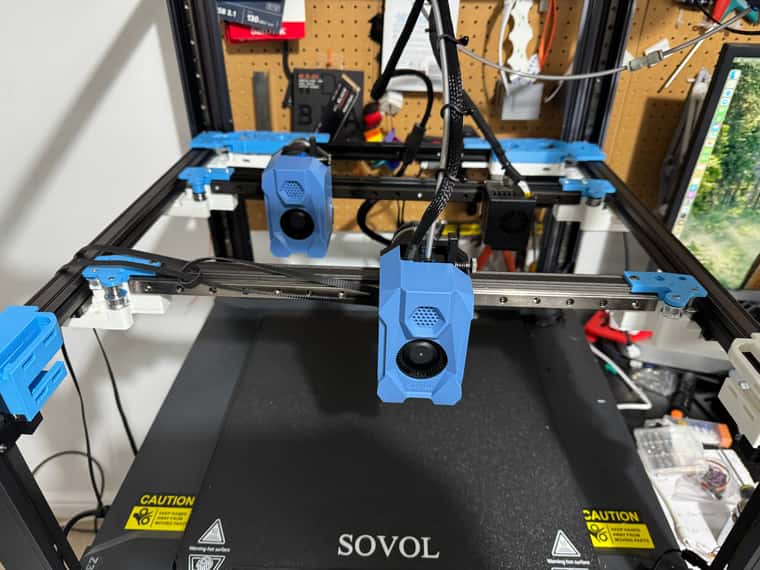
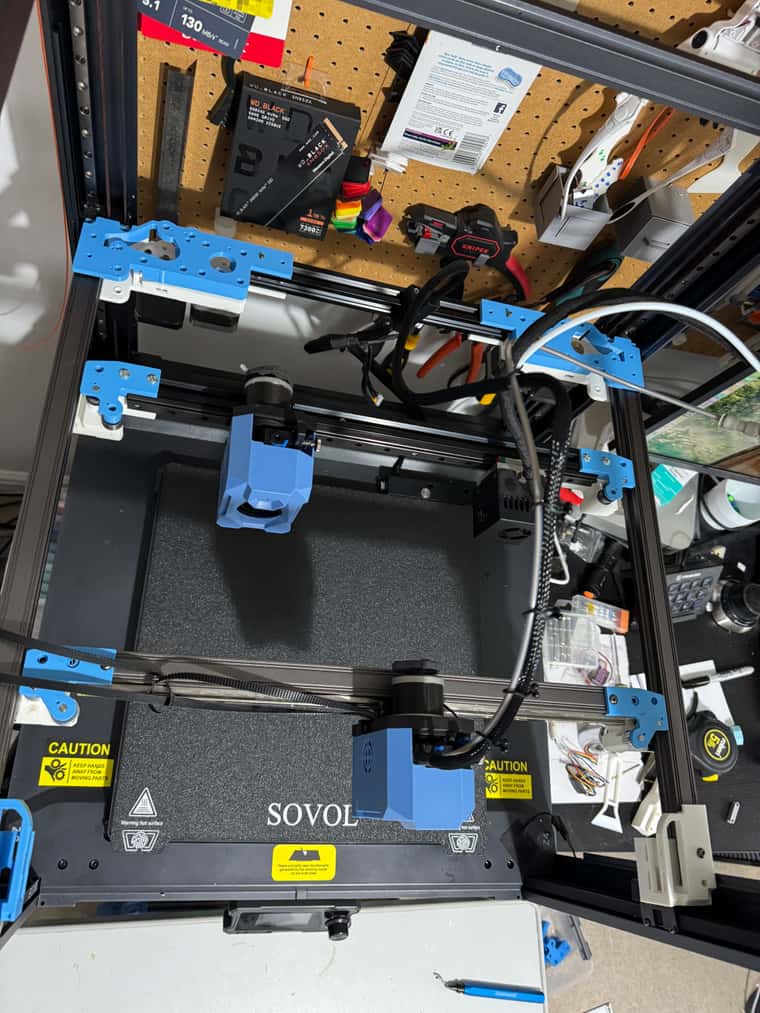
                    Still waiting for a few parts - but basic Phase1 structure now complete - just needs to be belted up.

                    Next step if to belt up both gantries and try running the original front gantry using the existing Klipper board just to see if it still works with the new belt routing and the 2nd gantry in the back.

                    Still awaiting Mini 5 Duet Board delivery - but rest of boards arrived ok.

                    Have used smaller New

                    2nd extruder on back gantry just there for illustration purposes of size target - it is a Bowden extruder from the WeedoX40 donor machine.
                    750BF08B-082E-4DF8-A521-8C19F8447822.jpeg

                    FC42A41D-E40D-485F-8AB7-F13675776E3D_1_201_a.jpeg

                    D4298745-1942-4AA5-AE6A-869E4A7F5B04.jpeg

                    o_lampeundefined 1 Reply Last reply Reply Quote 1
                    • o_lampeundefined
                      o_lampe @dwuk3d
                      last edited by

                      @dwuk Having a bowden extruder in the mix makes sense if you want to print infill_every_nth_layer with a bigger nozzle.

                      1 Reply Last reply Reply Quote 1
                      • dwuk3dundefined
                        dwuk3d
                        last edited by

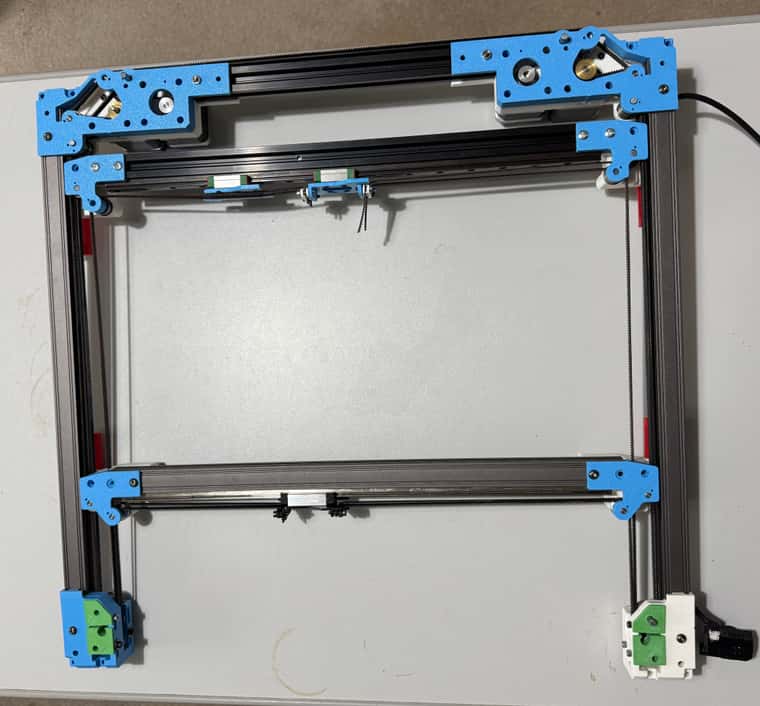
                        All belted up.
                        Short a few parts before I can do a proper test - most important of which is the linear rail carriages for the 2nd gantry, plus some idler posts.

                        Some belts quite close to each other - will try both gantries out next - will have to swap the carriages.
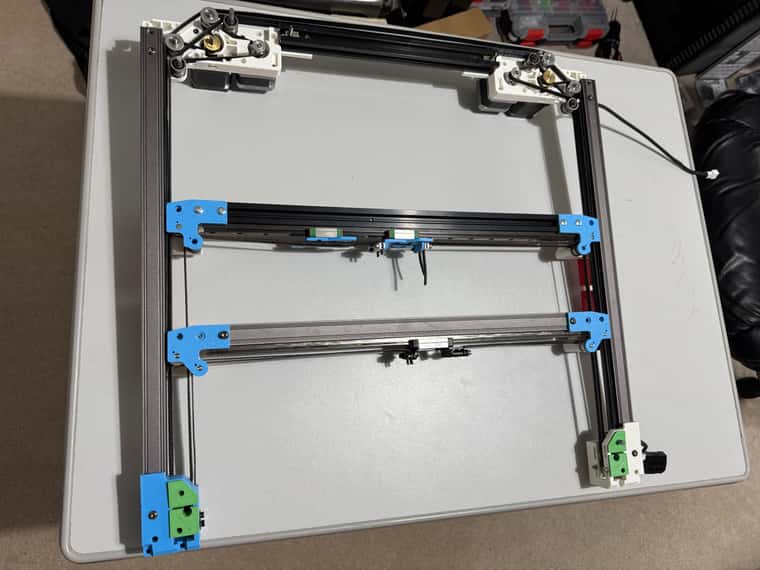
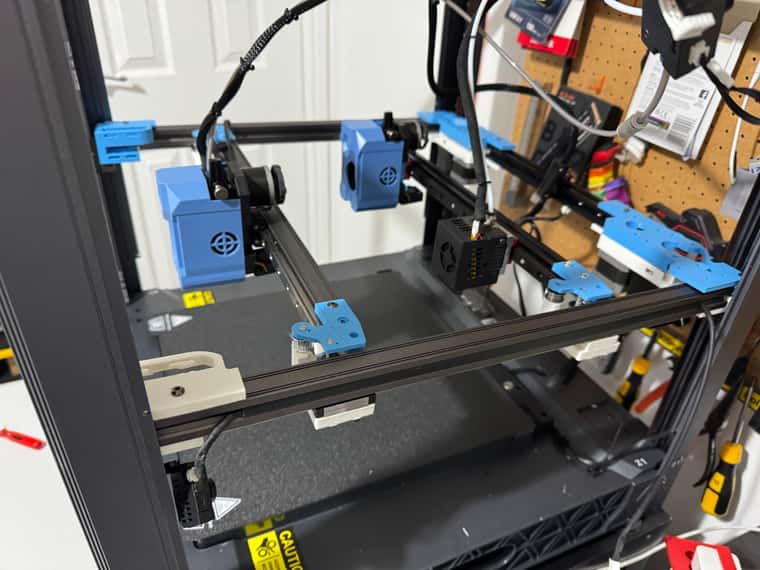
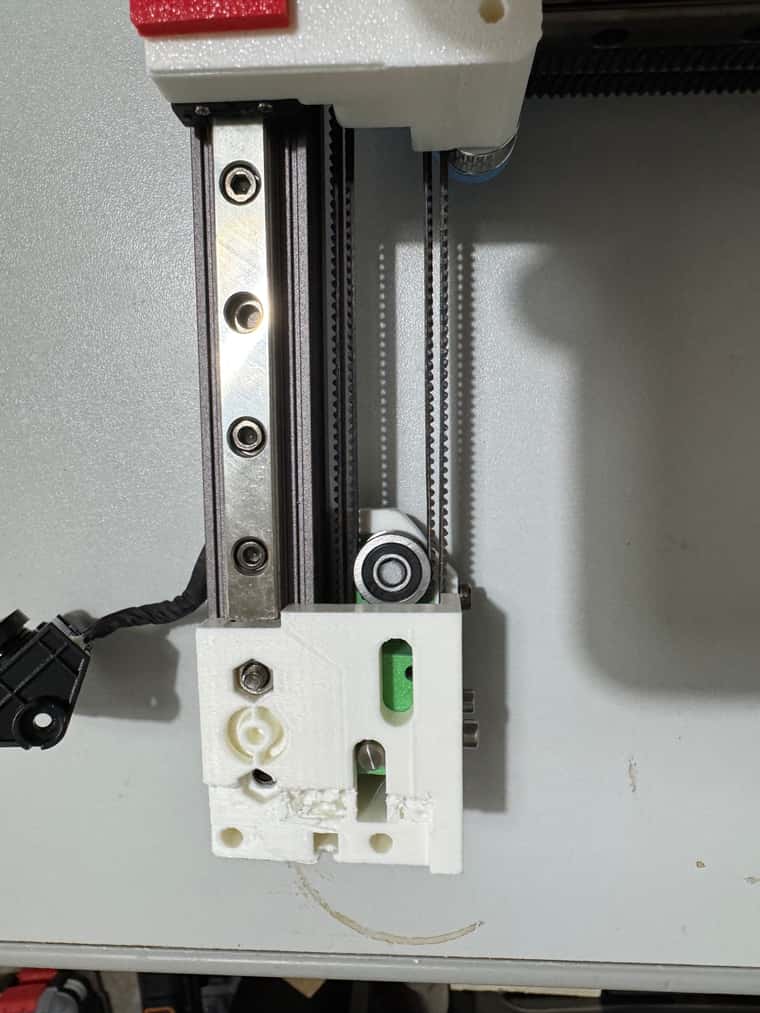
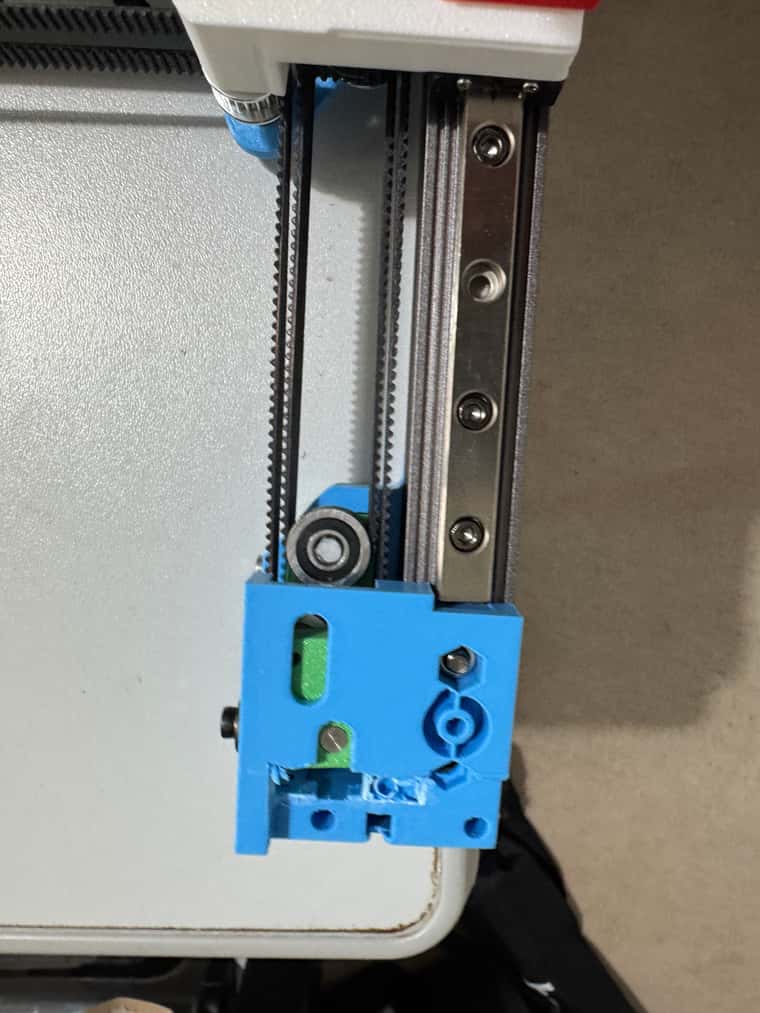
                        B430C399-9047-4F23-84BF-66DC3D970B7C_1_201_a.jpeg

                        Rear left
                        FED32B10-B31C-4728-BE48-91D8AFBFBC0A_1_201_a.jpeg IMG_6568.JPG

                        Rear right
                        D466D753-4558-4A79-898E-2B64D4A8E75D_1_201_a.jpeg

                        Front left
                        B8B53572-DA53-4328-8E05-26A6C9C7C513_1_201_a.jpeg

                        Front right
                        35A4B30B-9A66-463E-AC0D-FB298428B89A_1_201_a.jpeg

                        Top with rear top halves on
                        5EFA712B-DDEF-43D5-B311-D9820AB40AD6_1_201_a.jpeg

                        T3P3Tonyundefined 1 Reply Last reply Reply Quote 2
                        • T3P3Tonyundefined
                          T3P3Tony administrators @dwuk3d
                          last edited by

                          @dwuk really enjoying following along with this build. Good to see the multiple motions systems code getting a chance to be used on a two head toolchanger!

                          www.duet3d.com

                          1 Reply Last reply Reply Quote 1
                          • dwuk3dundefined
                            dwuk3d
                            last edited by dwuk3d

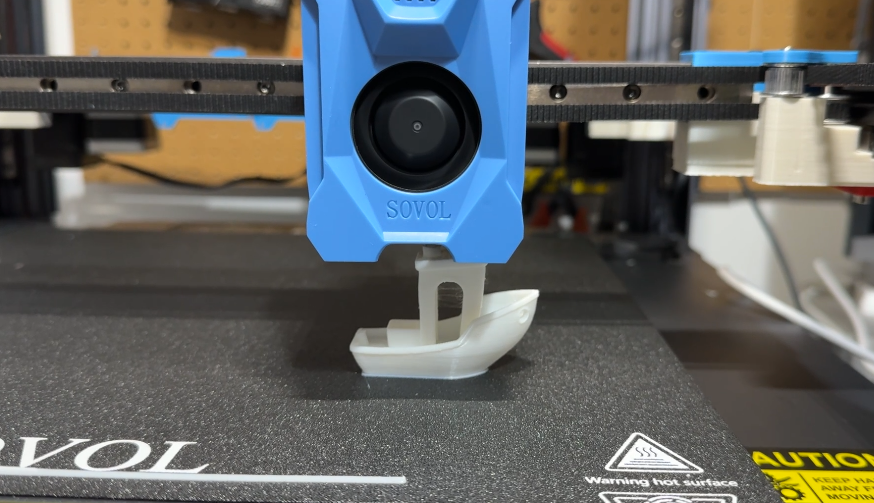
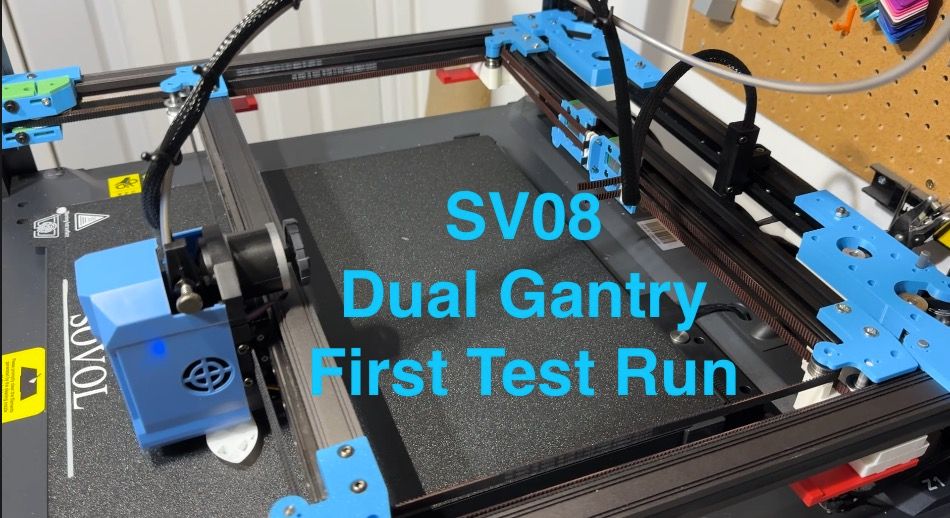
                            First test of the mechanics - to make sure I haven't messed up Gantry1.
                            87FDA742-BBF1-4047-B6F0-2E12B496F37B.png

                            Worked surprisingly well on existing Klipper board - see short video demo.
                            https://youtu.be/3d6z5srohSQ
                            37128F6B-42A0-4461-8173-CBAF2DE1FECB_1_201_a.jpeg

                            Can't yet get gantry 2 to work - due to lack of linear rail carriages, plus motors are probably not powerful enough - as for first try they didn't move.

                            Will try Swapping the motors around before upgrading.

                            Set smaller motors at 0.85a (the rating printed on them) - which didn't work.

                            Update - rear gantry moves ok with original sovol motors at both 0.85a and 1.5a (even with 3d printed carriages).

                            1 Reply Last reply Reply Quote 1
                            • dwuk3dundefined
                              dwuk3d
                              last edited by

                              Managed to get 2nd gantry working.

                              Had a lot of trouble with Motors - the ones I saved from a WeedoX40 wouldn't work.

                              Eventually I discovered that they have different pin connections to Sovol motors - with have the coils connected on pins 1+4 and 3+6. My motors were 1+3 and 4+6.

                              So found some other motors - from my MPCNC - which are more powerful - 1.7a - and they eventually worked.

                              Then had a lot of trouble withy homing and setting values for TMC drivers - will probably switch to end stops for the final build - but eventually got it working.

                              Then next problem was prints keep losing position - eventually worked it out that I was moving too fast for the MPCNC motors - F36000 was too fast for them - so slowed down to 18000 (300mm/s). And that sorted out the problem.

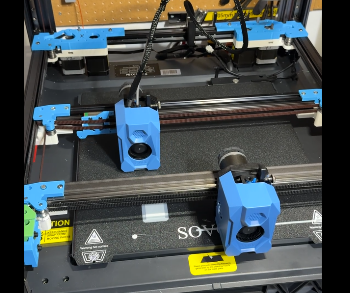
                              Decided to try a print - despite plastic bearing posts, and plastic linear rail carriages - ran the print at half speed - but it worked.

                              Did an initial print on the from gantry - then swapped over the extruder and stepper connections - and reconfigured Klipper for the different motors.

                              Demo of print on 2nd gantry here
                              https://youtu.be/7ar74Ne5ryI
                              Screenshot 2025-01-19 at 17.14.46.png

                              Have learn't quite a lot about configuring steppers which will come in useful once I try the Duet migration - which is probably now the next step.

                              1 Reply Last reply Reply Quote 3
                              • dwuk3dundefined
                                dwuk3d
                                last edited by

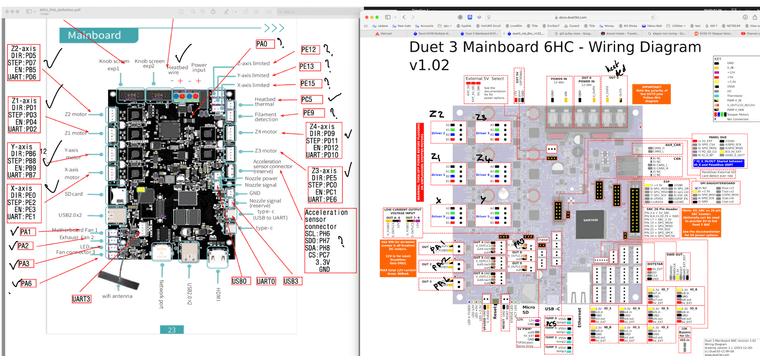
                                Starting to plan Duet Conversion - initially with just one Gantry and the 6LC and a single 1LC board
                                Screenshot 2025-01-19 at 23.04.47.png

                                configtool.json

                                1 Reply Last reply Reply Quote 0
                                • dwuk3dundefined
                                  dwuk3d
                                  last edited by

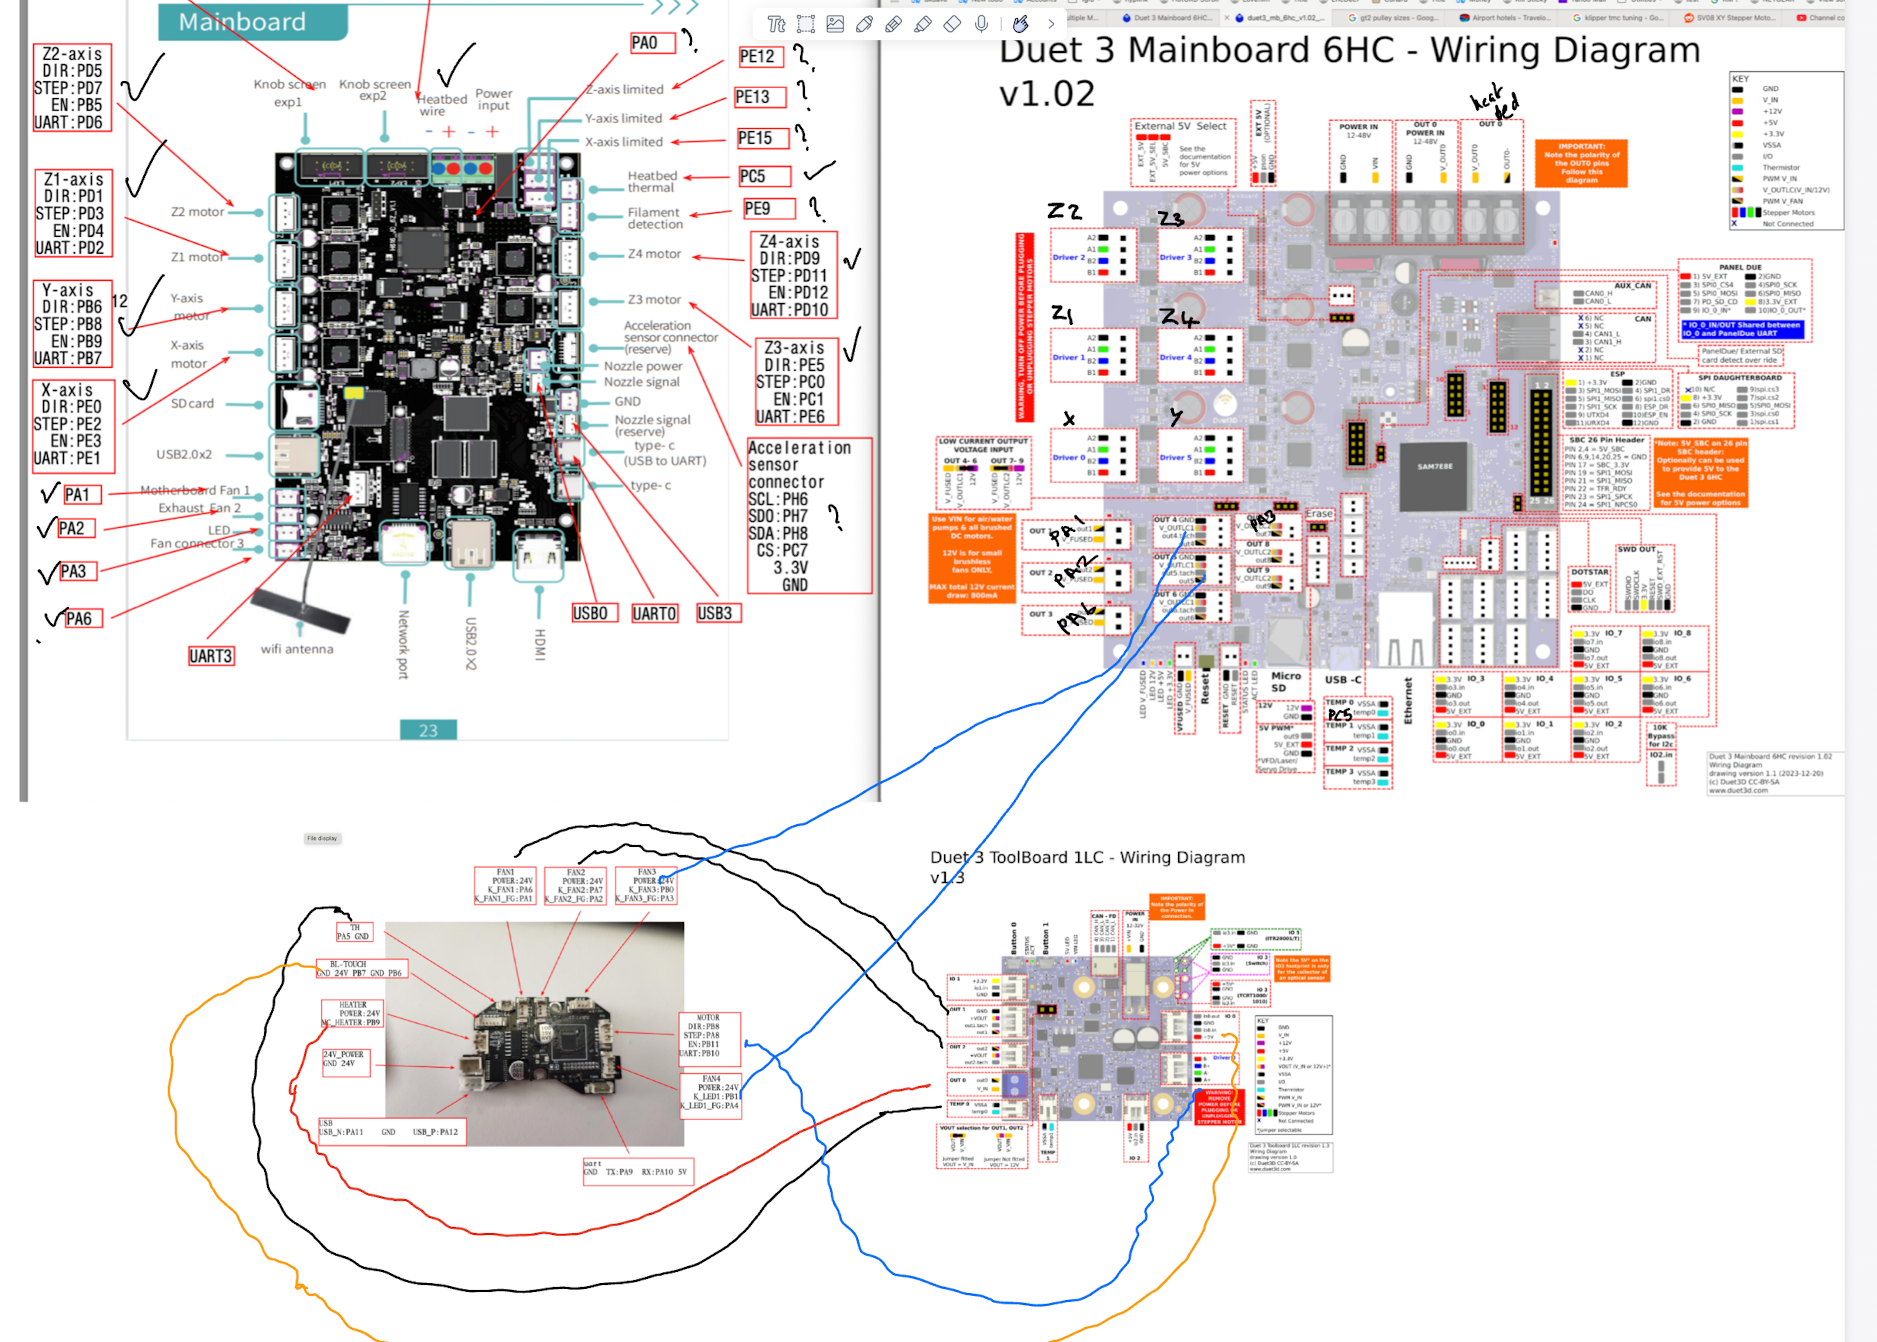
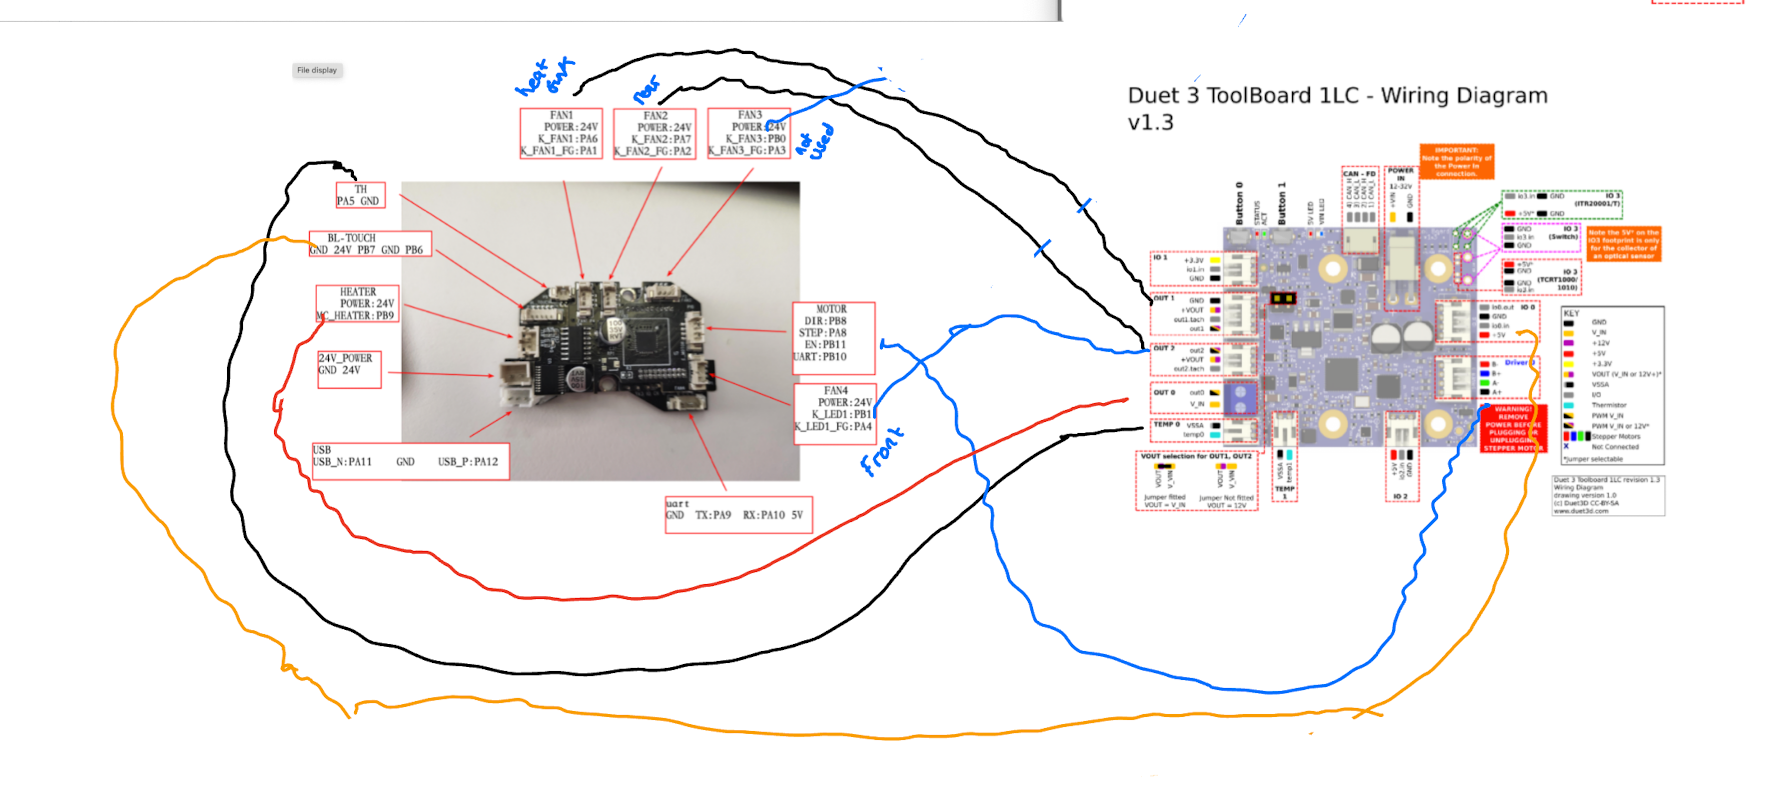
                                  Added tool board wiring - looks like there are not enough connections for the 3 fans - so might have to run some extra cables from the main board. I have shown wiring for 4 fans - but I think only 3 are used.
                                  Screenshot 2025-01-20 at 07.46.04.png

                                  configtool-2.json

                                  1 Reply Last reply Reply Quote 0
                                  • dwuk3dundefined
                                    dwuk3d
                                    last edited by

                                    Revised Toolboard wiring with the help of @jay_s_uk and @T3P3Tony

                                    Screenshot 2025-01-20 at 09.01.14.png

                                    Toolboard comparison - need to now work out which way up to place board and physical wiring. Ideally I want to be able to go back to Sovol board - so will have to work out some adaptors.

                                    714D3898-240A-4AEB-BF98-9D255CBA380A.jpeg

                                    1 Reply Last reply Reply Quote 0
                                    • dwuk3dundefined
                                      dwuk3d
                                      last edited by dwuk3d

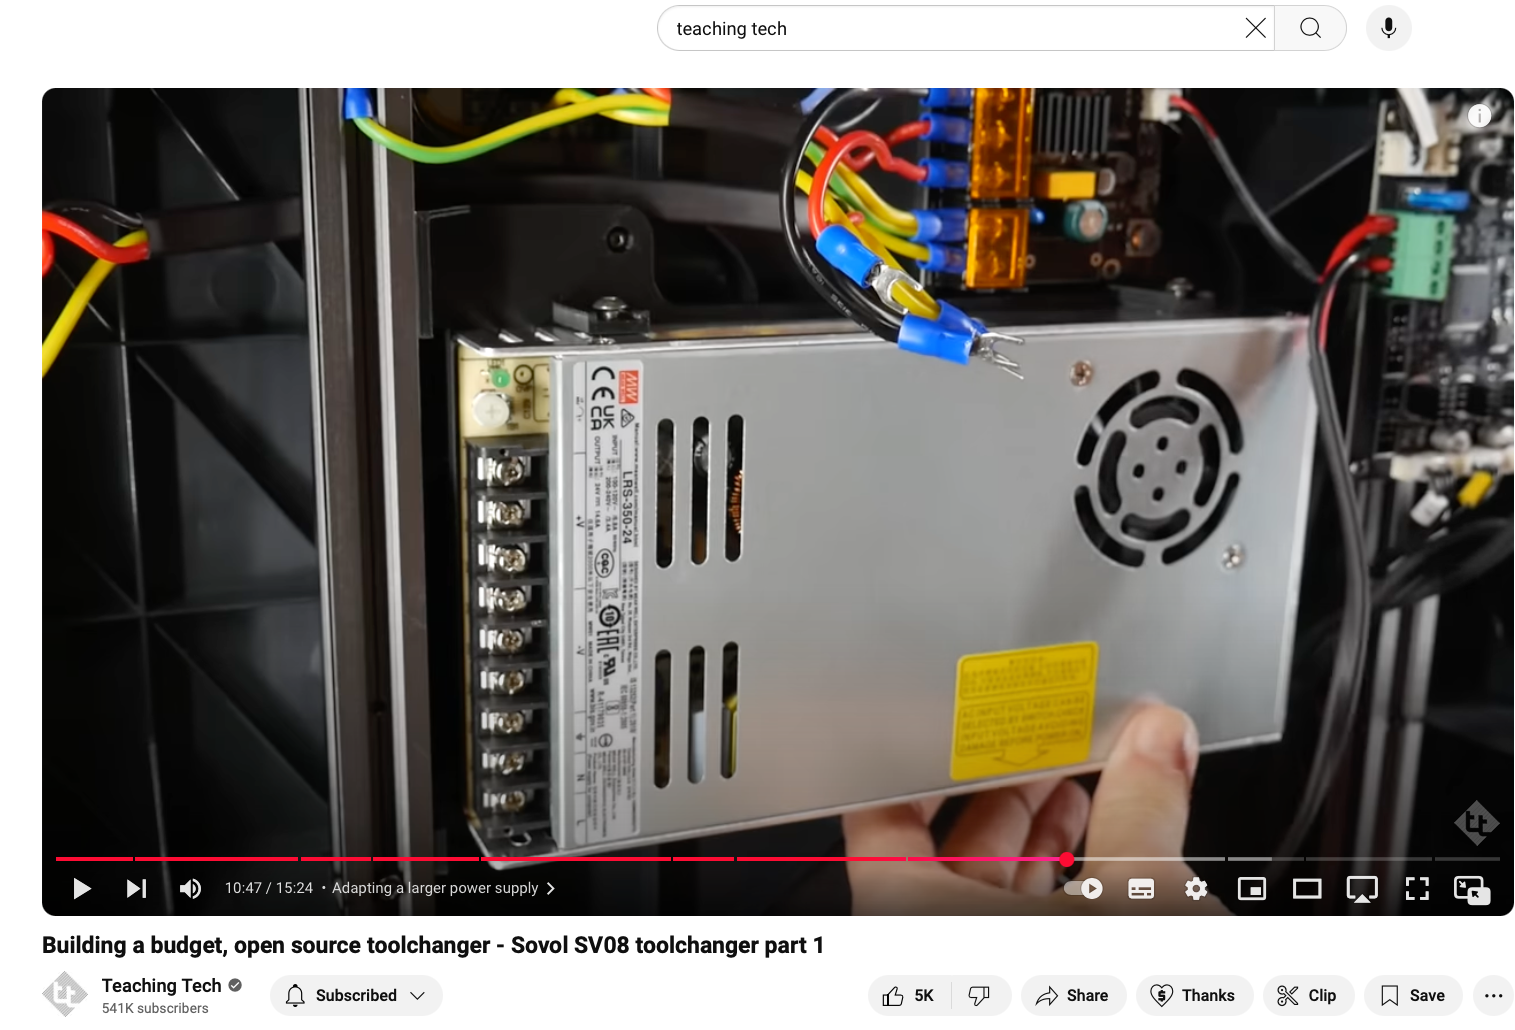
                                      Next job is the power supply upgrade. The stock PSU is tiny - only 6.5a. I've got a 20A PSU from my WeedoX40 - so will put that in there instead. Need to decide whether to take the @TeachingTech approach- and put it in the same place as the existing PSU - which involves cutting some posts off.
                                      Screenshot 2025-01-20 at 10.59.20.png

                                      Or go with @JohnSC's approach and mount the new PSU at the bottom - Screenshot 2025-01-20 at 10.59.39.png
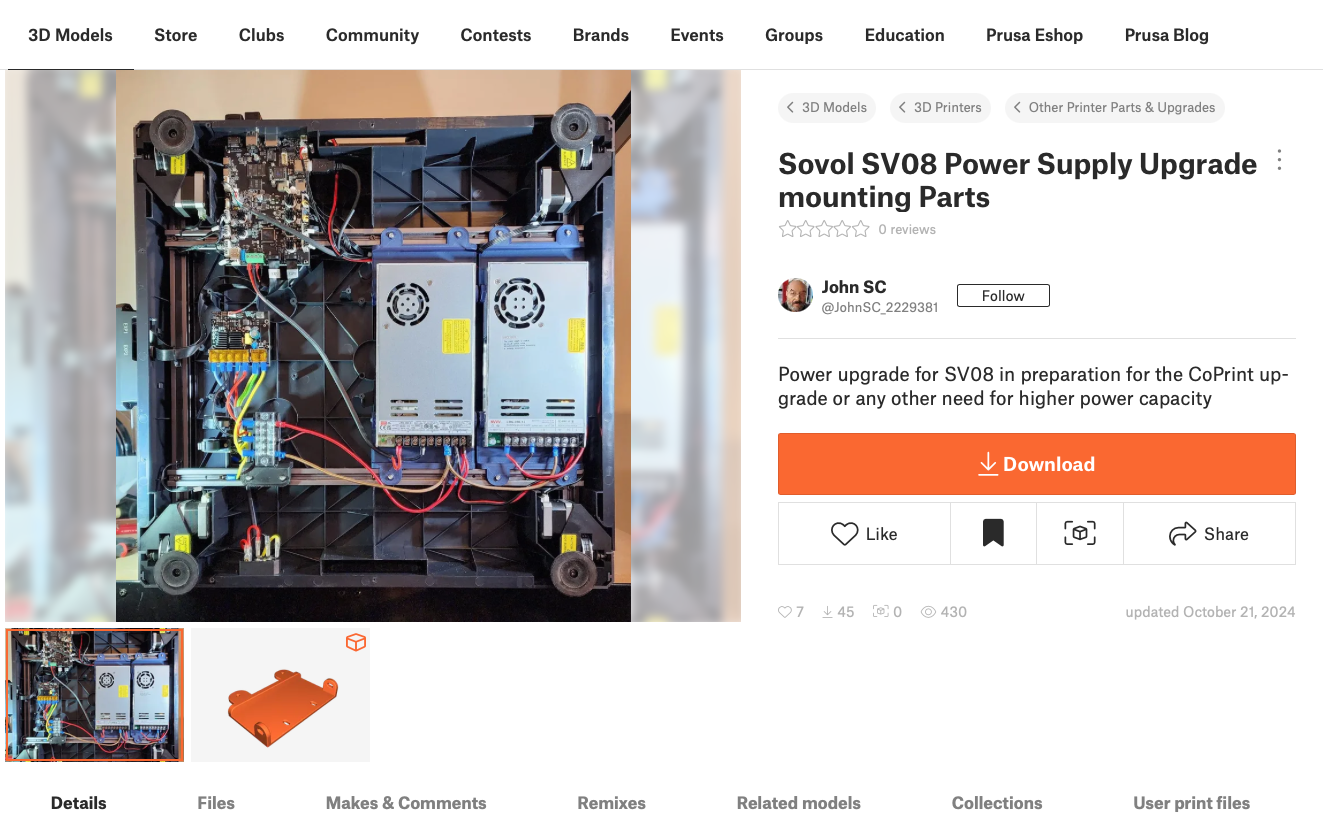
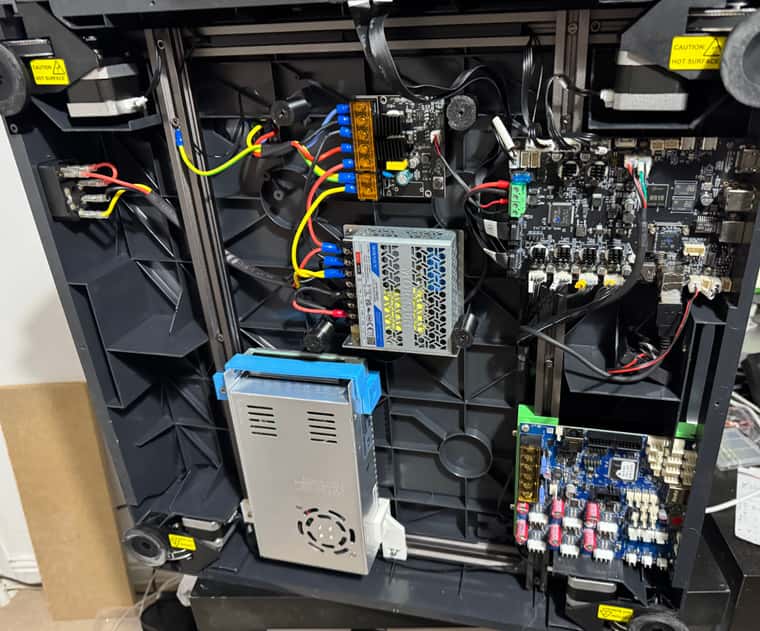
                                      Then for placement of Duet Boards. The Mini5+ board hasn't arrived yet - but it can be inside somewhere. I'm thinking of putting the Duet 6HC below the existing board - here maybe
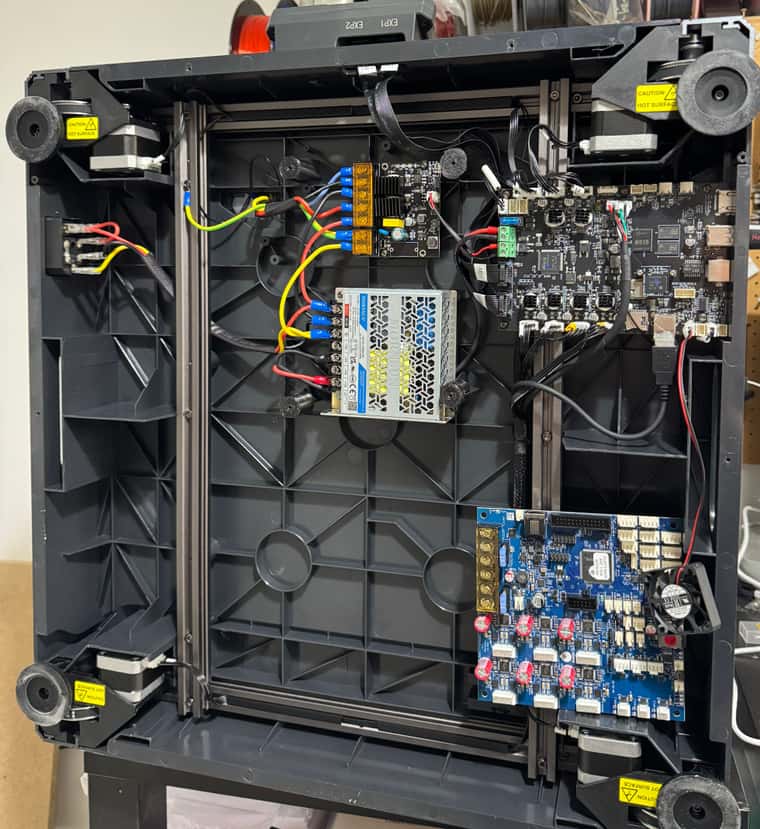
                                      D22AE6FD-64D5-4EEC-BD32-B484FBF6426C_1_201_a.jpeg

                                      Will involve cutting out some new holes to give access to the sd card, usb-c and ethernet. This pushes me towards the teachingTech approach to PSU placement.

                                      In the end decided to go for this model as first attempt at PSU mounting
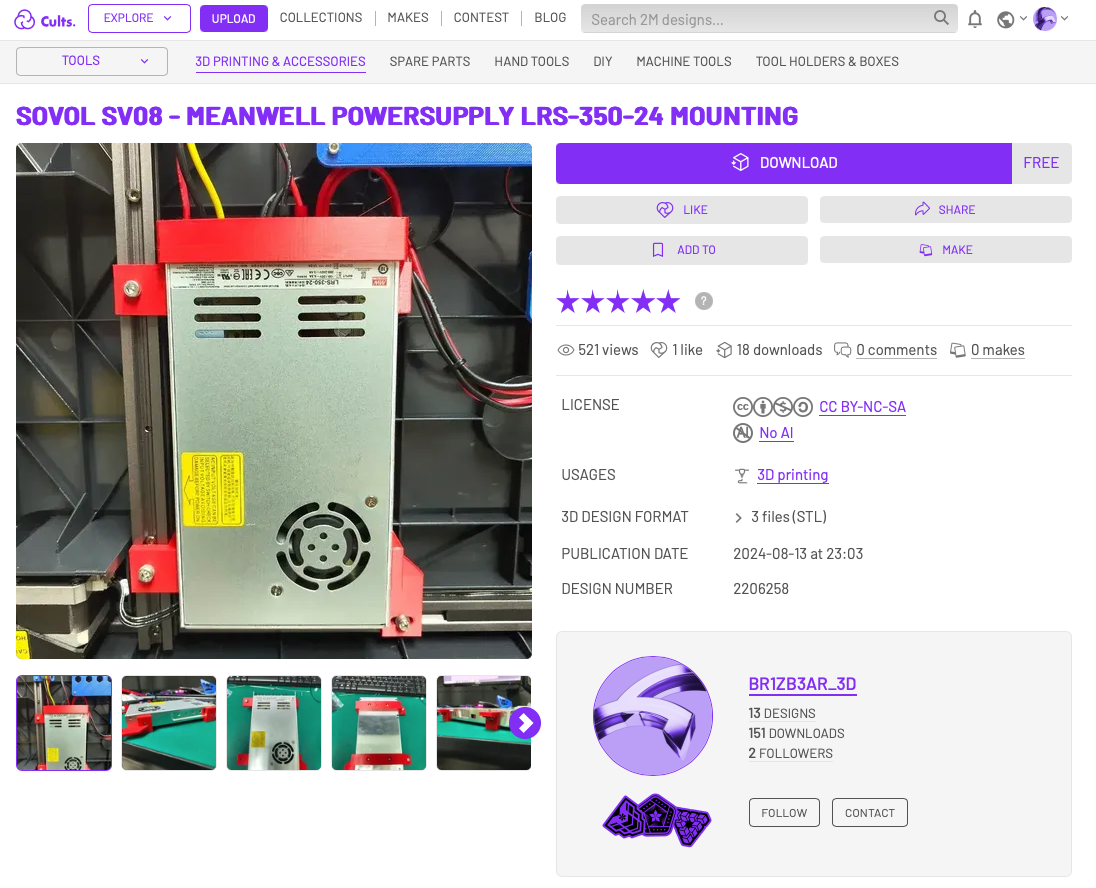
                                      Screenshot 2025-01-20 at 13.52.30.png

                                      1 Reply Last reply Reply Quote 0
                                      • dwuk3dundefined
                                        dwuk3d
                                        last edited by

                                        PSU Installed and design for Duet Holder done.
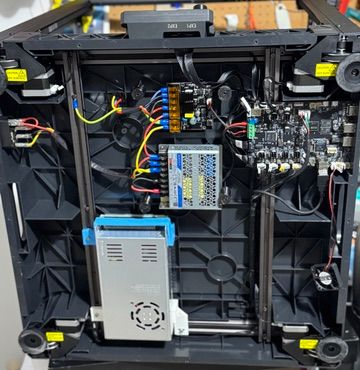
                                        A5839622-59F4-43DF-9E93-8540B33AB425_4_5005_c.jpeg

                                        Screenshot 2025-01-20 at 16.45.52.png Screenshot 2025-01-20 at 16.46.04.png

                                        dwuk3dundefined 1 Reply Last reply Reply Quote 0
                                        • dwuk3dundefined
                                          dwuk3d @dwuk3d
                                          last edited by

                                          @dwuk Duet3 6HC board now installed - now for lots of wiring up.
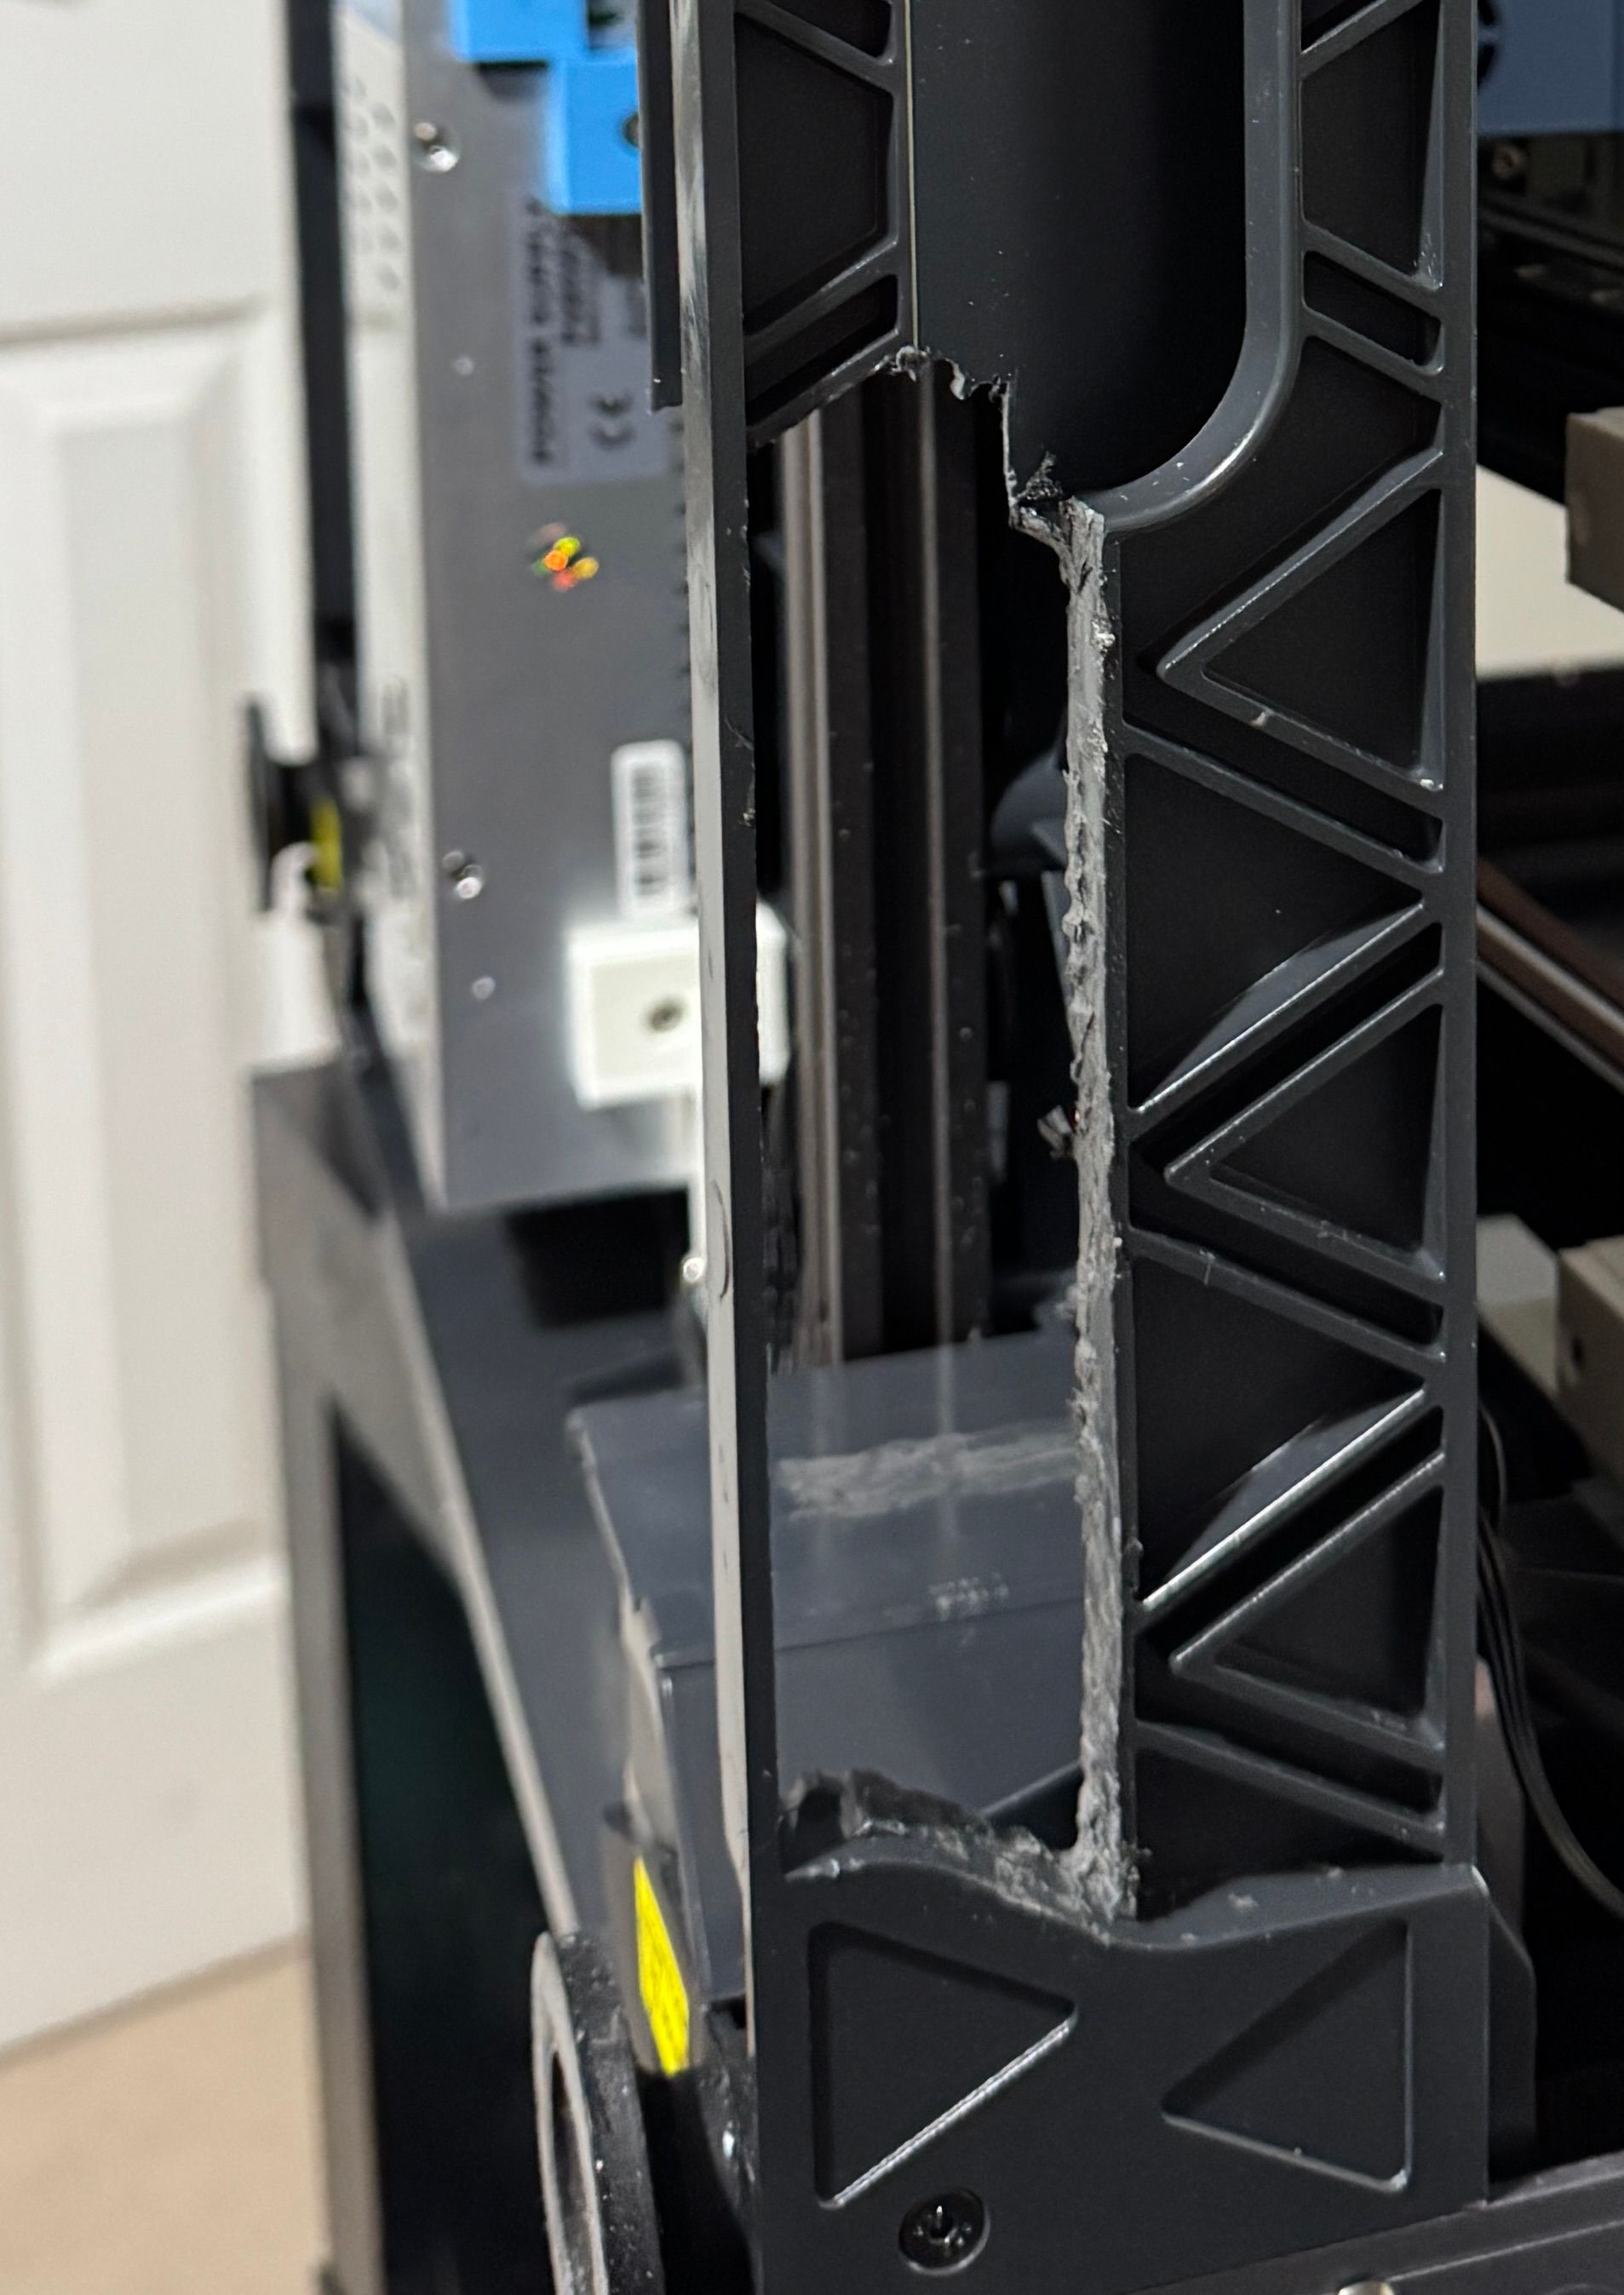
                                          AD045D3E-FDAA-4746-8DA5-221BBA1444AC_1_201_a.jpeg 9482B9A4-0C76-4553-A9D5-5CDADAD7692A_1_201_a.jpeg 35AFF38C-B36A-4A8B-B19B-1008CB011F91_1_201_a.jpeg

                                          1 Reply Last reply Reply Quote 0
                                          • dwuk3dundefined
                                            dwuk3d
                                            last edited by

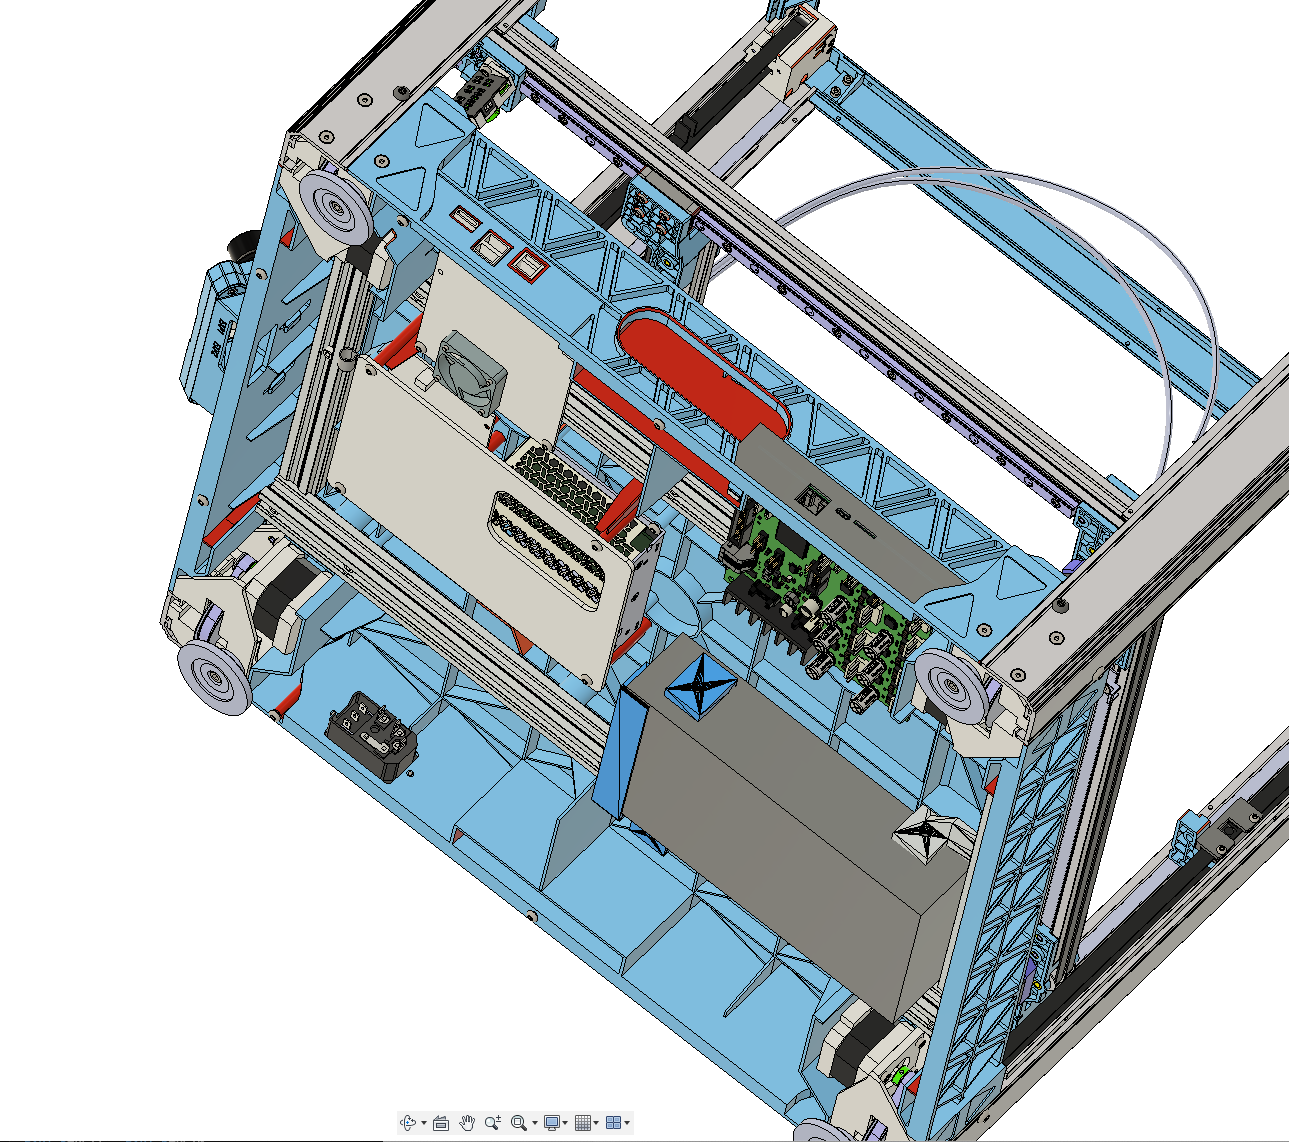
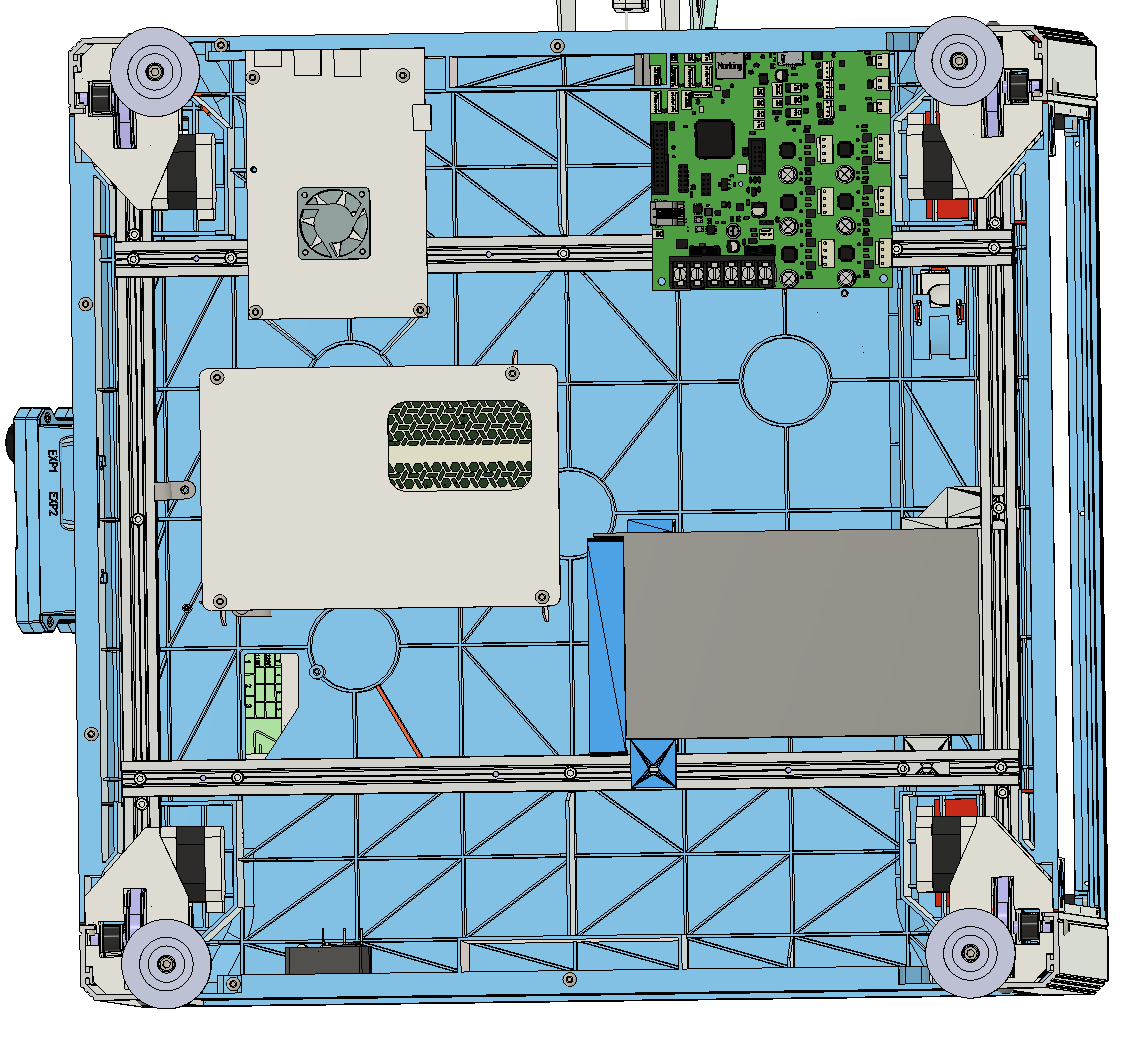
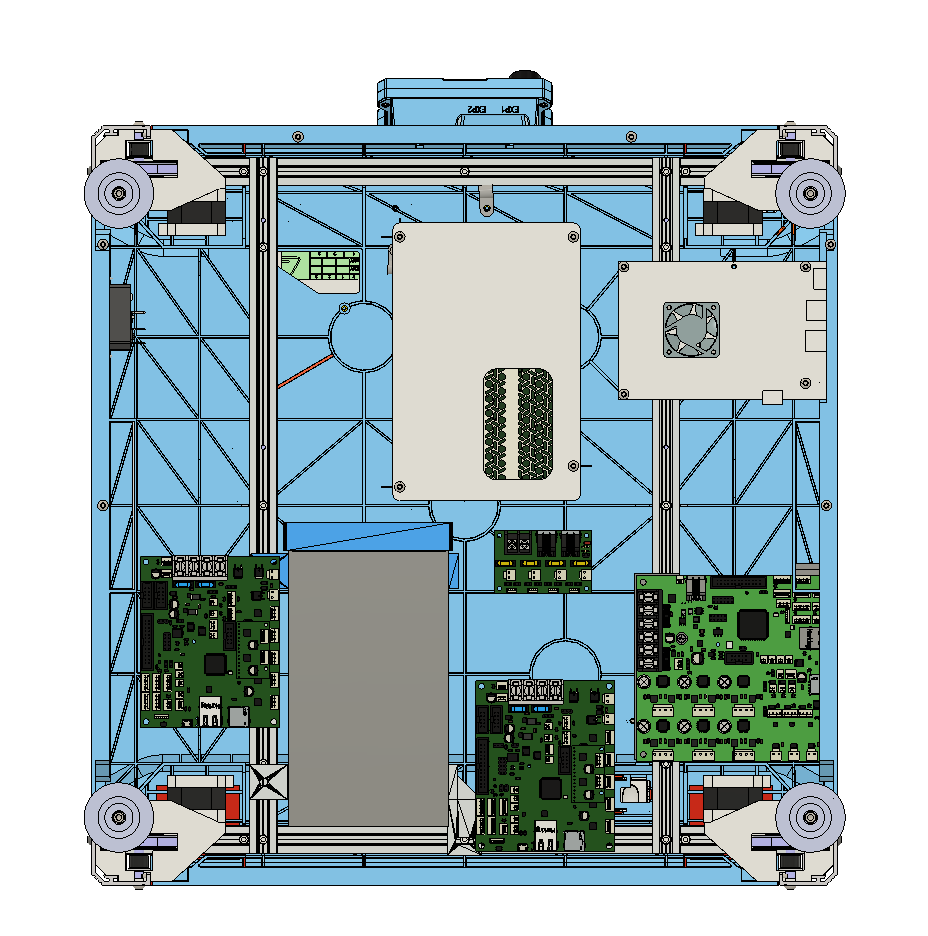
                                            Starting to plan for expansion boards - looks like there is room,
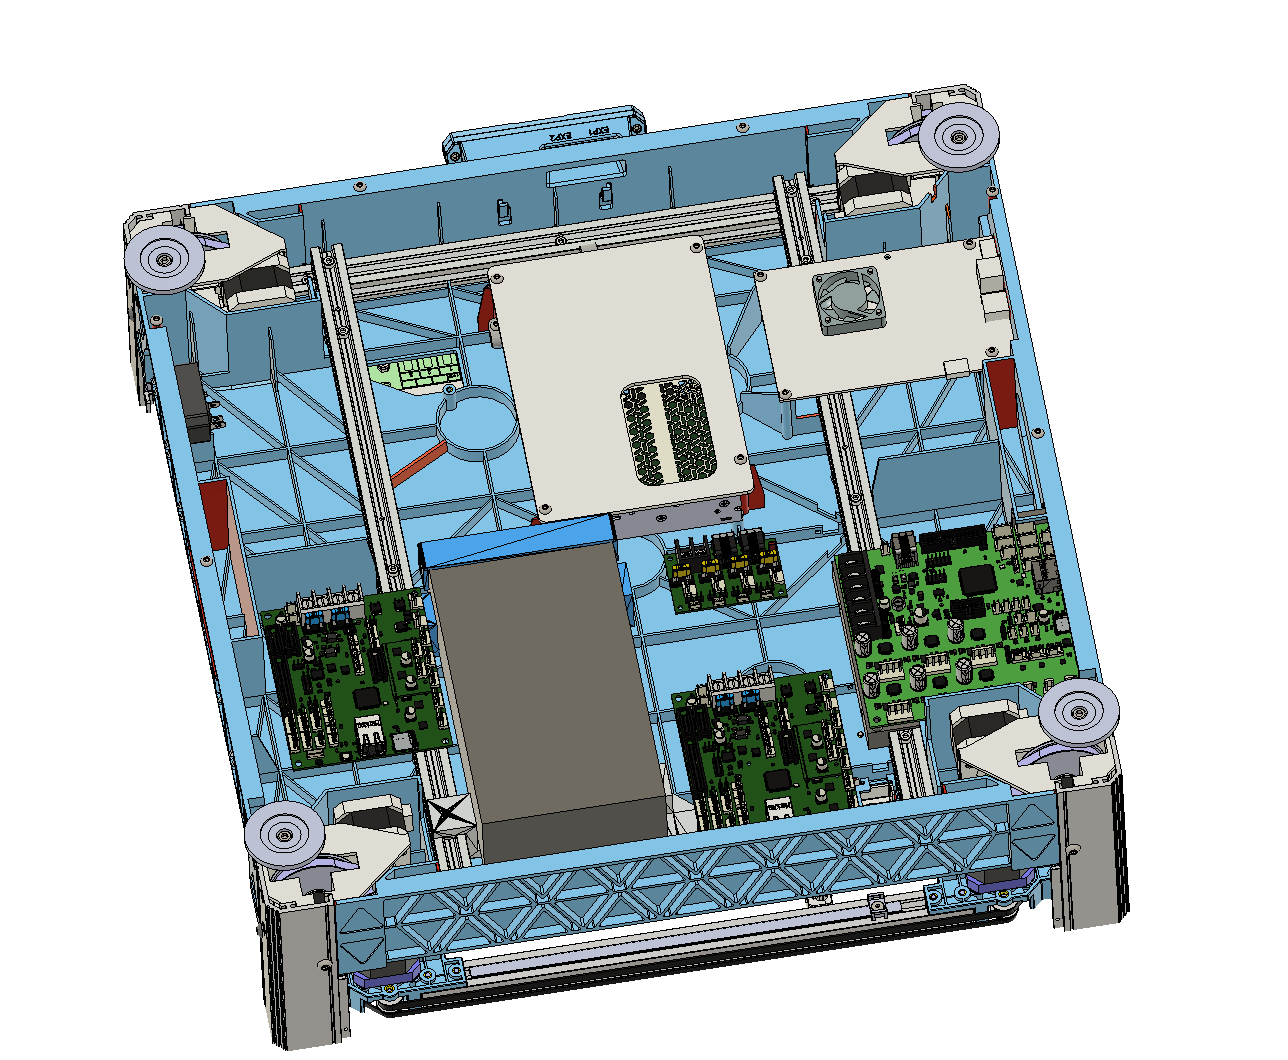
                                            155207F1-0936-4054-A140-B7C0D9E15800.png 5D5F091D-BC65-49DC-8087-D004171F762E.png

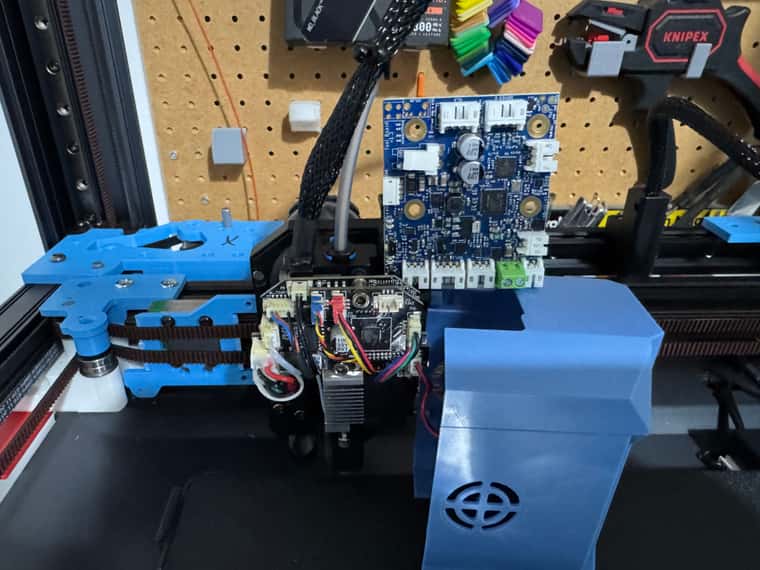
                                            Tool Distribution board and first Mini5+ needed for Dual Gantry, with further Mini 5 probably needed for IDEX - unless I can reduce the stepper requirement - by using less for IDEX and Servo's for Z Hoppers.
                                            droftartsundefined 1 Reply Last reply Reply Quote 2
                                            • First post
                                              Last post
                                            Unless otherwise noted, all forum content is licensed under CC-BY-SA