Sovol SV08 Multiple Motion System Upgrade.
-
As per my previous posts on this thread I am embarking on a fairly complicated re-engineering of an SOVOL SV08 (Voron 2.4 clone) to be Duet 6HC controlled.
The build will be done in a number of phases:
Phase 1 - Dual Gantry, Multi Motion System - needing a Duet 6HC, Mini5, 2x 1LC
Phase 2 - Dual Idex - needing another Mini5, and further 2 x 1LC
Phase 3 - Tool/Nozzle Changer - A few more 1LCs
Phase 4 - AMS - ideally finding a way to connect Bambu Lab AMSs - if not some sort of MMU solution - which will need more Mini5s
Phase 5 - Occasionally moving bedPrinter received, Phase 1 2nd Gantry initial design done, parts for 2nd gantry ordered.
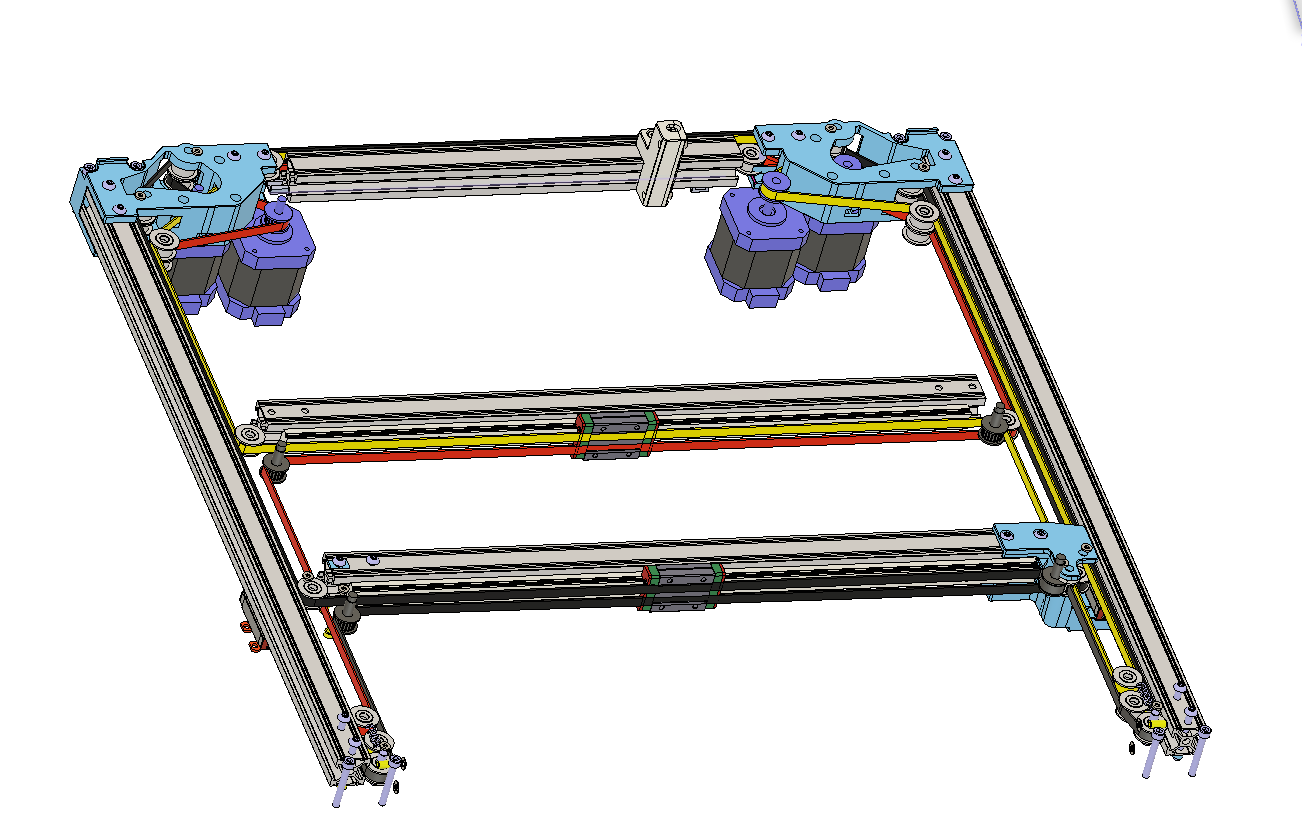
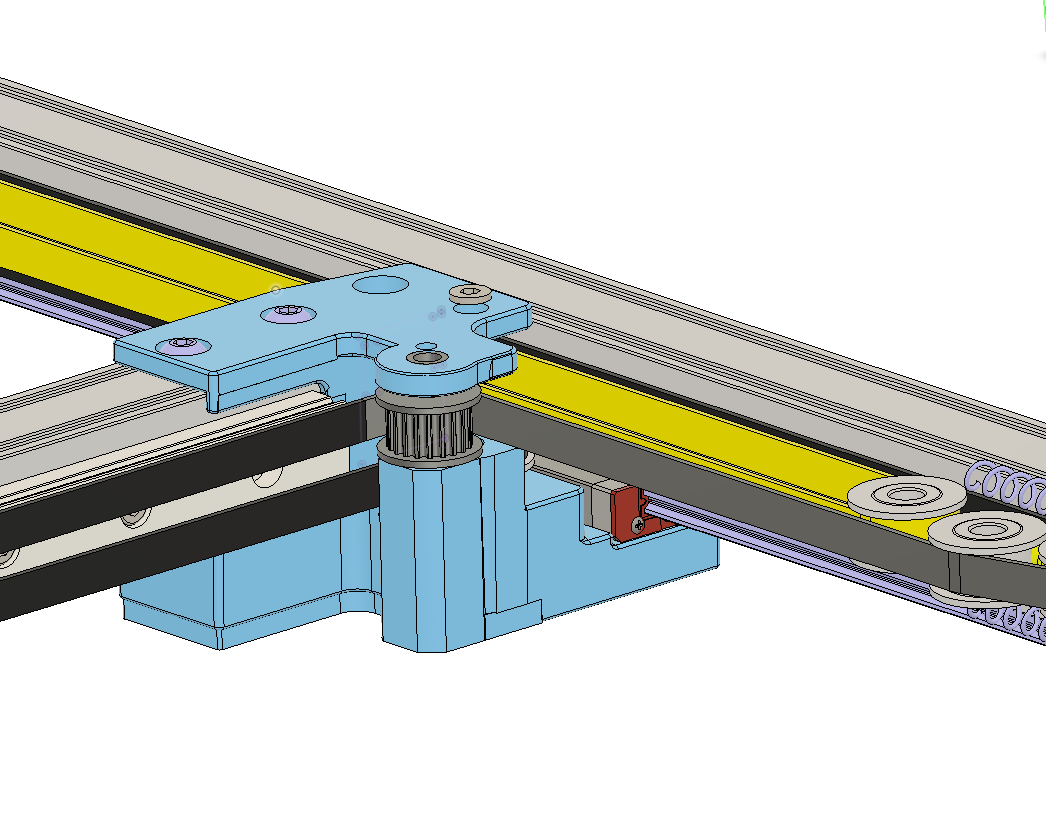
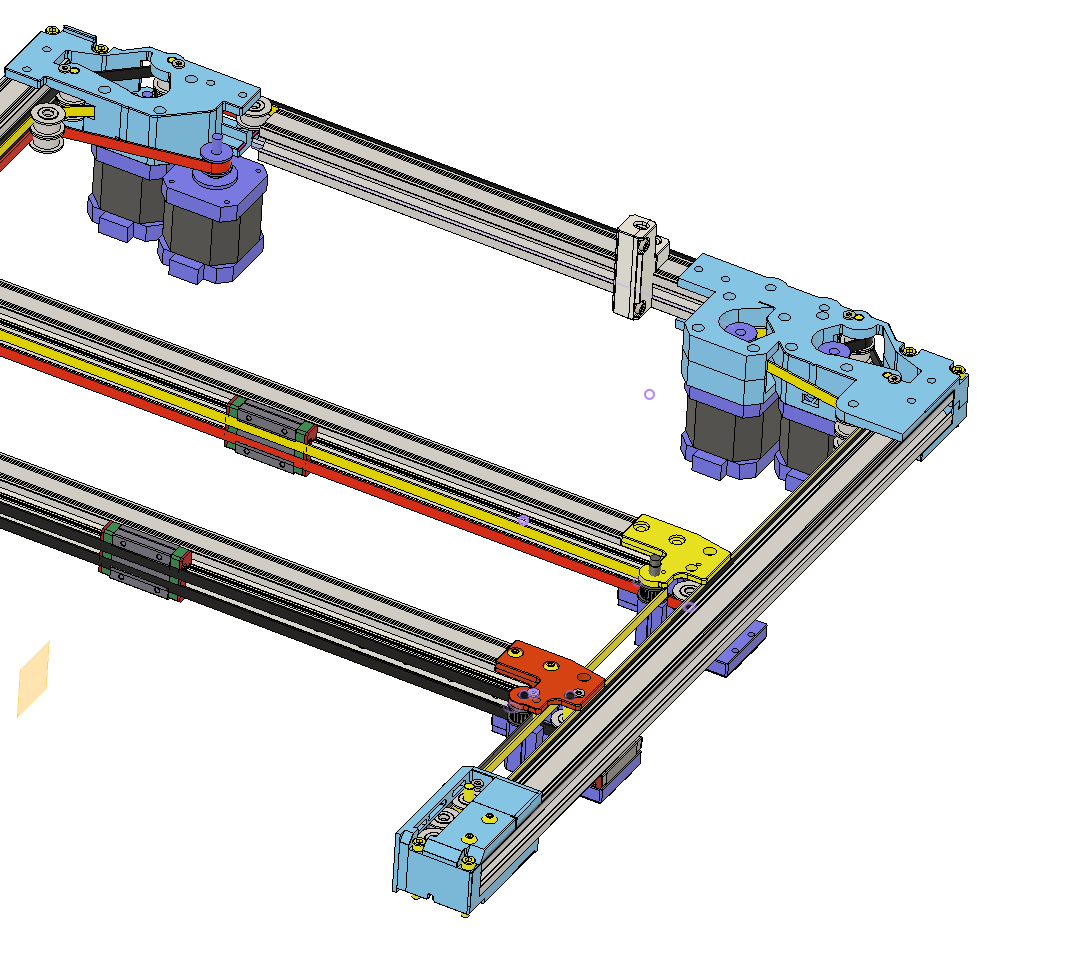
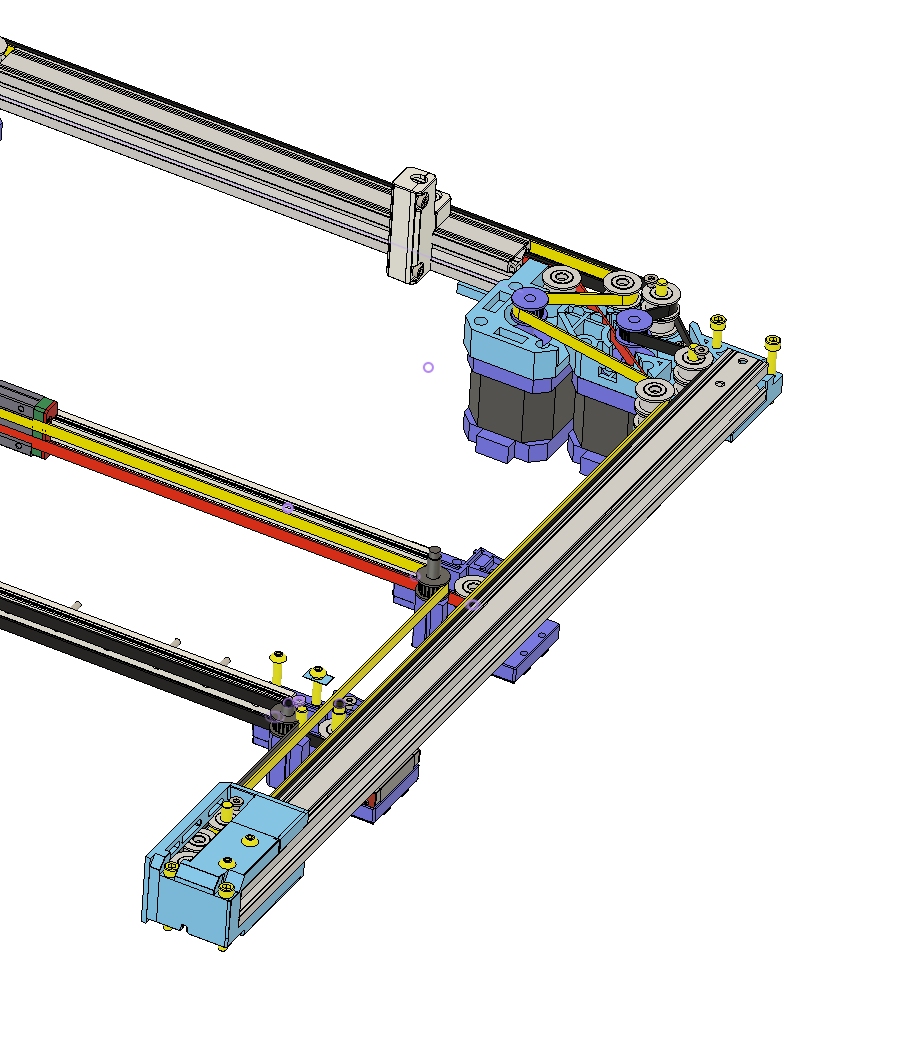
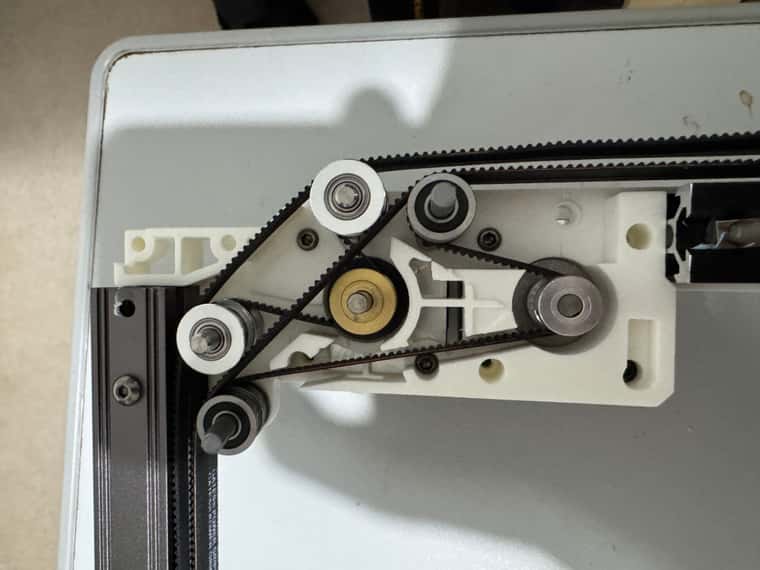
Basic additional belts design here - red and yellow belts are the new ones for the 2nd gantry - which are basically just a duplicated of the Voron 2.4 CoreXY setup - but inside at the back.
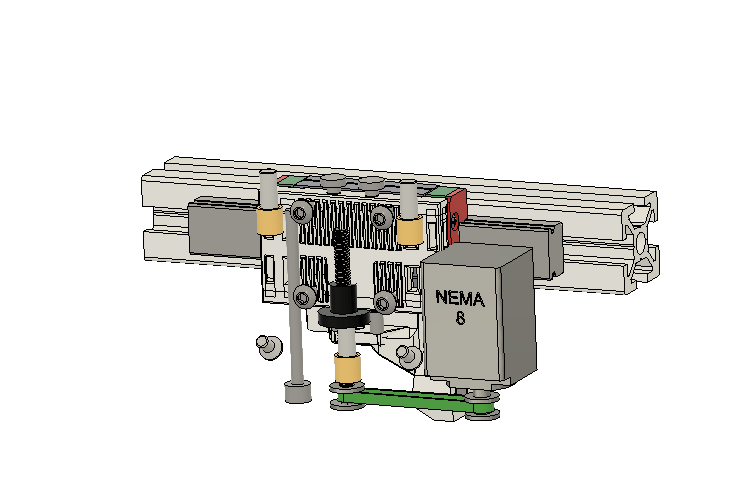
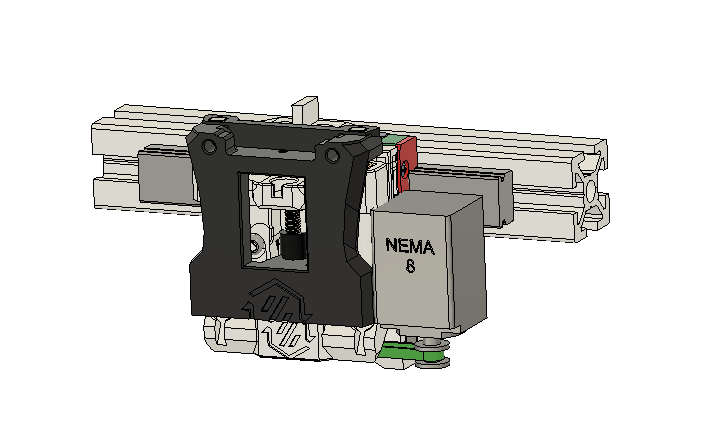
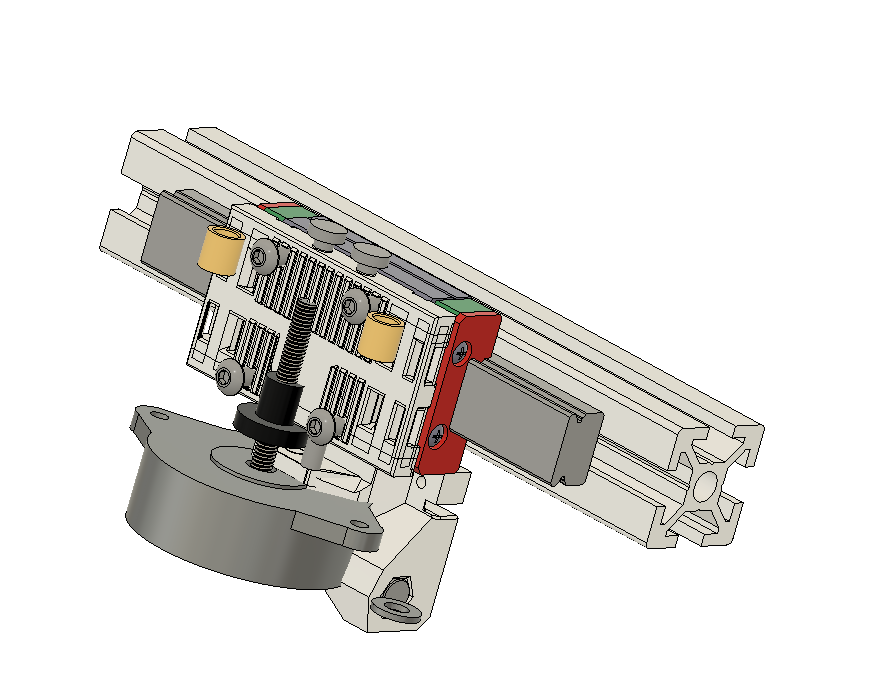
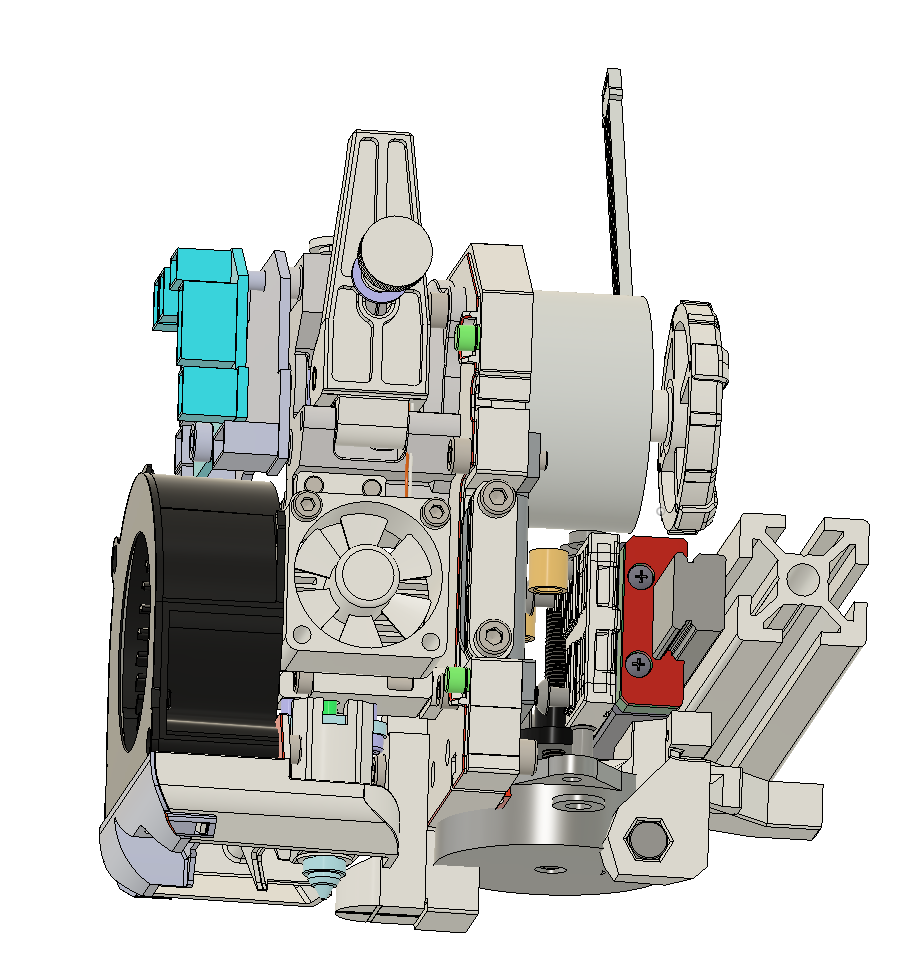
Now working on how to add mini Z hoppers for parallel printing /mesh correcting the two print heads - Am thinking I will start with a Stealth Changer - as it has the bushes to allow clean up and down movement, plus it is a good foundation for phase 3.
The smallest Stepper I can think is a Nema 8. - they are only about 45g - hope they will be powerful enough if I use a lead screw - might have to add some gearing if not.
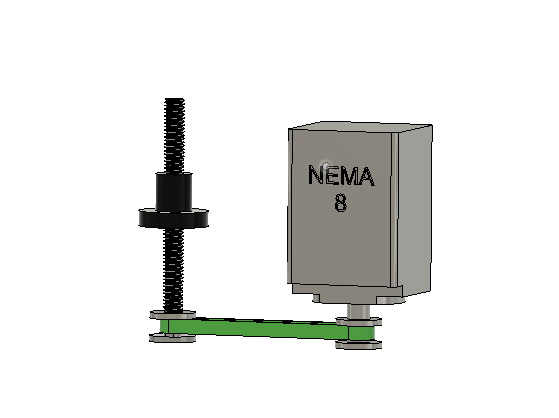
So am thinking I might be able to add it into the stealth changer something like this.

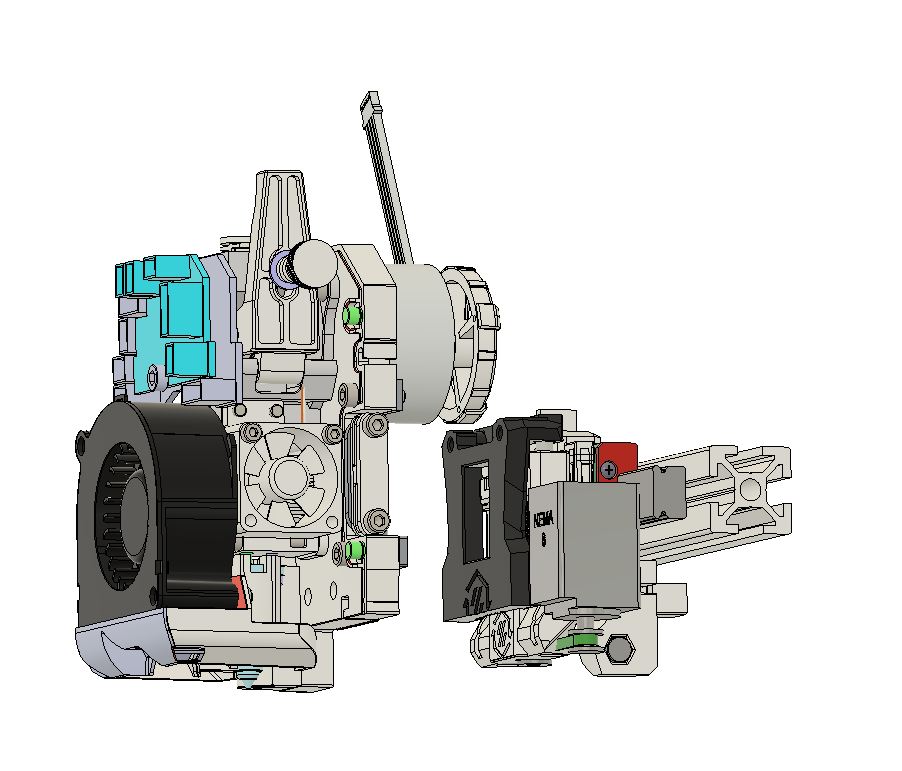
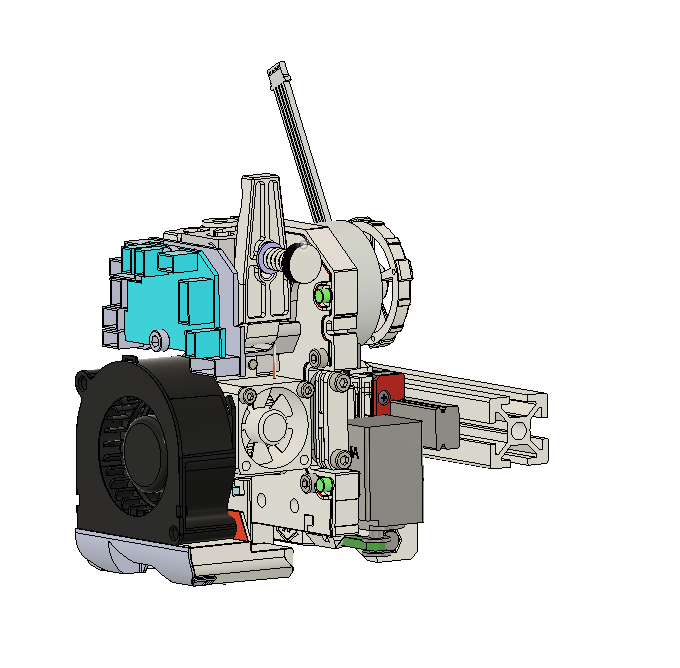
Update - I think a Nema14 Pancake could also work even better - so will probably try one of those first
-
@dwuk Whenever I need toothed idlers or gears I choose @droftarts 's openScad pulley library. (don't have the actual link RN)
When I print them on a resin printer (fudge factor settings to 0 ) they are spot on. and with "Anycubic's tough resin" they last very long (almost like nylon gears)Regarding z-hop: I think you should put it under or on the far side of the 2020 beam. Everything not-toolchanger-related could go there for better balance.
Don't forget an endstop for those hoppers.
The NEMA08 motors are quite weak, they'd definitely need gear reduction. What's the pitch of the mini leadscrews?
The smallest steppers I've used were salvaged from old DVD drives. You can still find them on Aliexpress for pennies, I guess.
The whole lift and bearing thing could probably be done with excenter bearings. (two flys with one clap) -
@o_lampe said in Sovol SV08 Multiple Motion System Upgrade.:
Whenever I need toothed idlers or gears I choose @droftarts 's openScad pulley library. (don't have the actual link RN)
Thank you for you custom! https://www.thingiverse.com/thing:16627
@dwuk said in Sovol SV08 Multiple Motion System Upgrade.:
I am embarking on a fairly complicated re-engineering of an SOVOL SV08
As a fellow SV08 owner, I look forward to updates on your project. I haven't done much with mine, apart from update it to mainline Klipper and replace the hotend with the newer version. It prints well, though Klipper feels rather alien to me. I plan to make some panels for it so it can print ABS/ASA soon, and convert it to Duet later, but I need at least one printer that's not in pieces, so I need to finish other projects first! I may do one of the toolchanger mods on it, initially just to be able to change out the toolhead for other hot end and extruder combinations.
Ian
-
@o_lampe Thanks - will try and place motor as far over. Have ordered a Nema14 and Nema 8 and will see which ones works best. Can you explain a bit more about the excenter bearings - do you have any links - have tried a few searches and can't quite work out what you are referring to.
-
Duet hardware order now in - went for the following from Uni3dverse who were the only uk reseller I could find that stocked everything I wanted for phase 1.
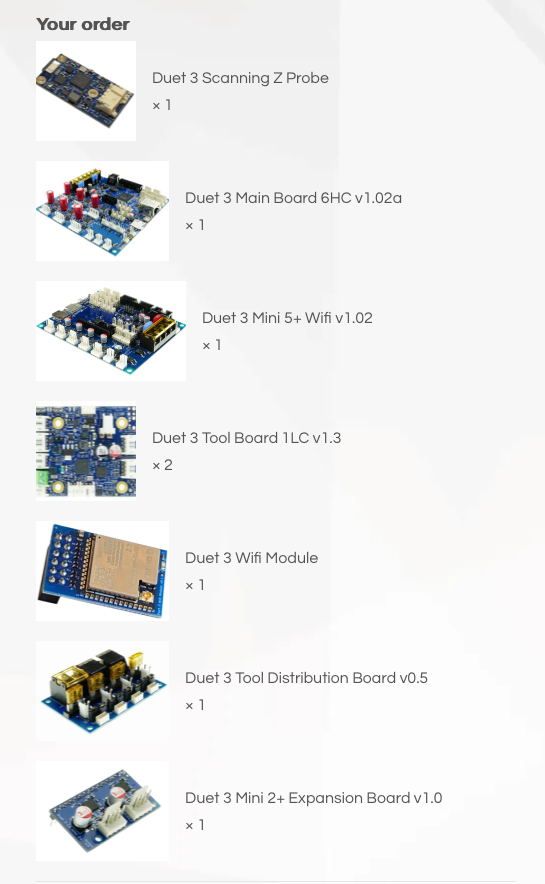
Quite a lot more expensive than the whole Sovol printer - but Duet/Reprap seems to be the only way to go at the moment for multi axis / multi motion systems.
-
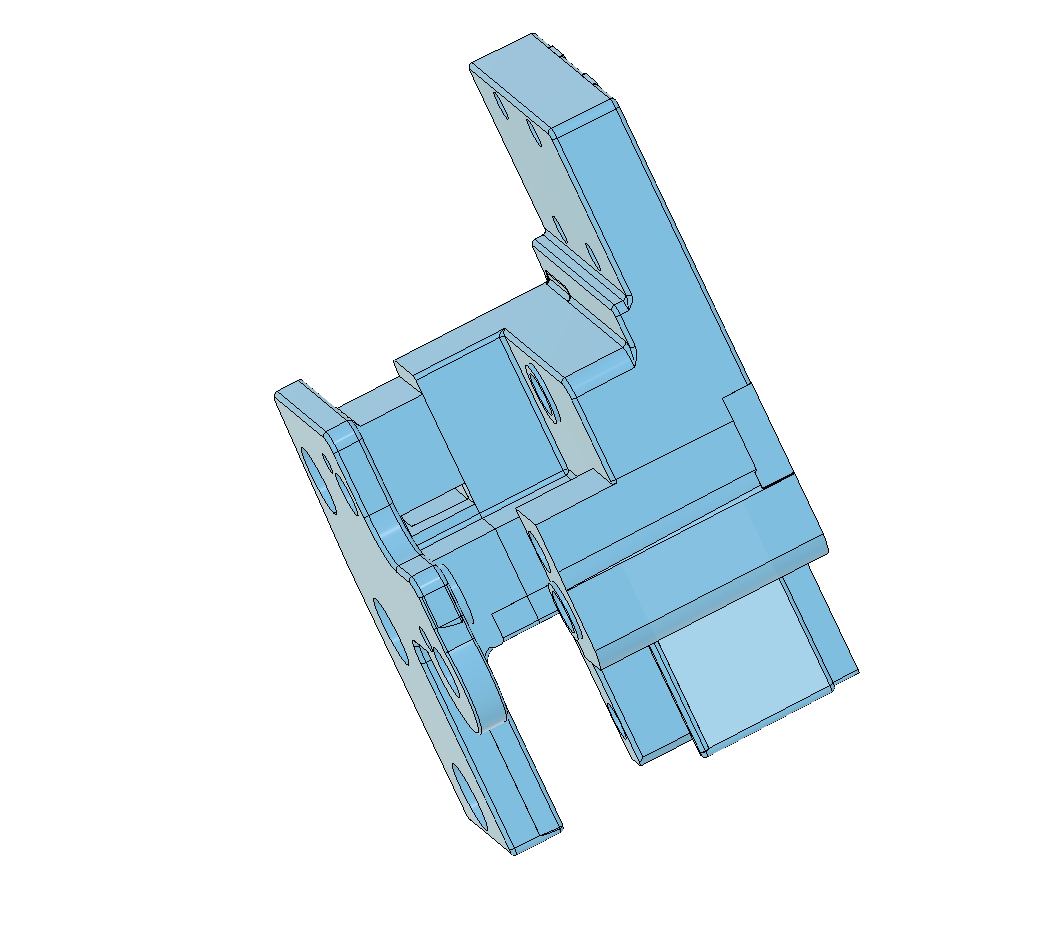
@dwuk Modelling for first re-modelled part now complete - existing gantry move of cogged pulley, plus making space for extra belts. - ready to test print tomorrow.
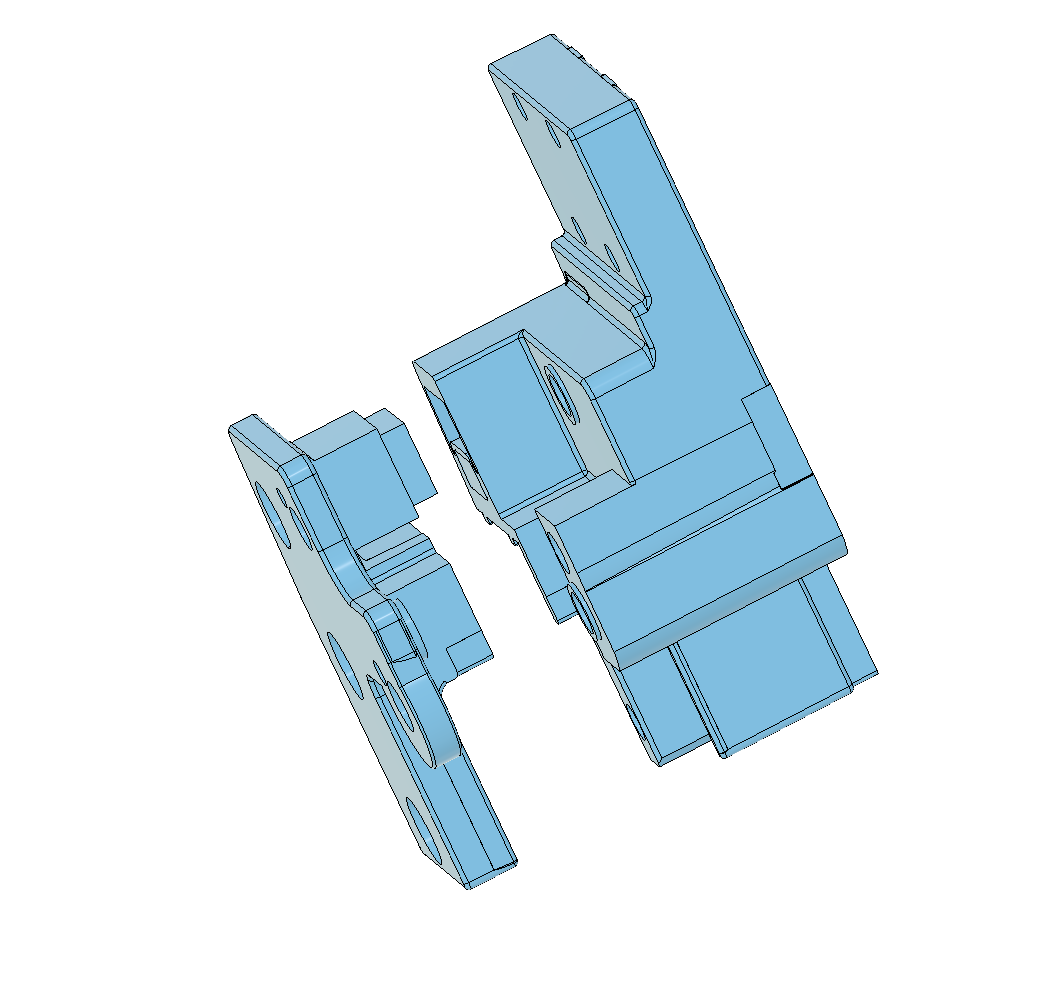
Split part into two for printing - as existing part injection moulded.
-
@dwuk said in Sovol SV08 Multiple Motion System Upgrade.:
about the excenter bearings
They aren't available off the shelf, you just have to use regular bearings and make an offcenter shaft for it.
When the shaft rotates (max 180°) , the bearings translate the offset to the housing where they are pressed in.
That's a much easier task than to overcome the stiktion of linear bearings.I have a vision of a planetary gear with three planets and a rotating orbit. This would give you a compact, yet powerful setup with a NEMA14 pancake stepper (they often come with a pinion, like the orbiter motors)
-
New parts progressing - original gantry pulley repositioning done.
-
@dwuk Designs for all parts on right hand side now completed - and printing underway. Left hand side fairly easy to derive as is mostly a mirror copy - with some height changes.
Biggest issue is losing about 25mm build volume at front due to idler and about 15mm at the back. Will need to address these two issues at some point.
Also had to remove the tensioner spring part to save a bit of space - so will need to so how well the tensioning works with just the side bolts.
-
@dwuk Equal belt tension is a critical part for a CoreXY. I hope you are still able to adjust all belts individually.
-
@o_lampe thanks. Yes tensioning will still be possible. In the factory design there are bolts that pull against springs to adjust the tension from the back, which are then locked off from the side.
I've removed the bolts and springs for space reasons - will try to add them back in - but probably coming in from the front.
All three pulleys at the front still have about 10mm of independent movement.
I think I will also try removing most of the lost build area too by repositioning the pulleys before I go much further.
-
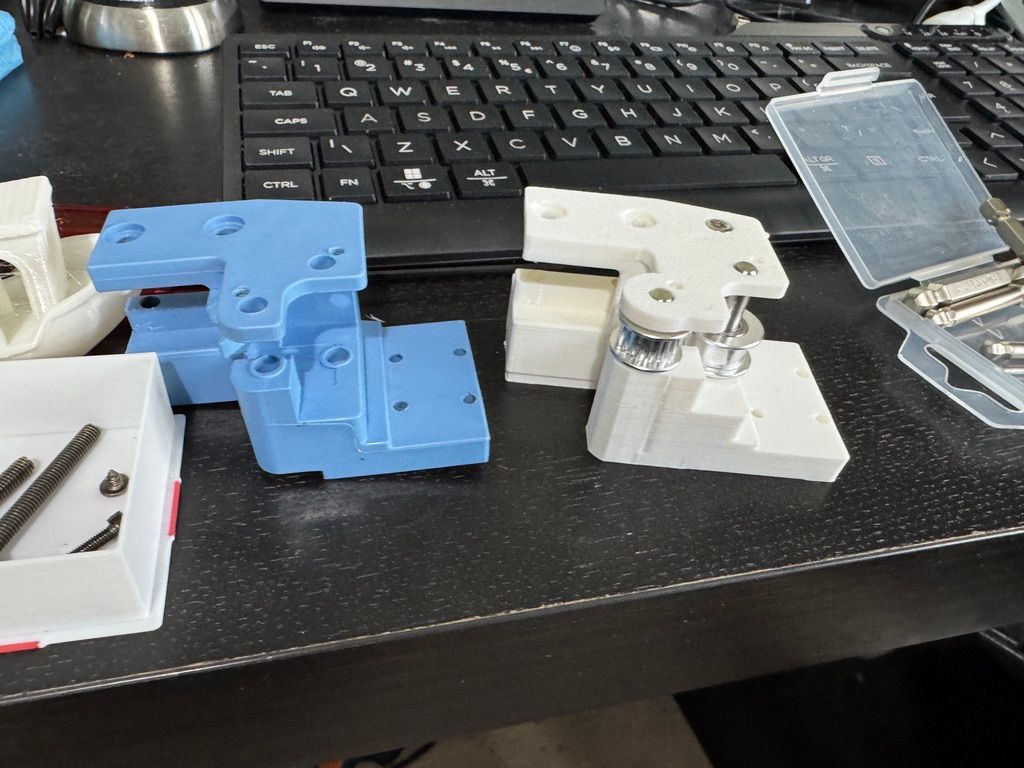
@dwuk Reworked the design of the right hand parts and belt paths - to make to routing more compact - so a lot less build plate now lost.
These screenshots show the factory single gantry front and rear part on the left - with the new double gantry parts on the right.
Improved more compact belt routing on right hand side
-
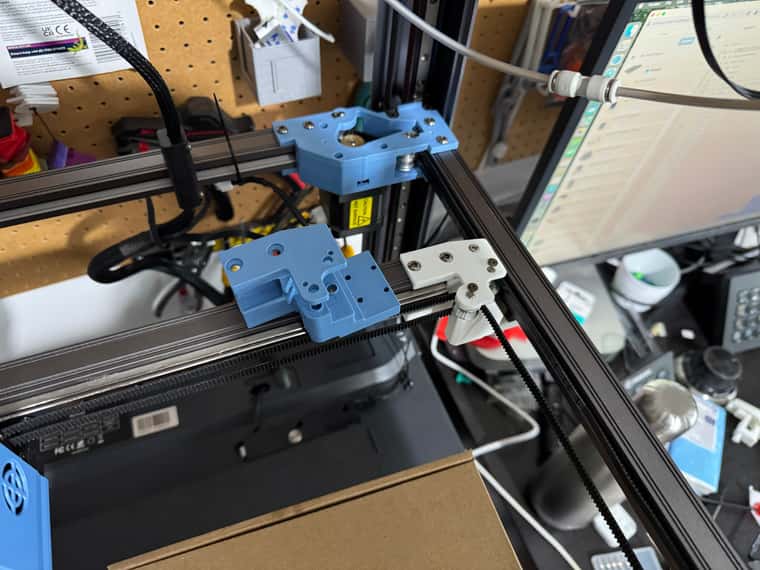
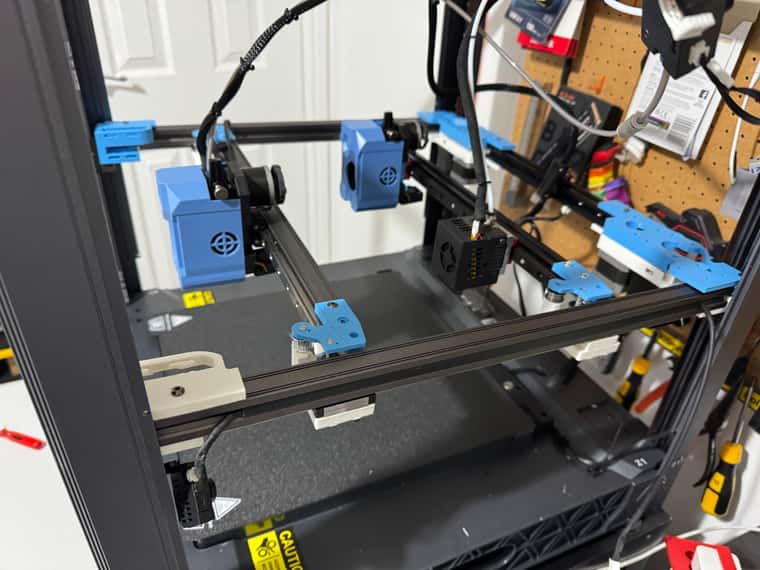
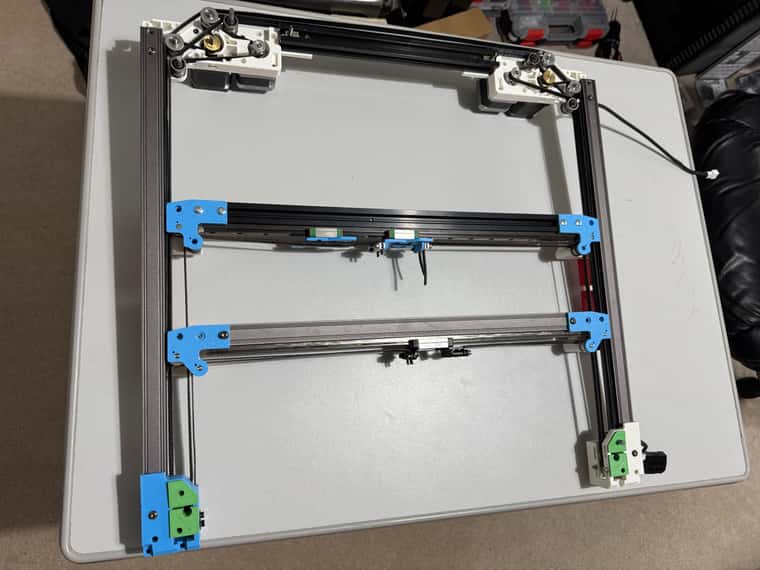
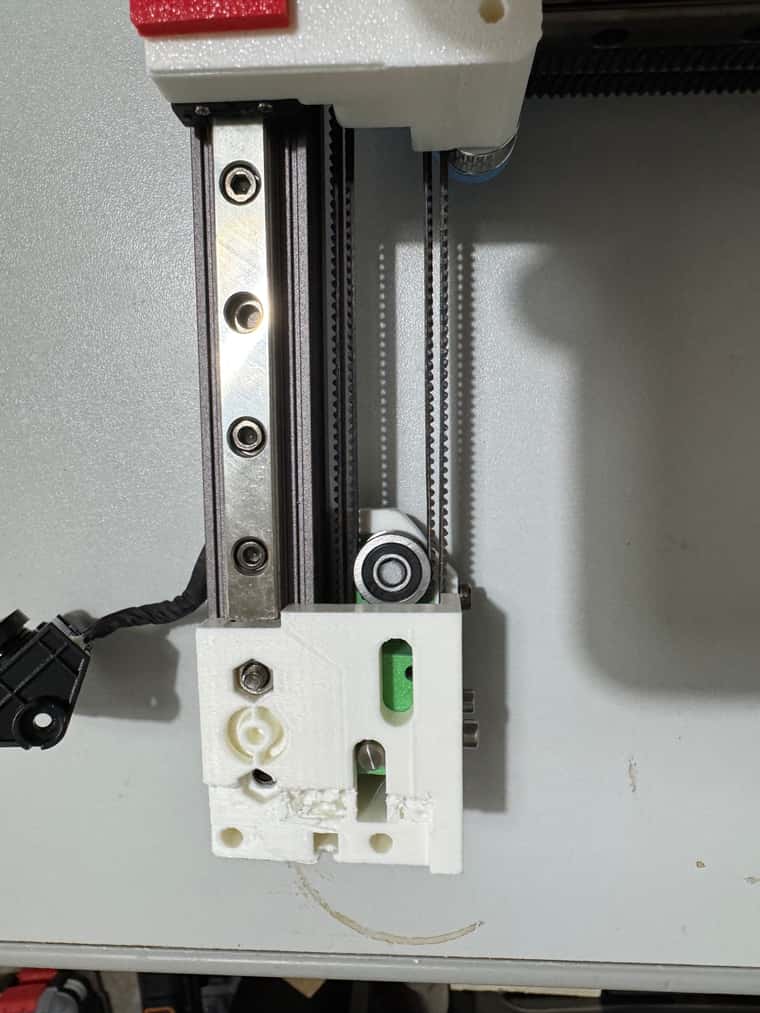
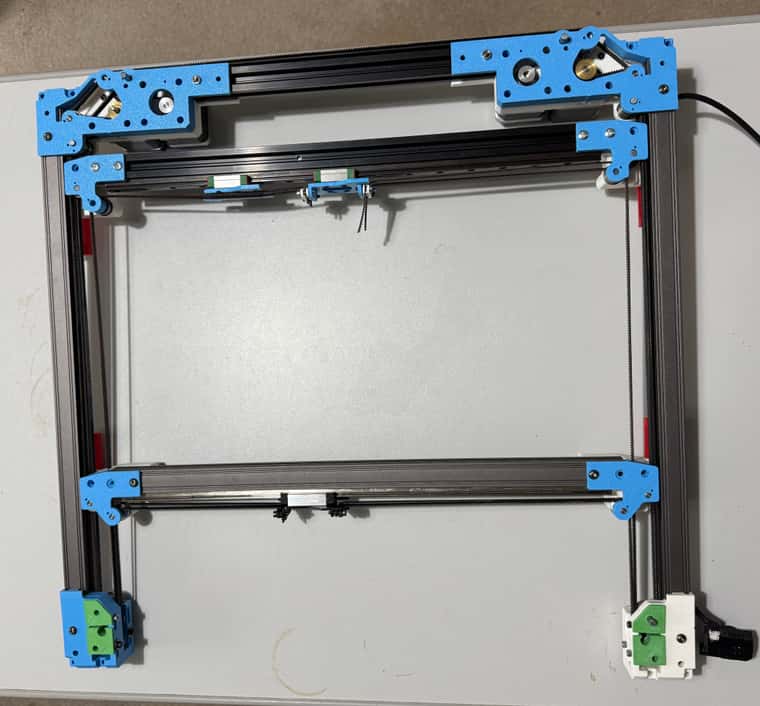
Still waiting for a few parts - but basic Phase1 structure now complete - just needs to be belted up.
Next step if to belt up both gantries and try running the original front gantry using the existing Klipper board just to see if it still works with the new belt routing and the 2nd gantry in the back.
Still awaiting Mini 5 Duet Board delivery - but rest of boards arrived ok.
Have used smaller New
2nd extruder on back gantry just there for illustration purposes of size target - it is a Bowden extruder from the WeedoX40 donor machine.
-
@dwuk Having a bowden extruder in the mix makes sense if you want to print infill_every_nth_layer with a bigger nozzle.
-
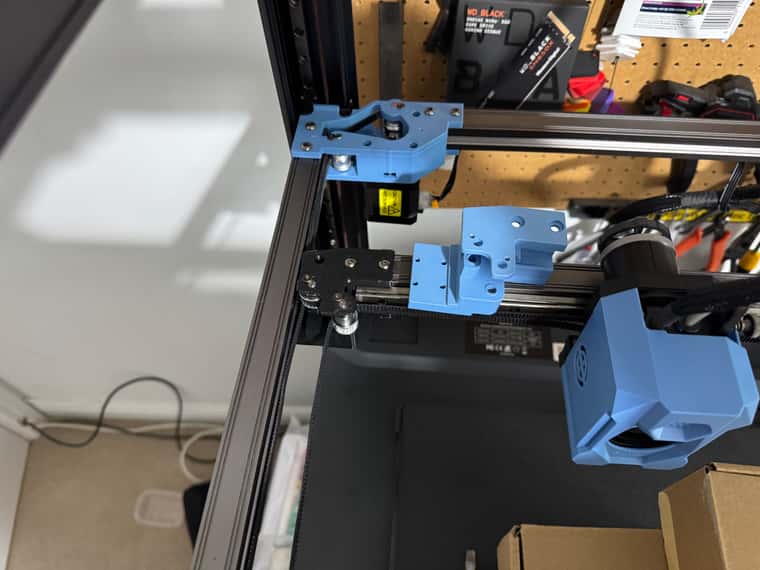
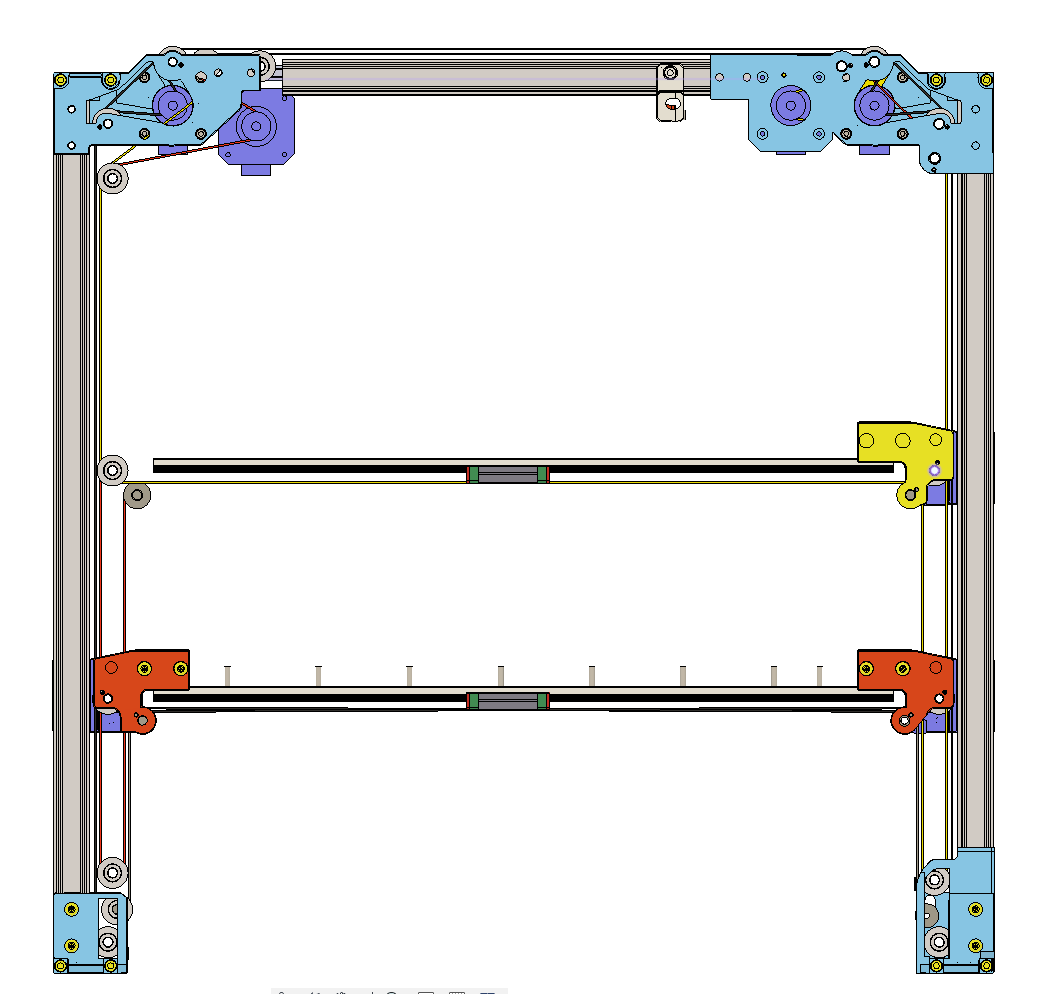
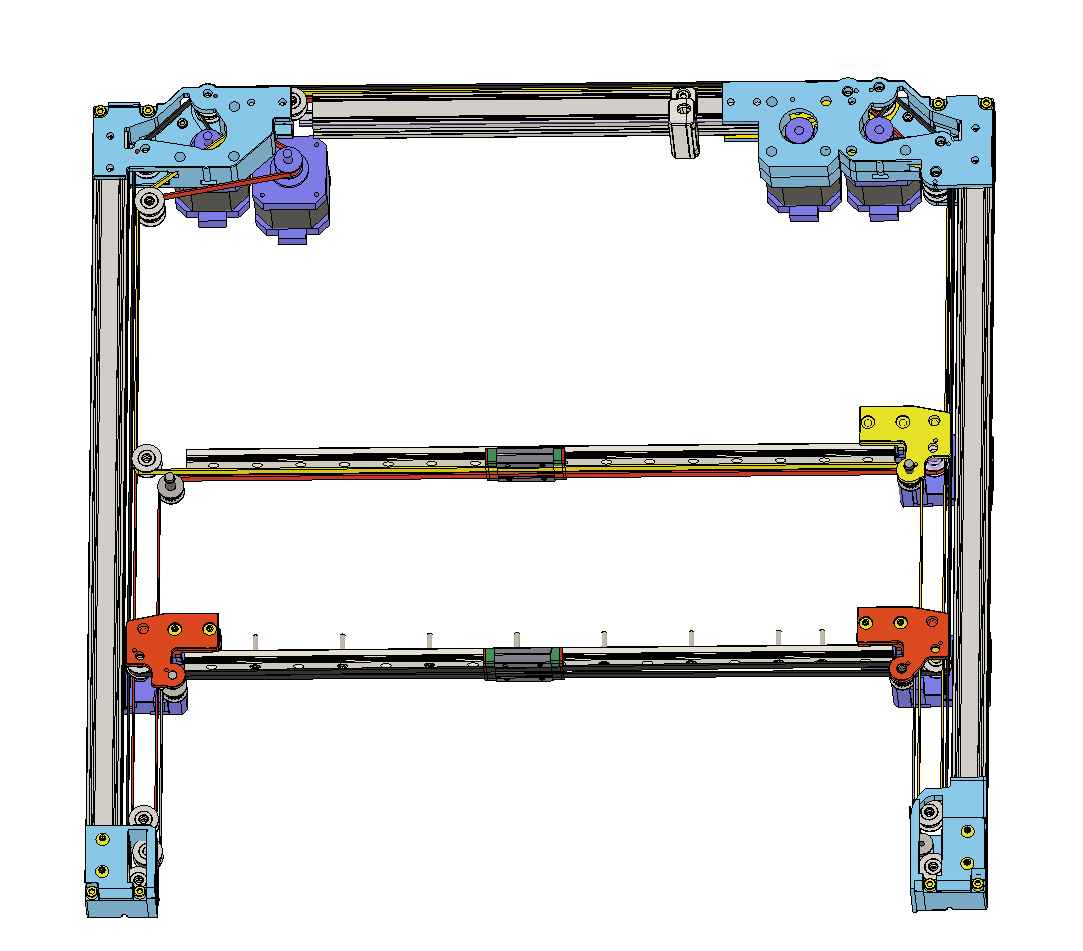
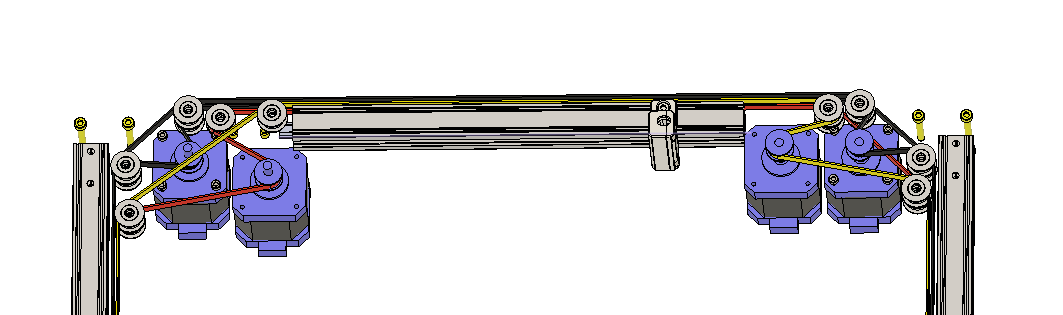
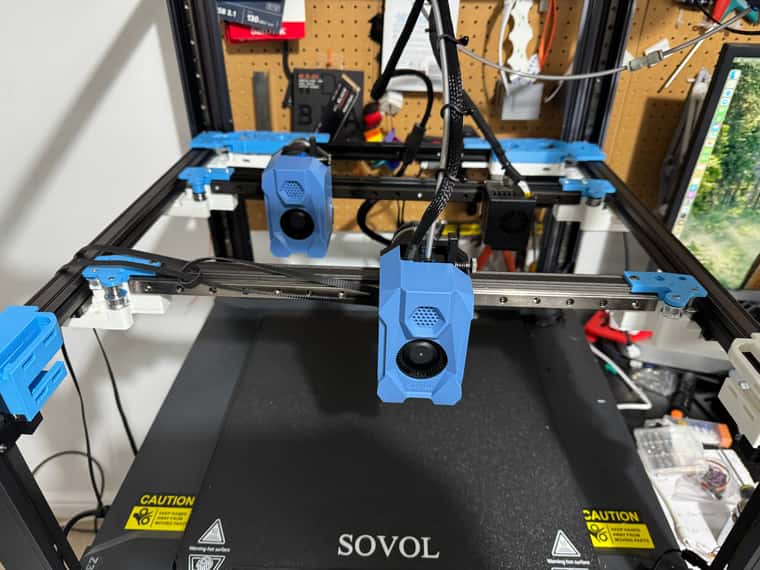
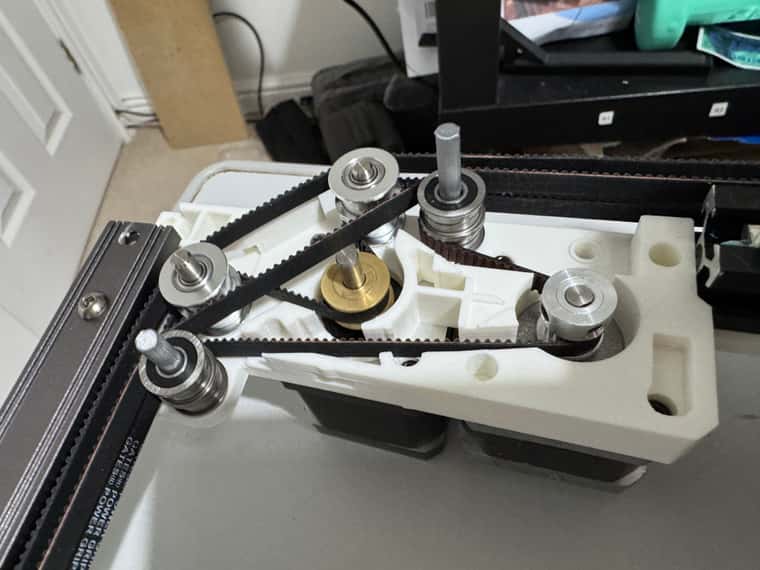
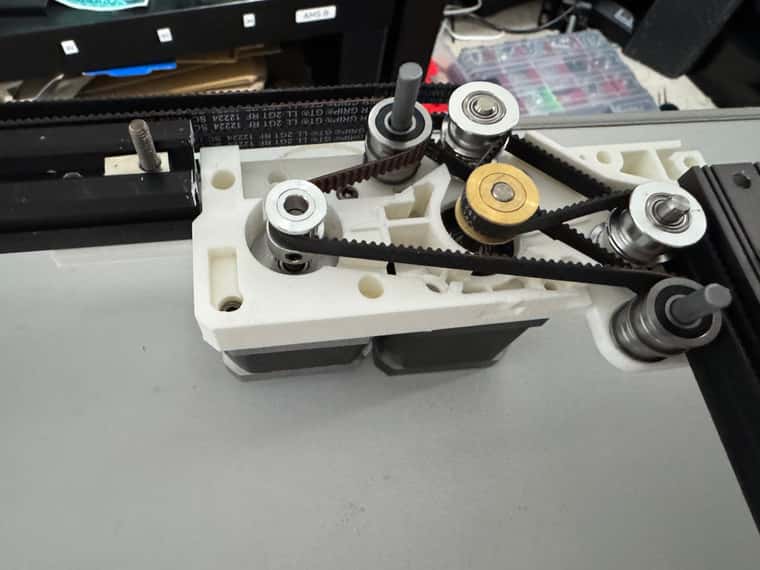
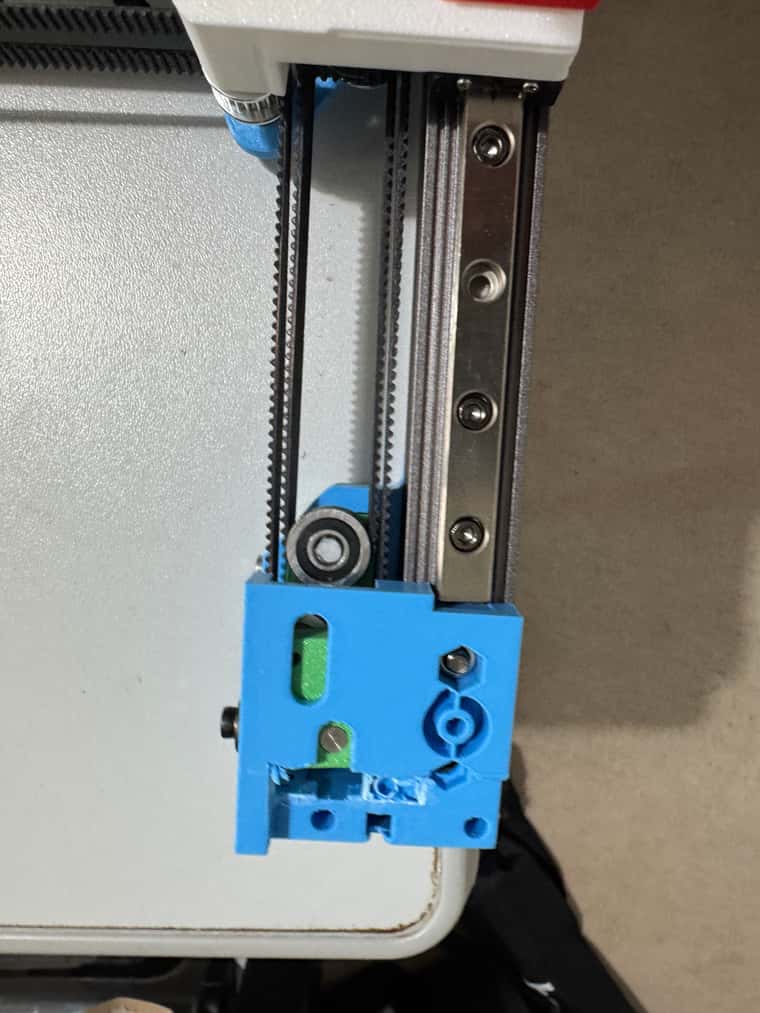
All belted up.
Short a few parts before I can do a proper test - most important of which is the linear rail carriages for the 2nd gantry, plus some idler posts.Some belts quite close to each other - will try both gantries out next - will have to swap the carriages.
Rear left
Rear right
Front left
Front right
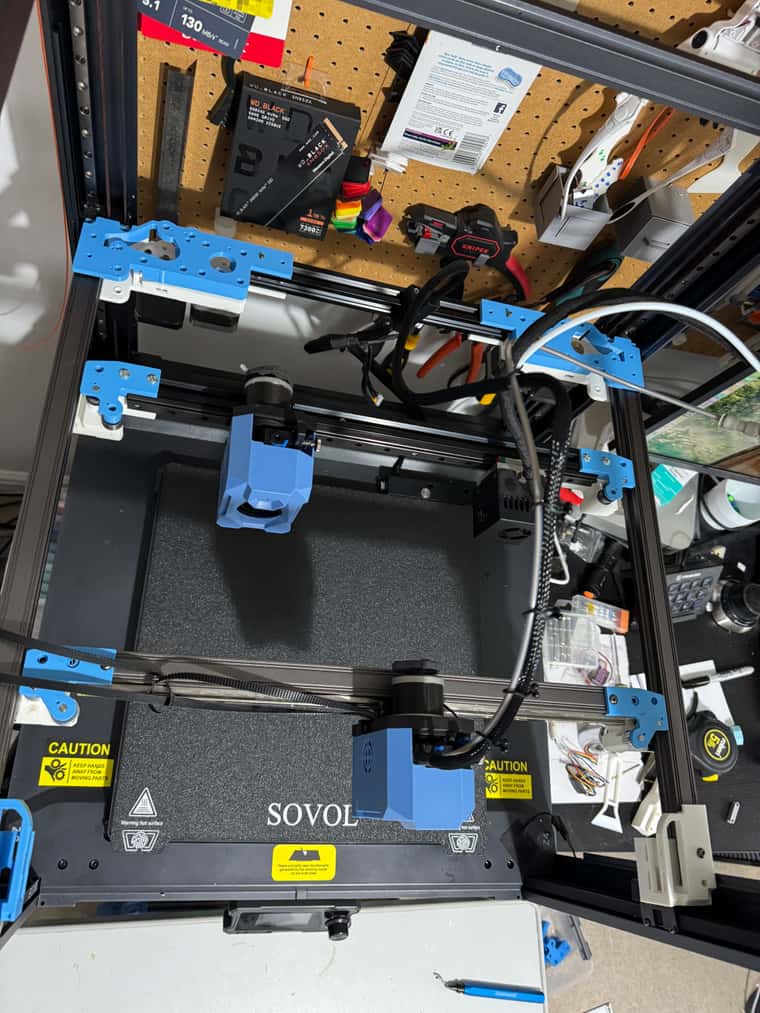
Top with rear top halves on
-
@dwuk really enjoying following along with this build. Good to see the multiple motions systems code getting a chance to be used on a two head toolchanger!
-
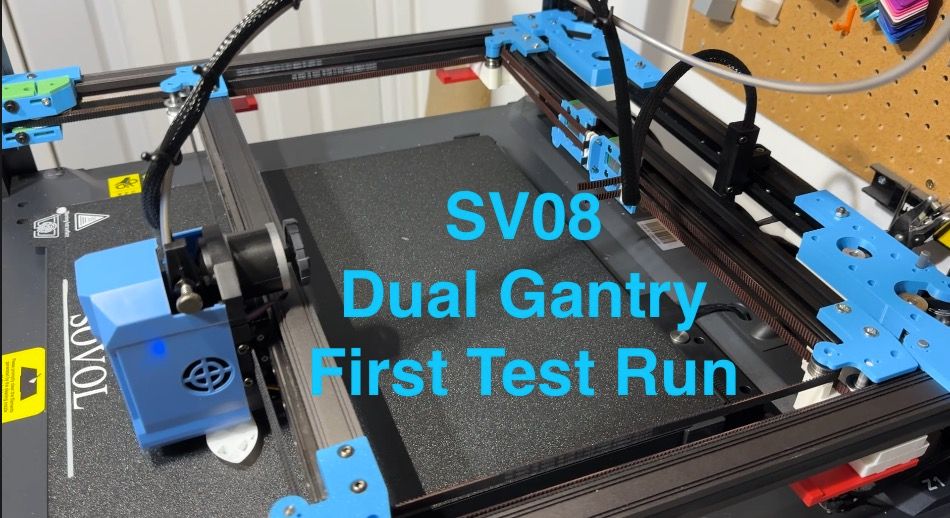
First test of the mechanics - to make sure I haven't messed up Gantry1.
Worked surprisingly well on existing Klipper board - see short video demo.
https://youtu.be/3d6z5srohSQ
Can't yet get gantry 2 to work - due to lack of linear rail carriages, plus motors are probably not powerful enough - as for first try they didn't move.
Will try Swapping the motors around before upgrading.
Set smaller motors at 0.85a (the rating printed on them) - which didn't work.
Update - rear gantry moves ok with original sovol motors at both 0.85a and 1.5a (even with 3d printed carriages).
-
Managed to get 2nd gantry working.
Had a lot of trouble with Motors - the ones I saved from a WeedoX40 wouldn't work.
Eventually I discovered that they have different pin connections to Sovol motors - with have the coils connected on pins 1+4 and 3+6. My motors were 1+3 and 4+6.
So found some other motors - from my MPCNC - which are more powerful - 1.7a - and they eventually worked.
Then had a lot of trouble withy homing and setting values for TMC drivers - will probably switch to end stops for the final build - but eventually got it working.
Then next problem was prints keep losing position - eventually worked it out that I was moving too fast for the MPCNC motors - F36000 was too fast for them - so slowed down to 18000 (300mm/s). And that sorted out the problem.
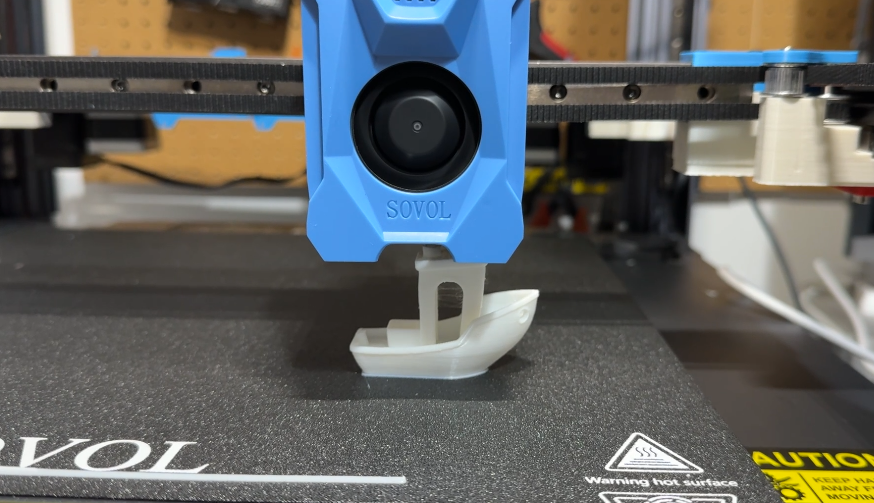
Decided to try a print - despite plastic bearing posts, and plastic linear rail carriages - ran the print at half speed - but it worked.
Did an initial print on the from gantry - then swapped over the extruder and stepper connections - and reconfigured Klipper for the different motors.
Demo of print on 2nd gantry here
https://youtu.be/7ar74Ne5ryI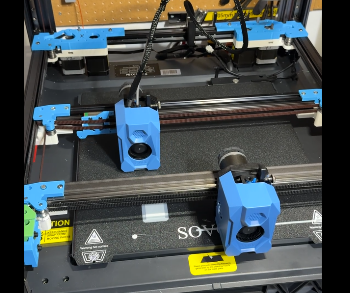
Have learn't quite a lot about configuring steppers which will come in useful once I try the Duet migration - which is probably now the next step.
-
Starting to plan Duet Conversion - initially with just one Gantry and the 6LC and a single 1LC board
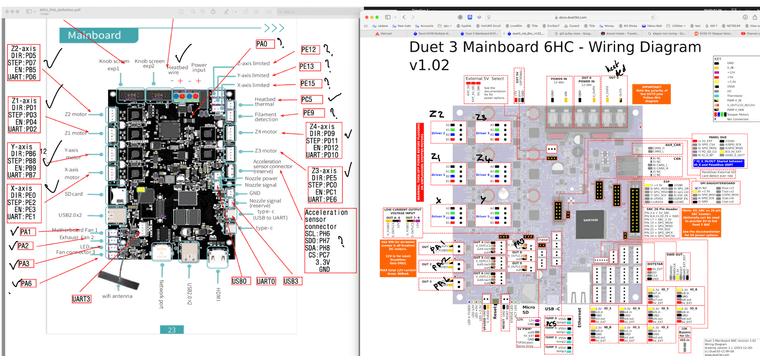
-
Added tool board wiring - looks like there are not enough connections for the 3 fans - so might have to run some extra cables from the main board. I have shown wiring for 4 fans - but I think only 3 are used.
