Thanks for your reply. I tried another (older) iiyama and that works perfectly…. Go figure. Both have Linux compatibility. The older screen is eol though and it’s not mine.
Good idea to ask iiyama. I’ll do that and see what comes up.
Thanks for your reply. I tried another (older) iiyama and that works perfectly…. Go figure. Both have Linux compatibility. The older screen is eol though and it’s not mine.
Good idea to ask iiyama. I’ll do that and see what comes up.
Hi guys, I'm struggling with a touch screen. My setup is a duet 6HC with a raspberry 4B 8Gb and that works. I like to have a large screen on it, hence a 21.5" iiyama prolite touch screen T2252MSC-B1. The good news it that the screen works fine, and the touch also works without having to install or setup anything.
But, the touch is very troublesome. It almost never does what is expected, which would be when I tap the screen behave like a left mouse click. It does move the cursor to the place where I tap, or right button click which opens the right click menu. Only once in 10 times I get the expected left mouse click. Infuriating and basically useless.
I spend hours and hours on raspberry forums to see how to disable right mouse click or otherwise modify behavior. Unfortunately I couldnt find anything useful. I'm very unfamiliar with raspberry/linux so I can only do basic stuff like modify config files.
Of course I can kick out the raspberry and replace it with with a windows PC to enjoy a proper touch screen, but that is a waste of space and money.
If somebody has a good idea how to improve this I would be very grateful!
@fcwilt Dont give the homing command when already homed. Not sure why that is a problem, but apparently it is in my case.
So I need to figure out what homing/tool/temp settings/commands are executed where: config, start, homing, cura. For me its not completely clear yet what makes the most sense.
Anyway the main problem I had is gone: I now have a more or less working pile of parts on my desk. I'm going to build the actual printer first and work from there.
thanks so far!
ah ok... I'm not trying to reinvent the wheel. Its fine if the printer homes when the print starts, however I currently see 2 problems in that case:
First: The printer only homes after the heaters have reached their setpoint. Not a real big issue but I hate unnecessary waiting ") I will have a 1000mm z-axis so homing takes a while. I guess this can be circumvented but it seems the default situation and I'm not yet comfortable enough with the whole system to alter sequences.
I will have a 1000mm z-axis so homing takes a while. I guess this can be circumvented but it seems the default situation and I'm not yet comfortable enough with the whole system to alter sequences.
Second: When the printer is already homed, for instance when starting up a second print, it will halt the print and causes the " insufficient axis homed". Of course I could restart the print and it will work but not elegant.
I could do homing in the start.g file, but how can I make it conditional? I found this but seems not conclusive. https://forum.duet3d.com/topic/17083/conditional-homing-and-z-height-fine-adjustment/20
ah ok good point, will do in the future. Below homing file, and snippet of the gcode file.
I found G28 "homing" in the gcode file, deleted that in the and now it prints. Checked cura, and saw cura placed this in the "start G-code".
Since I home on power up using G28 in the config file, I deleted this in the cura "start G-code" and all is well. Thanks for pointing me in the right direction!
; homeall.g
; called to home all axes
;
; generated by RepRapFirmware Configuration Tool v3.3.2 on Mon Aug 30 2021 18:34:21 GMT+0200 (Central European Summer Time)
G91                     ; relative positioning
G1 H2 Z5 F6000          ; lift Z relative to current position
G1 H1 X-105 Y-105 F1800 ; move quickly to X or Y endstop and stop there (first pass)
G1 H1 X-105             ; home X axis
G1 H1 Y-105             ; home Y axis
G1 X5 Y5 F6000          ; go back a few mm
G1 H1 X-105 F1800       ; move slowly to X axis endstop once more (second pass)
G1 H1 Y-105             ; then move slowly to Y axis endstop
G90                     ; absolute positioning
G1 X15 Y15 F6000        ; go to first bed probe point and home Z
G30                     ; home Z by probing the bed

; Uncomment the following lines to lift Z after probing
;G91                    ; relative positioning
;G1 Z5 F100             ; lift Z relative to current position
;G90                    ; absolute positioning
;FLAVOR:RepRap
;TIME:1291
;Filament used: 1.43758m
;Layer height: 0.1
;MINX:32.4
;MINY:32.4
;MINZ:0.3
;MAXX:67.6
;MAXY:67.6
;MAXZ:20
;Generated with Cura_SteamEngine 4.10.0
T0
M104 S200
M109 S200
M82 ;absolute extrusion mode
;G28 ;Home
G1 Z15.0 F6000 ;Move the platform down 15mm
;Prime the extruder
G92 E0
G1 F200 E3
G92 E0
M83 ;relative extrusion mode
G1 F1500 E-6.5
;LAYER_COUNT:198
;LAYER:0
M107
G0 F3600 X34.82 Y34.439 Z0.3
;TYPE:SKIRT
G1 F1500 E6.5
G1 F1800 X35.417 Y33.937 E0.07783
G1 X36.062 Y33.5 E0.07774
G1 X36.748 Y33.131 E0.07772
G1 X37.469 Y32.834 E0.07781
G1 X38.217 Y32.612 E0.07785
G1 X38.983 Y32.468 E0.07777
G1 X40 Y32.4 E0.1017
G1 X60 Y32.4 E1.99561
G1 X60.778 Y32.44 E0.07773
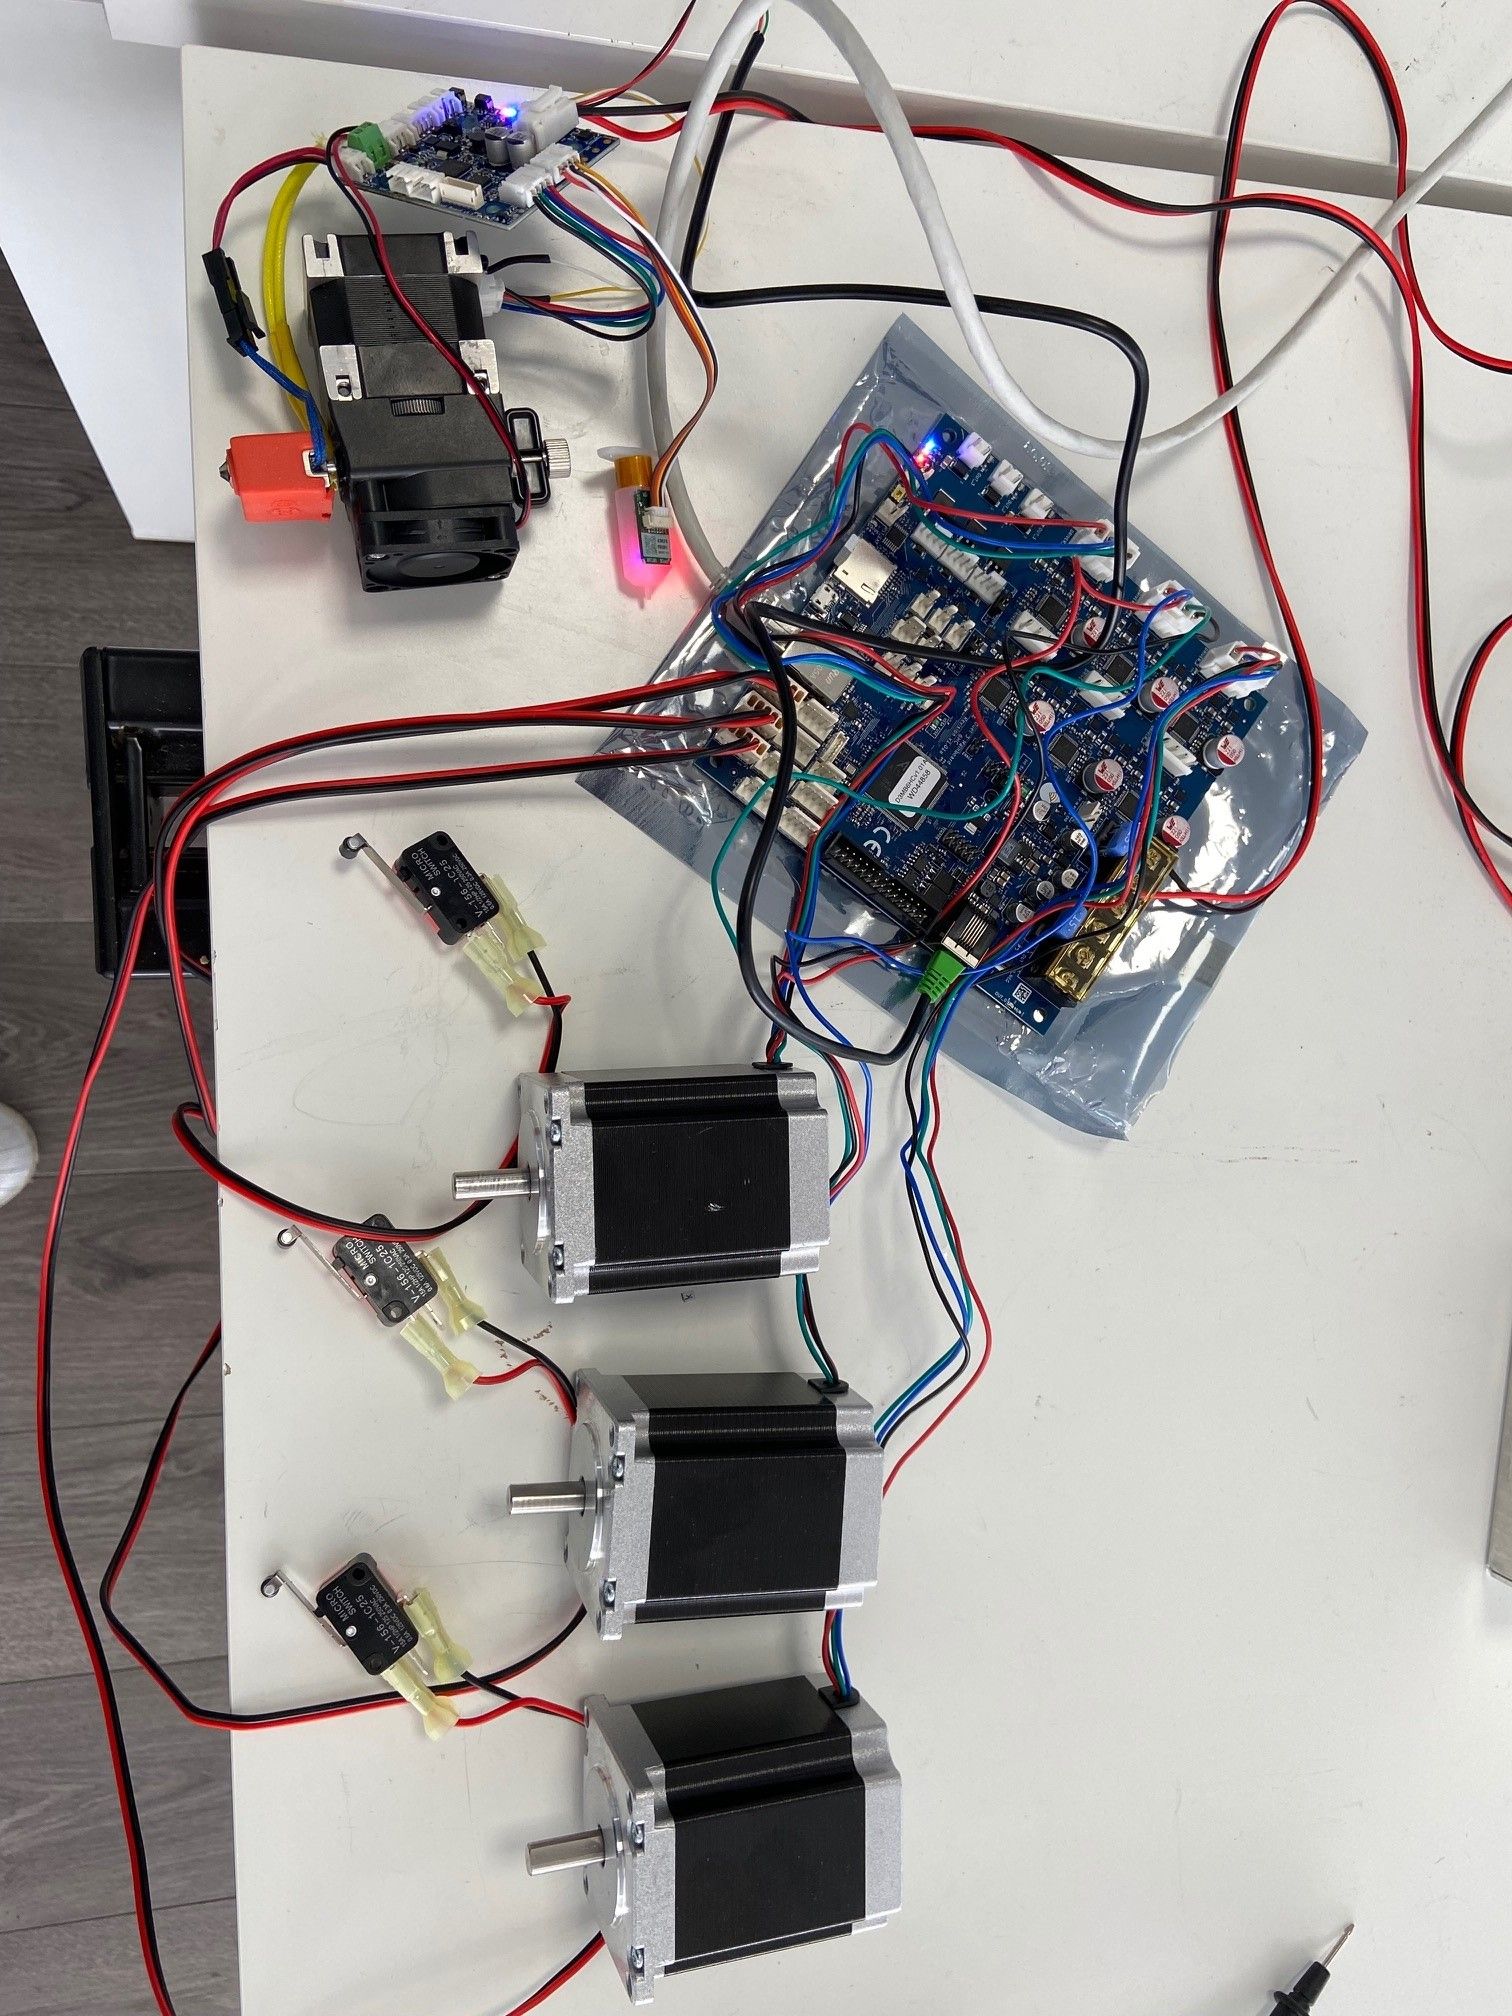
Hi guys, I'm a new user of the duet platform. Today I wired everything up. My configuration: standalone duet 3 6HC, 1x tool board directly wired to mainboard, hemera&volcano printhead and corexy setup. Managed to connect everything, connect to LAN, startup DWC, update firmware and setup the basics using the config tool. I can move and home the axis, play with the fan, extruder and heater. Also use cura with plugin to make a gcode file and load that to DWC and start the print. Since the printer is not build yet I have the electronics laid out on the table.
Unfortunately, when start printing within seconds the error "insufficient axis homed" pops up and when checking, indeed the previous homed axis arent anymore.
Help is welcome! (Config under the picture)
; Configuration file for Duet 3 (firmware version 3.3)
; executed by the firmware on start-up
;
; generated by RepRapFirmware Configuration Tool v3.3.2 on Mon Aug 30 2021 18:34:21 GMT+0200 (Central European Summer Time)
; General preferences
G90 ; send absolute coordinates...
M83 ; ...but relative extruder moves
M550 P"My Sculptura" ; set printer name
M669 K1 ; select CoreXY mode
; Wait a moment for the CAN expansion boards to start
G4 S2
; Network
M552 P0.0.0.0 S1 ; enable network and acquire dynamic address via DHCP
M586 P0 S1 ; enable HTTP
M586 P1 S0 ; disable FTP
M586 P2 S0 ; disable Telnet
; Drives
M569 P0.0 S1 ; physical drive 0.0 goes forwards
M569 P0.1 S1 ; physical drive 0.1 goes forwards
M569 P0.2 S1 ; physical drive 0.2 goes forwards
M569 P121.0 S1 ; physical drive 121.0 goes forwards
M584 X0.0 Y0.1 Z0.2 E121.0 ; set drive mapping
M350 X16 Y16 Z16 E16 I1 ; configure microstepping with interpolation
M92 X80.00 Y80.00 Z400.00 E420.00 ; set steps per mm
M566 X900.00 Y900.00 Z60.00 E120.00 ; set maximum instantaneous speed changes (mm/min)
M203 X6000.00 Y6000.00 Z180.00 E1200.00 ; set maximum speeds (mm/min)
M201 X500.00 Y500.00 Z20.00 E250.00 ; set accelerations (mm/s^2)
M906 X800 Y800 Z800 E800 I30 ; set motor currents (mA) and motor idle factor in per cent
M84 S30 ; Set idle timeout
; Axis Limits
M208 X0 Y0 Z0 S1 ; set axis minima
M208 X100 Y100 Z100 S0 ; set axis maxima
; Endstops
M574 X1 S1 P"io0.in" ; configure active-high endstop for low end on X via pin io0.in
M574 Y1 S1 P"io1.in" ; configure active-high endstop for low end on Y via pin io1.in
M574 Z1 S2 ; configure Z-probe endstop for low end on Z
; Z-Probe
M950 S0 C"121.io0.out" ; create servo pin 0 for BLTouch
M558 P9 C"^121.io0.in" H5 F120 T6000 ; set Z probe type to bltouch and the dive height + speeds
G31 P500 X0 Y0 Z3.3 ; set Z probe trigger value, offset and trigger height
M557 X15:85 Y15:85 S20 ; define mesh grid
; Heaters
M308 S0 P"temp0" Y"thermistor" T100000 B4138 ; configure sensor 0 as thermistor on pin temp0
M950 H0 C"out0" T0 ; create bed heater output on out0 and map it to sensor 0
M307 H0 B1 S1.00 ; enable bang-bang mode for the bed heater and set PWM limit
M140 H0 ; map heated bed to heater 0
M143 H0 S120 ; set temperature limit for heater 0 to 120C
M308 S1 P"121.temp0" Y"thermistor" T100000 B4138 ; configure sensor 1 as thermistor on pin 121.temp0
M950 H1 C"121.out0" T1 ; create nozzle heater output on 121.out0 and map it to sensor 1
M307 H1 B0 S1.00 ; disable bang-bang mode for heater and set PWM limit
M143 H1 S280 ; set temperature limit for heater 1 to 280C
; Fans
M950 F0 C"121.out2" Q500 ; create fan 0 on pin 121.out2 and set its frequency
M106 P0 S1 H-1 ; set fan 0 value. Thermostatic control is turned off
M950 F1 C"121.out1" Q500 ; create fan 1 on pin 121.out1 and set its frequency
M106 P1 S1 H-1 ; set fan 1 value. Thermostatic control is turned off
; Tools
M563 P0 S"Volcano " D0 H1 F0 ; define tool 0
G10 P0 X0 Y0 Z0 ; set tool 0 axis offsets
G10 P0 R0 S0 ; set initial tool 0 active and standby temperatures to 0C
; Custom settings are not defined
; Miscellaneous
T0 ; select first tool