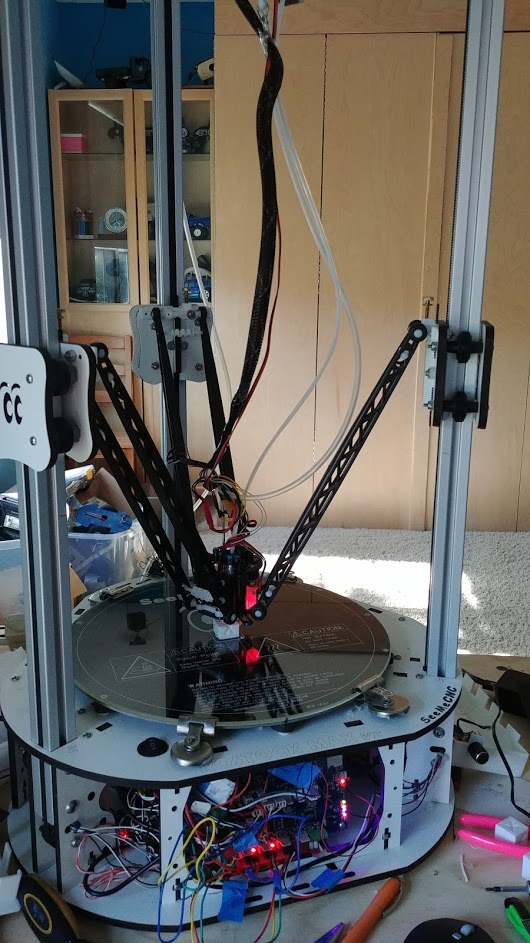
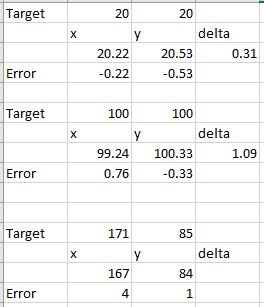
Spoke too soon sizing is still off.
Posts made by raptor
-
RE: upgraded to smart extruder ,getting parts that are off sizeposted in Tuning and tweaking
-
RE: upgraded to smart extruder ,getting parts that are off sizeposted in Tuning and tweaking
those are the first results.
i spend some time tweaking the probe sensitiviy, i noticed that the effector was tilting over on a probe, so increasing the sensitivity to 15 seems to have helped it. the parts are more in size now. i ran the 7 factor and it decided the arms were all the same length but needed to be as follows:
M665 L293.761:293.761:293.761 R136.460 H323.451 B134.0 X0.096 Y0.131 Z0.000
M666 X0.978 Y0.004 Z-0.983 A0.00 B0.00sizing seems to be improved now
-
RE: upgraded to smart extruder ,getting parts that are off sizeposted in Tuning and tweaking
@dc42 sorry I should have mentioned that the parts are too small. I'll reduce the arm length like the 7 factor did.
-
RE: upgraded to smart extruder ,getting parts that are off sizeposted in Tuning and tweaking
here is what the log said: 6 factor original steps per mm and original arm length.
this was the final override
M665 L291.500:291.500:291.500 R135.003 H323.062 B134.0 X0.285 Y0.293 Z0.000
M666 X0.941 Y0.019 Z-0.960 A0.00 B0.00please let me know how to proceed
G32
Calibrated 6 factors using 16 points, deviation before 0.117 after 0.115G32
Calibrated 6 factors using 16 points, deviation before 0.120 after 0.119G32
Calibrated 6 factors using 16 points, deviation before 0.119 after 0.117G32
Calibrated 6 factors using 16 points, deviation before 0.128 after 0.123G32
Calibrated 6 factors using 16 points, deviation before 0.127 after 0.124G32
Calibrated 6 factors using 16 points, deviation before 0.130 after 0.127G32
Calibrated 6 factors using 16 points, deviation before 0.172 after 0.120G32
Calibrated 6 factors using 16 points, deviation before 4.763 after 0.136G32
Calibrated 6 factors using 16 points, deviation before 20.182 after 0.381 -
RE: upgraded to smart extruder ,getting parts that are off sizeposted in Tuning and tweaking
@t3p3tony ooops sorry! totally missunderstood. i'll run g32 a few times and report back
-
RE: upgraded to smart extruder ,getting parts that are off sizeposted in Tuning and tweaking
sure! what data do you need? i posted the results above before i changed the arm length. here are the images


-
RE: upgraded to smart extruder ,getting parts that are off sizeposted in Tuning and tweaking
so i changed to 7 factor with 16 points.
this is what it wrote to the override file
M665 L286.069:286.069:286.069 R133.041 H321.956 B134.0 X0.220 Y0.287 Z0.000
M666 X0.965 Y-0.085 Z-0.880 A0.00 B0.00considering the arms are supposed to be 291.06 and this is what seemecnc use on their printers with duets, any ideas what could be causing this?
-
RE: upgraded to smart extruder ,getting parts that are off sizeposted in Tuning and tweaking
yes, here is what i found.
i am updating this value and running the test again.
the printer was printing within the expected size range with the Rambo board, and when i disabled the probe and probe manually with a paper the error seems to go away. the issue seems to be with the probe trigger. it is much better with the smart effector vs the bltouch i removed before.
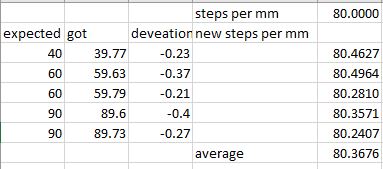
i have also run the bed probe 6 times and this is what i got:

-
RE: upgraded to smart extruder ,getting parts that are off sizeposted in Tuning and tweaking
thanks for the help.
im using the ball arms from seemecnc, they are injection molded and i just checked they are all the same length. i measured them a few different ways and got a number of 291.5mm but its hard to measure the center of a circle and i don't have calibers long enough. seemecnc think the arms are 291.06mm
here is a pic of the printer. i am not using the pcb adapters.
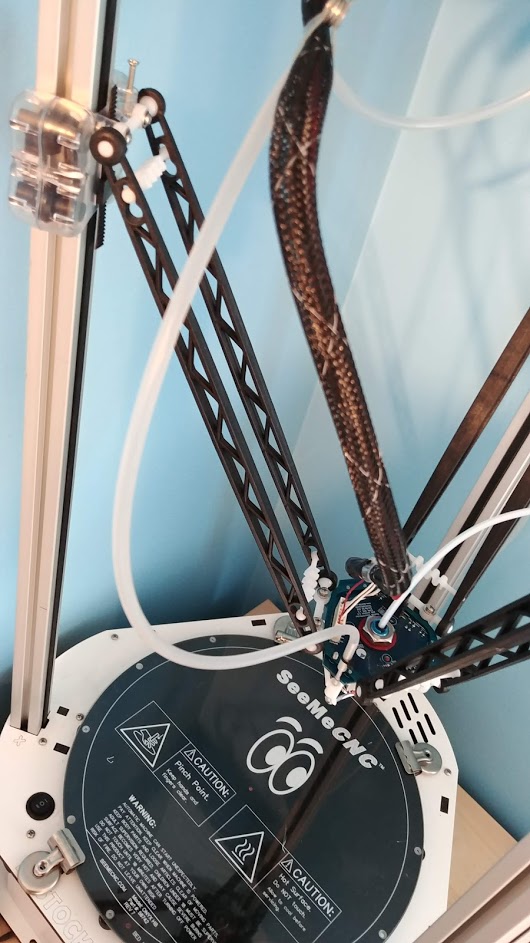
-
upgraded to smart extruder ,getting parts that are off sizeposted in Tuning and tweaking
ok do im still chasing issues with my delta and im sure its due to the auto calibration not being able or over correcting my setup.
parts are not sized correctly and if i am interpreting it correctly the printer is moving in a concave arc (higher in the middle)
the bed level compensation seems to show this too. any ideas how i fix this?
where do i start?
printer is a rostock mk2 with injection molded cheap skates, ball cup arms, smart effector, e3d volcano , maker 713 metal effector plate for smart extruder.
Firmware Name: RepRapFirmware for Duet 2 WiFi/Ethernet
Firmware Electronics: Duet WiFi 1.02 or later
Firmware Version: 2.03beta3 (2019-03-25b6)
WiFi Server Version: 1.23
Web Interface Version: 1.22.6everything is tight and seems to be working ok its printing well just not to size
thanks
Raptor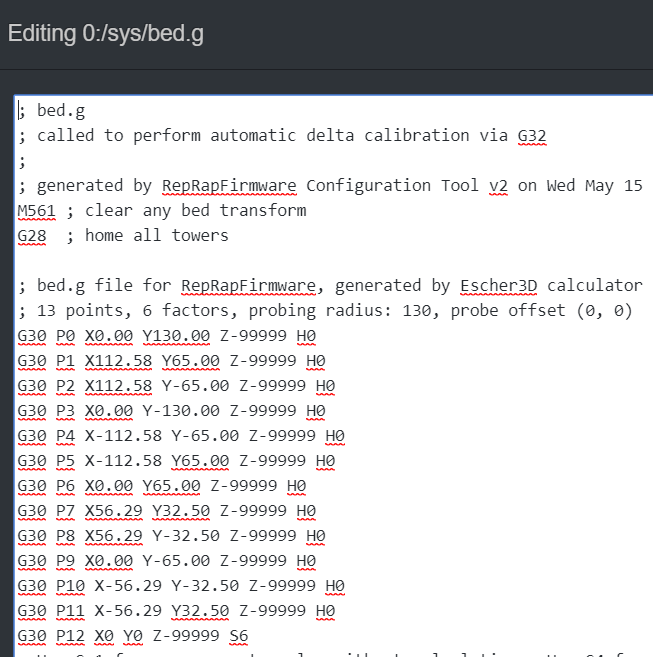



-
RE: G30 works autocalibration tilts before it gets a triggerposted in Smart effector for delta printers
that fixed it, thanks,
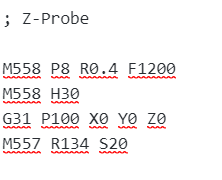
i think i copied it the first time without the last 0 on 1200 because i had upped it from 120 to 400 because i thought it was too slow!
its working great now, thanks
-
G30 works autocalibration tilts before it gets a triggerposted in Smart effector for delta printers
Hi All, figured i'd ask here before i break something (again).
so after issues with my BLTouch and getting the printer working without a probe i decided to order a smart effector. its all wired up and G30 works great, but when i try to do the delta autocalibraion, it touches the bed and starts tilting the effector before the probe triggers.
Video of the issue
https://youtu.be/SK9TI8eFZxgthe printer is a SeeMeCNC Rostock mk2 with an e3d volcano, smart effector and for now a 3d printed adapter until my aluminum one from maker 713 arrives.
what am i doing wrong?
thanks
RaptorConfig
; Configuration file for Duet WiFi (firmware version 1.21)
; executed by the firmware on start-up
;
; generated by RepRapFirmware Configuration Tool v2 on Wed May 15 2019 08:59:39 GMT-0400 (Eastern Daylight Time); General preferences
G90 ; Send absolute coordinates...
M83 ; ...but relative extruder moves
M665 R119.761 L291.06 B134 H306 ; Set delta radius, diagonal rod length, printable radius and homed height 360.677 was old h
M666 X0 Y0 Z0 ; Put your endstop adjustments here, or let auto calibration find them; Network
M550 P"Rostock mk2" ; Set machine name
M552 S1 ; Enable network
M587 S"Wifi" P"password" ; Configure access point. You can delete this line once connected
M586 P0 S1 ; Enable HTTP
M586 P1 S0 ; Disable FTP
M586 P2 S0 ; Disable Telnet; Drives
M569 P0 S1 ; Physical drive 0 goes forwards
M569 P1 S1 ; Physical drive 1 goes forwards
M569 P2 S1 ; Physical drive 2 goes forwards
M569 P3 S1 ; Physical drive 3 goes forwards
M350 X16 Y16 Z16 E16 I1 ; Configure microstepping with interpolation
M92 X80.00 Y80.00 Z80.00 E92.40 ; Set steps per mm
M566 X1200.00 Y1200.00 Z1200.00 E1200.00 ; Set maximum instantaneous speed changes (mm/min)
M203 X15000 Y15000 Z15000 E15000 ; Set maximum speeds (mm/min)
M201 X3000 Y3000 Z3000 E3000 ; Set accelerations (mm/s^2)
;M203 X18000.00 Y18000.00 Z18000.00 E1200.00 ; Set maximum speeds (mm/min)
;M201 X1000.00 Y1000.00 Z1000.00 E1000.00 ; Set accelerations (mm/s^2)
M906 X1000.00 Y1000.00 Z1000.00 E900.00 I60 ; Set motor currents (mA) and motor idle factor in per cent
M84 S30 ; Set idle timeout; Axis Limits
M208 Z0 S1 ; Set minimum Z; Endstops
M574 X2 Y2 Z2 S1 ; Set active high endstops; Z-Probe
;M307 H3 A-1 C-1 D-1 ; Disable heater on PWM channel for BLTouch
M558 P8 R0.4 F400 ; Set Z probe type to bltouch and the dive height + speeds
M558 H30 ;*** Remove this line after delta calibration has been done and new delta parameters have been saved
G31 P100 X0 Y0 Z-0.1 ; Set Z probe trigger value, offset and trigger height
;G31 P9 X18.38 Y-10.62 Z0 ; Set Z probe trigger value, offset and trigger height
M557 R134 S20 ; Define mesh grid; Heaters
M305 P0 T100000 B4138 R4700 ; Set thermistor + ADC parameters for heater 0
M143 H0 S120 ; Set temperature limit for heater 0 to 120C
M305 P1 T100000 B4138 R4700 ; Set thermistor + ADC parameters for heater 1
M143 H1 S280 ; Set temperature limit for heater 1 to 280C; Fans
M106 P0 ; Part Cooling Fan
M106 P1 T60 s0.7 H1 ; Heat sink fan
M106 P2 ; Case fan; Tools
M563 P0 D0 H1 ; Define tool 0
G10 P0 X0 Y0 Z0 ; Set tool 0 axis offsets
G10 P0 R0 S0 ; Set initial tool 0 active and standby temperatures to 0C; Automatic power saving
M911 S10 R11 P"M913 X0 Y0 G91 M83 G1 Z3 E-5 F1000" ; Set voltage thresholds and actions to run on power loss; Custom settings are not configured
; Miscellaneous
M501 ; Load saved parameters from non-volatile memory -
RE: Delta Scaling issue X printing shorter than Yposted in Tuning and tweaking
well you were spot on, removing the BLTouch and doing the manual calibration fixed it and all is well again!
thanks
-
RE: Delta Scaling issue X printing shorter than Yposted in Tuning and tweaking
thanks, i had a look at that and it was much more expensive than the smart effector and an adapter plate:
https://713maker.com/rostock/duet-smart-effector-adaptorso i have gone down that route.
appreciate all your hard work!
-
RE: Delta Scaling issue X printing shorter than Yposted in Tuning and tweaking
Thanks for your reply. ill order up a smart effector and see what happens from there.
-
Delta Scaling issue X printing shorter than Yposted in Tuning and tweaking
Hi,
i just upgraded my seemecnc rostock mk2 to a Duet 2 Wifi. it was printing ok before the upgrade.
the issue i am seeing is the x direction of my prints are undersized and the y and z are spot on.
example: if i print a 100mm square its 99 on the x and 100 on the y.
the error seems to grow with the length of the object so in the case of a 170mm long part it is short by about 3mm
i have retensioned the belts with a chromatic tuner, checked nothing is loose, and run the delta calibration many times.
I am running firmware 2.03b, i had the same issue on 2.02.
the printer has the seemecnc ball arm ends, an aluminium effector from maker 713, an original bltouch as a sensor and the original lasercut cheapskates.
i have tried changing the firmware, and starting from scratch with the config. at this point i am out of ideas.
does anyone have any suggestions?
thanks
Raptor[0_1558013039133_duet cofig.zip](Uploading 100%) 3_1558013068828_heightmap.csv 2_1558013068827_config-override.g 1_1558013068827_config.g 0_1558013068827_bed.g