Duet3D Logo Duet3D
    • Tags
    • Documentation
    • Order
    • Register
    • Login
    1. Home
    2. Ripeds_O3P
    • Profile
    • Following 0
    • Followers 0
    • Topics 5
    • Posts 14
    • Best 1
    • Controversial 0
    • Groups 0

    Ripeds_O3P

    @Ripeds_O3P

    1
    Reputation
    1
    Profile views
    14
    Posts
    0
    Followers
    0
    Following
    Joined Last Online

    Ripeds_O3P Unfollow Follow

    Best posts made by Ripeds_O3P

    • RE: Help with Temperature Sensor Issues

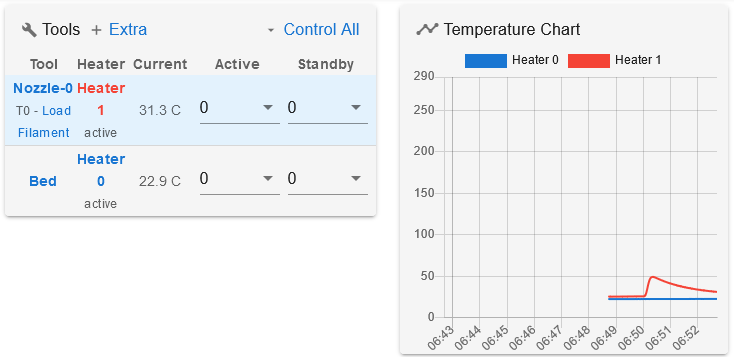
      Fixed!
      temp sensor fixed.png

      Turns out the wrong wires were plugged into the terminal (wasn't for a PT100 but a different component). sigh

      I lost a few labels to my wires when pushing them through the designated holes in the printer (for cable management). Out to the Duet board. Add in the fact that it has been a few weeks since I last tinkered with the printer and that's the recipe for this mistake.

      posted in General Discussion
      Ripeds_O3Pundefined
      Ripeds_O3P

    Latest posts made by Ripeds_O3P

    • RE: Bondtech DDG Extruder Settings (Ultimaker 2+) for Duet?

      @deckingman Bud, you're not wrong. I know what you're talking about from using my old bedslingers.

      But at the sametime, I think having missing values on an extruder I have zero experience with is a symptom for my problems. And that Bondtech guide while it is in english, is difficult for me to confirm if I can apply it to Duet.

      Like I can't be sure LONG_MOVE_SPEED (UM2 firmware value) is the same as Max Speed (Duet firmware). Something could be lost in translation of different styles of text for what may or may not be the same values.

      Which is why I keep surfing google for DDG values and bombarding different forums that I think might be able to answer this question: what am I missing for Max. Speed Change (mm/s), Max Speed (mm/s), Acceleration (mm/s2), and Motor Current (mA)?

      I need a baseline. With those values, I could then approach it different. If it's printing with the right numbers and it's still making noise, I can then ask new questions. I could watch it print and if it does so without issue (aside from sometimes clicking), I'd have a baseline where it's like "ok, so this is what it sounds like normally when it prints." I don't have that.

      And Bondtech makes it a point in their guide that certain values need to be changed (not just e-steps).

      Still, I welcome all advice. So thank you. This long rant was more for...well hope against hope some random Duet user who also has a DDG or a Bondtech dev that has a Duet board in his UM2 stumbles on this thread. To give some insight on this. I guess I could try Bondtech support next.

      And maybe going to youtube is an option to listen to someone's DDG on a regular Ultimaker for me to calibrate my inner baseline to how the extruder should sound for my machine. But right now I feel defeated. I haven't had much success with my experiments.

      I'll dig back into this on Monday.
      posted in Tuning and tweaking
      Ripeds_O3Pundefined
      Ripeds_O3P
    • Bondtech DDG Extruder Settings (Ultimaker 2+) for Duet?

      I'm getting a "click click click" noise whenever my extruder is going. It is usually between 3-8 seconds, but fact remains it's there. With my last attempt, I tried to make a crude copy of my understanding of what Bondtech changes for settings on the Ultimaker 2 firmware and what the defaults are for what they don't change.

      ; This is a rough example of the Ultimaker firmware settings, trimmed down
      
      default_motor_current = ("E" 1250)
      
      class MoveMaterialProcedure (Procedure):
      _LONG_MOVE_ACCELERATION = 10 # mm/s^2
      _LONG_MOVE_SPEED = 70 mm/s
      _LONG_MOVE_POWER_PERCENTAGE = 66 # 66%
      
      def_init_(speed = 25.0, length = 1.0)


      How I interpreted that (which I probably got something wrong):
      DDG values maybe.png

      I originally used the 1250mA. It's too much. Sounds like a vacuum cleaner. But the clicking noise is sometimes spaced out more and sometimes closer together. I've also tried 800mA, which sounds fine but I still get that "clicking" noise every few seconds or so. I haven't yet tried 825mA, but I will with the next try. I just don't know if any of what I have here is correct for these settings (other then the default e-steps and microstepping for that).

      I also recalculated the e-steps on my own by extruding a 100mm (actually extruded 97.3) of filament getting 251.25. Which I've been using for most of my tests. The screenshot is more for reference of my interpretation of Bondtech's guide (https://support.bondtech.se/Document/sjUxItjSPQiKm1NH/Bondtech-DDG-Ultimaker-V2.0.pdf)

      Long story short, I'm hoping for some insight. I know the e-step settings for this particular extruder is 311 as a default. But I'd like to know the values other users with this extruder put for Max. Speed Change (mm/s), Max. Speed (mm/s), Acceleration (mm/s²), and Motor Current (mA). Or if you know what else might be causing it and have a fix for it, I'd be interested in hearing it

      posted in Tuning and tweaking
      Ripeds_O3Pundefined
      Ripeds_O3P
    • RE: Extrusion Options Extrude/Retract Greyed Out - Please Help

      @phaedrux That fixed it! Thanks! ^.^

      ; Tools
      M563 P0 S"Nozzle-0" D0 H1 F0                     ; define tool 0
      G10 P0 X0 Y0 Z0                                  ; set tool 0 axis offsets
      G10 P0 R0 S0                                     ; set initial tool 0 active and standby temperatures to 0C
      T0						 ; ensures a tool is selected upon start up (allowing extrusion/retraction)
      

      Added a note in the config to remind myself what it does.

      posted in Duet Web Control
      Ripeds_O3Pundefined
      Ripeds_O3P
    • Extrusion Options Extrude/Retract Greyed Out - Please Help

      So I made the jump to DWC 3.4.0. Updated the firmware to the latest version. Updated the files as well.

      Auto-tuned the nozzle and bed heaters. Updated the config file with the new lines (Nozzle example: M307 H1 R3.938 K1.379:1.484 D7.52 E1.35 S1.00 B0 V24.1).

      Now the extrustion control options are greyed out (unusable) for extrude/retract when I hit 205 on the nozzle. It worked at 160 celcius on previous versions. And I'm at a loss on what the issue is.

      Did I do something wrong during the PID tuning? This is probably a dumb question, but hey, I may as well have been born yesterday on the subject of firmware. Is the target temperature meant to push it to a high temp close to the limit of the heater to get good data from the sensor back? Or is the target temp the bare minimum that allows the extruder to function while also testing the sensor?

      Or is there some other setting I messed up on? Another line of code that needs changing/defining after auto-tuning the nozzle heater?

      I've quoted my config.g file below:

      ; Configuration file for Duet WiFi (firmware version 3.3)
      ; executed by the firmware on start-up
      ;
      ; generated by RepRapFirmware Configuration Tool v3.3.10 on Tue Mar 22 2022 06:30:04 GMT-0700 (Pacific Daylight Saving Time)
      
      ; General preferences
      G90                                              ; send absolute coordinates...
      M83                                              ; ...but relative extruder moves
      M550 P""                               ; set printer name
      
      ; Network
      M551 P""                                    ; set password
      M552 S1                                          ; enable network
      M586 P0 S1                                       ; enable HTTP
      M586 P1 S0                                       ; disable FTP
      M586 P2 S0                                       ; disable Telnet
      
      ; Drives
      M569 P0 S0                                       ; physical drive 0 goes backwards
      M569 P1 S1                                       ; physical drive 1 goes forwards
      M569 P2 S0                                       ; physical drive 2 goes backwards
      M569 P3 S1                                       ; physical drive 3 goes forwards
      M584 X0 Y1 Z2 E3                                 ; set drive mapping
      M350 X16 Y16 Z16 E16 I1                          ; configure microstepping with interpolation
      M92 X80.00 Y80.00 Z400.00 E311.00                ; set steps per mm
      M566 X900.00 Y900.00 Z12.00 E120.00              ; set maximum instantaneous speed changes (mm/min)
      M203 X1080000.00 Y1080000.00 Z162000.00 E1200.00 ; set maximum speeds (mm/min)
      M201 X500.00 Y500.00 Z500.00 E250.00             ; set accelerations (mm/s^2)
      M906 X800 Y800 Z800 E800 I30                     ; set motor currents (mA) and motor idle factor in per cent
      M84 S30                                          ; Set idle timeout
      
      ; Axis Limits
      M208 X0 Y0 Z0 S1                                 ; set axis minima
      M208 X223 Y223 Z213 S0                           ; set axis maxima
      
      ; Endstops
      M574 X1 S1 P"!xstop"                             ; configure switch-type (e.g. microswitch) endstop for low end on X via pin !xstop
      M574 Y2 S1 P"!ystop"                             ; configure switch-type (e.g. microswitch) endstop for high end on Y via pin !ystop
      M574 Z2 S1 P"!zstop"                             ; configure switch-type (e.g. microswitch) endstop for high end on Z via pin !zstop
      
      ; Z-Probe
      M558 P0 H5 F120 T6000                            ; disable Z probe but set dive height, probe speed and travel speed
      M557 X15:215 Y15:195 S20                         ; define mesh grid
      
      ; Heaters
      M308 S0 P"spi.cs1" Y"rtd-max31865"                         ; configure sensor 0 as PT100 on pin spi.cs1
      M950 H0 C"bedheat" T0                                      ; create bed heater output on bedheat and map it to sensor 0
      M307 H0 R0.204 K0.220:0.000 D2.29 E1.35 S1.00 B0           ; disable bang-bang mode for the bed heater and set PWM limit
      M140 H0                                                    ; map heated bed to heater 0
      M143 H0 S120                                               ; set temperature limit for heater 0 to 120C
      M308 S1 P"spi.cs2" Y"rtd-max31865"                         ; configure sensor 1 as PT100 on pin spi.cs2
      M950 H1 C"e0heat" T1                                       ; create nozzle heater output on e0heat and map it to sensor 1
      M307 H1 R3.938 K1.379:1.484 D7.52 E1.35 S1.00 B0 V24.1     ; disable bang-bang mode for heater  and set PWM limit
      M143 H1 S290                                               ; set temperature limit for heater 1 to 290C
      
      ; Fans
      M950 F0 C"fan0" Q500                             ; create fan 0 on pin fan0 and set its frequency
      M106 P0 S1 H-1                                   ; set fan 0 value. Thermostatic control is turned off
      M950 F1 C"fan1" Q500                             ; create fan 1 on pin fan1 and set its frequency
      M106 P1 S1 H1 T45                                ; set fan 1 value. Thermostatic control is turned on
      
      ; Tools
      M563 P0 S"Nozzle-0" D0 H1 F0                     ; define tool 0
      G10 P0 X0 Y0 Z0                                  ; set tool 0 axis offsets
      G10 P0 R0 S0                                     ; set initial tool 0 active and standby temperatures to 0C
      
      ; Custom settings are not defined


      If it's easier to download and read, here's my config.g

      posted in Duet Web Control
      Ripeds_O3Pundefined
      Ripeds_O3P
    • RE: Help with Temperature Sensor Issues

      Fixed!
      temp sensor fixed.png

      Turns out the wrong wires were plugged into the terminal (wasn't for a PT100 but a different component). sigh

      I lost a few labels to my wires when pushing them through the designated holes in the printer (for cable management). Out to the Duet board. Add in the fact that it has been a few weeks since I last tinkered with the printer and that's the recipe for this mistake.

      posted in General Discussion
      Ripeds_O3Pundefined
      Ripeds_O3P
    • RE: Help with Temperature Sensor Issues

      @phaedrux
      PT100 issue: I plugged the sensor directly into the Duet before getting a reading of 2000 Celsius. This was before using the daughterboard. I'm pretty sure I'm reusing the original sensor I got with my secondhand Ultimaker 2 which is supposed to be a PT100. That's what this machine is known to ship with.

      I guess I could just redo the tips of the wires meant for the terminal. I'm using ferrules. It could be a bad connection. Perhaps the wire is bad? Or maybe this PT100 sensor itself?

      Shoot, I think I may have spare PT100 around here. That could be worth a try.

      Endstops: Thank you.

      posted in General Discussion
      Ripeds_O3Pundefined
      Ripeds_O3P
    • RE: Help with Temperature Sensor Issues

      @phaedrux I'm going to break this response into three parts.

      DWC firmware rollback: Thank you.

      RRF3 settings for endstops: Sure, I'll try it again sometime in the future if you're able to recreate the endstop settings in the latest version. Here's the current version of my config.g .

      This is a picture of the endstop settings I needed.
      endstop types needed.png
      I also quoted the code for it.

      ; Endstops
      M574 X1 Y2 Z2 S0               ; set active low and disabled endstops
      

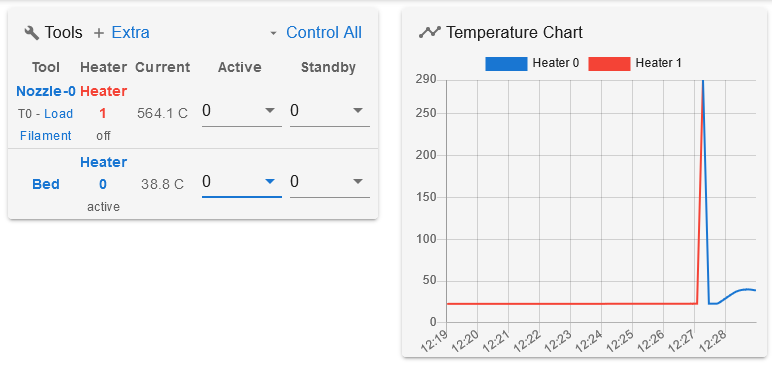
      Back to the temperature sensors: So I decided to check the daughterboard. I tugged on the wires and one came loose (one for the bed sensor). I fixed it, tightening it back into place. One of the sensors reads accurately now. It took some tinkering to learn it is the bed sensor that works. The nozzle sensor reads in the 500s.

      Still unsure why. The wires are generally the same length and size (bed sensor & nozzle sensor). I'll post a new picture.

      printer temp error 2.png
      This is the bed temperature after a quick test of raising the temp to 40 degrees celsius just to see if it works.

      posted in General Discussion
      Ripeds_O3Pundefined
      Ripeds_O3P
    • RE: Help with Temperature Sensor Issues

      @phaedrux DWC 3.3.0.

      (As for endstops, my apologies, but that's too long of a story. All I can say is in my experience, I needed specific endstop type options that I couldn't find in later versions. Just to get my UM2 to home all properly. Maybe someone more experienced in using the tool or knows how to code wouldn't have that issue, but I did. It works great now.)

      From what I can see with the daughter board it looks seated okay. In the area from the photos I've seen in the guide.

      Should I try removing the daughter board and placing it back in it's spot? I can try that tomorrow if you think it'll help.

      posted in General Discussion
      Ripeds_O3Pundefined
      Ripeds_O3P
    • Help with Temperature Sensor Issues

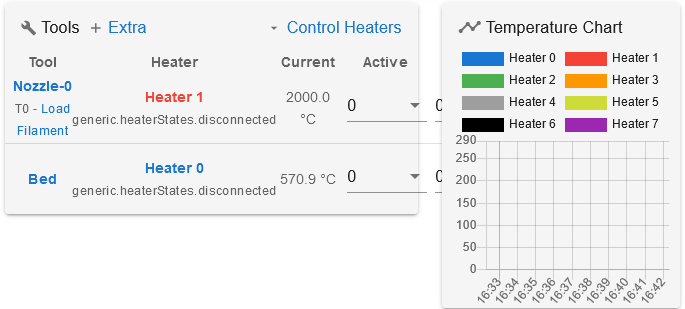
      I bought the RTD Daughter Board (Max 31865) for Duet 2 Wifi and I am getting incorrect readings.

      printer sensor error.png

      Everything is hooked up hardware wise for the Bed (a PT100 sensor) and the Nozzle sensor (another PT100 sensor). I followed the guide for the hardware. Tried following the firmware guide. The version of firmware I'm using is 2.03 (I need this version for specific endstop settings).

      Any advice to get the two PT100 sensors working? I've posted my config.g below.

      config.g

      ; Configuration file for Duet WiFi (firmware version 2.03)
      ; executed by the firmware on start-up
      ;
      ; generated by RepRapFirmware Configuration Tool v3.3.10 on Mon Mar 14 2022 15:32:07 GMT-0700 (Pacific Daylight Saving Time)
      
      ; General preferences
      G90                                     ; send absolute coordinates...
      M83                                     ; ...but relative extruder moves
      M550 P""                      		; set printer name
      
      ; Network
      M551 P""                           	; set password
      M552 S1                                 ; enable network
      M586 P0 S1                              ; enable HTTP
      M586 P1 S0                              ; disable FTP
      M586 P2 S0                              ; disable Telnet
      
      ; Drives
      M569 P0 S0                              ; physical drive 0 goes backwards
      M569 P1 S1                              ; physical drive 1 goes forwards
      M569 P2 S0                              ; physical drive 2 goes backwards
      M569 P3 S1                              ; physical drive 3 goes forwards
      M584 X0 Y1 Z2 E3                        ; set drive mapping
      M350 X16 Y16 Z16 E16 I1                 ; configure microstepping with interpolation
      M92 X80.00 Y80.00 Z400.00 E420.00       ; set steps per mm
      M566 X900.00 Y900.00 Z12.00 E120.00     ; set maximum instantaneous speed changes (mm/min)
      M203 X6000.00 Y6000.00 Z180.00 E1200.00 ; set maximum speeds (mm/min)
      M201 X500.00 Y500.00 Z250.00 E250.00    ; set accelerations (mm/s^2)
      M906 X800 Y800 Z800 E800 I30            ; set motor currents (mA) and motor idle factor in per cent
      M84 S30                                 ; Set idle timeout
      
      ; Axis Limits
      M208 X0 Y0 Z0 S1                        ; set axis minima
      M208 X223 Y223 Z205 S0                  ; set axis maxima
      
      ; Endstops
      M574 X1 Y2 Z2 S0                        ; set active low and disabled endstops
      
      ; Z-Probe
      M558 P0 H5 F120 T6000                   ; disable Z probe but set dive height, probe speed and travel speed
      M557 X15:215 Y15:195 S20                ; define mesh grid
      
      ; Heaters
      M307 H0 B0 S1.00                        ; disable bang-bang mode for the bed heater and set PWM limit
      M305 P0 X201                            ; configure PT100 for heater 0
      M143 H0 S120                            ; set temperature limit for heater 0 to 120C
      M305 P1 X200                            ; configure PT100 for heater 1
      M143 H1 S290                            ; set temperature limit for heater 1 to 290C
      
      ; Fans
      M106 P0 S0 I0 F500 H-1                  ; set fan 0 value, PWM signal inversion and frequency. Thermostatic control is turned off
      M106 P1 S1 I0 F500 H1 T45               ; set fan 1 value, PWM signal inversion and frequency. Thermostatic control is turned on
      
      ; Tools
      M563 P0 S"Nozzle-0" D0 H1 F0            ; define tool 0
      G10 P0 X0 Y0 Z0                         ; set tool 0 axis offsets
      G10 P0 R0 S0                            ; set initial tool 0 active and standby temperatures to 0C
      
      ; Custom settings are not defined


      posted in General Discussion
      Ripeds_O3Pundefined
      Ripeds_O3P
    • RE: UM2 Homing Issues

      @stephen6309 I appreciate the response. I actually made a breakthrough forty minutes ago. A clean homing sequence with no motor grinding. X & Y went first, then Z.

      Aloooot of research went into getting that result. I hope any future hurdles are easier to tackle.

      I still have more things to test with the printer. But things are looking up now.

      posted in General Discussion
      Ripeds_O3Pundefined
      Ripeds_O3P