Tired of Mod, tweak, tune, repair, rinse, repeat...
-
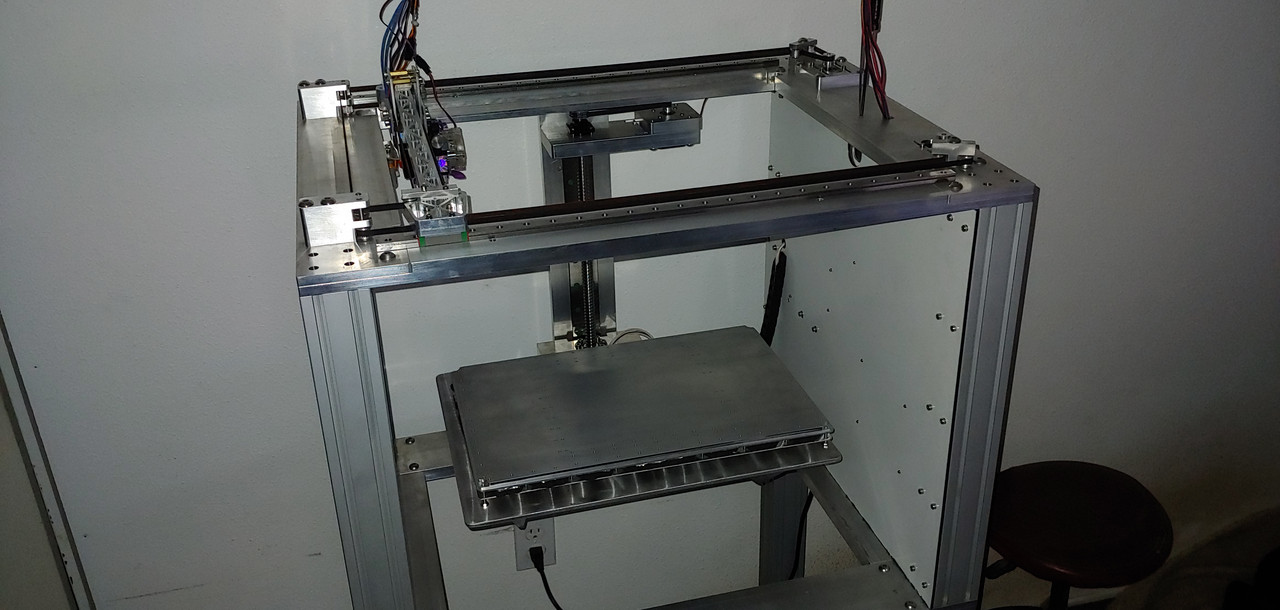
I got tired of the endless cycle on something that should be the concrete foundation of a production machine, the frame. I've worked in machine and production shops for the last 15 years and one thing i've noticed is the machine's frame is generally 2-5 times what it would theoretically need. When you have problems it is with materials or isolated components, and almost never requires adjustment of the frame. My experience with a Tevo Blackwidow just further reinforced the necessity of this simple rule. and after seeing the results E3D was getting with their early prototypes I knew what I had to do.
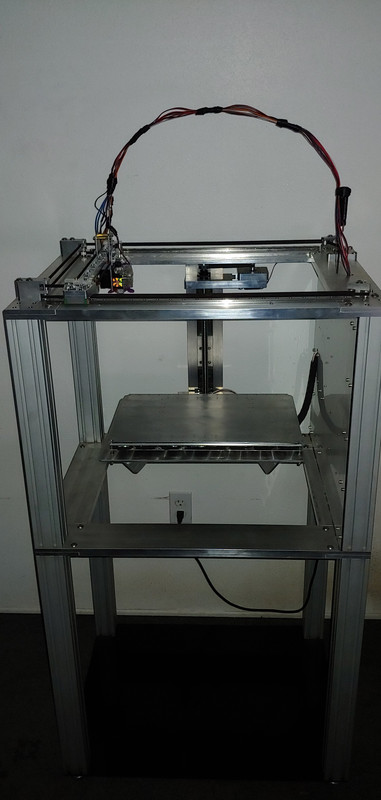
With that idea becoming rule number 1 I designed a new printer. And after some wheeling and dealing with my boss and a few months wait for some free time on a machine I finally have her assembled and moving under her own power and since everything looks like it is going to work I decided I'd show her off. Just a little bit more firmware work and I can start getting some calibration prints going. (I think)
-
Dare I ask how much it weighs? Looks quite sturdy.
-
Hi,
How are you getting any rigidity when supporting the bed at what looks like a single point?
Thanks.
Frederick
-
@Phaedrux My current estimate is about 120lbs/55Kg. I figure another 25-30lbs when fully enclosed, and depending on if it wobbles much while printing this one will eventually get drawers to hold tools, nozzles, etc. pushing it up into 200+. Also dependent upon the wobble, this design is "technically" stackable. That would push a stack of 2-3 printers into the 3-500lb/226Kg range.
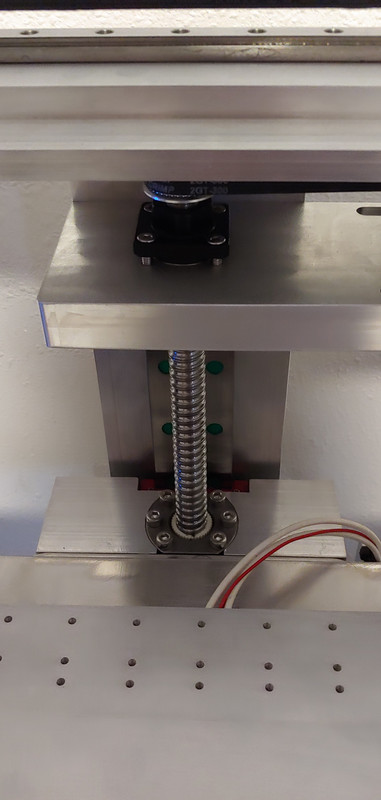
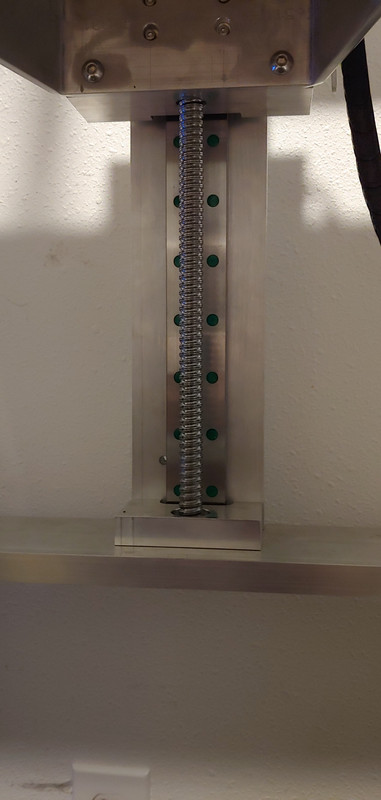
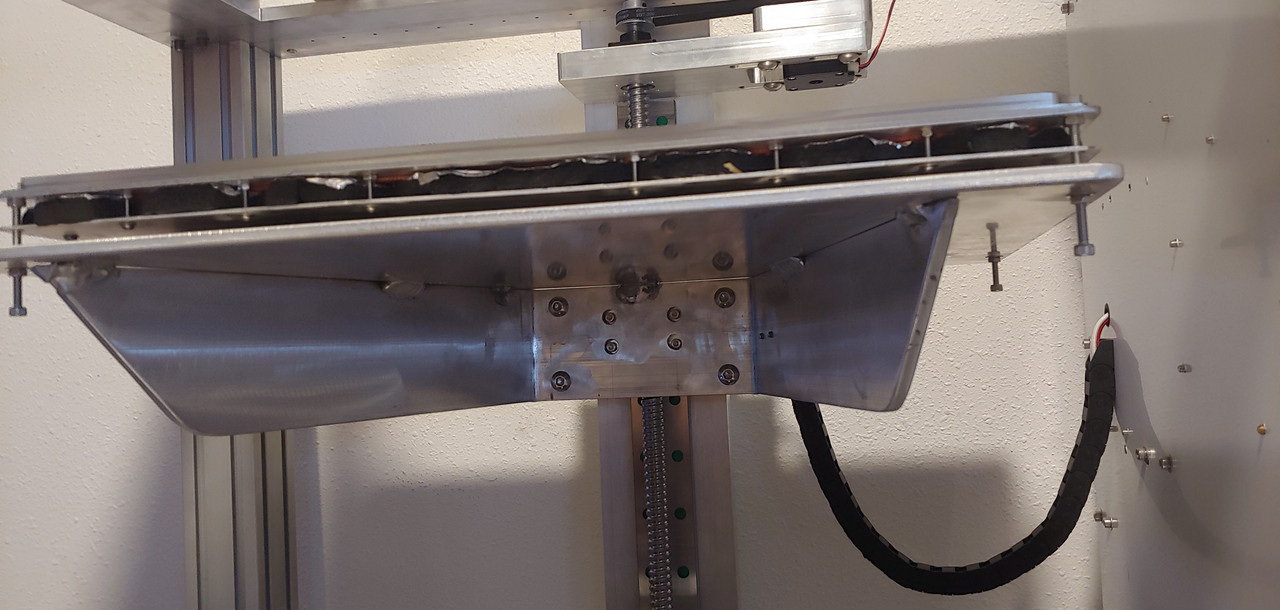
@fcwilt That would be the doublewide rail on the Z, and the 16mm ball screw probably added a bit as well. The carriage is made from 0.25in/7mm aluminum
-
Thanks.
That seems very sturdy.
Frederick
-
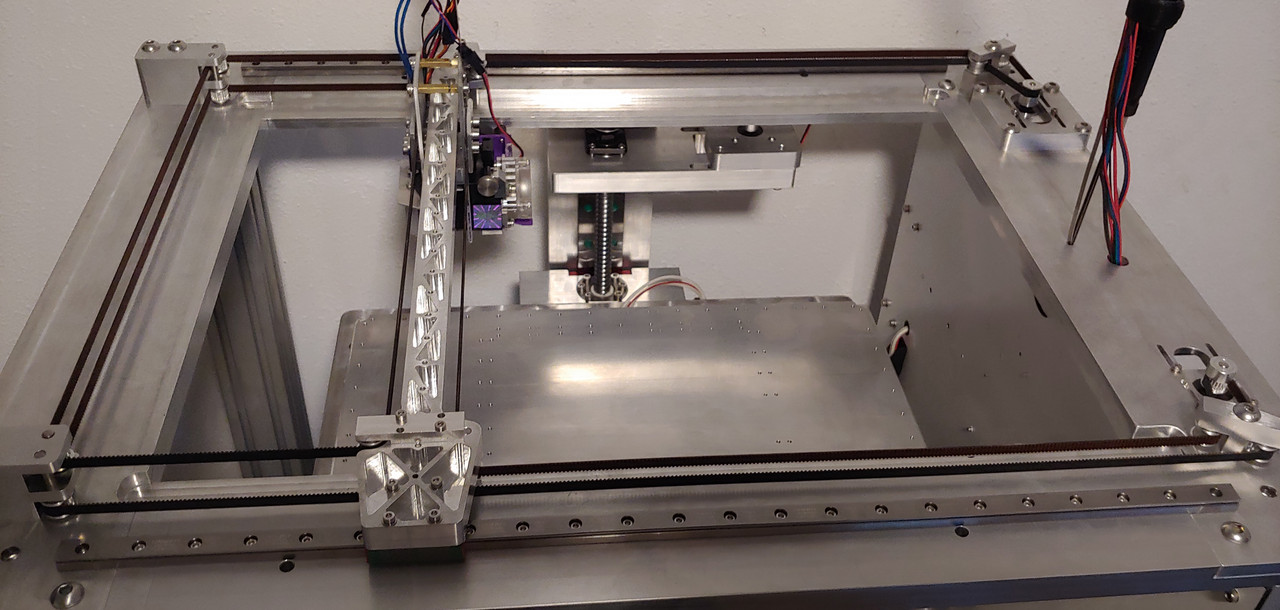
Nice build, I like the stepper installation for changing tension without changing the belt direction, especially. And the X Axis (CNC routed?)
-
@JoergS5 Thanks. Yeah I wanted this to be as maintenance and hassle free as possible. The belt ends and the steppers are the only adjustments that can be made in the entire belt path, besides shims to move the idlers up or down slightly. Other than that the idler's positions are fixed and can't be adjusted at all.
I work in an aerospace machine shop so everything except the extrusions on the corners, the bed carriage, and 1 or 2 other small parts is machined on a cnc mill. Made it very easy to assemble and was stupid easy to true up the frame, rails, etc.
-
how much did that set you back in material costs?
-
Very nice! How much does the X axis weigh? Build volume?
The only thing I would consider a weak point is the bearings in the pulleys- those things are tiny and may not last very long.
Does the free edge of the bed bounce when it's printing?
Video or it didn't happen...
-
@Veti I estimate it will be 4,500-5,000 once enclosed. Add another 1,200-3,000 when I do a tool changer depending on whether I scratch that itch and modify E3D's setup and make it double sided for 8 tools.
@mrehorstdmd it's around 2.5lbs/1.1kg (I forgot to weigh it as a complete assembly, but will do that soon). The pulleys are at least genuine Gates, but yeah those things are TINY.
As for bounce it seems pretty rigid, but I haven't printed yet. I think I'm done with the firmware, I just need to tune the heaters after work today and we'll find out then hopefully.
-
And here we go. First print, just had to see some plastic go down. Used what ever settings were in simplify3d from 6 months ago and just upped the speeds to 6,000mm/min. It detached from the raft in the back left corner early on and then front, and then other back, so it finished pretty warped accordingly.
The highest speeds i saw were 28mm/sec with blips of 100. Build volume is X16Y10Z12 X400Y250Z300 Y has 2in/50mm More with a new part cooling fan. Z has about the same if I mount the tools higher if and when I do a tool changer. and the tool wiring is going to be upgraded soon, bouncing around some ideas in my head about that... just had to see this run...
![20191011_181720[1].jpg](/assets/uploads/files/1570846153436-20191011_181720-1-resized.jpg)
and video evidence it works.
https://www.youtube.com/watch?v=Mt7YN0w6clc -
I enjoy watching beautifully machined things running.
If your steppers have the power I expect you should be able to achieve some very impressive speeds.
Frederick
-
@fcwilt They're a weaker link of the build out of my Tevo Blackwidow. Next big step is enclosing it (really considering looking at that insulated fiber composite board to hold in more heat) , then a few electrical upgrades like a shunted circuit breaker controlled by the raspberry pi so I can kill it from anywhere. I'll probably upgrade them to something higher end at that point. Around that point she is gonna have to start making me money if she wants those fancy upgrades like a tool changer anytime soon.
-
Very nice!
For enclosure, look into PIR (polyisocyanurate) foam panels. They're cheap, effective, and essentially fireproof. You can cut it with a razor knife.
In the uS you can buy a 4' x 8' x 1" PIR foam panel at Home Depot for $15.
-
So it's up and printing. 7,000mm/min no problem, so it's beating my Tevo BW's score of 1,800 by a bit. For a torture test of the bed I bumped the speed up to 17,000mm/min in simplify3d. The filament ground out on the raft so I killed the heaters and air printed a benchy to get my readings. The side to side wiggle of the bed was 0.002in/0.05mm. The frame flex at 11.75in/300mm on the front span is the same at 0.002in/0.05mm. I think that will go away almost entirely with a rigid enclosure and then we'll see how much of the bed's movement is it's own.
PIR foam might go on the outside of that depending on what I choose for material and whether or not the 800watt heater and .360 thick bed are enough to heat the enclosure to the desire temps. I'm thinking 60-70*C. For now i'm probably going to go plexi so I can see it and troubleshoot. Although I do have a potential source for more of the aluminum plastic sandwich composite stuff the electronics are mounted to. Also curious about something like this https://www.merrittsupply.com/product/spaceage-versatile-series-30-lb-thermo-lite-board/
Bed wiggle
https://www.youtube.com/watch?v=oDJJwl-0OqA&feature=youtu.beFrame flex
https://www.youtube.com/watch?v=Y71p6a-50U8&feature=youtu.be -
@macguyver I like the measurements- is there any way you can measure bounce at the free end of the cantilevered bed? I would expect that to be worse than lateral movement.
The bed heater alone won't get your large enclosure up to 60-70C. Once the bed reaches set temperature, the power used to maintain that temperature is only 200W or so. You'll need extra heat to raise the enclosure temperature. I print ABS at 50C chamber temp and my printer's enclosure is about 420 liters. I use a 500 watt heater with a low speed fan (a 208VAC fan running on 117VAC in) to quietly and gently blow air across the heater. The combo of the bed's 750W heater and the 500W enclosure heater gets the enclosure up to 50C in about 20 minutes. The fan is wired in parallel with the heater so that if the SSR fails on (that's how they fail) the fan will keep blowing air across the heater and limit its temperature rise. I still need to add a TCO.
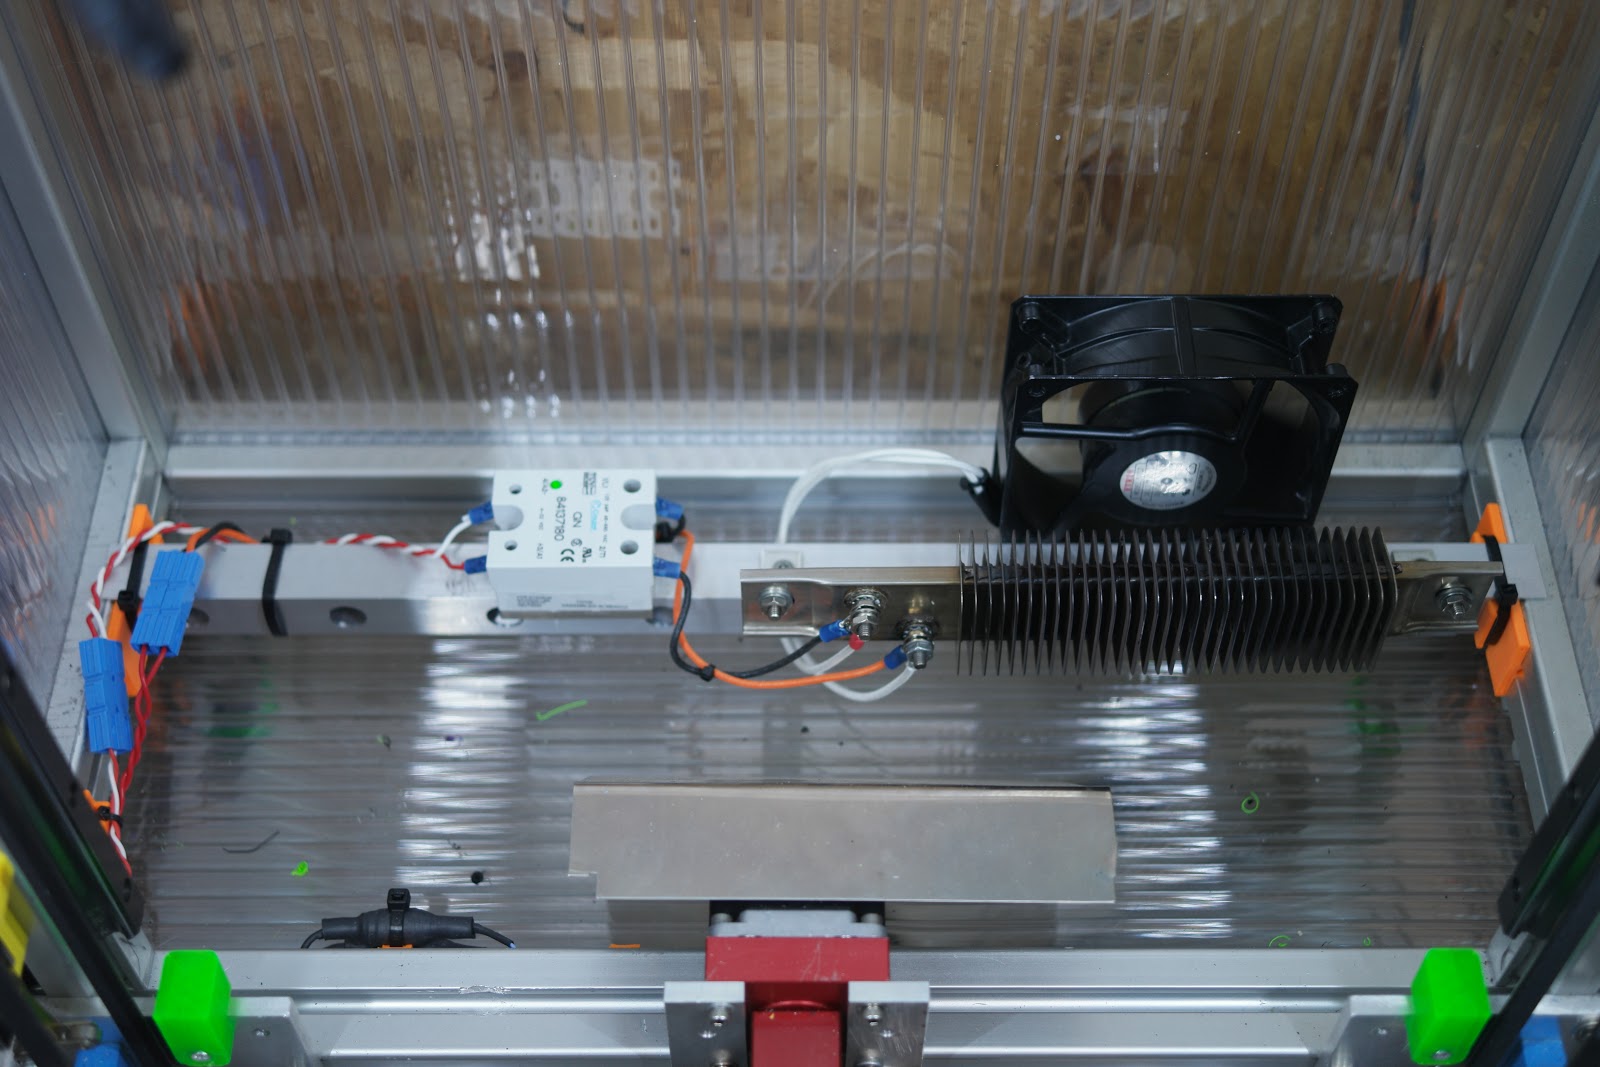
The enclosure panels are dual layer polycarbonate that's frequently used to make greenhouses. It is lightweight, provides thermal insulation (if you tape the ends of the panels) and lets light pass through. It also provides some nice visual effects when the LEDs reflect on the surface of the material. It doesn't contribute to structural rigidity at all, and probably produces toxic fumes if it burns. The front access doors are just plain polycarbonate so I can see through them. They don't provide much insulation at all.
-
It's got a print going at 8,000mm/min and i'm seeing about the same amount of bounce as frame flex and wiggle. Kept bumping the printer trying to reach inside to get video though and it used the same bracket i made to test the frame flex so it is bound to have some travel it's self. Once it is enclosed I will try to remember to test it again.
That said if I ever make another it will probably be dual rail. Still cantilever, just 2 rails spread apart 8-10 inches and the ballscrew in the middle.
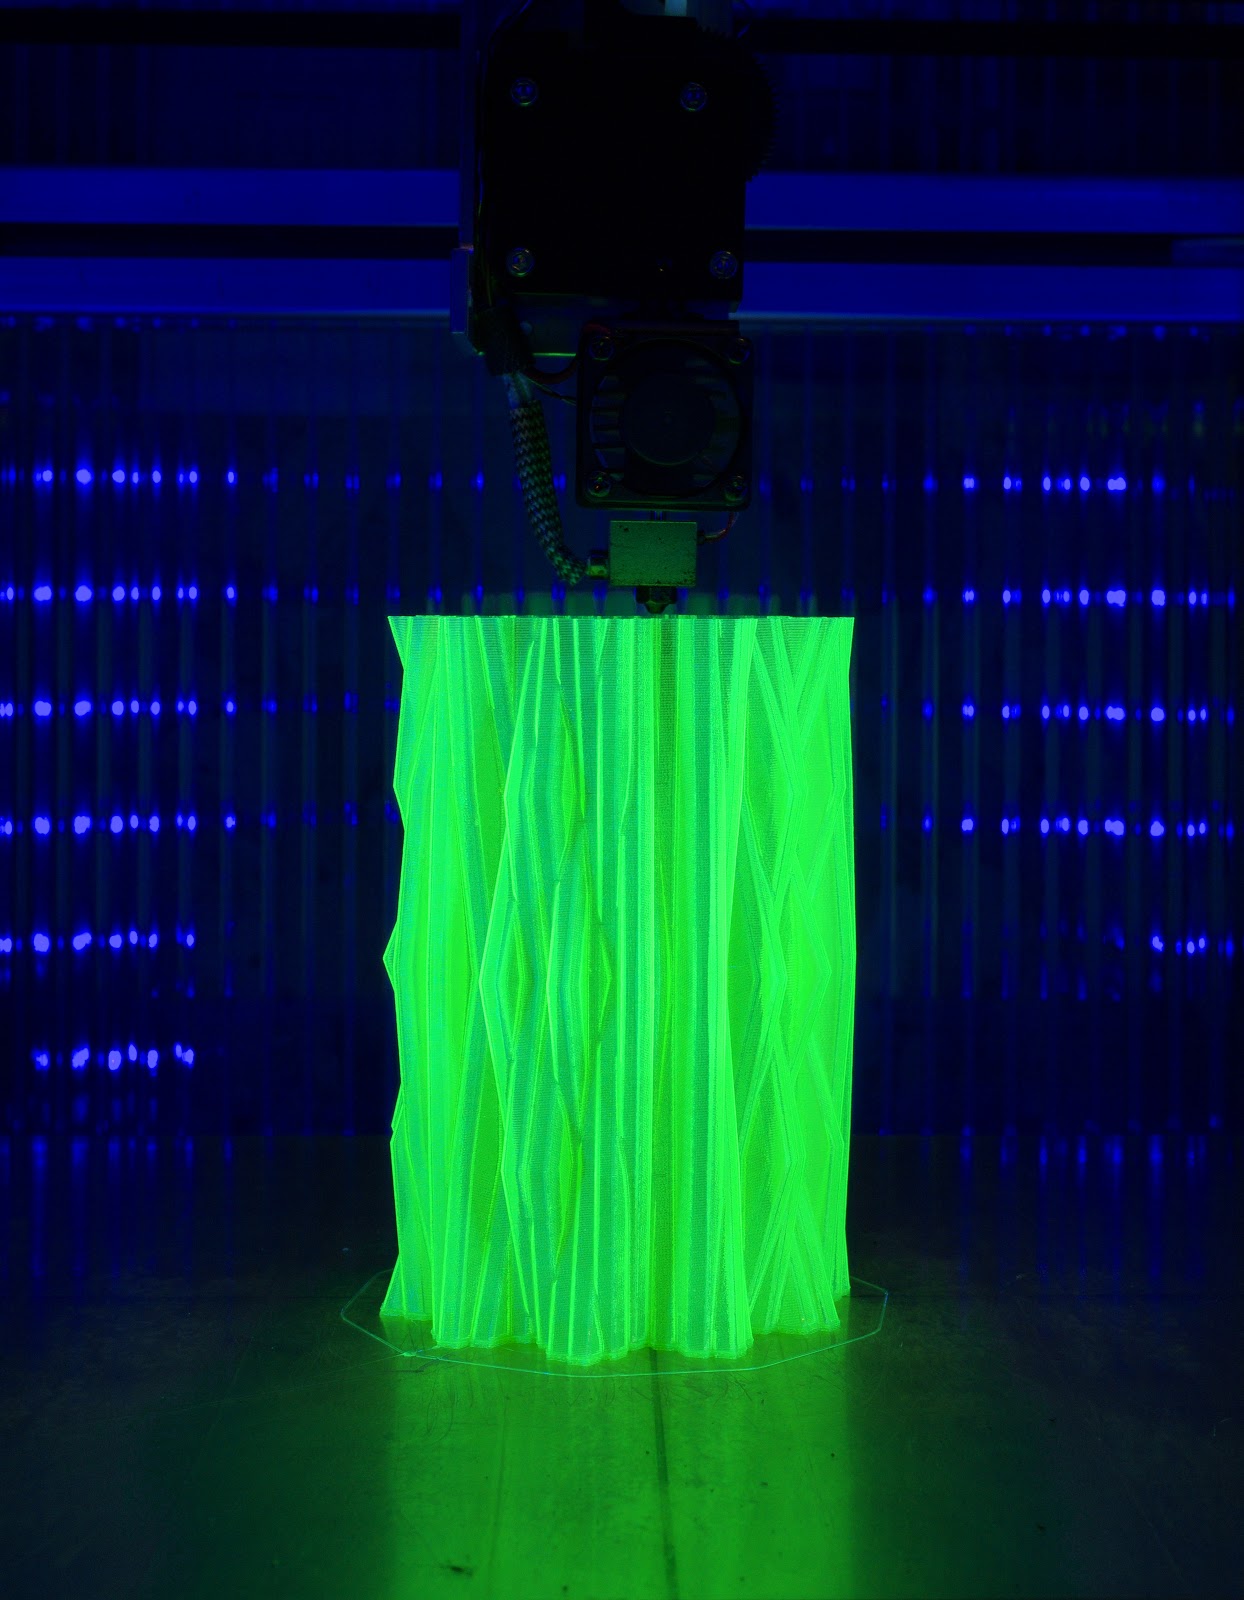
And here are a couple of pics from that 8,000 print, fresh off the printer, because someone told me its what the cool kids do.
![20191013_212829[1].jpg](/assets/uploads/files/1571027483018-20191013_212829-1-resized.jpg)
![20191013_212844[1].jpg](/assets/uploads/files/1571027497816-20191013_212844-1-resized.jpg)
![20191013_212909[1].jpg](/assets/uploads/files/1571027512747-20191013_212909-1-resized.jpg)
-
I had to put this on the back burner for a while, but now she's pretty much fully assembled and up and running. I'm pushing a direct drive aero 0.4 volcano, 0.2 layer heights at 150mm/s with more than satisfactory results. I can push it to 300, but the ringing is terrible, never shifted a layer though. I'll eventually upgrade the rail carriers to the next highest preload and see if I can push it faster.
My biggest hurdle was getting everything connected to the raspberry pi. It's still a bit wonky, and crashes the duet2 sometimes, but at least I get print finished alerts now. I'm guessing I have to upgrade to the duet3 to get the print paused because of filament alerts though.
And because it's finished, for now. I grabbed a handtruck and wheeled it over to my neighbor that had a scale big enough to weigh it. 230 LBS/104.3KG and solid as a rock! That will easily jump another 75-100 once I get all the drawers in it and fill them up.


-
My God! What hinges!
-
Great overall, and particularly nice panel wiring.