Pressure Advance Calibration
-
I want to share some of my experience tuning pressure advance. It was mentioned that you will need to recalibrate retraction.
I'm using a bowden tube setup and at higher speeds (100mm/s) I was missing material at the start of extrusion. Increasing prime amount would fix the higher speed problems but leave blobs at lower speeds (25mm/s). To resolve this I had to reduce the retraction distance. I ended up with retractions similar to a direct drive and no extra prime amount. I ended up with the following retract and pressure advance settings:
M207 S2.0 R0.0 F3600 T600
M572 D0 S0.3This is with the following setup:
E3D Volcano, 0.4mm nozzle
550mm Capricorn XS Bowden tube
Bondtech QR Extruder
1.75mm Amazon Basics PETGExtruder config settings per request: (these are not necessarily limits of the extruder)
M350 E32:32 ;microstepping
M92 E953:953 ;steps/mm
M906 E900:900 ;motor currents
M201 E1000:1000 ;accelerations
M203 E3600:3600 ;maximum speed
M566 E900:900 ;maximum jerk speedBefore Tuning these settings I was printing slower (50mm/s) with 6.5mm retraction distance.
-
@rs4race said in Pressure Advance Calibration:
I want to share some of my experience tuning pressure advance. It was mentioned that you will need to recalibrate retraction.
I'm using a bowden tube setup and at higher speeds (100mm/s) I was missing material at the start of extrusion. Increasing prime amount would fix the higher speed problems but leave blobs at lower speeds (25mm/s). To resolve this I had to reduce the retraction distance. I ended up with retractions similar to a direct drive and no extra prime amount. I ended up with the following retract and pressure advance settings:
M207 S2.0 R0.0 F3600 T600
M572 D0 S0.3This is with the following setup:
E3D Volcano, 0.4mm nozzle
550mm Capricorn XS Bowden tube
Bondtech QR Extruder
1.75mm Amazon Basics PETGBefore Tuning these settings I was printing slower (50mm/s) with 6.5mm retraction distance.
Thanks for sharing this.
-
@rs4race Could you also post your speed, jerk and accelleration settings for the extruder?
-
When running the python script changing the center of bed to 110,110
This is a little snippet of the code it produces. Obviously X is off the charts. What am I doing wrong. Using python 3.7
G1 X3853.750 Y126.800 E0.2910 F4200
G1 X3858.750 Y126.800 E0.1663 F300
G1 X3867.500 Y126.800 E0.2910 F4200
G1 X3876.250 Y126.800 E0.2910 F4200
G1 X3881.250 Y126.800 E0.1663 F300
G1 X3890.000 Y126.800 E0.2910 F4200
G1 X3898.750 Y126.800 E0.2910 F4200
G1 X3903.750 Y126.800 E0.1663 F300
G1 X3912.500 Y126.800 E0.2910 F4200
G1 X3921.250 Y126.800 E0.2910 F4200
G1 X3926.250 Y126.800 E0.1663 F300
G1 X3935.000 Y126.800 E0.2910 F4200
G1 X3935.000 Y127.200 E0.0133 F4200I should note that python is giving me Indentation errors.
-
Im still quite a newbie in this realm and i guess the amount of variables are getting to me
")
Backstory is I have a zesty nimble, which worked amazing but had 2 issues I cannot solve
- Ripples in the surface finish - Company is still working on a fix
- blobs at the end of a layer creating terrible Z seam scars
Tried all the ideas such as coast and wipe, but they have their own issues such as only available in some slicers, cannot be used with firmware retraction, etc.
Pressure advance by the sounds of it should eliminate the blobs at end of layer, but any attempt to use PA with a nimble due to its required low jerk values caused my prints to slow to about 3x the time. Was painful to watch.
Although, with the nimble I was able to get a great calibration part from the above enclosed script.
With the nimble, the calibration part has easily discernible reversing thick areas, and one can find the "best" setting of 0.12, but pressure advance was unusable for me in combination with the nimble.
So I order a Bondtech BMG and use a capricorn bowden tube of about 650mm paired with an E3D 0.9 degree stepper.
Now i get the Esteps all setup at E808, run some retraction calibration parts, and i still get blobs due to pressure at the end of a layer.
Run the above scripts on a Pressure Advance test and..... The results do not make sense to me.
Before the extruded line ever gets to an optimal state, the extrusion is messed up. It gets to the point where nothing is coming out of the nozzle at all. I was at 5-100 print speed so ran again at 20-80 which is the speeds I actually print at (E3D volcano, 0.6mm X nozzle)
And again the part never gets to the optimal PA value without the PA settings making the filament retract so much it doesn't print.What am i doing wrong? Any suggestions?
Duet Wifi, Smart Effector, newest firmware, Delta printer based smilar to DC42's large kossel
Config is as follows :
M350 X16 Y16 Z16 E16 I1 ; Configure microstepping with interpolation
M92 X200 Y200 Z200 E808; Set steps per mm original
M566 X1200 Y1200 Z1200 E2000 ; Set maximum instantaneous speed changes (mm/min)
M203 X18000 Y18000 Z18000 E3600 ; Set maximum speeds (mm/min)
M201 X1000 Y1000 Z1000 E3000 ; Set accelerations (mm/s^2)
M906 X1000 Y1000 Z1000 E900 I30 ; Set motor currents (mA) and motor idle factor in per cent -
@jarery said in Pressure Advance Calibration:
E2000
Hi @Jarery
I don't know if I can still help you, you asked that question way back in April. But I would try to decrease your extruder jerk dramatically. I got mine around 4-5mm/s, and because the values are in mm/min that translates to 240-300. Your extruder jerk is at 2000, meaning that your extruder doesn't try to accelerate in most cases and could loose steps easily, which seems plausible concerning your shown print results.
And at all, and of course @DigitalVision I tried to improve your python script a little. Added some comments, a cooling fan speed parameter, start and end gcodes kind of parameters, and some small tweaks. If you want you can merge it to your script or link this one in your first post.
For all the windows-python newbies:
- Install python3 or newer (or python2.7, also called python27, but it's getting unsupported by the end of the year, so install python3)
- navigate to the downloaded pressureadvance2.py script in your explorer
- open the file with a good editor (no not editor.exe! I mean a good one) and change the parameters to fit your printer. Be careful not overshooting the dimensions and bed center!
- hold down shif key and right click on and empty spot in the file list of the windows explorer
- choose "open terminal here" or "open command line here" or similar
- type in: python pressureadvance2.py > output.gcode
the shell command simply means "use [python] with script [ pressureadvance2.py ] and redirect output [>] to the file [output.gcode]"
- Use calipers to measure the position of the best layer. Mine was at around 7mm of 20mm total height for having the parameters set to pressureadvance_min = 0.0 and pressureadvance_max = 0.2. Meaning you get a gradient from 0 to 0.2... Now simply use math to calculate your pressure advance value for your printed calibration wall. It's a good idea to reprint a version with refined parameters around your determined sweet spot. I reprinted one in 0.05 to 0.10 for my roughly measured 0.07 of my first version, finally sticked with 0.068
For my direct extruder with hobb goblin ID 5mm with e3d volcano and 0.8mm nozzle I got round about 0.068
Tests with my 0.4mm Volcano is up next.Have fun guys!
-
I've done some tests now and I think I found the right PA value.
First question:
The with python generated GCode "works" during the test without retraction?That would mean I can Set it in the Slicer to 0, if I write the determined PA value directly into the config.g?
-
I feel like i´ve missed something obvious, but when i try the script it doesnt really extrude anything. It just pivots around the same length of filament.
I´ve looked in the code and compared it to a normal other code and the command to reset extrusion length is totally absent (G92 E0).
So it makes sense that it is just going up and down on the extruder axis.
What do you have to do? Use M82 instead of M83 to use absolute extruder coordinates? -
Ok nevermind, i overlooked the fact that my starting script had a M82 in it. I changed that and it works.

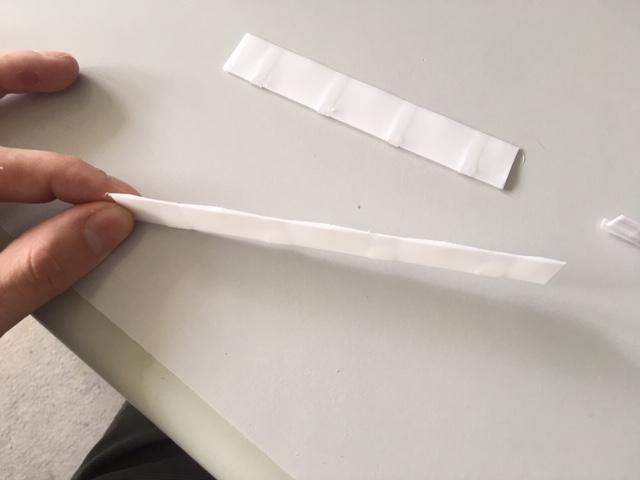
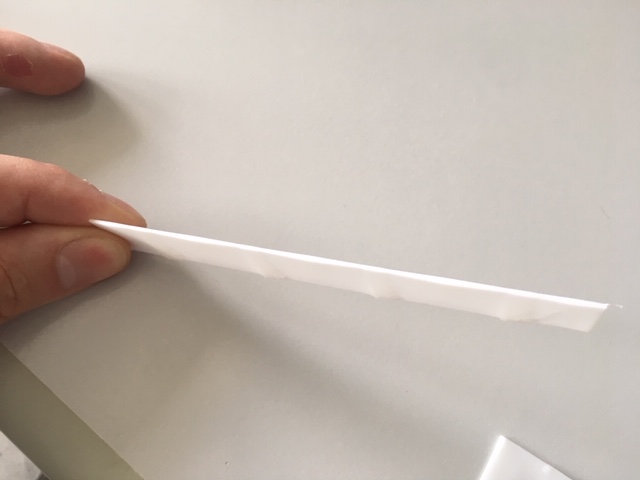
The top one is a variation between Pressure advance 0 and 0.2, the second is a taller version for the PA of 0 to 0.5 and lastly the bottom one is between a PA of 0 and 1.
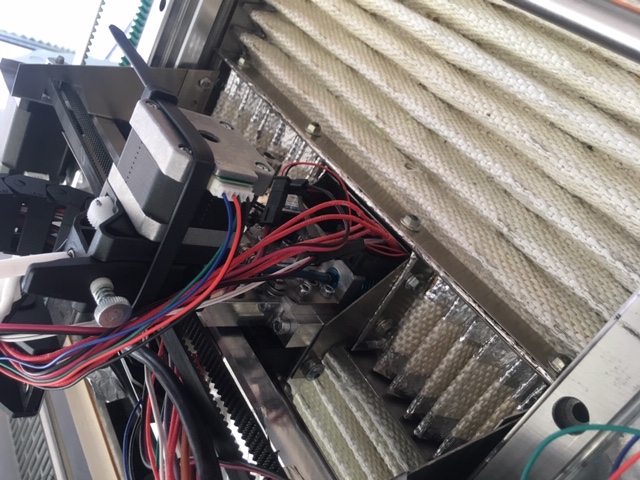
I´m using a super short "bowden" of around 120 mm, see picture.
BMG clone, genuine capricorn tube and e3d Volcano copper block, 0.4mm nozzle. Printing Tiertime ABS filament @260°C and 70°C Chamber temperature.
My Jerk is set to X500/Y600/E200. Acceleration is set to X1000/Y1000/E1000.
Looking at the results i need a PA of 0.55. Can this be? It seems a little excessive for a more or less direct drive extruder. Is it because of the volcano and the ABS filament?
Also, in the long segment the centers seem to bulge up, even at the part that had a maximum of 0.5 PA which is close to the needed value. I never get a consistent extrusion throughout like the other pictures posted.
 !
!What is the culprit of that? What do i need to change to have the extrusion in the fast segment even?
I have checked nonlinear extrusion but have not configured it since my extrusion stays consistently at 100% up until 7mm/s, at 8mm/s it is at 98.8% and at 10mm/s it is at 96.8%. If i configured nonlinear extrusion, the square fitment nature would mess up my extrusion below 7mm/s. It may need more variables.
@DigitalVision Thanks for the script, it works perfectly!
-
I am running pressure advance calibration as per
http://www.sternwolken.de/tmpup/3dprint/pressureadvance2.py
The code seems to want to print out the current pressure advance setting (ie a print statement). Where would that end up ?
I am running this code on a Duet WiFi via the web panel.
Running on an Ubuntu system. -
I don't see any print out commands (MM117, M291)
-
@OBELIKS, I only looked at the python script .... Dooohhhh
Turns out the print commands put comments into the g_code output file where they are doing precious little unless you can see the codes as they are run.Thanks! Mystery solved
-
Haha, yeah different code

-
Hello
If I run the python file and generate the PA test gcode file, I see that it contains G1 Xxxxx Yyyyy Eeeee commands whose E values are very large, e.g.:
G1 X-47.400 Y3.200 E15.7653
whereas if I look into any gcode file generated by Cura, I only see very small E values in the G1 commands, e.g.:
G1 X9.063 Y1.1 E0.16886
Why does this happen, and how can I safely run/print the generated PA test gcode file ? (i.e., won't my extruder/hotend be blown up because of such enormous E values in the G1 commands ?)
Regards
Mihai -
These are all long printing moves, as the models usually have small ones.
You can always check in gcode.ws -
Is pressure advance supposed to change with different extrusion thickness ? I was always under the impression it was relatively constant at least with the same filament.
I had run calibration for PLA 0.8 mm nozzle and 0.2 mm layer thickness and got a number of 0.45.
I subsequently printed out a model at 0.4 mm layer thickness and ran into some odd issues that looked a lot like pressure advance issues but dismissed that because I had just calibrated that.
I ran another pressure advance calibration but this time with 0.4 mm layer thickness and got a figure closer to 0.2 for pressure advance.
Does this mean that in order to run a long bowden tube (where pressure advance is most critical) I have to calibrate every combination of filament, nozzle size, layer thickness and possibly nozzle temperature ?
If so then the case for a direct extruder setup got a lot stronger .... -
@jens55 I must confess that although I've played around with various parameters in relation to pressure advance, layer height vs nozzle diameter isn't one of them. I'd say that it's eminently possible that using a layer height of 20% of the nozzle diameter could offer a restriction to the filament flow as it exits the nozzle (because the nozzle tip is closer to the part being printed). Which would of course affect the pressure in the hot end, making it higher than if the layer height was greater.
That being the case, then I'd expect the same problem to manifest itself, regardless of whether the extruder is direct drive or Bowden (because the cause of the pressure increase is downstream of the extruder).
-
@deckingman said in Pressure Advance Calibration:
That being the case, then I'd expect the same problem to manifest itself, regardless of whether the extruder is direct drive or Bowden (because the cause of the pressure increase is downstream of the extruder).
All I have ever read about pressure advance seems to indicate that a direct extruder only uses minimum amounts ... or put into other words, just a smidgen to optimize things.
Going from 0.45 to 0.2 in a bowden setup becomes the difference between a good print and a failed print. The print I have been dealing with recently ended up with holes in the outer wall layer (still testing this finding) at the point where a layer started.
I would very much like to have confirmation if my understanding of this is correct before I contemplate a major printer configuration change ! -
@jens55 Common perception is that pressure build up happens mostly in the Bowden tube, due to the filament buckling and twisting, which is why direct extruders are less prone to it's effects. Nobody really knows for sure but it seems a reasonable hypothesis. I was just surmising that if you are seeing a big difference between layers heights, then it might be because the filament flow as it exits the nozzle is being restricted with small layer heights. In which case, the cause of the pressure might be something other than the filament buckling and twisting. So if that is the case, then a direct extruder may exhibit the same behaviour. It's just conjecture on my part.........
-
@deckingman , thanks for your input. I agree with your thinking.
I am hoping that somebody with first hand experience might chime in as we are both guessing.