Odd printing artifacts - pressure advance ?
-
I am running into some odd printing artifacts that I can't think of a cause for and was hoping I could get some help with.
The printer is a Creality CR10-S5, heavily modified and with a Duet Wifi controller. I am using a Volcano hot end, 0.8 mm nozzle and 0.4 mm layer height. I realize that with that big a nozzle and layer height the result isn't going to be too pretty but even with that, the print takes over 9 hours. With a more normal 0.4 mm nozzle and 0.2 mm layer height I'd be looking at some 32 hours and I haven't got the patience for that.
I just finished doing a pressure advance calibration and am using 0.45 - it's a very long bowden tube ...!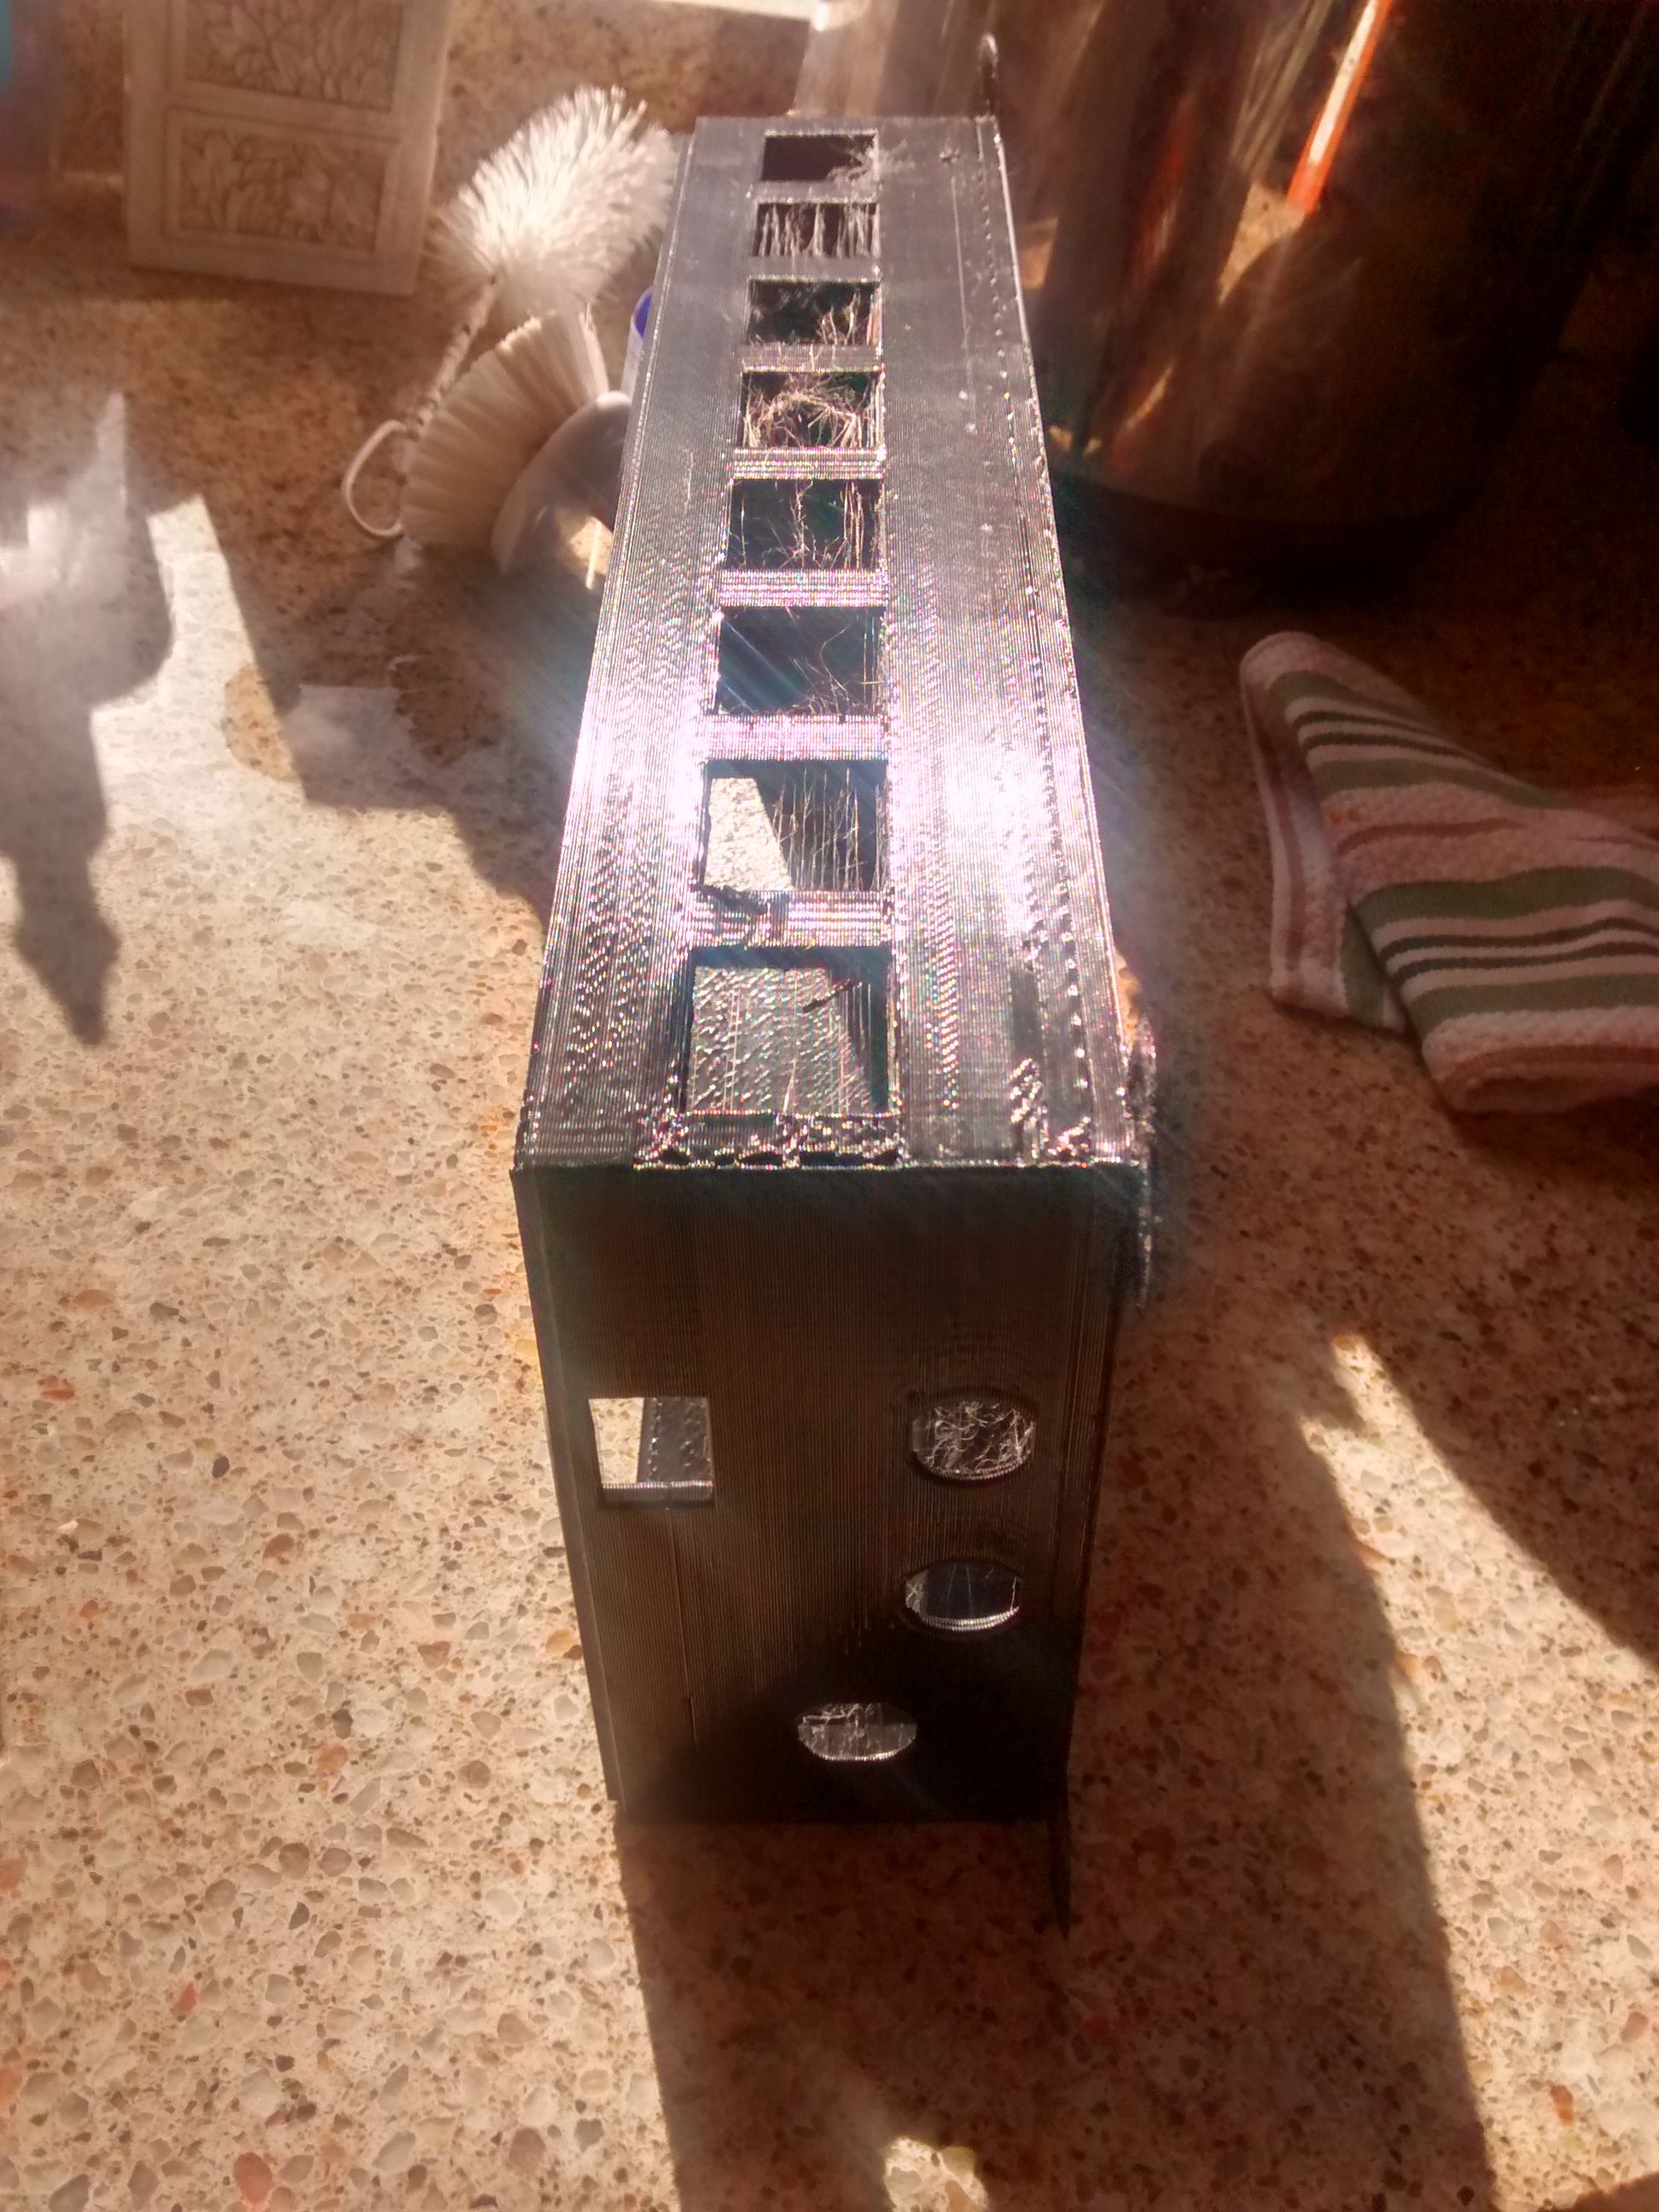
The corner that the attached picture shows is where the print starts. One can see the nastiness right before the first rectangular piercing. On closer examination, what you see is a hole in the outer layer. The extrusion is quite irregular until the first hole and is a bit irregular between first and second hole and is perfectly fine for the remainder.
My first thought was 'pressure advance' which is why I calibrated the advance setting. The strange thing is that these artifacts do not show on the upper section or most of the lower section of the corner. They do show on the bottom of the corner even though there is no hole following the edge. On the bottom of the corner the symptoms are the same - lack of filament for the outer layer.
Although the model appears to be horrible, in real life things aren't that bad - I played a bit with the sunlight to exaggerate the issue for diagnostic purposes.
You can also see lots of very thin spider strands in the openings - I have been unable to eliminate them with the Volcano hot end but a quick going-over with a heat gun clears all that up.
The model is PLA, 210 nozzle temp, 0.75 mm retraction (because of the high pressure advance setting, a higher retraction causes intermittent blockages), speed is 60 mm/sec with outer wall speed being 30 mm/sec.Thoughts ?
-
Hi,
Probably I'm not the right experienced person to help you BUT I can try to suggest you some tips as I was facing your same issues time ago.
I suggest you to avoid , for now, the "pressure" side (so restore the original settings). I use an at least 60cm bowden pipe. https://forum.duet3d.com/topic/8397/tevo-little-monster-duetwifi-touch7-my-conversion/9I'm impressed by the holes. Maybe the fast printing can avoid the collapse of material... In general I use the support.
Supposing you are using the latest version of Cura (4.3)
- the tiny holes close the corner (bottom illuminated one) , where the layers seems start, could be related by : Print Settings >>> Shell >>> Outer Wall Wipe Distance. This is an interesting feature but if not properly settled generate more trouble (holes) than benefit (hide seams). With the 0.8 nozzle is really hard to hide perfectly the seams.
2)The walls artifact can be related by several factor. Two of them can be "vibration". You should check your hardware , especially the belts. I suggest you , if you will never have to upgrade your printer, to buy the belts with iron core. They stretch less the half of the ones with fiber glass core.
Also, the temperature are relevant. I have the volcano too. I have seen that same material with an E3D standard need more temp for fuse the material in that short nozzle than the volcano. It have much more length where it can exchange heat on the material , so often is good practice lower the temps a bit.3)other tips:
-don't exaggerate with the retraction , it generate tiny hole when the movements occur.- Print Settings >>> speed >> equalize filament flow . Especially if you have long bowden you want avoid tons of retraction. And the printer , also if well calibrated , if have to change the flow continuously generate different extrusions making some layers or part of them more large than others.
-Check the extruder calibration: https://3daddict.com/3d-printer-extruder-calibration-steps/
Any print need its settings , we need to make lots of attempts and save lots of profiles.
-
@giostark, thanks for your input.
Yes, I use Cura 4.3
Settings are as follows (in reference to your suggestions):Outer wall wipe distance - 0.4 mm
Z seam alignment - shortest
Seam corner preference - hide seamThe wall artifacts are not of big concern at the moment. The print bed has a lot of mass so I am not surprised to get some vibration (actually it is amazing how much the vibration carries through the printing bench and the wall studs which support the bench)
Retraction - only 0.75 mm so very short and not exagerated (or are you saying it should be even less?)
I do not have 'equalize filament flow' turned on currently
Filament extrusion seems well calibrated although you can see (well barely) a couple of instances where there was insufficient extrusion over the entire model outer walls for a single complete layer. I did not mention that issue because it seems different then the 'holes' issue and I did not want to bring up multiple issues.
-
Additional information:
It would seem that pressure advance needs to be calibrated much more often than I had realized.
I calibrated for a 0.8 mm nozzle and 0.2 mm layer thickness but ran the actual print at 0.4 mm layer thickness. I ran pressure advance calibration again but this time with 0.4 mm layer thickness and arrived at a figure of 0.2.
I will be running the print at this much reduced pressure advance setting and see what happens. -
Outer wall wipe distance : I have this setting to zero foe avoid that holes in the corner.
pm me your mail . I'll send you my curaprofile (I cant attach it here) maybe can be helpful. Or make you reflect on some details. -
@giostark , thank you for your thoughts. As the subject print is 9 hours, I have removed 4/5th of the print, just leaving the corner that gave me all the trouble. Unfortunately, even with wrong pressure advance settings, I am unable to reproduce the issue.
I have recalibrated pressure advance for a layer height of 0.4 mm but have not yet reprinted the entire model. I will be doing a complete reprint tonight to see what happens. I will set the wall wipe distance to zero for the upcoming print.
I think I will be spending some extra time learning how to do refinishing of PLA. I am hoping that a bit of work can fix the holes. It is not realistic to keep trying different print settings with such a large print and as I said, removing the sections that had no issues also removed any trace of the problem and I can't see if setting changes will fix the issue.
I will do one last print with the adjusted pressure advance and the wall wipe distance set to zero and if that doesn't fix the issue I will have to live with it or at least wait till it happens on smaller prints where I don't waste 500 grams of filament on a test print.
Thanks again and thank you for the offer of your Cura settings. -
Your welcome buddy
")
When I start my adventure with 3D printing here I found lots of help so I try to give it back as I can... -
Latest print shows perfect pressure advance settings (no bulges around any cutouts). Alas, the original problem persists. The holes are smaller but still there. Also, an issue that I did not recognize in the first print made more sense now - what looks like an under extrusion over an entire layer. The under-extrusion happens where the wall meets the bottom. Picture to follow later this morning.
-
Here is the latest print
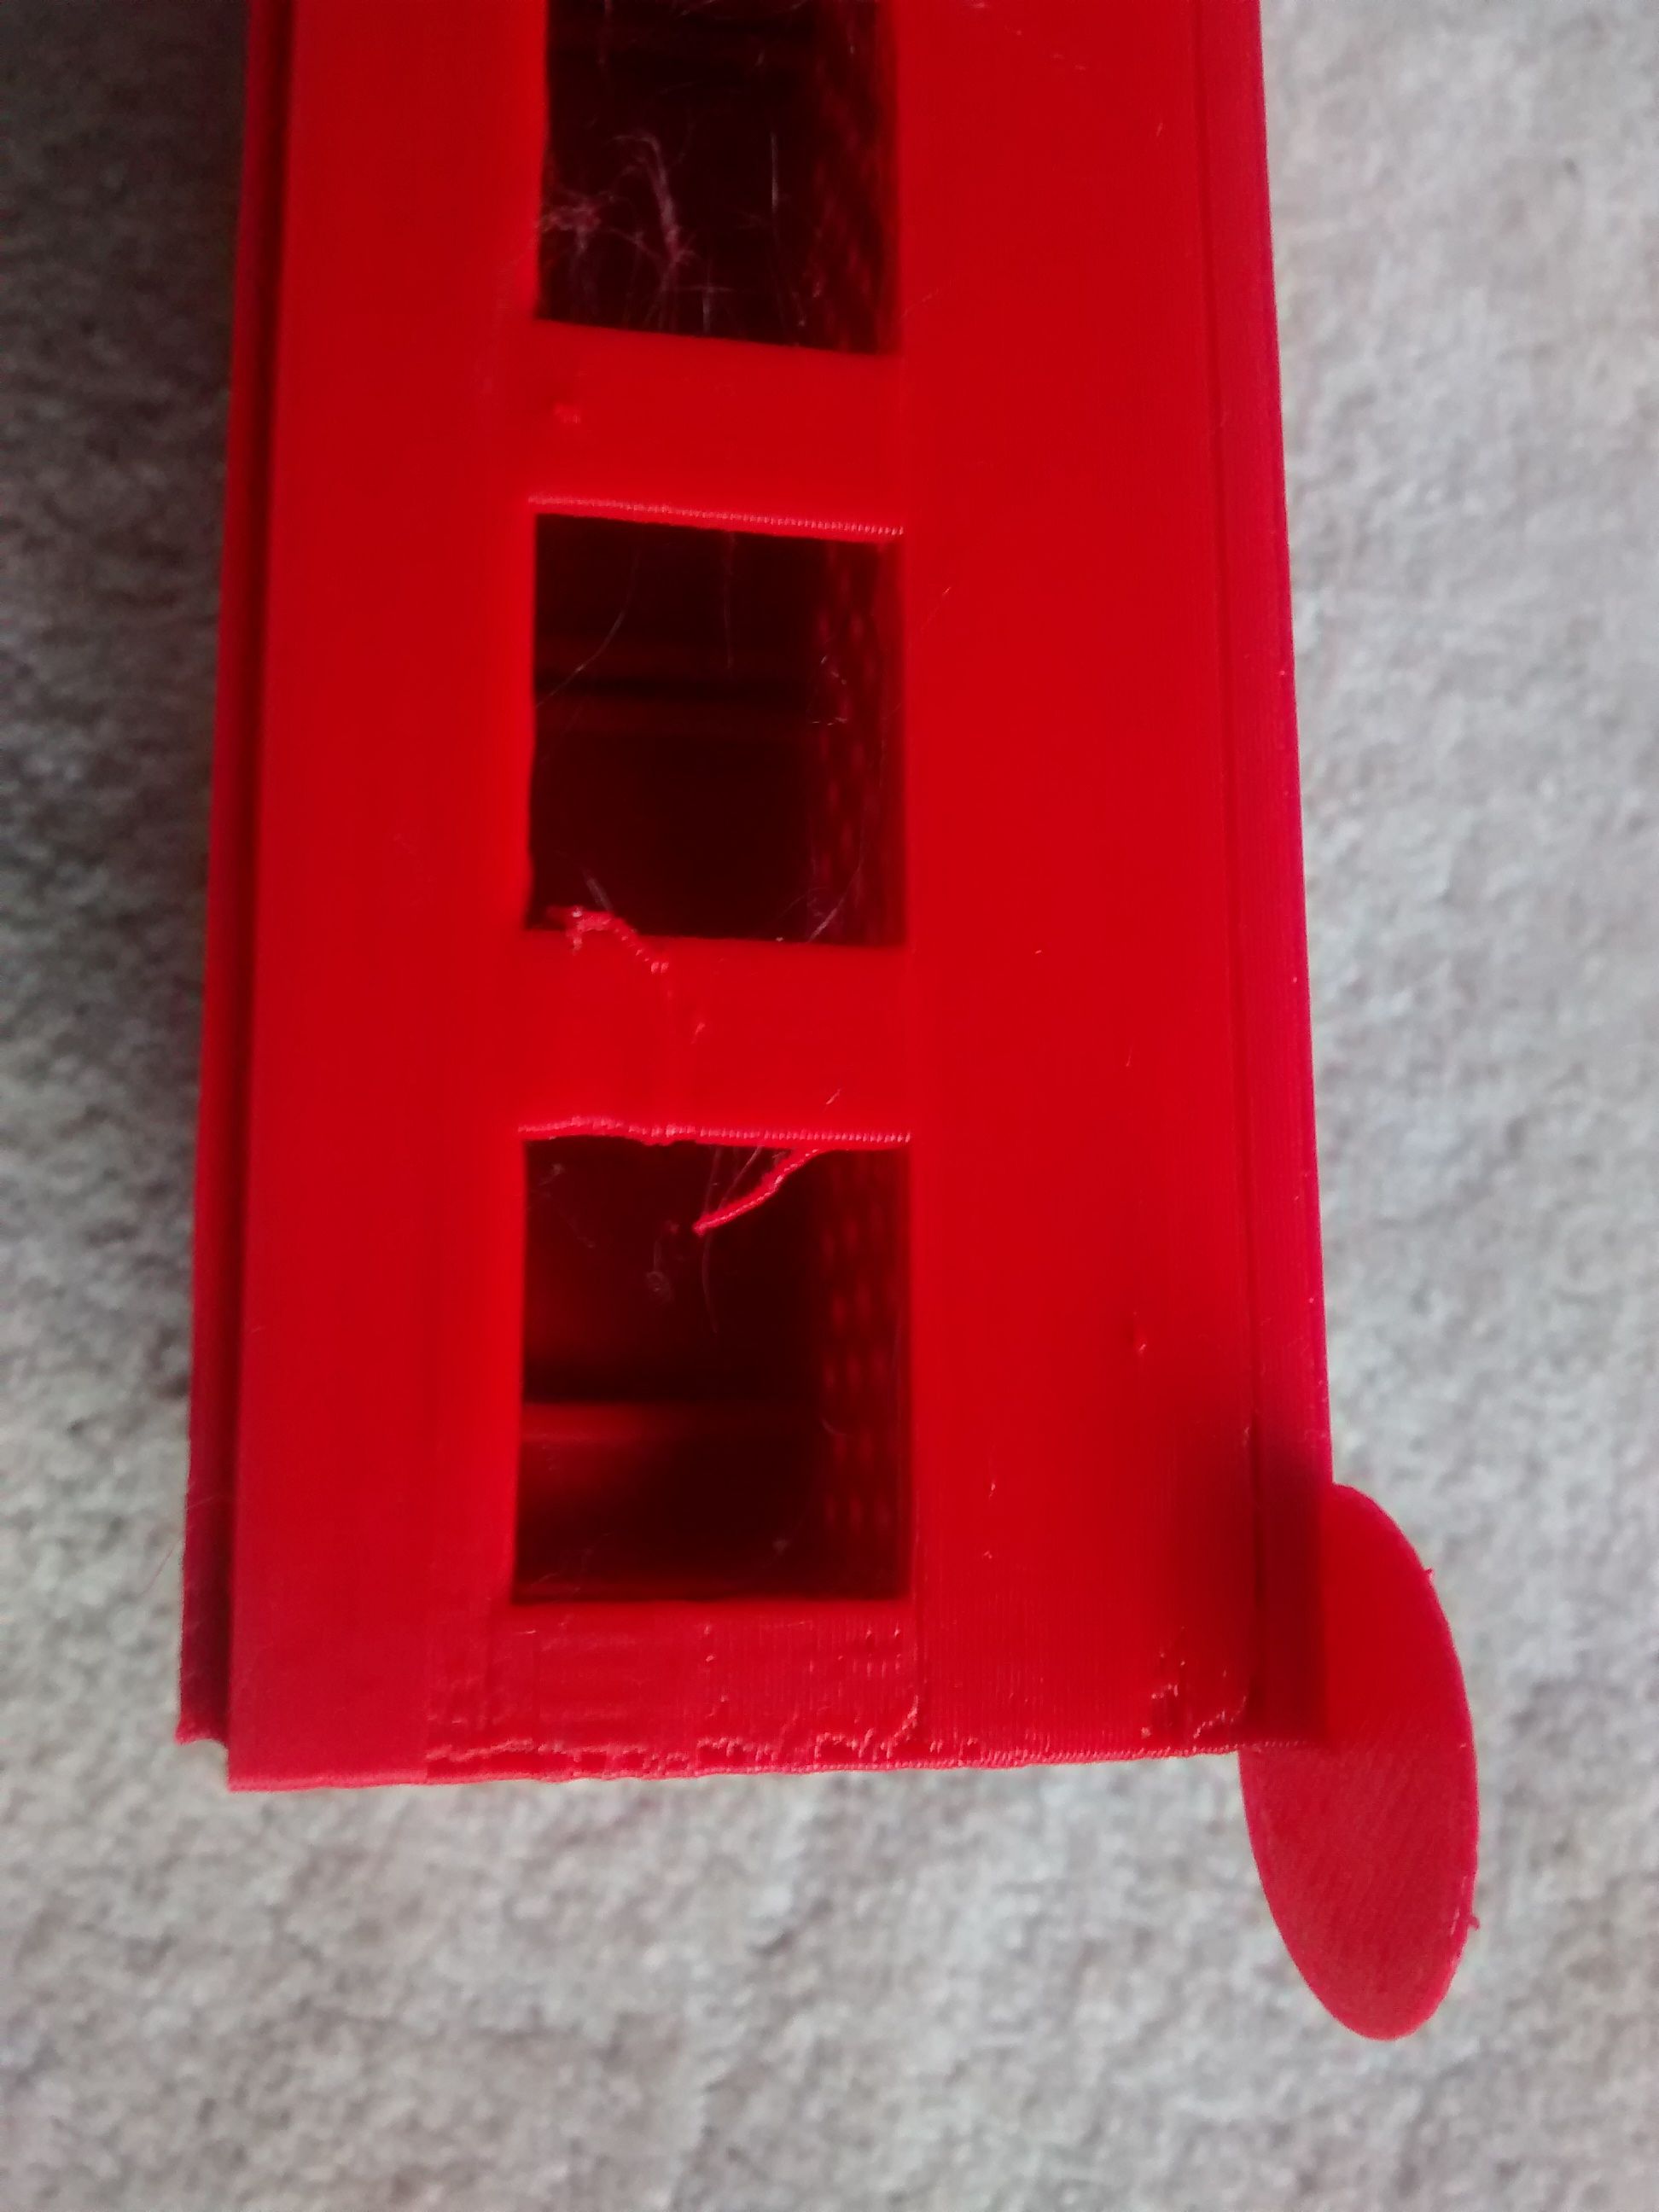
You can clearly see the holes as well as the line of under extrusion on the bottom. The bottom is 4 mm thick and the line is at the 4mm mark.
Any thoughts on the line at the bottom?
As previously mentioned, if I just print the corner, about 2 inches along the side you don't see in this picture and with two of the rectangular openings on the side that you do see, none of the artifacts show up.Edit: Just to be clear on the line of under extrusion along the bottom ... the bottom is printed and then the walls are printed onto the edges of the bottom. The line happens right where the edges are built up onto the bottom. The round thing on the bottom corner is for added adhesion to prevent the corner from lifting off the glass build plate.
-
I had a similar problem. Please try disabling any "Combing" and "use combing instead of retract" in cura.
Basically, at any point that the extruder wants to move from A to B without extruding, have it do a retract and Z hop, and rapid to that position. The problem is that cura usually defaults to using combing without retract ( to eliminate stringing) which means that especially on cases with thin walls the extruder travels a lot without retracting and it oozes out on the part. When it arrives, there is too little plastic to be pushed out (because it oozed out on the travel move) so on the start of the layer there is underextrusion.
I know this topic is old but anyone looking for this is at least finding a solution.