Pressure Advance Tuning file generator
-
Hi All,
In my quest to tune my various settings I decided I needed to be able to automatically generate a test file that would change the pressure advance at set intervals.
The only programming language I know is Delphi/Lazarus, so I created a windows application to carry out the task.Essentially that application creates a square box with two wall perimeters.
The inner wall prints at a constant speed and acts merely for support.
The outer wall alternates between a high and low speed with the transition point being mid way along the wall.
At the end of each layer a retraction is added.This allows you to see how the PA adjustments are affecting corners at the two speeds and how it is affecting the retraction settings.
A start and end G code section takes care of temps etc.
Here are some pics of tests starting a PA of zero and increasing by 0.05 every 5mm in height.
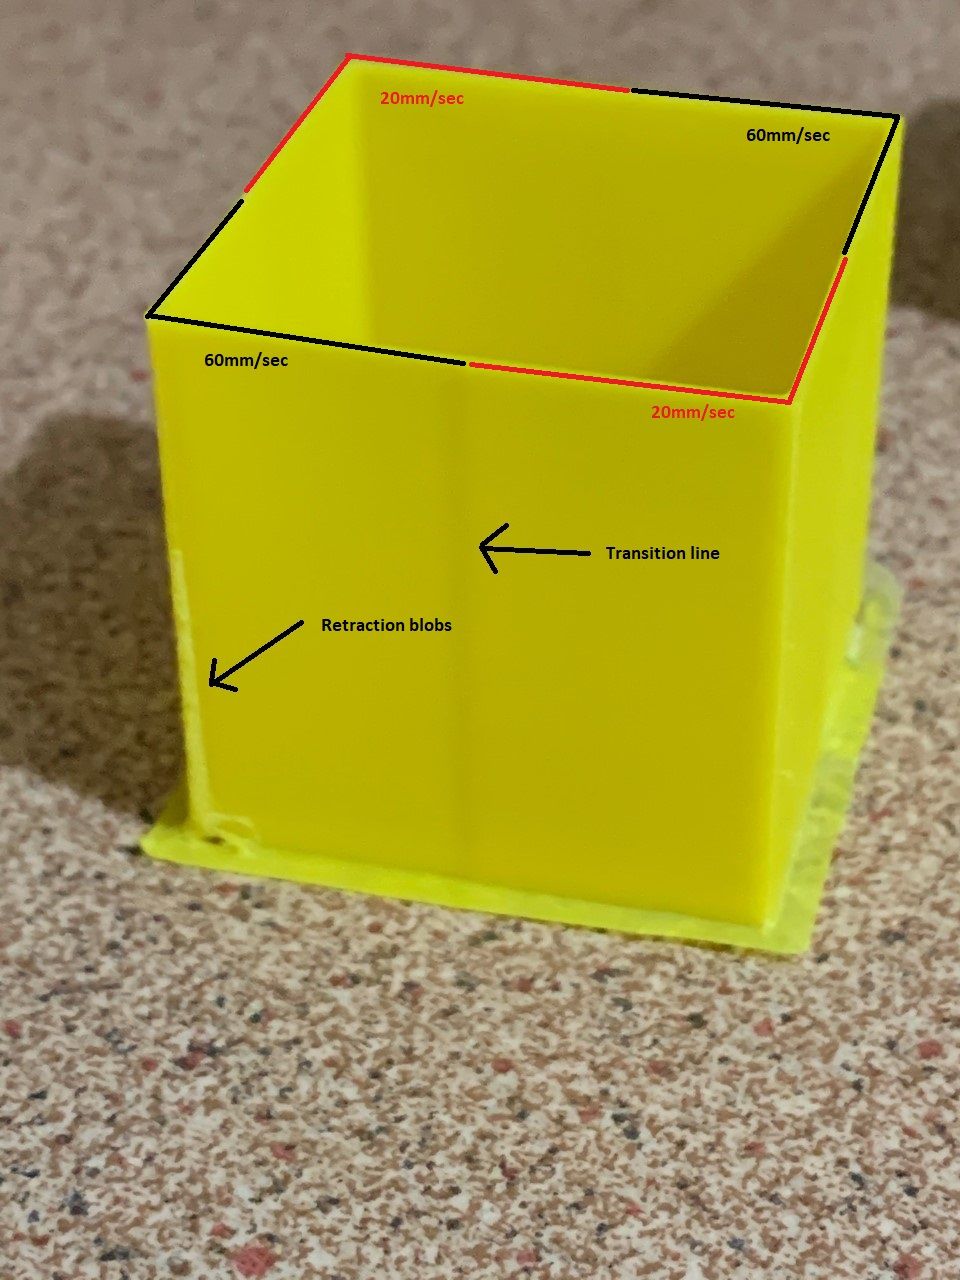
My printer runs about a 350mm bowden tube.Pic 1: PA range 0-0.35
Note the distinct thickness variations at the speed change point and the blobbing at the retraction/layer change point.
Pic2: PA Range 0.4-0.75
Transition line still faintly visible and some issues around retraction area
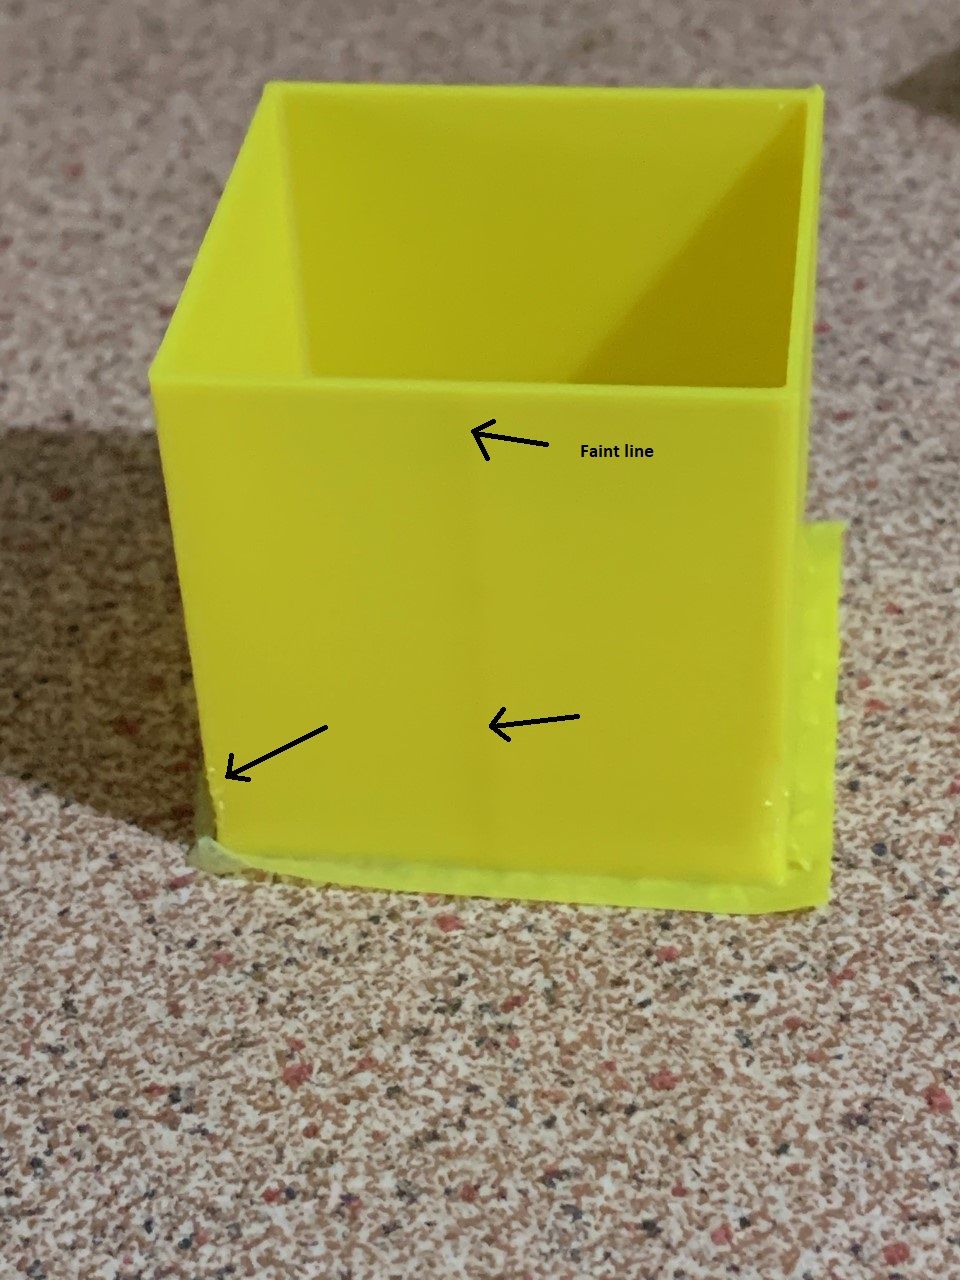
Pic3: PA range 0.8-1.15
Looks pretty good at about mid way
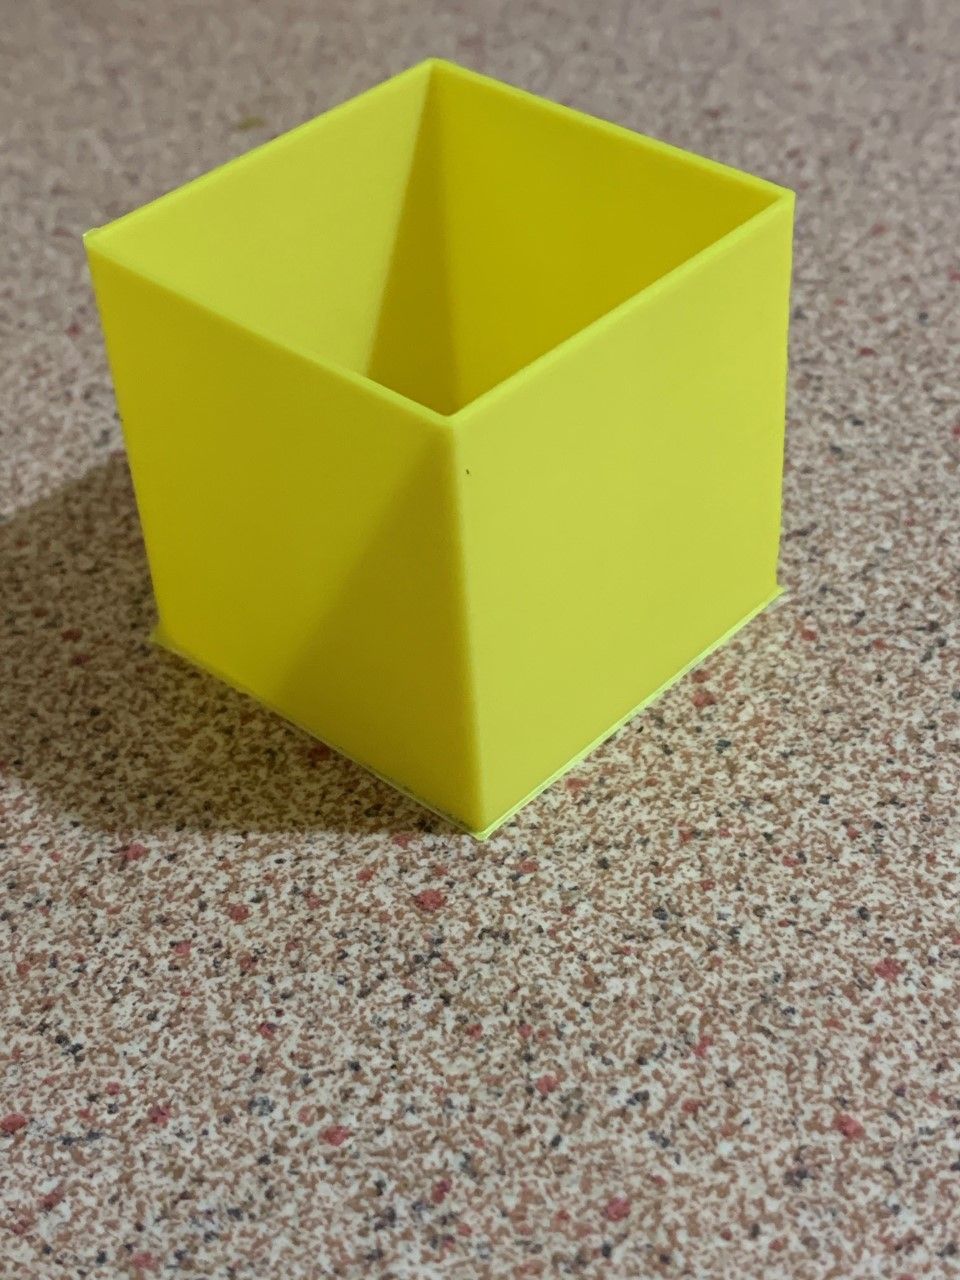
Pic4: PA range 1.2-1.55
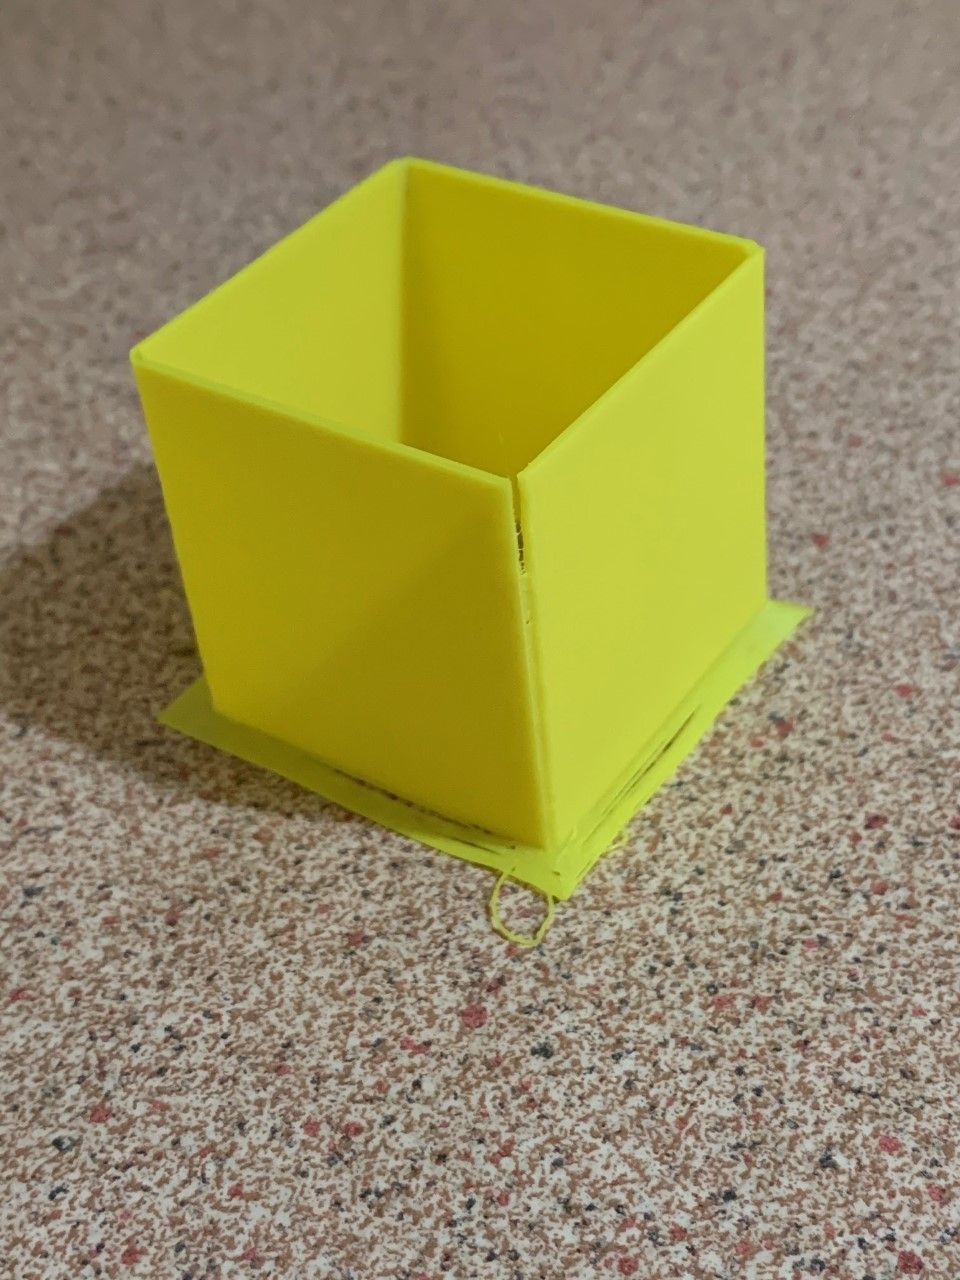
Here we can see that pressure advance is starting to cause too much retraction.
I'd either have to reduce PA or try again with less retraction.
If anyone would like to try the application and provide feedback , I have put a link to my dropbox.
Download link:
https://www.dropbox.com/s/nolo5aca26e7fni/PaAdvanceTestInstall_v1-0.zip?dl=0BE WARNED!!
This should be considered very much beta software.
Use at your own risk.
I've only tested on Windows 10.I'm not sure my extrusion volume calculations are 100% accurate.
They seem close, but not identical to Cura's values.
At any rate it seems good enough for the test purposes. -
Been waiting / looking for something like this.
I know Marlin has a script for PA but I am not advanced enough to tweak for my Duet and do not know Python.Looking forward to trying this when I get back from france.
Thank You. -
I have to say that as a single tool to adjust PA, this app is a fail.
Unfortunately the settings that worked best for the speed transition on a simple box didn't translate into the best settings for more complex prints.
After the initial tests using the generator, I ran a test using and array of nine x 3mm posts to check retraction/stringing and it was perfect (at least in terms of retraction between them - still something going on with the top layer of base).
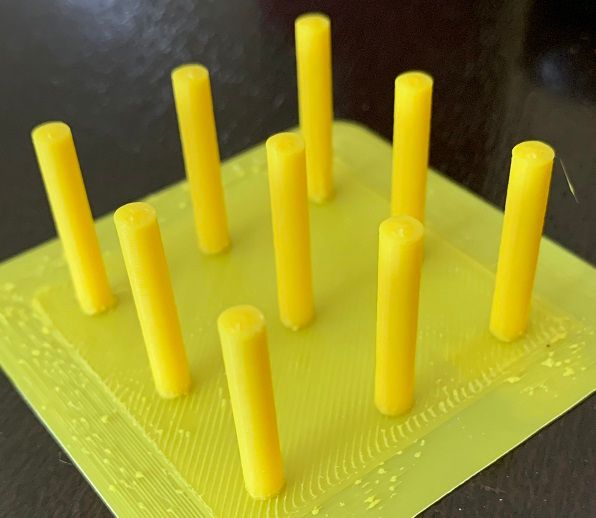
However, I have found that on items with many short paths, the "optimum" setting from the box produced massive under extrusion (likely from negative extrusion being applied).
I have since run many tests with varying PA and retraction values using the part in these pics.
In this example I have taken photos from two angles on the same part to demonstrate the compounding nature of too high a PA value.
Not sure which settings this was, but it gives an example.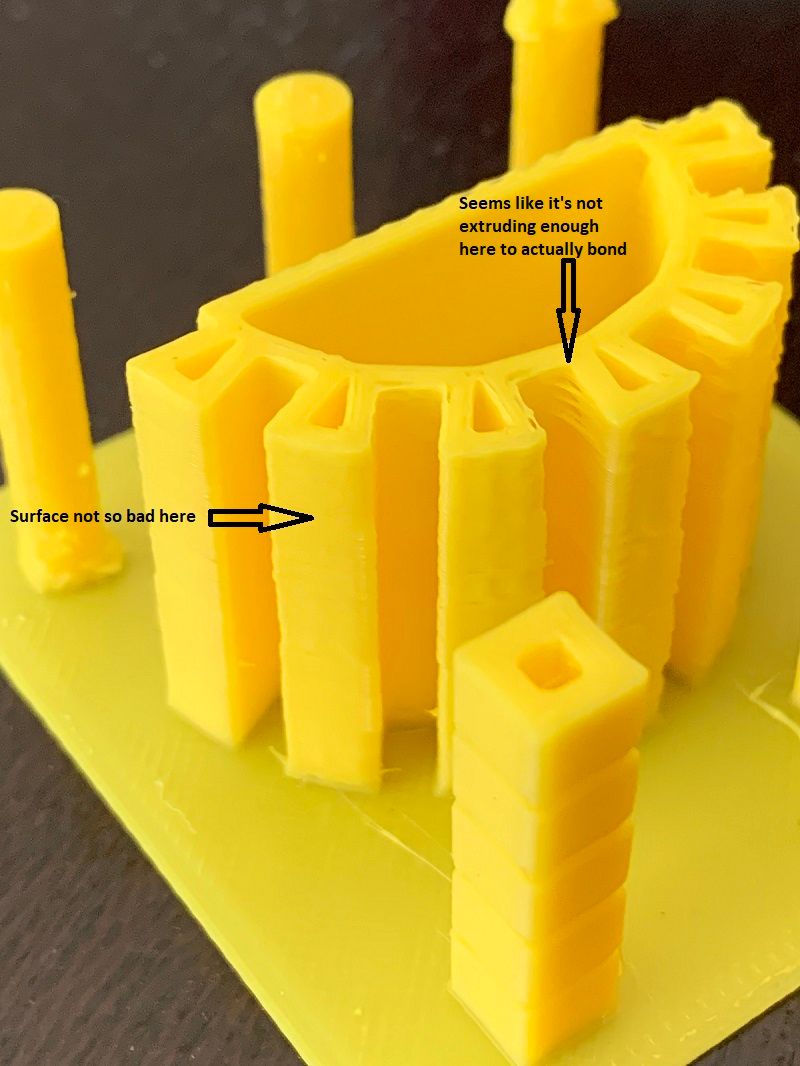
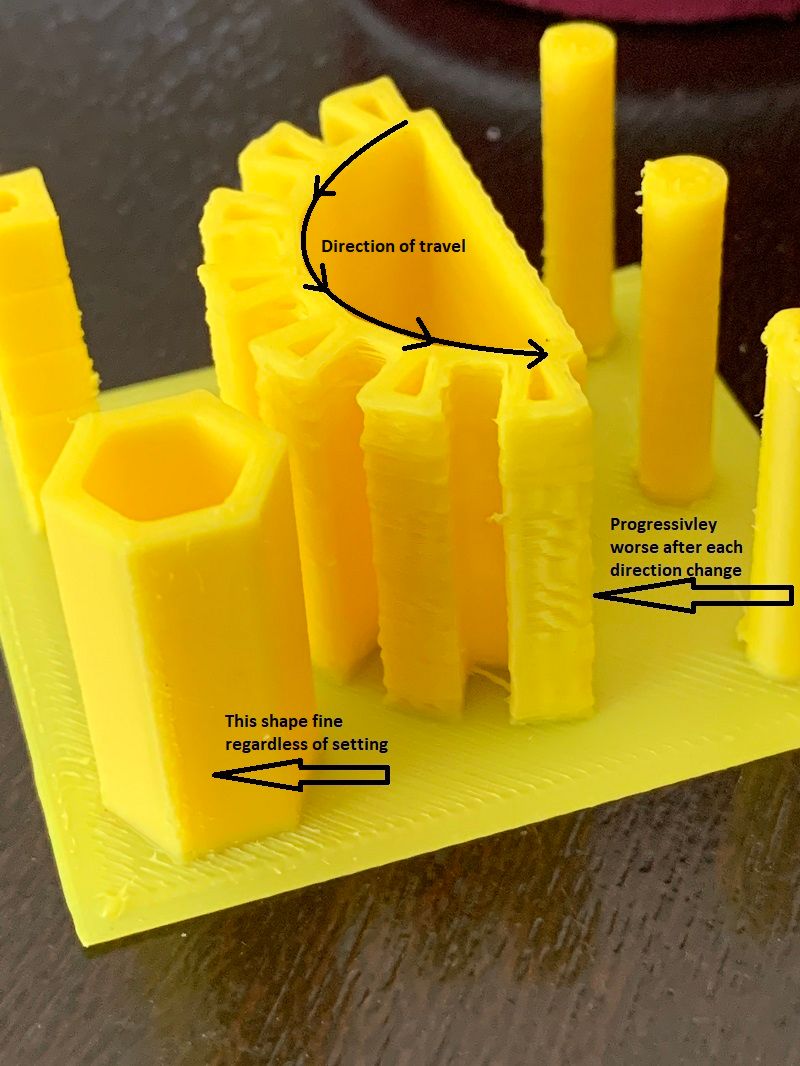
To make the tests somewhat easier I fudged up a python script to use in Cura (has been submitted in a pull request)
This allows you to add any G or M code at specific height.https://www.dropbox.com/s/a80x32vsdw2u05p/AddGcodeAtHeight.zip?dl=0
To use, you need to put it in the scripts folder of the post processing plugin.
e.g. "C:\Program Files\Ultimaker Cura 4.4\plugins\PostProcessingPlugin\scripts"Using this I've been going up and down with both PA and retraction looking for a sweet spot.
I have to admit, I'm not 100% sure that part of the problem could be the Chimera hotend I use.
These don't cope with much retraction before you get extrusion problems and I've found heat creep is an issue since I started to use an enclosure for ABS.I have a zesty nimble of order, so when I get that I'll change back to a V6 hotend and do it all over again.

I guess I could re-work the generator to create a more complex shape.
-
What kind of a printer are you using? Is it bowden? What tube length?
I struggled for months with a bowden (600mm) and zesty configurations and all problems went away when I switch to a direct configuration (BMG, V6, 150gram Nema 17).
-
@zapta At present I run a standard Bowden setup about 400mm long and a genuine E3D chimera.
The chimera has simply never given clean multi colour prints, but print quality with a single colour has been pretty good.
I have a zesty nimble V2 on order and will be ditching the chimera in favour of a V6 at that time..This round of tests was inspired more from wanting to be able to refine and validate the settings I had been using than because of particularly bad prints.
Hopefully my experience with the nimble will be better than yours.
-
@OwenD A couple of pointers from someone who has done a lot of work with PA which might help you. Firstly PA only operates during the acceleration and deceleration phases of a move. So it only affects the beginning and end parts of a move. Therefore, anything you see during the constant speed part of a move is something other than PA. Secondly, the additional extrusion which is applied to the start of a move is exactly equal to the reduction in extrusion at the end of a move. For any given move, the net amount of material extruded is the same, with or without PA. So if you see signs of overall under or over extrusion it's something other than PA (but it might be an indirect contributory factor - ie filament grinding). In general, there is a direct link between extruder "jerk" and PA. You need to set extruder jerk really high - you can go as high as you like because it has no effect on anything else (unless it's too low, in which case it will slow down the entire print). Finally anything which affects the viscosity of the filament will affect the PA value that you need. So different temperatures or different filaments will need different PA values.
HTH -
@deckingman said in Pressure Advance Tuning file generator:
Secondly, the additional extrusion which is applied to the start of a move is exactly equal to the reduction in extrusion at the end of a move. For any given move, the net amount of material extruded is the same, with or without PA.
When I run PA calibration I got the impression that PA affects the total amount of material deposited per layer. Here are some pictures (scroll that page to the pictures of blue cube), the only variable between layers is the PA value.
-
@zapta said in Pressure Advance Tuning file generator:
@deckingman said in Pressure Advance Tuning file generator:
Secondly, the additional extrusion which is applied to the start of a move is exactly equal to the reduction in extrusion at the end of a move. For any given move, the net amount of material extruded is the same, with or without PA.
When I run PA calibration I got the impression that PA affects the total amount of material deposited per layer. Here are some pictures (scroll that page to the pictures of blue cube), the only variable between layers is the PA value.
I'm fairly sure that David would not use code which did not faithfully respect the extrusion amount for a given move. So if a move command asks for say 6mm of filament to be extruded, that is what we should get. My understanding is that pressure advance merely affects the distribution of the flow rate - more at the start of a move, less at the end but we should still get 6mm overall (if that is what the gcode asked for).
Of course, if the mechanics cannot keep up with the demand due to (for example) missed steps or extruder slippage) then there may well be signs of under extrusion. But that would be an indirect effect caused, not by the pressure advance algorithm but by some mechanical defect which limits the machine's capability to reproduce the commanded movement. One example might be that if you print close to the melt rate capability of the hot end, then with pressure advance the additional increase in extruder acceleration at the start of a move, might lead to a rate of extrusion which is higher than the melt rate capability of the hot end, so there could be some slippage or grinding of filament.
-
@deckingman said in Pressure Advance Tuning file generator:
So if a move command asks for say 6mm of filament to be extruded, that is what we should get.
This is something I can test with my little stepper analyzer, running the same print with different PA and compare the total estep count.
-
I run a test with two empty cubes, one with PA=0 and the other with PA=0.5 (the optimum is PA=1.5) for this printer and the full esteps counts are 6452 and 6450 respectively so basically identical.
(I paused after the initial purge, base and skirt and reset the counter so the counts are just for the perimeters of the empty 20x20x10 empty box.
-
@zapta It's reassuring to know that PA is working as I'm sure David intended it to - i.e. that there is no difference in the total extrusion amount with or without PA. So if a model exhibits signs of overall under or over extrusion with PA, it is due to factors other than firmware - most likely mechanical as I postulated above.
-
@deckingman, another theoretical possibility is that the under-extrusion at the ends is deposited at the middle of the layer. Measuring the filament used or weighing the prints could tell.
I am using a BMG dual drive extruder and those have an excellent grips so the possibility of minute grinding and slippage is very interesting. I was aware of only stepper full step slips.
-
@zapta said in Pressure Advance Tuning file generator:
@deckingman, another theoretical possibility is that the under-extrusion at the ends is deposited at the middle of the layer. Measuring the filament used or weighing the prints could tell.
I thought you said that the extruder gave the same number of steps with and without PA. So I thought we had reached agreement that it must follow that the overall amount of filament used must be the same (unless there are missed steps or mechanical slippage). Why would extra filament be deposited in the middle of a move? For sure if you set PA too high, you'll get the opposite effect of not using PA. That is to say, without PA, the print head can accelerate faster than the filament coming out of the nozzle so you get under extrusion at the start of a move. Too much PA would over compensate giving over extrusion at the start. Conversely, at the end of a move, the pressure which has built up in the system will tend to continue to push filament through the nozzle even though the extruder decelerates along with the print head. So withou PA you can get over extrusion at the end of a move but too much PA would over compensate leading to under extrusion.
Of course, with short moves where there is no steady speed section, the extruder is either accelerating or decelerating so PA is either advancing the extruder or retarding it. Which is why I have always advocated using long fast moves as the only way to properly tube PA. But nobody listens so I've given up trying to explain. -
@deckingman said in Pressure Advance Tuning file generator:
I thought we had reached agreement that it must follow that the overall amount of filament used must be the same (unless there are missed steps or mechanical slippage).
A comparison of the print weights or the lengths filaments consumed will indicate if extruder slippage occurred. (I am pretty sure there was no full step misses at the stepper level).
Without slippage the under extruded material from the ends of the lines must go to the middle of the lines to keep the overall consumed filament length. With slippage, one print will consume more material then the other.
I have always advocated using long fast moves as the only way to properly tube PA
Any suggestion on how to do that without having to run a generator script? E.g. with a model, a slicer and potentially conditional gcode in the slicer. This will reduce the hassle of running a PA calibration.
-
@zapta said in Pressure Advance Tuning file generator:
I have always advocated using long fast moves as the only way to properly tube PA
Any suggestion on how to do that without having to run a generator script? E.g. with a model, a slicer and potentially conditional gcode in the slicer. This will reduce the hassle of running a PA calibration.
I wrote this up on my blog nearly 2 years ago but at that time, there was an issue with the firmware when printing curves with PA - this is now fixed. https://somei3deas.wordpress.com/2018/01/15/an-attempt-to-investigate-pressure-in-the-extrusion-system-with-a-diamond-hot-end/
But basically all you need do is print the biggest possible cuboid with 100% infill. Start at slow speed so that pressure does not build up and lay down a few layers to get a nice flat surface. Then increase the speed to the highest practical speed that does not exceed the melt rate of the nozzle and observe the start and end of the moves for signs of over/under extrusion. I found that a finger tip is more sensitive than an eyeball. Increase PA until you can see/feel no difference between the ends of the filaments beads and the mid point. If you can't find the best setting in one layer, slow the print down again and lay down a few layers at really slow speed so there is no pressure build up, and lay down a few more layers until the surface is nice and flat again. Then increase the speed again an continue increasing the PA value. Repeat as necessary. Once you have found the optimum PA value for that particular filament type and temperature, it will work at all print speeds. Then run a retraction test to find the best retraction settings. Anything which changes the viscosity of the filament (such as temperature or filament type) will affect the pressure and thus the amount of compensation required.
No fancy script or conditional gcode required. Just slice normally. Then use M220 to change the speed factor and M572 to change PA.