Duet3D Logo Duet3D
    • Tags
    • Documentation
    • Order
    • Register
    • Login

    Pressure Advance seems to not be working.

    Scheduled Pinned Locked Moved
    Tuning and tweaking
    8
    83
    6.7k
    Loading More Posts
    • Oldest to Newest
    • Newest to Oldest
    • Most Votes
    Reply
    • Reply as topic
    Log in to reply
    This topic has been deleted. Only users with topic management privileges can see it.
    • Phaedruxundefined
      Phaedrux Moderator @Samuel235
      last edited by

      @Samuel235 said in Pressure Advance seems to not be working.:

      Hiccups: 129

      I wouldn't be too concerned by this over the course of a print.

      Do you happen to have Z hop on retract enabled?

      You can do more fine grained testing to try and pin down when the hiccups are occuring. Every time you send M122 it resets the counter, so you can send it at the start, send it after homing, send it after the first layer, etc. and eventually you'll get an idea of where and when they are occuring.

      Z-Bot CoreXY Build | Thingiverse Profile

      Samuel235undefined 1 Reply Last reply Reply Quote 0
      • Samuel235undefined
        Samuel235 @Phaedrux
        last edited by

        @Phaedrux - I was doing this while it was printing also, it seems to be consistent on most layers if i remember correctly. I'm not currently running Z Hop, no.

        1 Reply Last reply Reply Quote 0
        • zaptaundefined
          zapta @Samuel235
          last edited by

          @Samuel235 said in Pressure Advance seems to not be working.:

          @zapta Its bowden, around 650mm bowden length.

          0.22 for a 650mm bowden is very low, good for you. I got > 1.0 with 600mm 1.9mm capricon bowden and lowered it to 0.15 when switched to direct drive.

          1 Reply Last reply Reply Quote 0
          • Samuel235undefined
            Samuel235
            last edited by

            I'm currently running some tests to attempt to calibrate it. I'm currently using CURA so I'm unable to force a seam to be in the middle of a flat face, so i'm using a cone print to put a seam on the face and to change PA as the print goes and then to find the best section. I'd be interested to know the calibration method you all face, do you all go for the python script that is floating around?

            Phaedruxundefined 1 Reply Last reply Reply Quote 0
            • Phaedruxundefined
              Phaedrux Moderator @Samuel235
              last edited by Phaedrux

              @Samuel235 said in Pressure Advance seems to not be working.:

              I'm currently using CURA so I'm unable to force a seam to be in the middle of a flat face

              It can be done in Cura.
              https://ultimaker.com/en/resources/52343-shell

              The options may be hidden by default. Use the gear icon on the shell heading to see any hidden options.

              Z seam alignment - User specified
              Z seam position - back
              Seam corner preference - none

              Produces the desired result. That's in 4.4.1. In older versions there was an X and Y position you could specify. The setting is still there in the settings visibility filter, but it's not being shown and I'm not sure what's blocking it. Regardless, setting it to back, front, left, or right works to align it to a face.

              Z-Bot CoreXY Build | Thingiverse Profile

              Samuel235undefined 1 Reply Last reply Reply Quote 0
              • Samuel235undefined
                Samuel235 @Phaedrux
                last edited by

                @Phaedrux - Im on 4.2.1 and the XY position will not put it in the middle of a flat face for me and a few others I chat to. I will try their update shortly to see if that new option works for me.

                Phaedruxundefined 1 Reply Last reply Reply Quote 0
                • Phaedruxundefined
                  Phaedrux Moderator @Samuel235
                  last edited by

                  @Samuel235 The corner preference must be none as well.

                  Z-Bot CoreXY Build | Thingiverse Profile

                  1 Reply Last reply Reply Quote 0
                  • Samuel235undefined
                    Samuel235
                    last edited by

                    I have just updated my Cura, and still facing the same issues:

                    529ff7e2-dd34-4c61-afac-fabf0d4d3d61-image.png

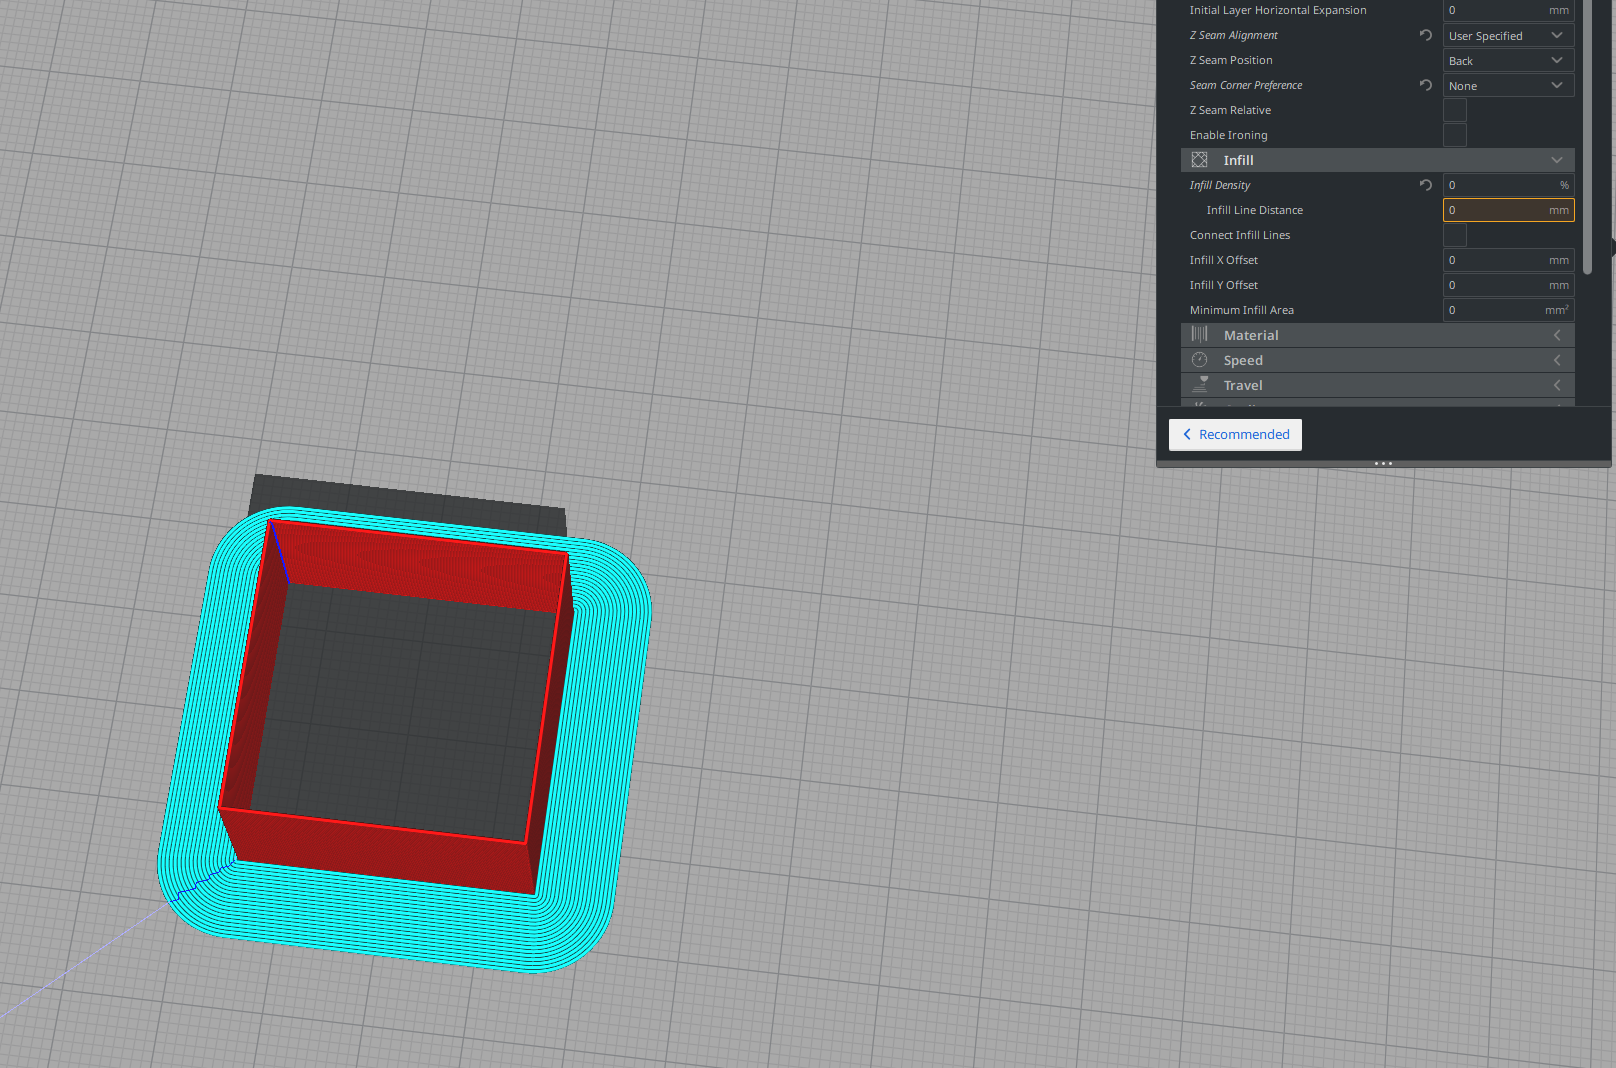
                    Will attempt to find a work around later today using another slicer.

                    Phaedruxundefined 1 Reply Last reply Reply Quote 0
                    • burtoogleundefined
                      burtoogle
                      last edited by

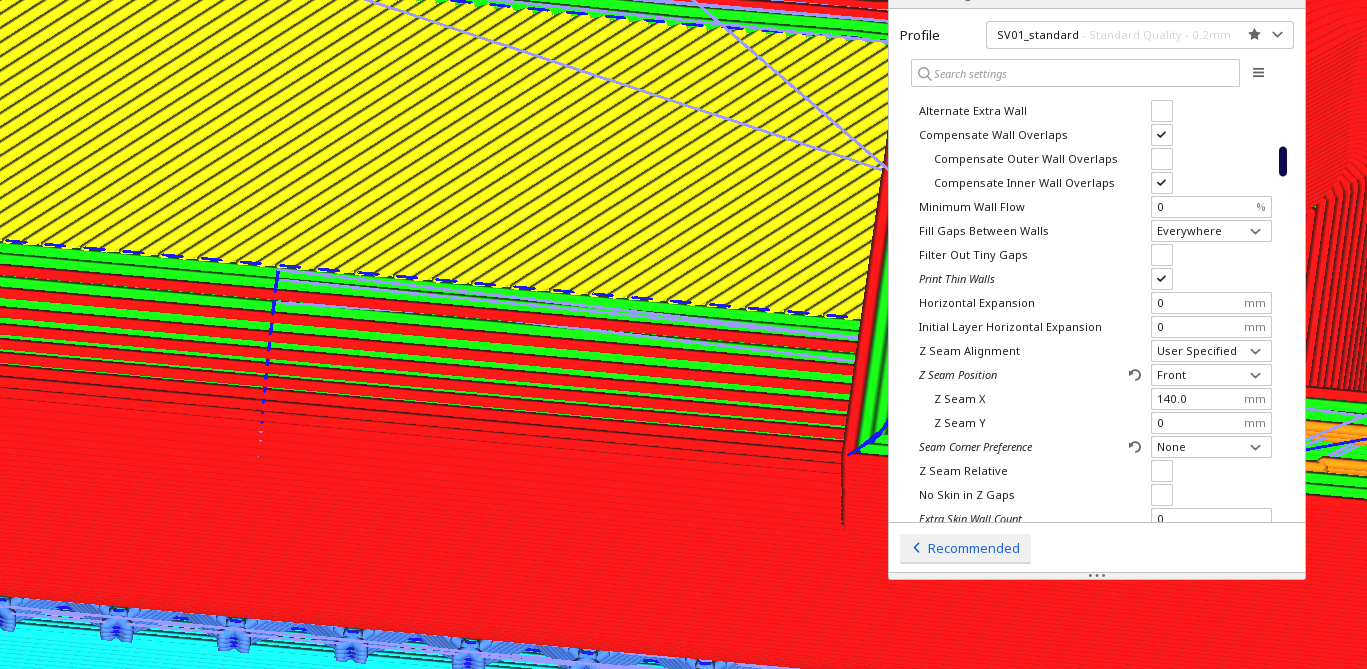
                      Re getting the z-seam in the middle of a flat face using Cura. Well, it can't be done using the UM releases but my Cura builds do now provide that capability. Setting the z-seam to user-defined and seam corner preference to none will enable this feature. You can find my releases at https://www.dropbox.com/sh/s43vqzmi4d2bqe2/AAADdYdSu9iwcKa0Knqgurm4a?dl=0. Please read the README.md file there for more info.

                      Here's an example, you can see the travel moves associated with the z-seam to the left of the middle of the flat area at the botttom of the image.

                      Screenshot_2020-01-02_07-49-20.png

                      Phaedruxundefined 1 Reply Last reply Reply Quote 1
                      • Phaedruxundefined
                        Phaedrux Moderator @burtoogle
                        last edited by

                        @burtoogle said in Pressure Advance seems to not be working.:

                        Well, it can't be done using the UM releases but my Cura builds do now provide that capability.

                        Just one more reason to use your builds.

                        @Samuel235 I was going by memory on the settings and didn't realize that the stock Cura does not allow this.

                        Z-Bot CoreXY Build | Thingiverse Profile

                        1 Reply Last reply Reply Quote 0
                        • Phaedruxundefined
                          Phaedrux Moderator @Samuel235
                          last edited by

                          @Samuel235 For what it's worth, setting the seam to a corner of the cube is also usable, it just makes finding the smoothest transition a little harder. You can also use a cylinder, but then you miss out on the corner bulge tuning.

                          Z-Bot CoreXY Build | Thingiverse Profile

                          1 Reply Last reply Reply Quote 0
                          • Samuel235undefined
                            Samuel235
                            last edited by

                            Oh awesome, thank you for including your build @burtoogle!

                            @Phaedrux - I have been using a cone, I imagine this to be the same as a cylinder for the sake of this test, just the layers would get quicker as they go up, and I ranged from 0.1 to 0.9 PA, I didn't get any change in apperance of the seam at all across the range of PA values unfortunately. I will try with a cube tomorrow to test.

                            1 Reply Last reply Reply Quote 0
                            • Phaedruxundefined
                              Phaedrux Moderator
                              last edited by

                              A cone might be ok. I think the fact the size is changing as it goes up would make it harder to see the difference in the seam since the layer time is a confounding factor.

                              The cube is probably the best option for this because you get up to speed over the 100mm length and the corners show the bulge and the seam on the face is clearly visible.

                              Z-Bot CoreXY Build | Thingiverse Profile

                              1 Reply Last reply Reply Quote 0
                              • Samuel235undefined
                                Samuel235
                                last edited by

                                Currently printing a 100mm cube with a single skin, no infil. Seam is in the middle of the face at the back with the build of Cura linked above (Thanks @burtoogle). I have PA changing its value from 0.05 to 0.9 in 0.05 increments every 25 layers. Will see how this turns out.

                                1 Reply Last reply Reply Quote 0
                                • Samuel235undefined
                                  Samuel235
                                  last edited by

                                  Cube just completed:
                                  Single Walled Cube Pressure Advance Test 01

                                  As you can see throughout the range of 0.5 to 7 PA value there is no difference. This was with a jerk value of 8000mm/min. I’m dropping that jerk down to 4000mm/min now for another test. Should i expect to see any improvements with lowering the extruder acceleration value too?

                                  Phaedruxundefined 1 Reply Last reply Reply Quote 0
                                  • Phaedruxundefined
                                    Phaedrux Moderator @Samuel235
                                    last edited by

                                    @Samuel235 something isn't right. There should definitely be some noticeable difference over such a wide range of 0.5 to 7.

                                    What command are you using?

                                    Can you post your config?

                                    Z-Bot CoreXY Build | Thingiverse Profile

                                    1 Reply Last reply Reply Quote 0
                                    • Samuel235undefined
                                      Samuel235
                                      last edited by Samuel235

                                      Nothing has changed from the settings i posted originally, other than change to the extruder current limit. Do you want me to post them again (Asking as i’m not at my system at the moment but will get to it if needed) so you can confirm any typos were not made or something? I don’t believe there is anything i would have typoed as It was just a change of number not a command or anything.

                                      1 Reply Last reply Reply Quote 0
                                      • Phaedruxundefined
                                        Phaedrux Moderator
                                        last edited by

                                        How are you changing the PA value? Via the console during the print, or is it scripted into the gcode file?

                                        I'm thinking it may not actually be getting applied because there should definitely be some visible result. At a value of 7 you'd likely see the extruder reversing dramatically.

                                        Z-Bot CoreXY Build | Thingiverse Profile

                                        Samuel235undefined 1 Reply Last reply Reply Quote 0
                                        • Samuel235undefined
                                          Samuel235 @Phaedrux
                                          last edited by

                                          @Phaedrux - its hardcoded into the code, but i confirm it changes every 25 layers using the command line console. The extruder behaviour changes each time PA changes, i can confirm that. But nothing changes in the print.

                                          Im thinking PA is working but something is masking its effects, hence why i was thinking of changing jerk and possibly acceleration on the extruder.

                                          1 Reply Last reply Reply Quote 0
                                          • Phaedruxundefined
                                            Phaedrux Moderator
                                            last edited by

                                            Are you still getting hiccups?

                                            Z-Bot CoreXY Build | Thingiverse Profile

                                            Samuel235undefined 1 Reply Last reply Reply Quote 0
                                            • First post
                                              Last post
                                            Unless otherwise noted, all forum content is licensed under CC-BY-SA