Purge and wipe in start script
-
I've seen a makerbot do a a small purge at the start of a print, with the extruder raised from the bed and moving on the X axis (right at the back of the bed, out of the print) before it started extruding. As it moved across the x axis, it started to extrude and lower to the build plate.
I'd like to put a command like that between the bed levelling and the start of the print in the starting script in S3D.
Could someone please give and example of the command that would do that? I'll work out the XY values I want from there.
Thanks in advance for any help,
Cheers
-
T0
M116
G1 Z10.0 F6000 ; Move the platform down
G1 X0 Y10 F5000 ; move to front left corner
G92 E0 ; reset extrusion distance
G1 F200 E5 ; prime Nozzle
G92 E0 ; reset extrusion distance
M117 Priming and Cleaning Nozzle... ; output message
M83 ; set extruder to relative mode
G92 E0; reset extrusion distance
G1 Z0.3 ; move down to the bed
G1 Y60 E5 F500 ; move 40mm backwards printing a line
G1 E-3 F1500 ; retracting
G92 E0; reset extrusion distance
G1 Y100 F7200 ; quick move 60mm backwards
G1 Z20 ; lift nozzle
G1 x10 Y10 ; move to the front
G4 P3000 ; wait 3s
M82 ; set extruder to absolute mode
G92 E0; reset extrusion distance
M117 Ready... ; output messageMaybe not exactly what you want.
I am printing a short line before the start of a print job.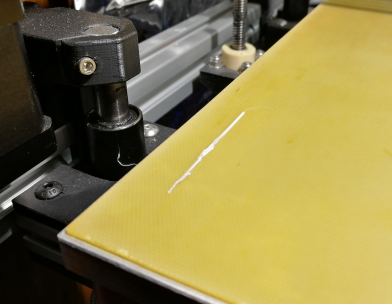
-
I have a "purge.g" in my macros subdirectory.
I call it with an M98 command.
M98 P"/macros/printing/purge.g";; purge.g ; macro to purge leave a print in process and purge some filament in a safe location before returning to the print ; currently configured for use with a fixed (x,y,z) purge bucket ; NOTE: When using G1"R" to restore a position, axis args are offset and any axis not mentioned will not restore ; (So use X0 Y0 Z0 with restore moves or else the tool will just sit there) G60 S2 ; Store Current Tool Coordinates in slot 2 (same as would occur at tool change) G1 X0 Y0 Z5 R2 F6000 ; move up 5 mm @ 100mm/s G1 X0 Y80 F12000 ; move to a spot above the bucket location (in front of Z tower) @ 200mm/s G60 S1 ; store position slot 1 G1 X0 Y80 Z0.1 F6000 ; move to purge coordinates @ 100mm/s G1 E20 F900 ; purge 20mm filament @ 15mm/s G4 S2 ; Wait for 2 second & G10 ; retract to minimize ooze G1 X0 Y0 Z0 R1 F6000 ; return to stored position 0 (above purge) @ 100mm/s G1 X0 Y0 Z5 R2 F12000 ; return to stored position 2 (Z offset 5mm above print) @ 200mm/s G1 X0 Y0 Z0 R2 F3000 ; return to stored position 2 (contact print) @ 50mm/s G11 ; unretract ; print will resume at this point -
@SteveYYC said in Purge and wipe in start script:
G10 ; retract to minimize ooze
G11 ; unretractNice, how easy... I will try that too. Thank you for sharing.
-
@SteveYYC
Have you installed a wiper at the plunge bucket?
Without I only could get rid of the leaking filament by printing the line. -
I do not have a wiper at this time, but I am only using the purge macro at the start of the print so I print a single-outline skirt that doesn't touch the print & that keeps the string from touching the part.
When I initially wrote this macro I didn't have the G4 command in it and the string was pretty awful. Adding the 2-second dwell made the string much thinner. I am thinking about adding a step to pull up just a little before the dwell, blast the part-cooling fans and then a quick move to snap the string. I'll let you know how it goes.
This macro is part of a project to add a moving purge bucket to my delta and once I get that built I will have a squeegee/wiper on the edge of the bucket.
-
Here's my wipe/prime line at back left of the bed.
; called by M98 P"0:/sys/PrimeNozzle.g" after slicer temps are set G90 ; Absolute positioning G1 X1 Y270 F6000 ; Move to front left corner M400 ; clear movement buffer M116 ; Wait for temps G1 Z0.3 F100 ; Move Z to prime height G91 ; Relative positioning M83 ; Relative extrusion G1 X40 E10 F300 ; Prime nozzle G10 ; Retract G1 Y-1 X1 F10000 ; Wipe nozzle M400 -
@SteveYYC said in Purge and wipe in start script:
move to snap the string
That is exacty what I do in my script.
It works perfect for PLA, good for ABS but should be improved for PETG.
The script is linked to the extruder, shurely it would be better to tweak and link it to the filament settings. -
@DIY-O-Sphere I would like to have the purge tied to the filament eventually (especially for minimizing the purge volume) but I think I might try to do that with RRF3.0 variables and Conditional Meta Commands once they're working.
-
This is the script I use, it puts a little glob to prime extruder on front edge of bed before beginning print.
G32
G1 X30 Y30 F9000 ;Go to purge start position
G1 Z0.3 ;Drop to bed
G92 E0 ;Reset E position
G1 X50 E20 F2000 ;Draw purge line
G1 X200 F4200 ;Wipe out
G92 E0 ;Reset E position