Blobs with PA and w/o
-
Hello,
I am struggling to tune my PA setting to get rid of blobs on every layer change. I did try PA 0.25-0.8 with no luck. Then switched to coast and wipe in Simplify3D feels a bit better but still not what I expect. Bowden tube is 850mm. BMG extruder. Custom CoreXY. 9mm retraction.
There is my config.g. Maybe somebody can guide me through what else I can tweak? Thank you!
; Configuration file for Duet WiFi (firmware version 2.03) ; executed by the firmware on start-up ; ; generated by RepRapFirmware Configuration Tool v2.1.4 on Thu Jan 02 2020 22:17:48 GMT+0100 (Central European Standard Time) ; General preferences G90 ; send absolute coordinates... M83 ; ...but relative extruder moves M550 P"own" ; set printer name M667 S1 ; select CoreXY mode ; Network M552 S1 ; enable network M586 P0 S1 ; enable HTTP M586 P1 S0 ; disable FTP M586 P2 S0 ; disable Telnet ; Drives M569 P0 S1 ; physical drive 0 goes forwards M569 P1 S1 ; physical drive 1 goes forwards M569 P2 S1 ; physical drive 2 goes forwards M569 P3 S0 ; physical drive 3 goes backwards M569 P4 S1 ; physical drive 4 goes forwards M584 X0 Y1 Z2 E3:4 ; set drive mapping M350 X16 Y16 Z16 E16:16 I1 ; configure microstepping with interpolation M92 X201.207 Y201.207 Z400.00 E415:415 ; set steps per mm M566 X1300 Y1300 Z80 E1200.00:1200.00 ; set maximum instantaneous speed changes (mm/min) M203 X10000 Y10000.00 Z200 E10000.00:10000.00 ; set maximum speeds (mm/min) M201 X900 Y900 Z250 E10000.00:10000.00 ; set accelerations (mm/s^2) M906 X800 Y800 Z1300 E700:700 I30 ; set motor currents (mA) and motor idle factor in per cent M84 S90 ; Set idle timeout ;M572 D0:1 S0.45:0.45 ; Pressure advance ; Axis Limits M208 X-12 Y0 Z0 S1 ; set axis minima M208 X316 Y267.5 Z334 S0 ; set axis maxima ; Endstops M574 X1 Y1 S0 ; set active low and disabled endstops M574 Z1 S2 ; set endstops controlled by probe ; Z-Probe M307 H3 A-1 C-1 D-1 ; disable heater on PWM channel for BLTouch M558 P9 H5 F300 T15000 ; set Z probe type to bltouch and the dive height + speeds G31 P500 X-10 Y-51.5 Z0.8 ; set Z probe trigger value, offset and trigger height M557 X0:290 Y0:250 S15 ; define mesh grid ; Heaters M140 H-1 ; disable heated bed M305 P1 X200 ; configure PT100 for heater 1 M143 H1 S450 ; set temperature limit for heater 1 to 450C M305 P2 X201 ; configure PT100 for heater 2 M143 H2 S450 ; set temperature limit for heater 2 to 450C ; Fans M106 P0 S0 I0 F500 H-1 ; set fan 0 value, PWM signal inversion and frequency. Thermostatic control is turned off M106 P1 S1 I0 F500 H-1 ; set fan 1 value, PWM signal inversion and frequency. Thermostatic control is turned off M106 P2 S1 I0 F500 H-1 ; set fan 2 value, PWM signal inversion and frequency. Thermostatic control is turned off ; Tools M563 P0 S"Left" D0 H1 F-1 ; define tool 0 G10 P0 X0 Y0 Z0 ; set tool 0 axis offsets G10 P0 S0 R0 ; Set tool 0 active and standby temperatures M563 P1 S"Right" D1 H2 F-1 ; define tool 1 G10 P1 X20 Y0 Z0 ; set tool 1 axis offsets G10 P1 S0 R0 ; Set tool 0 active and standby temperatures ; Custom settings are not defined ; Miscellaneous M501 ; load saved parameters from non-volatile memory 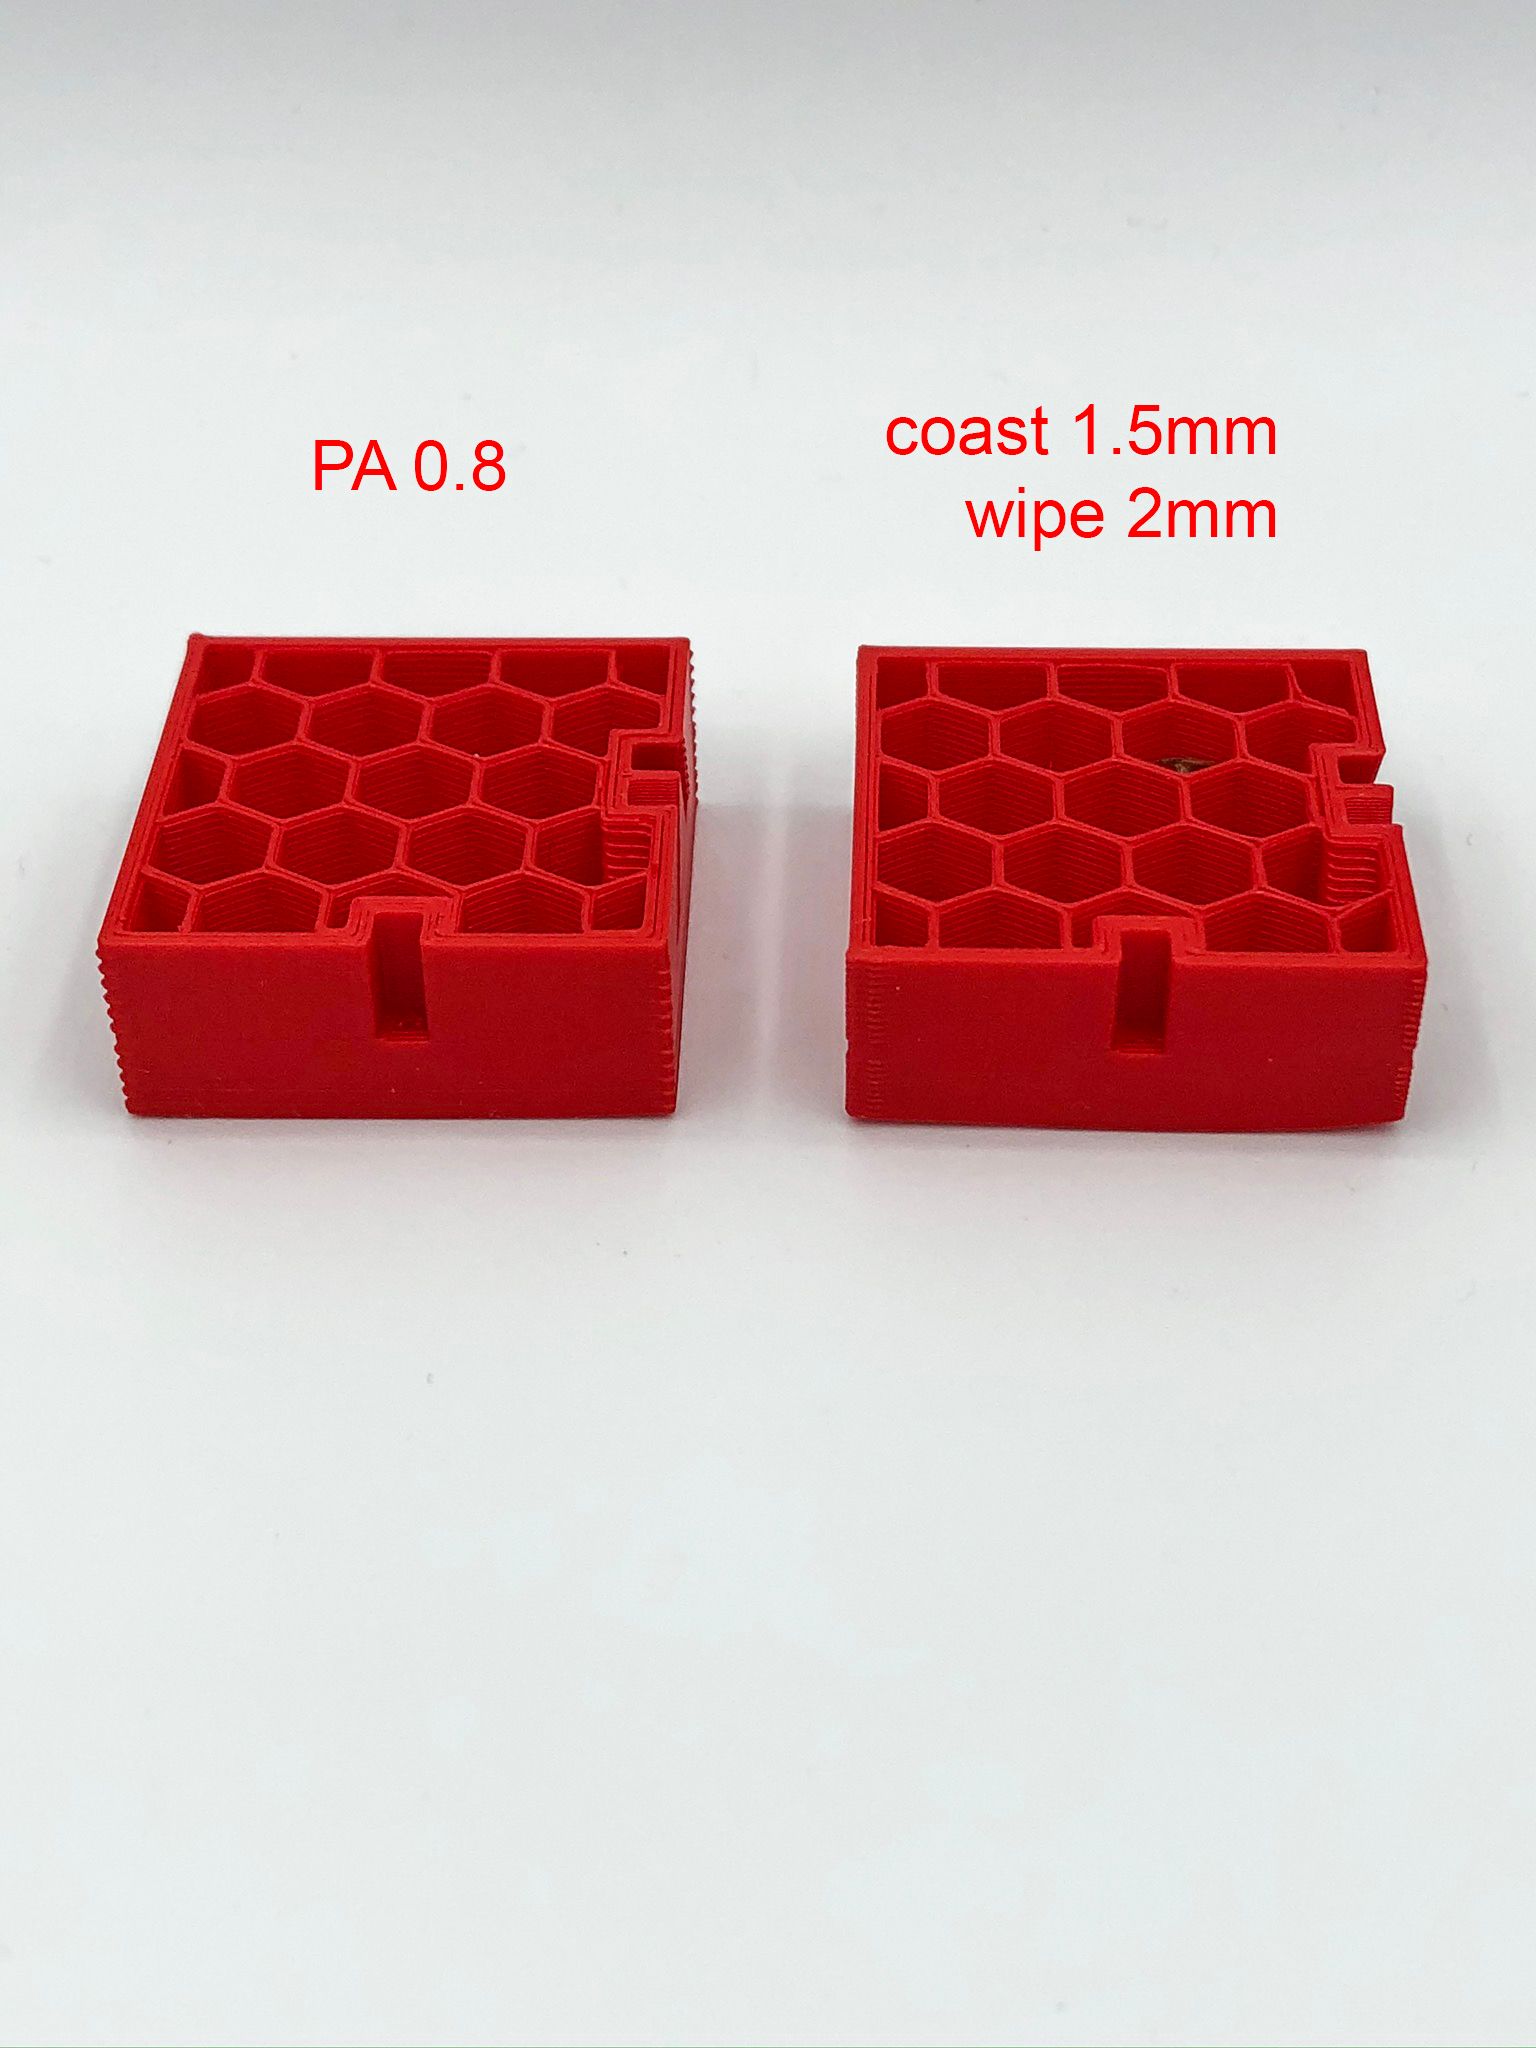
-
it does look like there is a lot of backlash on your printer.
while the motors are energized. grab the hotend and try to move it with a finger. idealy it should not move. -
Just tried that, I should push really hard to make gantry move.
-
@felt342 said in Blobs with PA and w/o:
Just tried that, I should push really hard to make gantry move.
no its about play in the position in the hotend.
i.e can you move it with one finger like a mm back and forth.
https://en.wikipedia.org/wiki/Backlash_(engineering) -
Oh sorry, seems stable, doesnt move at all to me.
-
-
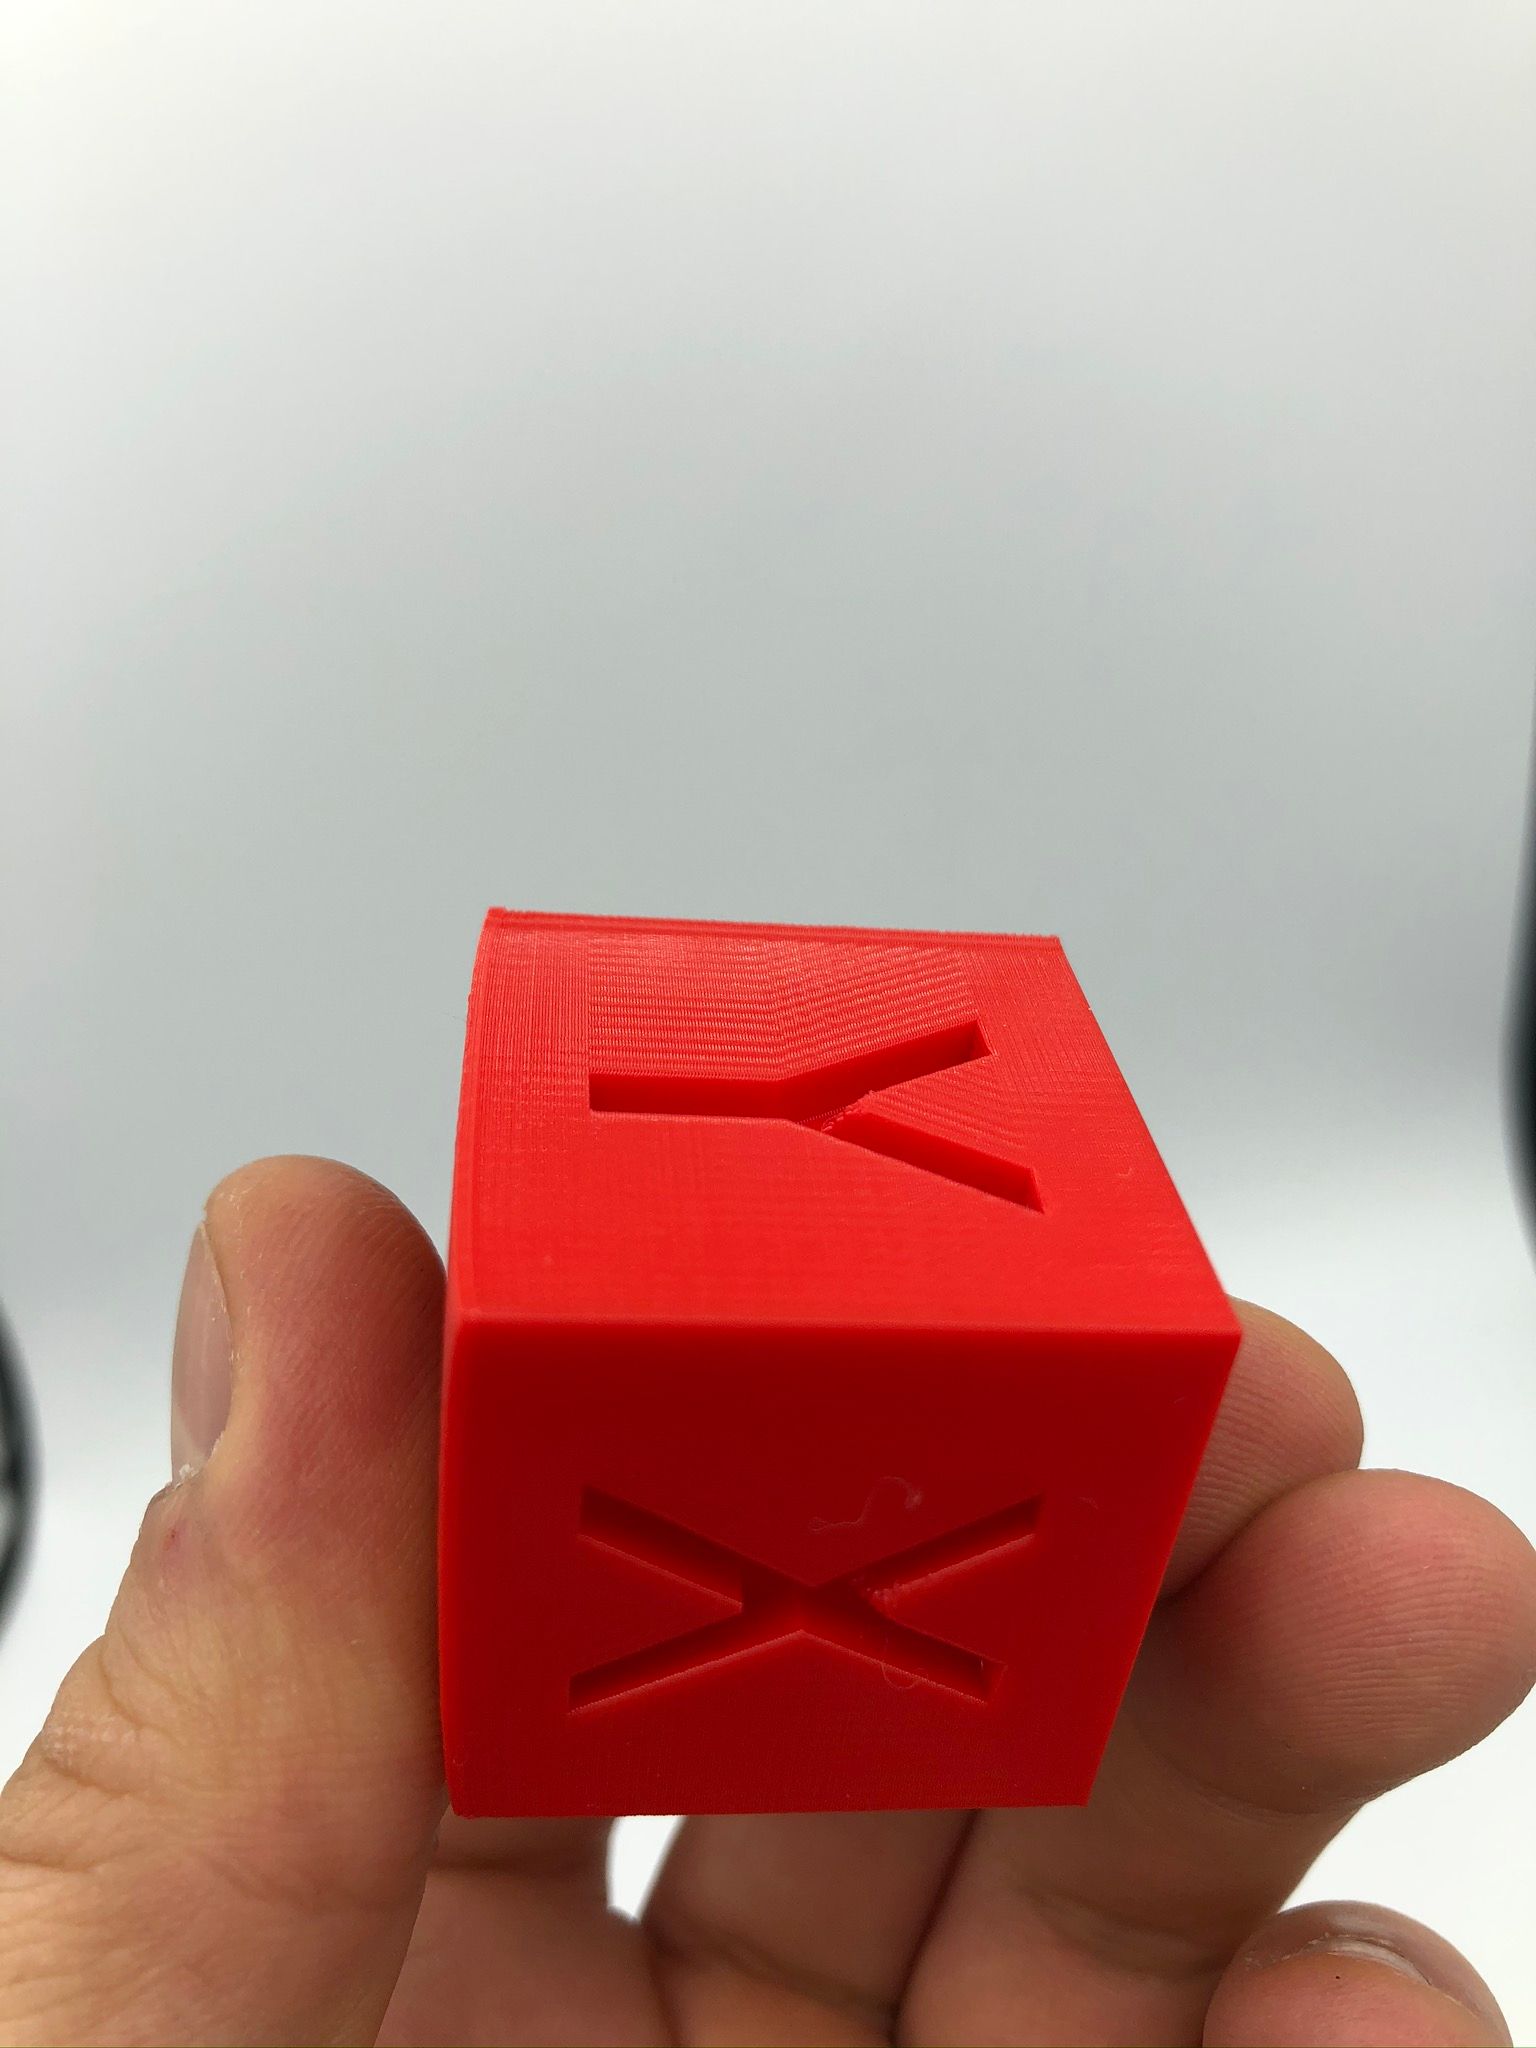
@Veti
There is it, looks the same to me.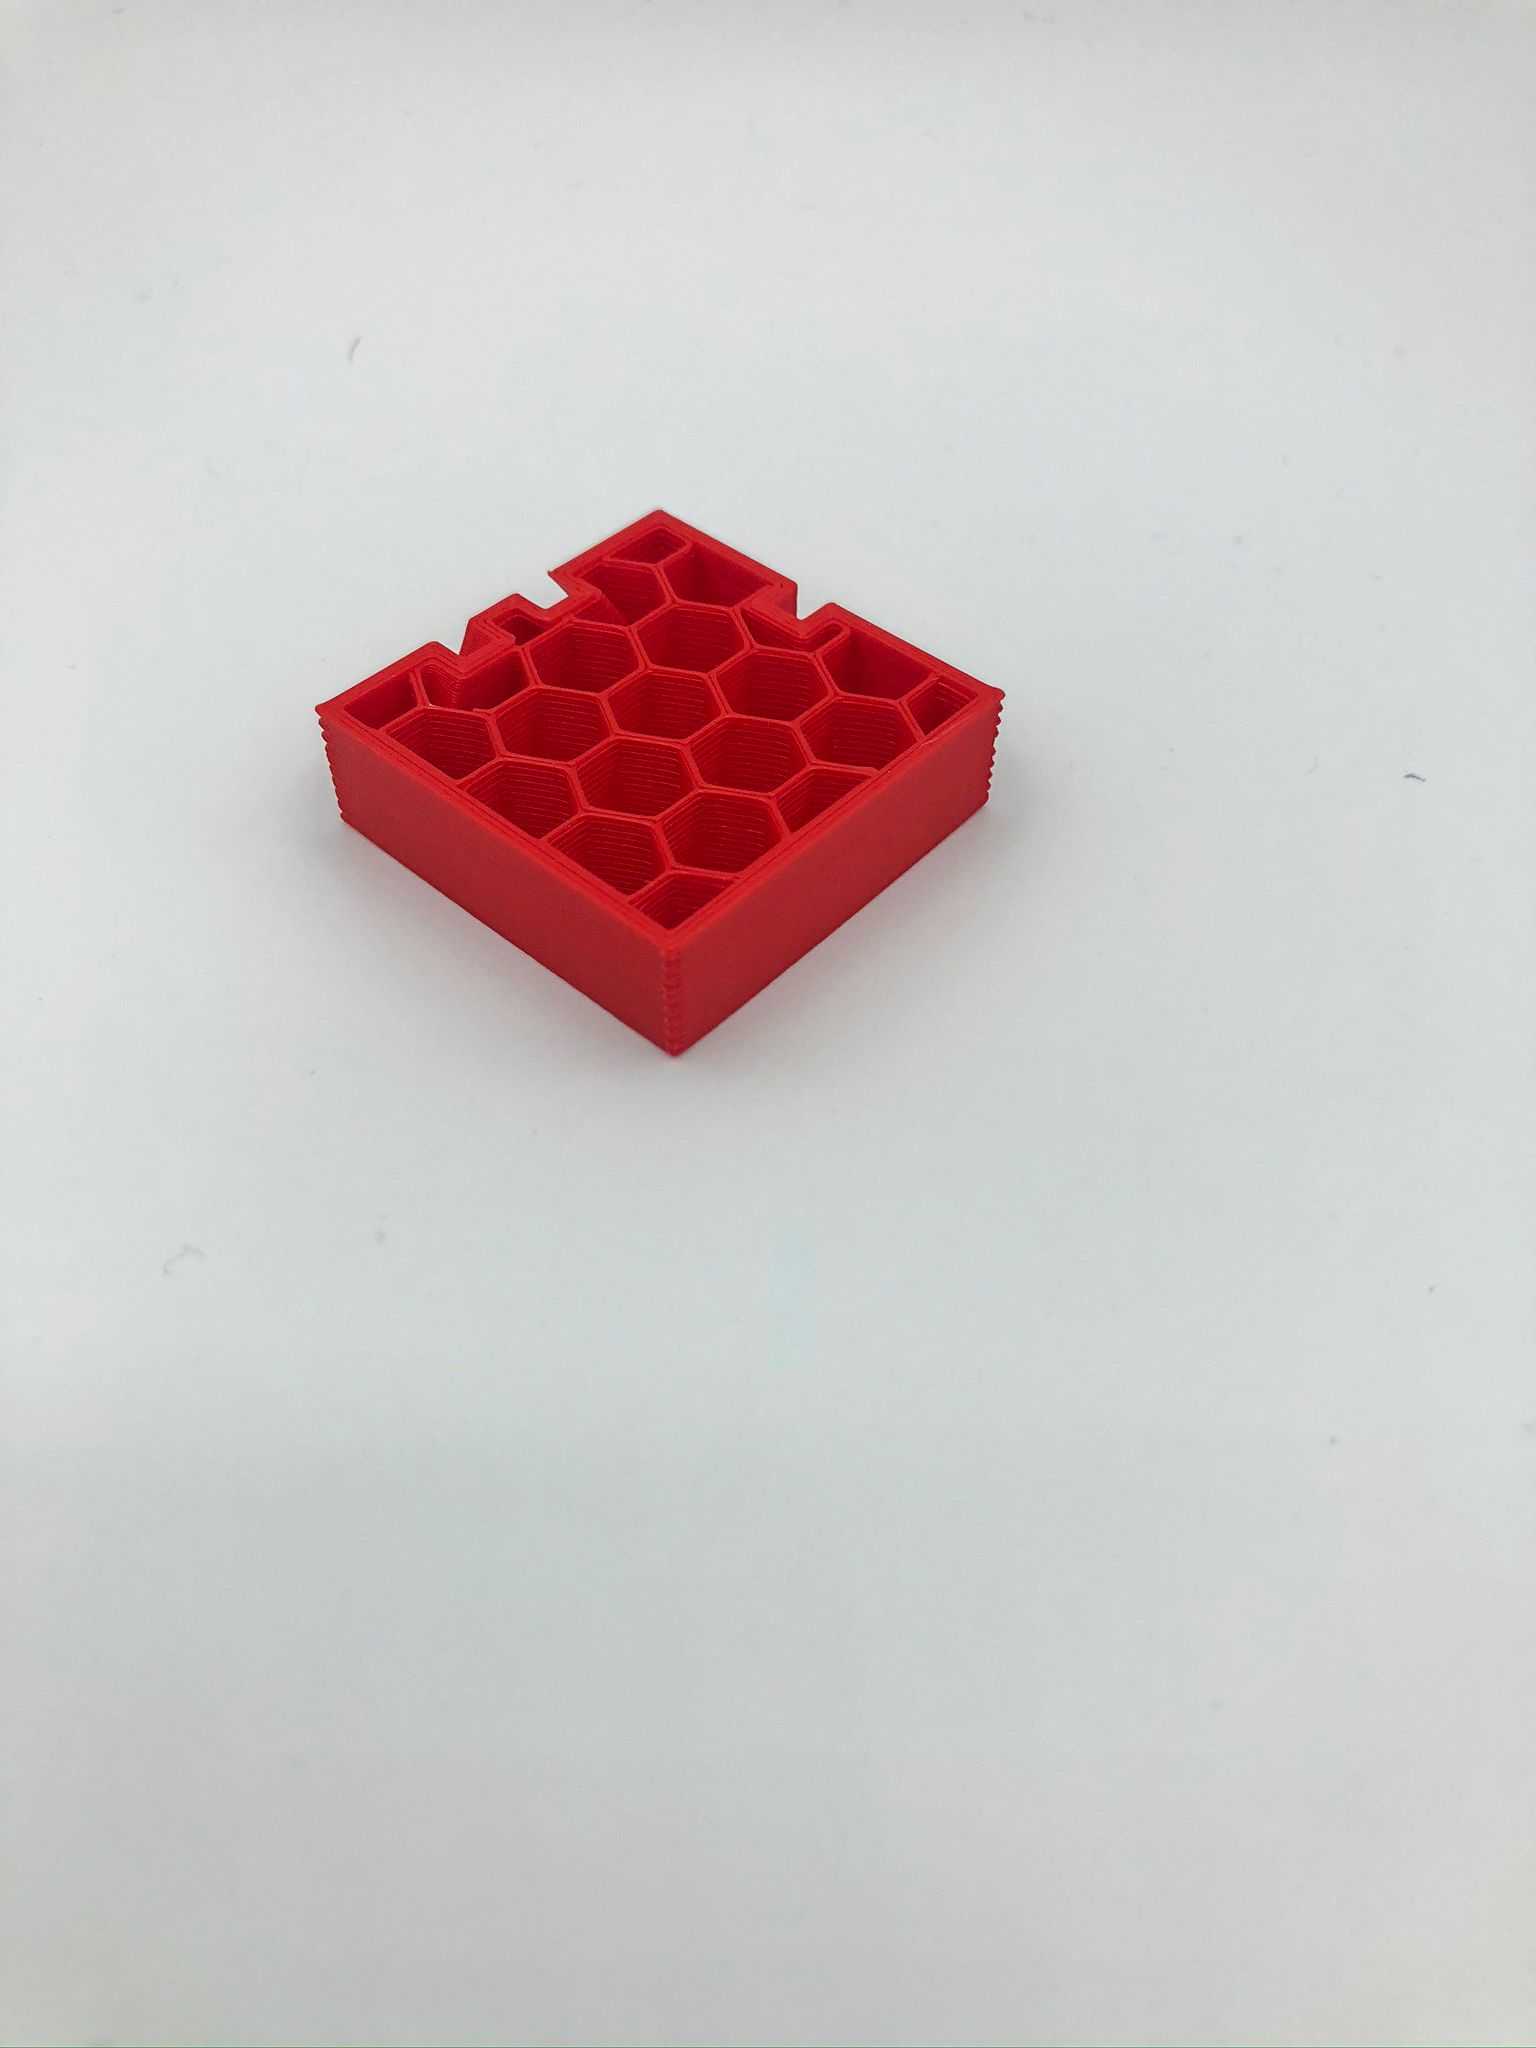
-
does the printhead spend a lot of time in those corners?
-
and to rule out the slicer. can you test with a different slicer. i.e prusaslicer or cura.
-
No, It was before until I crank up acceleration and jerk for a extruder. Than it’s start moving instantly but those corners still left. Shall I make a small video?
-
Ok I will try Cura!
-
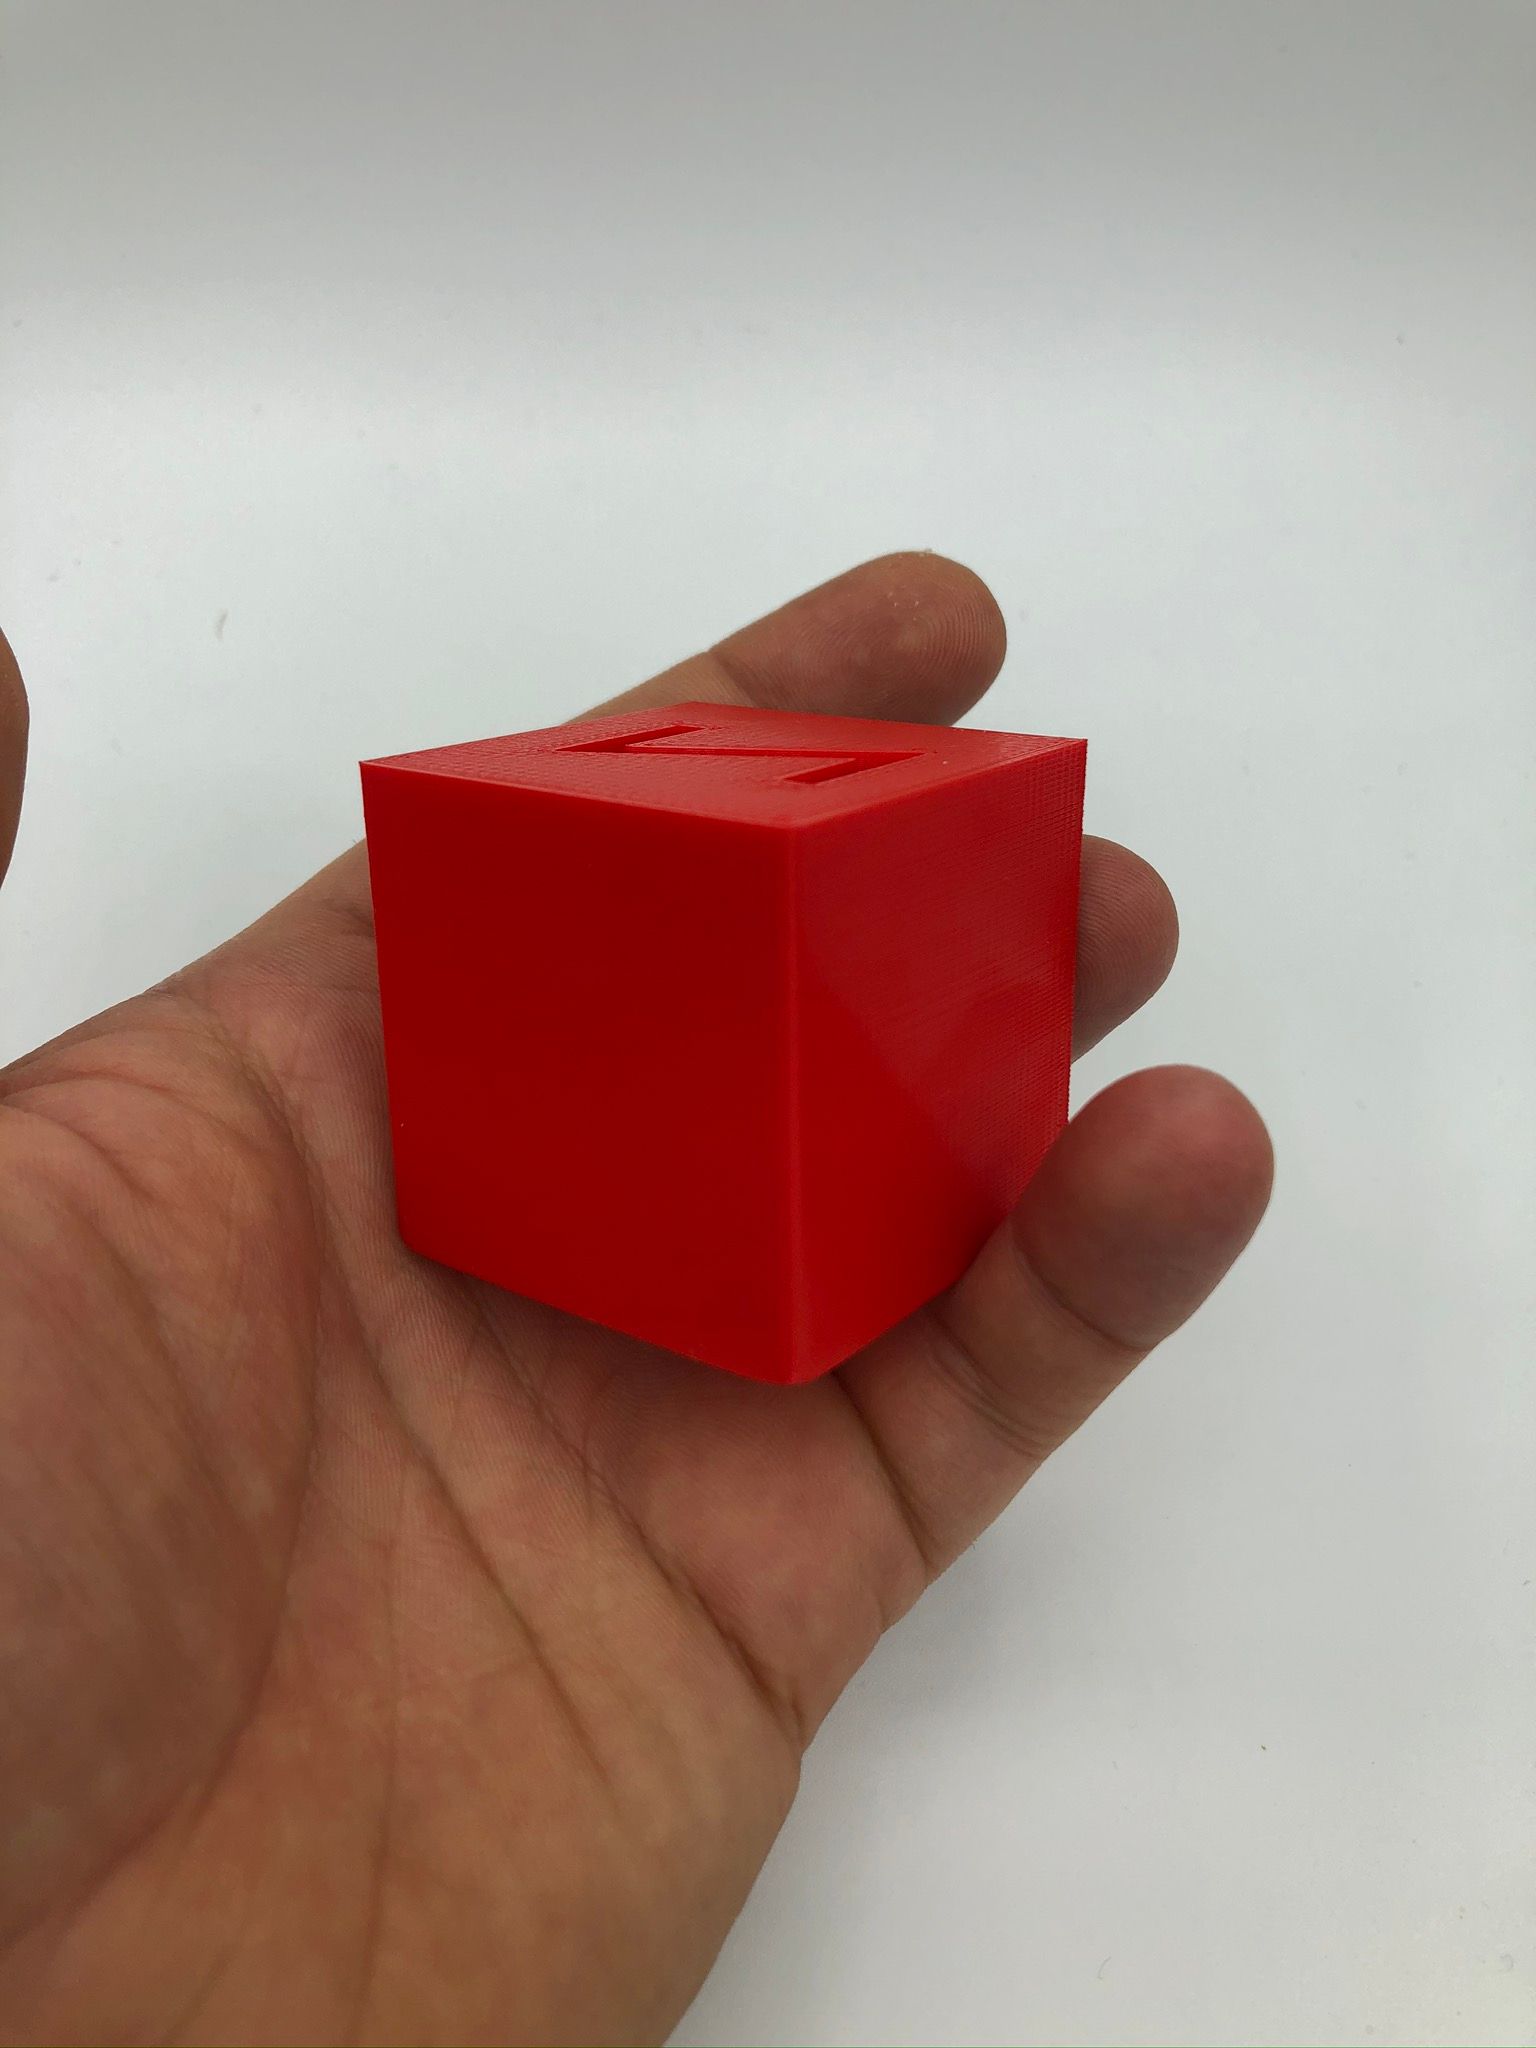
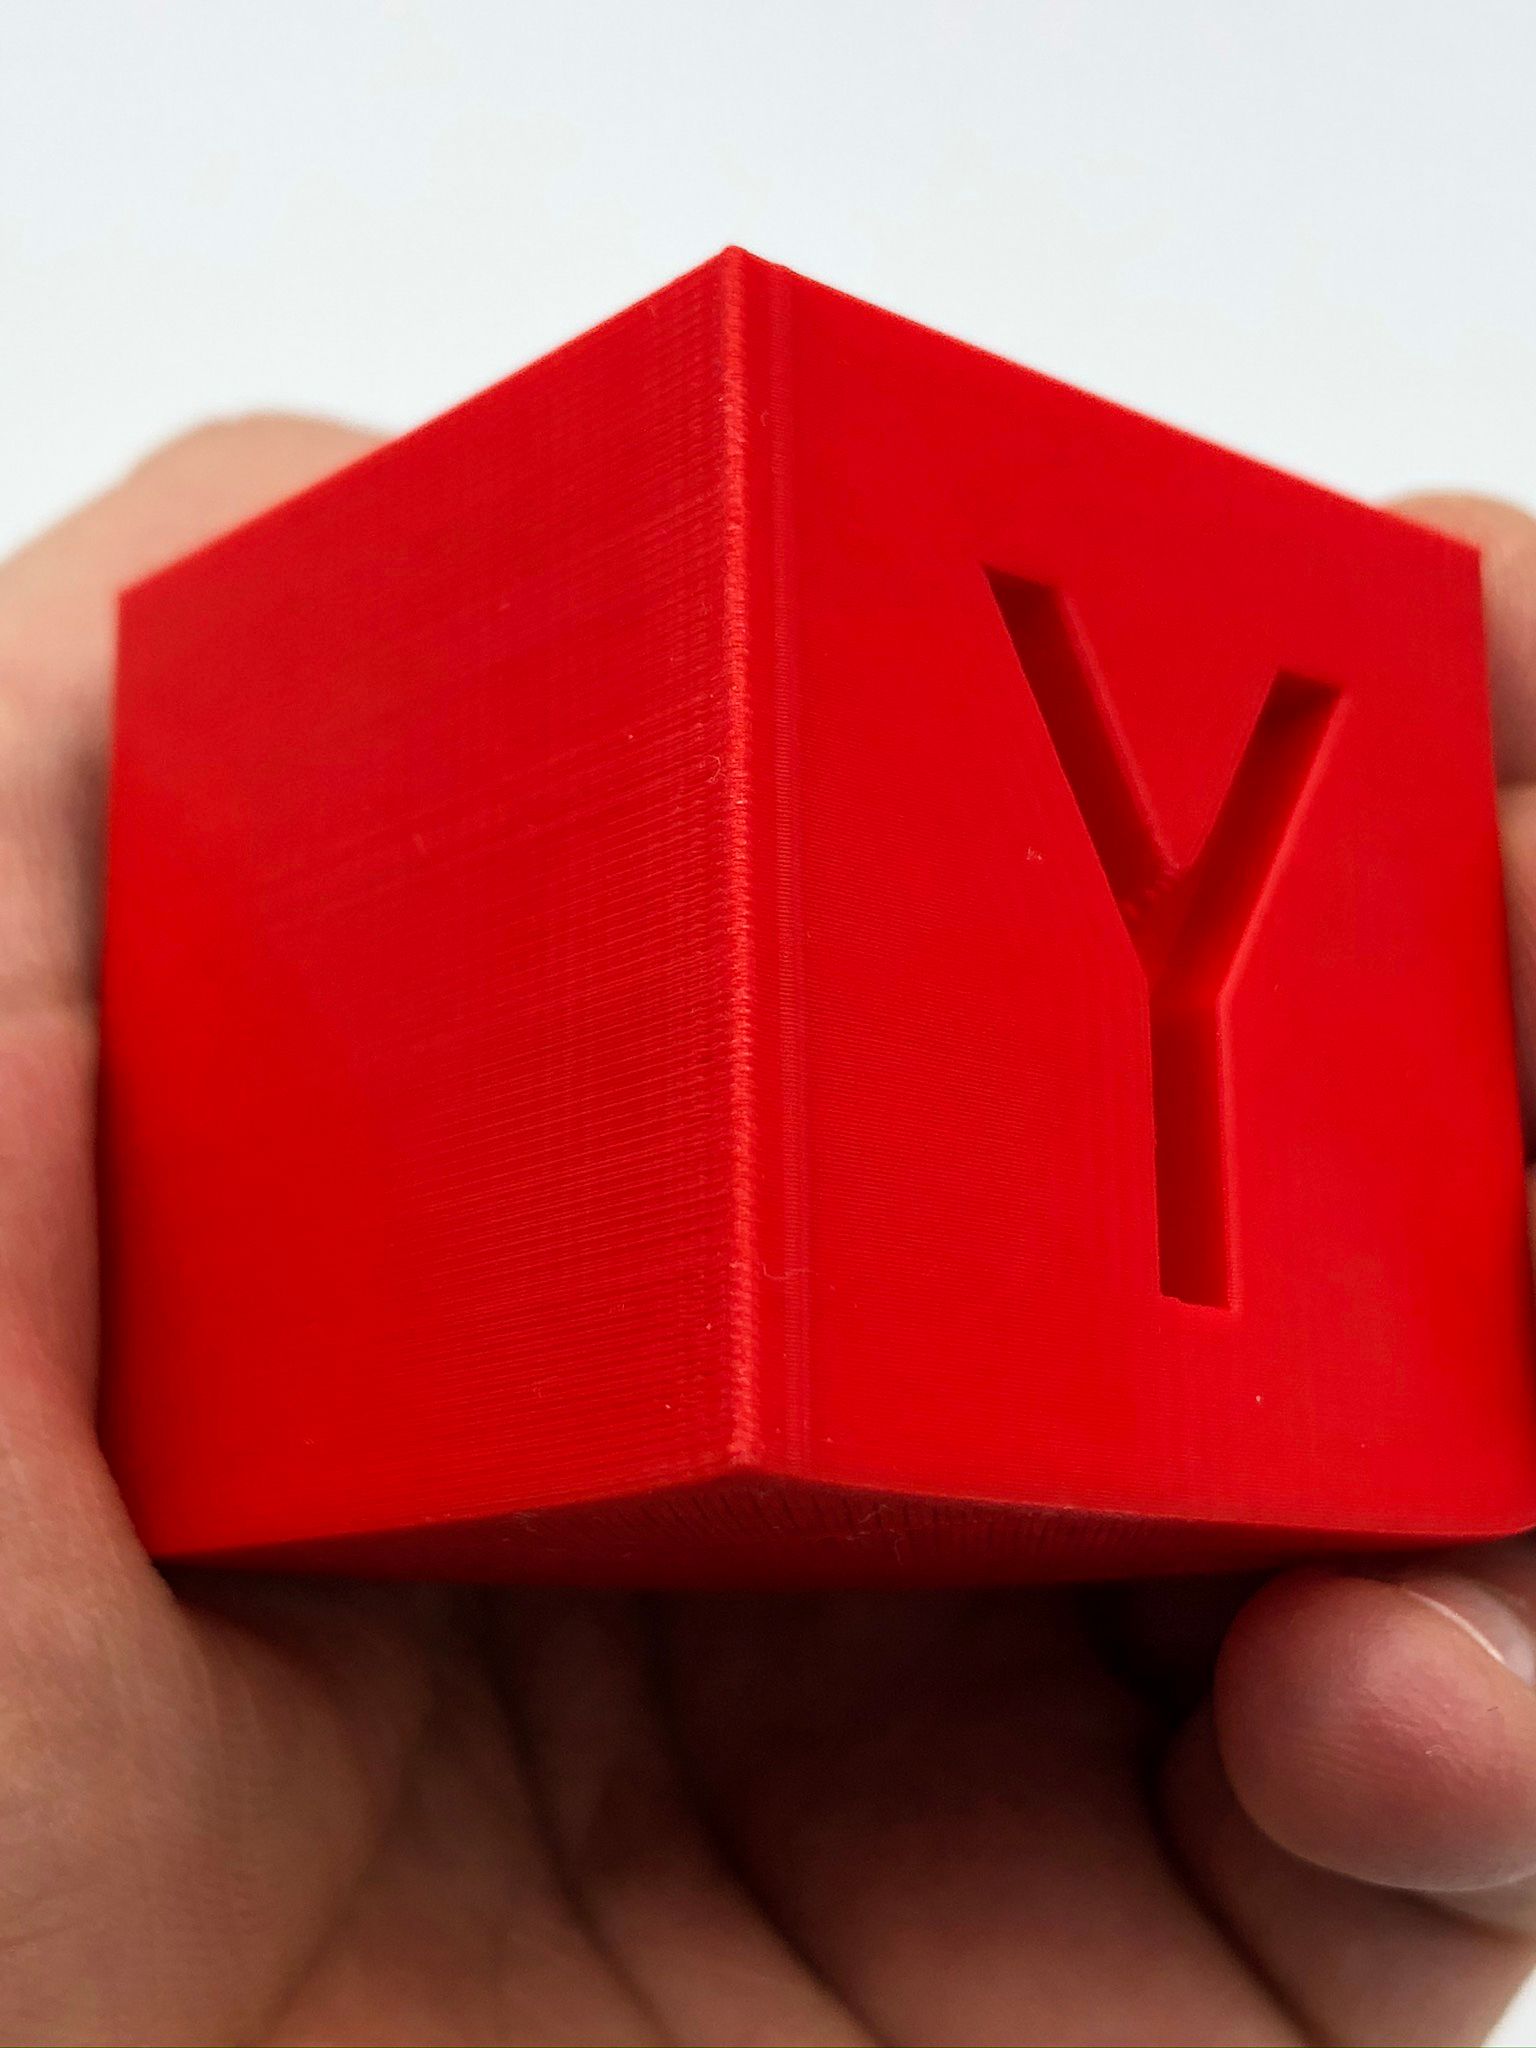
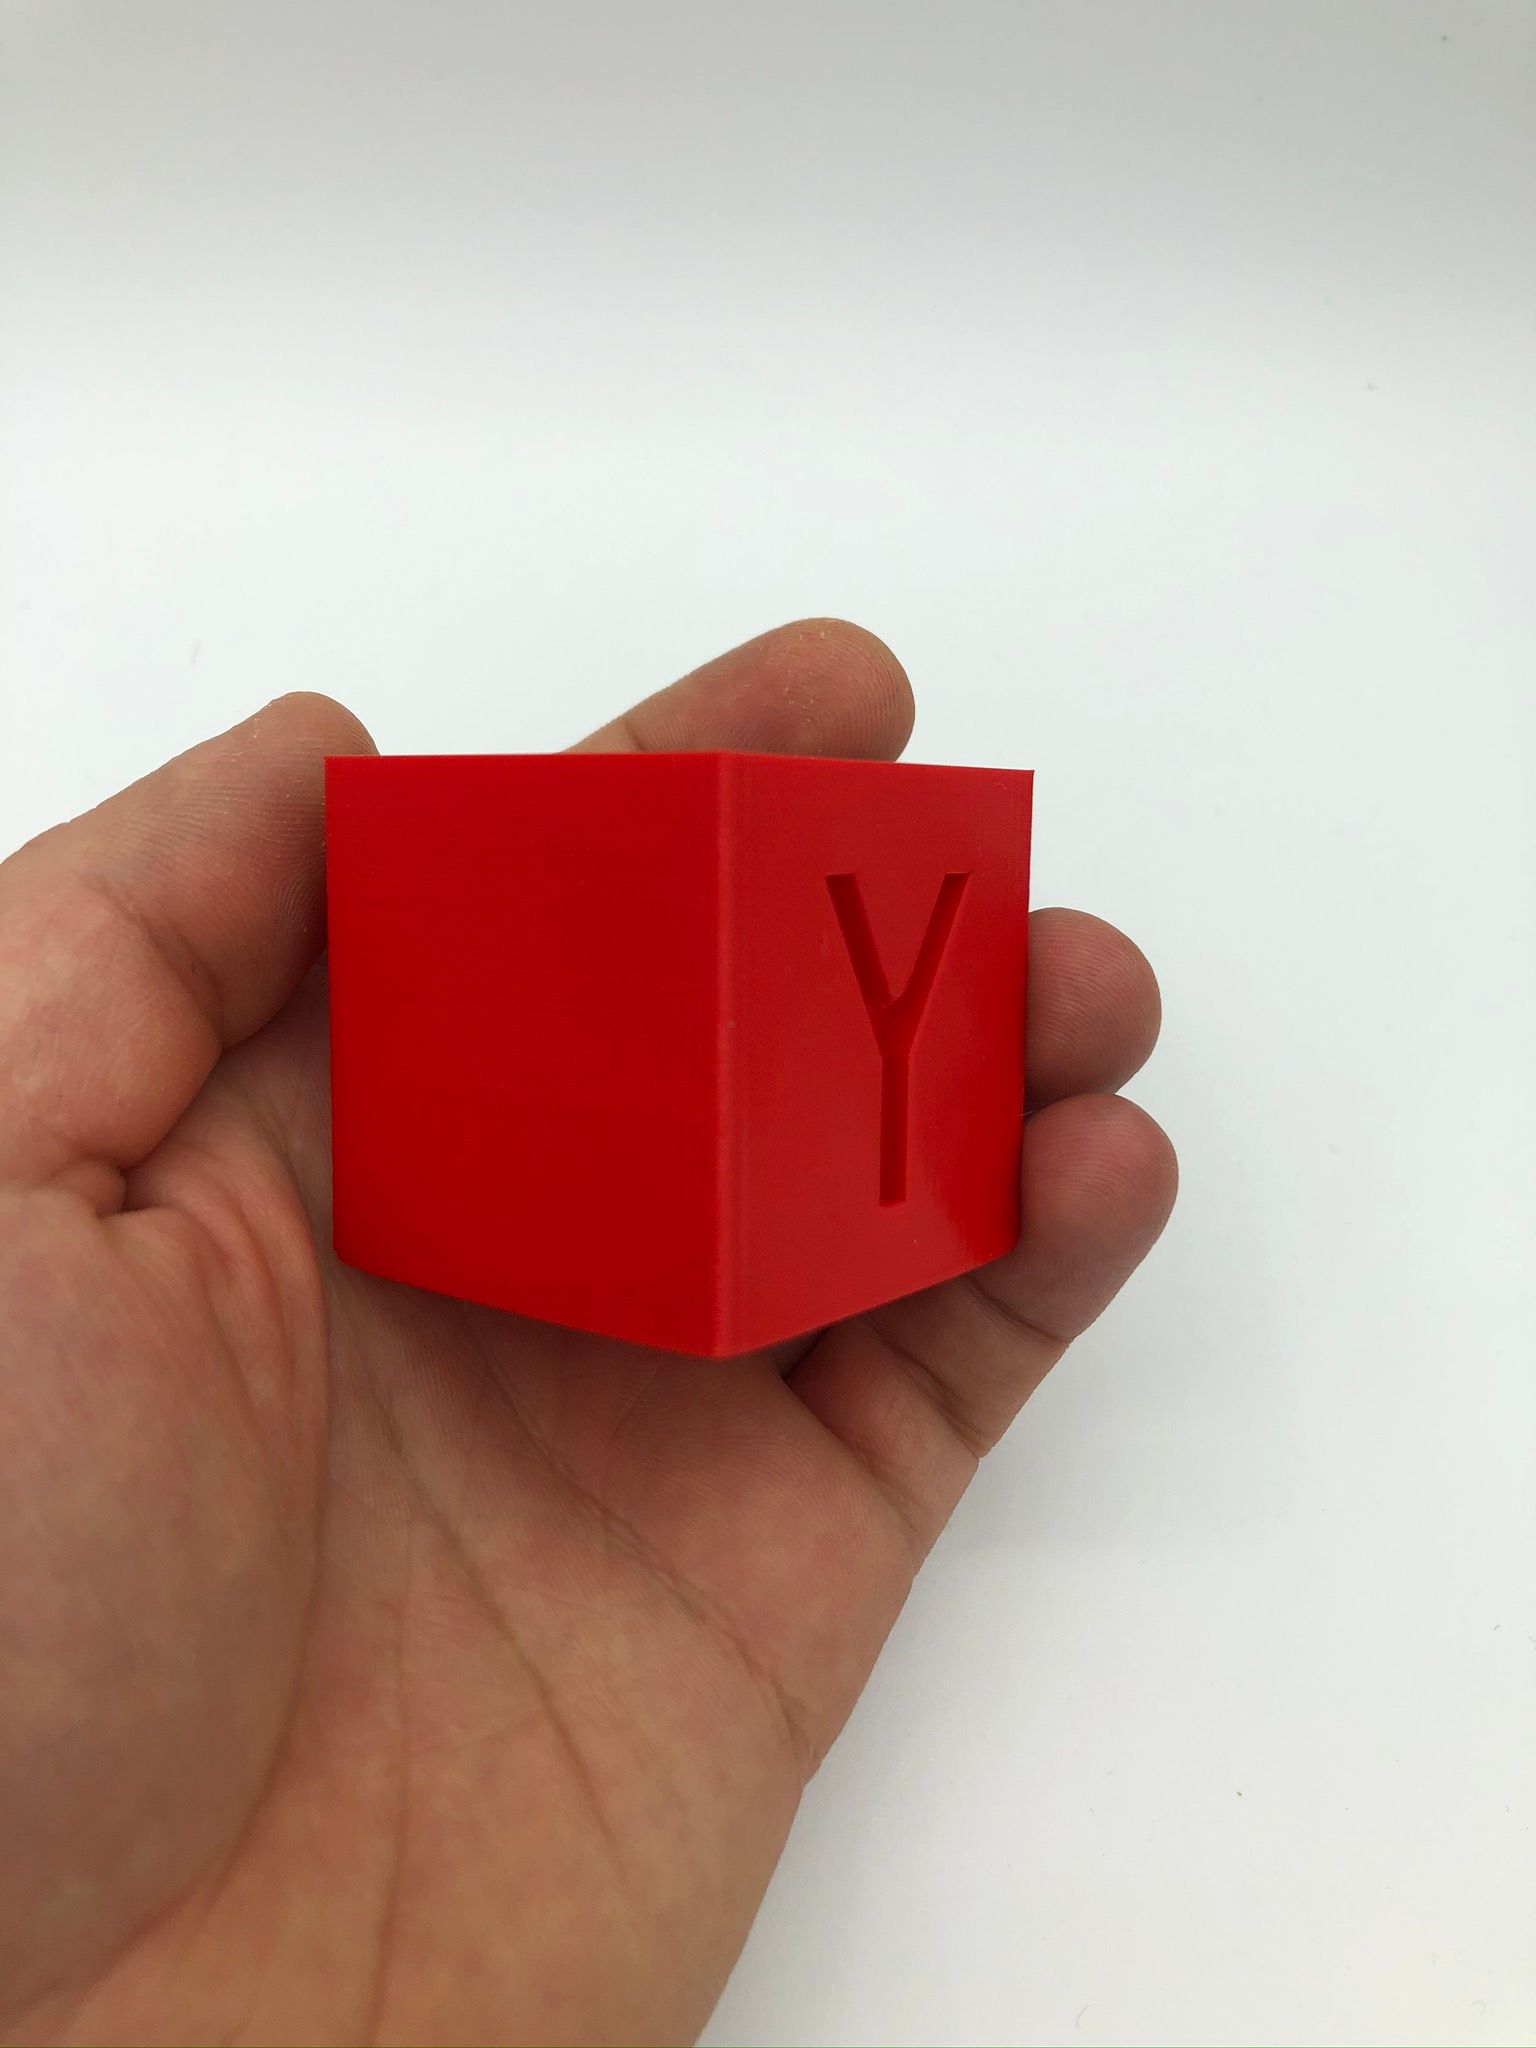
I did try Cura, was looking the same to me. I switched to Simplify3D back as I am familiar with it. I did turn off retraction completely and PA. Was a lot of oozing but had minimal blobs. Tune retraction to 3.0mm extra restart distance of -0.2 and PA 0.45 lead to those results, which is finally a progress, blobs are getting much less visible, but still there - I guess tweaking retractions and PA next? I have been a bit surprised how it was possible with such a long tube of 850mm to have 3mm retraction only.
There is a couple of images: first, around 20 layers was without PA just retraction of 3.mm. After PA was set to 0.45.
-
@felt342 said in Blobs with PA and w/o:
I did try PA 0.25-0.8 with no luck. Bowden tube is 850mm.
You should try more PA with such a long bowden tube. Some people are using 1 or more.
https://duet3d.dozuki.com/Wiki/Pressure_advance#Section_How_much_pressure_advance_to_use
Use the test procedure described here to test values from 0.8 up to 1 and see if you can start to notice a difference. Disable wipe and coast when using pressure advance.
-
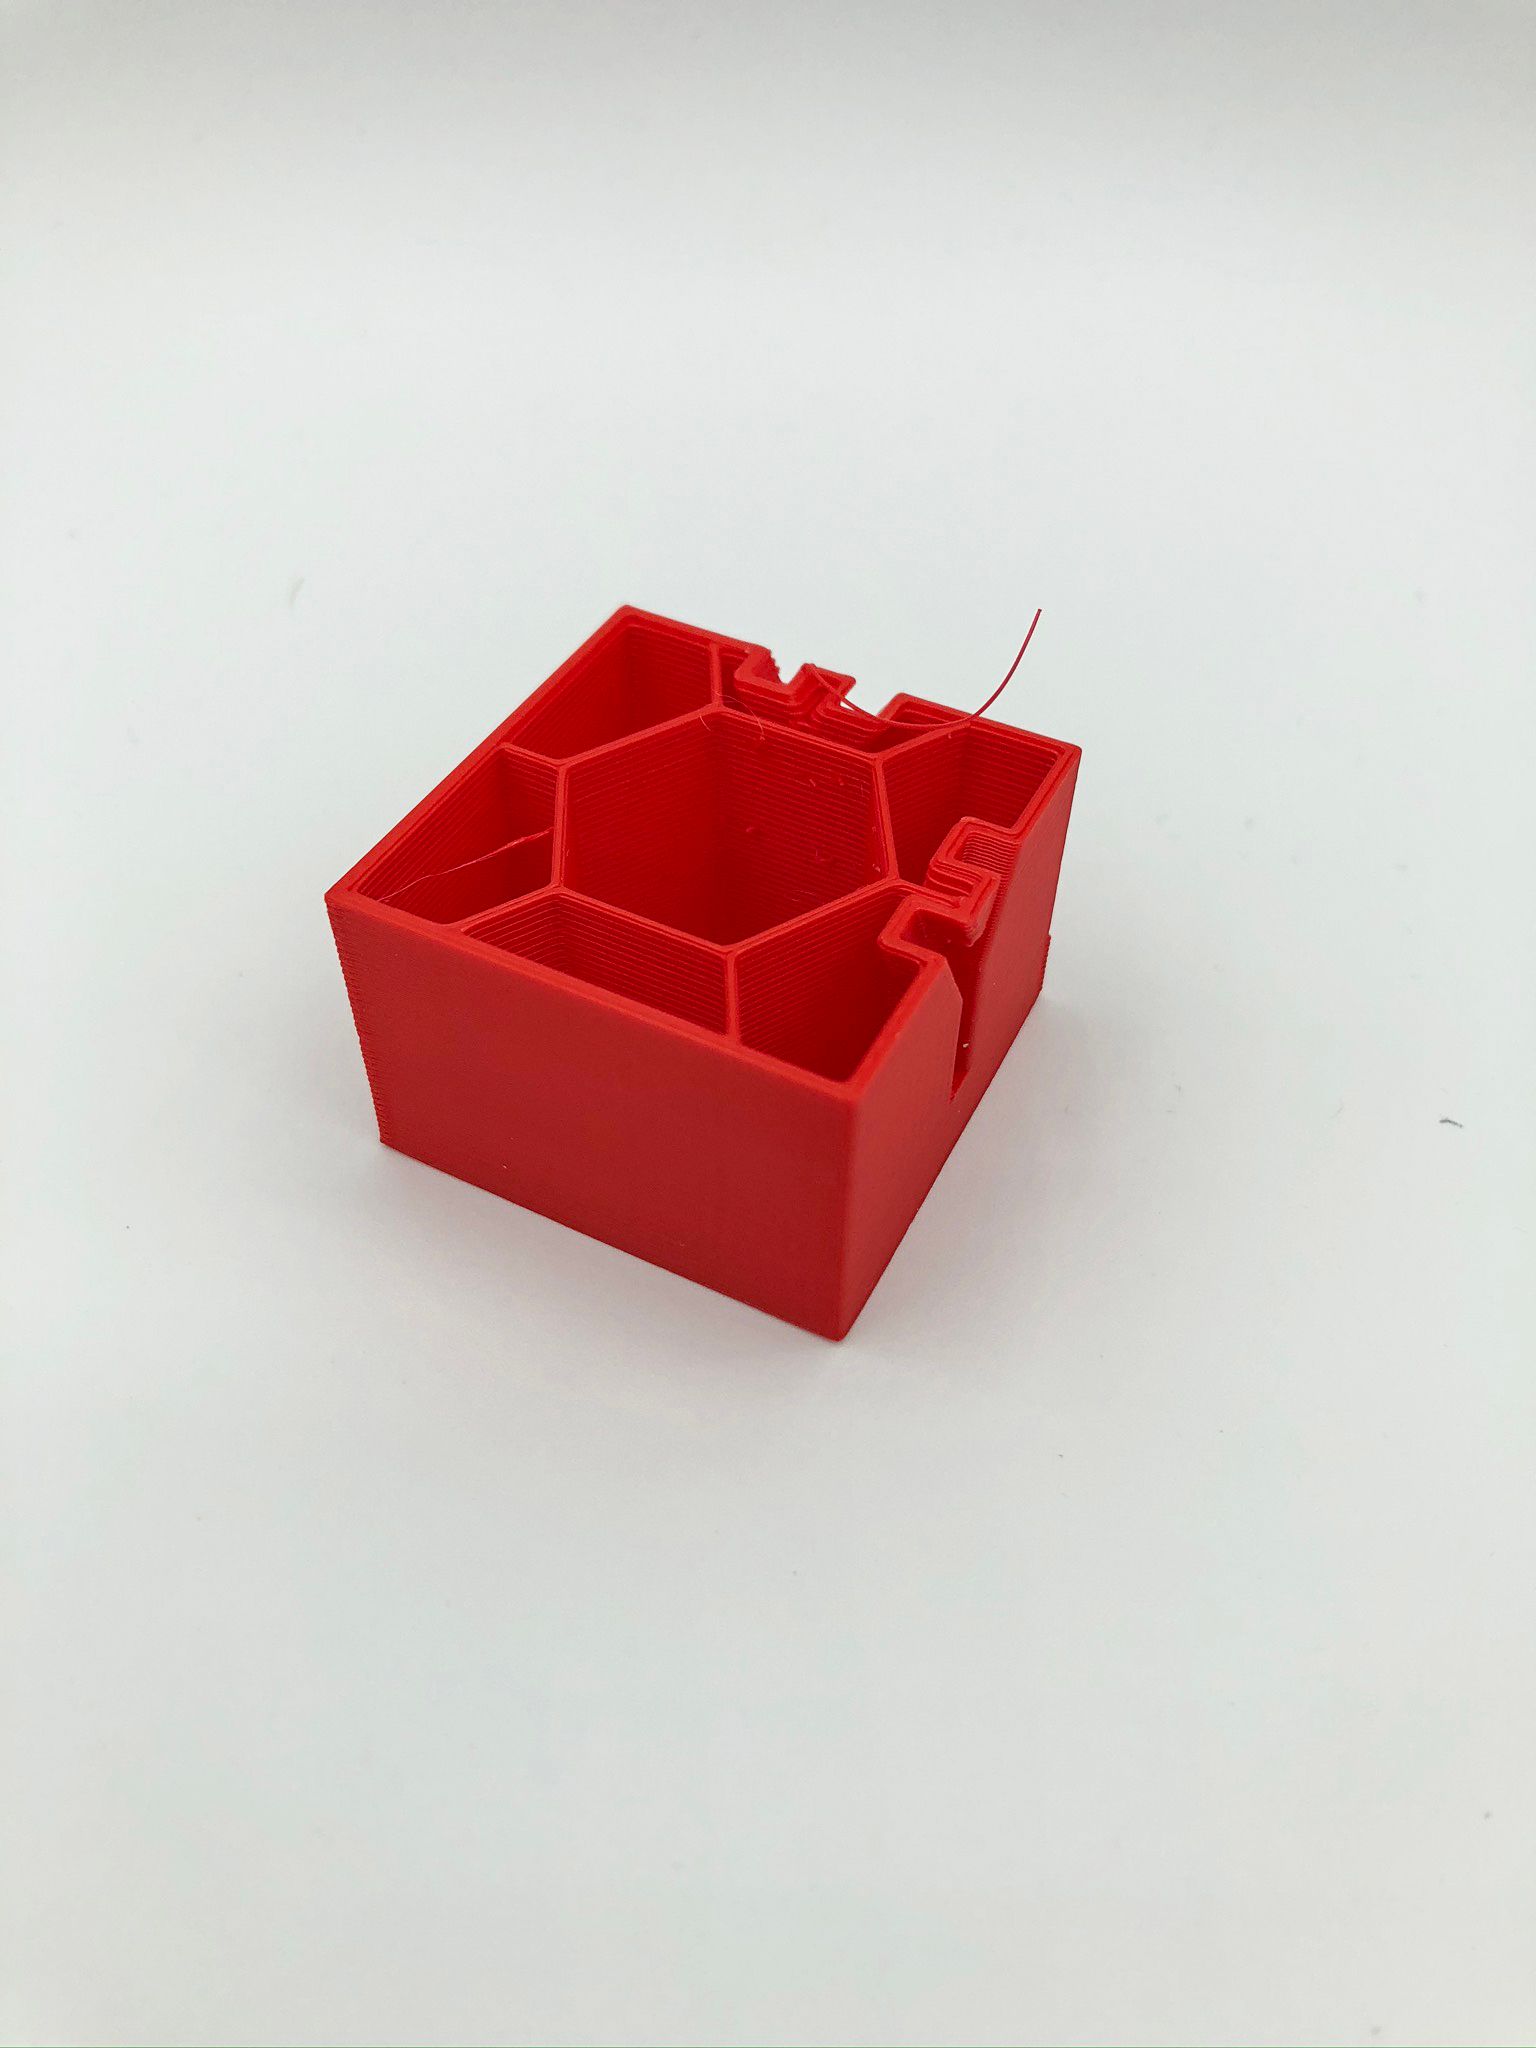
I did try out PA till 2.0 with 0.10 steps with wipe and coast disabled. I could not reach the desired effect and I could not see any difference higher than 0.7 to be honest. I turned off PA completely switched back to coast and wipe set in Simplify3D:
So far these settings gave me the best result - I would say almost perfect. I do have high-speed settings a bit- therefore there is ringing. Now it's a time to tweak it and hopefully not produce blobs again...
")
M350 X16 Y16 Z16 E16:16 I1 ; configure microstepping with interpolation M92 X201.207 Y201.207 Z400.00 E415:415 ; set steps per mm M566 X2000 Y2000 Z350 E3000.00:3000.00 ; set maximum instantaneous speed changes (mm/min) M203 X10000 Y10000.00 Z400 E10000.00:10000.00 ; set maximum speeds (mm/min) M201 X900 Y900 Z600 E4000.00:4000.00 ; set accelerations (mm/s^2) M906 X800 Y800 Z1300 E700:700 I30 ; set motor currents (mA) and motor idle factor in per cent M84 S90 ; Set idle timeout 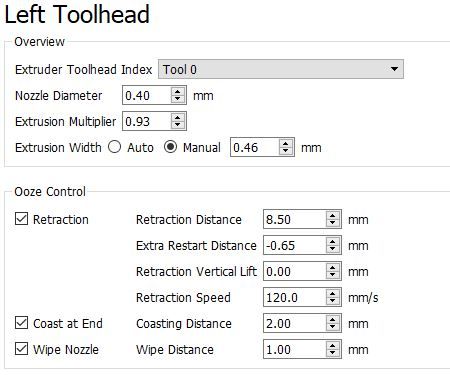

-
Good stuff. Very long bowden setups are hard to tune. That's looking quite good.
-
Yeah after reading a bunch of forums and blobs related issue I start to regret about using bowden, until now... will see, keep tweaking. Still thinking would be better to come back on using PA, just need more time for tweaking I guess.
-
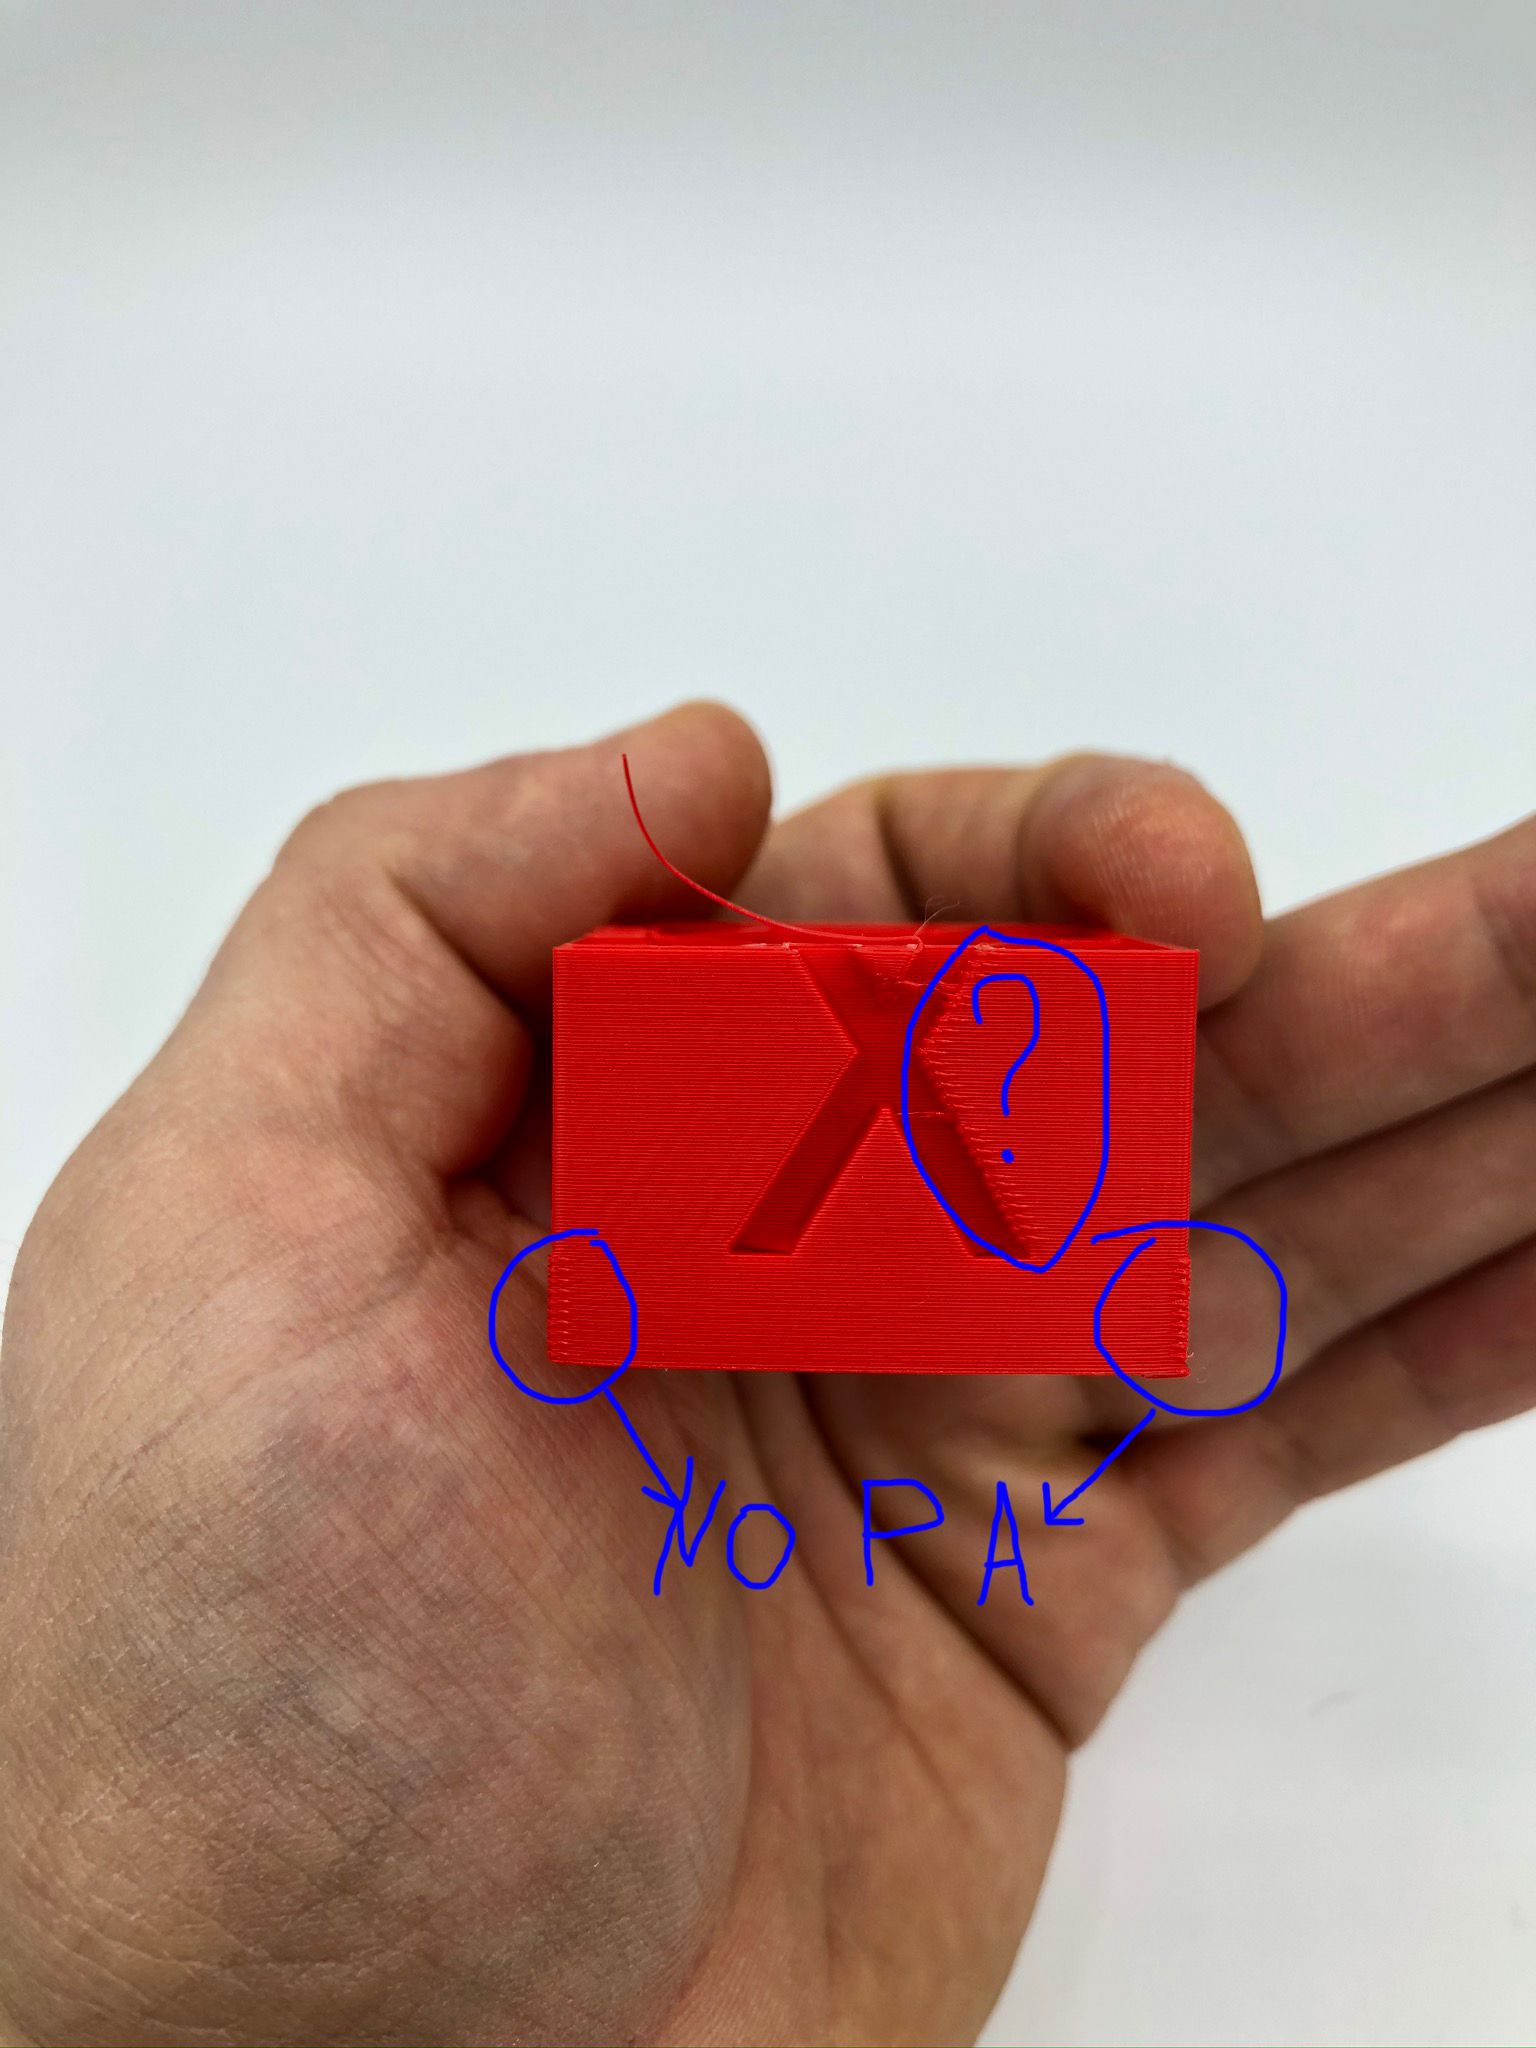
My next problem appears to be - ringing!
I just changed my jerk and acceleration of XYZ back to more or less normal values fromM350 X16 Y16 Z16 E16:16 I1 ; configure microstepping with interpolation M92 X201.207 Y201.207 Z400.00 E415:415 ; set steps per mm M566 X2000 Y2000 Z350 E3000.00:3000.00 ; set maximum instantaneous speed changes (mm/min) M203 X10000 Y10000.00 Z400 E10000.00:10000.00 ; set maximum speeds (mm/min) M201 X900 Y900 Z600 E4000.00:4000.00 ; set accelerations (mm/s^2) M906 X800 Y800 Z1300 E700:700 I30 ; set motor currents (mA) and motor idle factor in per cent M84 S90 ; Set idle timeout to
M92 X201.207 Y201.207 Z400.00 E415:415 ; set steps per mm M566 X700 Y700 Z250 E3000.00:3000.00 ; set maximum instantaneous speed changes (mm/min) M203 X10000 Y10000.00 Z300 E10000.00:10000.00 ; set maximum speeds (mm/min) M201 X800 Y800 Z400 E4000.00:4000.00 ; set accelerations (mm/s^2) M906 X800 Y800 Z1300 E700:700 I30 ; set motor currents (mA) and motor idle factor in per cent M84 S90 ; Set idle timeout And got this huge ringing effect, is that normal? I would prefer to use lower values of jerk/acceleration, as my printer works quiter with those values. Does it mean what higher jerk can solve some of ring effects?
-
Have a read up on Dynamic Acceleration Adjustment, or DAA for short. Do a search for that in the duet gcode wiki. It helped my machines.
Edit: https://duet3d.dozuki.com/Wiki/Gcode#Section_M593_Configure_Dynamic_Acceleration_Adjustment
-
Thats a lot looks promising. I will give an try tomorrow after work.
Really surprised how many cool features those Duet boards have...! -
@felt342 That's a very impressive tune for such a long Bowden tube. I gave up trying to get such a long tube to work on my CoreXY and converted it to direct drive instead.
It wasn't that I couldn't get the machine to print nice cubes (and without the warping you have on the bottom of yours), but what worked for one print wouldn't work for the next one.
Direct drive fixed all that and made the printer much more consistent.
Ringing is fixed in two ways: slow down or stiffen up!
If there is a resonance problem, DAA can fix that. If there are other problems with the mechanics or simply exceeding the acceleration that the frame can tolerate, then DAA will not help you.
If slowing down doesn't cure the problem, then you need to look hard at the motion system.
If it helps, these are my settings for the motion system from my V-Core CoreXY. It can print close to 300x300x300mm and runs on 24V with beefy 2A 4.8Kg/cm NEMA17 stepper motors which drive 9mm wide belts.
The theoretical maximums were calculated using wilriker's Maximun Accelleration calculator and other calculators available at reprapfirmware.org and reprap.org
; Motion settings ; ; The V-Core is theoretically capable of the following settings: ; M566 X1200.00 Y1200.00 Z100.00 E3600.00 ; Maximum instantaneous speed changes (mm/min) ; M203 X18000.00 Y18000.00 Z600.00 E3600.00 ; Maximum speeds (mm/min) ; M201 X5800.00 Y5800.00 Z180.00 E3600.00 ; Maximum accelerations (mm/s^2) for X and Y. Z and E are best guesses M566 X600.00 Y600.00 Z100.00 E3600.00 ; Set maximum instantaneous speed changes (mm/min) M203 X18000.00 Y18000.00 Z600.00 E3600.00 ; Set maximum speeds (mm/min) M201 X600.00 Y600.00 Z180.00 E3600.00 ; Set accelerations (mm/s^2) M906 X1600.00 Y1600.00 Z1800.00 E595.00 I30 ; Set motor currents (mA) and motor idle factor as percentage of normal current My print speeds are dynamic and depend on things like if the printer is printing infill, outer perimeters or bridges. Print speeds range from 30 - 100mm/s with travel moves at 200mm/s. I use Prusa Slicer and take advantage of the volumetric speed limit to restrict the maximum volumetric speed when slicing to what I know the particular filament is capable of. I find this gives me much more consistent dimensions and interlayer adhesion.