Homemade Blv Cube
-
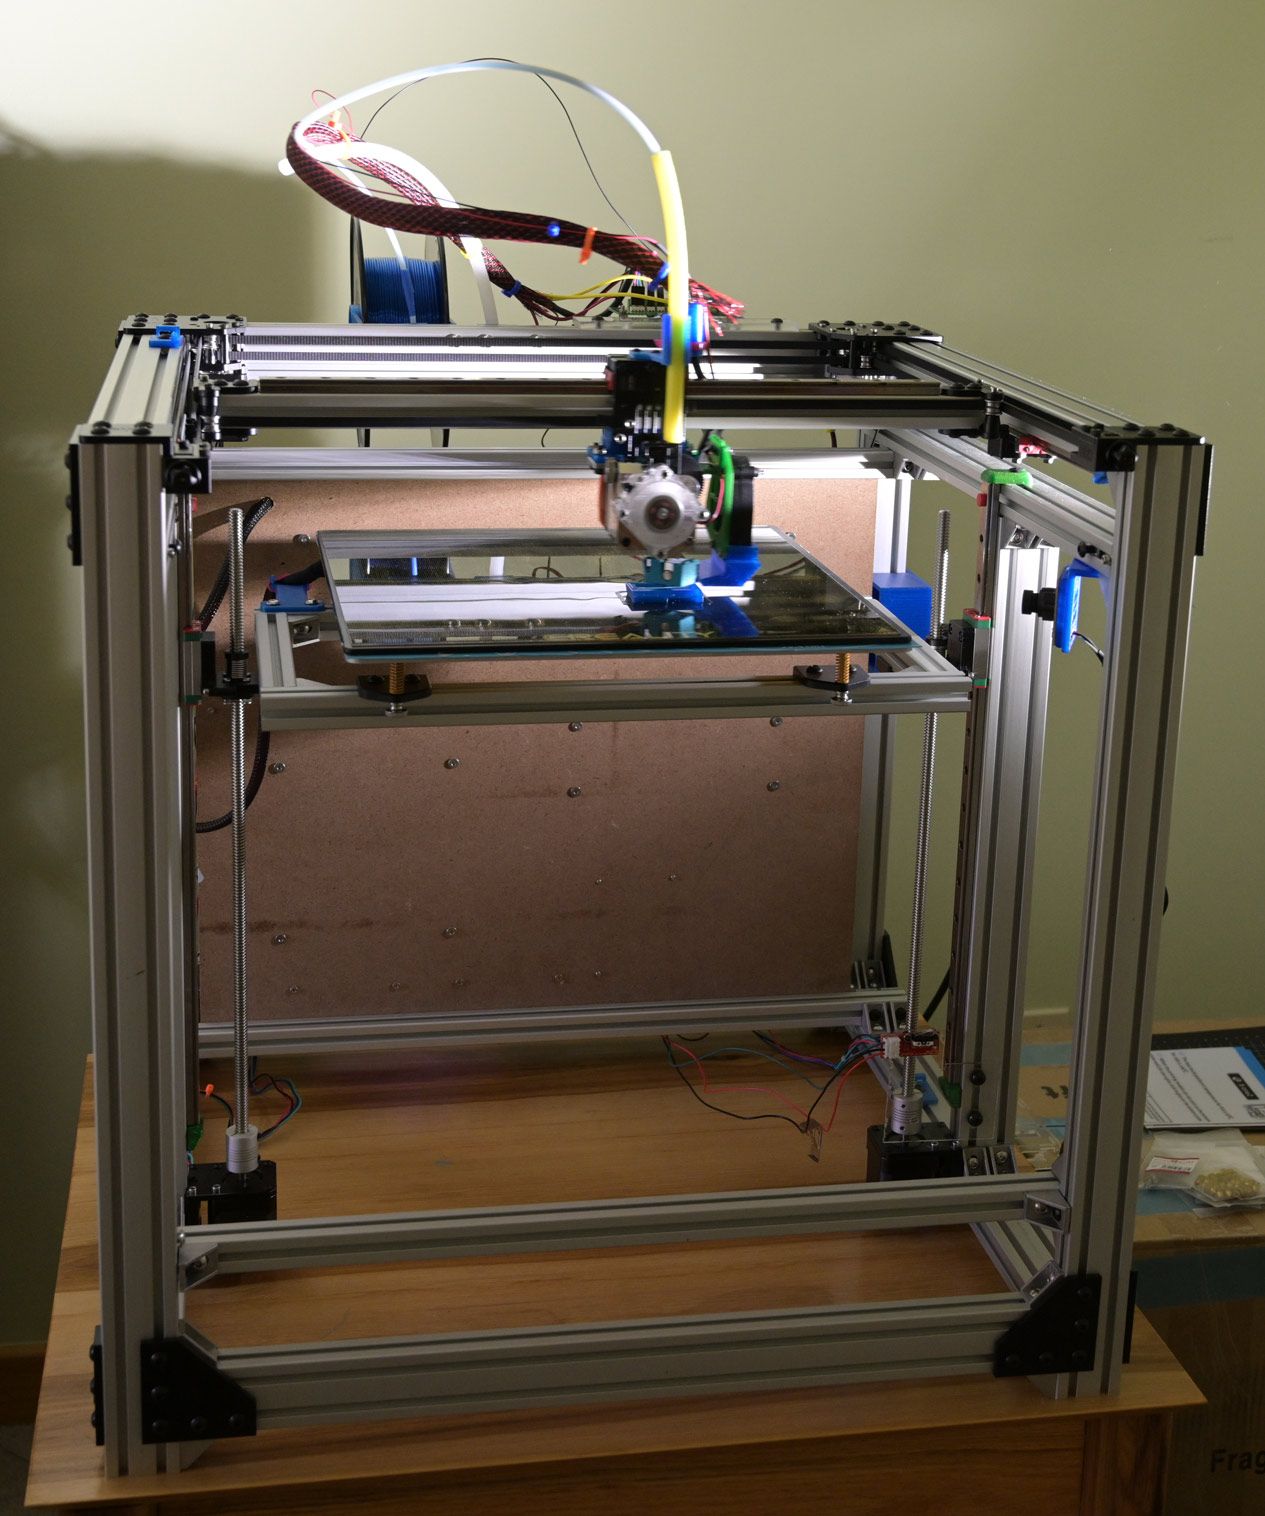
I just finished my Blv Mgn cube. After using Marlin for a long time I'm really liking the change anything from G/M-code stuff.
My prior Qidi printer cost ~$300 and prints flawlessly, still, after 4 years of almost-daily use (with a heat-block replacement to all-metal). This one I wanted much better upgradability, a larger bed, and good-quality board with open-source firmware.
This machine:
Duet 3 + Rpi 3B+
Two power supplies (one for bed) + Pi power supply
Mosfet switch for bed
Titan Aero extruder
"Real" 8020.net aluminum rails
inexpensive linear carriages, bearings, and lead-screws - already iffy
4 StepperOnline standard 59Ncm motors
bed -> CR10S 3mm aluminum bed, silicone baking sheet, Creality glass bed, Gizmodorks PEI sheetSo far it's working like a champ. No Z sensor but standard end-stop.


-
@markz said in Homemade Blv Cube:
inexpensive linear carriages, bearings, and lead-screws - already iffy
nice, you already have the blv cube metal kit.
there is a ball screw metal kit for the blv cube if you are considering replacing the "iffy"
https://de.aliexpress.com/item/4001120210864.html -
Yeah, I got a beta metal kit. It had a few issues (the bed support in particular is just bad) but it looks and feels way better. I had already printed out all the parts before it unexpectedly showed up early.
I'd much prefer pre-loaded carriages and real thk or hiwin but totally don't trust the ali-x sellers. The leadscrews seem ok (delrin nuts) but the flanged bearings already click with too much pressure and the carriages are making slight noises. All that said - the printer is working flawlessly at 1.5x the old speed and with a 300mm2 bed and the prints are amazing. I love the duet.
-
i order my rails from robotdigg.
https://www.robotdigg.com/product/766/Quality-440C-SUS-MGN12-linear-rail-with-carriage
you will get better quality rails, but not hiwin quality.
edit: they also sell hiwin original
https://www.robotdigg.com/product/671/HIWIN-Origin-Miniature-Guideway-Narrow-Linear-Rail -
NICE !!!! , it look like what I am designing in CAD does work in reality , the lead screw nut connected to a linear rail block , but found in my design that putting the stepper motor next to the frame there isn't space for the lead screw nut.
So the bed is on just held up on 2 linear rails ? , I think my design is over kill again I'm thinking of using 3 linear rails / lead screws. -
I may look into Robotdigg, thanks for the hint when/if these fail enough.
The lead screw-rail block works very well and I think two is plenty. I don't think it's enough linearity support and would prefer one or even two more rails (total) for stability. In normal use there's no pressure on the bed but...
-
Most designs I've looked at have 4 linear rails on each corner and 2 lead screws in the middle OR using 3 lead screw / linear rails.
OR 1 big linear rail like e3d's tool changer. -
@markz said in Homemade Blv Cube:
I'd much prefer pre-loaded carriages and real thk or hiwin but totally don't trust the ali-x sellers.
There is a very good seller on ebay from South Korea that i get new old stock and good used THK & Genuine Hi-Win rails from.
As for ball-screws on a FDM machine I (now) see no need and in the real world no discernible improvement, I took a set off a printer recently as there was no improvement, went to T10 2mm lead with a 2mm lead you get a much better step resolution
Nice printer, just a pity about the wiring...
-
@CaLviNx
i prefer ball screws as they have very little backlash, easy running compared to the leadscrew nuts and they keep my bed from descending when the printer is turned off.
-
Thats fine if you prefer them but they do nothing for print quality, It a huge misconception that ball-screws are better on F.D.M.
And Lead screws only allows a bed to drop if the incorrect specification of lead screw has been employed or has been incorrectly deployed for the application at hand.
Lead screws of the correct specification are more than enough for F.D.M. printers and have less inertia and less weight than a ball-screw, which leads to a reduction in Z banding.
If the lead screws you are using are not easy running then you are using cheap tat.
On the "Feature" of less back lash that's another misconception as on F.D.M the Z axis is never really moving fast enough and higher quality lead screws have a minimal amount of backlash, and certainly a small enough amount to be more than acceptable for F.D.M
People need to remember this is F.D.M levels of precision not Hurco/Makino CNC levels of precision.
-
Nice printer. Looks stiffer than my HEVO, especially the X rail. A good candidate for a next build for me.
The bed seems to be held by only two rails. Is it so? How stable is it?
-
@zapta Yes, the bed is held by the two rails+carriages+leadscrews.
I've only been running the printer for a few days now, but it's my second printer and my second rail-based device (I just designed/built a pick&place) - so that's the extent of my knowledge.
Most of it is just excellent. The CoreXY, the motor locations the rails/leadscrew combinations, the support locations, ... so I really do like the machine but... everything has room for improvement.
The things I don't like:
- I wish it used 5mm-bore standard idlers instead of 3mm double-bearings. Imho that's under-designed and painful to install/maintain. The metal work has no clearance for a larger retrofit.
- The head carrier is clearly a work-in-progress in the metal and I'd expect iterations. It's ok but not for a direct drive.
- The bed design does look rickety - but it's more than anything dependent on the quality of the Z rail carriages. That said, I'd prefer two more rails so less dependence on carriage quality.
- I had to do skew correction in software because getting all the aluminum rails orthogonal seems to be a skill I lack.
bottom line -> I'm running without a bed sensor (just an endstop all the way at the bottom) and so far it seems to be repeating reliably - so it's pretty good. I want to go a month without adjusting the thumbscrews.
I'll report back.
-
I said I'd 'report back' so after a few weeks of using the cube - yes the Z axis mechanics (at least with the metal kit) is bad.
I've increased the depth of the bed holder - it was far too narrow - and added a third 'leg' (leadscrew and rail) for stability. I hate using another motor driver (my last one...) but looking at the bed wrong caused it to tilt in the Y direction and this is the simplest fix.
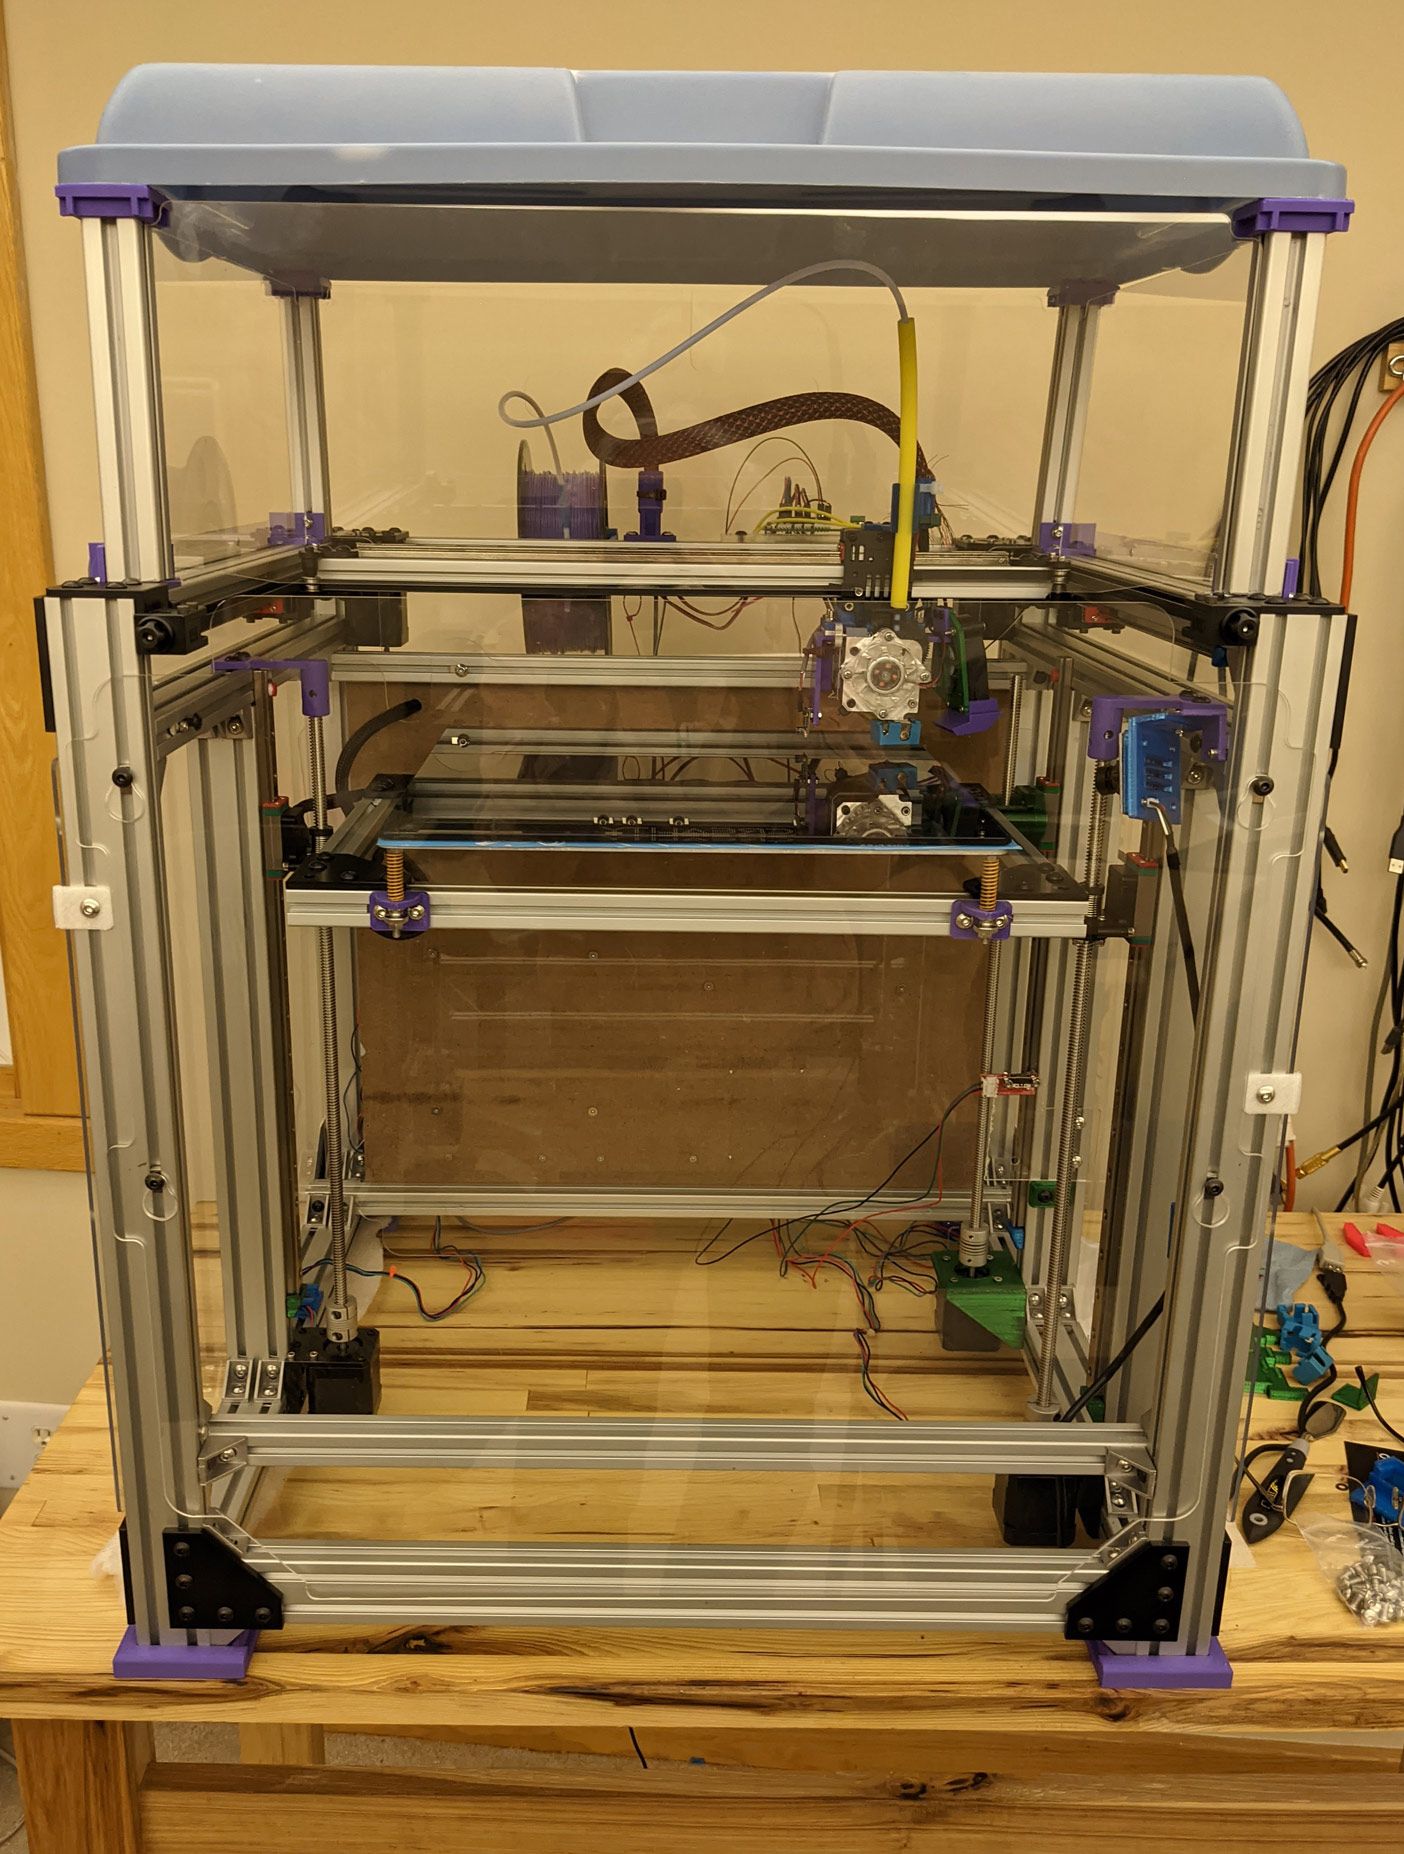
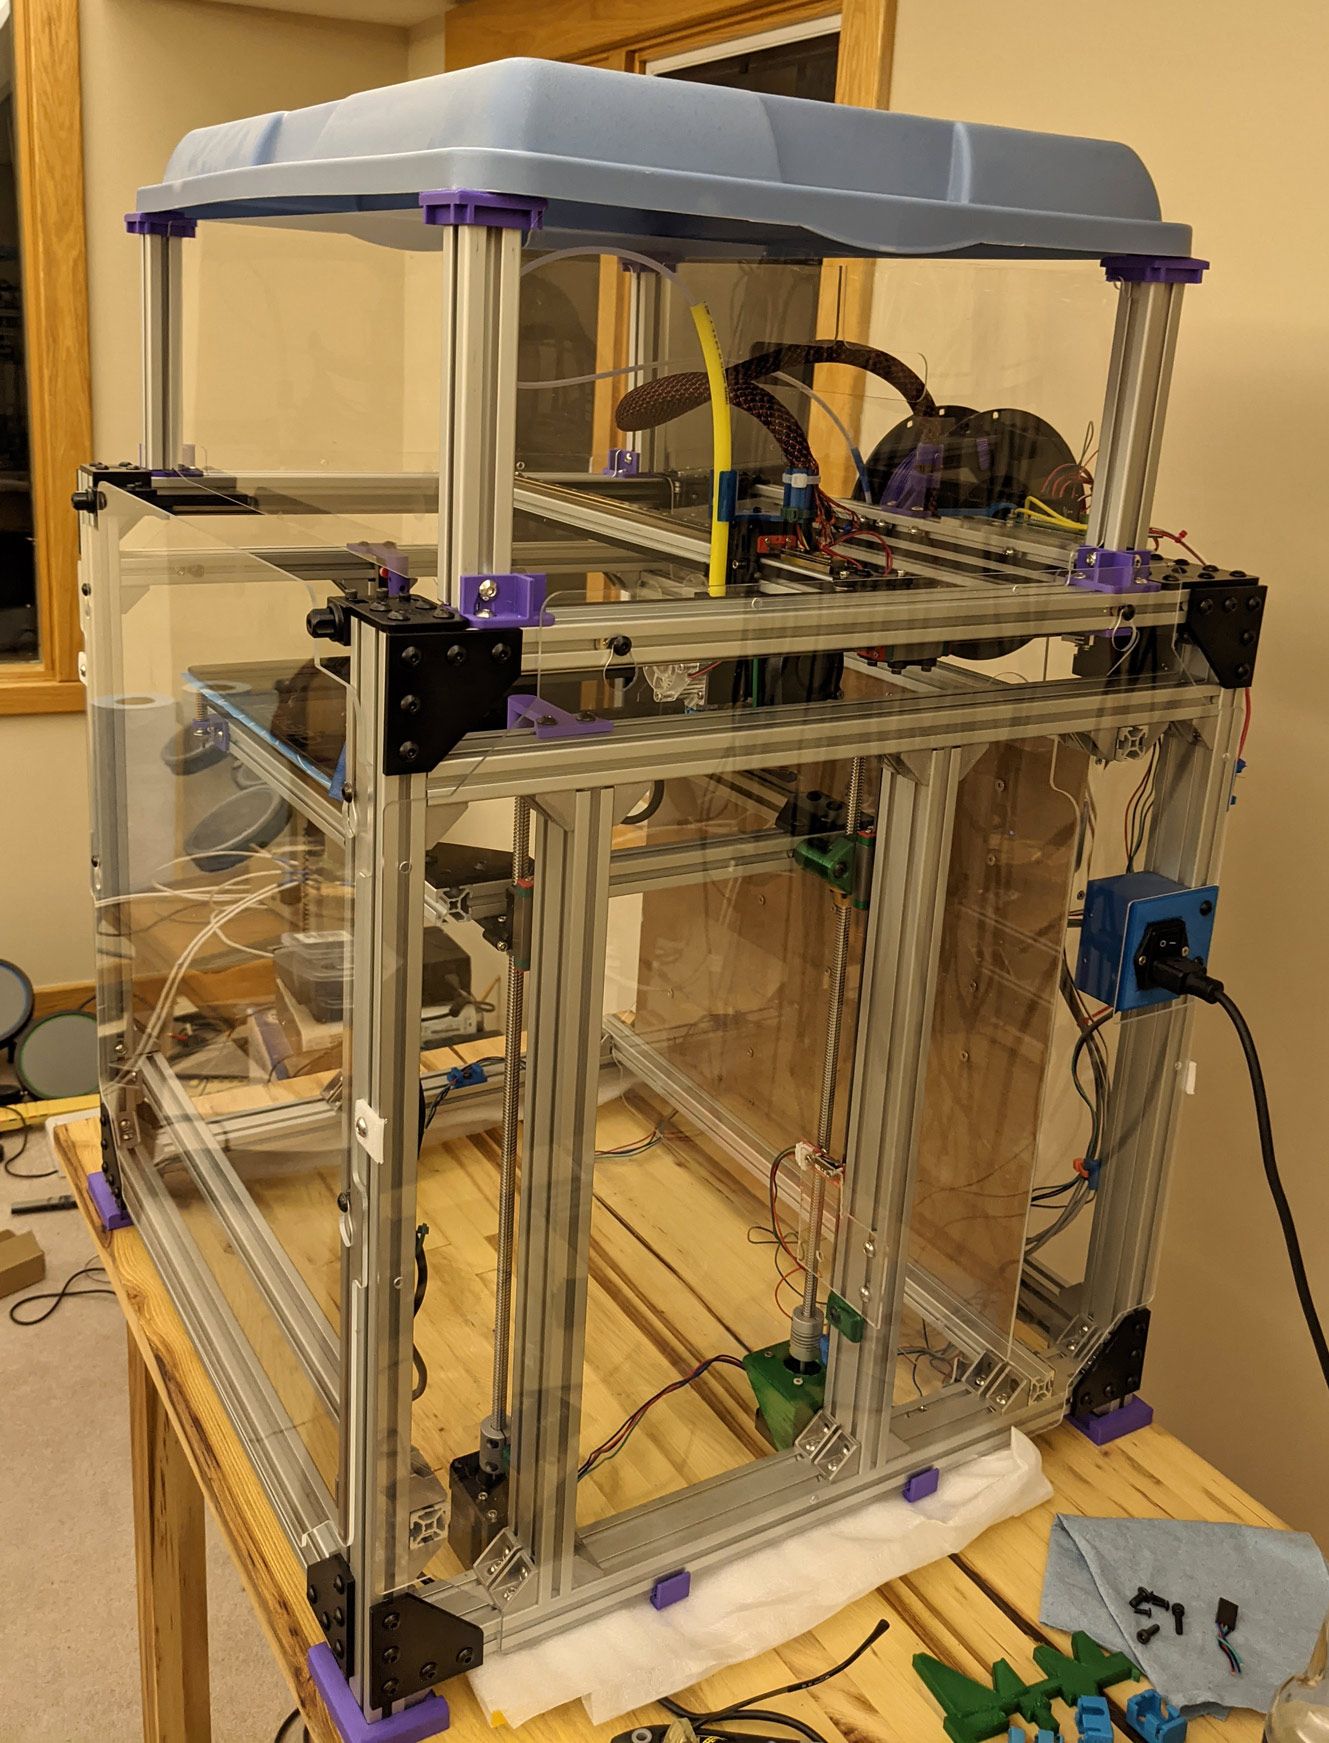
Other than that, it's been working very well. I've built an Acrylic enclosure for doing Nylon but otherwise it's been fine.
-
@markz said in Homemade Blv Cube:
but looking at the bed wrong caused it to tilt in the Y direction and this is the simplest fix.
are you using hiwin rails? in theory the linear rails should stop this wobble
-
@Veti I'm not using Hiwin rails but cheaper rails that have some small amount of slop even when new. It's not the carriage that's tilting here but it's all of the other mechanics - the 2020 interconnects and mainly the linkage from the carriage to the bed which relies on two small aluminum surface area's friction. If I had a magnetic bed, and never ever pushed on it, it might be ok - but for me just pressing on the bed to remove a printed part caused Y axis tilt.
Personally, if you're relying on a single linear rail/carriage to stop any tilt at all that's just not a good design and denies physics and wear over time. Just my opinion, although my cnc (which uses hiwin rails and always in pairs) has worked reliably for 15 years.
Consider this .... if your carriage bed assembly allows a tilt of 0.1 degree that correlates to a tilt of about 1/2mm of a 300mm bed - which is significant. If you have two carriages then the only way to get 0.1 degree of tilt is if they are at different heights and the assembly is almost irrelevant.
-
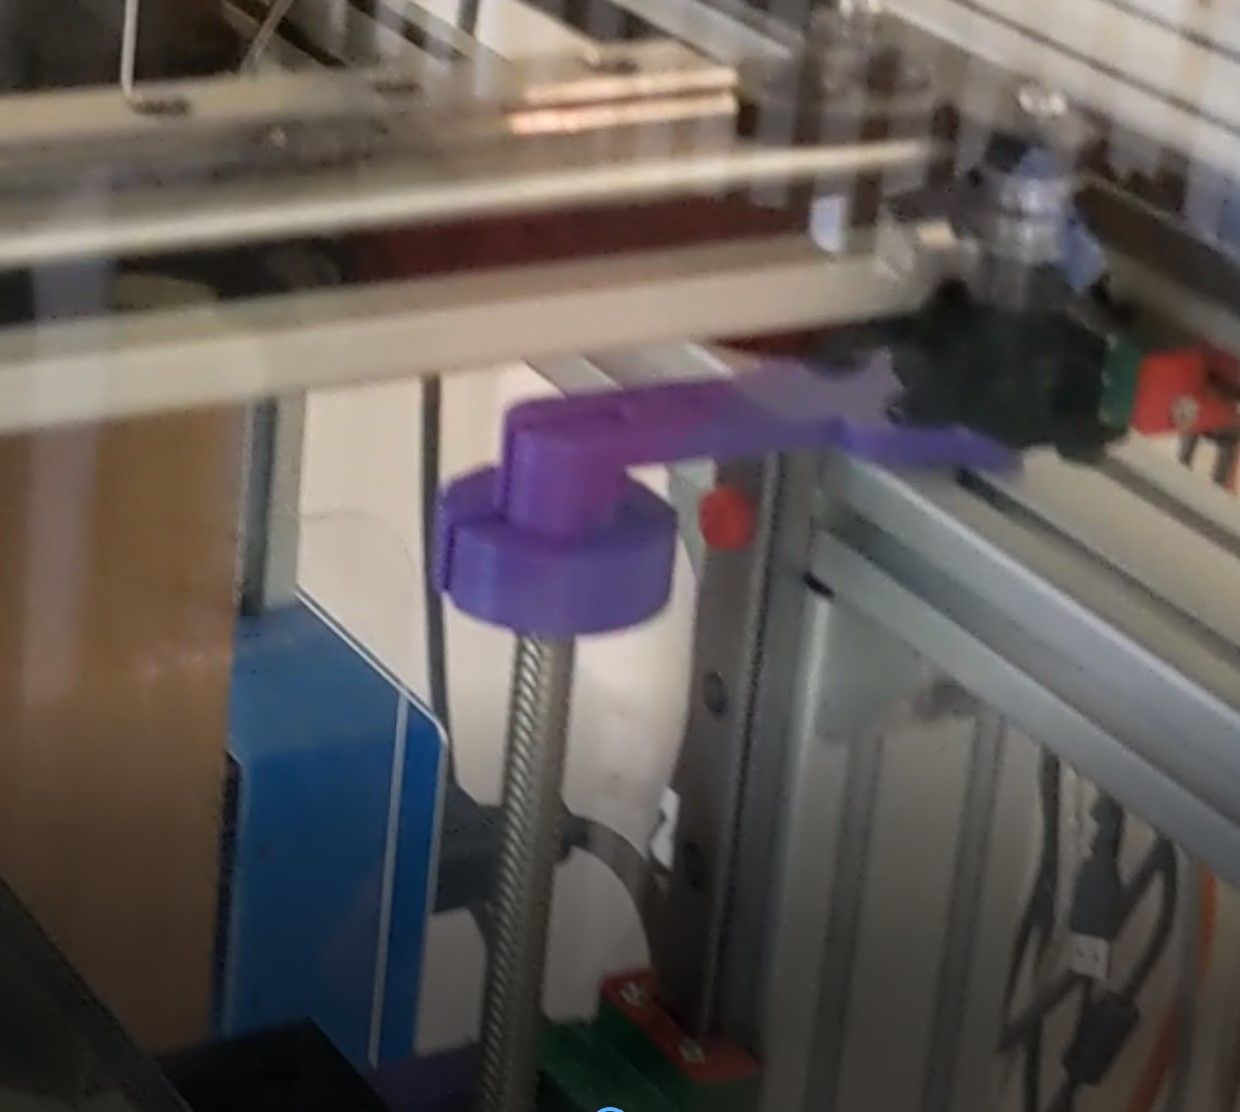
Why do you constrain the top of your z rods with those purple 3 printed parts? Doesn't that contribute to more z-wobble?
-
@doublec4 said in Homemade Blv Cube:
Why do you constrain the top of your z rods with those purple 3 printed parts? Doesn't that contribute to more z-wobble?
Hush now, don't you know you are not supposed to use common sense anymore
-
I would delete the MOSFET. The duet is more than capable enough to drive your bed and the guys know what they are doing. Having such a humongous heat sink is a sure sign of a badly selected MOSFET for the application, a well chosen more expensive one with a low Ron (such as used on your duet board) doesn’t get hot when switching typical 3D printer bed currents.
-
The three purple printed parts now have standard 8mm leadscrew bearings inside. I bought std flange bearings and used just the bearings - which I stuck in the purple caps so they wouldn't be as constrained as the steel flanges. The purple caps shown here were temporary while waiting for the bearings.
They just stop the top from bouncing around when the leadscrews turn. There was enough of an angle in one leadscrew connection that at the lowest Z the top of the screw would bounce pretty badly and shake the printer when rotating quickly. The bearings calmed it down substantially.
I used the mosfet for a few reasons.
- I'm using the bed mosfet on the duet3 to drive the extruder heater cartridge.
- The bed heater is on a separate 24V supply so that the Duet doesn't get a voltage spike when the bed switches on and off. The Duet3 might be well designed, but the cheap switching supplies not so much -and high-current spikes cause RFI no matter how good you are.
- I'm leaving open option of using much larger 24V heater or even 110VAC bed heater and swapping all that stuff out for an SSR without needing to rewire/rework the Duet.
- The mosfet is way overspec'ed for the application - so I can use other heaters (or if I switch to 110VAC I have lots of uses elsewhere for a high power mosfet switch).
-
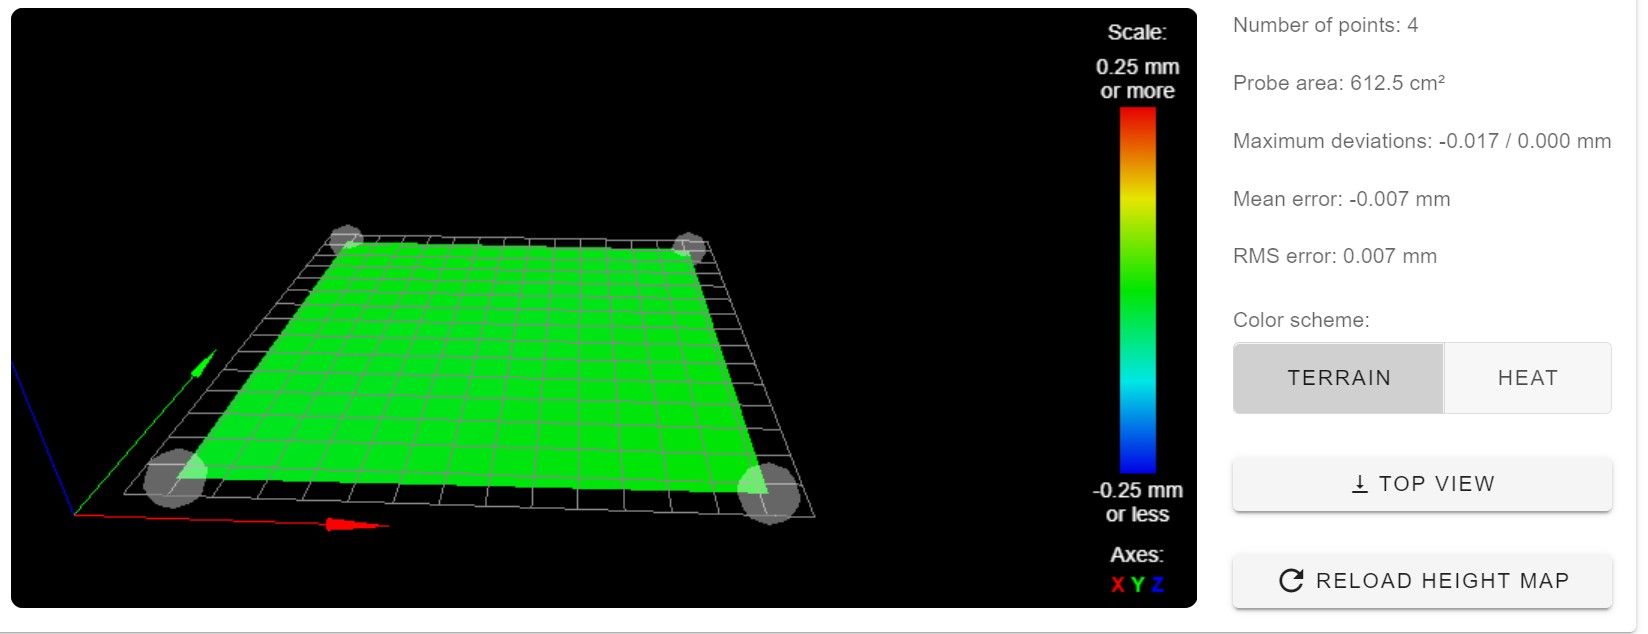
Just a note that I've now been running for a week or so on my 'final' adjustment of the bed springs. When I print I usually take off the glass bed, remove the print, then replace the bed. Sometimes I just peel the print off the bed in place.
Even after a week, the bed has been stable now that I have 3 legs. Here's a 4-point mesh scan from yesterday. I have specifically not touched any mechanical adjustment for a week - just ran prints.