After Micro swiss DD upgrade,Extruder skips steps
-
@Veti i think i have solved it !
i have a all Metal hotend from micro swiss and it was recommended to increase temperatur 5-10°C so i have tested it with 222°C and i have no stringing just a little bit but its ok.what i can print now to check if its all ok with my setup ?
Edit:
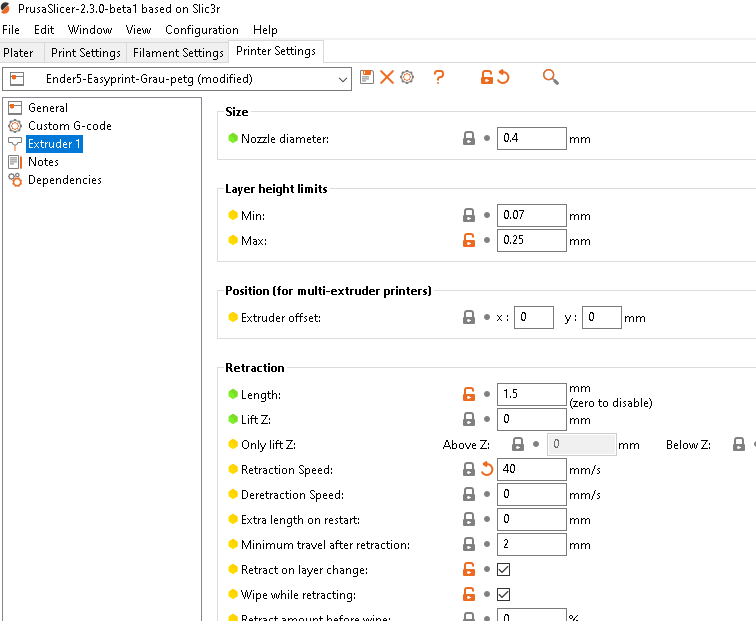
I have a 0.4 Nozzle which Extrusion Widht did i take ? in some how to and youtube Videos they say take EW: 0.45 another Video says take 0.48 Etrusion Widht, its a little bit confusing
-
@Veti thats the benchy
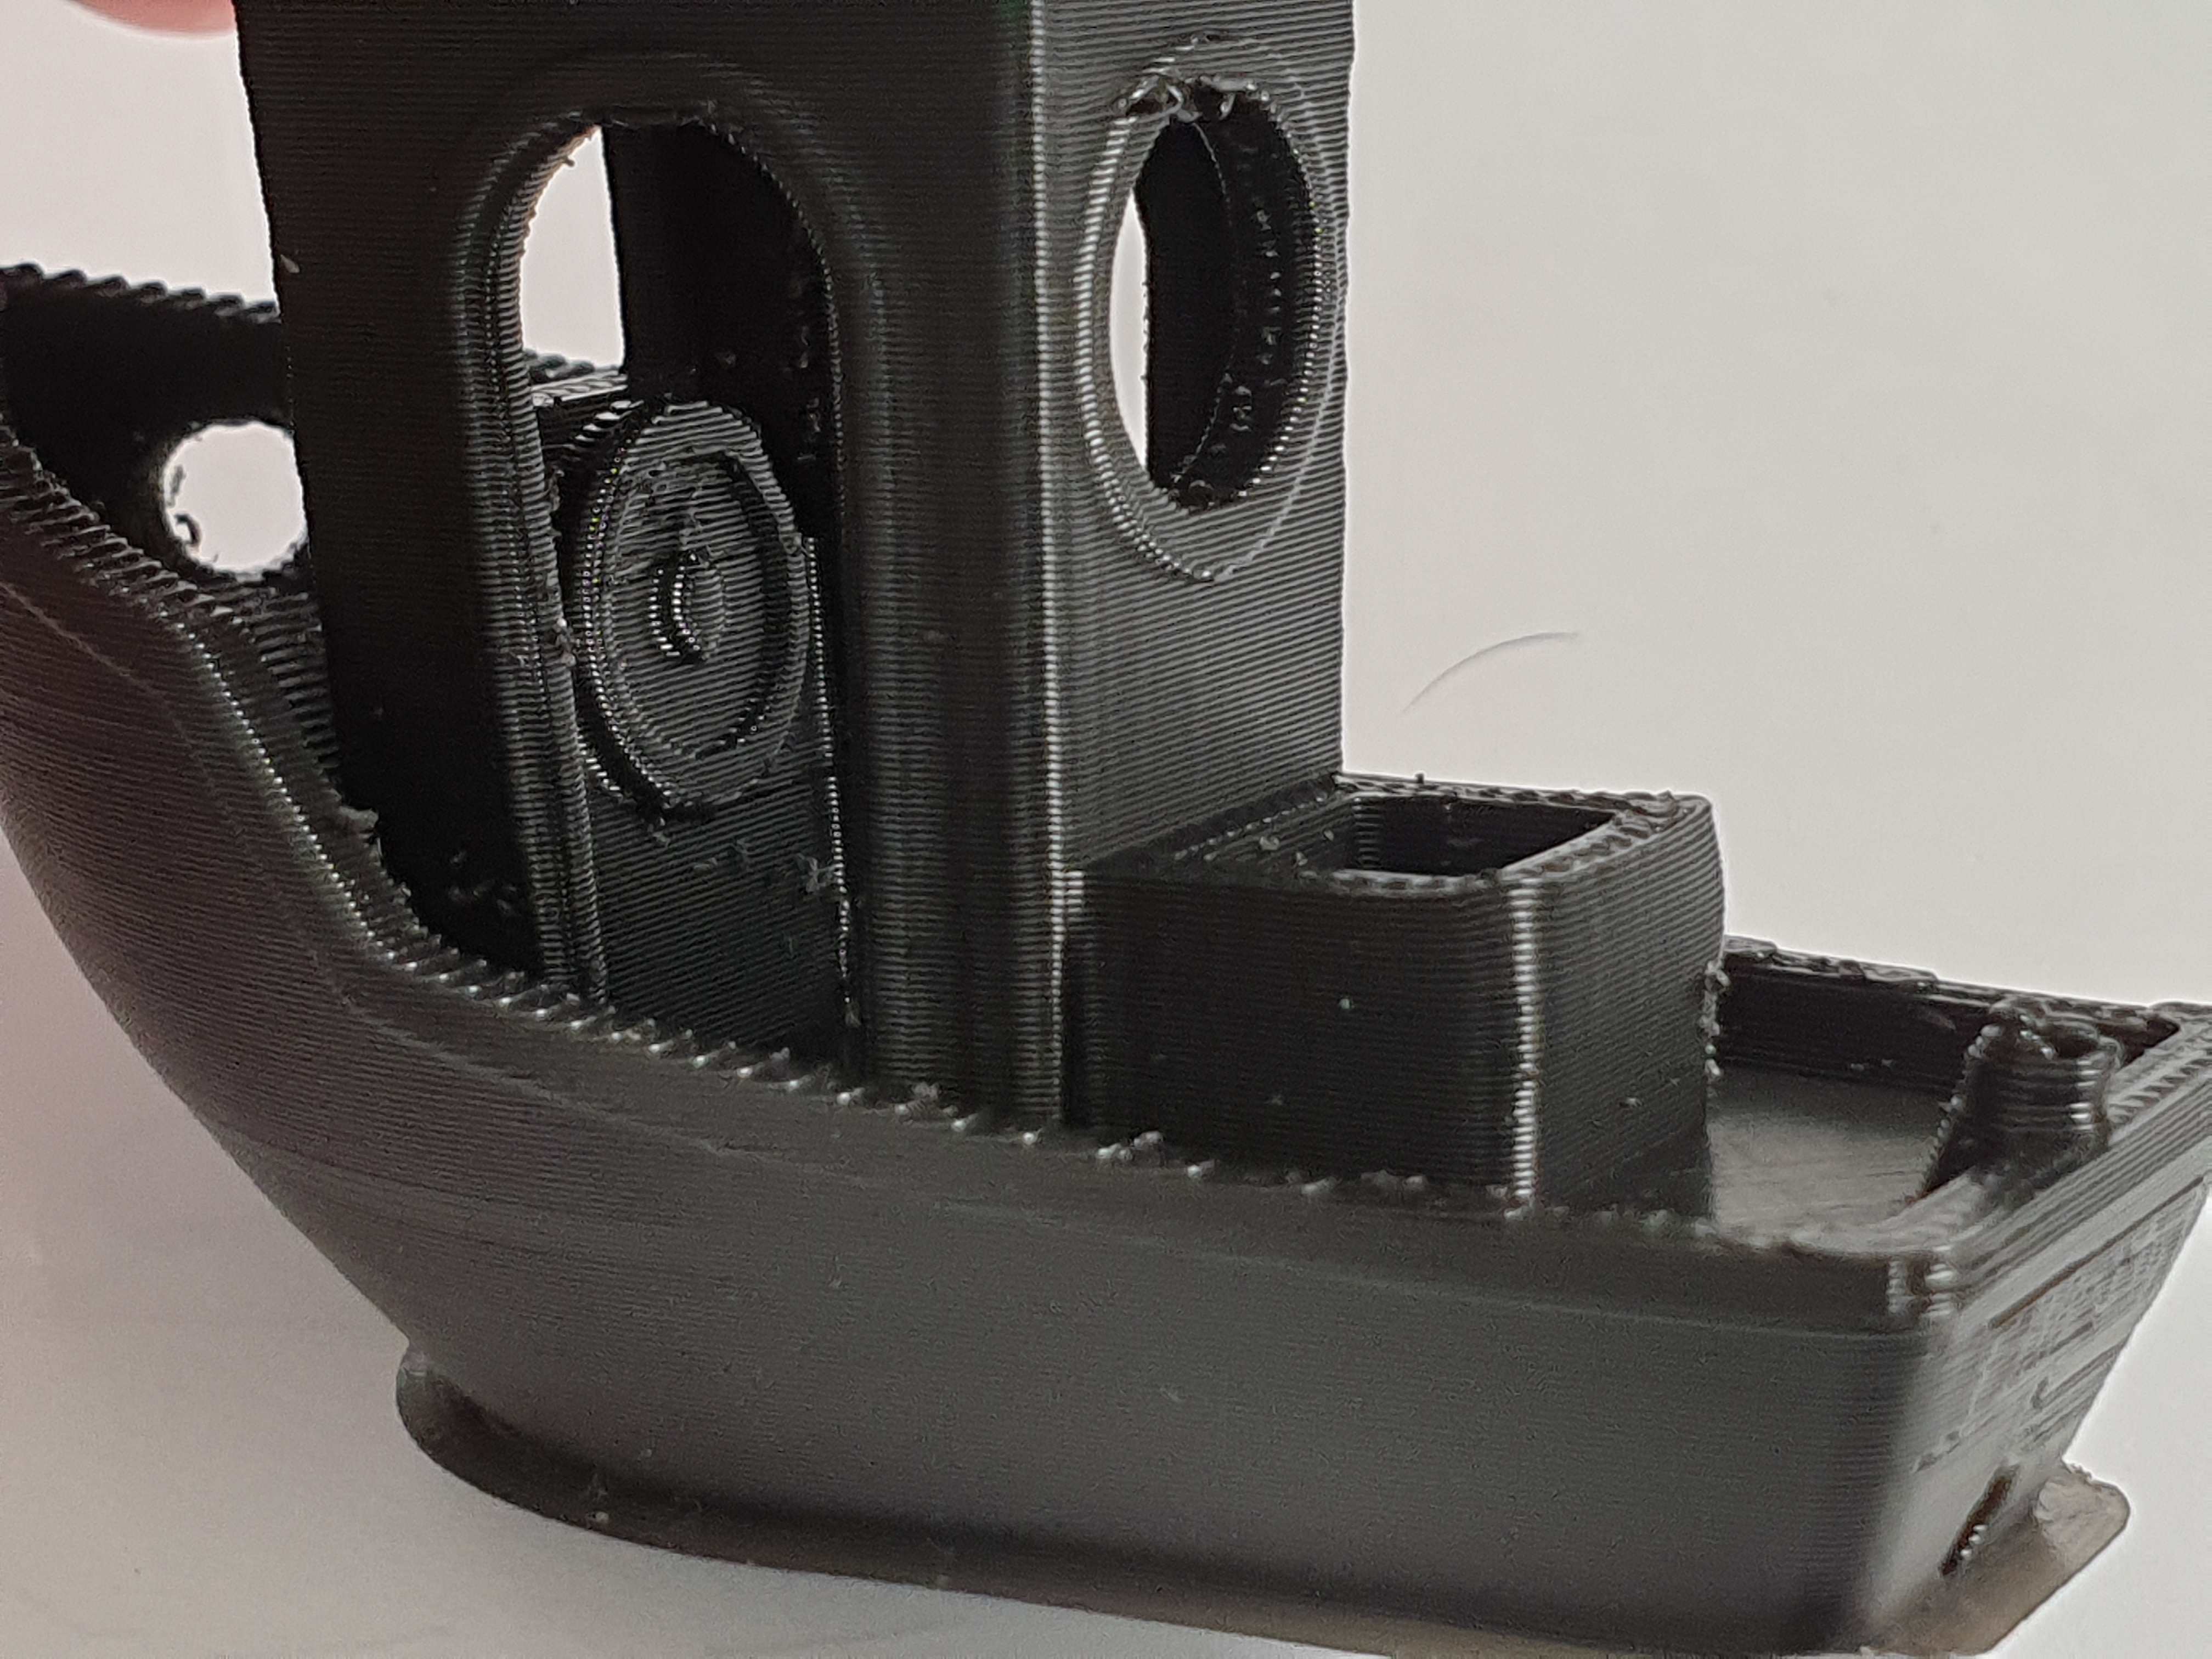
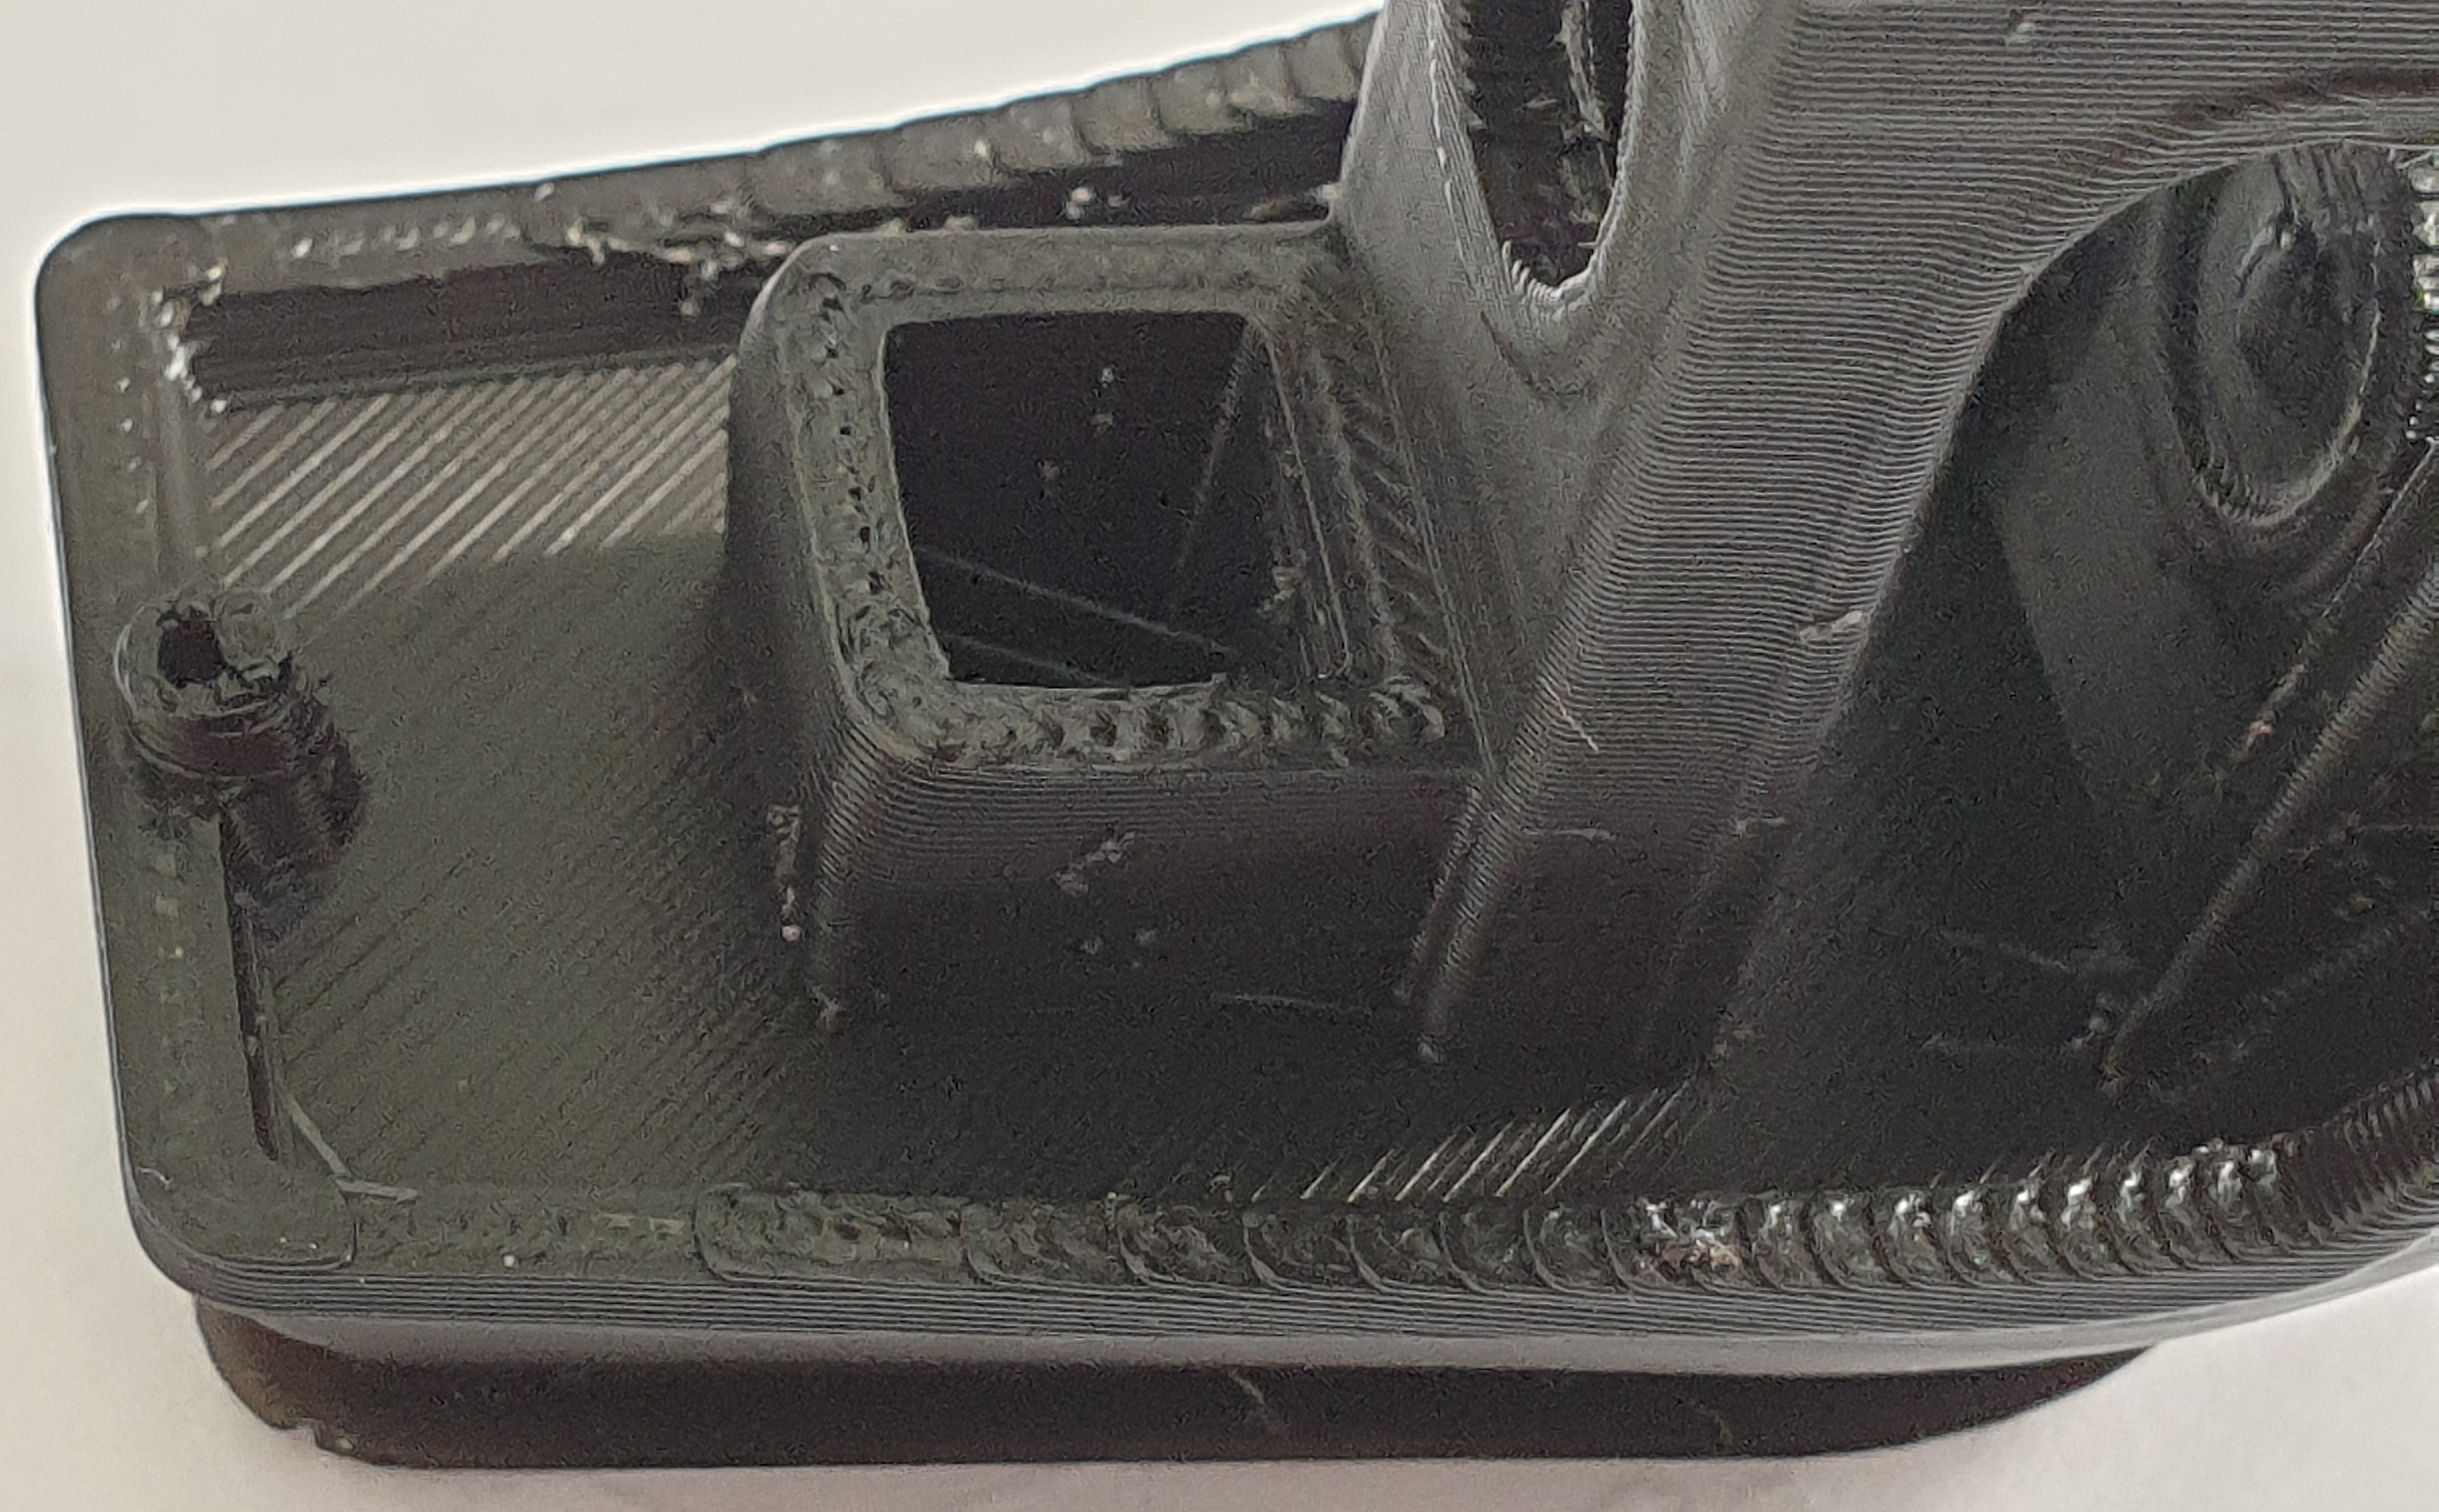
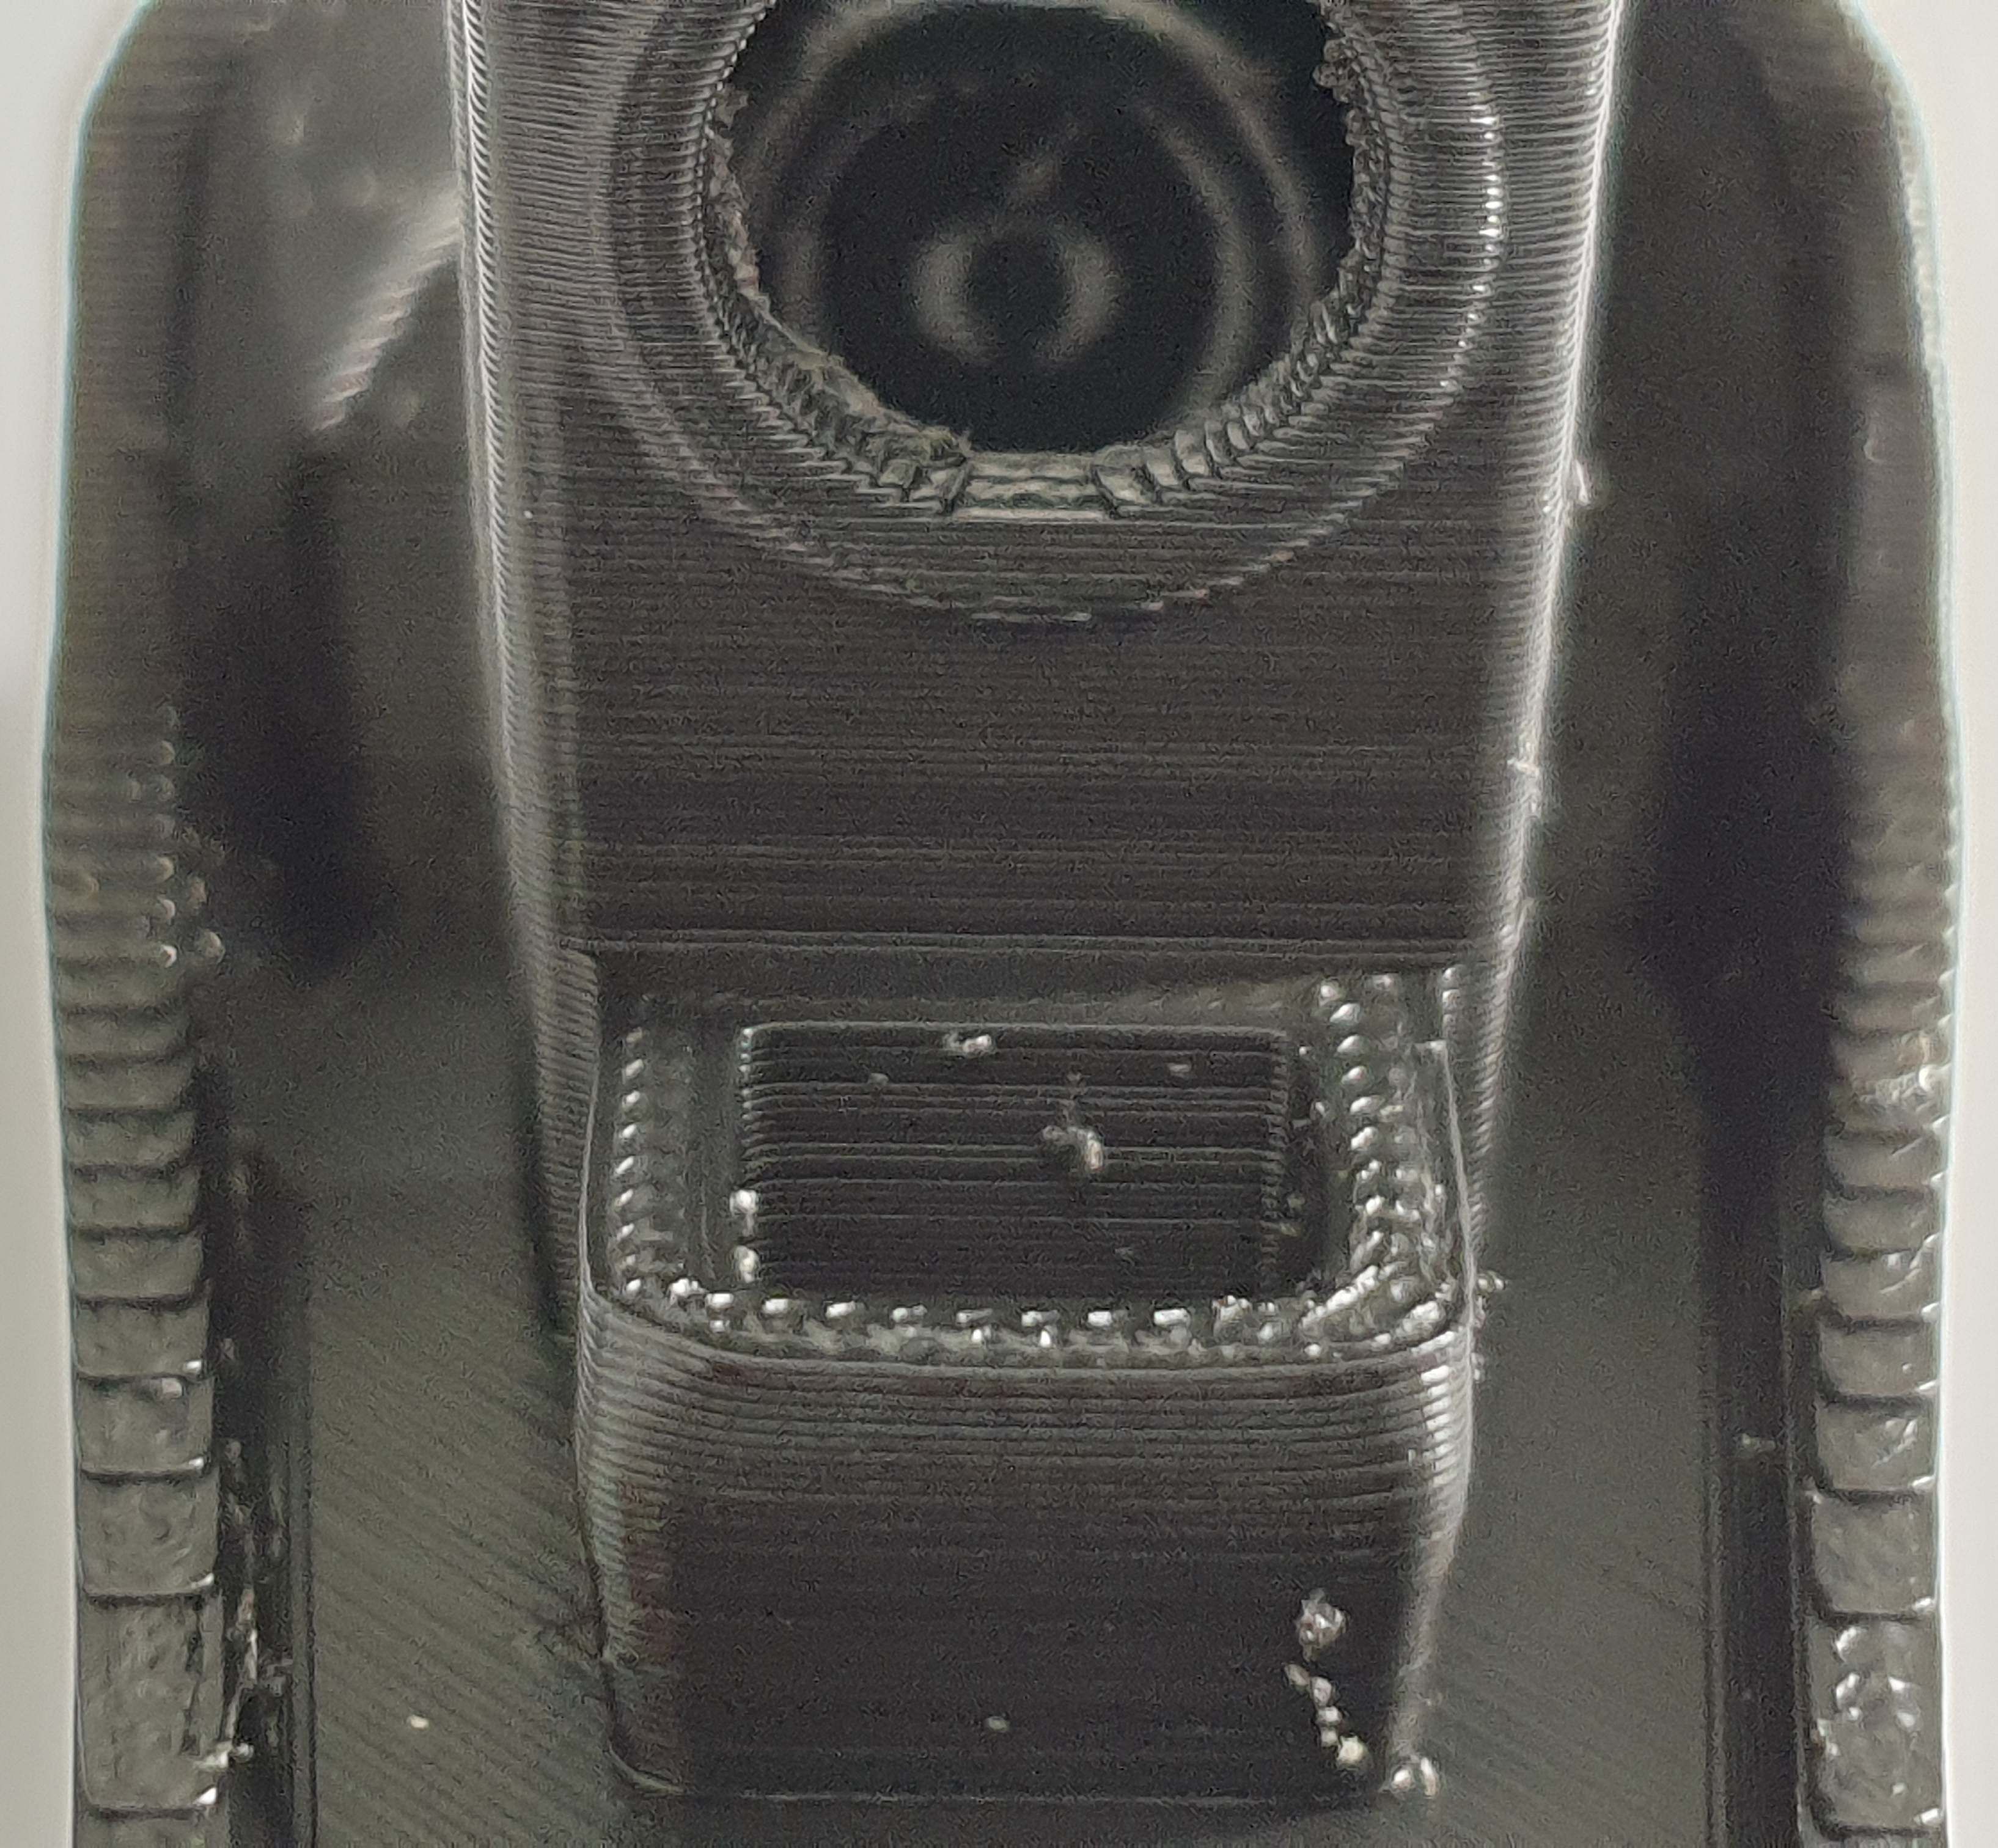
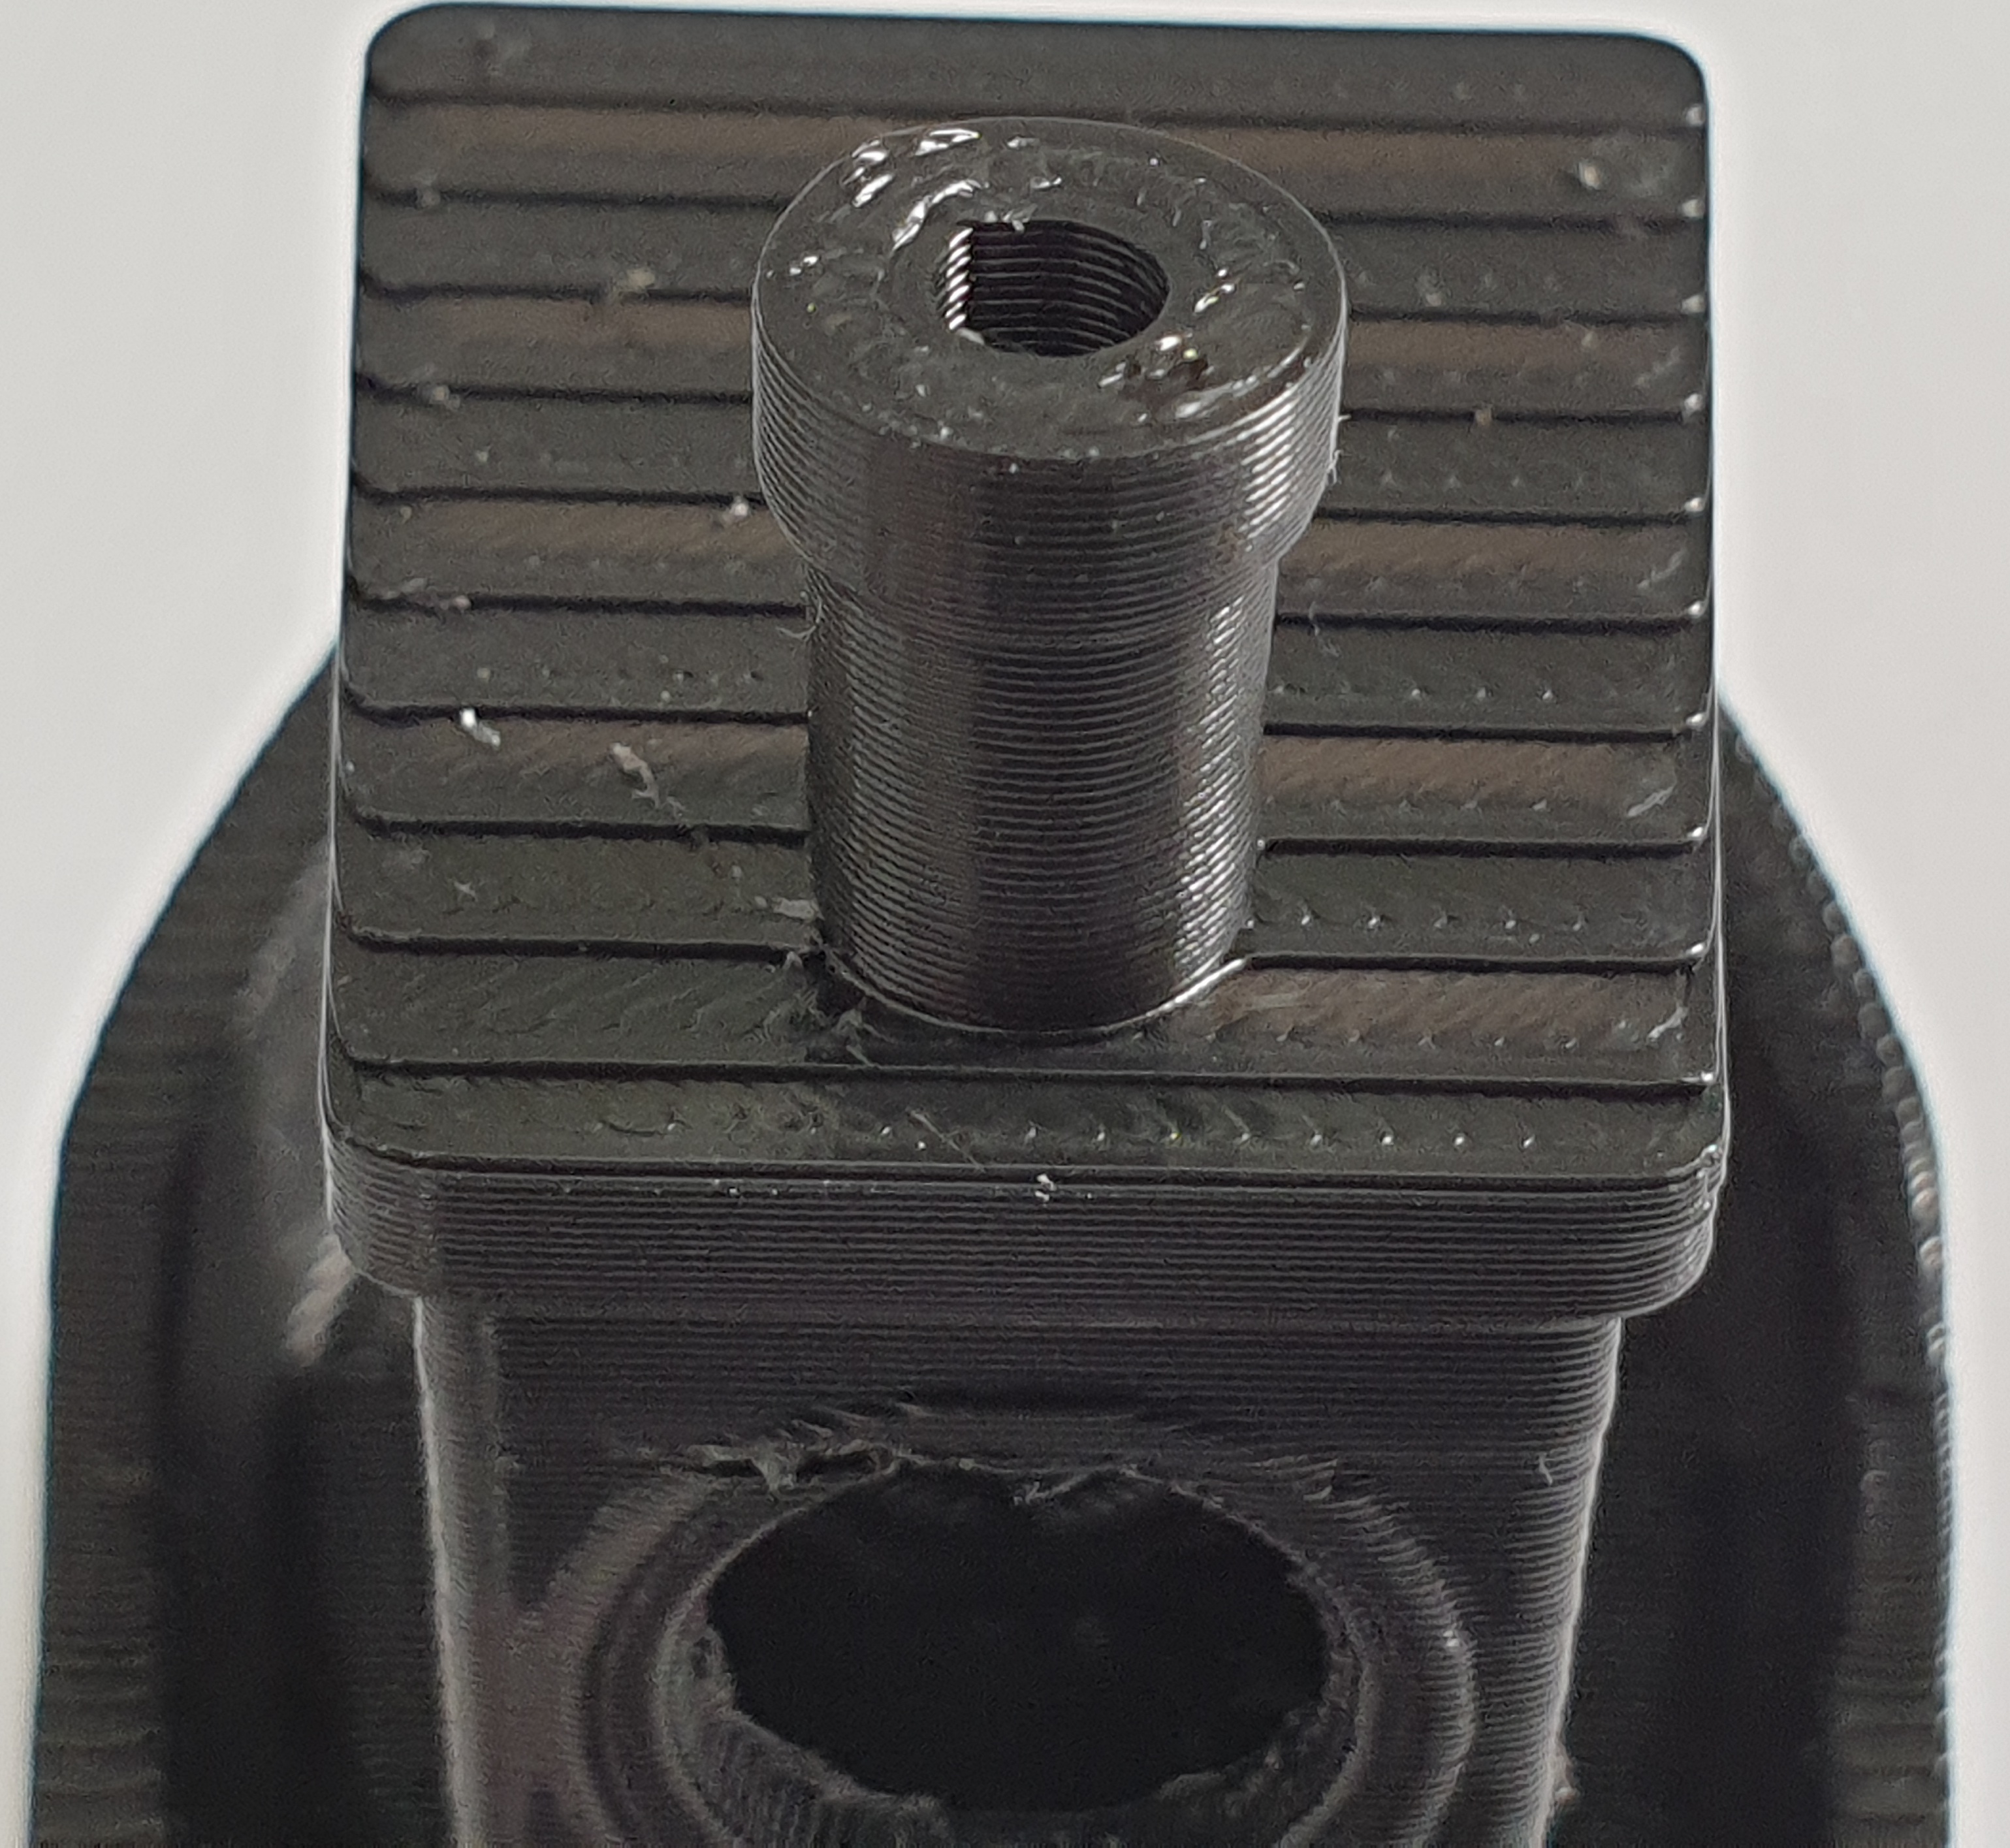
Can i make somrhing better ? This was printer with prusaslucer 2.3.0 alpha 2
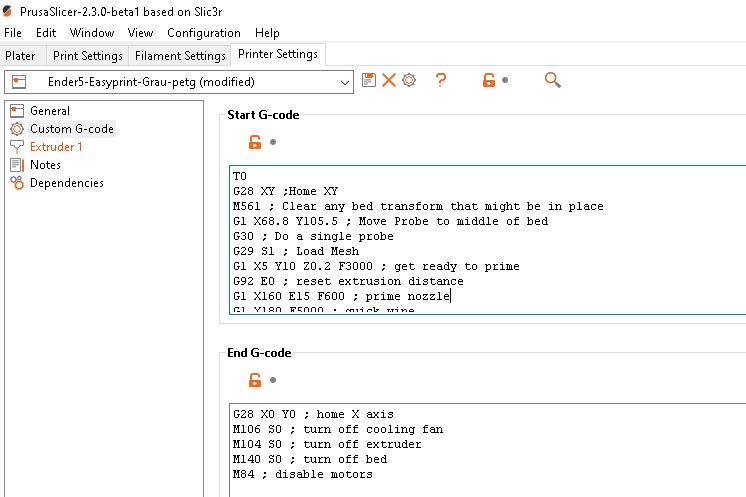
If you need slicer configi got this error with prusaslicer and duet wifi
Attempting to extrude with no tool selected
or
Setting temperature: no tool selectedi must heating up manual is there a fix ?
-
@lui2004 said in After Micro swiss DD upgrade,Extruder skips steps:
Attempting to extrude with no tool selected
Add a T0 to the start g code
-
@lui2004 said in After Micro swiss DD upgrade,Extruder skips steps:
I have a 0.4 Nozzle which Extrusion Widht did i take ? in some how to and youtube Videos they say take EW: 0.45 another Video says take 0.48 Etrusion Widht, its a little bit confusing
It's not super critical. Generally it's recommended to use a value somewhat larger than the nozzle orifice. You can let PrusaSlicer handle it entirely by setting the width to 0. It will likely end up around .48. You can adjust it manually as well. Smaller to get better detail or to fit 2 perimeters evenly into a thin wall. Going below nozzle width can help make supports easier to break apart.
-
Hi
I have made some modifications i want your opinion what i can make betterconfig.g
; Configuration file for Duet WiFi (firmware version 1.21)
; executed by the firmware on start-up
;
; generated by RepRapFirmware Configuration Tool v2 on Tue May 07 2019 23:06:50 GMT+0100 (British Summer Time)

; General preferences
G90                                      ; Send absolute coordinates...
M83                                      ; ...but relative extruder moves

; Network
M550 P"Ender 5"                          ; Set machine name
M552 S1                                  ; Enable network
M586 P0 S1                               ; Enable HTTP
M586 P1 S0                               ; Disable FTP
M586 P2 S0                               ; Disable Telnet

; Drives
M569 P0 S1                               ; Physical drive 0 goes forwards
M569 P1 S1                               ; Physical drive 1 goes forwards
M569 P2 S0                               ; Physical drive 2 goes backwards
M569 P3 S1                              ; Physical drive 3 goes forwards
M584 X0 Y1 Z2 E3                               ; set drive mapping
M350 X16 Y16 Z16 E16 I1							; configure microstepping with interpolation
M92 X80.20 Y80.12 Z794.04 E277.89             ; set steps per mm
M566 X900.00 Y900.00 Z60.00 E4000.00      ; Set maximum instantaneous speed changes (mm/min)
M203 X15000.00 Y15000.00 Z600.00 E8000.00  ; Set maximum speeds (mm/min)
M201 X500.00 Y500.00 Z200.00 E5000.00          ; set accelerations (mm/s^2)
M906 X800 Y800 Z800 E1400 I30                   ; set motor currents (mA) and motor idle factor in per cent
M84 S30                                  ; Set idle timeout


; Axis Limits
M208 X0 Y0 Z0 S1                         ; Set axis minima
M208 X220 Y220 Z300 S0                   ; Set axis maxima

; Endstops
M574 X1 S1 P"xstop"                            ; configure active-high endstop for low end on X via pin xstop
M574 Y1 S1 P"ystop"                            ; configure active-high endstop for low end on Y via pin ystop
M574 Z1 S2 									   ; configure Z-probe endstop for low end on Z

;Filament Sensors
M591 D0 P2 C"!e0_stop" S1   			   ;Extruder 1(0)


M950 S0 C"exp.heater7"                         ; create servo pin 0 for BLTouch
M558 P9 C"^zprobe.in" H3 F60 T6000 A10 R0.75 S0.003            ; set Z probe type to bltouch and the dive height + speeds
G31 P500 X41.2 Y4.5 Z2.498                  ; set Z probe trigger value, offset and trigger height
M557 X41.2:221.2 Y4.5:219.5 S20                       ; define mesh grid
M671 X28.8:198.8:198:28.8 Y24:24:194:194


; Heaters
M308 S0 P"bedtemp" Y"thermistor" T100000 B3950 ; configure sensor 0 as thermistor on pin bedtemp
M950 H0 C"bedheat" T0                          ; create bed heater output on bedheat and map it to sensor 0
M307 H0 B0 S1.00                               ; disable bang-bang mode for the bed heater and set PWM limit
M140 H0                                        ; map heated bed to heater 0
M143 H0 S120                                   ; set temperature limit for heater 0 to 120C
M308 S1 P"e0temp" Y"thermistor" T98801 B4185 ; configure sensor 1 as thermistor on pin e0temp
M950 H1 C"e0heat" T1                           ; create nozzle heater output on e0heat and map it to sensor 1
M143 H1 S300 								   ; set temperature limit for heater 1 to 300C
M307 H1 B0 S1.00

; Fans
M950 F0 C"fan0" Q500                           ; create fan 0 on pin fan0 and set its frequency
M106 P0 S0 H-1                                 ; set fan 0 value. Thermostatic control is turned off
M950 F1 C"fan1" Q500                           ; create fan 1 on pin fan1 and set its frequency
M106 P1 S1 H1 T45                              ; set fan 1 value. Thermostatic control is turned on

; Tools
M563 P0 D0 H1                            ; Define tool 0 S3D
;M563 P0 D0 H1 F0							; Für Prusa Slicer
G10 P0 X0 Y0 Z0                          ; Set tool 0 axis offsets
G10 P0 R0 S0                             ; Set initial tool 0 active and standby temperatures to 0C

; Automatic saving after power loss is not enabled

; Custom settings are not configured
M575 P1 S1 B57600 ; enable support for PanelDue
M572 D0 S0.05 ; Pressure Advance
M204 P500 T2000
M501


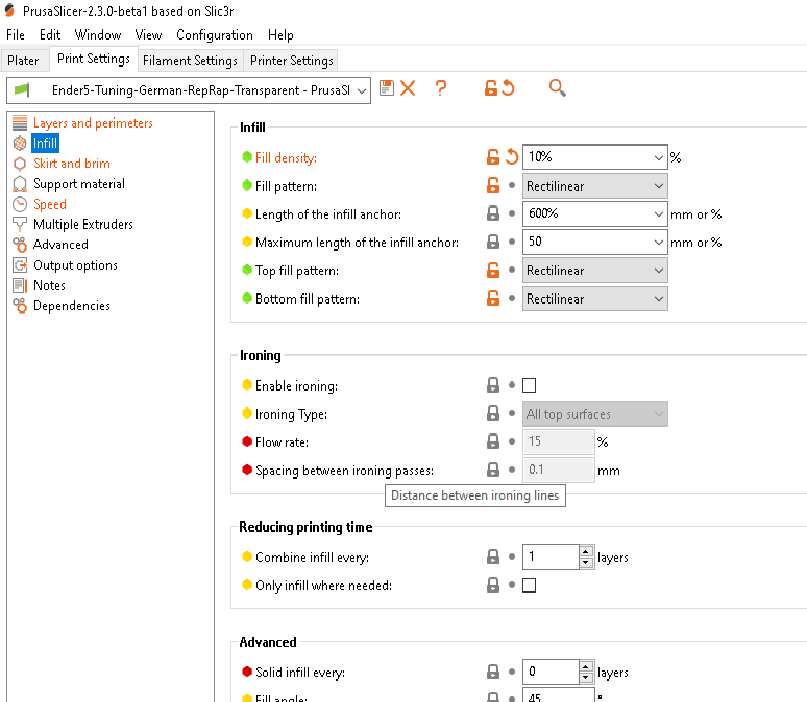
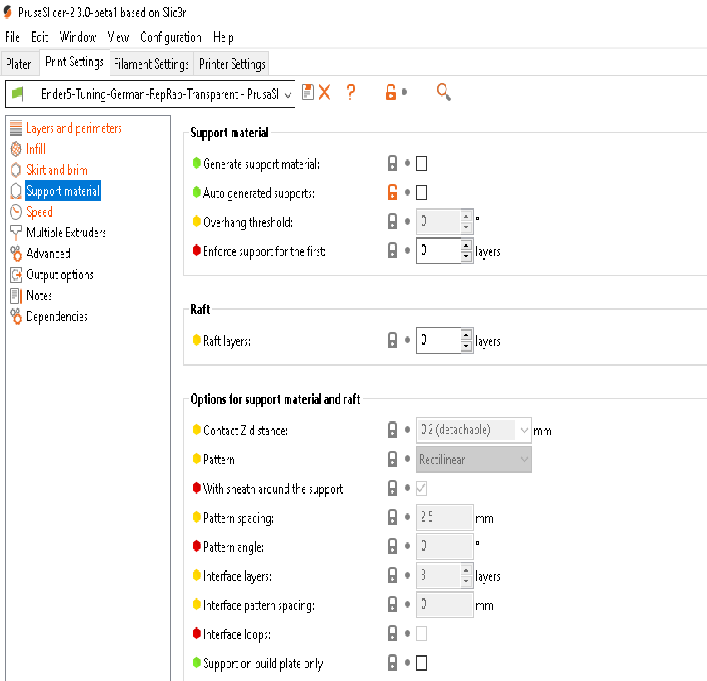
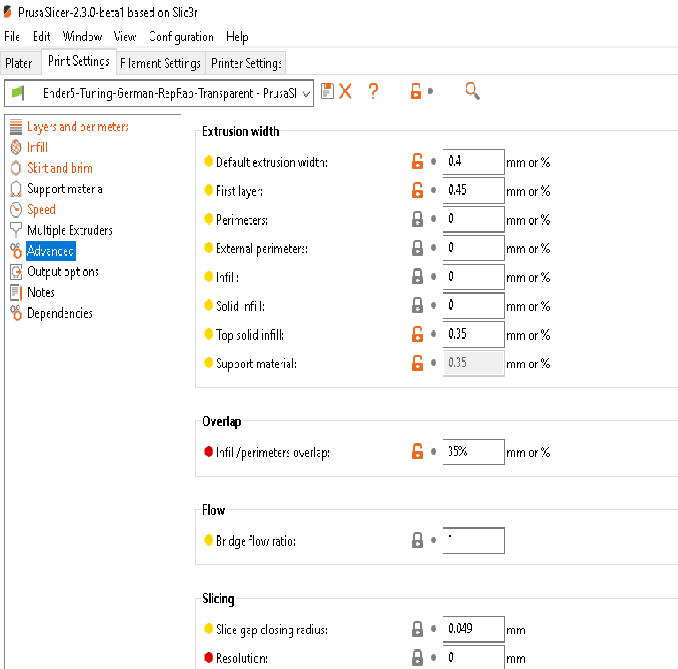
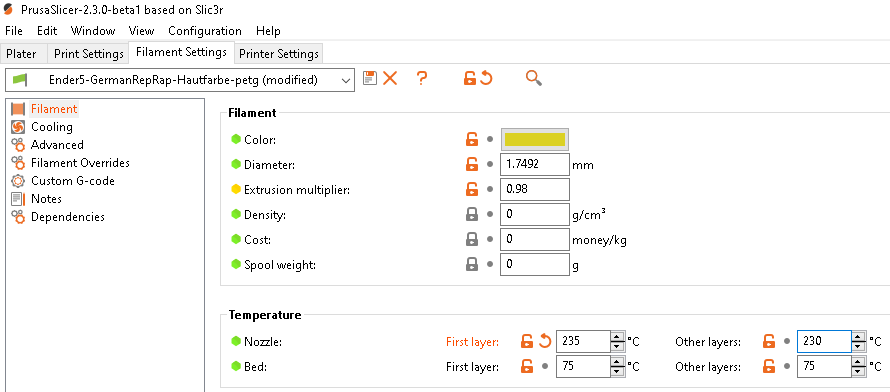
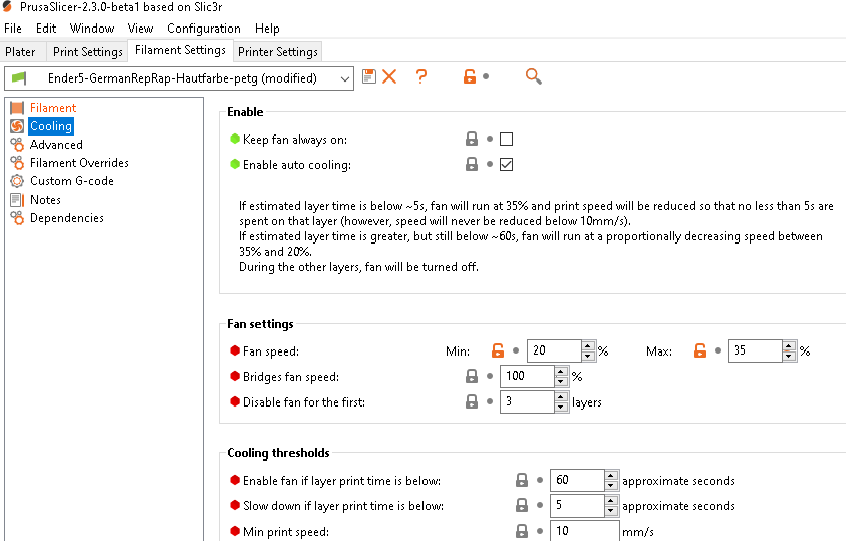
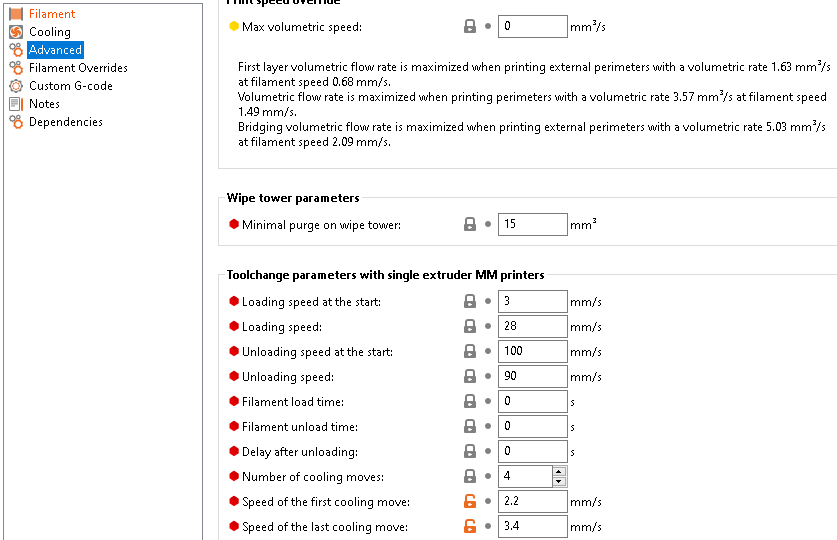
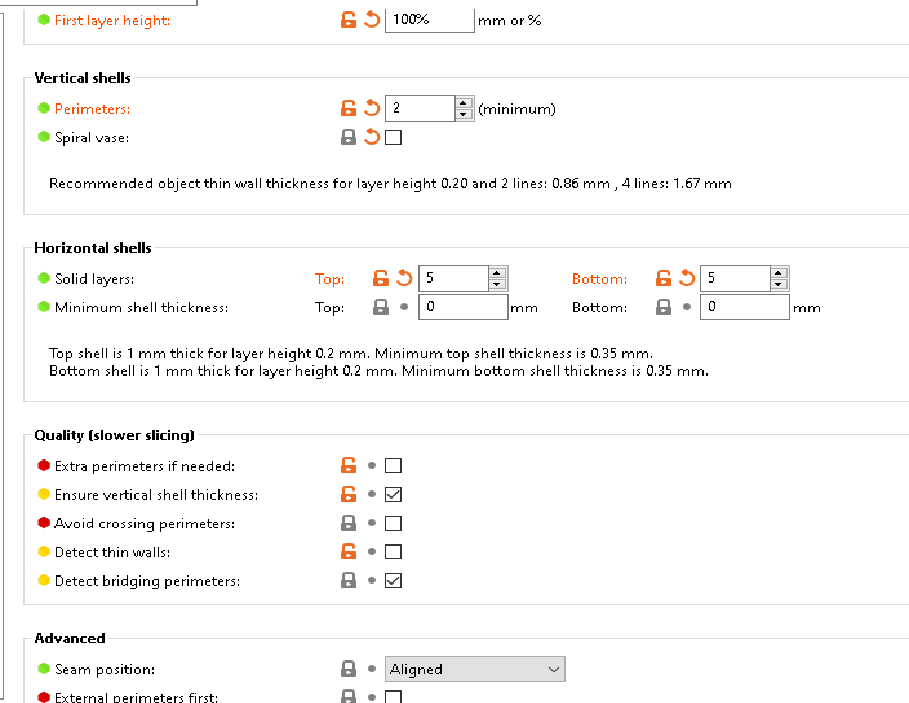
this is my prusaslicer settings:

-
Your extrusion multiplier as configured in that screen shot is set to 0.4 for all move types (read the hover text to see how it's calculated) to let the slicer use it's default set the first number to 0 as well. Nothing wrong with 0.4 per se, especially on small detailed models, but going a bit above nozzle size as the default does (25% above I believe) will allow for stronger parts and maybe some reduced print times.
Your print speeds are also very conservative. You could likely double those speeds and have adequate quality.
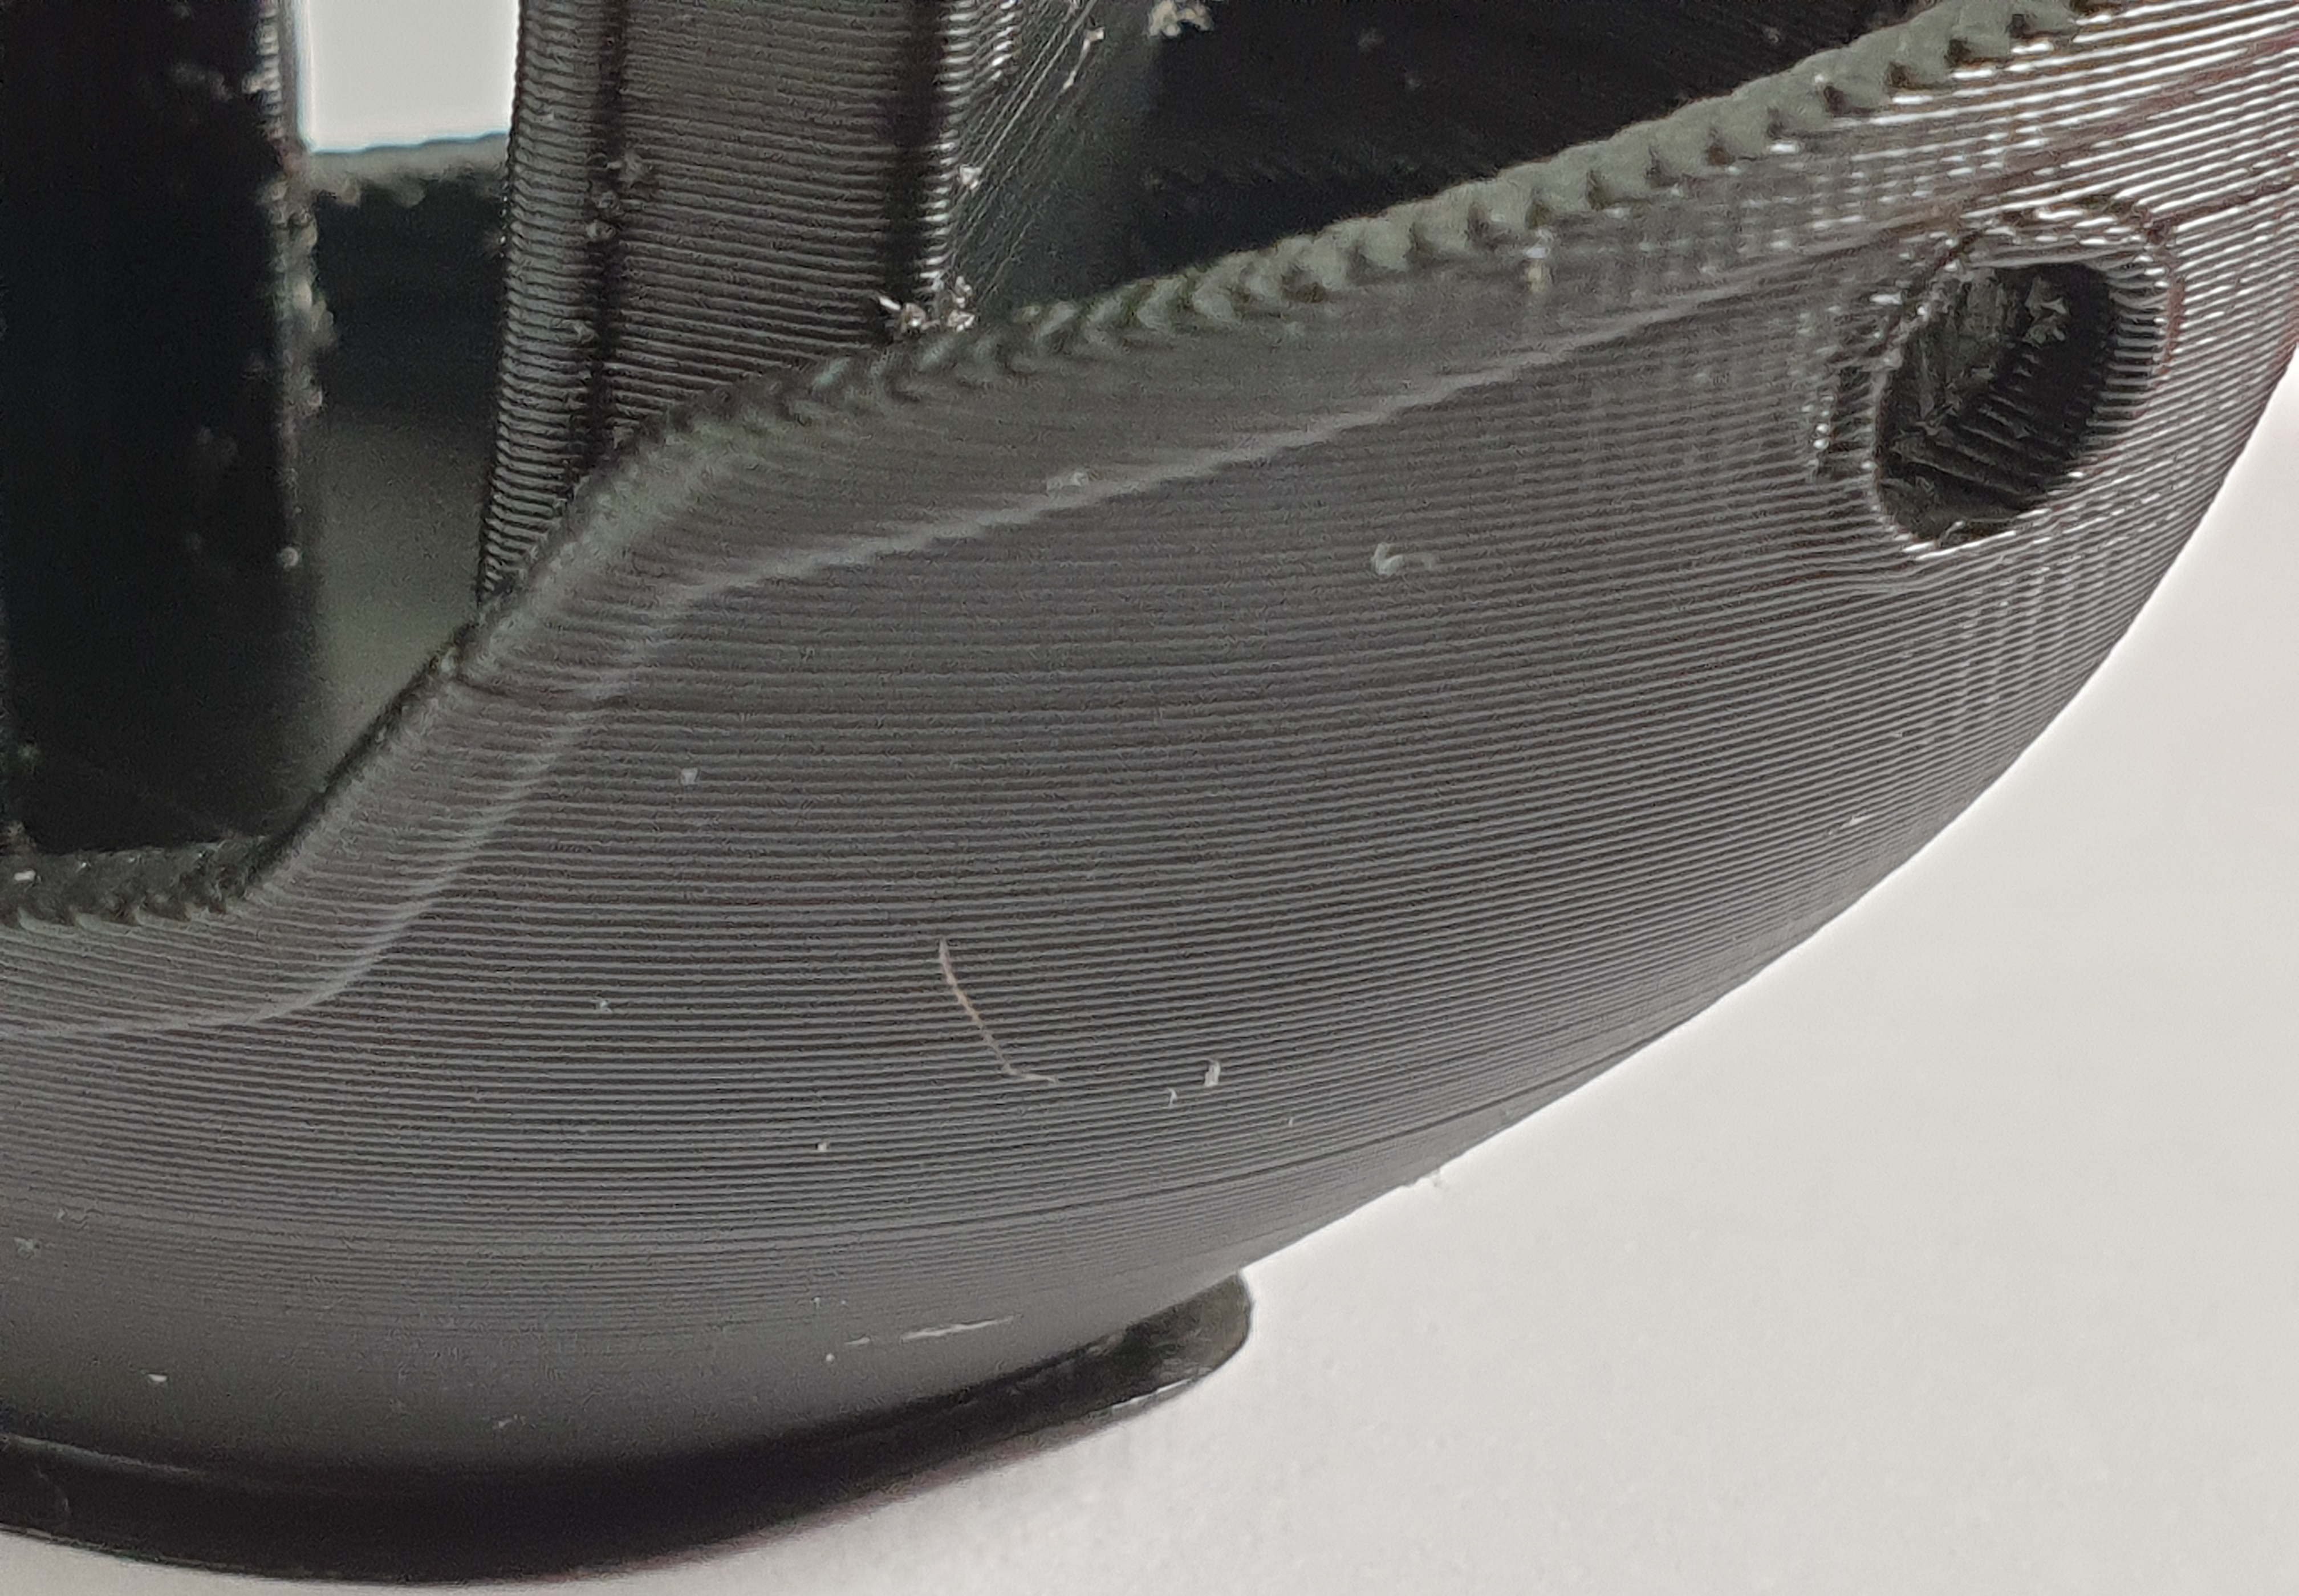
The benchy appears slightly over extruded with some strings. Dropping your extrusion multiplier form 98% to 95% would likely help with that.
Look into enabling firmware retraction in the printer tab. Then you can more easily fine tune it with M207.
https://duet3d.dozuki.com/Wiki/Gcode#Section_M207_Set_retract_length
-
@Phaedrux inwill test tommorow
But can you help me with firmware retract? Is it not the same with setting in my slicer ? If i enable firmware retract do i need retraction in my slicer ?
Thanks
-
For firmware retraction you tell the slicer you want to use firmware retraction. There's a check box in the printer tab. Then you configure how much retraction and how fast etc using the m207 command. That lets you modify the various parameters on the fly during a print to more easily test what works best. Then you can put that commabd in config.g to make it permanent. It also means you can modify it more easily for different filaments or if you find that you have too much or not enough in the middle of a print.
-
@Phaedrux ok now i have downloaded the retract model stl
i have install the macroshow i start now for firmware retraction ?
-
Well you'll need to tell the slicer to use firmware retraction. That will insert a G10 or G11 command into the code file when a retraction is needed.
Then you'll need to configure your retraction settings with an M207 command. https://duet3d.dozuki.com/Wiki/Gcode#Section_M207_Set_retract_length
Use that to set the speed and distance of retraction and unretraction.
Then during the print you can send an M207 command to modify one of those parameters every few layers to see how it behaves.
-
@Phaedrux ok i will try it
do i need to uncheck retraction on prusaslicer ?
-
In Prusa Slicer go to Printer Settings, general tab, and near the bottom check "use firmware retraction". Then slice your file.
Then you'll need to have a M207 command in your config.g to set the starting values.
This set of macros may help make the tuning easier, especially if you have a PanelDue.
https://forum.duet3d.com/topic/6181/tuning-macros-menus-accel-jerk-retraction-pressure-advance
-
i allready check use firmware retraction.
what is a good starting value for DD M207 ?
Macros are allready installed and i have PanelDue
")
-
@lui2004 said in After Micro swiss DD upgrade,Extruder skips steps:
what is a good starting value for DD M207 ?
Start with what you have set in the slicer
-
-
Z is for Z hop. Leave it at 0 for starters. But if you ever want to use Z hop that's where you set the distance.
-
@Phaedrux ok thanks a lot
i still printing the retraction stl
-
-
what changes did you make since the last print where it worked
-
This post is deleted!