Large Format Dowell to Duet conversion
-
Any help? Is it fried? I can't believe it fries just because of a short that doesn't make sense to me
-
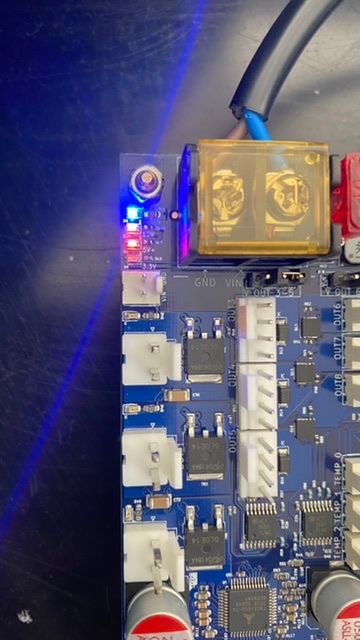
Is the 3.3v LED lit on the 3HC? (its with the other power LEDS in the top left og the board as you have it oriented.
-
@charles-fraser said in Large Format Dowell to Duet conversion:
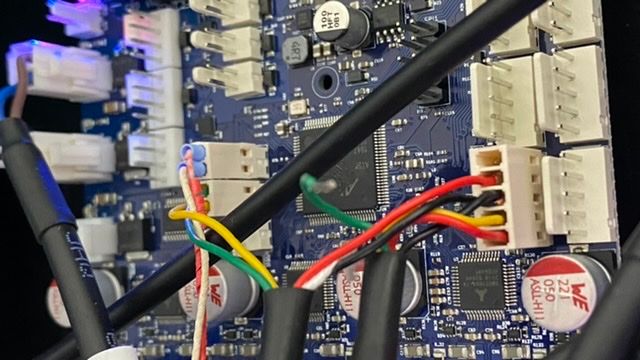
Not sure what is going on here? why were there two sets of wires going into IO2?
-
@t3p3tony said in Large Format Dowell to Duet conversion:
Not sure what is going on here? why were there two sets of wires going into IO2?
None of this is plugged in any more. I explained this in my post with the description of the wiring of the 3D touch above. Please have a look.
-
-
@T3P3Tony this explains the wiring
@charles-fraser said in Large Format Dowell to Duet conversion:
I’m sorry it’s a bit of a fudge but I have only been able to get the 3D touch wired up (I hope correctly) with the 3HC, IO_2
Here is what the wiring from the touch is supposed to be:
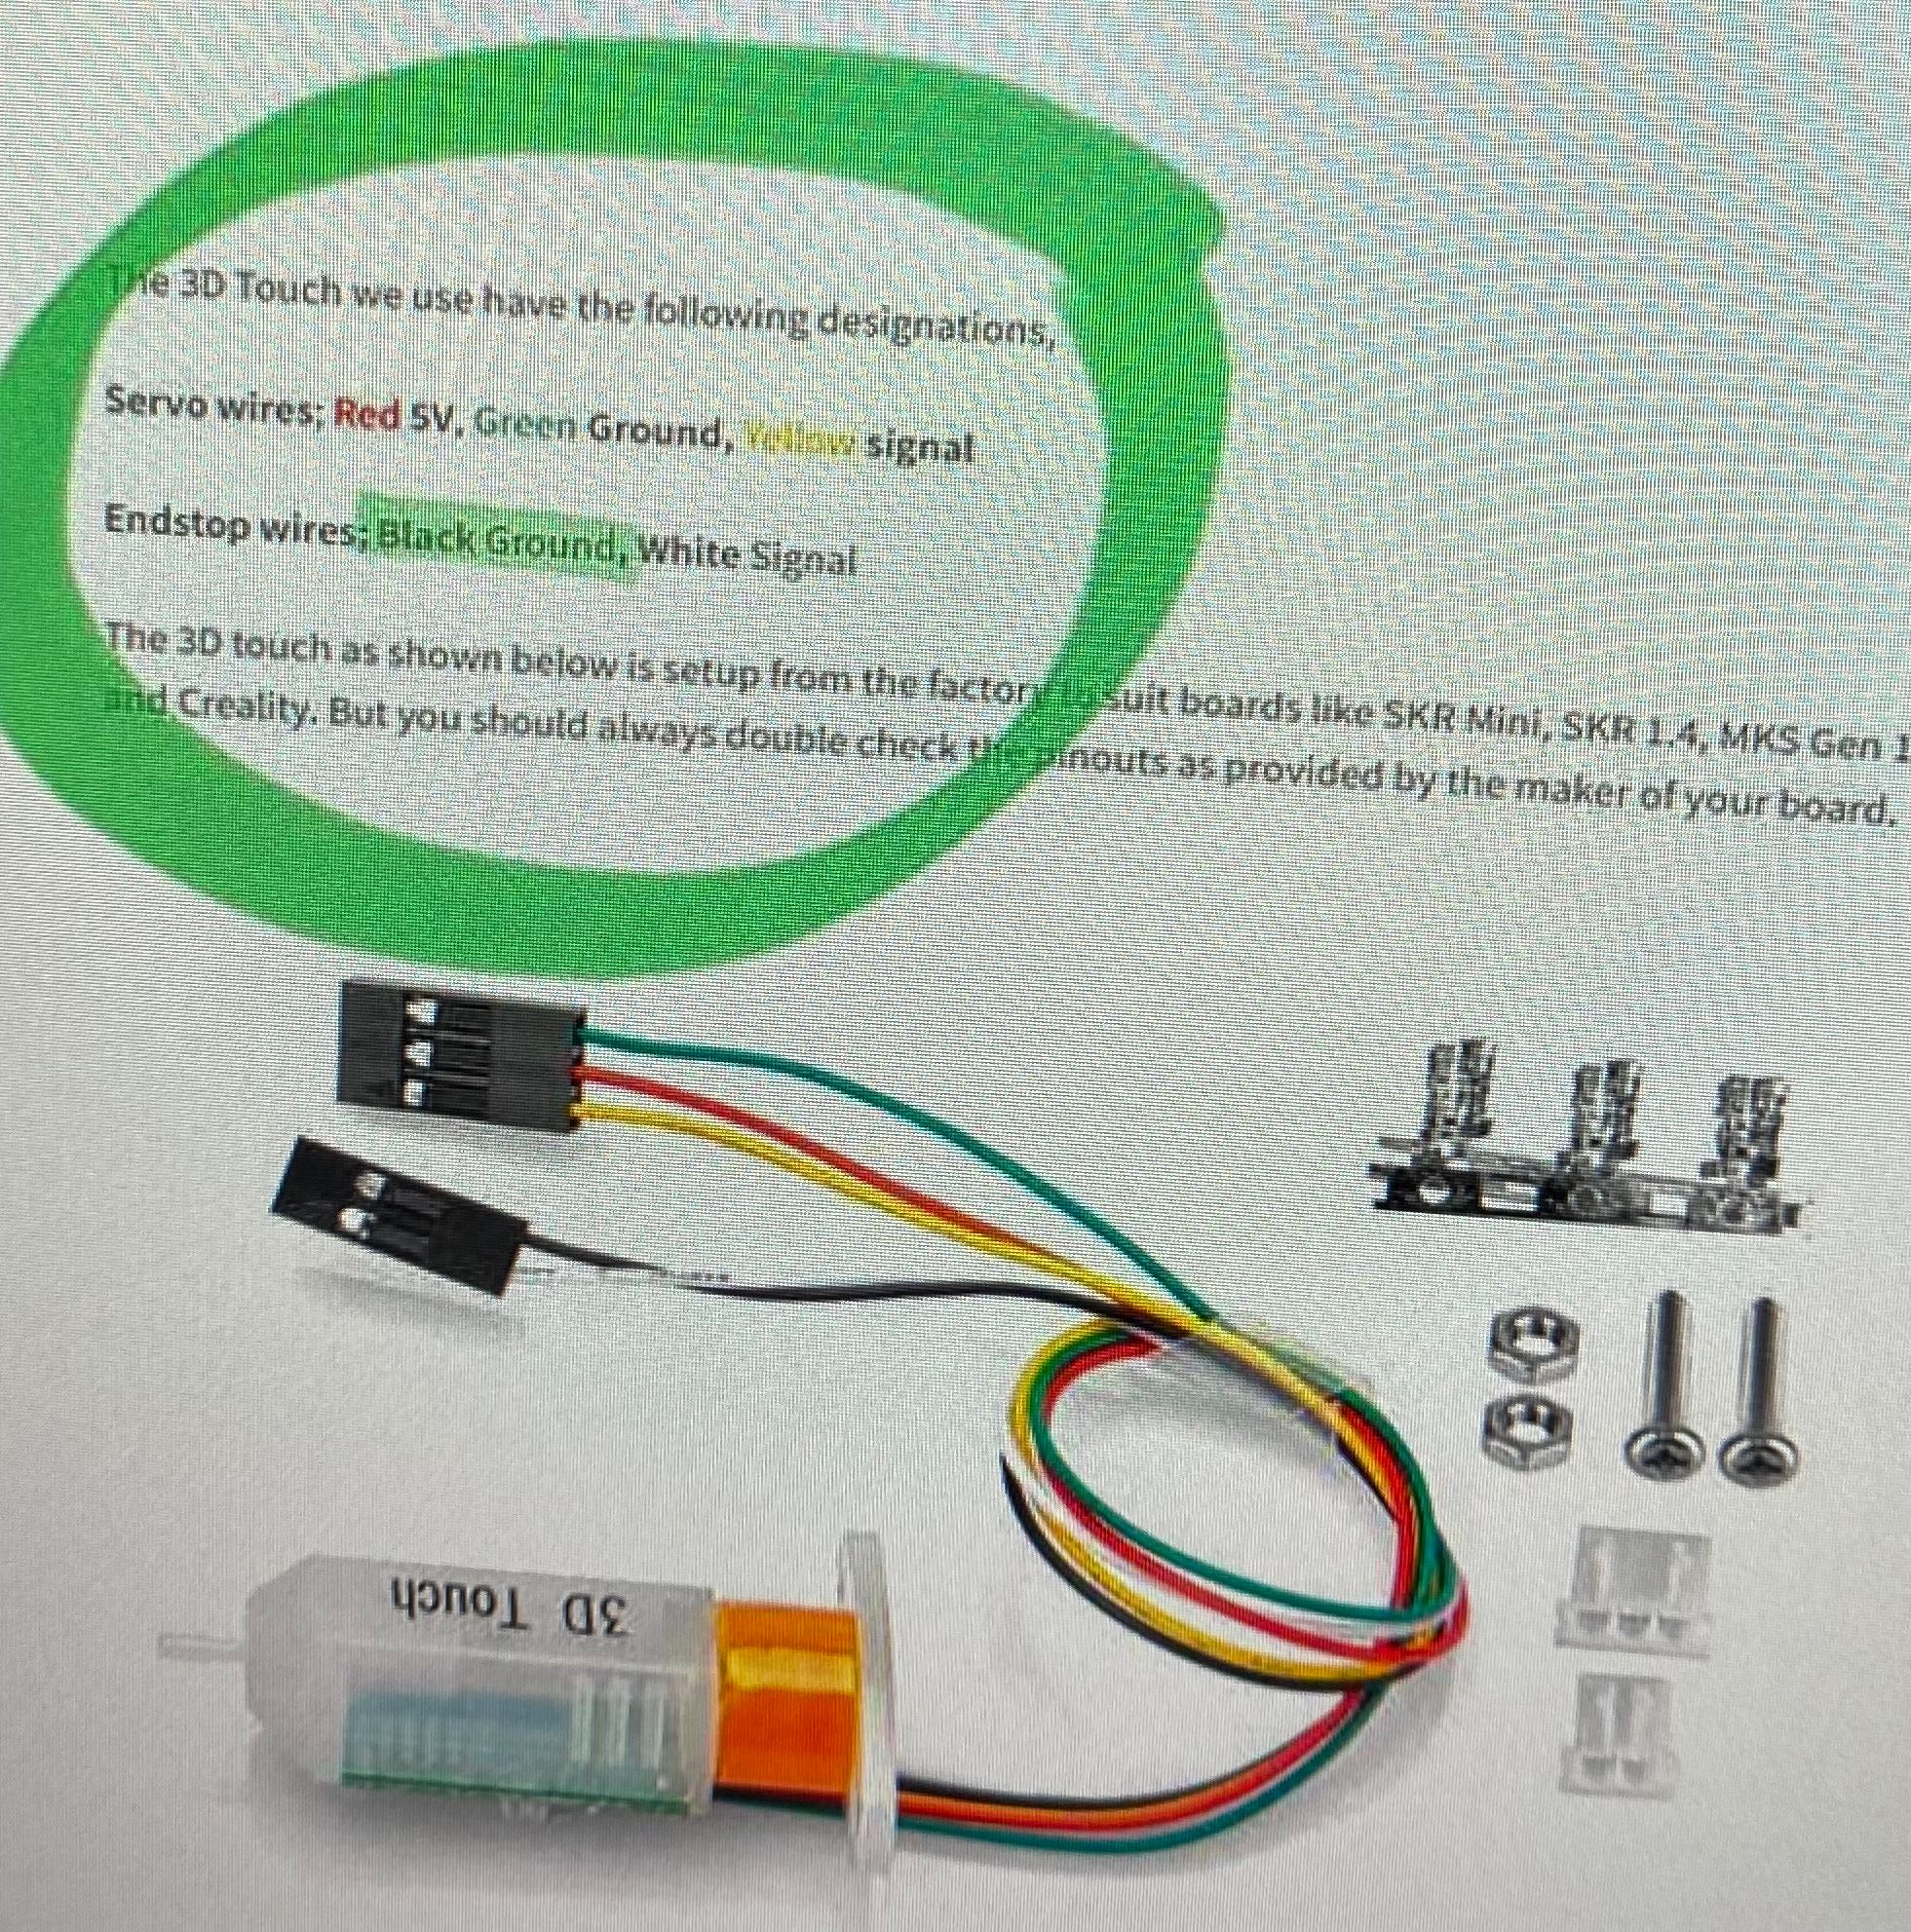
But the 3D touch I have does not have a white wire, it has a blue wire though so I am guessing that’s the only difference.
I have to connect the BL touch to two different cables, each with four wires in them to reach the board at the other end of the printer. In one of the cables, two of the wires are already used by the NTC thermistor so it looks like this:

Then I can only reach IO_2 on the 3H with all that following this diagram:
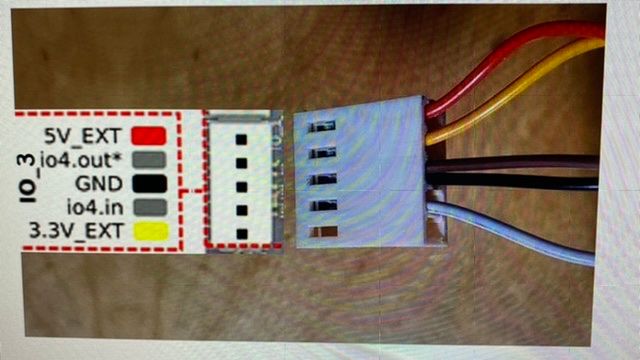
Which looks like this:
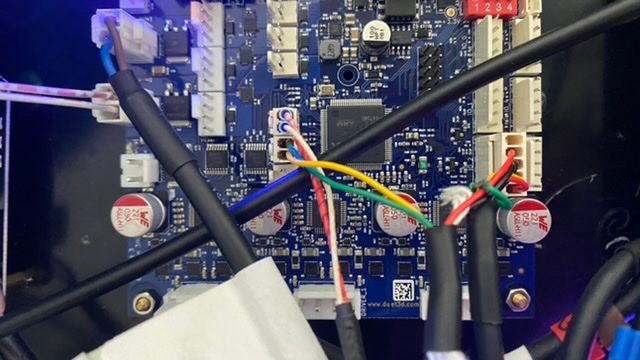
I hope that’s correct! I’ll try to change the code and hope it works!
-
Hi please advise. Do I need to buy a new board or what to keep things moving forwards?
-
@charles-fraser It looks like the 3.3V regulator & possibly other ICs on the 3HC was blown by the 3d touch. I suspect given that it caused issues before that it is faulty, I don't know much about the 3d touches but if they are the same as the BL touch internally they should not blow the board by just mis wiring.
Yes you need to replace the 3HC
-
Okay I will as soon as I have some money. Is there a way to diagnose what caused this? Is a fan wired the wrong way or a 3D touch really able to blow a whole board?
-
@t3p3tony hi Tony, I have the replacement 3HC now and am awaiting a BL Touch to arrive next week.
I’ll try to reconnect the new 3HC and rewire it as it was before just leaving out the fan and 3D Touch.
-
@charles-fraser sounds good.
-
@t3p3tony Hi Tony,
Sorry for the radio silence. The Marquee that I am storing the 3D printer in became quite damp and would drip with moisture when it had rained and any sun shone on a cold day, dispite the cotton inner lining and ventillation I had made for the dome. So I wrapped up the printer in some synthetic sheets and tarps to mothball it over winter. I am now planning to get back into it, starting in the next couple of weeks. I will work to connect everything only through the second (hopefully not faulty extruder block).
Thanks
Charles -
@t3p3tony marquee was destoryed in the storm. Project is mothballed till I complete/afford an upgrade to the frame to include cbearm linear actuators from openbuilds to mount my MDPH2 extruder on as per Dr. D Flo’s work
Thanks for your help getting this far

-
That's sad to see. Hopefully you can get it back on track.
-
Big Green Machine Update:
@dc42 @T3P3Tony @chrishamm @Phaedrux
Hi dear Duet team and community. I’m happy to say my Green Camp business is making income so I can afford to keep making some progress:
Update:
1.cutting down the Dowell frame so it fits in my garage:

2: upgrading the X-Y gantry with openbuilds’ 1500 C-Beam Linear Actuators:


This will allow me to run the Massive Dimension MDPH2 Extruder (I crowdfunded for one last year and have it on my desk waiting) just like Dr. D Flo is teaching us how:
Present situation:
-
The 6HC, PU and Raspberry survived being drenched for 3 days in the hurricane!!! (Kudos to Duet!!!)
-
Old 3HC shorted by fan with and needed replacing
-
New 3HC has arrived needs to be fitted and firmware updated.
-
What’s the console command that updates the 6HC and 3HC again please?
-
In order that I don’t fry another 3HC, I need to learn how to determine the polarity of the wires of the fan and the pins on the board to match them
-
I need to work out what is the expansion board I need to drive the MDPH2
-
I need to workout the firmware config file. I will ask Dr. D Flo for his
-
I need to work out how to reattach the 4 X lead screws for the Z axis / heater bed after I cut them down to match the decrease in size of the printer that I had to make so it would fit in my garage.

-
-
So latest update is that I have installed all of the C-beam actuators, installed new ball thread rods and cut those and the slide rods to fit onto this frame since it has been cut down to fit inside the garage.
The next steps would be to:
-
Define what parts are still needed for the printer & order
-
Plug kinematics (X Y), test
-
Plug Z Axis, test
-
plug endstops, test
-
plug probe, test
-
plug heaters, test
-
plug bed, test
-
leave the AC to the end
-
connecting the extruder requires a metal plate to fit onto the C-beam trolly
-
Connecting heated bed
-
Pellet feed system
-
Drying pellets and testing the system
I am seeking help to complete this project as I lack the time and skills to complete safely.


-
-
Are those ball screws rusty?
-
@Phaedrux dude they are so damn rusty I had to cover them in greace and force the slidey thing up and down till it all started moving again. I could only afford to buy one new one.
-
@Phaedrux also my effort to drill custom 16mm holes for those pulleys so they fit on the ball rods was so jankey it is crazy. I tried so hard to get them centre but they are anything but centre. I finally found some new ones with 16mm bores and I will bang those ones off and replace them with these new ones. At least those were good for proving the concept. If I have to buy more ball rods I will.
I'm looking on upwork for someone to come spend some time with me to work on the machine and get it going as I don't have the time to look after the machine now and it's getting rusty.
-
NB: Since I started this project a very capable (but not very friendly) engineer, Dr. D Flo, has started building with the same ingredients. I did reach out to him for help so we can print our green camp system shelters for refugee camps etc but he blocked me. Anyway, he seems to have it all working. Have a look how Dr. D Flow built a similar printer using Duet and this extruder in this 4 part series here:
Part 1:
https://www.youtube.com/watch?v=m7JpumMS0PoPart 2: https://www.youtube.com/watch?v=xP074X8fUu8&t=1192s
Part 3: https://www.youtube.com/watch?v=sW0k0BZvWno&t=1749s
Part 4: https://youtu.be/s27CzktFDCg