auto calibration
-
Hello all, I have been fighting with trying to get this corexy calibrated to get a consistent first layer all day. It seems like one minute it's fine then the next its back out of skew.
I'm running a core xy with 4 lead screws. I tried using g32 and now g29 both work fine one minute then one of the points wont trigger. ```
; bed.g
; called to perform automatic bed compensation via G32
;
; generated by RepRapFirmware Configuration Tool v3.3.10 on Fri Dec 17 2021 18:35:59 GMT-0600 (Central Standard Time)
G28 ; home
G30 P0 X50 Y25 Z-99999 ; probe near a leadscrew
G30 P1 X50 Y420 Z-99999 ; probe near a leadscrew
G30 P2 X480 Y420 H-2 Z-99999 ; probe near a leadscrew
G30 P3 X480 Y25 H-1 Z-99999 S4 ; probe near a leadscrew and calibrate 3 motors
; Drives M569 P0 S1 ; physical drive 0 goes forwards M569 P1 S1 ; physical drive 1 goes forwards M569 P2 S1 ; physical drive 2 goes forwards M569 P3 S0 ; physical drive 3 goes forwards M569 P4 S1 ; physical drive 4 goes forwards M569 P5 S0 M569 P6 S0 M584 X0 Y1 Z2:4:5:6 E3 ; set drive mapping M350 X16 Y16 Z16:16:16:16 E16 I1 ; configure microstepping with interpolation M92 X80.00 Y80.00 Z400.00:400.00:400.00:1600.00 E158.49 ; set steps per mm M566 X900.00 Y900.00 Z20.00:20.00:20.00:20.00 E120.00 ; set maximum instantaneous speed changes (mm/min) M203 X24960.00 Y24960.00 Z24960.00:24960.00:24960.00:24960.00 E7980.00 ; set maximum speeds (mm/min) M201 X3000.00 Y3000.00 Z80.00:80.00:80.00:80.00 E500.00 ; set accelerations (mm/s^2) M906 X800 Y800 Z950:90:950:950 E800 I30 ; set motor currents (mA) and motor idle factor in per cent M84 S30 ; Set idle timeout ; Axis Limits M208 X0 Y0 Z0 S1 ; set axis minima M208 X520 Y480 Z790 S0 ; set axis maxima ; Endstops M574 X1 S1 P"xstop" ; configure switch-type (e.g. microswitch) endstop for low end on x via pin ystop M574 Y1 S1 P"ystop" ; configure switch-type (e.g. microswitch) endstop for low end on Y via pin ystop M574 Z1 S2 ; configure Z-probe endstop for low end on Z ; Z-Probe M558 P1 C"zprobe.in" H6 F120 T10000 ; set Z probe type to unmodulated and the dive height + speeds G31 P500 X0 Y0 Z0.192 ; set Z probe trigger value, offset and trigger height M557 X45:485 Y50:424 S80 ; define mesh grid ; Heaters ;M140 H-1 ; disable heated bed (overrides default heater mapping) ;M308 S0 P"e0temp" Y"thermistor" T100000 B4725 C7.06e-8 ; define E0 temperature sensor ;M950 H0 C"e0heat" T0 ; create nozzle heater output on e0heat and map it to sensor 0 ;M307 H0 B0 S1.00 ; disable bang-bang mode for heater and set PWM limit ;M143 H0 S270 ; set temperature limit for heater 0 to 270C ;M570 S360 ; allow one minute for fault detection ; Fans M950 F0 C"fan0" Q500 ; create fan 0 on pin fan0 and set its frequency M106 P0 S0 H-1 ; set fan 0 value. Thermostatic control is turned off ; Heaters ;M308 S0 P"bedtemp" Y"thermistor" T100000 B4267 C7.06e-8 ; configure sensor 0 as thermistor on pin bedtemp ;M950 H0 C"bedheat" T0 ; create bed heater output on bedheat and map it to sensor 0 ;M143 H0 S130 ; set temperature limit for heater 0 to 130C ;M307 H0 B0 S1.00 ; disable bang-bang mode for the bed heater and set PWM limit M140 H-1 ; map heated bed to heater 0 M308 S1 P"e0temp" Y"thermistor" T100000 B4267 C7.06e-8 ; configure sensor 1 as thermistor on pin e0temp M950 H1 C"e0heat" T1 ; create nozzle heater output on e0heat and map it to sensor 1 M143 H1 S275 ; set temperature limit for heater 1 to 275C M307 H1 B0 S1.00 ; disable bang-bang mode for heater and set PWM limit ;Lead screw position M671 X45:45:485:485Y45:424:424:45 s5 ; Tools M563 P0 D0 H1 F0 ;G10 P0 X0 Y0 Z0 ; set tool 0 axis offsets ;G10 P0 R0 S0 T0 ; set initial tool 0 active and standby temperatures to 0C ; Custom settings are not defined ; Miscellaneous M501 ; load saved parameters from non-volatile memory ; Automatic power saving M911 S10 R11 P"M913 X0 Y0 G91 M83 G1 Z3 E-5 F1000" ; Set voltage thresholds and actions to run on power lossattached are my bed and config files.
-
Not sure what you mean by "tried using G32 and now G29" - those are two totally different things.
G32 is for invoking bed.g to level the bed.
G29 is for invoking mesh.g to create the heightmap needed for using the Mesh Bed Compensation feature.
I don't see it in your code but there are certain times when you need to set the Z=0 Datum using a single G30 at a consistent XY location.
- after bed leveling
- before creating a heightmap
- before loading a heightmap
Also what sort of Z probe do you have that has a X offset of 0 and a Y offset of 0?
Thanks.
Frederick
-
@fcwilt I've been out of the 3d printing loop for a while lol. I'm using the ir height sensor. I never really set offsets for the probe it just worked.
so would I use a G92 to set z to zero?
-
@trublu89 said in auto calibration:
@fcwilt I've been out of the 3d printing loop for a while lol. I'm using the ir height sensor. I never really set offsets for the probe it just worked.
so would I use a G92 to set z to zero?
In the G31 command there is the Z parameter which sets the probe Z Trigger Height value.
When you execute a G30 the probe and bed move toward one another and when the probe triggers the logical Z axis position is set to the value of the G31 Z Trigger Height parameter value.
So let's assume that value is 5 mm. G30 executes, the probe and bed move, the probe triggers, the logical Z axis position is set to 5 mm and then the probe and bed move apart based on the values of the G31 Z Trigger Height parameter and the M558 H parameter.
If the physical Z axis position at the moment the probe was triggered was actually 5 mm then the physical Z axis position and the logical Z axis position are in sync.
If the G31 Z Trigger Height parameter was too large or too small then the physical Z axis position and the logical Z axis position would be out of sync and any Z axis moves would result in the physical Z axis position being incorrect.
So it is essential that the correct value for the G31 Z Trigger Height parameter is determined with very good accuracy.
You can determine the correct value by trial-and-error or by using a reference object of known height.
I can explain how to do that if needed.
Frederick
-
@trublu89 said in auto calibration:
both work fine one minute then one of the points wont trigger.
You mean that it will move to the probe points but randomly the probe doesn't trigger? Meaning a nozzle crash? An error message?
You can test and calibrate your probe following this: https://docs.duet3d.com/en/User_manual/Connecting_hardware/Z_probe_testing
-
@phaedrux it won't even crash it will just stop before reaching it. And sometimes the margin of error is -9.
Now I'm getting a temperature excursion error I'm printing at 230 it will jump to 250 I paid tuned several times. Tried with fan on didn't realize the fan comes on with the newer firmware.
-
@trublu89 said in auto calibration:
it won't even crash it will just stop before reaching it. And sometimes the margin of error is -9.
What do you mean by "reaching it" - what does "it" refer to?
Frederick
-
right before it tries to trigger it will just stop and error out probe was not triggered during move.
-
@trublu89 said in auto calibration:
right before it tries to trigger it will just stop and error out probe was not triggered during move.
That is usually caused by starting to probe to far from the bed.
Does the probe move smoothly towards the bed?
Frederick
-
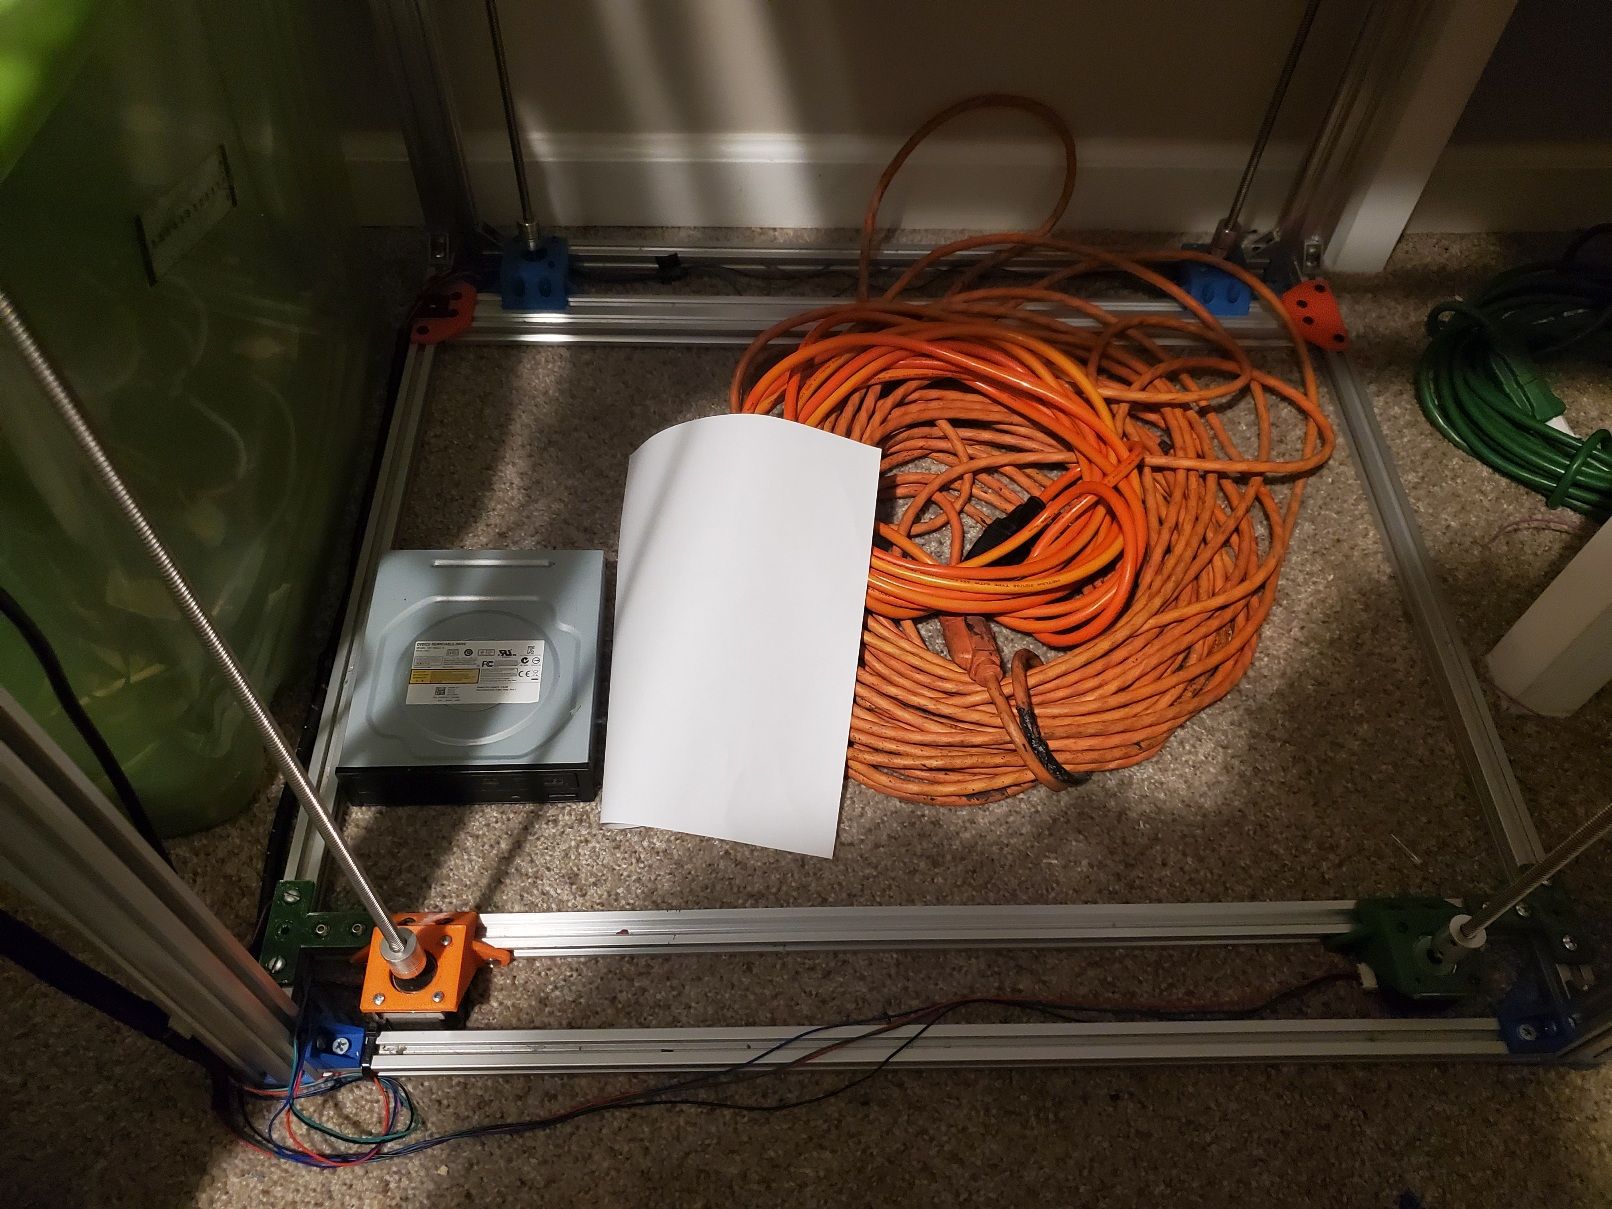
I have the ir probe and my lead screws are independent driven by motors.
-
The offsets for the probe look suspect
G31 P500 X0 Y0 Z0.192There is no X Y offset from the nozzle so the firmware doesn't know where the probe actually is. And the trigger height seems very small.
Have you gone through this yet? https://docs.duet3d.com/en/User_manual/Connecting_hardware/Z_probe_testing
;Lead screw position
M671 X45:45:485:485Y45:424:424:45  s5
This command to define your lead screw positions may not be registering correctly because there is a missing space between the X and Y values and an extra space before the S.
Can you also post your homeall.g and config-override.g?
It would also be nice to see the results of sending M122 and M98 P"config.g" in the gcode console.
@trublu89 said in auto calibration:
it won't even crash it will just stop before reaching it.
Does this happen consistently in the space spot? Or totally randomly?
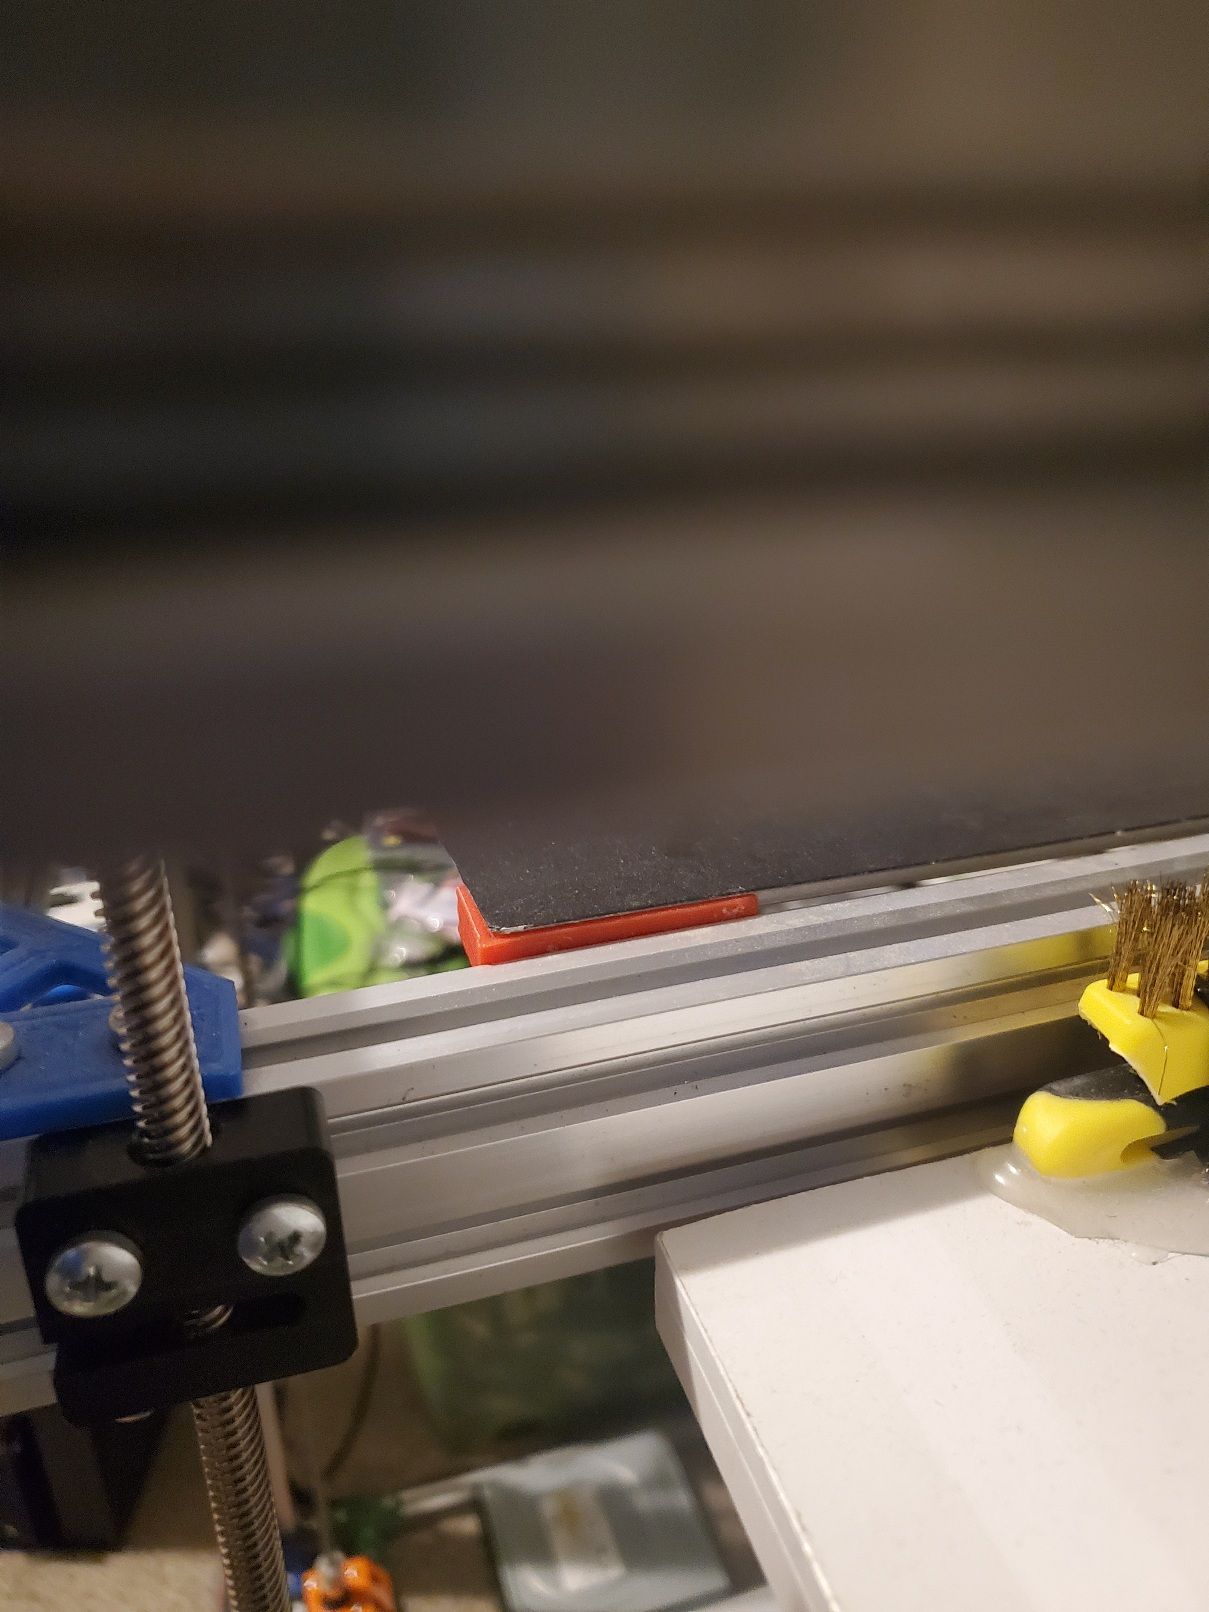
What is your bed surface? The IR probe can be sensitive to reflective or multicolor surfaces. You can try and eliminate this by putting a plane piece of white paper on your bed.
It would also be good to get some close up photos of the IR probe itself incase it is damaged in some way.
-
I didn't realize there was a gap in my m671

That's how I came up with .192 homing to where the paper grabbed the nozzle and g92 z=0 g30 s1 to get the mean results.
; homeall.g
; called to home all axes
;
; generated by RepRapFirmware Configuration Tool v3.3.10 on Fri Dec 17 2021 18:35:59 GMT-0600 (Central Standard Time)
G91                     ; relative positioning
G1 H2 Z5 F108000        ; lift Z relative to current position
G1 H1 X-565 Y-535 F1800 ; move quickly to X or Y endstop and stop there (first pass)
G1 H1 X-565             ; home X axis
G1 H1 Y-535             ; home Y axis
G1 X5 Y5 F108000        ; go back a few mm
G1 H1 X-565 F360        ; move slowly to X axis endstop once more (second pass)
G1 H1 Y-535             ; then move slowly to Y axis endstop
G90                     ; absolute positioning
G1 X32 Y50 F108000      ; go to first bed probe point and home Z
G30                     ; home Z by probing the bed
; config-override.g file generated in response to M500 at 2022-05-14 23:47 ; This is a system-generated file - do not edit ; Heater model parameters M307 H1 R1.925 K0.303:0.261 D5.51 E1.35 S0.90 B0 V12.2 ; Workplace coordinates G10 L2 P1 X0.00 Y0.00 Z0.00 G10 L2 P2 X0.00 Y0.00 Z0.00 G10 L2 P3 X0.00 Y0.00 Z0.00 G10 L2 P4 X0.00 Y0.00 Z0.00 G10 L2 P5 X0.00 Y0.00 Z0.00 G10 L2 P6 X0.00 Y0.00 Z0.00 G10 L2 P7 X0.00 Y0.00 Z0.00 G10 L2 P8 X0.00 Y0.00 Z0.00 G10 L2 P9 X0.00 Y0.00 Z0.00What is the config overide g? I never really looked in there.
M122
=== Diagnostics ===
RepRapFirmware for Duet 2 WiFi/Ethernet version 3.4.0 (2022-03-15 18:58:31) running on Duet WiFi 1.02 or later + DueX5
Board ID: 08DGM-956GU-DJMSN-6JKF2-3S86L-TBRVG
Used output buffers: 3 of 24 (16 max)
=== RTOS ===
Static ram: 23868
Dynamic ram: 74744 of which 0 recycled
Never used RAM 13468, free system stack 184 words
Tasks: NETWORK(ready,12.4%,247) HEAT(notifyWait,0.0%,332) Move(notifyWait,0.0%,364) DUEX(notifyWait,0.0%,24) MAIN(running,87.0%,440) IDLE(ready,0.5%,30), total 100.0%
Owned mutexes: WiFi(NETWORK)
=== Platform ===
Last reset 00:02:37 ago, cause: power up
Last software reset at 2022-05-14 19:46, reason: User, GCodes spinning, available RAM 13264, slot 0
Software reset code 0x0003 HFSR 0x00000000 CFSR 0x00000000 ICSR 0x0041f000 BFAR 0xe000ed38 SP 0x00000000 Task MAIN Freestk 0 n/a
Error status: 0x00
Aux0 errors 0,0,0
Step timer max interval 0
MCU temperature: min 29.6, current 36.9, max 37.2
Supply voltage: min 12.3, current 12.4, max 12.5, under voltage events: 0, over voltage events: 0, power good: yes
Heap OK, handles allocated/used 0/0, heap memory allocated/used/recyclable 0/0/0, gc cycles 0
Events: 0 queued, 0 completed
Driver 0: standstill, SG min n/a
Driver 1: standstill, SG min n/a
Driver 2: standstill, SG min n/a
Driver 3: standstill, SG min n/a
Driver 4: standstill, SG min n/a
Driver 5: standstill, SG min n/a
Driver 6: standstill, SG min n/a
Driver 7: standstill, SG min n/a
Driver 8: standstill, SG min n/a
Driver 9: standstill, SG min n/a
Driver 10:
Driver 11:
Date/time: 2022-05-15 16:48:09
Cache data hit count 4294967295
Slowest loop: 135.24ms; fastest: 0.19ms
I2C nak errors 0, send timeouts 0, receive timeouts 0, finishTimeouts 0, resets 0
=== Storage ===
Free file entries: 10
SD card 0 detected, interface speed: 20.0MBytes/sec
SD card longest read time 1.2ms, write time 60.6ms, max retries 0
=== Move ===
DMs created 83, segments created 0, maxWait 0ms, bed compensation in use: none, comp offset 0.000
=== MainDDARing ===
Scheduled moves 0, completed 0, hiccups 0, stepErrors 0, LaErrors 0, Underruns [0, 0, 0], CDDA state -1
=== AuxDDARing ===
Scheduled moves 0, completed 0, hiccups 0, stepErrors 0, LaErrors 0, Underruns [0, 0, 0], CDDA state -1
=== Heat ===
Bed heaters -1 -1 -1 -1, chamber heaters -1 -1 -1 -1, ordering errs 0
=== GCodes ===
Segments left: 0
Movement lock held by null
HTTP is idle in state(s) 0
Telnet is idle in state(s) 0
File is idle in state(s) 0
USB is idle in state(s) 0
Aux is idle in state(s) 0
Trigger is idle in state(s) 0
Queue is idle in state(s) 0
LCD is idle in state(s) 0
Daemon is idle in state(s) 0
Autopause is idle in state(s) 0
Code queue is empty
=== Filament sensors ===
Extruder 0 sensor: ok
=== DueX ===
Read count 1, 0.38 reads/min
=== Network ===
Slowest loop: 111.91ms; fastest: 0.00ms
Responder states: HTTP(0) HTTP(0) HTTP(0) HTTP(0) FTP(0) Telnet(0), 0 sessions
HTTP sessions: 1 of 8
- WiFi -
Network state is active
WiFi module is connected to access point
Failed messages: pending 0, notready 0, noresp 0
WiFi firmware version 1.26
WiFi MAC address 5c:cf:7f:76:72:b4
WiFi Vcc 3.39, reset reason Turned on by main processor
WiFi flash size 4194304, free heap 24952
WiFi IP address 10.0.0.18
WiFi signal strength -66dBm, mode 802.11n, reconnections 0, sleep mode modem
Clock register 00002002
Socket states: 4 0 0 0 0 0 0 0
M98 P"config.g" HTTP is enabled on port 80 FTP is disabled TELNET is disabledIt stops before reaching it in the rear right corner I adjusted the screw manually and eventually it will still do it.
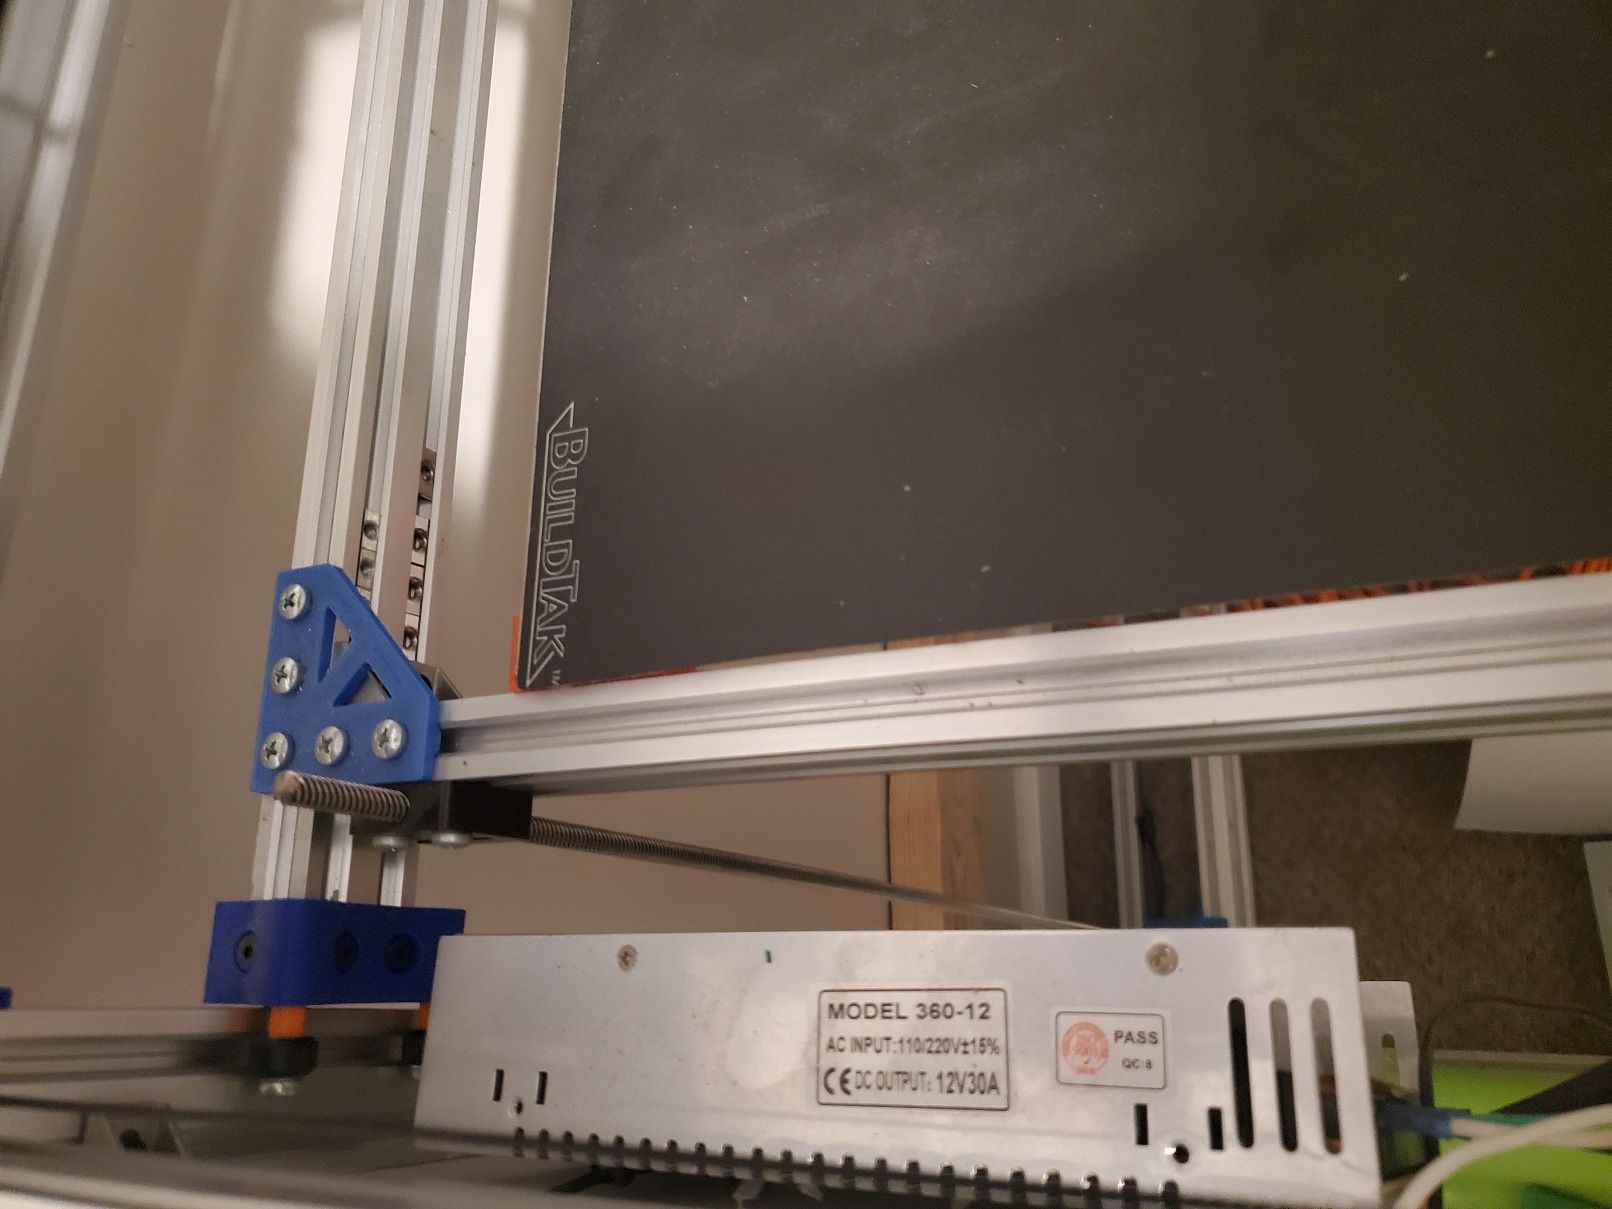
The build surface I have is buildtak.
-
@trublu89 said in auto calibration:
It stops before reaching it in the rear right corner I adjusted the screw manually and eventually it will still do it.
Is there anything unique about that corner? Can you try putting the plain white paper there?
-
@phaedrux nope is there a way to just move one z motor instead of all?
-
@trublu89 said in auto calibration:
@phaedrux nope is there a way to just move one z motor instead of all?
Have you tried Auto Bed Leveling?
Docs where bed leveling is discussed
How do the Z steppers connect to the bed? Do the connections have any give? Are the kinematic connections?
Frederick
-
@fcwilt this is g29 initially and then g29 with s1 at startup code right?
-
G29 is related to Mesh Bed Compensation which is a feature used during printing to try and adjust for an uneven bed.
G32 is related to Auto Bed Leveling which is a feature used before printing to level the bed. Since you have multiple Z steppers you may be able to use Auto Bed Leveling but it depended on how much "flex" you have in the connections from the Z lead screws to the bed. The firmware probes the bed with your Z probe and attempts to adjust the Z steppers individually to level the bed.
Here is a link to a quick-and-dirty video showing the Auto Bed Leveling feature leveling the bed on my printer. I designed the printer to support bed leveling and I use kinematic mounts to connect the Z belts to the bed. The mounts allow a lot of "flex" so the Z steppers are free to adjust the bed without any binding.
Frederick
Printers: a small Utilmaker style, a small CoreXY and a E3D MS/TC setup. Various hotends. Using Duet 3 hardware running 3.4.6
-
@fcwilt I have the flexible z couplers.
-
@fcwilt also what would cause temperature excursion. I have paid tuned several times with and without the fan on.
-
@trublu89 said in auto calibration:
@fcwilt also what would cause temperature excursion. I have paid tuned several times with and without the fan on.
What error exactly are you getting and when are you getting it? Did you save the results of the PID tune and have it loaded again at startup? This is usualy done by sending M500 after the tuning to save it to config-override.g and then adding M501 to the end of config.g to load that file at startup.