Noob building a HEVO in need of help.
-
Try this for the probe
; Z-Probe
M558 P5 C"^zprobe.in" H5 F120 T6000 ; set Z probe type to switch and the dive height + speedsWhy have you uncommented that ?
;M307 H0 B0 S1.00
Delete the ; -
@Quattro said in Noob building a HEVO in need of help.:
100 kohm NTC3950 thermistor
Check what thermistor is really used for the bed. I think it's not the correct one.
-
@Quattro said in Noob building a HEVO in need of help.:
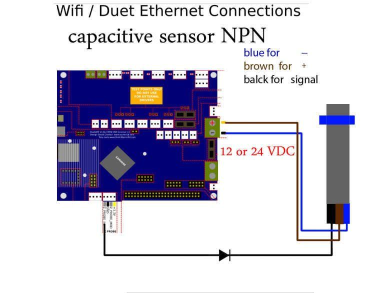
The sensor is connected like this, but the power goes to the 5V ext/fan output.
I'm not shure where you have puged power of the probe.
I would suggest to plug it in the +5V for PanelDue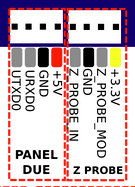
And also check if the diode is in correct direction.
-
@blt3dp said in Noob building a HEVO in need of help.:
For the bed.
Looks to me like your bed heater needs to be tuned.
M303 H0 P1.0 Swhatever temperature you usually printThen take the values it returns and put it in the M307 in your config.g as the A, C, and D parameters.
Heater 0 model: gain 129.7, time constant 343.8, dead time 1.0, max PWM 1.00, calibration voltage 23.7, mode PID
Computed PID parameters for setpoint change: P463.5, I24.749, D331.1
Computed PID parameters for load change: P463.5, I93.008, D331.1Like this? M307 H0 A129.7 C343.8 D1.0 V23.7 B0
@DIY-O-Sphere said in Noob building a HEVO in need of help.:
Try this for the probe
; Z-Probe
M558 P5 C"^zprobe.in" H5 F120 T6000 ; set Z probe type to switch and the dive height + speedsWhy have you uncommented that ?
;M307 H0 B0 S1.00
Delete the ;Because the bed heating did not work with this command.
(Black cable) Signal connected to "Z PROBE IN"
(Brown and blue) Power connected to fan output (always on fan, measured 4.86V)
The probe does read "Current reading 1000, threshold 500, trigger height 4.000, offsets X21.0 Y0.0" with G31 now.
It's a cheap Chinese probe, so it might be crap, but I expect it to work.@DIY-O-Sphere said in Noob building a HEVO in need of help.:
@Quattro said in Noob building a HEVO in need of help.:
100 kohm NTC3950 thermistor
Check what thermistor is used for the bed. I think it's not the correct one.
The bed is working after the PID adjustment.
-
@Quattro
So I think the part where I could support you is working.As mentioned I have never set up sensorless homing.
But I have realized that the stall detection M915 is missing in config.g
I think you have found that?
https://duet3d.dozuki.com/Wiki/Stall_detection_and_sensorless_homing -
Good and bad news. I got the probe to work. It is a 6-36V probe, not 5V as advertised. Its working on 24V. Should the non triggered value be "0" and the triggered value "1000"? The probe does not read thru the glass and down to the alu bed. Do i need to change to a BL touch? Is it reliable to manually adjust the springs on the bed and run without a Z-probe?
-
@Quattro said in Noob building a HEVO in need of help.:
Should the non triggered value be "0" and the triggered value "1000"?
Detail of the guide:
"HIGH during probing, LOW at other times"
I would expect that is correct.
Have you tried to remove the glass and maybe stick some tap on the alu plate?Edit:
I'm a satisfied BlTouch user
-
I have attached the belt to the X Y assembly and I am trying to home the X-axis. I had to change the homex.g and congig.g according to https://duet3d.dozuki.com/Wiki/Stall_detection_and_sensorless_homing
But I can't figure out why the motor keep "skipping" for so long. After some time it is detecting stall and runs the next g-code. I did try a few S-values. I get G28 X Error: Homing failed.Does anyone have a suggestion?
-
@Quattro said in Noob building a HEVO in need of help.:
Good and bad news. I got the probe to work. It is a 6-36V probe, not 5V as advertised. Its working on 24V. Should the non triggered value be "0" and the triggered value "1000"? The probe does not read thru the glass and down to the alu bed. Do i need to change to a BL touch? Is it reliable to manually adjust the springs on the bed and run without a Z-probe?
NPN-output sensors are usually active low, so you need to invert the input to get a reading of 0 when not triggered and 1000 when triggered. How you do this depends on whether you are using RRF2 or RRF3.
Capacitive sensors can usually detect glass beds. Inductive sensors don't detect glass, and may have difficulty detecting aluminium below glass. They work best on steel and other magnetic materials.
Duet WiFi hardware designer and firmware engineer
Please do not ask me for Duet support via PM or email, use the forum
http://www.escher3d.com, https://miscsolutions.wordpress.com -
@dc42 said in Noob building a HEVO in need of help.:
@Quattro said in Noob building a HEVO in need of help.:
Good and bad news. I got the probe to work. It is a 6-36V probe, not 5V as advertised. Its working on 24V. Should the non triggered value be "0" and the triggered value "1000"? The probe does not read thru the glass and down to the alu bed. Do i need to change to a BL touch? Is it reliable to manually adjust the springs on the bed and run without a Z-probe?
NPN-output sensors are usually active low, so you need to invert the input to get a reading of 0 when not triggered and 1000 when triggered. How you do this depends on whether you are using RRF2 or RRF3.
Capacitive sensors can usually detect glass beds. Inductive sensors don't detect glass, and may have difficulty detecting aluminium below glass. They work best on steel and other magnetic materials.
Thank you. I will use the aluminium bed with a glued on sheet to start with.
I got the X and Y homing to work with info from this forum thread: https://forum.duet3d.com/topic/4830/sensorless-homing-oddness/2
The X-axis moves to the left with "- moves" but the y-axis moves further away with "- moves" that must be wrong, how do i invert only ones axis without changing the X-axis? Now i am trying to make the z-homing work ... EDIT: I got the z-homing to work!
-
I got the printer working!
But then it follows a bunch of new questions.
1: I am struggeling with first layer adhersion. Do i set z=0 with a paper between the bed and the nozzle?
2: The print with PLA is sticking to the bed, but I am struggeling with PC. PC is sticking to the nozzle. Is this taped on bed sheet bad?
 This is PC.
3: The probe seems to measure inconsistent depending on temperatur. Is it because I have a cheap probe, or should they only be used for low temp printing? PC is printing at 260C hot end and 90C bed temp.
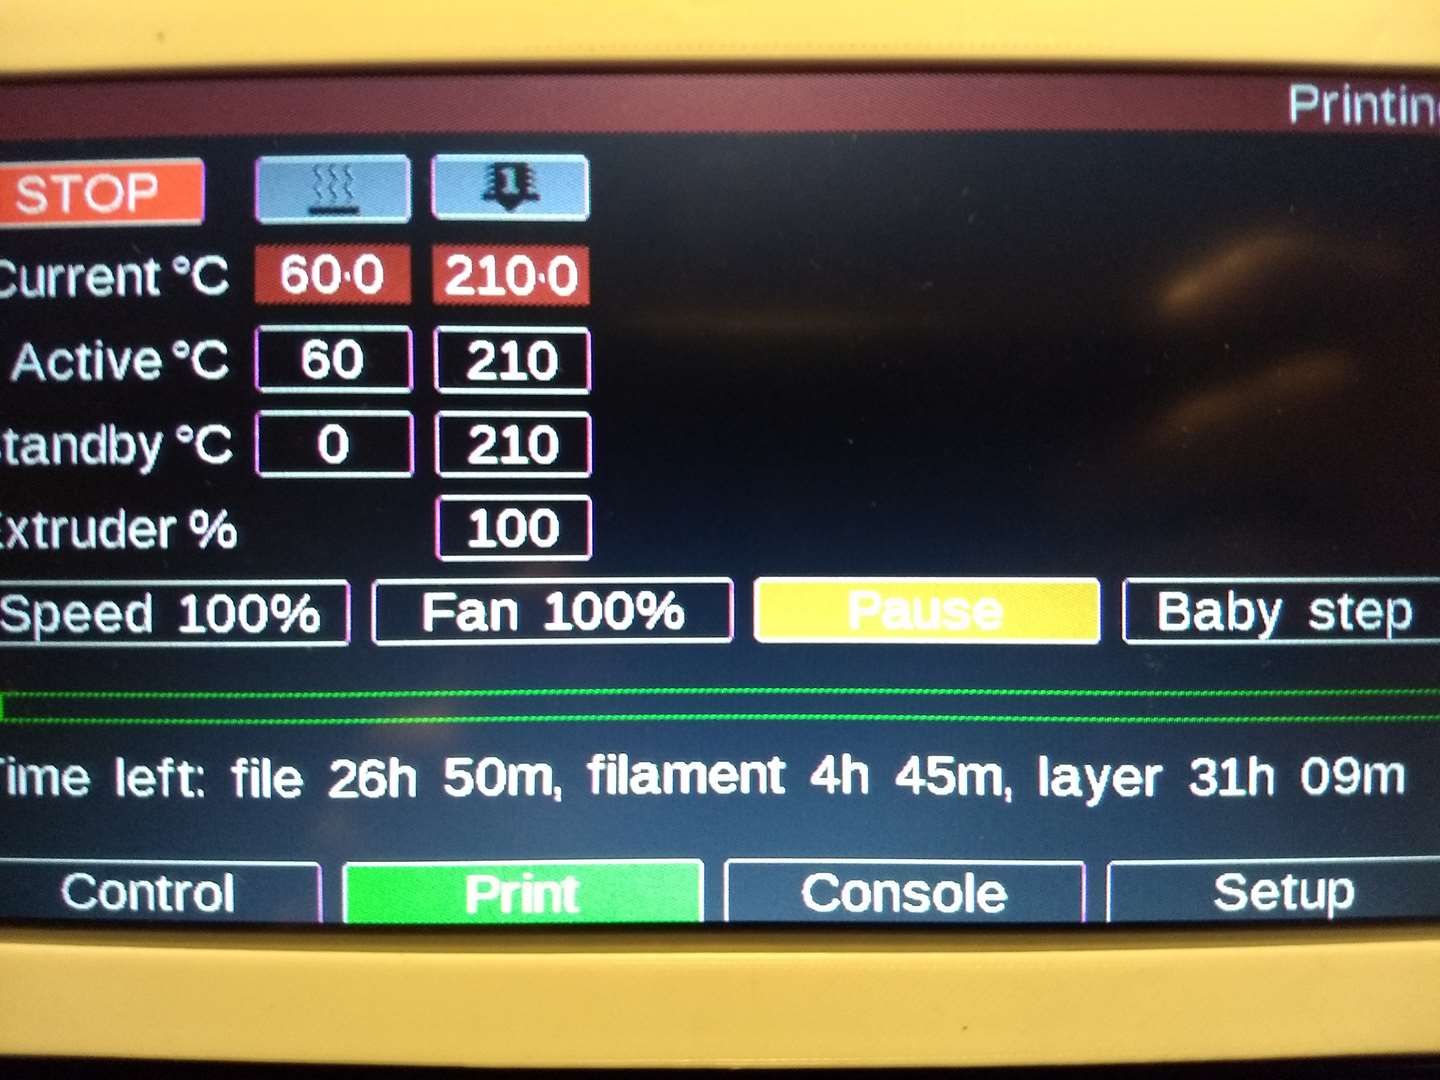
4: How do i set up time left the right way? After some time the countdown seems to be on point.
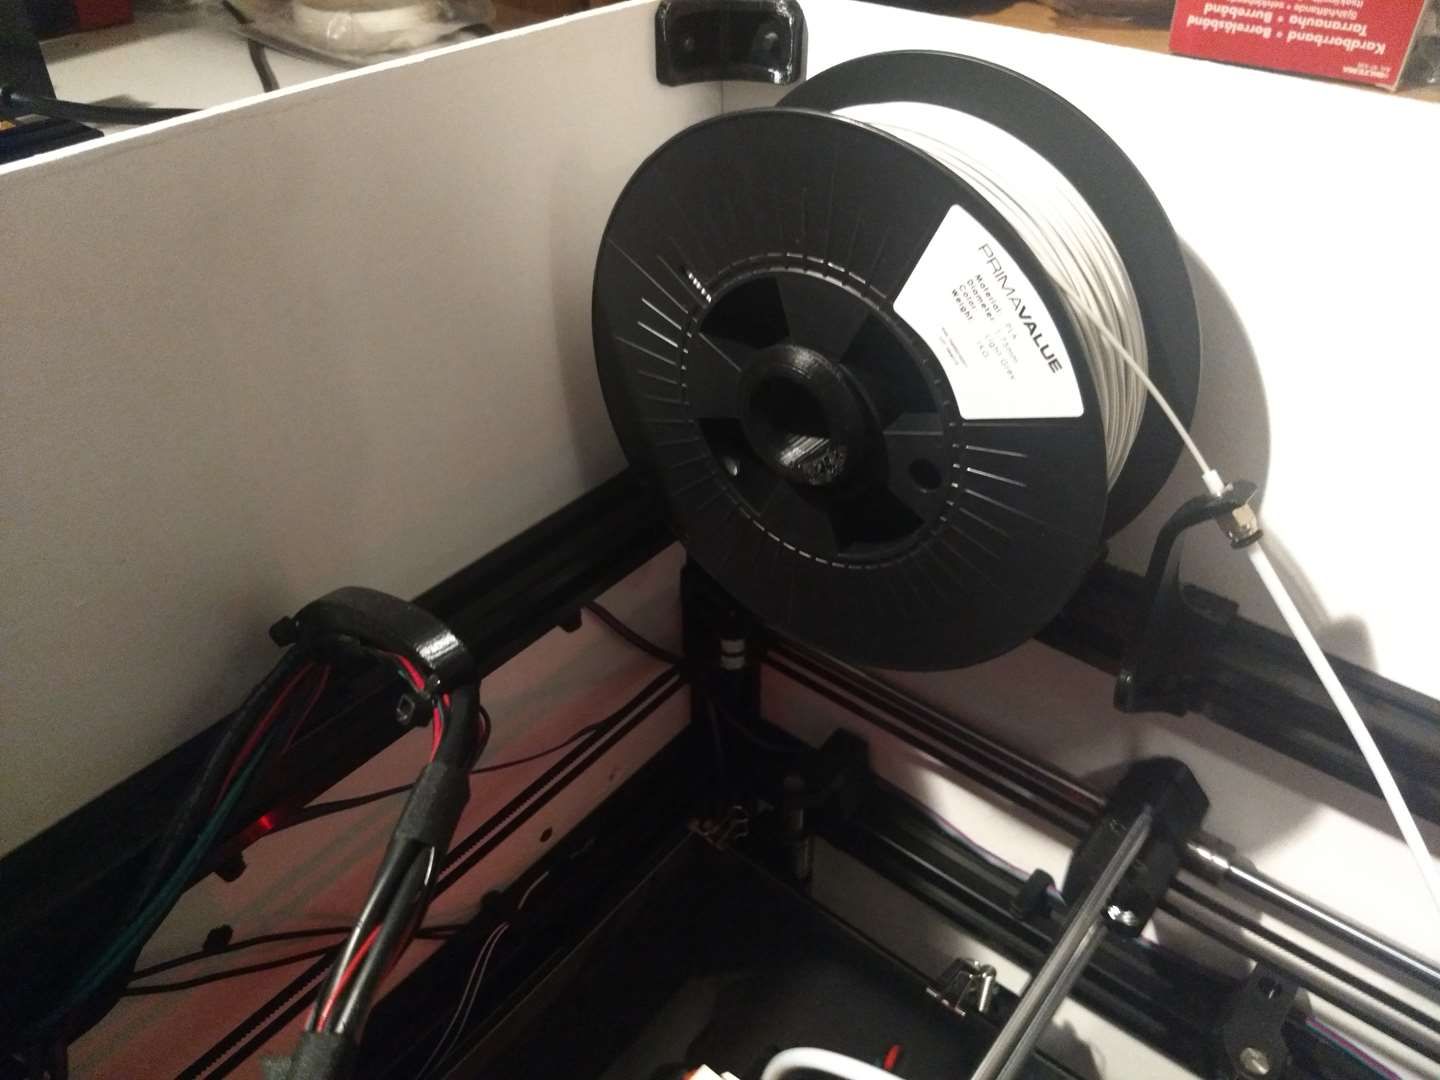
5: This is my temporary rigged extruder and filament holder.
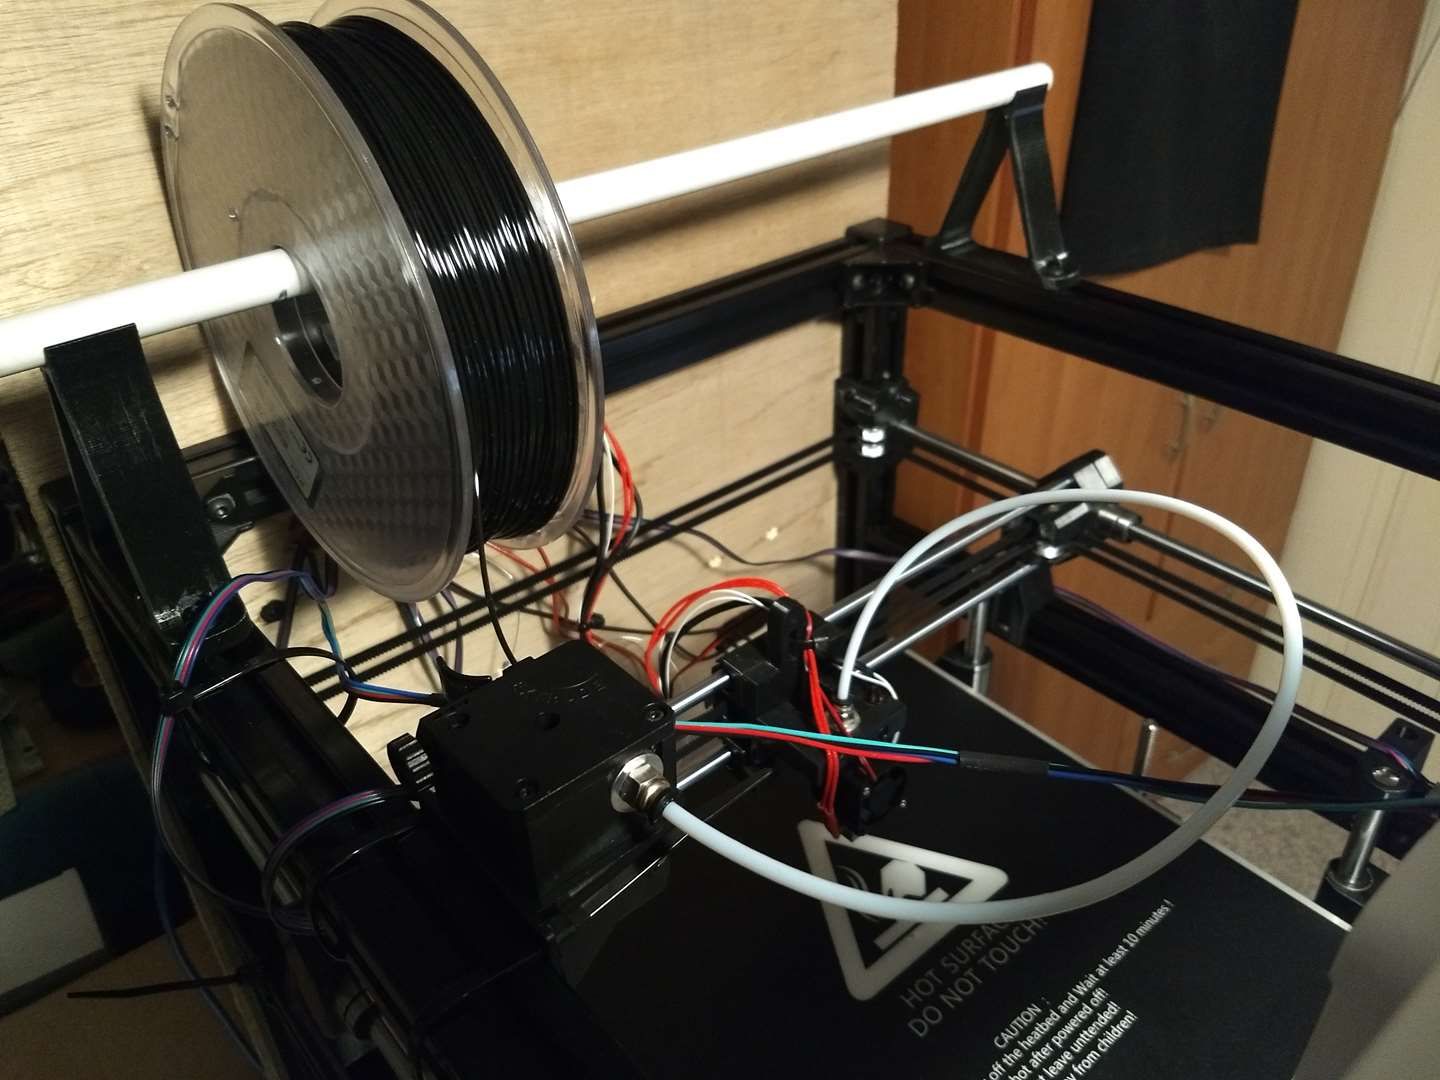 Any suggestion how I should change this setup for a direct extruder? I am going to heat up the chamber and have the filament inside the case.
6: How do you guys attach the cables for the hot end, to the case?
7: I am struggeling with the setup for bed mesh leveling.
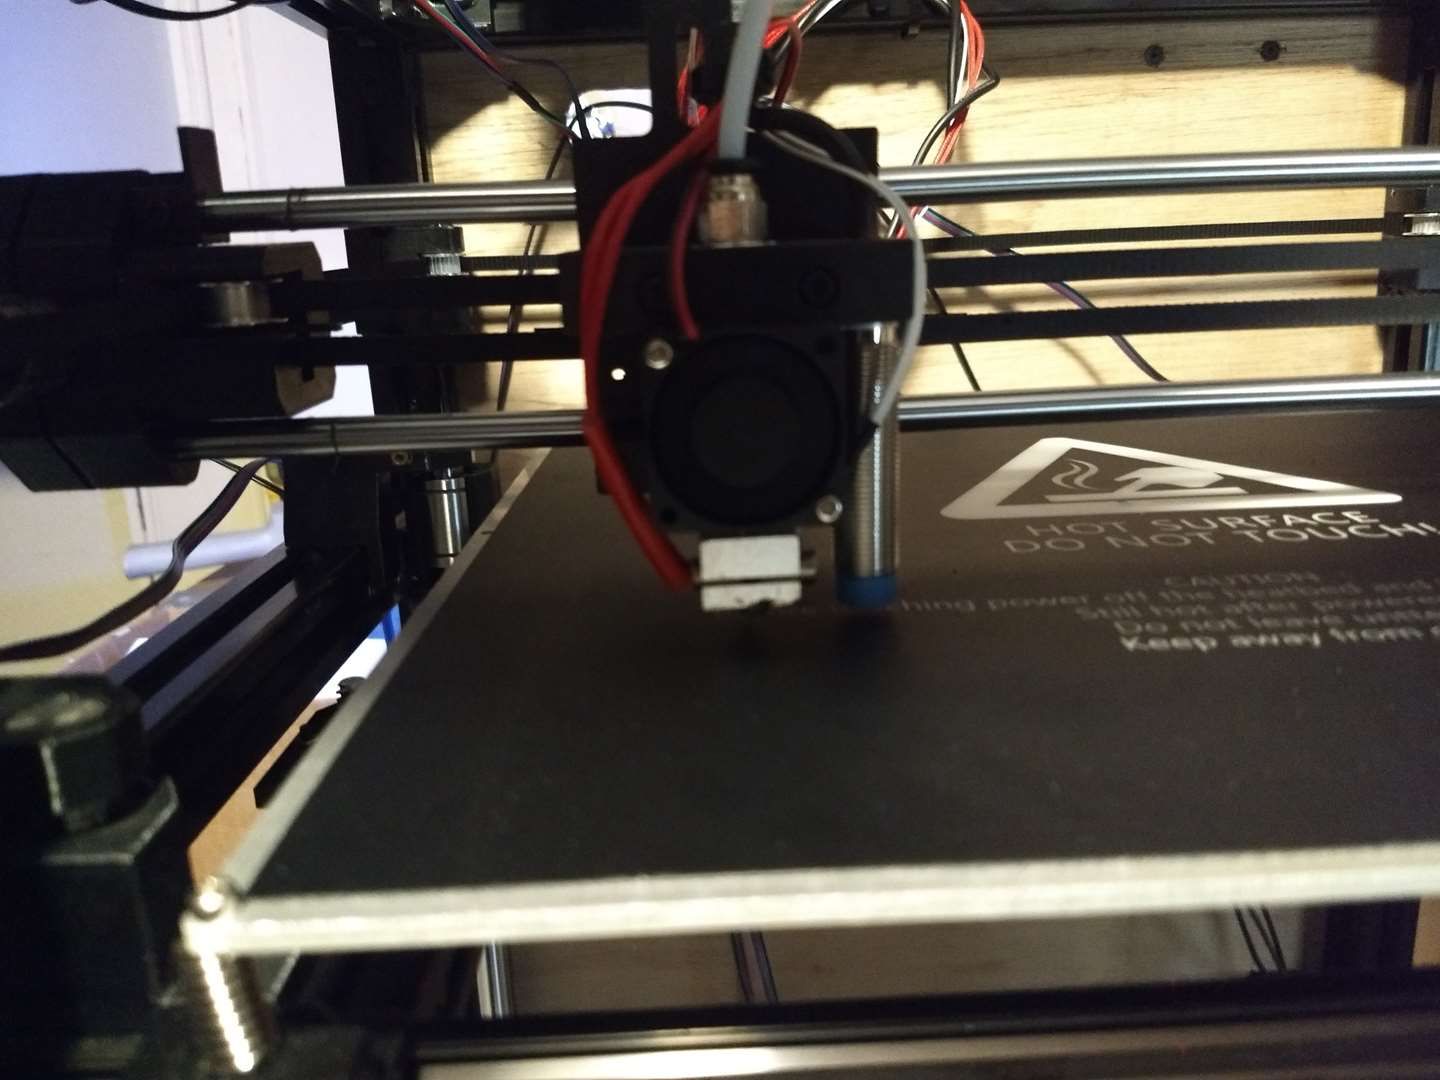 The probe won't measure more to the left than this. If I change the probe X-offset from minus to plus, then I can. What is wrong?
8: Should i use set up m671 to get better compensation for the prints?
9: The parts are printing to small. Where is the best place to calibrate the print size? I printed a cylinder with Ø: 25mm and height 25mm and the part became Ø: 24.56mm and height: 25mm.
10: Does the g-code for the test print seem OK?
This is the first lines, the whole file was to big to upload.G1 X3.0 Y3.0 Z1.0 F8000.0 ; prepare to prime
G92 E0 ; reset extrusion distance
G1 Z0.2 F1000.0
G1 X60.0 E9.0 F1000.0 ; priming
G1 X125.0 E12.5 F1000.0 ; priming
G1 Z0.5 F1000.0
G92 E0 ; reset extrusion distance
M109 S260 ; set temperature and wait for it to be reached
G21 ; set units to millimeters
G90 ; use absolute coordinates
M82 ; use absolute distances for extrusion
G92 E0
; Filament gcode
G1 Z0.200 F7800.000
G1 E-2.00000 F2400.00000
G92 E0
G1 X75.972 Y94.032 F7800.000
G1 E2.00000 F2400.00000
G1 F1800
G1 X76.739 Y93.412 E2.03092
G1 X77.716 Y92.727 E2.06832
G1 X78.570 Y92.211 E2.09963
G1 X79.455 Y91.748 E2.13093
G1 X80.548 Y91.269 E2.16835
G1 X81.488 Y90.931 E2.19966
G1 X82.447 Y90.652 E2.23096
G1 X83.612 Y90.397 E2.26837
G1 X84.600 Y90.251 E2.29967
G1 X85.595 Y90.167 E2.33099
G1 X86.788 Y90.147 E2.36841
G1 X87.785 Y90.199 E2.39971
G1 X88.777 Y90.312 E2.43102
G1 X89.951 Y90.528 E2.46845
G1 X90.919 Y90.775 E2.49976
G1 X91.869 Y91.082 E2.53106
G1 X92.977 Y91.525 E2.56848
G1 X93.877 Y91.958 E2.59979
G1 X94.748 Y92.445 E2.63109
G1 X95.747 Y93.098 E2.66850
G1 X96.544 Y93.700 E2.69981
G1 X97.302 Y94.350 E2.73112
G1 X98.152 Y95.187 E2.76854
G1 X98.815 Y95.934 E2.79984
G1 X99.430 Y96.721 E2.83115
G1 X100.099 Y97.709 E2.86857
G1 X100.601 Y98.572 E2.89988
G1 X101.049 Y99.464 E2.93119
G1 X101.510 Y100.565 E2.96860
G1 X101.832 Y101.510 E2.99991
G1 X102.096 Y102.473 E3.03122
G1 X102.331 Y103.643 E3.06863
G1 X102.460 Y104.633 E3.09994
G1 X102.528 Y105.629 E3.13123
G1 X102.529 Y106.795 E3.16779
G1 X102.462 Y107.805 E3.19953
G1 X102.331 Y108.808 E3.23125
G1 X102.102 Y109.952 E3.26785
G1 X101.836 Y110.929 E3.29959
G1 X101.511 Y111.886 E3.33127
G1 X101.082 Y112.917 E3.36627
G1 X100.570 Y113.938 E3.40211
G1 X100.063 Y114.800 E3.43344
G1 X99.498 Y115.638 E3.46514
G1 X98.773 Y116.568 E3.50213
G1 X98.107 Y117.313 E3.53345
G1 X97.387 Y118.024 E3.56517
G1 X96.493 Y118.793 E3.60214
G1 X95.694 Y119.391 E3.63343
G1 X94.859 Y119.939 E3.66475
G1 X93.819 Y120.524 E3.70218
G1 X92.917 Y120.954 E3.73349
G1 X91.991 Y121.326 E3.76479
G1 X90.856 Y121.695 E3.80221
G1 X89.888 Y121.938 E3.83351
G1 X88.906 Y122.121 E3.86482
G1 X87.721 Y122.258 E3.90223
G1 X86.723 Y122.306 E3.93354
G1 X85.725 Y122.291 E3.96485
G1 X84.536 Y122.193 E4.00226
G1 X83.549 Y122.043 E4.03356
G1 X82.573 Y121.832 E4.06488
G1 X81.426 Y121.501 E4.10230
G1 X80.488 Y121.159 E4.13360
G1 X79.572 Y120.760 E4.16491
G1 X78.514 Y120.210 E4.20232
G1 X77.662 Y119.690 E4.23362
G1 X76.843 Y119.118 E4.26494
G1 X75.913 Y118.369 E4.30237
G1 X75.180 Y117.691 E4.33368
G1 X74.490 Y116.969 E4.36498
G1 X73.726 Y116.052 E4.40240
G1 X73.141 Y115.243 E4.43371
G1 X72.607 Y114.400 E4.46501
G1 X72.039 Y113.350 E4.50243
G1 X71.625 Y112.442 E4.53373
G1 X71.268 Y111.509 E4.56504
G1 X70.918 Y110.368 E4.60247
G1 X70.691 Y109.396 E4.63378
G1 X70.524 Y108.411 E4.66508
G1 X70.406 Y107.224 E4.70248
G1 X70.375 Y106.227 E4.73378
G1 X70.406 Y105.228 E4.76510
G1 X70.524 Y104.040 E4.80252
G1 X70.691 Y103.056 E4.83383
G1 X70.918 Y102.084 E4.86514
G1 X71.268 Y100.943 E4.90256
G1 X71.625 Y100.010 E4.93387
G1 X72.039 Y99.102 E4.96517
G1 X72.607 Y98.052 E5.00259
G1 X73.141 Y97.208 E5.03390
G1 X73.726 Y96.400 E5.06519
G1 X74.448 Y95.529 E5.10065
G1 X75.239 Y94.703 E5.13650
G1 X75.928 Y94.072 E5.16580
G1 X76.214 Y94.321 F7800.000
G1 F1800Should I just buy a Bl touch so i can use a glass bed? Should i buy a E3D Hemera and new sensors? What filament sensor should I buy? Any tips for good webshops for parts?
-
@Quattro said in Noob building a HEVO in need of help.:
I got the printer working!
But then it follows a bunch of new questions.
1: I am struggeling with first layer adhersion. Do i set z=0 with a paper between the bed and the nozzle?
No. You use the paper method to level/tram the bed because it's easier to adjust for even drag than for nozzle touching bed. The nozzle should just touch the bed when you set z to 0.
3: The probe seems to measure inconsistent depending on temperatur. Is it because I have a cheap probe, or should they only be used for low temp printing? PC is printing at 260C hot end and 90C bed temp.
Capacitative and inductive probes are temperature sensitive. You should probe at the bed temp you intend to print at.
4: How do i set up time left the right way? After some time the countdown seems to be on point.
The times are estimated based on file processed/filament used/layers printed. It usually takes some time for these to smooth out and converge because initial layers print slow and use more filament per layer than higher ones with less infill. If you want a better estimate, make sure your slicer knows your printers acceleration limits, which makes the slicer estimate more accurate (but it disregards heatup time). You can also simulate a file uploaded which should give you a decent estimate as well.
-
Bonus answer to question 7: the probe offset is plus X when it's to the right of the nozzle. The value is the distance to the nozzle, or how you would need to move the nozzle to get to where the probe is.
-
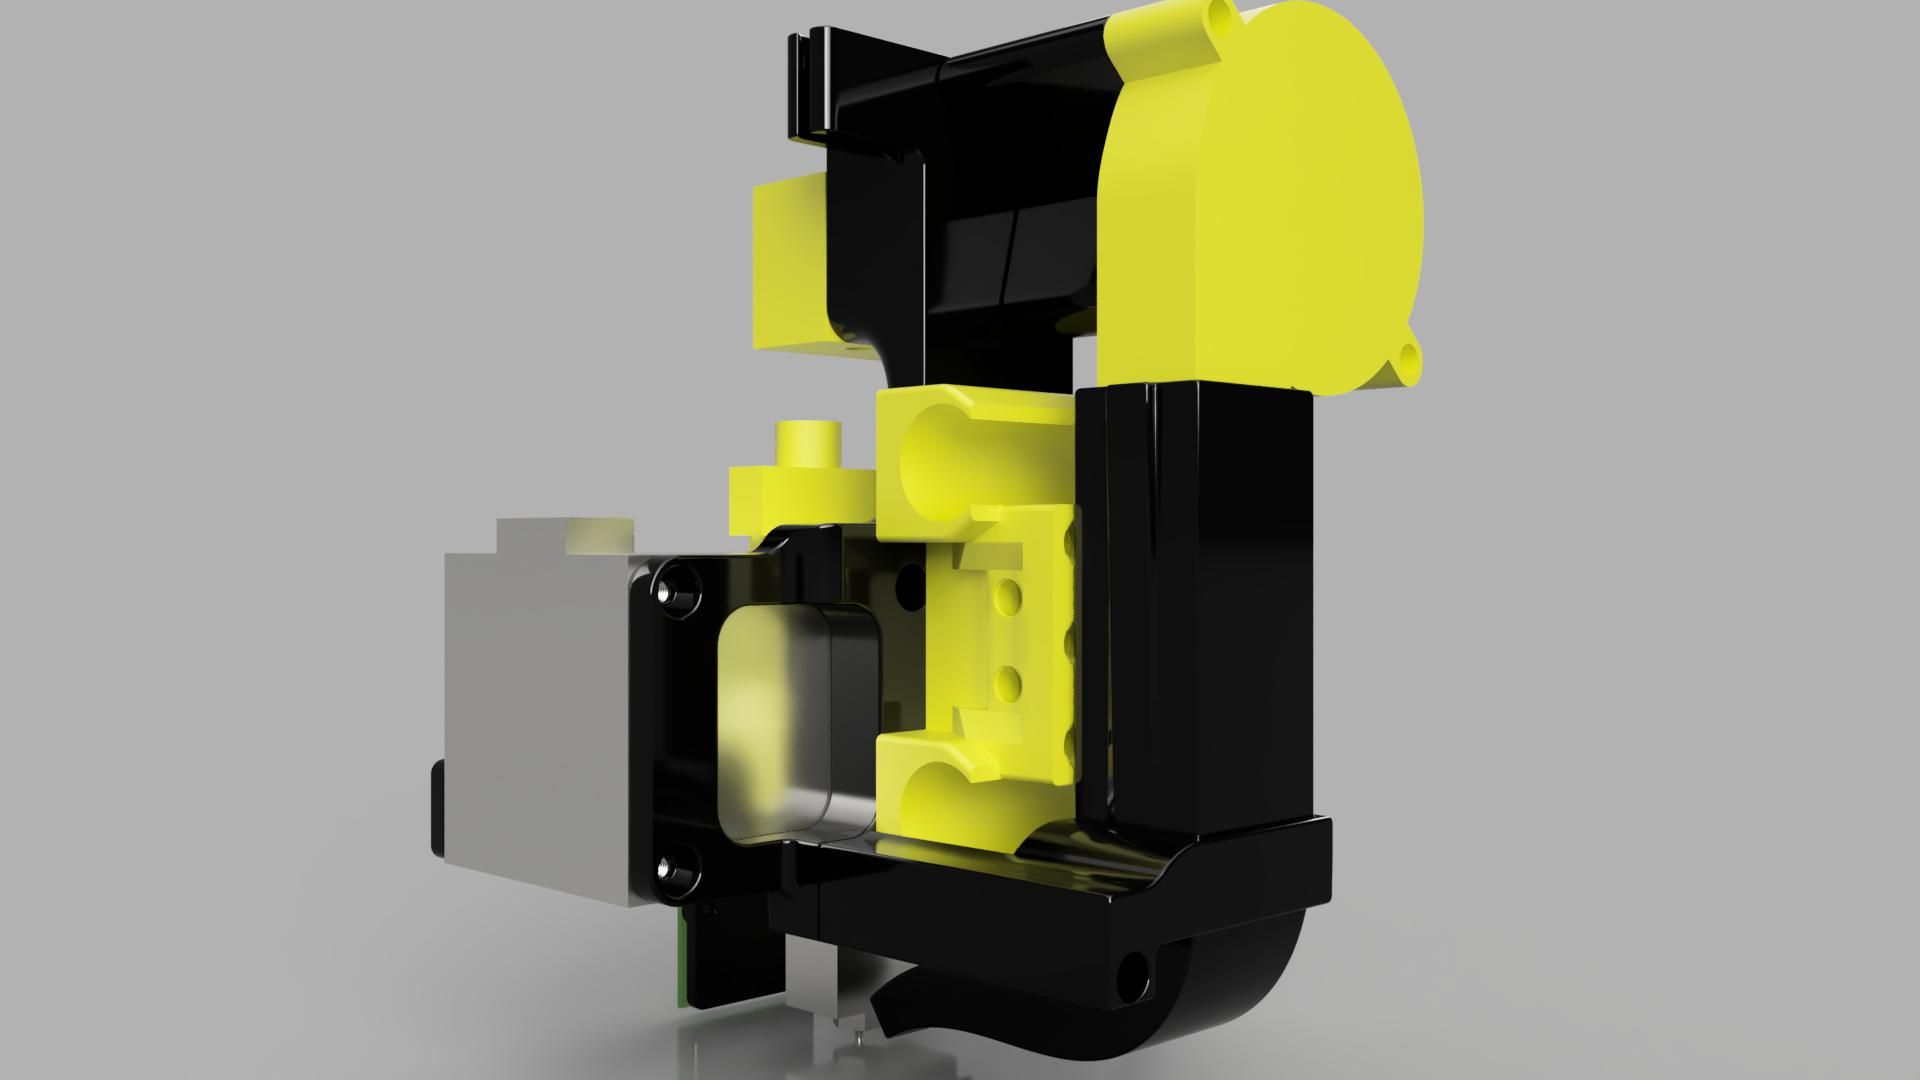
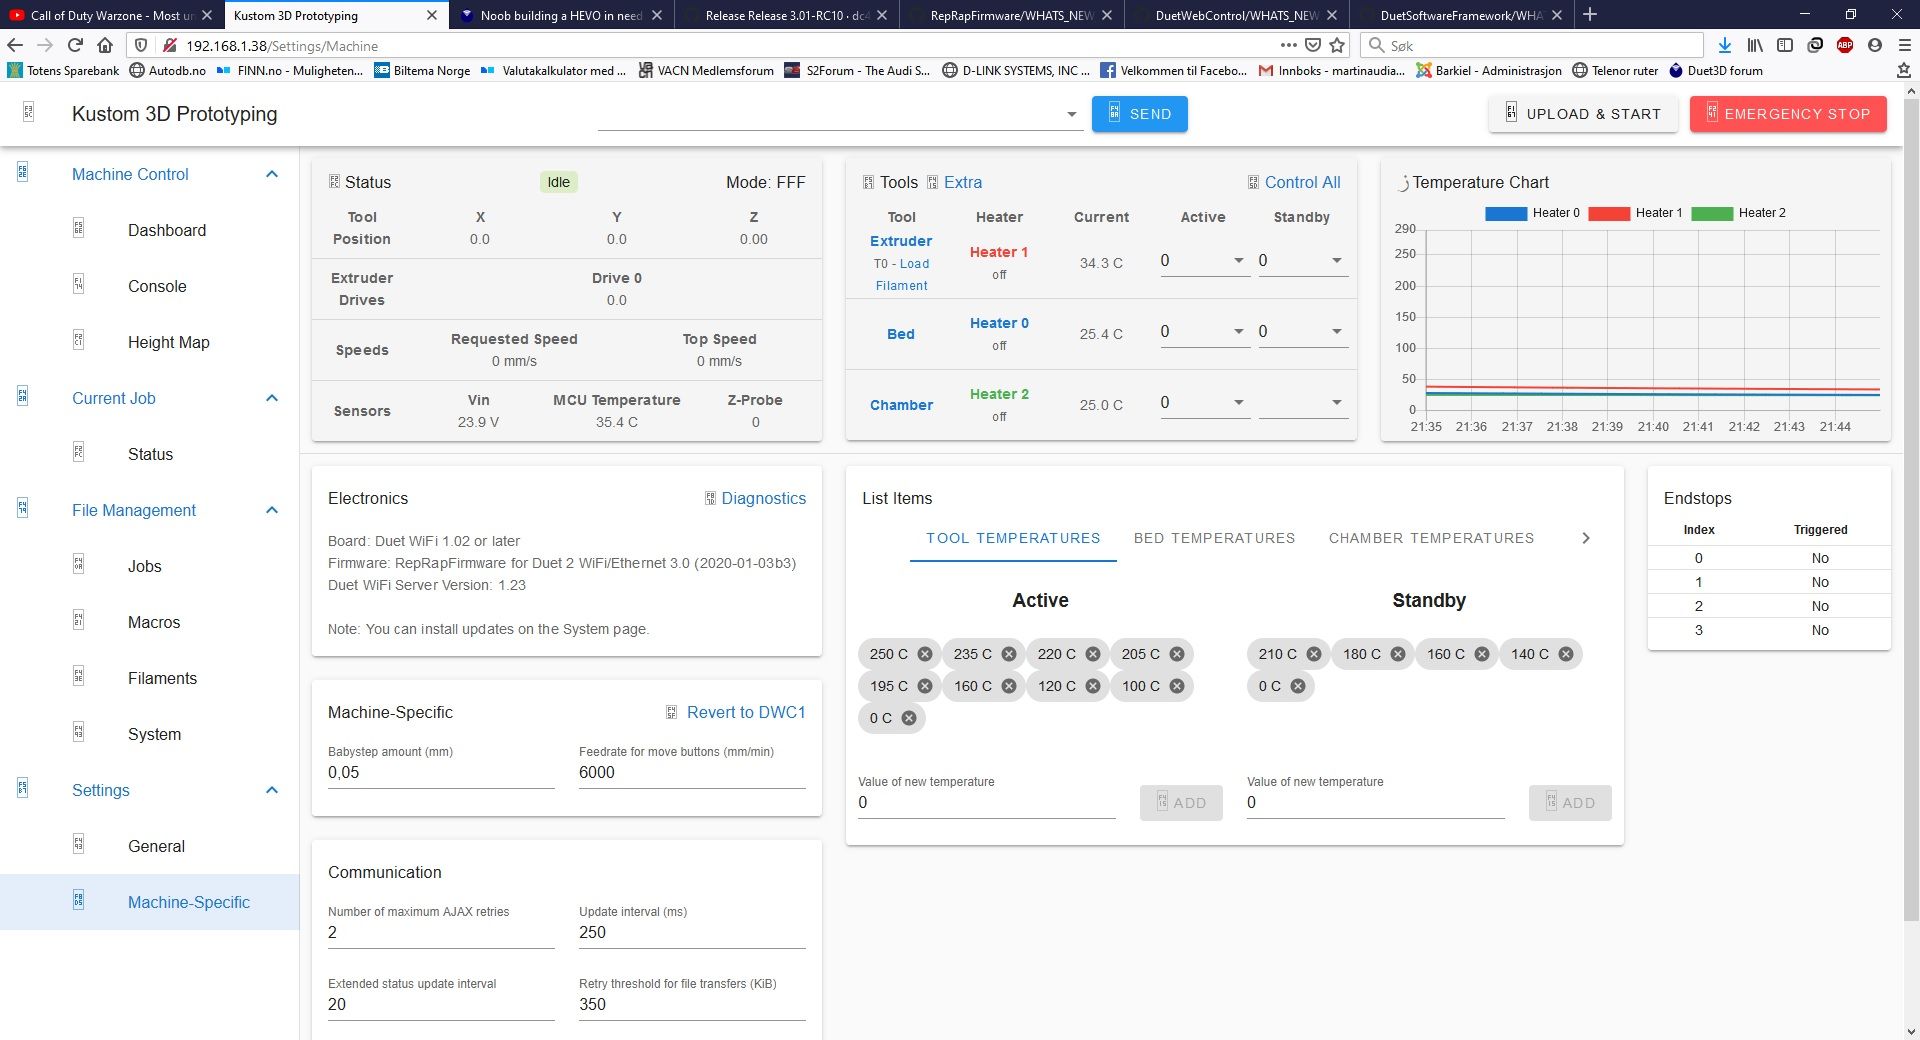
New parts installed, and new problems.
I have changed to a e3d Hemera with vulcano hot-end and 40w heater, duet magnetic filament sensor, Piezo Orion, PT100 with duet daughterboard. The magnetic filament sensor is not setup yet.
1: I need help with the piezo. I have changed the config.g and got it working, but only when i tap the hotend. When I try to home Z the bed is pushing the nozzle and extruder up. It does only trigger with a tap, not bending slow upwards. If I change the sensitivity on the board it triggers of the machine it self. I did try to increase the speed on the z-motors, but it seems like I can't get them to move any faster. What should i try?
3.3V / V+ Red wire
GND black wire
Sig Green wire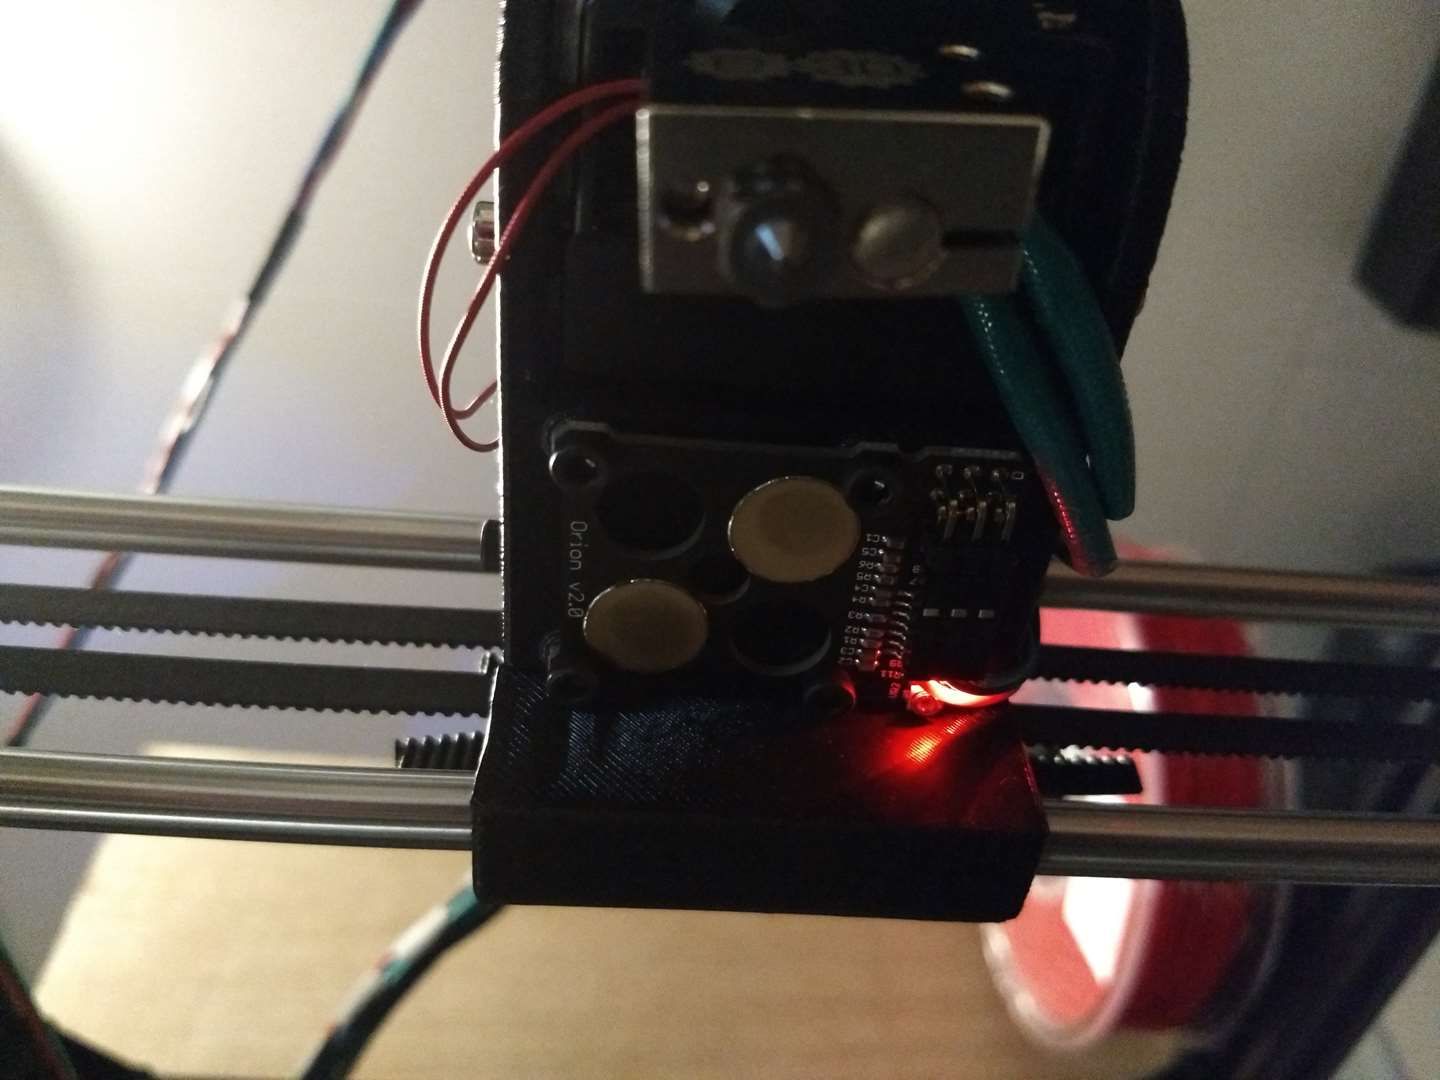
2: The PT100 is working, but if I touch or bend the cables on the sensor it shows 2000 C on the display and the fan starts to run. Can this problem only be intermittent connection? Sometimes it shows the wrong temp aswell, like 46C when it should be 23C/ room temp.
-
@Quattro said in Noob building a HEVO in need of help.:
but it seems like I can't get them to move any faster.
M558 P8 C"zprobe.in" I1 R1 F3000 X0 Y0 Z1You should remove the X0 Y0 Z1 as that's not been used for quite some time.
You've got a probe speed of 3000, and your config has M203 Z3000 as the limit, but is it actually moving that fast?
You're also missing a travel speed so try adding T6000 to your M558.
You should also consider lowering the Z axis motor current during the homing routine to reduce the risk of damage if it doesn't trigger.
It sounds like you have a bad connection with the PT100. Could be damage at the cartridge or the connector plug, or even the wire.
-
@Phaedrux said in Noob building a HEVO in need of help.:
@Quattro said in Noob building a HEVO in need of help.:
but it seems like I can't get them to move any faster.
M558 P8 C"zprobe.in" I1 R1 F3000 X0 Y0 Z1You should remove the X0 Y0 Z1 as that's not been used for quite some time.
You've got a probe speed of 3000, and your config has M203 Z3000 as the limit, but is it actually moving that fast?
You're also missing a travel speed so try adding T6000 to your M558.
You should also consider lowering the Z axis motor current during the homing routine to reduce the risk of damage if it doesn't trigger.
It sounds like you have a bad connection with the PT100. Could be damage at the cartridge or the connector plug, or even the wire.
I have removed "X0 Y0 Z1" now. I can't see a difference on the bed speed when i changed the F-value. I added the T-value now and the bed moves fast, but it still crashes with the nozzle. The Piezo is very sensetive to vibrations and taps, but does not trigger when pushed. I installed one rubber damper on each z-motor, and the vibrations became worse.
The cable on the PT100 broke off inside the connector today. I have installed a thermistor for now, but i can't find all the values I need. Should I use 4300 as the B value? What about C and H?
Semitec 104GT thermistor
https://e3d-online.com/thermistor-cartridge
I think it is this one: Thermistor 61-0452.pdf -
The Z speed is limited in M203 as well as set by M558, so if you want to raise it you'll need to raise it in both places.
If your thermistor is from e3d, see here for the settings: https://e3d-online.dozuki.com/Guide/V6+RepRap+Firmware+Configuration/26?lang=en
-
@Phaedrux said in Noob building a HEVO in need of help.:
The Z speed is limited in M203 as well as set by M558, so if you want to raise it you'll need to raise it in both places.
If your thermistor is from e3d, see here for the settings: https://e3d-online.dozuki.com/Guide/V6+RepRap+Firmware+Configuration/26?lang=en
This is the kind of document I was looking for. Yes, I got the bed moving fast, but the piezo won't trigger when the nozzle hits the bed now either. I am going to send an email to them and see if they got any suggestions for me.
-
Time for an update! Good and bad news as always.
I have had a lot of strange software bugs in the past.
1: The wifi won't always connect, I have to restart the printer
2: The axis won't home every time I try, sometimes there is no reaction, I have to restart the printer
3: I got some strange error in my macro files. It's not actually errors. The macro files were overwritten with these two lines.
Load and unload filament: Error: Bad command: {"main":{"language":"en":, "lastHostname":"192.168.1.38","darkTheme":false, "useBinaryPrefix":true
G29 macro ; Unload 20mm filament G1 E-20 F2000me":"192
I changed the load and unload manually and the commands are working again. The G29 macro was deleted.
4: The printer does not load the configs on the SD card always, I have to restart the printer and take the SD card out and in.
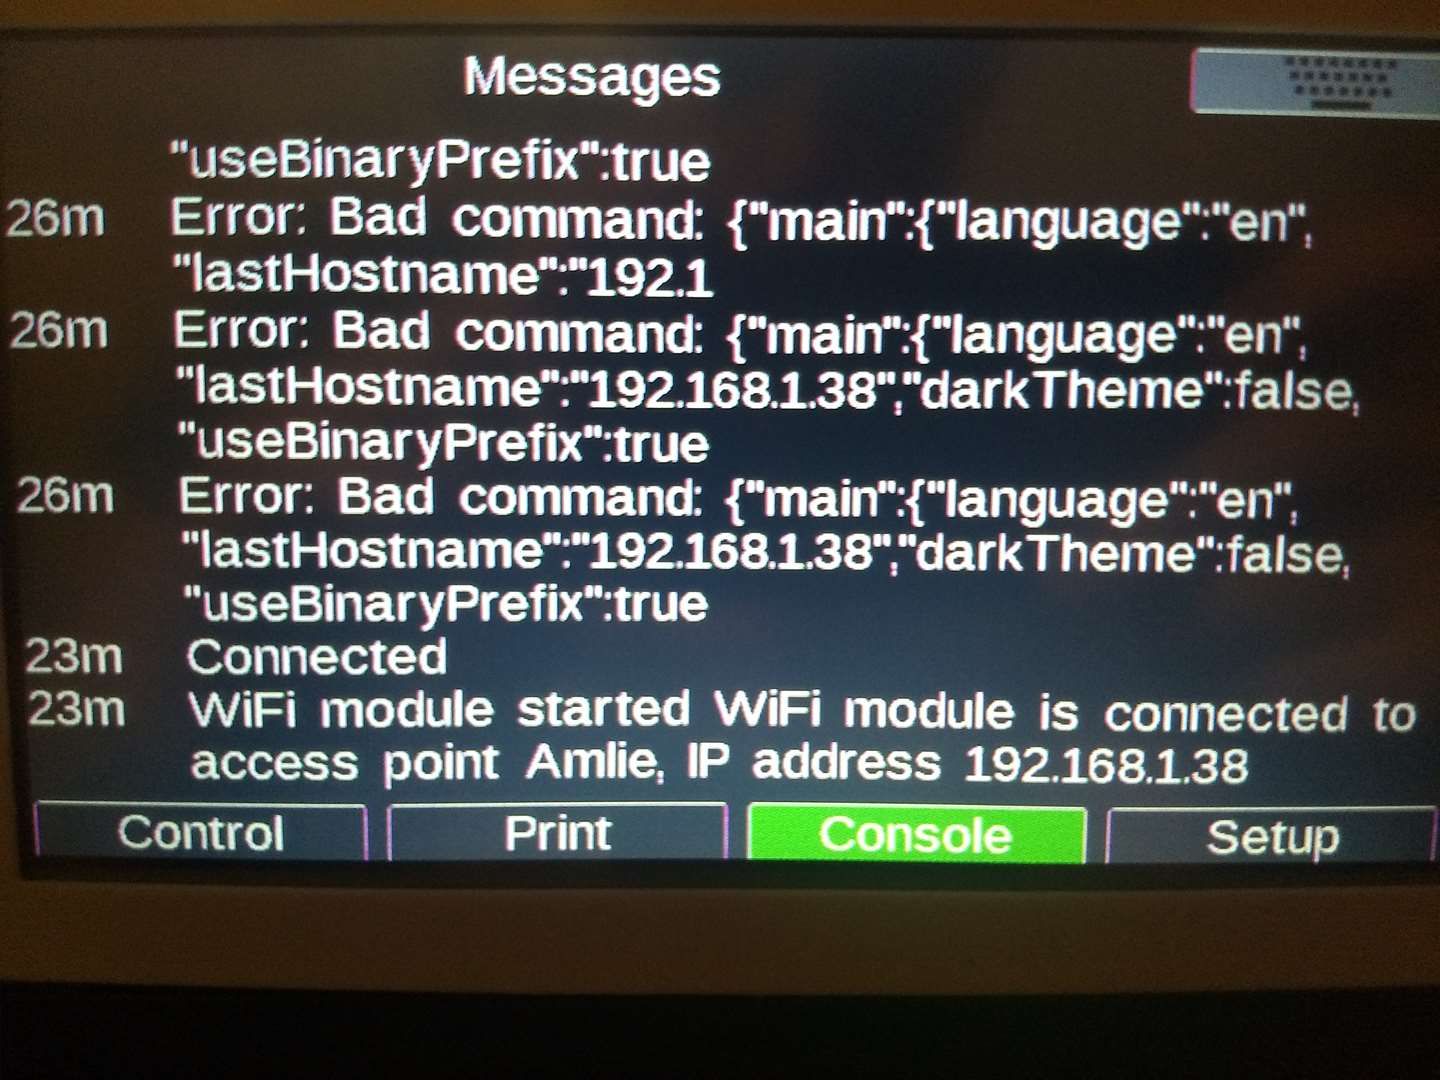 This is the error message that was generated in the load and unload filament macro.
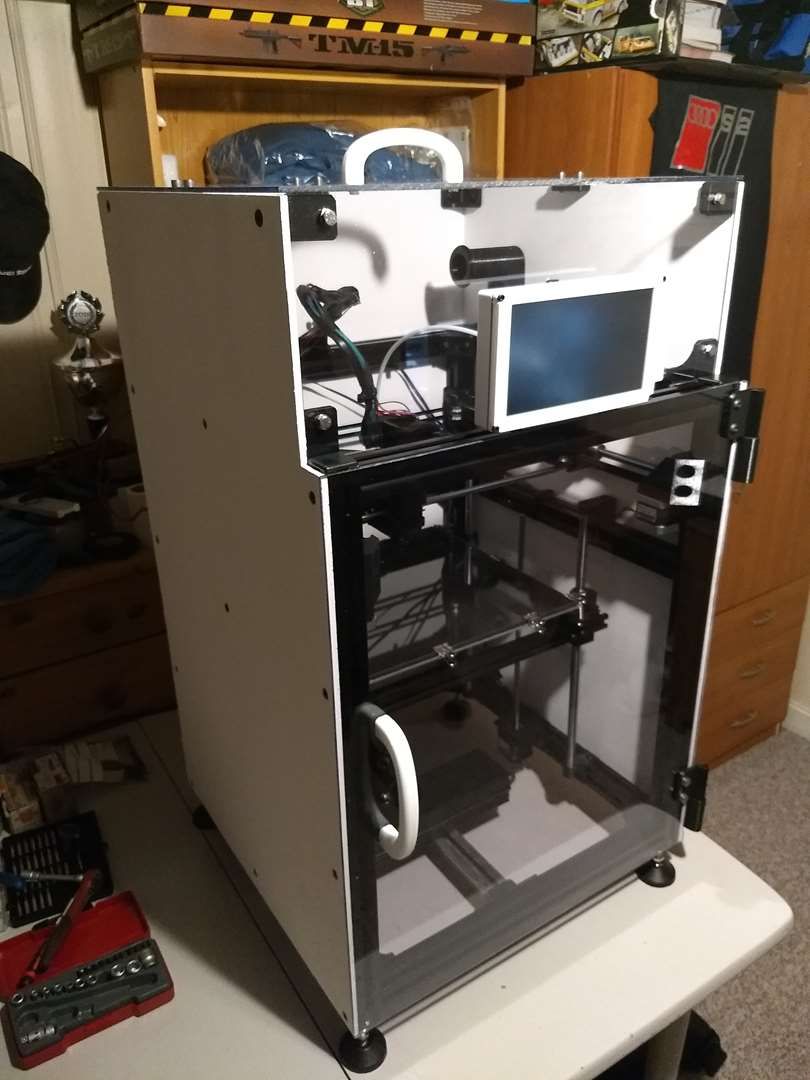 The printer is up and running with a Hemera, IR probe, PT100, magnetic filament sensor and a chamber heater. I never got the Piezo to work with my setup. The enclosure is painted white to reflect a light source inside. Plexi glass and 4mm plywood. Magnetic door "lock".
 The chamber heater connected with a SSR relay controlled by the Duet.
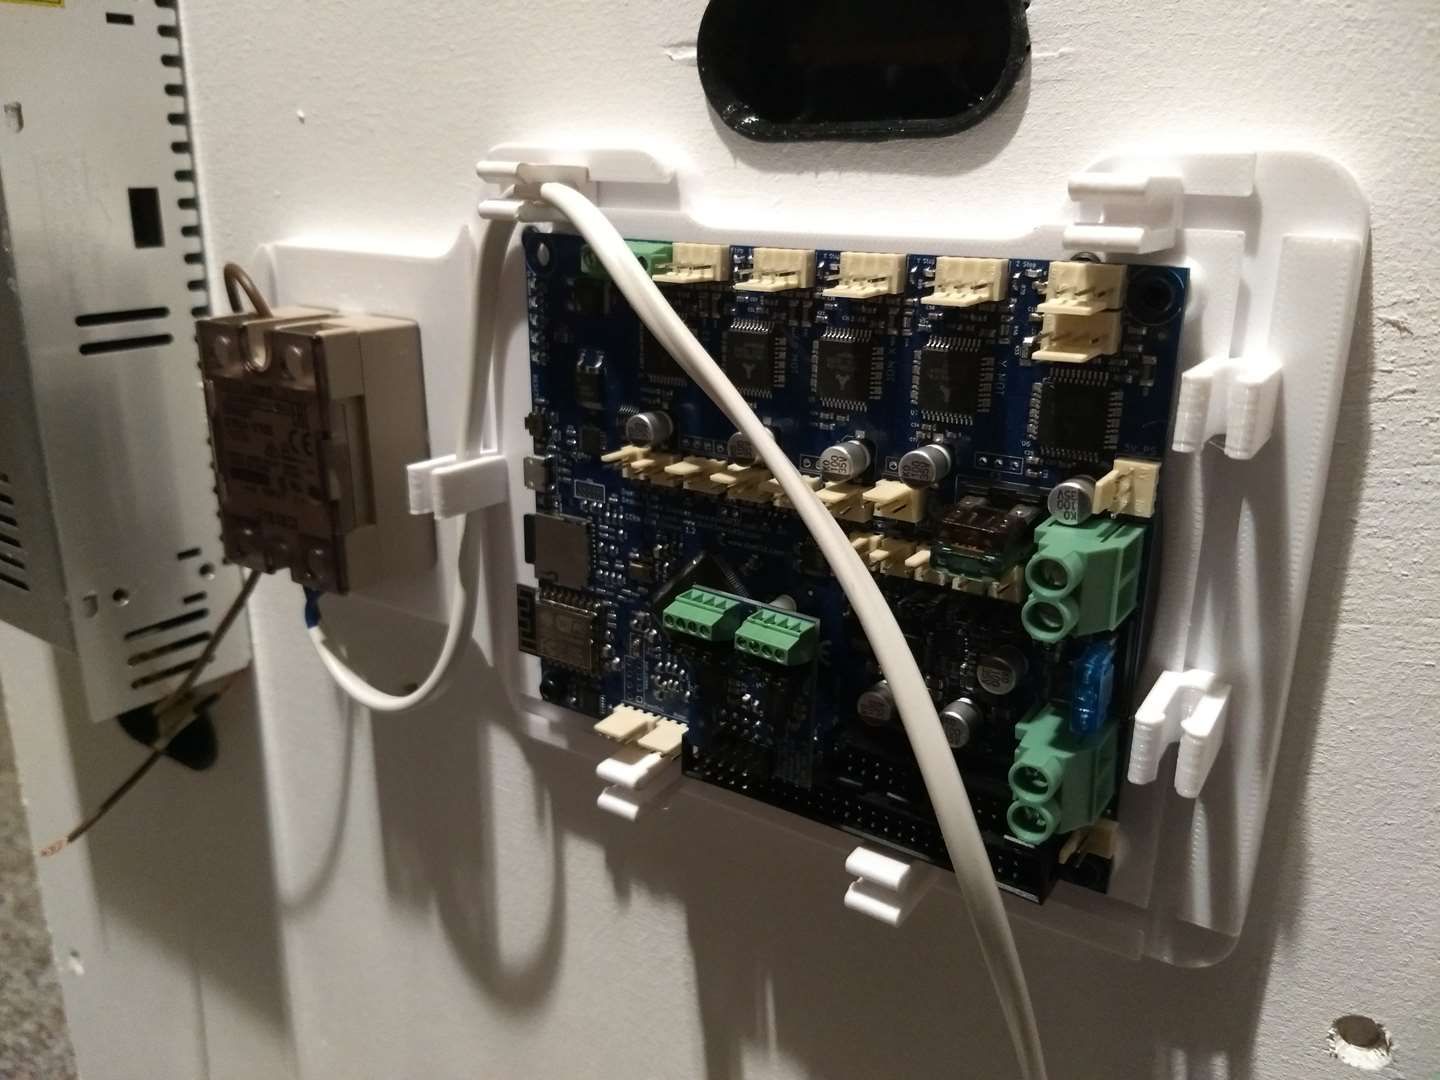 During the building process.
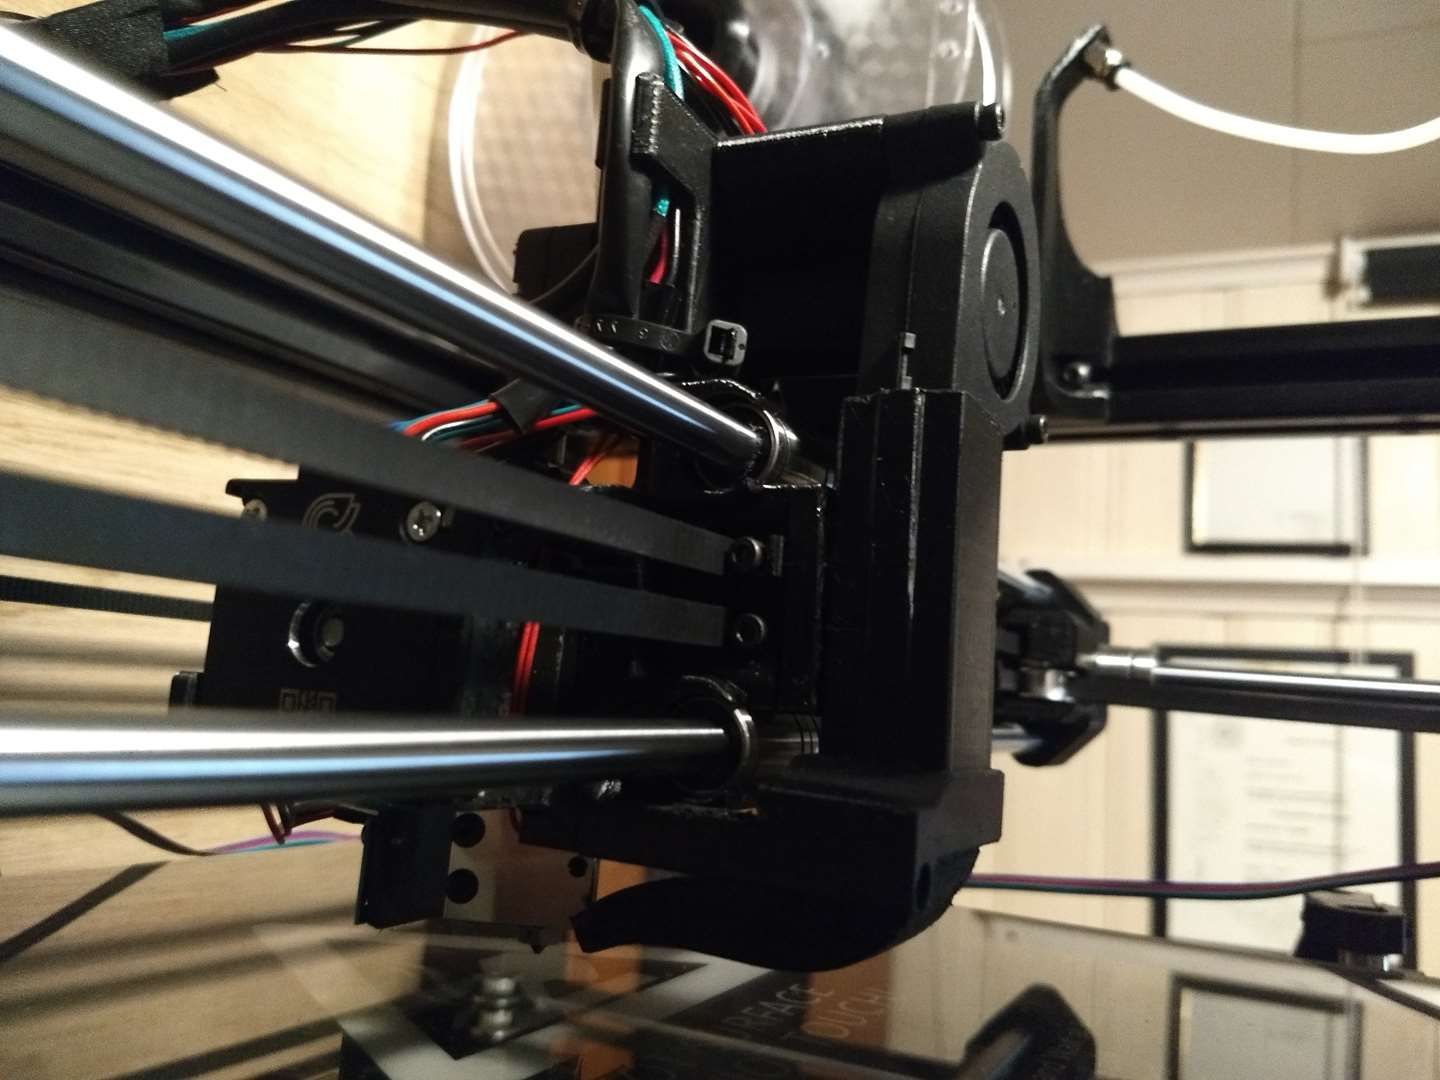
 I made a cable support and the filament holder with bowden holder.
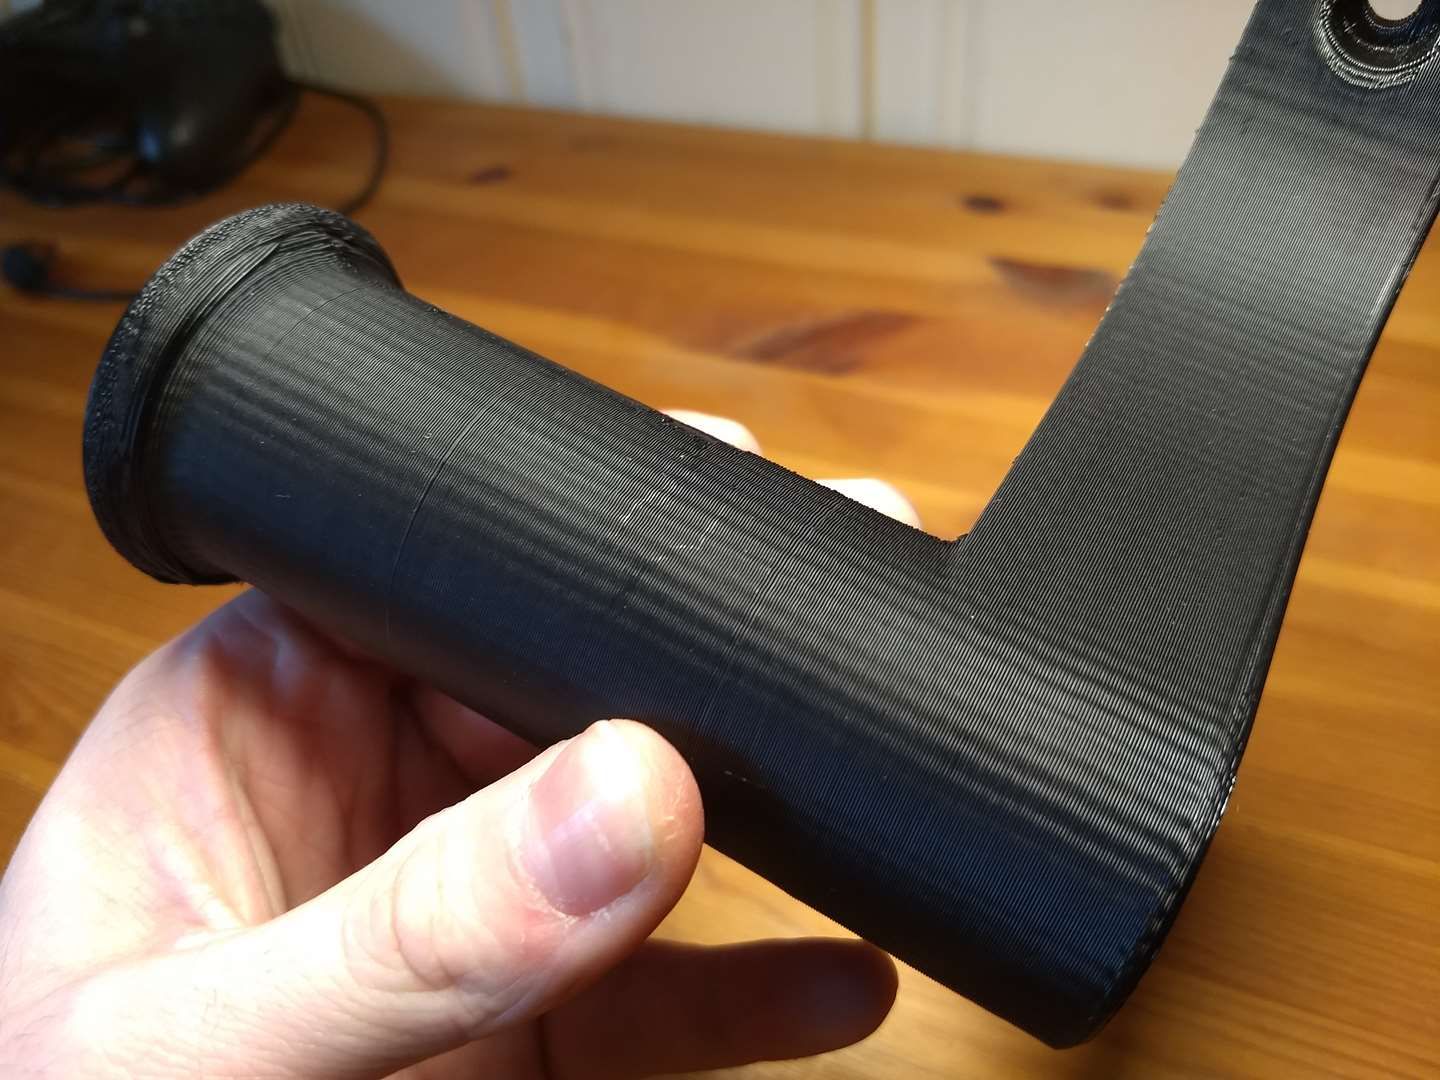 This is where i noticed the wobbling.
Next on the list:
- Further adjustments to get better print quality. I have already reduced wobbling.
- Prototype a new version of the extruder mount. I am losing to much space in the axis because of the size of the Hemera.
- Buy linear rails. The x and y rods are flexing.
- Buy and install LED light inside the enclosure. Any tips?
-
I am trying to edit my last post, but I got this error in the forum: Post content was flagged as spam by Akismet.com
I had a bug in the web interface with the icons, but they was fixed when I updated the firmware and the web interface.