please help me blv setting
-
Hello I have just lived through months of hardship the most difficult days of my life. how to adjust my printer as my prints are really bad i know some people it can be very simple and are able to resolve quickly but i constantly fail and get frustrated at this point i dont understand anything could someone help me, i dont know what to do more than take to throw this whole printer away. to anyone i asked for help other sites are not friendly please help me
at this stage i don't know what to do i want to give up but i like 3d printing
-
@sgk

-
@sgk want to start of posting your config and which issues you are looking to tackle first?
-
@jay_s_uk
thank you thank you for answering me. -
@sgk
-
@sgk can you copy and paste the information rather then screenshots?
use the

circled button when posted so its properly formatted for us to read.
Also, what board are you using and what firmware are you running? (M115 will tell you)Owns various duet boards and is the main wiki maintainer for the Teamgloomy LPC/STM32 port of RRF. Assume I'm running whatever the latest beta/stable build is
-
This post is deleted! -
M208 X-23 Y0 Z0 S1 ; Set axis minima
M208 X320 Y320 Z350 S0 ; Set axis maxima; ======================== Z-Probe =========================M558 P1 C"^zprobe.in" H5 F200 T9000 I0 R0.5 ; Set Z probe type mini ir sensor
G31 P500 X-2.24 Y-20.81 Z1.300 ; Set Z probe trigger value, offset and trigger height
M557 X20:270 Y20:270 S240 ; Define mesh grid; ======================== Heaters =========================M308 S0 P"bed_temp" Y"thermistor" T100000 B3950 ; define bed temperature sensor
M950 H0 C"bed_heat" T0 ; heater 0 uses the bed_heat pin, sensor 0
M307 H0 R0.272 C388.6 D16.77 S1.00 V23.6 ; Heatbed PID
M140 H0 ; map heated bed to heater 0
M143 H0 S120 ; set temperature limit for heater 0 to 120C
M308 S1 P"e0temp" Y"thermistor" T100000 B3950 ; define E0 temperature sensor
M950 H1 C"e0heat" T1 ; heater 1 uses the e0heat pin and sensor 1
M307 H1 R2.697 C168.9:154.1 D9.06 S1.00 V23.6 ; Hotend PID .4mm
M143 H1 S260 ; set temperature limit for heater 0 to 260C
M308 S2 P"mcu-temp" Y"mcu-temp" A"Duet Board" ; Configure MCU sensor -
@jay_s_uk M552 S1 ; enable network
M586 P0 S1 ; enable HTTP
M586 P1 S0 ; disable FTP
M586 P2 S0 ; disable TelnetM669 K1 ; select CoreXY mode
; ======================= Endstops =========================M574 X1 S1 P"xstop" ; configure active-high endstop for low end on X via pin xstop
M574 Y2 S1 P"ystop" ; configure active-high endstop for high end on Y via pin ystop
M574 Z1 S2 ; configure Z-probe endstop for low end on ZM575 P1 S1 B57600 ; Set things up for the PanelDue
; Filament sensorM591 D0 P1 C"e0stop" S1 ; Set Filament sensor Simple type (High) for extruder drive 0, connected to endstop input 3 (E0
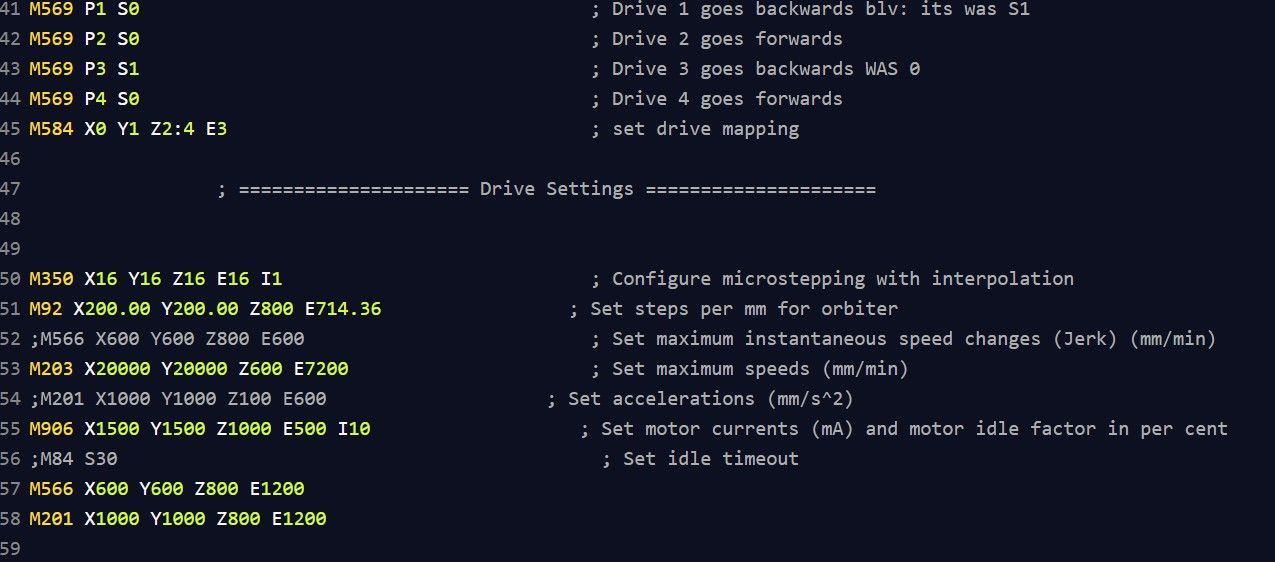
; ======================= Drives ===========================M569 P0 S0 ; Drive 0 goes backwards blv: its was S1
M569 P1 S0 ; Drive 1 goes backwards blv: its was S1
M569 P2 S0 ; Drive 2 goes forwards
M569 P3 S1 ; Drive 3 goes backwards WAS 0
M569 P4 S0 ; Drive 4 goes forwards
M584 X0 Y1 Z2:4 E3 ; set drive mapping; ===================== Drive Settings =====================M350 X16 Y16 Z16 E16 I1 ; Configure microstepping with interpolation
M92 X200.00 Y200.00 Z800 E714.36 ; Set steps per mm for orbiter
;M566 X600 Y600 Z800 E600 ; Set maximum instantaneous speed changes (Jerk) (mm/min)
M203 X20000 Y20000 Z600 E7200 ; Set maximum speeds (mm/min)
;M201 X1000 Y1000 Z100 E600 ; Set accelerations (mm/s^2)
M906 X1500 Y1500 Z1000 E500 I10 ; Set motor currents (mA) and motor idle factor in per cent
;M84 S30 ; Set idle timeout
M566 X600 Y600 Z800 E1200
M201 X1000 Y1000 Z800 E1200;M203 E3600 or E7200 ;max speed mm/min
;M566 E600 ;instantaneous speed change mm/min
;M201 E600 or E800 ;acceleration mm/s^2
;M906 E500 or E1200 I10 ;motor current mA idle current 10%
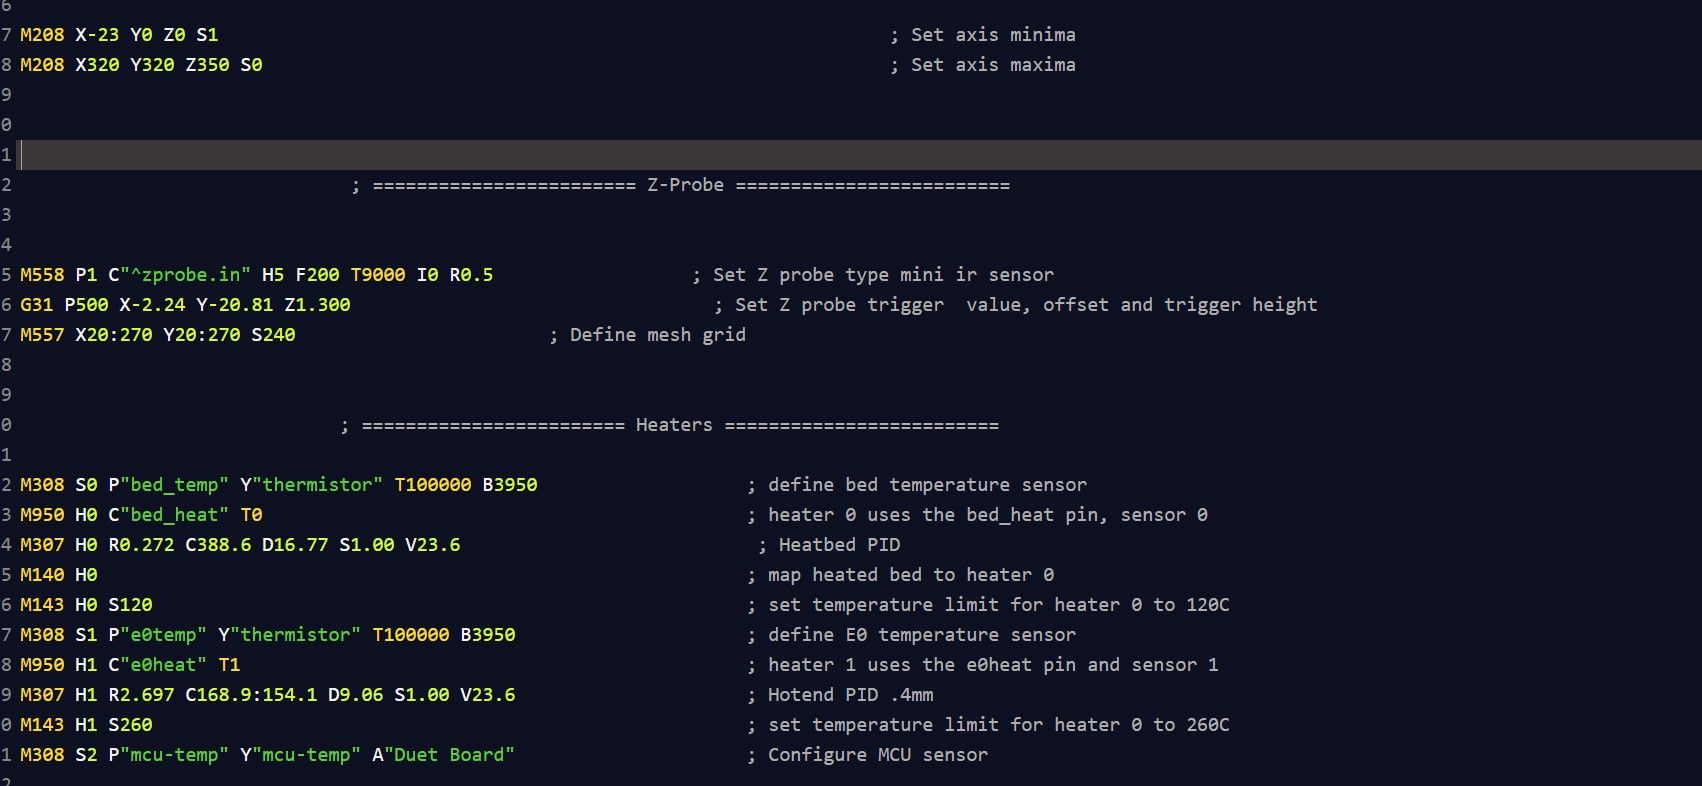
; ===================== Axis Limits ========================M208 X-23 Y0 Z0 S1 ; Set axis minima
M208 X320 Y320 Z350 S0 ; Set axis maxima; ======================== Z-Probe =========================M558 P1 C"^zprobe.in" H5 F200 T9000 I0 R0.5 ; Set Z probe type mini ir sensor
G31 P500 X-2.24 Y-20.81 Z1.300 ; Set Z probe trigger value, offset and trigger height
M557 X20:270 Y20:270 S240 ; Define mesh grid; ======================== Heaters =========================M308 S0 P"bed_temp" Y"thermistor" T100000 B3950 ; define bed temperature sensor
M950 H0 C"bed_heat" T0 ; heater 0 uses the bed_heat pin, sensor 0
M307 H0 R0.272 C388.6 D16.77 S1.00 V23.6 ; Heatbed PID
M140 H0 ; map heated bed to heater 0
M143 H0 S120 ; set temperature limit for heater 0 to 120C
M308 S1 P"e0temp" Y"thermistor" T100000 B3950 ; define E0 temperature sensor
M950 H1 C"e0heat" T1 ; heater 1 uses the e0heat pin and sensor 1
M307 H1 R2.697 C168.9:154.1 D9.06 S1.00 V23.6 ; Hotend PID .4mm
M143 H1 S260 ; set temperature limit for heater 0 to 260C
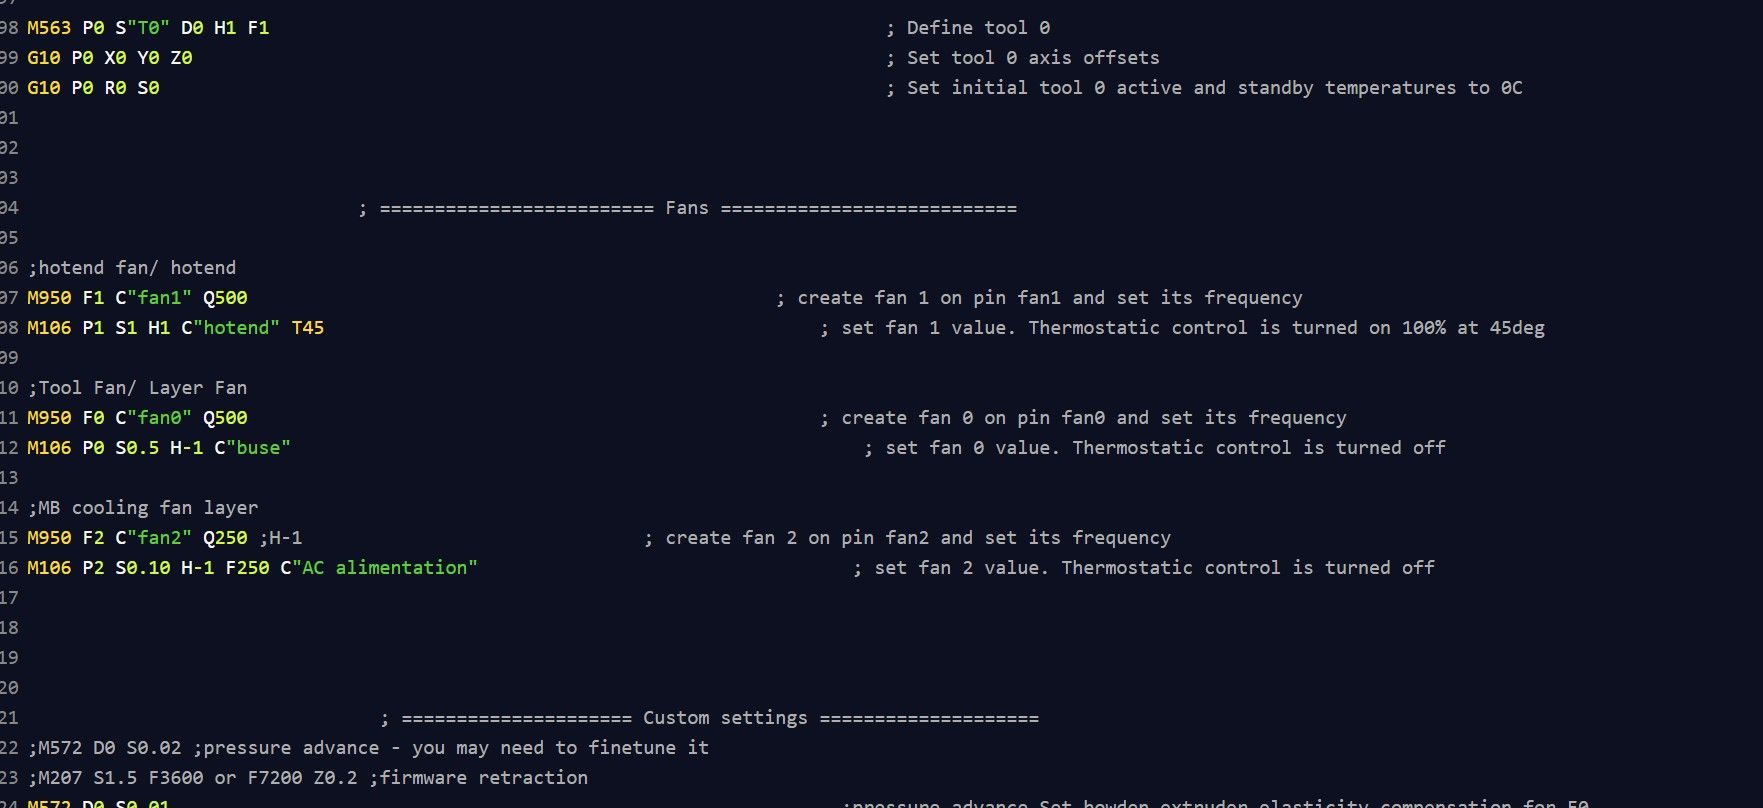
M308 S2 P"mcu-temp" Y"mcu-temp" A"Duet Board" ; Configure MCU sensor; ======================== Tools ===========================M563 P0 S"T0" D0 H1 F1 ; Define tool 0
G10 P0 X0 Y0 Z0 ; Set tool 0 axis offsets
G10 P0 R0 S0 ; Set initial tool 0 active and standby temperatures to 0C; ========================= Fans ===========================;hotend fan/ hotend
M950 F1 C"fan1" Q500 ; create fan 1 on pin fan1 and set its frequency
M106 P1 S1 H1 C"hotend" T45 ; set fan 1 value. Thermostatic control is turned on 100% at 45deg;Tool Fan/ Layer Fan
M950 F0 C"fan0" Q500 ; create fan 0 on pin fan0 and set its frequency
M106 P0 S0.5 H-1 C"buse" ; set fan 0 value. Thermostatic control is turned off;MB cooling fan layer
M950 F2 C"fan2" Q250 ;H-1 ; create fan 2 on pin fan2 and set its frequency
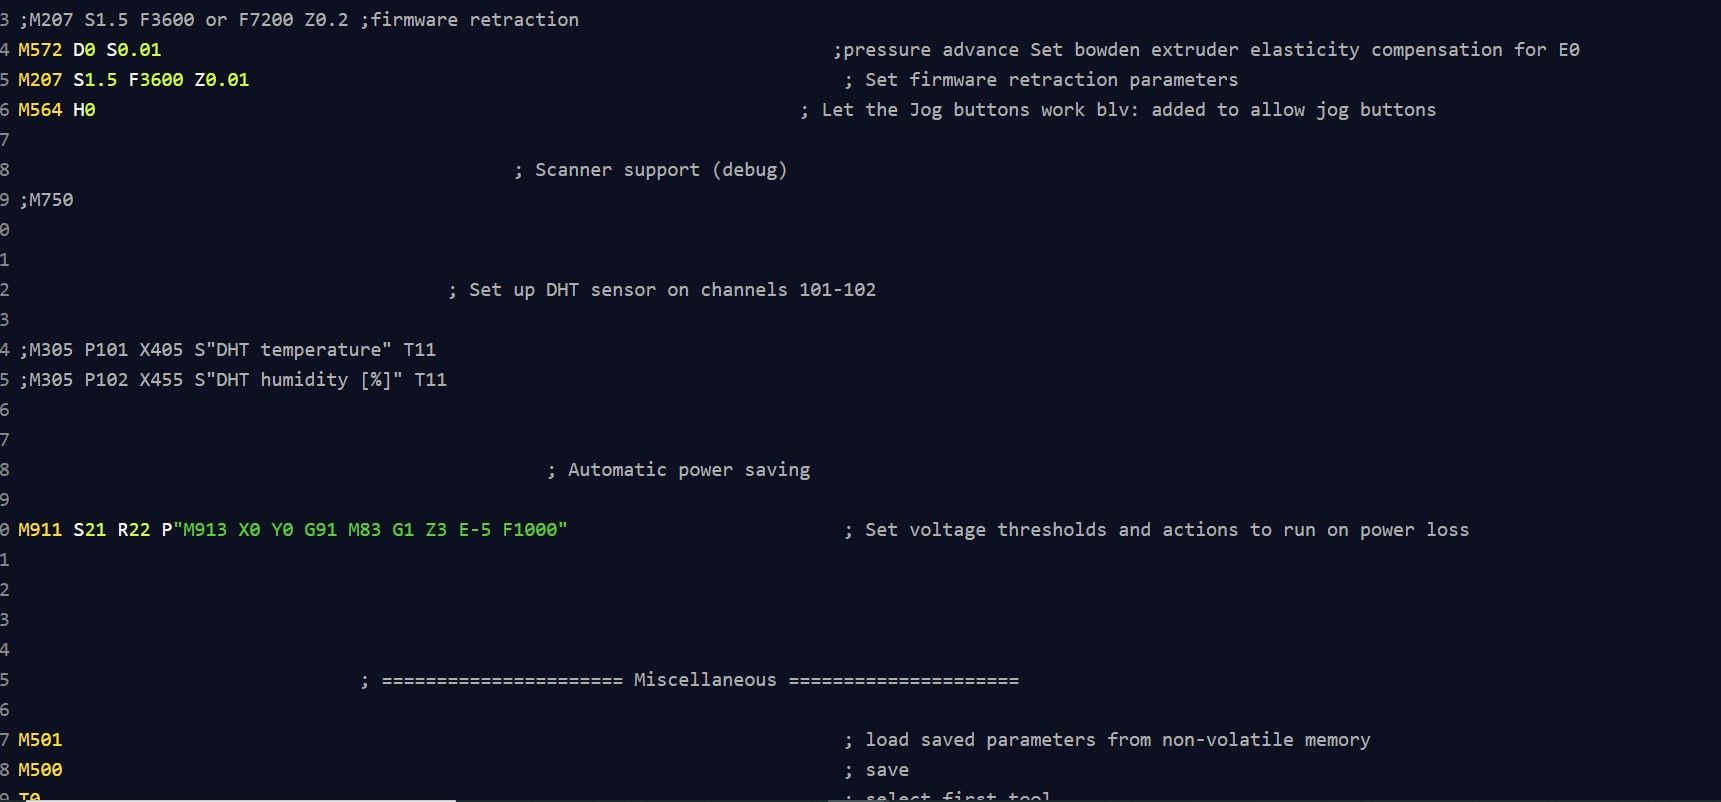
M106 P2 S0.10 H-1 F250 C"AC alimentation" ; set fan 2 value. Thermostatic control is turned off; ===================== Custom settings ====================;M572 D0 S0.02 ;pressure advance - you may need to finetune it
;M207 S1.5 F3600 or F7200 Z0.2 ;firmware retraction
M572 D0 S0.01 ;pressure advance Set bowden extruder elasticity compensation for E0
M207 S1.5 F3600 Z0.01 ; Set firmware retraction parameters
M564 H0 ; Let the Jog buttons work blv: added to allow jog buttons; Scanner support (debug);M750
; Set up DHT sensor on channels 101-102;M305 P101 X405 S"DHT temperature" T11
;M305 P102 X455 S"DHT humidity [%]" T11; Automatic power savingM911 S21 R22 P"M913 X0 Y0 G91 M83 G1 Z3 E-5 F1000" ; Set voltage thresholds and actions to run on power loss
; ====================== Miscellaneous =====================M501 ; load saved parameters from non-volatile memory
M500 ; save
T0 ; select first toolM575 P1 S1 B57600 ; enable support for PanelDue
;M911 S10 R11 P"M913 X0 Y0 G91 M83 G1 Z3 E-5 F1000" ; set voltage thresholds and actions to run on power loss -
@jay_s_uk
sorry some ask me to take a screenshot. -
@sgk said in please help me blv setting:
M563 P0 S"T0" D0 H1 F1
the fan defined here should be F0 not F1
nothing else looks out of place.
which bits do you have issues with?
and which firmware version are you running? M115 will tell youOwns various duet boards and is the main wiki maintainer for the Teamgloomy LPC/STM32 port of RRF. Assume I'm running whatever the latest beta/stable build is
-
@jay_s_uk Board: Duet 2 WiFi (2WiFi)
Firmware: RepRapFirmware for Duet 2 WiFi/Ethernet 3.3 (2021-06-15)
Duet WiFi Server Version: 1.26 -
@jay_s_uk said in please help me blv setting:
which bits do you have issues with?I do not understand
-
@sgk what problems are you having?
-
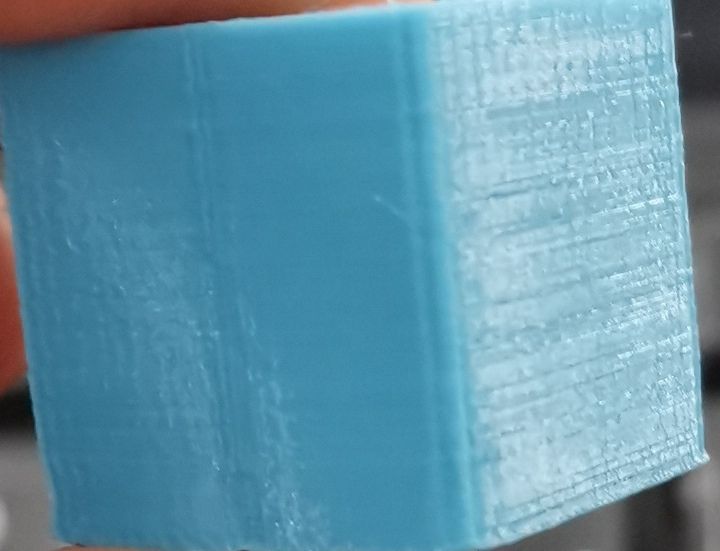
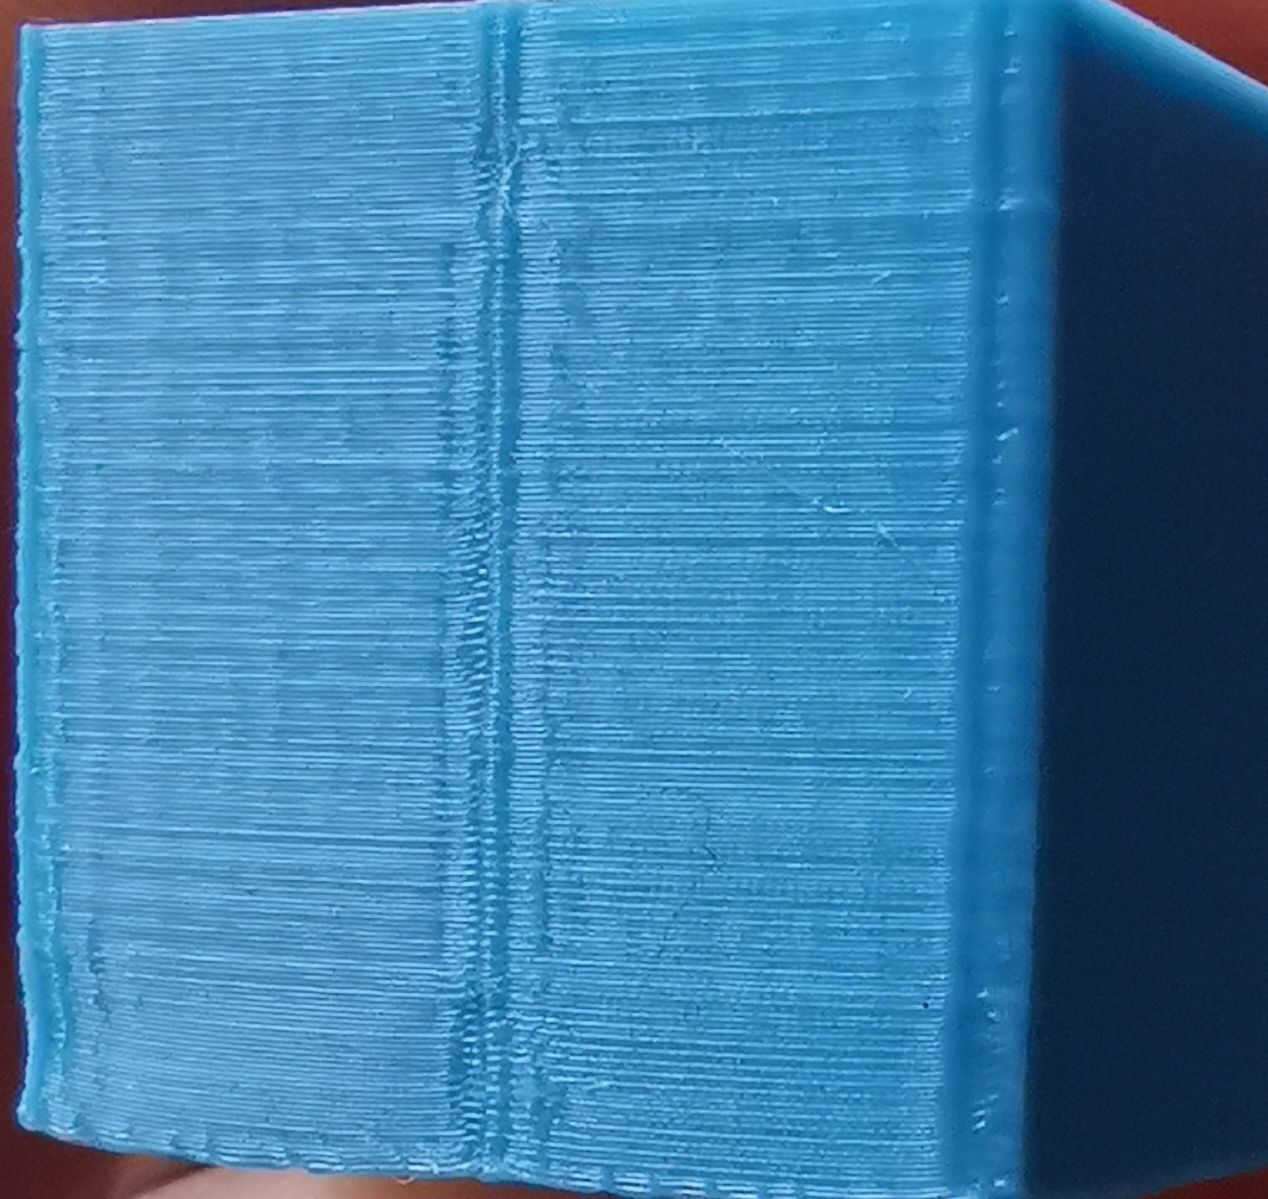
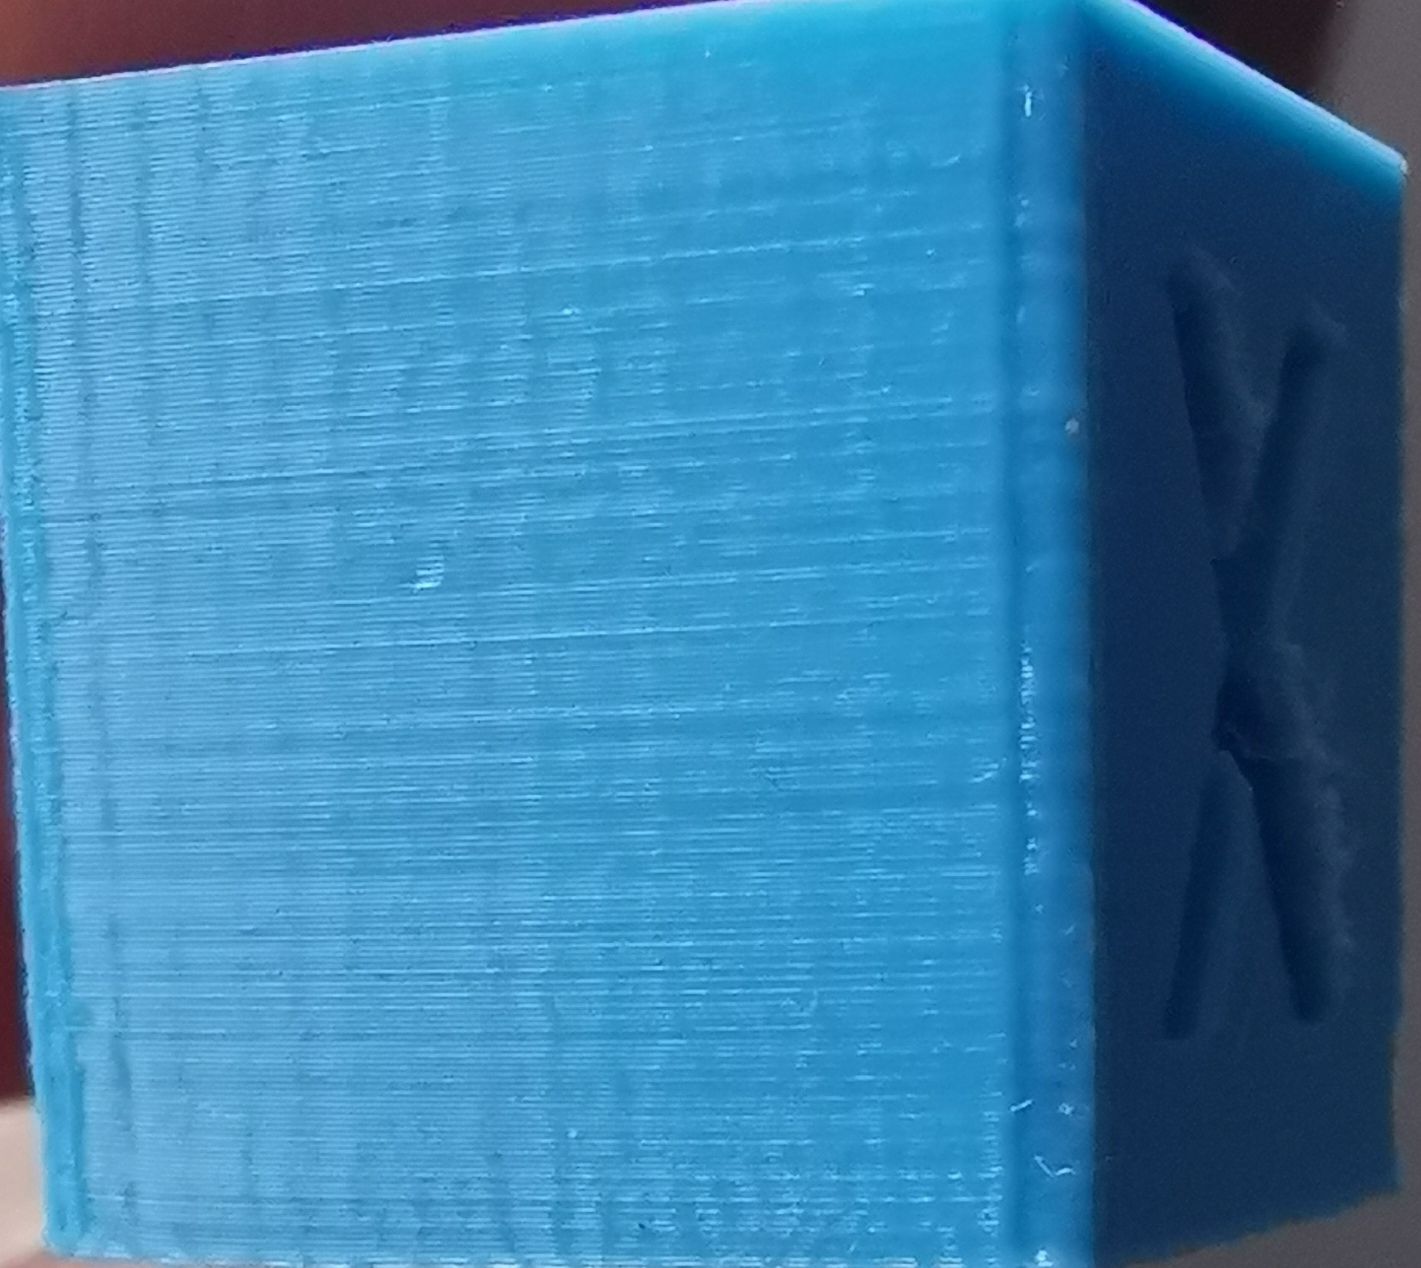
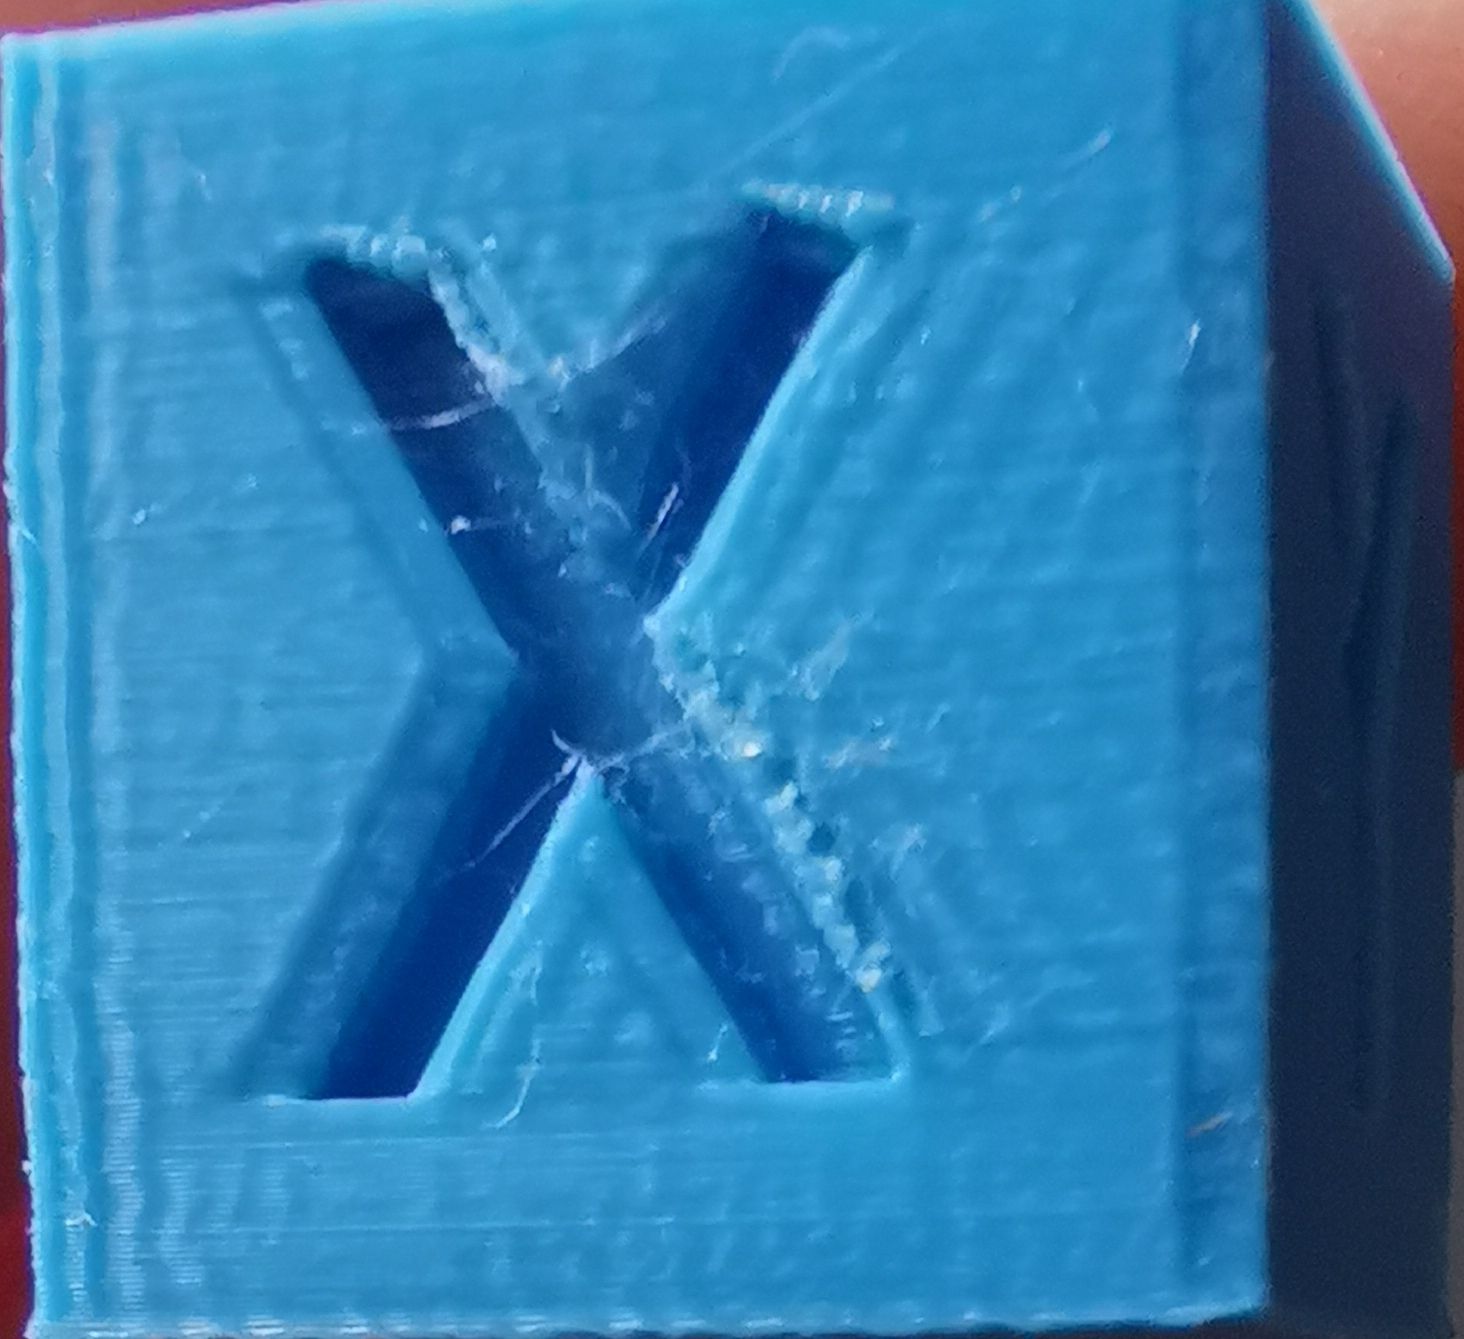
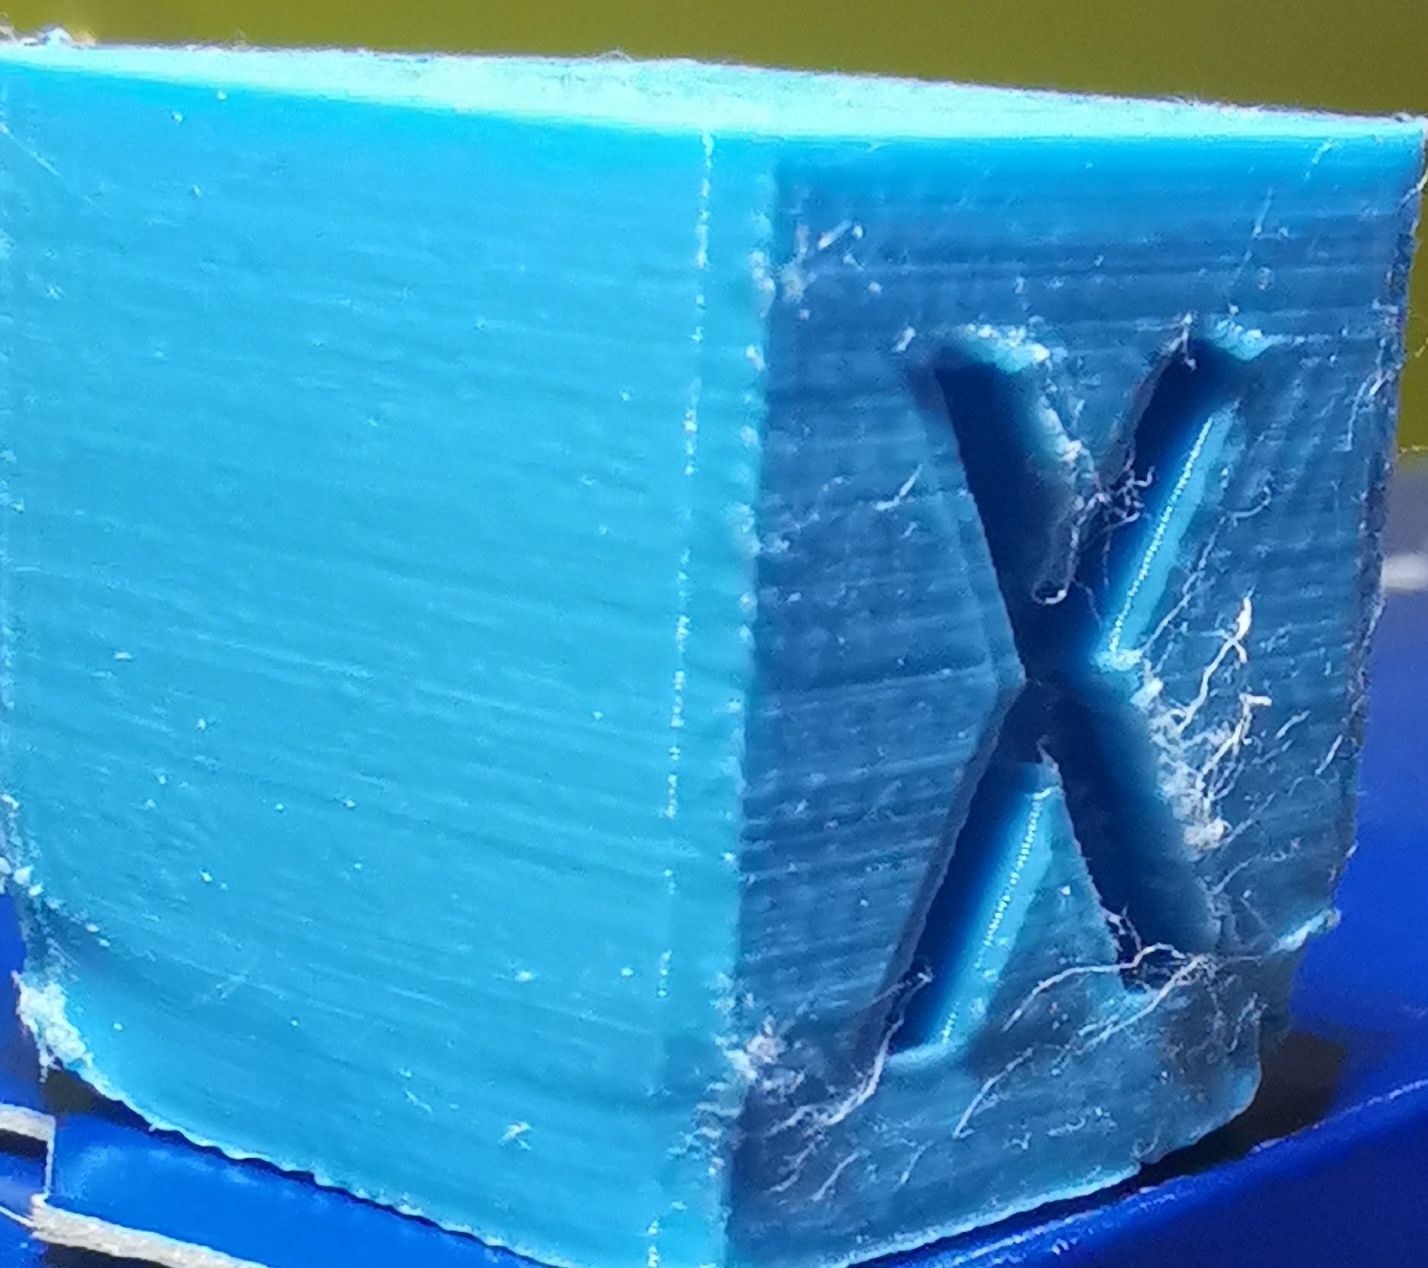
@jay_s_uk when I print my pieces where the cubes are of a really bad quality even with my cr10 which is not in good condition I have better impression. I have changed a lot of things on my blv and always a shit quality excused me word
-
@sgk well make the change i suggested here and then print another cube and see how that comes out
https://forum.duet3d.com/topic/26387/please-help-me-blv-setting/11 -
 undefined jay_s_uk referenced this topic
-
@jay_s_uk ok thank you sir jay
-
@sgk
-
@sgk
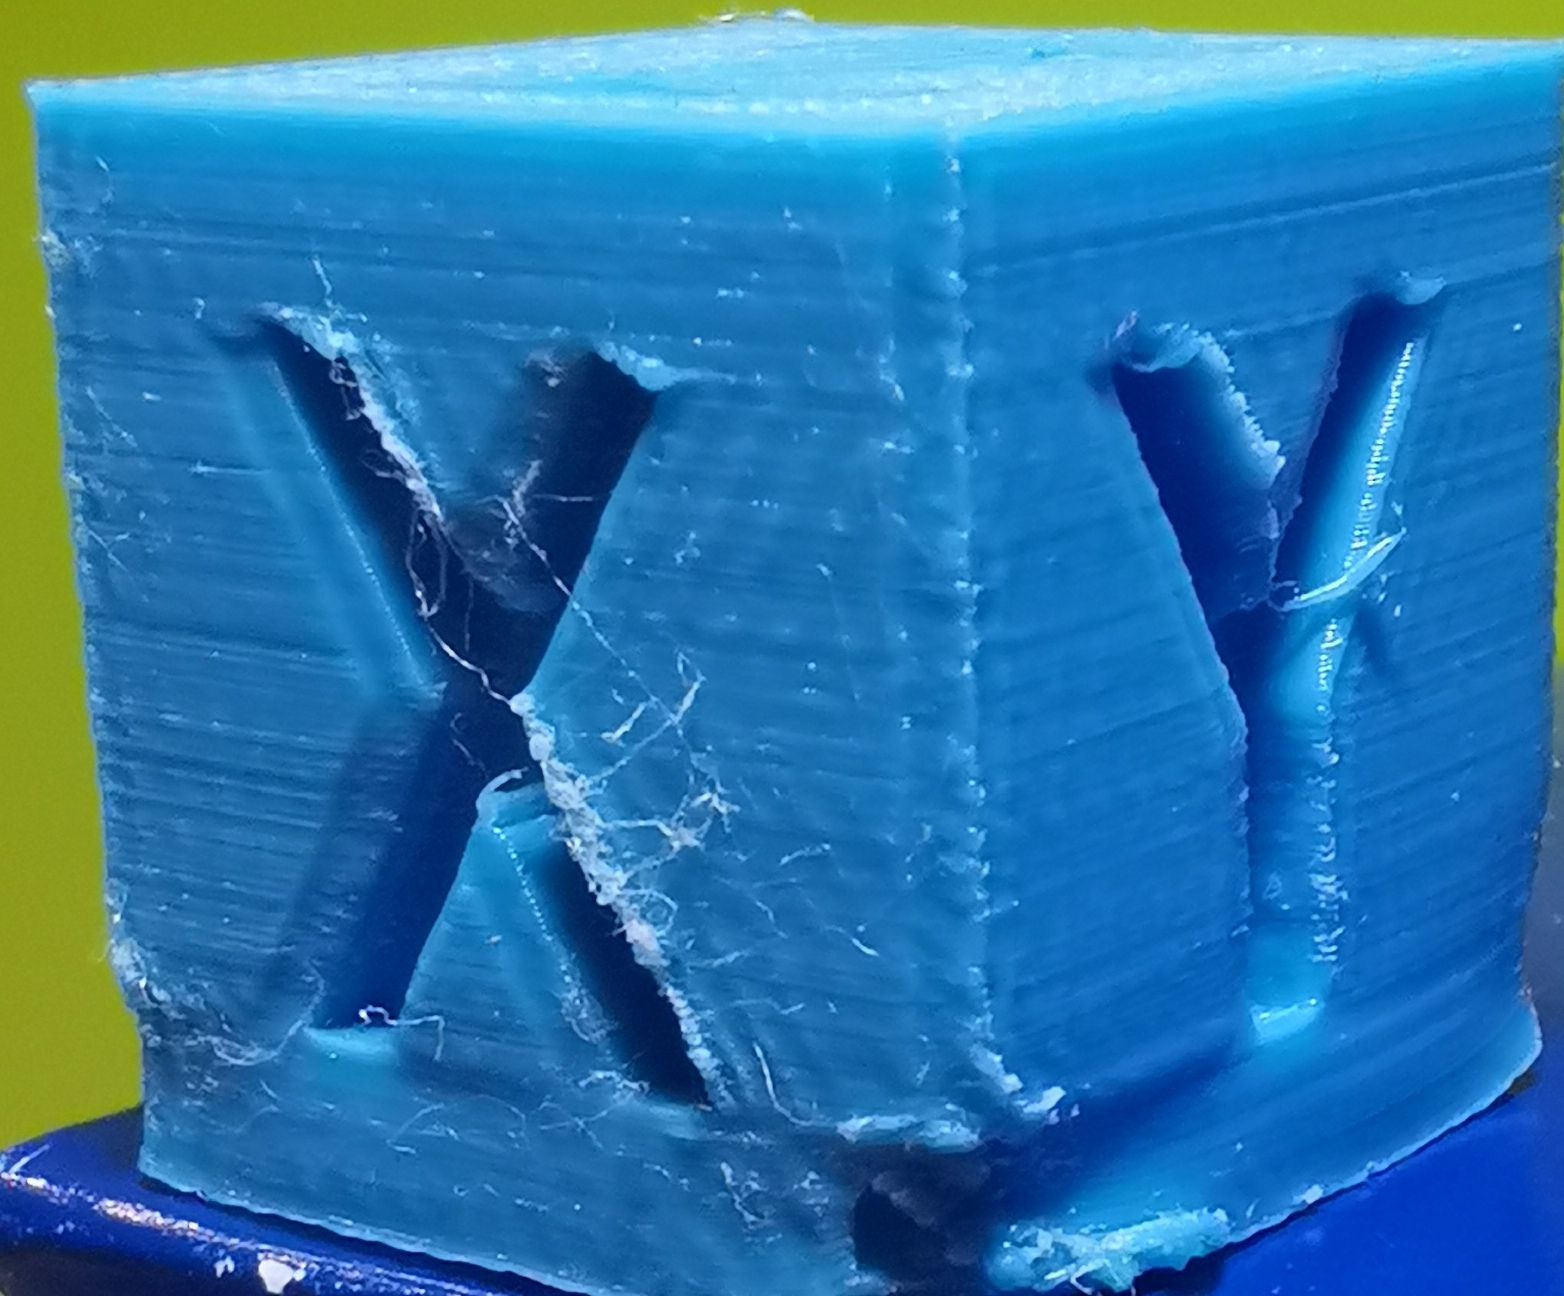
it’s the same if it’s not worse -
Looks like you need to to flow and temperature calibration. Here is a website which may help you with that https://teachingtechyt.github.io/calibration.html