Duet3D Logo Duet3D
    • Tags
    • Documentation
    • Order
    • Register
    • Login
    1. Home
    2. mrehorstdmd
    3. Posts
    • Profile
    • Following 0
    • Followers 3
    • Topics 53
    • Posts 1,451
    • Best 332
    • Controversial 2
    • Groups 0

    Posts made by mrehorstdmd

    • RE: Spirograph emulator with Duet2

      @dc42 I'm having some trouble figuring out how to randomly select a file from the /gcodes/ folder. Do I have to put the files names in that folder in an array, or is there a way to declare the contents of the /gcodes/ folder as an array? I currently have about 200 gcode files stored in the /gcodes/ folder, and I add more files to it as I generate them.

      I typically run a macro at the end of the config.g file, like this:

      M98 P"/macros/macro01"
      

      And that macro file looks like this (though much longer):

      ; file name: macro01
      M98 P"/gcodes/wipe_03.gcode"
      M98 P"/gcodes/file_04.gcode"
      G04 S60
      M98 P"/gcodes/wipe_01.gcode"
      M98 P"/gcodes/file_02.gcode"
      G04 S60
      M98 P"/gcodes/wipe_02.gcode"
      M98 P"/gcodes/file_06.gcode"
      .
      .
      .
      

      Should macro01 file look like this:

      ; file name: macro01
      var myfile = {"file_01", "file_02", "file_03", "file_04", "file_05", "file_06"}
      M98 P"/gcodes/^myfile[random 6]^.gcode"
      G04 S60
      M98 P"/gcodes/^myfile[random 6]^.gcode"
      .
      .
      .


      It seems like I'll quickly run out of line length if I try to put all 200 file names in the variable declaration.

      Another idea- rename all the files in the gcodes folder with simple numeric names:
      1.gcode, 2.gcode.... 212.gcode

      Then in the macro file, select a random pattern file like this:

      M98 P"/gcodes/^{random(212)}^.gcode"
      

      Sorry if this stuff is too basic. I've been away from programming for a looooong time.

      posted in CNC
      mrehorstdmdundefined
      mrehorstdmd
    • RE: Spirograph emulator with Duet2

      @dc42 Thanks! I will try it out and see if I can get it working.

      posted in CNC
      mrehorstdmdundefined
      mrehorstdmd
    • RE: Spirograph emulator with Duet2

      @dc42 Will it work with the Duet2 Wifi board? I typically set up the controller to run a macro containing a sequence of patterns to run at power up. That way I don't need to have a UI or even to connect to the machine.

      I am not familiar with the way tick counter works. If I use the random function to select files to run instead of a macro that contains a specific sequence, will it give me the same sequence each time I power up the board, or is there some variability in the power up timing that will result in a different seed when I use the random function after each power up? Thanks!

      posted in CNC
      mrehorstdmdundefined
      mrehorstdmd
    • RE: Spirograph emulator with Duet2

      @o_lampe I don't know that you gain much drawing area using a delta mechanism. I don't think you can draw any further than the towers, so you'll still have a wide, undrawn perimeter like what you get with a corexy or other rectangular mechanism. A lot of people make SCARA mechanism sand tables. With those the magnet is on the end of an arm that can reach very close to the edges of the table. The mechanism is located at the center of the table, so there's plenty of room for people's legs/feet if they are sitting around the table.

      See: https://robdobson.com/2018/08/a-new-sandbot/

      posted in CNC
      mrehorstdmdundefined
      mrehorstdmd
    • RE: Spirograph emulator with Duet2

      @dc42 The controller has no RTC, so what seeds the random function? If I set up a macro to randomly select and run gcode files from a list, will it give me a different file/sequence each time the controller is powered up, or will it give me the same pseudo random sequence of files each time? Thanks!

      posted in CNC
      mrehorstdmdundefined
      mrehorstdmd
    • RE: Spirograph emulator with Duet2

      @o_lampe AFAIK, the Duet firmware doesn't have any provision for random number generation. I use macros, painstakingly composed, to play sequences of patterns. I'm thinking of writing a spreadsheet or maybe Perl script to create macro files by randomly selecting from a list of pattern files and a list of erase files.

      Infinity tables only work when you can see the mirror at the bottom of the table. In a sand table, it's going to be covered by the sand, unless you limit the sand drawings to an area at the center of the table.

      posted in CNC
      mrehorstdmdundefined
      mrehorstdmd
    • RE: Ringing in Y axis (Linear guide system, coreXY design)

      @JayT Have you tried tweaking the motor currents?

      posted in General Discussion
      mrehorstdmdundefined
      mrehorstdmd
    • RE: Spirograph emulator with Duet2

      @o_lampe Maybe you can build in a magnetic comb that sits between the glass sheets and move it with magnets from the top side when needed, and leave it along an unlit edge when it isn't needed.

      posted in CNC
      mrehorstdmdundefined
      mrehorstdmd
    • RE: Spirograph emulator with Duet2

      @o_lampe RGB light strips can do color combinations like that without going to the trouble and extra expense of using addressable LEDs. I use something similar to this. It has two outputs for RGB LED strips wired in parallel - i.e. same color.
      The 4 wire connections to the LEDs are R,G,B, and common. If you swap any two of the RGB wires on one of the connectors, you'll always have two different colors on the LED strips, unless you select white on the remote control- then all the LEDs in both strips light up and you get sort of white light. If you want the light show you can put the controller into a switching or fading mode and it will shift the colors of the LED strips.

      One of the things that happens on the table is the sand gets pushed toward the edges as the table runs and you periodically have to push it back toward the center of the table. That's going to be very difficult if the two pieces of glass are glued together and only a few mm apart. Also, as the ball rolls over an area multiple times, the surface it's rolling on becomes visible. In your case, it's glass so it will become transparent and you'll see through the bottom of the table.

      posted in CNC
      mrehorstdmdundefined
      mrehorstdmd
    • RE: Spirograph emulator with Duet2

      @o_lampe Are you planning to put the sand and ball between the two glass sheets? That's going to be a problem for spreading the sand. Also with narrow spacing, you can expect some of the sand to stick to the top glass from static charges. You really want to be able to clean the top glass, by lifting it up or removing it completely. Also, if you put LED strips in a narrow space at the level of the ball/sand, the sand will end up blocking the light. I think you really want to have 50 mm or so between the two sheets of glass, and the LED strips should sit about 10-20 mm above the level of the bottom glass.

      A steel ball rolling on glass is surprisingly noisy. I used a fake leather white vinyl cloth to cover the bottom of the table to reduce the noise, and to always leave the bottom of the grooves drawn in the sand white. I also use an air gap between the magnet and the bottom glass to prevent noise from the magnet dragging on the glass.

      I use RGB LED strips that allow color changes, and typically operate with two different colors because I like the contrast, but white all around also looks pretty good and long as the illumination angle is low so the ridges in the sand cast shadows. A lot of people use addressable LEDs and create all sorts of light shows, but I find I want to watch the ball drawing in the sand and flashing lights quickly become hard to look at.

      Humidity isn't usually a problem with baking soda. I find that if I don't run the table for a couple weeks, small lumps will start to form, but they crumble to dust the instant the ball runs again.

      I'm probably going to end up building a new coffee table because I don't think my brother is going to give me the old one back. I will buy a glass top table at a thrift store, and then either modify the table or throw the table away and use the top for the top glass on the sand table. I'm going to try using dibond material for the bottom of the table- it's a lot lighter and cheaper than glass (custom sized glass), it's rigid, and I can cut it to the size I need. I'm not sure if it will create drag because of eddy currents generated in the aluminum by the moving magnet- it shouldn't matter at low speeds, but high speeds?

      posted in CNC
      mrehorstdmdundefined
      mrehorstdmd
    • RE: Spirograph emulator with Duet2

      @o_lampe I would build the machine and alter the sandify patterns using a post processor, to press the spinning abrasive down and lift it up again at specified or calculated distances as it follows the pattern. But, it might also be create an interesting finish to drag it around while it is spinning against the metal.

      There are abrasive "sticks" made for engine turning operations that wear away as they are used. They provide a consistent scratch size by controlling the diameter of the diamonds or other abrasive stones embedded in the stick. See: https://www.cratex.com/engine-turning-sticks

      Are you going to use servomotors or steppers?

      posted in CNC
      mrehorstdmdundefined
      mrehorstdmd
    • RE: Spirograph emulator with Duet2

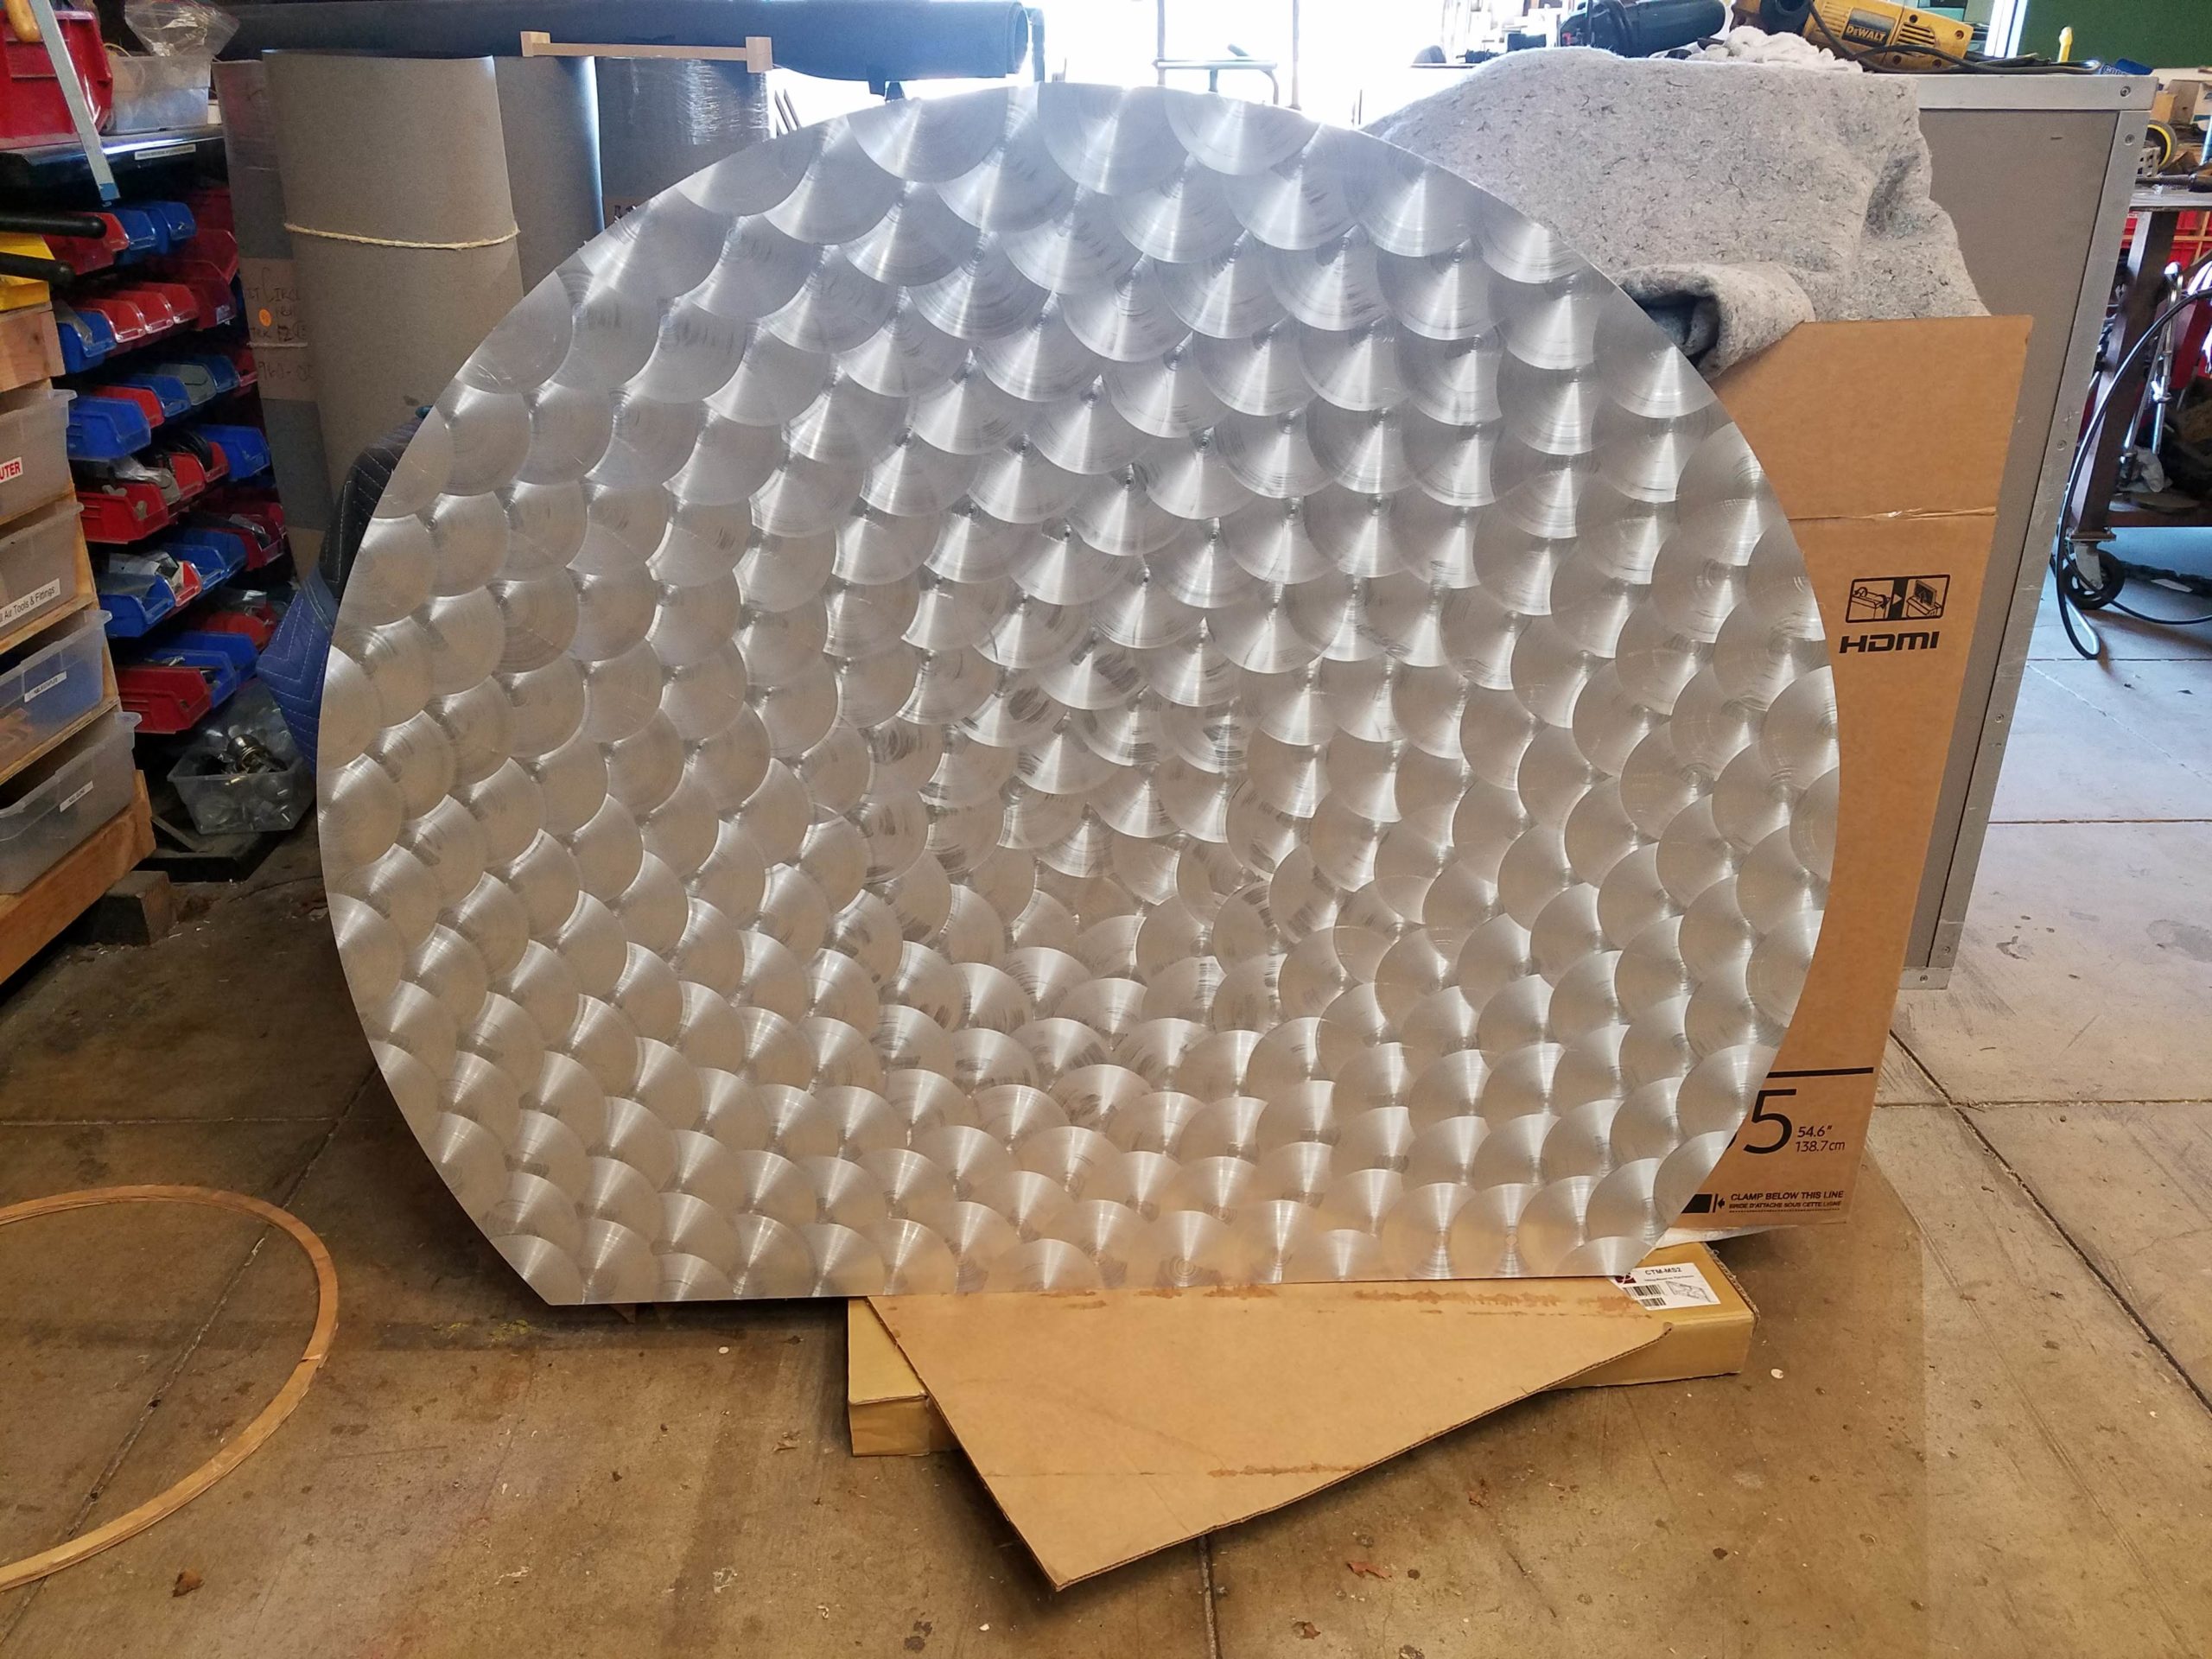
      @o_lampe I've been thinking about building a machine that uses the sandify generated patterns to move a spinning abrasive head to do fancy engine-turning on metals.

      alt text

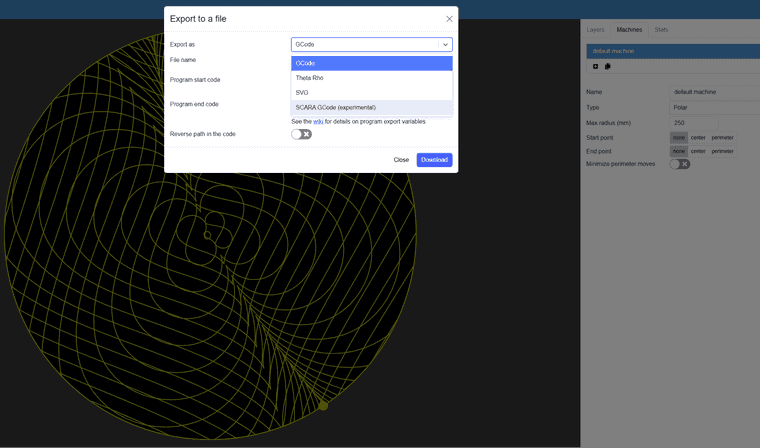
      You can export the sandify patterns in different formats:

      d5e79a46-4999-46c9-b6dc-00c51436e5df-image.png

      posted in CNC
      mrehorstdmdundefined
      mrehorstdmd
    • RE: Spirograph emulator with Duet2

      @o_lampe What are you actually trying to do? Are you planning to mill groves into wood or plastic?

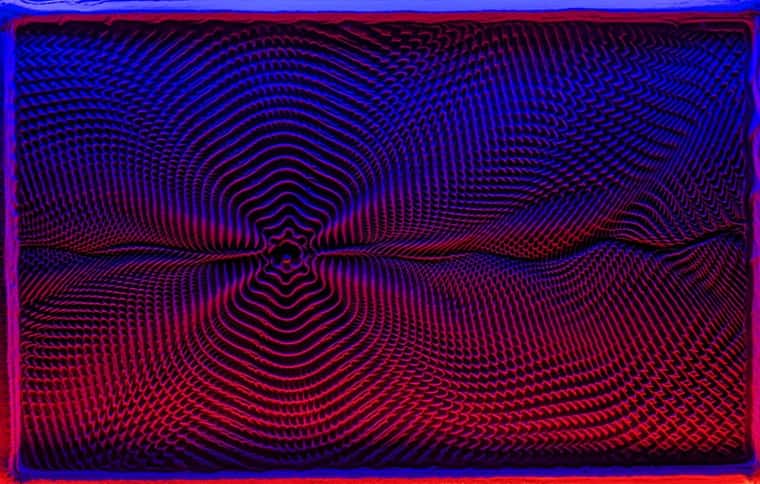
      Sandify gives a preview of what the pattern will look like, but not the way the sand piles up- just the path the ball follows:

      73b28bb6-e3d0-47ac-92f6-eb9f4e38fd56-image.png

      That might give a better idea of what a groove carved into wood or plastic would look like. The pattern starts at the green dot and ends at the red dot. You can sort of control the placement of the start and finish points with the Sandify UI, but can also edit the gcode to move them as needed, within certain limitations.

      posted in CNC
      mrehorstdmdundefined
      mrehorstdmd
    • RE: Spirograph emulator with Duet2

      @o_lampe I built a corexy sand table that draws patterns in baking soda "sand". Patterns are generated with Sandify. Sandify produces g-code files. My table uses a Duet2 WiFi board with an expansion board to drive two Chinese servomotors (but steppers work fine if going slow is acceptable). The servos can move the ball up to 2000 mm/sec the way I built it, but could go even faster with small changes. Many patterns have a lot of motion along the edges of the drawing space, so I use a Perl post processor that makes the Sandify pattern files run at two speeds, a relatively low speed for the actual drawing, and a high speed for the edge motion.

      Arrakis video

      Sandify can also generate patterns for round tables that use rho/theta coordinates.

      09.jpg

      01.jpg

      06.jpg

      posted in CNC
      mrehorstdmdundefined
      mrehorstdmd
    • RE: First time Core XY Build using Duet Hardware

      @gwatson90 I don't know if the belts expand significantly at elevated temperatures. Most belts have glass cores and glass tends to be pretty stable over temperature. I would think that since both belts will be at the same temperature there won't be any tension differential causing the X axis to tilt relative to the Y axis, bit I'm just speculating. It shouldn't be too hard to test it. You could always tension the belts at the print temperature to make sure the X axis is square. Make sure you buy belts that are specced for high temperature operation.

      The most critical thing about setting up CoreXY is to ensure that the pulleys are positioned accurately to keep the belts parallel to the linear guides. Any error in that will result in belt tension varying with extruder position in the XY plane and will lead to distorted prints, especially as the extruder gets closer to corners of the build space.

      You will also want to use quality drive pulleys that have properly sized and centered holes, and quality idler pulleys. Don't buy the cheapest crap that is marketed to 3D printer hobbyists. Gates makes quality drive pulleys that you can buy from Filastruder. I recommend stacked ball bearings for idlers. The cheap, crappy 3D printer idlers have too-tiny bearings that wear out quickly.

      Finally, don't stand pulleys up on posts. The belt tension will cause them to tilt. Make sure pulley shafts are supported solidly at the top and bottom.

      See: https://drmrehorst.blogspot.com/2023/07/corexy-x-axis-wobble-revisited.html
      and https://drmrehorst.blogspot.com/2020/12/x-axis-wobble-in-ummd.html

      posted in General Discussion
      mrehorstdmdundefined
      mrehorstdmd
    • RE: My Second build (in progress)

      @fcwilt said in My Second build (in progress):

      The flatness spec is based on an entire sheet (4'x12' or so) of tooling plate. Typical flatness over a smaller piece is usually much better. In my printer, I would guess the varying thickness of the PEI and adhesive sheet under it are likely to contribute more to the unflatness than the plate itself. I have never tried to print a 100um first layer- I'm not sure why that would be needed - but I do print with 200 um first layers once in a while without any trouble.

      The purpose of tramming/mesh compensation is to get the first layer to stick for the duration of the print, not to get a flat bottom on the print. If you move the Z axis up and down to compensate for bed unflatness or tramming error, you're not going to have a flat bottom on the print - it's going to be the shape of the bed, whatever that is. I can't imagine any application for a plastic 3D print where the flatness of its bottom, beyond what comes off the bed, would be critical to the function or appearance of the print. If flatness down to micron level is needed, a 3D printer is the wrong way to make the part in the first place.

      Auto tramming and multiple screws/motors to lift the bed are a chicken and egg sort of thing. A lot of people think they want auto tramming so they use multiple screws/motors to lift the bed. But if you use multiple screws/motors, you have to use auto tramming because the bed is going to tilt every time you cycle power to the printer. I think what people really want is a reliable printer that they don't have to mess around with, but youtube videos showing corners of beds going up and down have made them think that auto tramming is the only way to achieve that.

      If you use a single motor to lift the bed, regardless of the number of screws or belts, the bed won't tilt when you cycle power. If the bed plate is on a stable mount, it won't require tramming every time you print. You won't need bed sensors, multiple motors, drivers, and cables. And you'll never experience the joy of troubleshooting it when it fails.

      I enjoy starting prints and not waiting for the machine to tram itself. I also enjoy not having to worry about whether the print is going to stick or whether I'll be able to to print at all if auto tramming fails. There's less to go wrong with a flat bed plate on a stable mount that doesn't require tramming before every print.

      posted in My Duet controlled machine
      mrehorstdmdundefined
      mrehorstdmd
    • RE: My Second build (in progress)

      @fcwilt And if you do it right, there's no need for mesh compensation or auto tramming.

      I use a single NEMA 23 stepper with a 30:1 worm drive gearbox to lift the bed on two linear guides in my printer. It has an 8 mm thick cast tooling plate bed on a kinematic mount. There's no autotramming or mesh compensation. The last time I trammed the bed was at least 2 years ago, and it took less than a minute. It just works every time I turn it on. The bed doesn't move when power is cut, so theoretically I can resume printing after a blackout, though I've never tried.

      posted in My Duet controlled machine
      mrehorstdmdundefined
      mrehorstdmd
    • RE: My Second build (in progress)

      @Dad003 That looks like a piece of cast tooling plate. That means it is flat. 3 points define a plane, not 4, so trying to tram with 4 screws is not a great idea.

      You might want to look into a kinematic mount for that bed plate. As it heats it will expand. That means something is going to have to flex and that means it will shift out of tram. A kinematic mount has 3 bed support points and just two tramming adjustments. It allows the bed to expand without causing anything to flex so doesn't go out of tram.

      posted in My Duet controlled machine
      mrehorstdmdundefined
      mrehorstdmd
    • RE: What useful things have you printed on a 3D printer?

      Several lamps, a bread box, bicycle disc brake sanding tool, bicycle fender mount, Nespresso capsule dispenser, Pax Plus vaporizer handle, Ikea Frakta bag handles, physical therapy rubber band handles, incandescent lamp replacement for microscope illuminator, camera and cell phone mounts for telescopes, microscopes, and 3D printer, in-drawer knife block, wire twister tool, Wago lever nut mounts, several furniture feet, a Van de Graaff generator, 3D printer spool holders, coin and wallet holder for Prius console, replacement for failed Prius trunk release cover, stand for S&B Mighty vaporizer, bottle cover for Uberlube, parts for my sand table and 3D printer, parts of a 20 liter soda syrup tank agitator, replacement pushbutton caps for an old preamp, brackets for a "cat ladder", cat puzzle toy, aperiodic tile array pieces and storage box, cutting board drying rack, dental x-ray sensor wall mount, brackets for mounting curtain rods,
      racks for torx and hex screwdrivers, bicycle air horn bracket, coasters, cable hold-downs, bicycle chain guard, One Wheel electric skateboard car stand, ear-savers and bias tape making tools for COVID masks, compartmentalized refrigerator storage box, binaural mic earpieces, manual coffee grinder electric drill adapter, antique radio dial belt, Audi and BMW jack pads, white board marker and eraser holder, and many more.

      Bread box and cover:
      bread box.jpg

      Disc brake sanding tool:
      PXL_20230512_170358483.jpg

      Bicycle fender mount:
      PXL_20240407_043712260 (2).jpg

      Button caps for old preamp:
      button caps.jpg

      Lamps:
      lamps.jpg

      Another lamp:
      PXL_20240901_155401241 (3).jpg

      Coin and wallet holder for Prius console:
      09030006.jpg

      posted in General Discussion
      mrehorstdmdundefined
      mrehorstdmd
    • RE: Duet 6hc Panel Wiring Material

      @Dizzwold I used a 7mm thick PVC foam board- I don't recall the product name. It isn't very rigid so I braced it with square aluminum tubing so it wouldn't sag too much.

      posted in Duet Hardware and wiring
      mrehorstdmdundefined
      mrehorstdmd