Duet3D Logo Duet3D
    • Tags
    • Documentation
    • Order
    • Register
    • Login
    1. Home
    2. SpoonUnit
    • Profile
    • Following 0
    • Followers 0
    • Topics 8
    • Posts 66
    • Best 7
    • Controversial 0
    • Groups 0

    SpoonUnit

    @SpoonUnit

    13
    Reputation
    5
    Profile views
    66
    Posts
    0
    Followers
    0
    Following
    Joined Last Online

    SpoonUnit Unfollow Follow

    Best posts made by SpoonUnit

    • Automating Sequenced Prints and Repetitions

      With the incidence of RRF 3.3beta2, specifically the introduction of macro commands and variables, I can finally update my earlier hacky solutions for print automation. I'm not sure whether any one else will be interested really, but I can't see anything else quite like this here, so I thought I'd try to get it all down and at the very least I've documented it here for myself for later.

      What have I achieved?

      I've automated print removal and next-job start.

      How does it affect slicing?

      From a slicing perspective, it boils down to simply changing my end gcode from this:

      M98 P"/macros/end.g"
      

      to this

      M98 P"0:/macros/nextjob.gcode"
      

      How are models removed from the bed?

      In my case, I have a PEI-coated Alu bed from which prints in ABS, PLA, and PETG are all freely movable once the temperature gets down to about 38 degrees C. At this point, I use a tool to push the printed models from the bed into a waiting cardboard box below. Even without a specific tool for this, some models could easily be pushed by some part of the hotend carriage, assuming it's also cooled sufficiently.

      OK. So let's get into the nitty gritty.

      First, this solution supports sequences of jobs named seq1.gcode, seq2.gcode, .... seqN.gcode, or the repetition of any job named *.gcode.

      The first change is in config.g, where I define some global variables:

      ; define variables
      global repeatingJob = false
      global sequenceJob = false
      global currentSeq = 1
      global seqLimit = 1
      global remainingRepCount = 0
      global repeatingJobName = "repeat"
      

      I then have two macros for initiating a sequence job or a repeating job.

      StartSequenceJob.g

      set global.sequenceJob = true
      set global.repeatingJob = false
      set global.currentSeq = param.A
      set global.seqLimit = param.B
      M32 {"0:/gcodes/seq" ^ global.currentSeq ^ ".gcode"}
      

      StartRepeatingJob.g

      set global.sequenceJob = false
      set global.repeatingJob = true
      set global.remainingRepCount = param.A - 1
      set global.repeatingJobName = param.B
      M32 {"0:/gcodes/" ^ global.repeatingJobName ^ ".gcode"}
      

      As previously mentioned, the last line of every job uses the following end g-code:

      M98 P"0:/macros/nextjob.g"
      

      So here's nextjob.g

      if global.repeatingJob || global.sequenceJob
        G91					; relative coords
        G1 Z2 F1000			; Move Z+2
        G90					; absolute coords
        T2					; switch to seep tool 2, position 3
      
        ; check sweep height
      
        G0 Z5 F1000			; Move to sweep height
      
        ; un-comment printing tools for job
      
        ;G10 P0 S120 R120	; Set tool 0 to active and standby temp of 120
        ;G10 P1 S120 R120	; Set tool 1 to active and standby temp of 120
        ;G10 P2 S120 R120	; Set tool 2 to active and standby temp of 120
        G10 P3 S120 R120	; Set tool 3 to active and standby temp of 120
      
        ; comment following 4 lines during testing
      
        M140 S25			; Set bed temp to 25
        M191 P0 R41		; Await bed temp to cool and report 41
        M141 P0 S0		; Set bed temp to 0 (in case no more jobs)
        G4 S300			; Pause 300 seconds (5 minutes) to allow to cool to 38 or lower
      
        G1 Y-35 F2000		; Move current tool to front, sweeping objects
        T-1				; drop off tool
      
      M98 P"/macros/CallTrigger4.g" ; CallRepeatingTrigger
      

      The last line is the solution of how to kick off the next job from a job. I create and call a trigger.

      CallTrigger4.g

      ; Set up trigger4.g automation
      M950 J2 C"duex.e3stop"	; Define Input J2 for pin duex.e3stop
      M581 P2 S1 T4 R0		; Connect Input J2 (P1) to trigger 4 (T4) always (R0) for inactive to active (S1 - also default)
      ; Execute trigger4.g
      M582 T4
      

      And finally we have trigger4.g

      ; This is triggered using M98 P"/macros/CallTrigger4.g" as the last line of the macro nextjob.gcode
      
      ; Switch off trigger4.g
      M581 P-1 T4 ; remove trigger
      ; Pause here to allow the previous job to complete and be flushed.
      M400
      G4 S5
      
      ; RRF 3.3b2 implementation
      ; Can now use globals and macro params
      
      ; Three possible repeat scenarios; sequenced jobs, repetitions, standard jobs
      if global.repeatingJob
      	if global.remainingRepCount > 0
      		set global.remainingRepCount = global.remainingRepCount - 1
      		M32 "0:/gcodes/repeat.gcode"
      	else
      		M98 P"/macros/end.g"
      elif global.sequenceJob
      	if global.currentSeq < global.seqLimit
      		set global.currentSeq = global.currentSeq + 1
      		M32 {"0:/gcodes/seq" ^ global.currentSeq ^ ".gcode"}
      	else
      		M98 P"/macros/end.g"
      else
      	M98 P"/macros/end.g"
      

      Finally, at the end of my end.gcode file, I have this:

      ; reset globals
      set global.repeatingJob = false
      set global.sequenceJob = false
      

      And that's it for the setup. With this all in place, creating a sequence of prints requires the following console command:

      M98 P"0:/macros/StartSequenceJob.g" A1 B13
      

      This will print seq1 to seq13. Should you wish to increase the job list, simply upload more jobs and execute the following at the command line:

      set global.seqLimit=14
      

      You can easily reduce the count the same ways. To cancel all jobs after the current one, you could also do this:

      set global.sequenceJob=true
      

      To setup a repeating job, use this console command:

      M98 P"0:/macros/Repeat Iterations/StartRepeatingJob.g" A4 B"cone"
      

      This will result in cone.gcode being printed 4 times.

      If a job (e.g. cone.gcode) is in progress, and you want repeat that job a further 3 times, you can set the globals appropriately:

      set global.repeatingJob=true
      set global.repeatingJobName = "cone"
      set global.remainingRepCount = 3
      

      Before RRF3.3beta2 I had to use a dummy heater to store my variable values and could only use numbers. I could have probably gone further and used dummy tool names to store strings, but it was all very hacky. Having variables and globals makes this whole solution feel a lot more solid and dependable, and a little bit less complex to explain.

      Hopefully there's something here someone can use.
      posted in Gcode meta commands
      SpoonUnitundefined
      SpoonUnit
    • RE: Aligning nozzles using baby stepping and global variables

      I was able to achieve the results I wanted after @Phaedrux pointed me in the direction of M290.

      So here's how I use baby stepping now to achieve alignment-by-eyeball.

      Firstly I have some new global variables set up in config.g:

      global T2XBase = 20.05
      global T2YBase = 45.04
      global T2ZBase = -5.625
      global T2XNudge = 0.675
      global T2YNudge = 0.35
      global T2ZNudge = 0.5
      
      global T3XBase = 20.05
      global T3YBase = 45.04
      global T3ZBase = -5.625
      global T3XNudge = 0
      global T3YNudge = 0
      global T3ZNudge = 0
      

      My nozzle offsets are then setup next in config.g:

      G10 P0 X-9 Y40 Z-4.79							; T0 - V6
      G10 P1 X-8.60 Y39.80 Z-4.845					; T1 - V6
      G10 P2 X{global.T2XBase} Y{global.T2YBase} Z{global.T2ZBase}	; T2 - Hemera
      G10 P3 X{global.T3XBase} Y{global.T3YBase} Z{global.T3ZBase}	; T3 - Hemera
      

      Initially, all Nudge values are set to zero. I'm using T3 as my reference, so they stay at zero and other tools need a nudge to align.

      Next part is a macro per Tool to create nudging capability. In the macro folder I have a Nudge folder with subfolder T2 and T3 (the ones I'm currently working on). In both T2 and T3 is a nudge.g macro that looks like this, e.g. for T2/nudge.g:

      set global.T2XNudge=global.T2XNudge + param.X
      set global.T2YNudge=global.T2YNudge + param.Y
      set global.T2ZNudge=global.T2ZNudge + param.Z
      
      M290 R0 X{global.T2XNudge} Y{global.T2YNudge} Z{global.T2ZNudge}
      echo "Tool 2"
      M290
      

      I then have a set of macros set up under the T2 and T3 folders to result in X, Y, and Z nudges of + and - 0.1. e,g T2/X/+0.1:

      M98 P"0:/macros/Nudging/T2/nudge.g" X0.1 Y0 Z0
      

      The amount of nudging required for a given tool becomes part of the tNpost.g file, e.g. t2post.g last line:

      M98 P"0:/macros/Nudging/T2/nudge.g" X0 Y0 Z0
      

      This simply reinstates global nudging for tool after it's properly mounted and out of the dock. Given these nudges could potentially be large, it's important to reset global nudging back to zero when re-docking. So in tNfree.g we have this:

      ;Reset Babystepping on X and Y
      M290 R0 X0 Y0
      

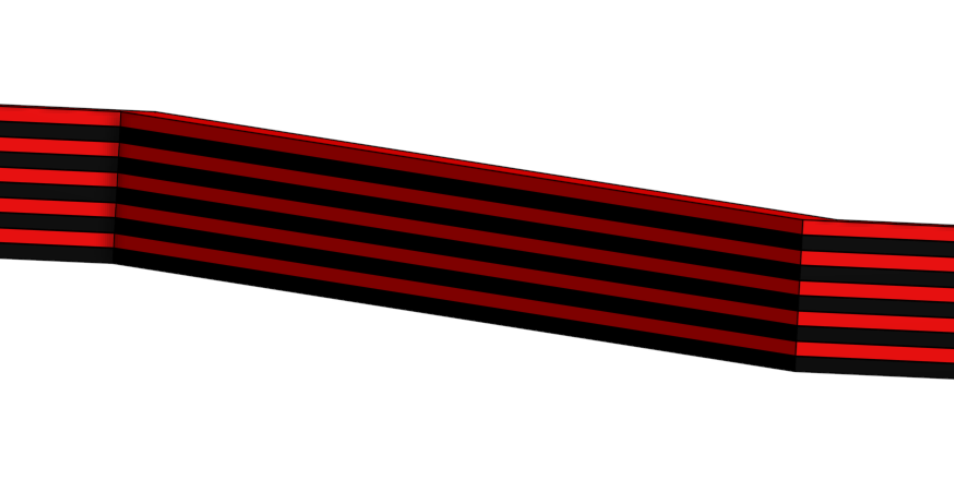
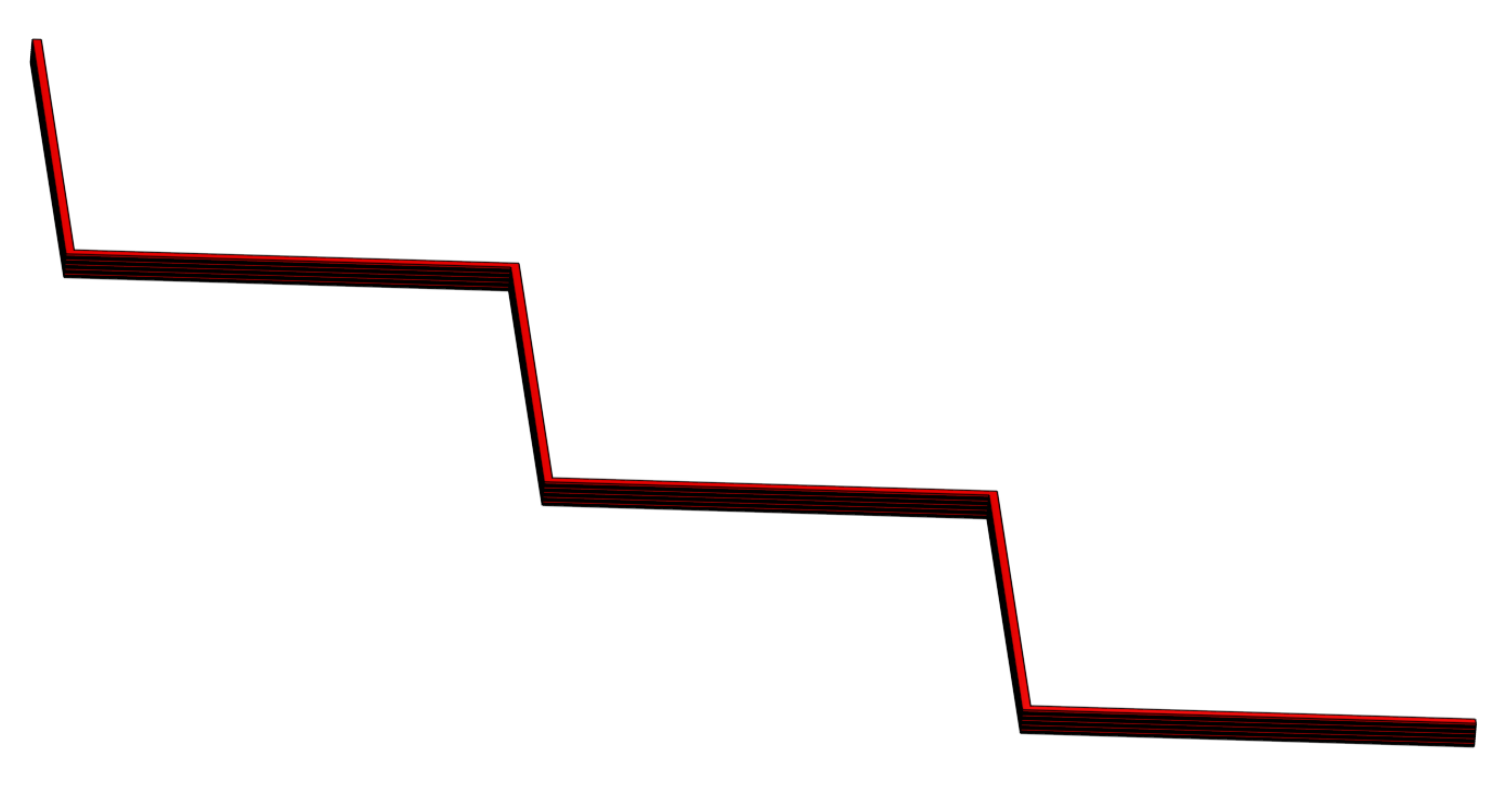
      That's the setup complete. Then to use this, I created a print that would help to identify nudging needs. This is a simple zigzag, though I could probably get away with just one line in each direction.

      52e0f618-ae34-4aeb-ada8-9d22767730f8-image.png

      65ecc13e-7c20-4414-9f59-578f01d0dd19-image.png

      So we're just printing alternate layers with different tools and making the print two nozzle widths thick. After a few layers, or maybe even straight away, once you notice a discrepancy between result and expectation, you can run the nudge macro on T2 to add or subtract 0.1 to X or Y, or simply get the whole macro ready in the console to apply large immediate changes:

      M98 P"0:/macros/Nudging/T2/nudge.g" X1.2 Y0.1 Z0
      

      Each execution of the macro spits out the current setup for the nudging for this nozzle to the console, and this is also seen in the console for each tool change. Once you have the nozzles aligned, you can copy this output back to config.g and apply the changes to the variables.

      I find this works quite well as you can iterate the changes during the print instead of having to complete the print and then makes changes to config.g and restart the whole process again. I was able to get accurate eyeball alignment in just two prints.

      Once things looked very close I then used calipers to measure the thickness of the X and Y stacks. If the alignment is good, this should be as per the model design. If not, then an adjustment to X or Y needs to be made of half the difference between the measured result and the design dimension. e.g if you measure the thickness of the line running in the X direction to be 1.1 instead of 1, this is the result of inaccurate alignment in the Y direction. The offset is resulting in overhang on both sides of the column, so a nudge of either 0.05 or -0.05 is needed to the Y nudge value for the nozzle which is out. It should be fairly clear to the naked eye which was it is, depending if the colour of the filament for nozzle in error is hanging out toward the front or back of the column.

      Overall this sounds pretty complex now I've written it all down, but in practice, it seems very easy to wield, and a bit more intuitive and rapid than printing entire vernier-gauge prints and then making changes and hoping for the best next time round when you're not 100% certain if your offsets should be + or - to the default nozzle offsets in G10.

      Hope this helps someone out there.

      posted in Gcode meta commands
      SpoonUnitundefined
      SpoonUnit
    • RE: Prints are warping

      @tratoon Personally, I print PLA at 220 for layer 1 and 210 for subsequent layers on a bed of 85 for first layer and 65 for subsequent layers. How confident are you that your bed is reaching temperature? The reason I ask is that, for my bed, the temperature reports as 85 much sooner than the surface of the bed actually reaches that temperature. Adding a significant pause to allow the heat to soak in can help, or, as I do, you can hook up a thermistor to the bed and configure this as a chamber in the Duet and await it to actually reach the target temperature.

      The fact the filament stops coming out suggests that you are encountering a jam. There are many possible reasons, but one is that the hot end isn't reaching the temperature you set. Another potential reason is over-agressive retraction settings.

      posted in Tuning and tweaking
      SpoonUnitundefined
      SpoonUnit
    • RE: M191 not waiting as expected

      @spoonunit For anyone else having a similar requirement, this can be inserted into GCODE

      M98 P"0:/macros/waitForChamberTemp" A36
      

      Where param A with a value of 36 is the temperature you wish to wait for.

      Now create this macro:

      waitForChamberTemp

      echo "starting"
      while true
      	if heat.heaters[6].current < param.A
                      G4 S30 ; wait 30 seconds until next reading
      		break
      echo "bed temp reached"
      

      Note: Check the object model for your version so ensure the exact coordinates of the heater you're interested in as they have been known to move around. The above example works with RRF 3.3beta2.

      posted in General Discussion
      SpoonUnitundefined
      SpoonUnit
    • RE: Invitation to share your conditional GCode scripts

      I'm using the following in pause.g

      ; eject
      if state.currentTool=3
      	M98 P"eject-hemera.g"
      else
      	M98 P"eject.g"
      

      and correspondingly in resume.g

      ;prime nozzle
      if state.currentTool=3
      	M98 P"prime-hemera.g"
      else
      	M98 P"prime.g"
      

      I'd really like to be able to only run G29 if that last G29 was run some length of time ago. At present, it runs every print, but could be handy to only run it if that last homing process ran over an hour ago (or some configurable time period).

      posted in Gcode meta commands
      SpoonUnitundefined
      SpoonUnit
    • RE: Duet reporting inaccurate percentage.

      @chrishamm here you go

      seq26.gcode

      posted in Duet Web Control
      SpoonUnitundefined
      SpoonUnit
    • RE: How can I calibrate the temperature of my bed

      @axiom Once you have the correct parameters for a heater, you need to measure the heating effect so that the Duet knows how quickly the heat should respond. M303 is used to perform this measurement:

      https://docs.duet3d.com/User_manual/Reference/Gcodes#m303-run-heater-tuning

      e.g. M303 H0 S70

      This will turn on heater zero (the bed heater) and the system will measure how quickly the bed reaches 70 degrees. It will spit out it's measurements along with information on how to set these configuration parameters so that they apply when the Duet is restarted.

      posted in Firmware installation
      SpoonUnitundefined
      SpoonUnit

    Latest posts made by SpoonUnit

    • RE: How can I calibrate the temperature of my bed

      @axiom Once you have the correct parameters for a heater, you need to measure the heating effect so that the Duet knows how quickly the heat should respond. M303 is used to perform this measurement:

      https://docs.duet3d.com/User_manual/Reference/Gcodes#m303-run-heater-tuning

      e.g. M303 H0 S70

      This will turn on heater zero (the bed heater) and the system will measure how quickly the bed reaches 70 degrees. It will spit out it's measurements along with information on how to set these configuration parameters so that they apply when the Duet is restarted.

      posted in Firmware installation
      SpoonUnitundefined
      SpoonUnit
    • RE: Prints are warping

      @tratoon Personally, I print PLA at 220 for layer 1 and 210 for subsequent layers on a bed of 85 for first layer and 65 for subsequent layers. How confident are you that your bed is reaching temperature? The reason I ask is that, for my bed, the temperature reports as 85 much sooner than the surface of the bed actually reaches that temperature. Adding a significant pause to allow the heat to soak in can help, or, as I do, you can hook up a thermistor to the bed and configure this as a chamber in the Duet and await it to actually reach the target temperature.

      The fact the filament stops coming out suggests that you are encountering a jam. There are many possible reasons, but one is that the hot end isn't reaching the temperature you set. Another potential reason is over-agressive retraction settings.

      posted in Tuning and tweaking
      SpoonUnitundefined
      SpoonUnit
    • RE: control 4 axis cnc machine

      @heisl Is the B end stop a physical switch and do you rely on an inability to rotate beyond a specific point based on the machine design?

      posted in Using Duet Controllers
      SpoonUnitundefined
      SpoonUnit
    • RE: PID tuning Thick bed

      @spoonunit Also, your SSR is typically controlling heat to the bed, not the hot end. Or is that machine different in that respect too?

      posted in Tuning and tweaking
      SpoonUnitundefined
      SpoonUnit
    • RE: PID tuning Thick bed

      @adamfilip There's still Z motion, but it's the head instead of the bed. That said, looks like you have linear rails for the Z motion, which ought to be great. I'd still look for Z motion first to be sure. Can you visually just watch the head as you increase and decrease Z and say there's not a jot of motion?

      posted in Tuning and tweaking
      SpoonUnitundefined
      SpoonUnit
    • RE: PID tuning Thick bed

      @adamfilip I'd bet on the banding being due to Z motion, given that it looks pretty periodical in Z. Bent lead screw perhaps and otherwise unconstrained build plate?

      posted in Tuning and tweaking
      SpoonUnitundefined
      SpoonUnit
    • RE: Prints are warping

      Some thoughts...

      Would be interesting to see a print of only the first layer. If the nozzle height isn't right, and the first layer isn't spot on, that can lead to warping.

      I can't see at a glance from the thread whether you ever put the filament you're using in. The level of warpage makes me think it's ABS. Having the right bed heat and the right nozzle temp are crucial whatever the filament, but ABS I find to be quite picky on PEI. Also, the temp the bed reports is not always the actual bed surface temp. Personally I print ABS at 250C on a bed temp of 125 for the first layer and it prints pretty well as long as the geometry isn't fighting a good print.

      Sharp corners can lead to warping. While you're tuning, trying working with a cube with rounded edges instead of square edges. If you absolutely, positively, MUST print square corners, make your first layer super slow to try to avoid lifting.

      posted in Tuning and tweaking
      SpoonUnitundefined
      SpoonUnit
    • RE: M191 not waiting as expected

      @spoonunit For anyone else having a similar requirement, this can be inserted into GCODE

      M98 P"0:/macros/waitForChamberTemp" A36
      

      Where param A with a value of 36 is the temperature you wish to wait for.

      Now create this macro:

      waitForChamberTemp

      echo "starting"
      while true
      	if heat.heaters[6].current < param.A
                      G4 S30 ; wait 30 seconds until next reading
      		break
      echo "bed temp reached"
      

      Note: Check the object model for your version so ensure the exact coordinates of the heater you're interested in as they have been known to move around. The above example works with RRF 3.3beta2.

      posted in General Discussion
      SpoonUnitundefined
      SpoonUnit
    • RE: M191 not waiting as expected

      @dc42 Macro !. Brilliant. Thanks. I'd started looking at the code and was thinking of recompiling, but this will be much quicker. Cheers.

      posted in General Discussion
      SpoonUnitundefined
      SpoonUnit
    • RE: M191 not waiting as expected

      @dc42 is there any chance to permit configuration of this bottom limit of 41 described above? While it might be a sensible default, individual users may decide it doesn't work for them.

      My blind wait of 5 mins today was not good enough due to the UK heat wave. As such, after 5 mins, the chamber temp had not got to 36 and my PETG item had not released from the bed. There was an almighty PING when the sweep finally applied enough pressure to release the item and it shot across the room. A blind wait of 10 mins might work, or maybe 15, but the neater answer would be able to simply put M191 P0 R36. Sadly all values of R below 41 result in the command returning instantly with no error.

      posted in General Discussion
      SpoonUnitundefined
      SpoonUnit