PEI surface without adhesive?
-
@bearer It will be at least a couple of weeks before I order all the materials, if not months. But if I have experiences to share, I will add them here

-
@bearer said in PEI surface without adhesive?:
There are magnetic sheets that will work up to 120C if I recall correctly.
Very interesting link. Thanks. I plan to upgrade my bed to 5/16" mic-6 and may use this magnetic sheet.
-
@nxt-1 I've tried exactly the same for my Wasp 60100 delta (60 cm buildplate). Got a 60 cm 1 mm thick sheet of PEI without adhesive and initially taped it down with kapton on the fringe. However, the PEI does warp when heated (even at 60C, more so at 100C) and not only pulled off the tape on the fringe but also bulged in the centre area. I then added spokes of double-sided kapton tape which mostly prevented the bulging in the centre:
 But, even then, it still lifted off the kapton tape at the fringe by several mm after a couple of hours, which would ruin the very large prints I want to do. There might be better/smarter solutions using other types of tape (better adhesive) or other ways of placing the tape but at this point the work to tape it down sufficiently somehow is way too much work. I'm wondering if I should have gone with a much thinner sheet thickness b/c the warping is probably less (?) but I don't know how thin is still practical and I'm not about to spend another $150 to find out. No sure what I'll do with the 1 mm sheet I have but I either have to perma glue it to the bed or find a springsteel/magnetic solution for it ...
 -
I think it would work fine if the tape wrapped under whatever the PEI is sitting on. Just holding down flat like that requires very little force to peel it up.
-
@charding said in PEI surface without adhesive?:
@nxt-1 I've tried exactly the same for my Wasp 60100 delta (60 cm buildplate). Got a 60 cm 1 mm thick sheet of PEI without adhesive and initially taped it down with kapton on the fringe. However, the PEI does warp when heated (even at 60C, more so at 100C) and not only pulled off the tape on the fringe but also bulged in the centre area. I then added spokes of double-sided kapton tape which mostly prevented the bulging in the centre:
 But, even then, it still lifted off the kapton tape at the fringe by several mm after a couple of hours, which would ruin the very large prints I want to do. There might be better/smarter solutions using other types of tape (better adhesive) or other ways of placing the tape but at this point the work to tape it down sufficiently somehow is way too much work. I'm wondering if I should have gone with a much thinner sheet thickness b/c the warping is probably less (?) but I don't know how thin is still practical and I'm not about to spend another $150 to find out. No sure what I'll do with the 1 mm sheet I have but I either have to perma glue it to the bed or find a springsteel/magnetic solution for it ...
Well that is exactly what I did not want to hear haha. Thanks for your experience.
I assume 'loose' PEI is off the table now sadly. The only alternative I can think off right now is to glue the PEI to a thin-ish flat aluminium tooling plate and consider that the removable part. The bed stack would become (optional) insulation -> aluminium tooling plate heat spreader -> aluminium tooling plate -> 3M -> PEI. I would hope to locate the alu/PEI combo in XY direction with locating pins/holes on the base heat spreader and unconstrained for the Z.
-
Before I planned to use a 6mm thick plate as heat spreader. I wonder what thicknesses I should plan now. Maybe something like 4-5mm for the base heat spreader and 2-3mm for the part the PEI will be attached to.
I also wonder whether the base heat spreader still needs to be tooling plate and regular flat-ish aluminium will suffice. Any thoughts? -
@nxt-1 said in PEI surface without adhesive?:
flat-ish
Since you want to transfer heat evenly between the two plates I would think you'd want it more than just flat-ish.
-
I think you would want the base that the heater is attached to to be tooling plate for the flatness and thermal conductivity, and then use a simple piece of aluminum sheet which will conform to whatever it sits on for the other piece. If you do it the other way, the base won't be flat and thermal performance will suffer.
-
@mrehorstdmd said in PEI surface without adhesive?:
I think you would want the base that the heater is attached to to be tooling plate for the flatness and thermal conductivity, and then use a simple piece of aluminum sheet which will conform to whatever it sits on for the other piece. If you do it the other way, the base won't be flat and thermal performance will suffer.
This might be the way I will have to do it as finding tooling plate available to Belgium, EU as a consumer seems to be no easy feat. Best I could find was https://www.aluminiumwarehouse.co.uk/ and the thinnest they cary is 5mm. Doing two sheets of 5mm would be to much thermal mass I believe as well as rather expensive.
-
you can do it with a vacuum bed.
That´s the way I´m doing it.
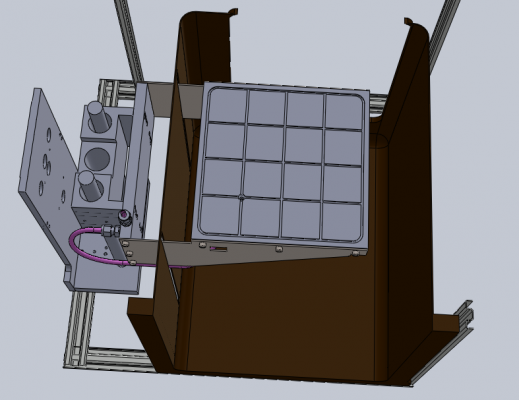
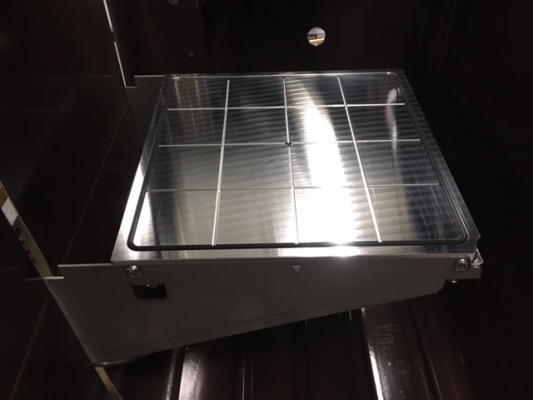
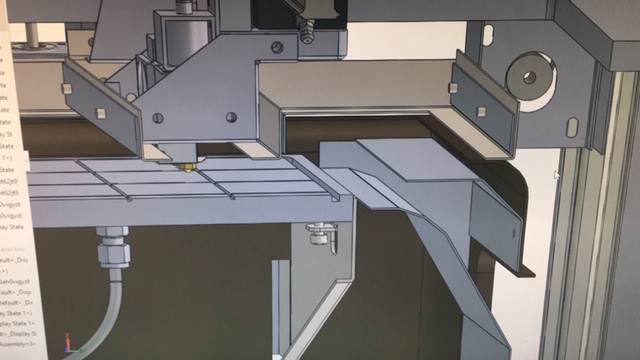
Works perfectly with all kinds of sheets. Here is me printing ABS on a PEI sheet
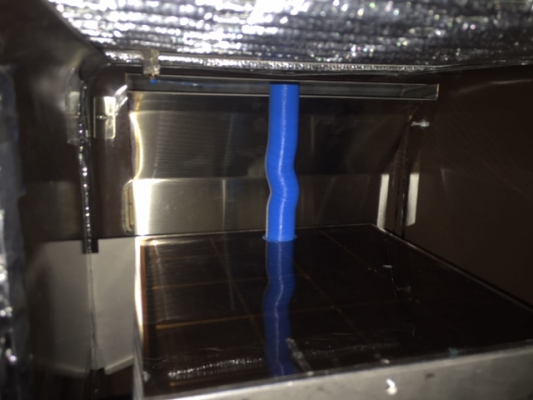
Here is PPSU being printed on a PEI sheet
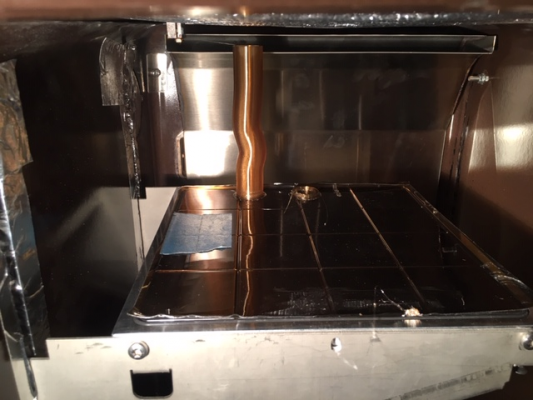
You just have to remember that you shouldn´t go above 190°C on the bed/chamber temp with the PEI sheet, otherwise this will happen
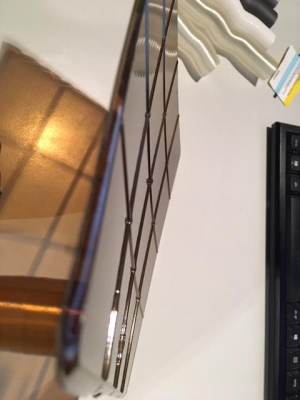
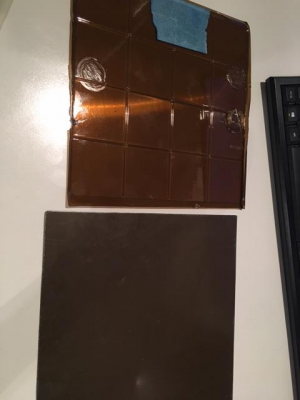
You will basically thermoform the PEI onto the build plate and it will flow into the channels.
For this reason most of the time i use borosilicate glass plates for printing high temperature stuff.
I can´t use magnets because at those high temperatures they would demagnetize.Cheers
Max -
@nitrofreak Holy crap, that is amazing. I have vacuum clamping in metal machining centers, but never on a 3D-printer. A quick Google leads me to believe that ready made tables are quite expensive though. Also, I am not sure if I would want a vacuum pump running for hours on end in my room. I love the idea though.
-
@nxt-1 said in PEI surface without adhesive?:
Also, I am not sure if I would want a vacuum pump running for hours on end in my room.
If the system didn't leak (much) and had some pressures control the pump would not run continuously. In an ideal setup it would just pull the vacuum and turn off, but I suspect in the real world some leakage would be expected, but I don't think it would require constant running.
-
Yes exactly you can just turn on the pump, pull a vacuum (takes only a second) and switch it off. it holds around two hours more or less. In future i want to include a small reservoir and a digital pressure gauge that kicks the pump on once it goes above the threshold pressure. For long prints i just let the pump run while i´m away.
you can get machining vacuum plates relatively inexpensively.
https://www.ebay.de/itm/Vakuumtisch-VT2020-R-20mm-Raster-aus-Gussaluminium-fur-CNC-Frase/292939802580?hash=item443492a7d4:g:aVcAAOSwPVFcUX7o
This is a 20x20cm bed, but it is available in all kinds of sizes. It even has the side mounted vacuum connectors.
I just made my own out of a 15mm cast aluminum plate because i have acess to a cnc, and i can mill it to size.
I also used brake line and crimp connectors that can handle the heat going into the chamber. Outside it is connected to the Z axis and changes to a PU tube which goes to the vacuum pump. -
I finally found a local source for 6mm cast and milled aluminium plate. Could you guys agree with the following layer stack (bottom to top):
1 - Silicone heater
2 - 6mm cast aluminium plate
3 - 3mm regular 1050 aluminium plate
4 - 3M glue sheeth
5 - 0.2mm PEI sheetFeedback welcome, especially on the thickness of layer 3. I am also still kind of unsure how good of a thermal contact and flatness I can expect between the two sheets of aluminium.
-
@nxt-1 I'd go with thicker PEI. I use 0.7mm stuff on a couple printers and it lasts for years. The thin stuff will stretch a bit when you try to pull an ABS or PETG print off, and will end up with air bubbles under it (just had to replace the plate on a Prusa I3 for that).
-
Why do you want to sandwich two aluminum plates together?
Also, I’m a bit late for the discussion, but I use a PEI sheet without adhesive. I use a thicker sheet (3.2 mm iirc) and I use a custom clamp around the perimeter of the bed. Works great, although it’s not perfect. My next attempt I will lap the cast plate and pie sheet together on a granite surface plate to get a precision flat print surface.
-
@mrehorstdmd said in PEI surface without adhesive?:
@nxt-1 I'd go with thicker PEI. I use 0.7mm stuff on a couple printers and it lasts for years. The thin stuff will stretch a bit when you try to pull an ABS or PETG print off, and will end up with air bubbles under it (just had to replace the plate on a Prusa I3 for that).
Thanks for the experience, I look around if I can find some a little ticker for a reasonable price.
@bot said in PEI surface without adhesive?:
Why do you want to sandwich two aluminum plates together?
Also, I’m a bit late for the discussion, but I use a PEI sheet without adhesive. I use a thicker sheet (3.2 mm iirc) and I use a custom clamp around the perimeter of the bed. Works great, although it’s not perfect. My next attempt I will lap the cast plate and pie sheet together on a granite surface plate to get a precision flat print surface.
Other users have reported PEI sheets without adhesive starting to deform and warp at temperature. So I wanted to back it with a thin sheet of aluminium, while still maintaining a removable bed.
-
@nxt-1 Oh I see. I don't think that is a good idea. You'll get no benefit of the flat surface of the cast tool plate.
-
@bot said in PEI surface without adhesive?:
@nxt-1 Oh I see. I don't think that is a good idea. You'll get no benefit of the flat surface of the cast tool plate.
That is the main thing that has still got me not 100% convinced. I wouldn't bother with the added complexity of a removable sheet if the bed didn't take as long to cool as it does.
-
Aren't there removable, thin steel flexible sheets with PEI coatings these days? That sounds like something you'd like.
Or, perhaps, you could have the PEI glued to the cast tool plate and simply have two of those that you can swap out.