Pressure Advance on Direct Drive
-
Is pressure advance worth using on a direct drive extruder?
I tried implementing it in the past and it didn't work out so well. I left some conservative settings on the printer but would like to revisit this or maybe remove the settings completely... I will share the settings I left shortly.Edit:
Turns out I did remove the settings a few months back, I think while troubleshooting filament, and never re enable it. Nonetheless, this is what I last tried to use...M572 D0 S0.01
Another item to note, is that my extruder, even though I consider it direct drive is not directly attached to the hotend. It is almost 42mm further away from the hotend when where it would normally be. I am using this setup to better balance the extruder, and give me more Z room to print...
https://www.myminifactory.com/object/3d-print-g-core-e3d-v6-hotend-mount-89258 -
@BlueDust Two things happen when you extrude filament. At the start of a move, the extruder turns and pushes filament into the hot end. If the hot end can melt that filament fast enough, and if the molten filament has the right viscosity and if the nozzle is big enough, then the filament will flow out of the nozzle at the same rate of acceleration as the carriage without any pressure build up. In which case, you won't need pressure advance to compensate.
But if one or more of those factors is untrue, then when the extruder pushes the filament into the hot end, there will be a build up of pressure before the molten filament exits the nozzle. This means that at the start of a move the carriage accelerates but the flow rate of molten filament does not accelerate at the same rate so you get under extrusion until the flow rate catches up with the carriage speed. Conversely, at the end of a move, the carriage decelerates but because of the latent pressure that has built up, the filament continues to be extruded at a faster rate (or decelerates more slowly), so you get over extrusion at the end of a move.
The pressure (if any) that builds up is a function of many factors - nozzle diameter, filament viscosity (which changes with temperature), the rate of acceleration that you are trying to print at, the volumes of both molten and un-molten filament, etc.
I find the best way to evaluate is print a big cuboid with 100% infill and observe the extrusion at the start and end of the lines, compared to the centre. Long fast moves are the circumstances where the effect of pressure will be most noticeable so you can tune pressure advance "on the fly" to get rid of any over/under extrusion at the beginning and end of the moves.
-
Have you tried running a pressure advance calibration? It should tell you the optimal value for your printer. E.g. some tests are discussed here https://forum.duet3d.com/topic/6698/pressure-advance-calibration
-
@deckingman
Thanks!
By your explanation, I would guess I am having issues that could be resolved with Pressure Advance.
Currently when there is a retraction, seemingly of just about any distance always leaves a gap. I see this alot (depending on filament) on infill and supports.@zapta
Thanks! I forgot all about that post. And now remember why I stopped. It seems way over my head. Maybe for the most part that I don't feel my Acel and Jerk are set correctly to make it work properly. I do need to figure out how to run the calibration scripts too... after I am able to get Acel and Jerk set. I have them pretty conservative based on what my printer is capable of... And I wasn't able to get pressure advanced to work... WIsh I understood this better, but never found good explanation for a noob. -
I'm guessing, seeing as you're using George's V6 mount for the V-Core, that you're printing with a BMG extruder and E3D V6 hot end on the RatRig V-Core?
Although I'm not using George's design, I have a very similar hot end mount on my V-Core with about 35mm between the bottom of the extruder and the top of the hot end's heat sink. It's probably a slightly larger distance than you have due to the Orion piezo sensor.
Here's a picture:
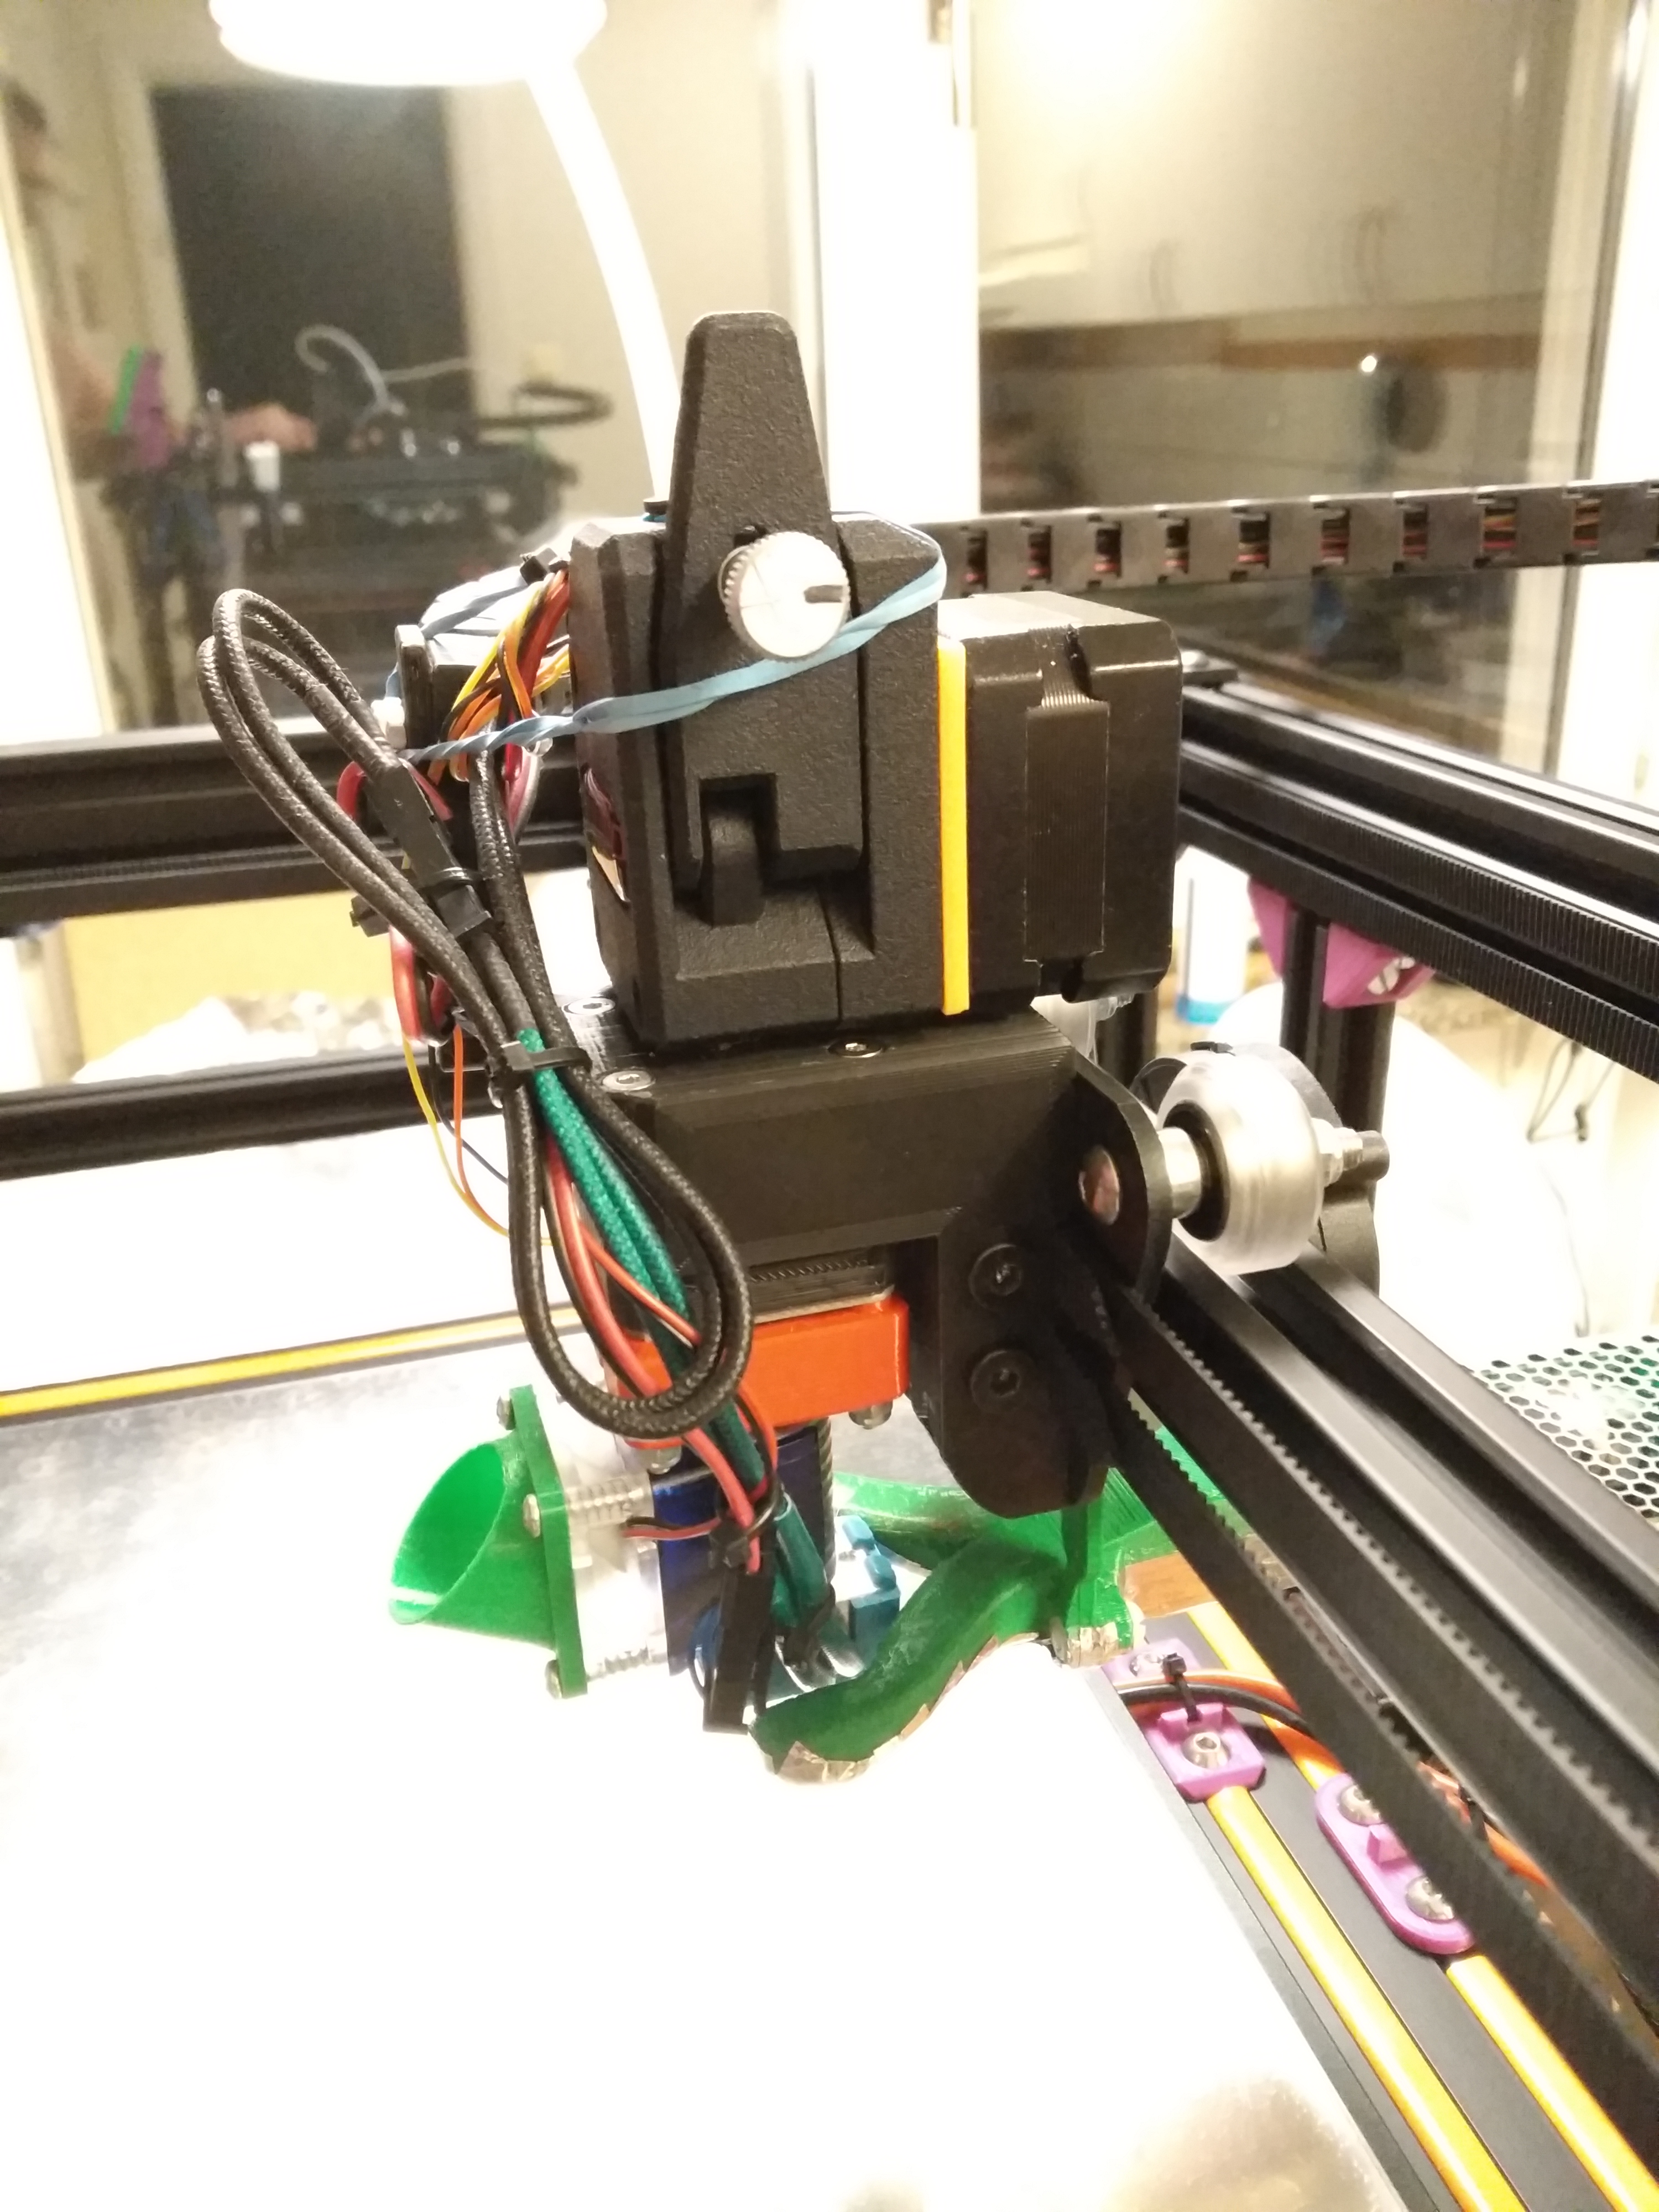
(The rubber band is a temporary feature due to me nearly ripping my cable chain support off during some testing.)
I used the method for tuning pressure advance which is detailed in the thread that zapta linked to. After many prints, I came up with a value of 0.11 for my machine and it seems to work very well. If I print a 100mm hollow square with three perimeter walls, I see no bulging corners or under extrusion at the start of a perimeter after a layer change, even when printing the test at 150mm/s.
With your slightly shorter distance between the extruder and hot end, you might like to try experimenting at around 0.08 as a starting point.
-
@grizewald
Thanks for the info. Knowing you are also using a V-Core Core XY frame... What are your Acceleration and Jerk settings? -
@BlueDust This is what I currently have set:
M566 X600.00 Y600.00 Z100.00 E3600.00 ; Set maximum instantaneous speed changes (mm/min)
M203 X18000.00 Y18000.00 Z600.00 E3600.00 ; Set maximum speeds (mm/min)
M201 X600.00 Y600.00 Z180.00 E3600.00 ; Set accelerations (mm/s^2)
M906 X1600.00 Y1600.00 Z1800.00 E595.00 I30 ; Set motor currents (mA) and motor idle factor as percentage of normal currentBut I'll turn the acceleration down in the slicer to 300mm/s^2 for print moves and 500mm/s^2 for travel moves. As I've just rebuilt the machine to a V2, these may be a bit conservative. With the new 9mm belts set fairly tight, I'm seeing zero ringing with a print speed of 60mm/s (infill 80mm/s outer perimeter 30mm/s), so I'll be experimenting to see what the limits are with the new configuration.
The Z stepper motors are the original 2.5A 1.8° motors which RatRig were supplying with the kit. The α and β motors are 2.0A 0.9° motors which I swapped to for more resolution on the X and Y axes.
The theoretical maximum acceleration with these motors is 5700mm/s^2 assuming that my print head weighs around 500g but I wouldn't actually try to accelerate that fast!
The settings for the BMG extruder are really high so that pressure advance can take all the performance it needs. It's unlikely that the actual speeds are even close to those settings.
-
@grizewald
Thanks!
I will experiment a bit with this tomorrow. -
Even with the very short path of my Titan Aero I get a good benefit using pressure advance. Usually between 0.03 and 0.06. For best results you'll need high extruder accel and jerk values. (3000 ish or more for each)
-
@Phaedrux said in Pressure Advance on Direct Drive:
Even with the very short path of my Titan Aero I get a good benefit using pressure advance. Usually between 0.03 and 0.06. For best results you'll need high extruder accel and jerk values. (3000 ish or more for each)
How does this benefit manifest itself?
Thanks.
Frederick
-
It's most noticeable on very short solid infill sections with quick back and forth movements. Without PA I get over extrusion in these areas even though extrusion in other areas is perfectly fine. With PA the over extrusion is limited. It also helps with reducing the amount of retraction needed, which is already under 1mm.
-
@Phaedrux said in Pressure Advance on Direct Drive:
It's most noticeable on very short solid infill sections with quick back and forth movements.
Thanks for the info.
Frederick