IR Sensor Potential Fault
-
Hello,
I recently got a DC42 IR sensor to fit to my CoreXY and have been running into some issues which I suspect be down to the sensor itself, or could be me doing something silly.
In essence I am getting poor repeatability between probing points, but very good repeatability when probing the same point multiple times. I use the A/S parameters in G31 and rarely need more than 2 probes to achieve 0.01 accuracy - all good. However, I often do bed autolevelling by probing two adjacent points near each lead screw, 5mm apart (the idea being that any issues with probe repeatibility are easy to see). I am finding that one of the pairs (usually my back leadscrew) often has a very big offset between the two probing values (like 0.2mm, even up to 0.5mm!). I have also seen the same thing when generating my heightmap.
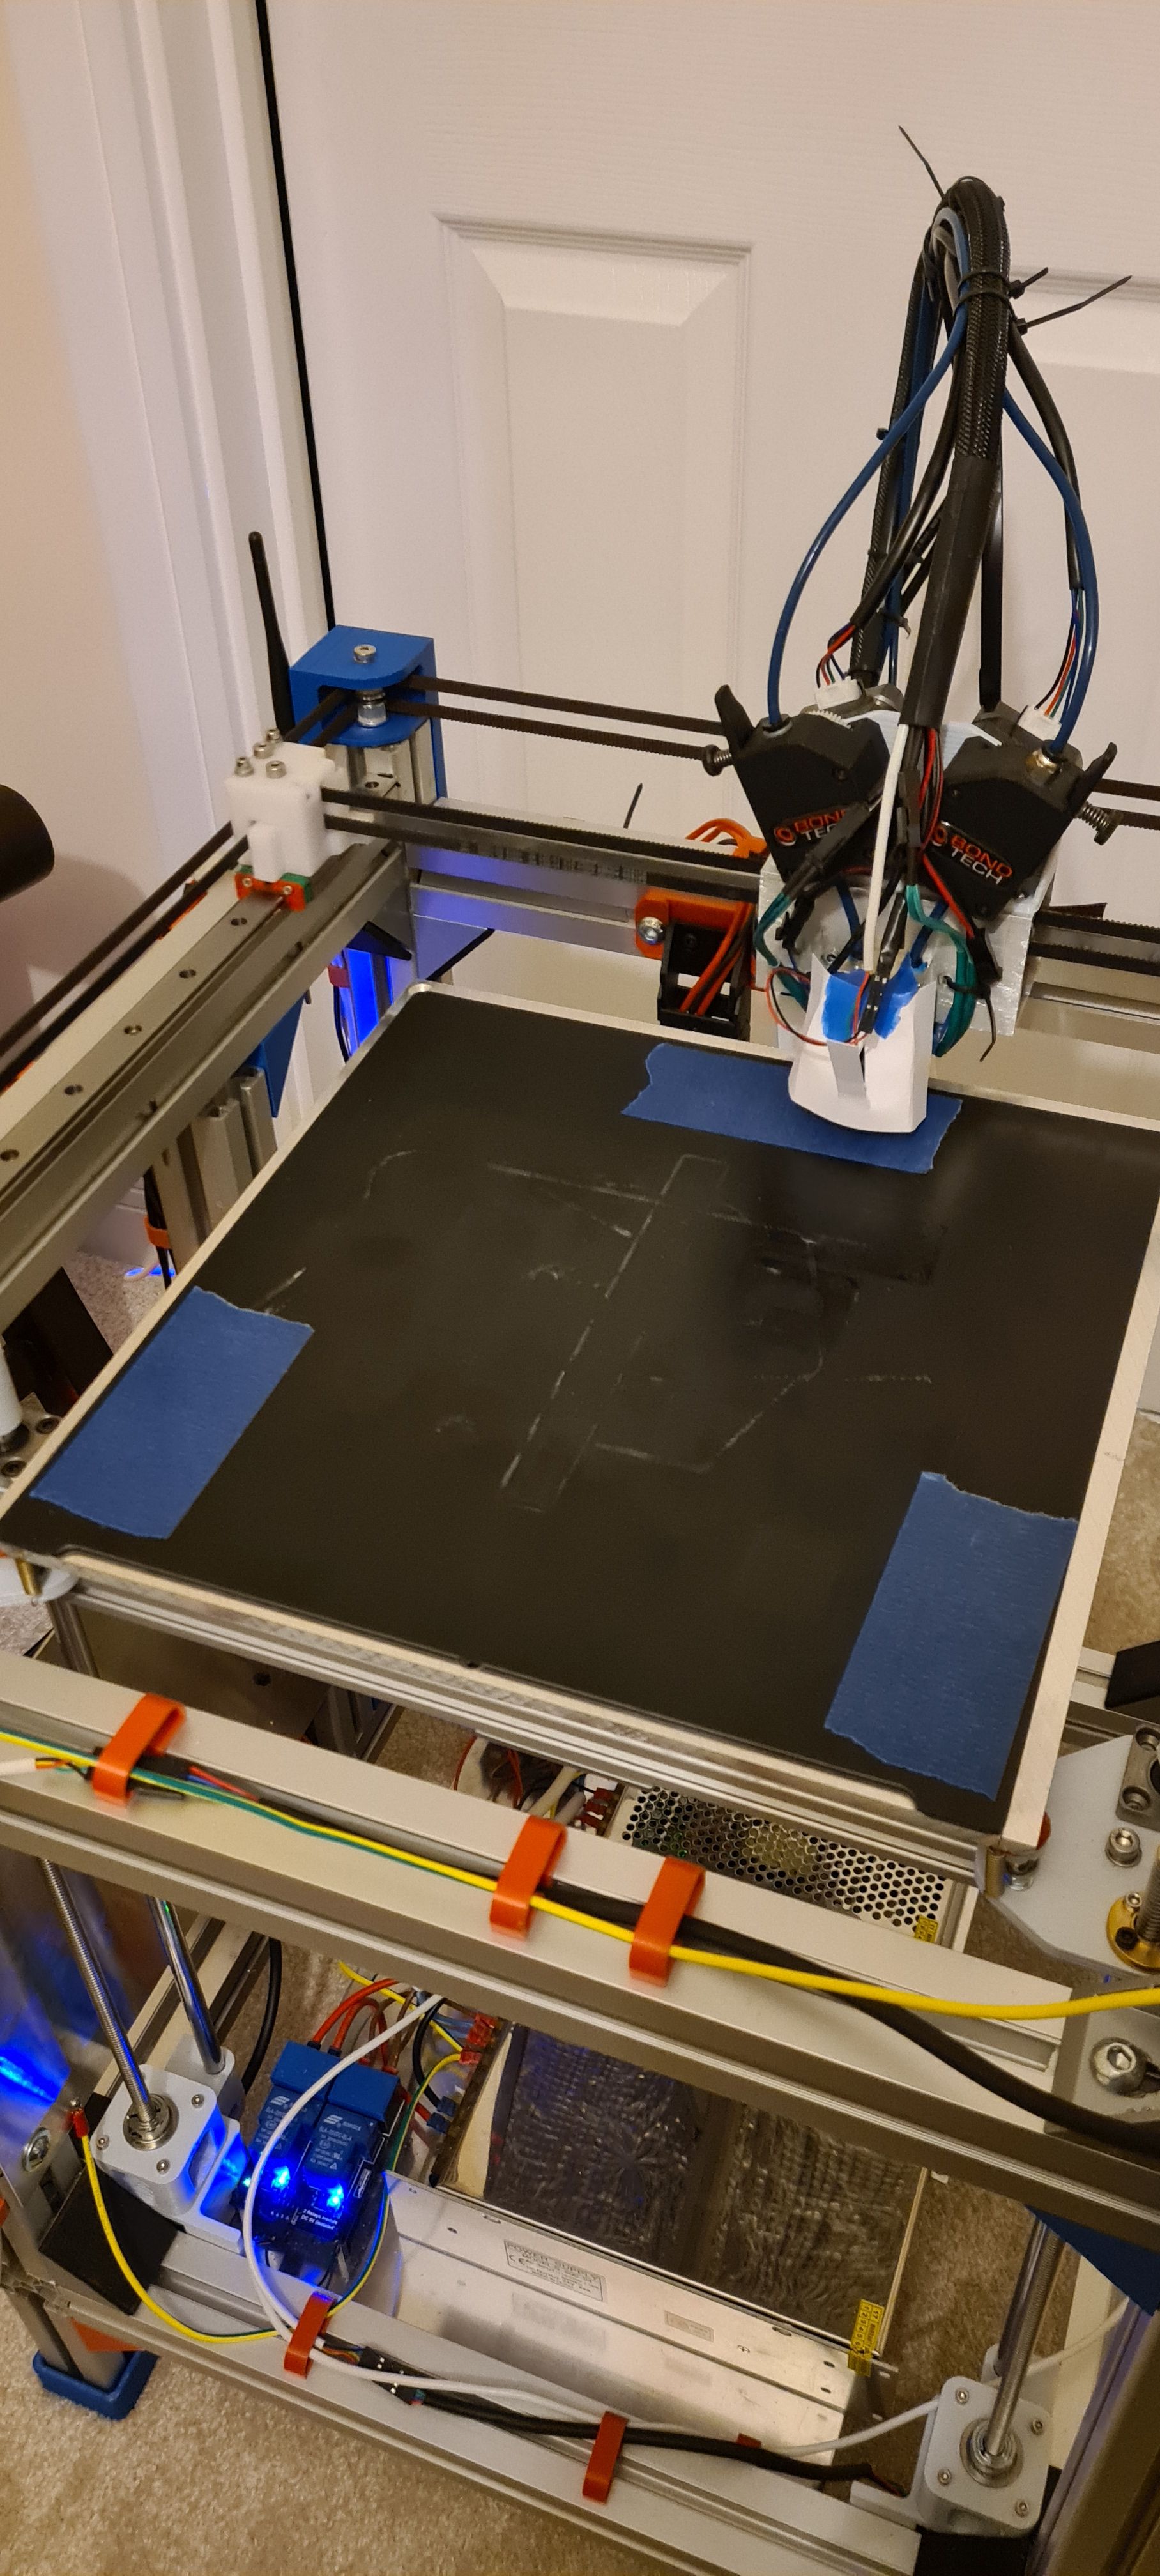
Please take a look at my config & bed.g in case there's anything silly I'm doing, but my theory is that the large capacitor on the board isn't sat flat - it's leaning over towards the left. Not sure how well you can see in these pictures...


An example of what I've been doing. Running "Test auto Level points.g" twice back to back I get:
G32 bed probe heights: -0.007 0.119 -0.154 0.266 0.095 0.011, mean 0.055, deviation from mean 0.129
G32 bed probe heights: -0.008 0.126 -0.152 0.262 0.092 0.005, mean 0.054, deviation from mean 0.128
Contents of the macro are as below (same as my bed.g but using G30 S-1 instead). You can see that it is points P0 & P1 and P2 & P3 that are quite different values but very are close on the bed and repeatable from one run to the next. If I keep running the printer and re-doing this routine, sometimes they suddenly agree and we're good to go but this is not repeatable/reliable.
G29 S2 ; clear any bed transform

; autolevelling points near leadscrews
G30 P0 X5 Y15 Z-99999 ; probe near a leadscrew
G30 P1 X5 Y20 Z-99999 ; probe near a leadscrew
G30 P2 X166 Y295 Z-99999 ; probe near a leadscrew
G30 P3 X172 Y295 Z-99999 ; probe near a leadscrew
G30 P4 X280 Y30 Z-99999 ; probe near a leadscrew
G30 P5 X280 Y25 Z-99999 S-1 ; probe near a leadscrew and calibrate 3 motors
At first I thought it was my build surface (I'm using Ziflex which has a tendancy to go shiny on areas that have been printed a lot), but I tried sticking blue tape down in the areas and got the same result. I'm confident from doing the paper-test that the two points are actually at a very similar height.
Sensor was purchased from Ooznest on 9th Jan 21, though only fitted this week. Any thoughts? I can have a go at reworking the capacitor to seat it better if that might help?
Running RRF3.2 & for completeness my config.g:
; Configuration file for Duet WiFi (firmware version 1.21) ; executed by the firmware on start-up ; ; generated by RepRapFirmware Configuration Tool v2 on Sat May 04 2019 23:30:24 GMT+0100 (British Summer Time) ; General preferences M81 ; turn power supplies (PS_ON) off G90 ; Send absolute coordinates... M83 ; ...but relative extruder moves M669 K1 ; Select CoreXY mode ; Network M550 P"ODIN" ; Set machine name M552 S1 ; Enable network M586 P0 S1 ; Enable HTTP M586 P1 S0 ; Disable FTP M586 P2 S0 ; Disable Telnet ; Drives M584 X0 Y1 Z5:6:7 E3:4 M569 P0 S0 ; Drive 0 goes backwards (x-drive) M569 P1 S0 ; Drive 1 goes backwards (y-drive) ;M569 P2 S0 ;z drive not used ; Drive 2 goes backwards (z-drive) M569 P3 S0 ; Drive 3 goes backwards (extruder0) M569 P4 S1 ; Drive 4 goes Forwards(extruder1) M569 P5 S0 ; Drive 5 goes backwards (Z1) M569 P6 S0 ; Drive 6 goes backwards (Z2) M569 P7 S0 ; Drive 7 goes backwards (Z3) M350 X16 Y16 Z16 E16:16 I1 ; Configure microstepping with interpolation M92 X160 Y160 Z3200 E861:821.1; E420.15:414.17 Z3198.158 ; Set steps per mm was E420.15:--- ;call macro to define motor settings M98 P"0:/macros/00 - Printer Settings/Motor setup.g" M204 P2000 T4000 ; Set max print accels to 2000mm/s^2, travel to 4000mm/s^2 M593 F48 ; set Dynamic Acceleration Adjustment to 43.5Hz M572 D0 S0.055 ; Set pressure advance factor for extruder 0 M572 D1 S0.055 ; Set pressure advance factor for extruder 1 ; Axis Limits M208 X-1 Y-18 Z0 S1 ; Set axis minima M208 X290 Y305 Z350 S0 ; Set axis maxima ; Endstops M574 X1 S1 P"xstop" ; X min active high endstop switch M574 Y1 S1 P"ystop" ; Y min active high endstop switch ; Filament Monitor M591 D1 P3 C"e0stop" S1 R40:140 L25.55 E6 A0 ; Duet3D rotating magnet sensor for extruder drive 0 is connected to E0 endstop input, enabled, sensitivity 25.55mm.rev, 40% to 140% tolerance, 6.0mm detection length, check only printing/extruding moves ; Z-Probe M574 Z1 S1 ; Set endstops controlled by probe M558 P1 C"zprobe.in" R0.2 H3.5 F350 T3500 A10 S0.01 ; Set Z probe type to effector and the dive height + speeds G31 P500 X0 Y-20 Z2.45 ; ; Set Z probe trigger value, offset and trigger height ; Heaters M308 S0 P"bed_temp" Y"thermistor" T100000 B3950 R4700 ;define bed temp sensor ; b3950 taken from https://keenovo.store/collections/frontpage/products/keenovo-square-silicone-heater-3d-printer-build-plate-heatbed-heating-pad?variant=8324021059639 M950 H0 C"bedheat" T0 ;heater 0 uses the bed_heat pin, sensor 0 M140 H0 M143 H0 A3 S120 ; Set temperature limit for heater 0 to 120C M308 S1 P"e0temp" Y"thermistor" T100000 B4725 C7.060000e-8 ; define E0 temp sensor ; https://e3d-online.dozuki.com/Guide/V6+RepRap+Firmware+Configuration/26?lang=en M950 H1 C"e0heat" T1 ; heater 1 uses the e0heat pin and sensor 1 M143 H1 A3 S280 ; Set temperature limit for heater 1 to 280C M308 S2 P"e1temp" Y"thermistor" T100000 B4725 C7.060000e-8 ; define E0 temp sensor ; https://e3d-online.dozuki.com/Guide/V6+RepRap+Firmware+Configuration/26?lang=en M950 H2 C"e1heat" T2 ; heater 2 uses the e1heat pin and sensor 2 M143 H2 A3 S280 ; Set temperature limit for heater 1 to 280C ; Fans M950 F1 C"fan1" ;Fan 1 uses the fan1 pin M106 P1 T45 H1:2 ; Set Fan 1 to run any time heater H1 or H2 is above 45C M950 F0 C"fan0" ; part cooling fan (Fan 0) uses the fan0 pin ; Tools definition M563 P0 S"Extruder 0" D0 H1 ; Define tool 0 G10 P0 X0 Y0 Z0 ; Set tool 0 axis offsets G10 P0 R0 S0 ; Set initial tool 0 active and standby temperatures to 0C M563 P1 S"Extruder 1" D1 H2 ; Define tool 1 G10 P1 X0 Y0 Z0 ; Set tool 1 axis offsets (set manually in slicer) G10 P1 R0 S0 ; Set initial tool 1 active and standby temperatures to 0C ;Heater fault parameters M570 H0 P5 T5 S0 ; Set heater fault params for bed. 5s anomoly, 5deg max temp deviation, timeout for print to be cancelled 0mins M570 H1 P5 T15 S0 ; Set heater fault params for Tool0 (Heater 1). 5s anomoly, 15deg max temp deviation, timeout for print to be cancelled 0mins M570 H2 P5 T15 S0 ; Set heater fault params for Tool1 (Heater 2). 5s anomoly, 15deg max temp deviation, timeout for print to be cancelled 0mins ;Firmware retraction settings M207 S1.8 R0 F5500 T4000 Z0 ; Retract 4.0mm (noextra restart) at 3900mm/min with 3300mm/min unretract. No Z hop ;Set CPU temperature offset M912 P0 S-9.3 ; Automatic saving after power loss is not enabled ;Bed mesh settings M557 X5:280 Y10:280 P20 ; Define mesh grid M376 H15 ; Taper mesh compensation off over 15mm Z-height ; Auto Bed Leveling setup M671 X346:169:-38 Y-5:380:-5 S2.5 M501 ; read temperature model parameters from config-override -
That capacitor is the thing that blocks light from leaking from LED to detector.
Try adding something that will block the light. Cardboard or something like that. Around the capacitor.
-
Any change in ambient lighting conditions?
-
@Phaedrux afraid not. I'm mostly testing after dark and have tried with the lights on/off with no real change.
@alankilian will try wrapping some tape round the capacitor later.
-
@Phaedrux I've had a go at some more testing and I'm now less convinced it's an issue with the sensor, and maybe something in my setup...
Test 1 - I put some electrical tape around the capacitor to block any stray light.
Outcome - same as before:G32 bed probe heights: 0.112 -0.191 -0.514 -0.116 -0.191 -0.068, mean -0.161, deviation from mean 0.188Test 2 - I have a cloned Ormerod V1.2 IR sensor on my delta which I know works (reasonably) well, so swapped that it
Outcome same as before....G32 bed probe heights: 0.125 -0.206 -0.235 0.145 -0.057 -0.022, mean -0.042, deviation from mean 0.146Back to the drawing board

One thought - the printer is currently in our spare bathroom (I'm working from home because of old 'rona and it was too noisy to keep in my office...). It's all tiled with lots of shiny surfaces. I'm wondering if some of the surfaces could be reflecting the IR light from the sensor and confusing things? Might explain why it is the same points that cause the issue if it's particular bits reflecting? Will try mocking up a cardboard shieled later, but any other ideas appreciated!
-
also try changing the surface? put a piece of paper underneath and see if it changes with that.
also try changing the speed.
M558 P1 C"zprobe.in" R0.2 H3.5 F350 T3500 A10 S0.01
change F to 120
-
@Veti I changed to F120, decreased T and increased R. No luck unfortunately... I also tried drecreasing my XYZ jark & accel, but no change
Tried a few different surfaces with no real difference:
- 2 different Ziflex mats
- straight onto the magnetic pad on my bed
- painters blue tape on top of the ziflex
- white card placed on top of the ziflex
I've also tried crafting a shield out of card to put around the probe and moved the machine into a different room but no real change....
I'm at a loss...
-
Try separating out the probe wiring? Might make sense if the problem was the same for both probes if the wiring stayed the same.
-
the fan is on in your picture. maybe the vibration are causing a problem?
-
@Veti fan (and heaters) were on for my first few runs, has been off for everything since
@Phaedrux Just put in a new cable back to the Duet, keeping it separate from my main bundle (and holding it as the gantry moved). Unfortunately no change

G32 bed probe heights: 0.267 0.290 -0.022 0.455 0.253 0.186, mean 0.238, deviation from mean 0.142Any other good/bad/silly ideas?

I've bought a BLtouch which I'm gonna have a go at mounting later, but will keep the IR probe mounted for now.
-
@Phaedrux I've now swapped in the BLtouch and it appears to be giving much more consistent readings
G32 bed probe heights: -0.033 -0.012 0.100 0.082 -0.229 -0.227, mean -0.053, deviation from mean 0.132So I'm guessing that there must be something in my setup that the IR sensor doesn't like.
Only thing I can think of, is does the IR sensor need the pull-up resistor enabled? I don't have it as I can't find any mention either way in the docs...
-
@engikeneer said in IR Sensor Potential Fault:
Only thing I can think of, is does the IR sensor need the pull-up resistor enabled? I don't have it as I can't find any mention either way in the docs...
I don't think so, but it wouldn't hurt to try.
-
@Phaedrux You were right.. no change with the pull-up.
I feel like I've been playing musical probes recently as I only just switched out my old piezo! All part of the fun
Ah well, my guess is that the IR sensor just doesn't like something on this printer. I'm sure I can put it to good use on one of my others
") The BLTouch seems to be working pretty well now so I'll stick with that on the core xy. Appreciate all yours and others help though!
The BLTouch seems to be working pretty well now so I'll stick with that on the core xy. Appreciate all yours and others help though! -
Yeah I don't know what that could be causing the ir sensor not to like the printer. Usually it comes down to the ambient light and bed surface, which you've tried to control for already, so I'm not sure. And it's both sensors, so it must be on the Duet side...
-
Your photos show an extrusion very close to the side of the sensor. I am wondering whether a reflection from that might be interfering with the sensor reading. If that's the case, probing a little further away from that extrusion or putting matt black tape over it might have helped.
That said, a properly working BLTouch is likely to give similar or better results that are not affected by the transparency of the bed surface.