massive overextrusion, E-Steps are calibrated
-
@Veti said in massive overextrusion, E-Steps are calibrated:
what temperature are you printing at?
also make sure your retraction settings are working
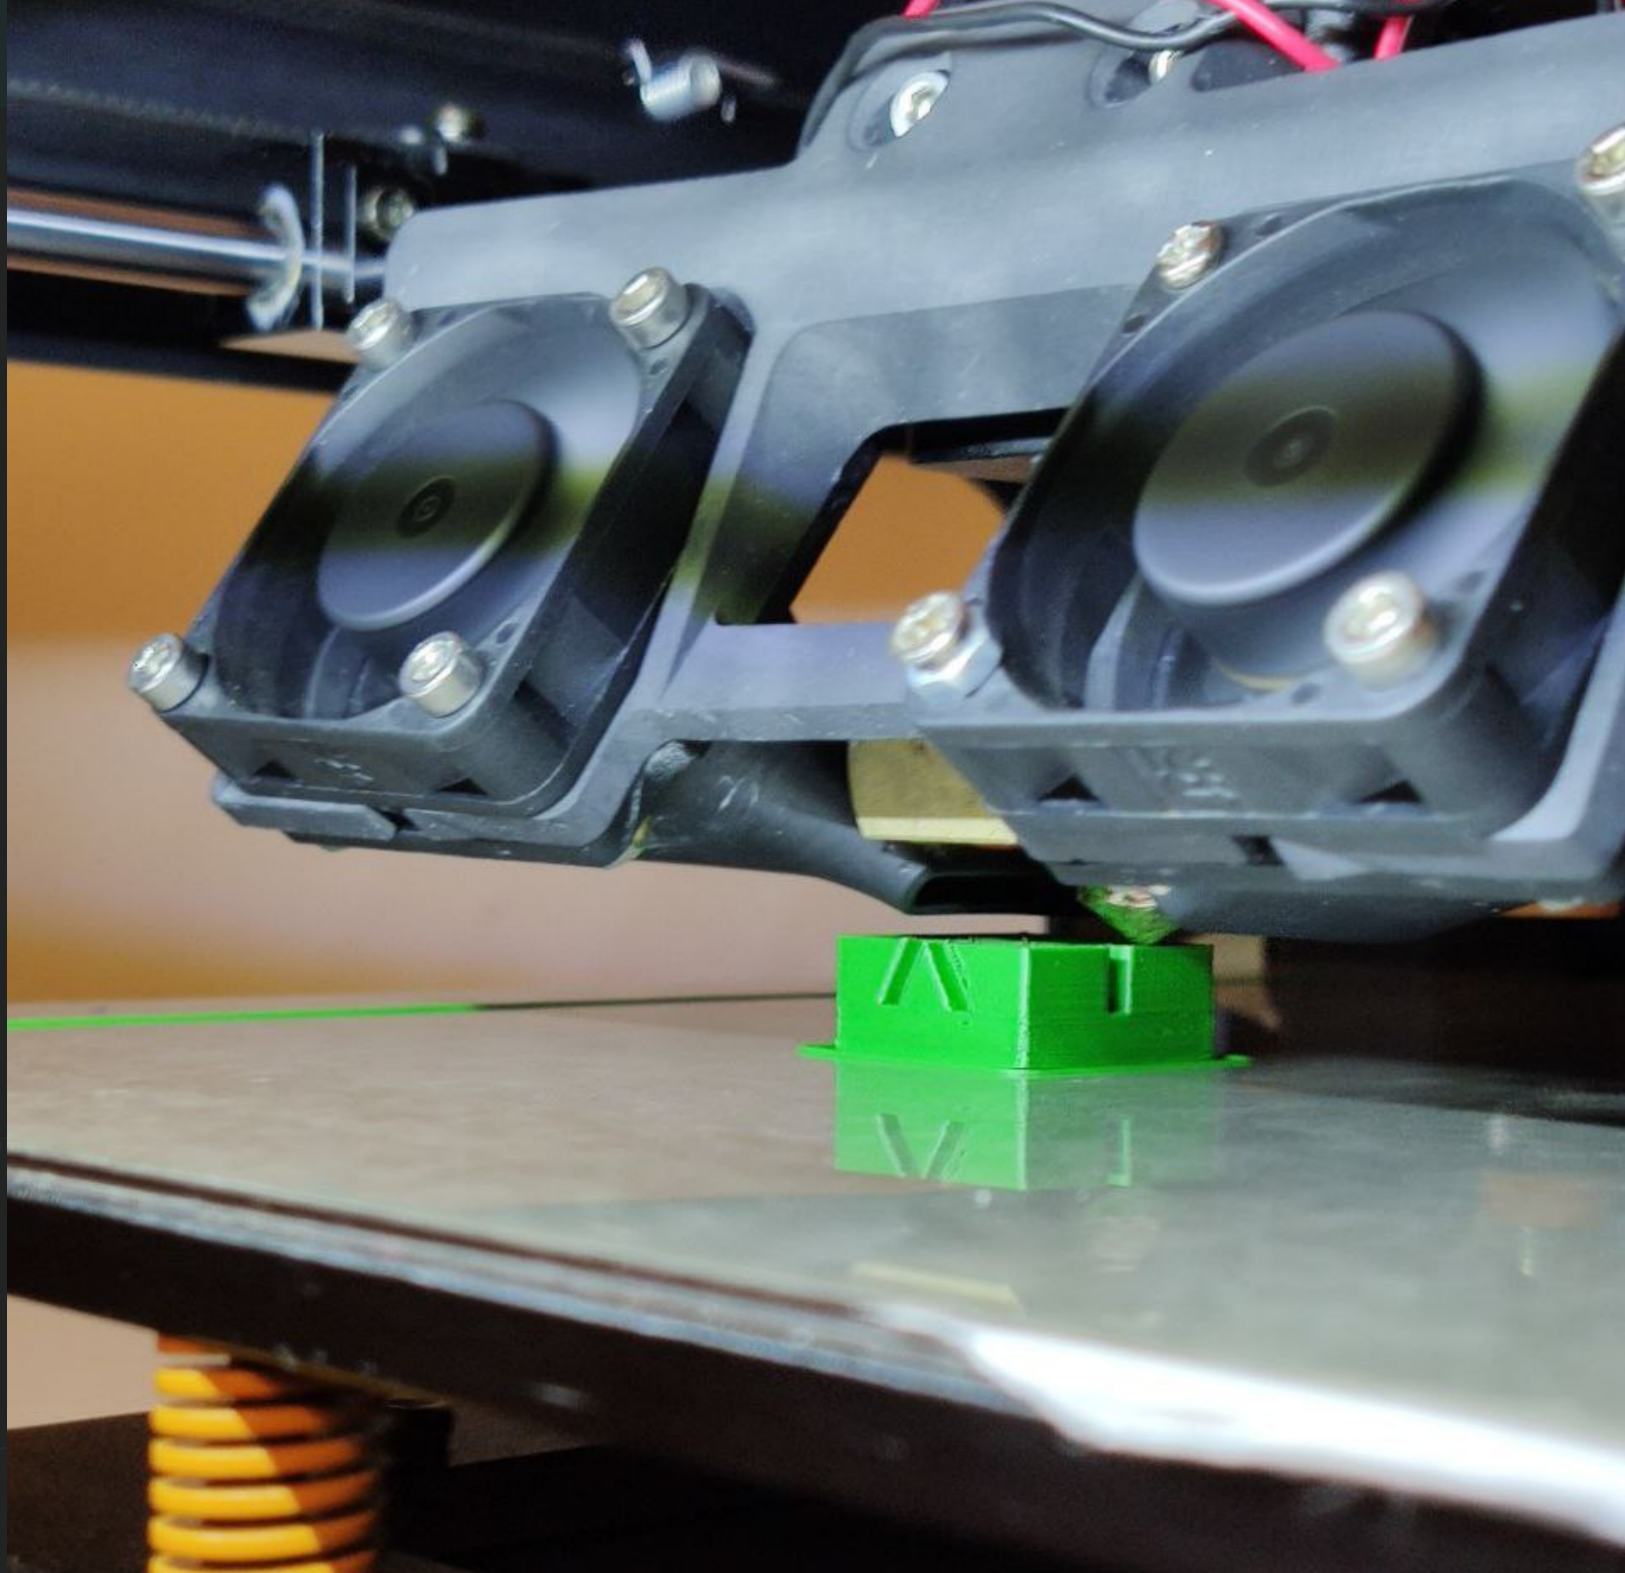
print this
https://www.thingiverse.com/thing:2766430
and check with differernt retraction distancesVeti, at the moment at 205°, but had pretty the same results with 190°
-
@Enpixa said in massive overextrusion, E-Steps are calibrated:
Thought, Offset 0.2 and EF 100% didnt look too bad. so went for it
to print it:0.2mm babystepping is a lot and explains the 50% extrusion rate you had to use earlier.
Question is, how good does the print stick to the surface with this new nozzle height? -
I wanted to thank you all for your input.
Atm the main-problem is still not solved but before further hunting for the overextrusion-issue and all the suffering :), i thought it is a good time to replace the old part-cooling-system which i got from Grabcad and never convinced me because the ducts were oriented 90° directly to bottom (but it looked awsome
") )
)So i opened my old loved Rhino3D an started to model a new cooling-system from scratch, simple, but hopefully well performing:


I keep you updated ! When i approved that the new cooling fans are doing well, i will provide the model on grabcad.
Hunting over-extrusion will start soon again.
-
Hi,
This may be a bit late to help but I will post it anyway.
I have had massive overextrusion myself and have decided the easiest way of overcoming this after much searching for the problem is to just reduce the extrusion factor until it prints well and leave it at that.I have built a large (500X500X500) core XY printer which I use for engineering components using mainly Nylon CF. This is the printer I have massive over extrusion.
I also have a Prusa MK3S and use the Prusa Slcr to do my slicing.The coreXY printer uses a Duet Wifi board with two independant Z axis drives. All of the X,Y,Z axis are calibrated and also the extruder is also calibrated. When printing I also checked that my extruder nozzle was the correct diameter (o.6mm) and that the first layer print was exactly the correct level (by using a vernier caliper to test the extrusion thickness and also the first layer thickness).
I tested my extrusion using just a single first layer and a spiral vase cylinder and found the perfect print at 0.75 extrusion factor. I now slice all of my prints using this and they come out perfectly.I spent a lot of time trying to solve why the overextrusion because there seems to be almost a religious belief in the 3D printing community that if the extrusion factor is more than 5% from 1 then there is a major problem that needs to be hunted down at all costs.
I might mention that my MK3S also over extrudes but a an extrusion factor of 0.9 seems to print OK.
Hope this was helpful.
-
did you get this resolved? I have exactly the same problem and have gone pretty much through all the steps in this thread aswell (minus changing the Duet2 Board)
-
@hadtstec
I'm not OP but I had this same result on my newly homemade coreXY.
First blunder was the steps for Z, a bit miscalculated... Got alot better but not near what to expect, still looked like over extruding.
Started to tune retraction and pressure advance and that did it for me! -
@hadtstec I, too, am having this problem. Did you ever figure out what was going on?
I think it corresponded to upgrading my printer to RRF 3.3, but I'm not entirely positive about that.
Basically the same underlying issue -- my printer is severely overextruding in prints and parts are dimensionally inaccurate if I don't set my flow rate to ~65%. Happens regardless of filament type or brand, temperature, etc. Extruder is calibrated to within a half percent, based on both a 200mm measurement into it and weighing raw and extruded filament with a ~5 milligram-accurate scale. (Thus within a half percent -- 200mm of filament is about .53g, and with my scale it could be off by a little, but a half percent is within the error bars of filament given inconsistent diameters, anyway.)
Its a head scratcher -- its behaving like the firmware is doing something different with extrusions while printing vs via the web interface. It doesn't seem to be slicer-related, as the exact same overextrusion is happening from Cura, PrusaSlicer, and SuperSlicer. Pressure Advance doesn't impact it, nor does input shaping.
I've been running out of variables to tweak, and as of yet I haven't found any hints where its coming from.
-
@dotorg Out of curiosity, what if you used gcode produced by the slicer up to the first extrusion and then checked your extruder calibration? If you suspect it has to do with where the gcode is stored, add the extrusion test to a slicer produced gcode file and see what happens.
-
@dotorg We'd have to take a much closer look at your setup and gcode configs to get an idea. If you suspect it's the firmware update, you could always roll back to confirm.
-
@generisi I'm 100% sure the extruder is accurately tuned to within, as I said, at least a half percent. Verified both by linear extrusion distances and milligram weight. (Ie, cut 200mm of filament, weight it on the kind of scale Snoop Dogg likes to use, extrude 200mm of filament and compare the weights... within the accuracy of the scale -- +/- .005g -- they match.
The extrusion test in the gcode is a good idea, however the "where it is" is unlikely to be an issue as much as "how its being extruded". A simple "G1 E200 F100" is not necessarily the same as a thousand "G1 X.001 Y.001 X.1", or something even smaller.
I had, for a while, a hypothesis that it was rounding related, but that would suggest smaller details would be dimensionally inaccurate, and big straight extrusions would be okay, but that doesn't appear to be the case.
My current hypothesis is that its something in the infill extrusions pushing out the perimeters slightly, but the differences are remarkably similar regardless of how much infill or how the sizes of the parts vary. There appears to be, consistently, around a 1/8 extrusion width oversize on a perimeter, growing very slightly with the size of the "infill" between them. So a 2mm wall will end up being about 2.12mm wide, a 5mm might be 5.16 and a 20mm tends to be more like 20.2. Strangely, single wall extrusions seem fairly dead on -- a .45mm single wall will be damn near .45mm.
The size of the space between is a bad variable to put much weight into, because that could be volume of plastic, but it could also be speed related, as the printer has more time to accelerate. I'm actually running a test right now with the max volumetric rate turned down 80% to see if there's any variance.
I've been testing the last few days, while trying to figure this out, using this model, which is nice for both varying widths and depths of parts. It makes it easier to see if the oversizing is consistent regardless of X/Y/Z size, what's around it, etc.
-
@phaedrux said in massive overextrusion, E-Steps are calibrated:
If you suspect it's the firmware update, you could always roll back to confirm.
I've been hesitant to do that, because the last time I did a comprehensive calibration was before the RTOS update, so its a major reconfiguration to downgrade. I've been using the printer constantly since the, but I haven't printed anything where a) accuracy was critical and b) I know for a fact the parts used to print fine, because I'd printed them before, until last week. I have a 2-3 year old cable chain on my printer that has sagged from time and ambient heat (PLA was a mistake above a heated bed), so I was reprinting it. That means I know the gcode was fine, and that the parts (when originally printed) were sized exactly right.
At this point its more of a head scratcher than a huge problem -- I can reprint the chain at 65% to get past that, but it doesn't explain what the regression is.
-
@dotorg I have one more idea. The paper you are using as a height gauge is 10 microns thick. Please try this and see what happens: Use a sheet of office weight paper. In the US, "80 lb." paper is about 0.1 mm thick (10 x your cigarette paper). Heat your hot end and your bed to printing temperature. Place the hotend at the center of the bed. Adjust the nozzle height to slightly drag on the paper. Your Z height should be 0.1 mm. If it isn't, put the necessary offset in your config gcode so that, after resetting the firmware and reheating the nozzle and bed, then re-centering the nozzle on the bed,the Z height reads 0.1mm using that office weight paper.
Now reset the firmware again and print a single layer of your test print. It should be very close to perfect at 100% extrusion. If it is, great! If it is not, remove the printed layer, reset the firmware , reheat the nozzle and bed and go through the same height test and see if the nozzle is still slightly dragging on a piece of paper at Z=0.1. If it is still the correct height and yet the print looked bad, watch the extruder and extruder a mm, then do it again, and again and see if, between the extrusion commands, any plastic is oozing out of the nozzle. If neither of those ideas points to a problem, I don't know what to say! -
So, a couple of test results:
- Single wall cubes print with the correct extrusion width, to .01mm
- Dual wall cubes print just as accurately
- Cylinders also print accurately (which, I think, rules out rounding issues with extrusion amounts, because they use lots of moves, not just a few)
Speed didn't vary the over extrusion, either -- prints printed at 20% are dimensionally identical to one printed at 100% at the same flow rate.
Interestingly, the test cubes seem to oversize slightly more than the cylinders do, which makes me wonder if its more of a problem with long move/extrudes not short.
I've even tested with and without hardware retraction (I usually print with), and the results are generally identical. Its bizarre. (This is because there's only one retract/deretract per layer on a single wall test cube, but many on a "normal" part.)
Lastly, I tested with and without mesh compensation, in the theory that mesh compensation could be causing a tiny squish that is causing the perimeter extrusions to be slightly too wide. Again, no difference. (Which isn't too surprising, as the compensated variance is less than .02mm), which wouldn't cause a nearly 50% over-extrusion.)
Even stranger, the test model I've been using, if I print it with 0 infill, still is oversized, but if I print with 0 top layers so I can measure the walls, they are correctly sized, in terms of thickness. Its just the space they're enclosing is slightly too big. That screams slicer to me, but prints sliced years ago are printing larger, too. And its not a sudden X/Y step calibration (which, of course, can't really vary, anyway) because if the steps were off, inner holes would also grow, not shrink.
I've even done extrusion tests in gcode doing 10,000 .01mm extrusions for the 100mm test, and 10,000 .01mm extrusions in a 1mm zig-zag to see if there's any variance in extruded volume during small steps and during movements. There was none, to the accuracy of my scale and calipers.
Hell, I've even replaced the nozzle, although a worn nozzle usually looks like under extrusion, not over extrusion.
That's why I was asking anyone had figured out the problem, because it appears to be something that has happened to multiple people in very consistent ways, which suggests its probably something stupid.
@GeneRisi -- I don't use paper to calibrate Z-height, I use feeler gauges. The z-height is precise. And, regardless, if it was off it'd only impact the first layer and things like bed adhesion, not a 20mm tall test print.
-
I hate to drag up a older post
but I am noticing similar problems
not sure exactly what firmware it started on I have recently upgraded 3.4.4 from 3.2
I am hesitant to say its a firmware problem but I have been through my config
and I have been struggling since the updateI am going to try this weekend to do a fresh sd card and fresh firmware install
I think I may have had minor problem with this this for a while but since the recent struggles
to get a print resulting in a full hotend rebuild and nozzle change new heat break hot block etc etc
the only thing that seem to help was a 20-30% reduction in extrusion and I probably could go furtherits a home built corexy with a bmg duet2-wifi with a LDO 0.9 degree stepper on the bmg
was kinda hoping someone found a solution to these problems above; Configuration file for Duet WiFi (firmware version 3) ; executed by the firmware on start-up ; ; generated by RepRapFirmware Configuration Tool v3.2.2 on Thu Jan 28 2021 22:17:50 GMT-0800 (Pacific Standard Time) ; General preferences G90 ; send absolute coordinates... M83 ; ...but relative extruder moves M550 P"Corexy" ; set printer name M669 K1 ; select CoreXY mode ; Network ;M551 P"bronco2" ; set password M552 S1 ; enable network M586 P0 S1 ; enable HTTP M586 P1 S0 ; disable FTP M586 P2 S1 ; disable Telnet ; Drives M569 P0 S1 ; physical drive 0 goes forwards M569 P1 S1 ; physical drive 1 goes forwards M569 P2 S0 ; physical drive 2 goes backwards M569 P3 S0 ; physical drive 3 goes backwards M569 P4 S1 ; physical drive 4 goes forwards M569 P5 S0 ; physical drive 5 goes backwards M569 P6 S0 ; physical drive 6 goes backwards M569 P7 S0 ; physical drive 7 goes backwards M584 X0 Y1 Z5:6:7 E3:4:8:9 ; set drive mapping M350 X32 Y32 Z16 E16 I1 ; configure microstepping with interpolation M92 X160.00 Y160.00 Z400.00 E830.00 ; set steps per mm 80 ,80 previously M566 X1200.00 Y1200.00 Z60.00 E1200.00 ; set maximum instantaneous speed changes (mm/min) M203 X18000.00 Y18000.00 Z400.00 E3000.00 ; set maximum speeds (mm/min) M201 X2000.00 Y2000.00 Z16.00 E8000.00 ; set accelerations (mm/s^2) M906 X1200 Y1200 Z700 E1000 I30 ; set motor currents (mA) and motor idle factor in per cent M84 S30 ; Set idle timeout ;Leadscrew locations M671 X25:185:207 Y-40:380:-40 S8 ; leadscrews at rear left, front middle and rear right ; Axis Limits M208 X0 Y0 Z0 S1 ; set axis minima M208 X295 Y308 Z290 S0 ; set axis maxima ; Endstops M574 X2 S1 P"!xstop" ; configure active-high endstop for high end on X via pin xstop M574 Y1 S1 P"!ystop" ; configure active-high endstop for low end on Y via pin ystop M574 Z1 S2 ; configure Z-probe endstop for low end on Z ; Z-Probe M950 S0 C"duex.pwm5" ; create servo pin 0 for BLTouch M558 P9 C"^zprobe.in" H8 F120 T18000 ; set Z probe type to bltouch and the dive height + speeds G31 P25 X4 Y31 Z1.2 ; set Z probe trigger value, offset and trigger height M557 X15:290 Y45:340 S50 ; define mesh grid ; Heaters M308 S0 P"bedtemp" Y"thermistor" T100000 B4138 ; configure sensor 0 as thermistor on pin bedtemp M950 H0 C"bedheat" T0 ; create bed heater output on bedheat and map it to sensor 0 ;M307 H0 B0 S1.00 ; disable bang-bang mode for the bed heater and set PWM limit M307 H0 R0.628 K0.621:0.000 D1.52 E1.35 S1.00 B0 M307 H1 R1.941 K0.469:0.000 D6.11 E1.35 S1.00 B0 V12.3 M140 H0 ; map heated bed to heater 0 M143 H0 S120 ; set temperature limit for heater 0 to 120C M308 S1 P"e0temp" Y"thermistor" T100000 B4072 ; C1.5611 ; ;M308 S1 P"e0temp" Y"thermistor" T100000 B4138 ; configure sensor 1 as thermistor on pin e0temp ;M308 S1 P"e0temp" Y"pt1000" ; sensor 1 M950 H1 C"e0heat" T1 ; create nozzle heater output on e0heat and map it to sensor 1 M307 H1 B0 S1.00 ; disable bang-bang mode for heater and set PWM limit M143 H1 S280 ; set temperature limit for heater 1 to 280C ; Fans M950 F0 C"fan0" Q500 ; create fan 0 on pin fan0 and set its frequency M106 P0 S0 H-1 ; set fan 0 value. Thermostatic control is turned off M950 F1 C"fan1" Q500 ; create fan 1 on pin fan1 and set its frequency M106 P1 S1 H1 T30 ; set fan 1 value. Thermostatic control is turned on ; Tools M563 P0 D0 H1 F0 ; define tool 0 G10 P0 X0 Y0 Z0 ; set tool 0 axis offsets G10 P0 R0 S0 ; set initial tool 0 active and standby temperatures to 0C ; Buttons M950 J1 C"!^e1stop" ; Input 1 uses e1Stop pin, inverted, pullup enabled (yellow) M950 J2 C"!^e0stop" ; Input 2 uses e0Stop pin, inverted, pullup enabled (white) M950 J3 C"!duex.e2stop" ; Input 3 uses panel due pin, inverted, pullup enabled (blue) M950 J4 C"!duex.e3stop" ; Input 4 uses panel due pin, inverted, pullup enabled (black) M950 J5 C"!duex.e4stop" ; Input 5 uses panel due pin, inverted, pullup enabled (green) M950 J6 C"!duex.e5stop" ; Input 6 uses panel due pin, inverted, pullup enabled (red) M581 T2 P1 S1 R2 ; power on and off button (yellow) M581 T3 P2 S1 R2 ; load unload filament while printer is not running (white) M581 T4 P3 S1 R0 ; pause resume while print is running (blue) M581 T5 P4 S1 R2 ; lower bed 50mm (black) while the printer is not running (black not printing) M581 T6 P4 S1 R1 ; lower bed 50mm (black) while print is paused (black while printing) M581 T0 P6 S1 R0 ; estop (red) ; filament sensor M591 D0 C"zstop" P2 S1 ;switch type ;M591 D0 P7 C"!zstop" S0 R30:400 L0.024 E6 ;rotary optical sensor ;M591 D0 P7 C"zstop" S1 R2:1400 L0.033 E20 ;rotary optical sensor ;M591 D0 P7 C"zstop" S1 R5:1800 L0.021 E6 ;rotary optical sensor ;global variables global start_bed_temp = 0 global start_tool_temp = 0 global PA_value = 0.05 global filamentload = 1 M81 C"pson" M501;my esteps are calibrated a little low already I get 95mm when I ask for 100mm
but to just get a print to work I had my slicer extrusion multiplier at 0.89 and my dwc extrusion between 80-90% anything higher would cause massive blobs and over extrusion
-
@broncosis said in massive overextrusion, E-Steps are calibrated:
LDO 0.9 degree stepper on the bmg
Are you sure it's a 0.9 stepper?
-
well unless LDO has a habit of shipping motors that are marked as 0.9 but are 1.8
but I have had good prints with this motor I was hoping someone would see something obviously wrong in my configI will pull the motor out and confirm rotation tonight
-
@broncosis said in massive overextrusion, E-Steps are calibrated:
my esteps are calibrated a little low already I get 95mm when I ask for 100mm
How are you determining that exactly? The BMG should have a set steps per mm based on what the maker indicates and then maybe a slight adjustment to flow rate. I suspect something is mechanically or thermally wrong.
-
check which gear you have on your LDO some have 10 teeth but there are some with 8
-
@moth4017
it is a BMG I installed on the LDO motor
they were not purchased as a unitit is confirmed it is 0.9 degree stepper I get a full rotation when I request 7.7mm of filament which check out at 800 steps per mm with 16x micro stepping the machine seems to be doing whats asked of it
starting to wonder if something is off in super slicer