Duet3D Logo Duet3D
    • Tags
    • Documentation
    • Order
    • Register
    • Login

    Adjusting Z0

    Scheduled Pinned Locked Moved Solved
    My Duet controlled machine
    6
    12
    415
    Loading More Posts
    • Oldest to Newest
    • Newest to Oldest
    • Most Votes
    Reply
    • Reply as topic
    Log in to reply
    This topic has been deleted. Only users with topic management privileges can see it.
    • zaptaundefined
      zapta
      last edited by

      @PaulHew Another option you have to make small changes to the nozzle height is to use the slicer's settings. This is what I do.

      9a99ecc6-151f-4662-b59b-103146c2b17a-image.png

      Corexyundefined 1 Reply Last reply Reply Quote 0
      • Corexyundefined
        Corexy @zapta
        last edited by Corexy

        @zapta said in Adjusting Z0:

        @PaulHew Another option you have to make small changes to the nozzle height is to use the slicer's settings. This is what I do.

        9a99ecc6-151f-4662-b59b-103146c2b17a-image.png

        Same here.

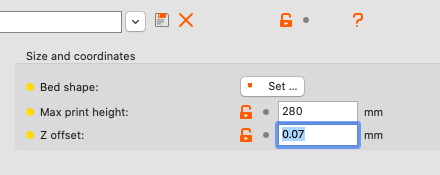
        I set it all up with G92 Z0, then I can tweak the Z offset a bit in the slicer profile for whatever filament/material I'm using. Really allows some fine tuning.

        1 Reply Last reply Reply Quote 0
        • mrehorstdmdundefined
          mrehorstdmd
          last edited by

          You can always add an adjustable Z=0 endstop. The linked design allows for 100 um adjustment per turn of the thumbwheel making small changes quick and easy.

          https://drmrehorst.blogspot.com/

          zaptaundefined 1 Reply Last reply Reply Quote 0
          • zaptaundefined
            zapta @mrehorstdmd
            last edited by

            This design using a micrometer, if you want to go the analog route.

            https://www.thingiverse.com/thing:1702285

            1 Reply Last reply Reply Quote 0
            • fcwiltundefined
              fcwilt
              last edited by

              Hi,

              I never cared for the "paper" approach, too easy to crush the paper.

              Instead I use a 1mm thickness gauge. Once the nozzle just touches the gauge I can use G92 1 to set the current Z position.

              Frederick

              Printers: a E3D MS/TC setup and a RatRig Hybrid. Using Duet 3 hardware running 3.4.6

              1 Reply Last reply Reply Quote 0
              • Phaedruxundefined
                Phaedrux Moderator
                last edited by

                I just eyeball it. It's well lit and at eye level so it's easy to see the gap disappear.

                Z-Bot CoreXY Build | Thingiverse Profile

                1 Reply Last reply Reply Quote 0
                • PaulHewundefined
                  PaulHew
                  last edited by

                  Appreciate the responses that everybody has shared.
                  Voron specify that when printing the parts Z must be 0 not a paper thickness 0.
                  Even with a 1st layer of 0.24 I still have to baby step 0.02 so it looks good and does not look like the top of a shepherds pie where the fork has been dragged through the potato!

                  The main reason for my question is the Panel Due that is connected to this printer can only baby step in 0.02, not the 0.01 I would like, even though DWC can perform 0.01 steps. Also the printer and my computer are about 6ft away so it can get tricky.

                  Eyeballing the nozzle onto glass on a RailCore is tricky as there is a piece of metal in the way!
                  I like @fcwilt idea so will invest in some feeler gauges which is effectively what I am doing with paper but more accurately!

                  Thanks again.

                  Regards

                  Paul

                  RailCore II - Duet Mini + 1LC, Voron V0.1 - Duet Mini
                  Voron 2.4 disassembled..... Waiting for the RailCore Mini....

                  Phaedruxundefined 1 Reply Last reply Reply Quote 0
                  • Phaedruxundefined
                    Phaedrux Moderator @PaulHew
                    last edited by

                    @PaulHew said in Adjusting Z0:

                    The main reason for my question is the Panel Due that is connected to this printer can only baby step in 0.02, not the 0.01 I would like

                    I've gotten around that by creating a macro that increments baby stepping by 0.01mm. It's a little less convenient, but it works.

                    @PaulHew said in Adjusting Z0:

                    feeler gauges

                    Feeler gauges are fine too, but they are also really thin and a bit hard to see, same as paper. There's nothing to say the gap being set must be small, it just needs to be accurate, so if you have a metal block that can be measured with a caliper you can use that to set the offset. Machinist blocks for instance.

                    Z-Bot CoreXY Build | Thingiverse Profile

                    fcwiltundefined 1 Reply Last reply Reply Quote 1
                    • PaulHewundefined
                      PaulHew
                      last edited by

                      @Phaedrux Nice one, I had not thought about that. GCode bible here I come!

                      P.

                      RailCore II - Duet Mini + 1LC, Voron V0.1 - Duet Mini
                      Voron 2.4 disassembled..... Waiting for the RailCore Mini....

                      1 Reply Last reply Reply Quote 0
                      • fcwiltundefined
                        fcwilt @Phaedrux
                        last edited by

                        @Phaedrux said in Adjusting Z0:

                        Feeler gauges are fine too, but they are also really thin and a bit hard to see, same as paper.

                        Which is why I use a 1mm gauge. My set has thicker ones but 1mm works well for me.

                        Frederick

                        Printers: a E3D MS/TC setup and a RatRig Hybrid. Using Duet 3 hardware running 3.4.6

                        1 Reply Last reply Reply Quote 2
                        • First post
                          Last post
                        Unless otherwise noted, all forum content is licensed under CC-BY-SA