please help me blv setting
-
@sgk to me, that looks like either z banding or a bed that doesn't have great PID control (so the bed temperatures fluctuate through the print).
If it is z banding, I.e. some issue with the z axis motion, things to look for would be:
- is there room for the ball screw to float a bit in case there is any misalignment?
- are the ball screws straight?
- do they wobble at all as the z axis moves?
- are the z guides giving the bed enough support (I.e. can the bed move in x and y at all)
For the PID issue, watch your bed temp during a print - it should be pretty stable. Also double check you are using it in PID mode, not bang bang
-
@engikeneer
hello thank you very much for your help. This has to say that I am an average novice there are things that I do not understand, excuse me
but how do I know and how can I verify all this?I put a new thermistor for the hotend I must also do for the bed?the z rods are mounted on sfu1204 I imagine they are straight.
i have this the z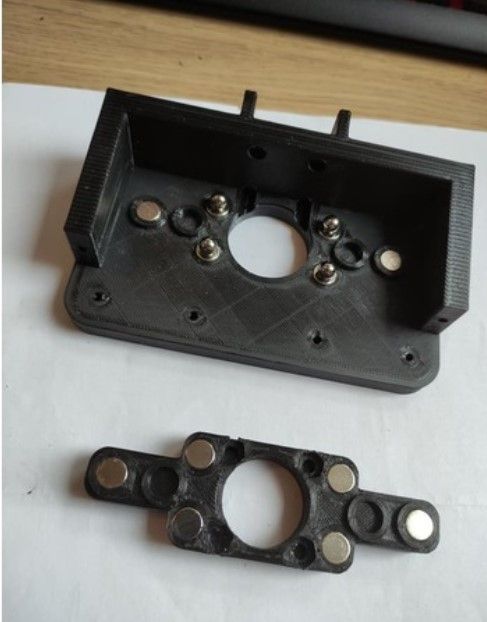
-
@sgk i have this for z
-
@sgk well that mount looks good for the bed end - looks like it's got some room for flex in x and y which is good.
Maybe down at the motor end, might be worth checking that. Is the coupler to the z motor perfectly concentric? I had a cheap one once that wasn't and made the bottom of the z screw wobble a lot. Maybe loosen the screws for the black support piece so it is slightly free and see if it wants to wobble? -
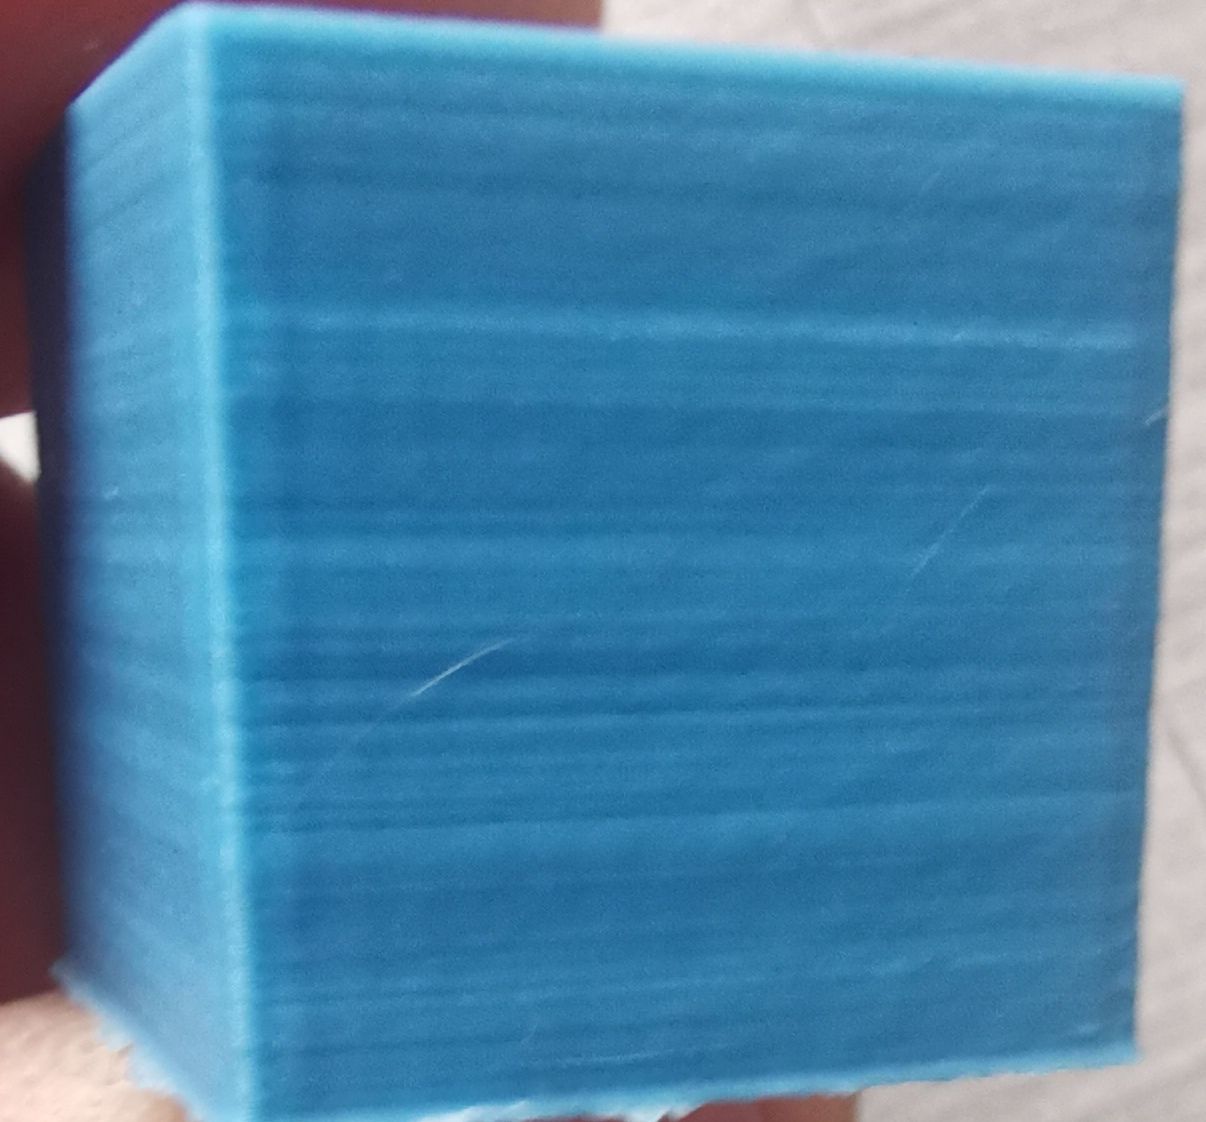
@sgk I run a BLV with SF1024 ball screws as well. With this set up you need the top blocks - the approach with lead screws does not translate well when you change to ball screws. Your variations in the horizontal layers going vertically is from micro shifts that are occurring, and it’s exacerbated with a two screw setup over a three a axis layout.
You also may want to rerun a PID. What version of the firmware are you running?

-
Example of output. Ignore the zits, I was still tuning the pressure advance and coasting after installing ball screws.
.

-
@nuramori hello my print is
Board: Duet 2 WiFi (2WiFi)
Firmware: RepRapFirmware for Duet 2 WiFi/Ethernet 3.3 (2021-06-15)
Duet WiFi Server Version: 1.26
i have thsi engine moonsthank you very much friends i will start to control the z.
I have installed a new semitec 104gt-2 104nt-4 and pid 3 x thermistor
It can also come from the hotend fan because at home I can not adjust it? -
are normal when I do the pid my fan does not cut hotend?
-
@sgk


-
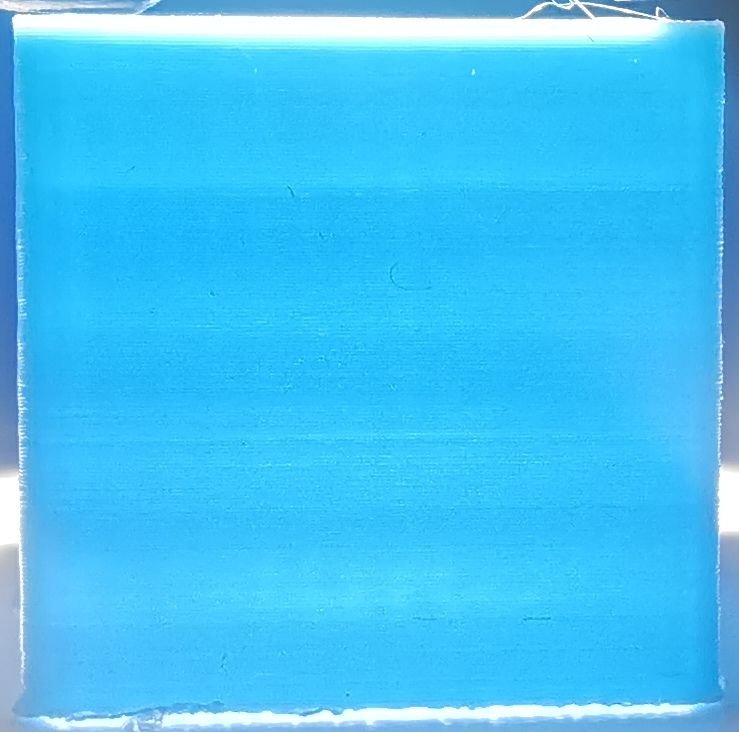
new cube test with the bed off? and new pid what do you think?
mor setting z.still so bad I am always so badly depressed.
frankly friends i am really losing hope.
how do you manage to have beautiful pieces?
-
@sgk you’re showing signs of overextension. To give you some idea, even though I have calibrated the extrusion, I still have my extrusion volume at 80% in my slicer (Cura). You can easily experiment with your settings to dial this down.
The banding that’s evident can be a number of factors, but I would look at securing the top of your ball screws and verifying that your belt tensions are equal and high enough in tension. I would also look at your extrusion temperature.
-
@nuramori
hello and thank you for your answers do you have a cura config to share? i will make the part for the top of the rod 1204
-
@sgk
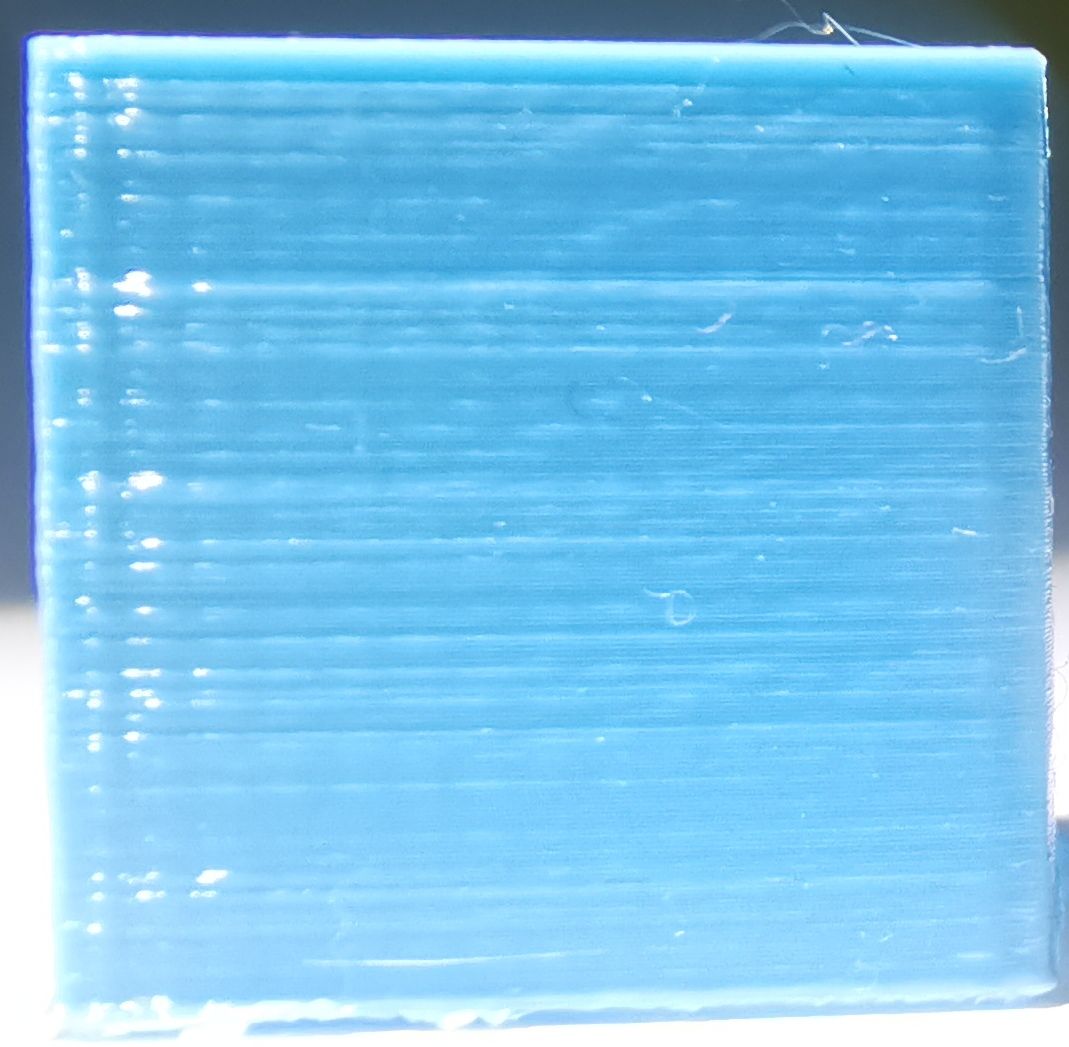
with the bk support at the top I have this quality.
on the cube it is as if there is a lack of material as seen in the photo. -
Have you tried to print a temp tower? It looks like your temps may be too high. The surface is very glossy. This can also lead to the messy walls and give the appearance of over extrusion.
-
@phaedrux thank you for your answer indeed I have the impression that the walls are not right I do not know where it can come from your an idea?
Have you tried to print a temp tower?
what does it mean? -
@sgk said in please help me blv setting:
Have you tried to print a temp tower?
what does it mean?The simplest way would be to print that same cube, but every so often reduce the temperature by 5c
You may also find this calibration guide helpful.
https://duet3d.dozuki.com/Guide/Ender+3+Pro+and+Duet+Maestro+Guide+Part+4:+Calibration/40 -
@phaedrux yes I printed at 190 to 195 200 205 210 215 220 but the result is almost the same not much difference.
but not continuously. -
How low of a temp can you set and still reliably extrude?
What kind of thermistor do you have and what parameters have you set for it in your config? If those values are very wrong for the thermistor your temps could be wildly off.
If you can extruder PLA much below 180 I think that may be part of the problem.
-
@phaedrux it is true that I have not tried 180 or even 175.
M350 X16 Y16 Z16 E16 I1 ; Configure microstepping with interpolation M92 X201.00 Y201.00 Z800 E693.55 ; Set steps per mm for orbiter M566 X500 Y500 Z800 E600 ; Set maximum instantaneous speed changes (Jerk) (mm/min) M203 X20000 Y20000 Z600 E3600 ; Set maximum speeds (mm/min) M201 X1000 Y1000 Z100 E600 ; Set accelerations (mm/s^2) M906 X1500 Y1500 Z1000 E500 I10 ; Set motor currents (mA) and motor idle factor in per cent ;M84 S30 ; Set idle timeout ;M350 E16 I1 ;micro stepping set to 16 with interpolation ;M92 E690 ;steps/mm - you may need to finetune it ;M203 E3600 or E7200 ;max speed mm/min ;M566 E600 ;instantaneous speed change mm/min ;M201 E600 or E800 ;acceleration mm/s^2 ;M906 E500 or E1200 I10 ;motor current mA idle current 10% ; ===================== Axis Limits ======================== M208 X-23 Y0 Z0 S1 ; Set axis minima M208 X320 Y320 Z350 S0 ; Set axis maxima ; ======================== Z-Probe ========================= M558 P1 C"^zprobe.in" H5 F200 T9000 I0 R0.5 ; Set Z probe type mini ir sensor G31 P500 X-2.24 Y-20.81 Z1.300 ; Set Z probe trigger value, offset and trigger height M557 X20:270 Y20:270 S240 ; Define mesh grid ; ======================== Heaters ========================= M308 S0 P"bed_temp" Y"thermistor" T100000 B3950 ; define bed temperature sensor M950 H0 C"bed_heat" T0 ; heater 0 uses the bed_heat pin, sensor 0 M307 H0 R0.272 C388.6 D16.77 S1.00 V23.6 ; Heatbed PID M140 H0 ; map heated bed to heater 0 M143 H0 S120 ; set temperature limit for heater 0 to 120C M308 S1 P"e0temp" Y"thermistor" T100000 B4725 C7.06e-8 ; define E0 temperature sensor M950 H1 C"e0heat" T1 ; heater 1 uses the e0heat pin and sensor 1 M307 H1 B1 R2.466 C168.0:167.2 D4.81 S1.00 V23.5 ; Hotend PID .4mm M143 H1 S260 ; set temperature limit for heater 0 to 260C M308 S2 P"mcu-temp" Y"mcu-temp" A"Duet Board" ; Configure MCU sensor -
@sgk ; ======================== Tools ===========================
M563 P0 S"T1" D0 H1 F1 ; Define tool 0
G10 P0 X0 Y0 Z0 ; Set tool 0 axis offsets
G10 P0 R0 S0 ; Set initial tool 0 active and standby temperatures to 0C; ========================= Fans =========================== hotend fan/ hotendM950 F1 C"fan1" Q500 ; create fan 1 on pin fan1 and set its frequency
M106 P1 S1 H1 C"hotend" T45 ; set fan 1 value. Thermostatic control is turned on 100% at 45degTool Fan/ Layer FanM950 F0 C"fan0" Q500 ; create fan 0 on pin fan0 and set its frequency
M106 P0 S0.5 H-1 C"Layer fan" ; set fan 0 value. Thermostatic control is turned offM950 F2 C"fan2" Q250 ; create fan 2 on pin fan2 and set its frequency
M106 P2 S0.15 H-1 F250 C"AC alimentation" ; set fan 2 value. Thermostatic control is turned off; ===================== Custom settings ====================M572 D0 S0.015 ;pressure advance Set bowden extruder elasticity compensation for E0
M207 S1.5 F3600 Z0.01 ; Set firmware retraction parameters
M564 H0 ; Let the Jog buttons work blv: added to allow jog buttons