Duet3D Logo Duet3D
    • Tags
    • Documentation
    • Order
    • Register
    • Login
    1. Home
    2. Emily
    • Profile
    • Following 0
    • Followers 0
    • Topics 1
    • Posts 11
    • Best 1
    • Controversial 0
    • Groups 0

    Emily

    @Emily

    1
    Reputation
    2
    Profile views
    11
    Posts
    0
    Followers
    0
    Following
    Joined Last Online

    Emily Unfollow Follow

    Best posts made by Emily

    • Need ideas for inline wire connectors for steppers

      Hi.

      Several of the motors I am using on a build have the wiring harness connected internally within the motor, rather than a connector. This has some obvious drawbacks. For one you have fixed length to work with. And you get whatever wire they give you, rather than proper motion, or cable carrier rated wire.

      Since this is a large corexy I don't think the wire leads will be long enough to reach the duet board which will be installed in a proper control box on the side of the machine.

      What I would like to do is cut the factory leads off short leaving a pigtail. Install a connector. Then run my own shielded cable to the controller. (shield to be terminated at one end, probably to the frame near the motor).

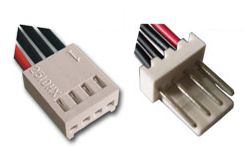
      I would prefer something more secure than Dupont connectors, and I am sort of lost when it comes to the numerous options options for various molex connectors.

      I have also seen this done using a fancy Wago connector on an industrial CNC machine that I installed.

      Anyway. I am curious if anyone has any input on some good solutions for this.

      Thanks.

      posted in Duet Hardware and wiring
      Emilyundefined
      Emily

    Latest posts made by Emily

    • RE: E3D heater burn spot

      In the unlikely scenario you have been getting defective heater cartridges I am sure E3D would take that very seriously and would want to know about that. Understandably they would probably have you go through a troubleshooting process first before they get to that conclusion.

      Here are some ideas.

      1. strip the heat shrink, and insulation near the burn spot. Then visually inspect for defective crimp, or broken strands in that area.

      2. Strip some fresh wire near the cartridge so the burnt wiring doesn't affect the reading. Then measure the resistance across the heater with an ohm meter to rule out bad cartridge. E3d publishes resistance specs for their heaters. The reading could be bad from damage from overheating so this might not be a conclusive indication of the cause.

      3. Check the installation of your thermistor to verify that its not shorting, intermittently failing open circuit, or decoupled from the heater block.

      4. Check that the 12v supply voltage is actually in the 12-14V range. Note that if you are using a 12V 40 watt cartridge this becomes 54 Watts at 14v!

      If you have everything secured with double strain relief, and its not catching on anything at any point in travel you should be ok. Be careful while installing stuff, wiring the printer, moving axis's around before you have the wiring secured. I have broken wires to thermistors before doing this.

      Thermistors also have different characteristics. We need to tell the firmware which one we are using, so when it reads the voltage it can translate this to the correct temperature.

      I think what they were suggesting since E3D supplied thermistors have a different value than the Generic 100k NTC that are commonly found is to make sure that

      1. you have the correct values set in firmware for the E3D Supplied thermistor.

      2. If you are using a different thermistor, that you have the correct values set for that which will almost certainly be different than the one E3D supplies.

      posted in Duet Hardware and wiring
      Emilyundefined
      Emily
    • RE: Anycubic Ultrabase

      I tried everything but PEI for PETG, because I had read that it can stick too much to PEI.

      I finally tried PEI and never looked back. I clean with 99% alcohol in between prints and set the temperatures around 82c. I set the nozzle height with printer paper. I mostly print Esun PETG. No gluestick. No hairspray.

      Never had an issue removing the prints. Have only had an occasional problems with warping on large thick parts with very dense infill.

      In my experience PETG likes moderate temperatures. I think I had some adhesion issues a while back from temperatures set too high.

      PETG adhesion can be tricky if you don't have slicer settings dialed in for it. In simplify 3D, I go for a 150% first layer height, 120% first layer width 35% first layer speed (might be able to go faster) and for PETG I set the outline direction to inside out (Don't do this with PLA). I had problems getting PETG dialed in in Cura.

      I do have an ultra base (I took the adhesive off so I can switch it with other surfaces) I don't like gluing things down because then your left with a mess when you have to change it out.

      I only really printed with it once. The PCB heater is nice though. They are a bit more powerful than the MKII boards (at least the 220x220 version is) and I have run mine set at 118C (measured with IR thermometer to get minimum 110c) for abs, no problem. If you have to run a PCB heater due to weight considerations, these are worth it just for the PCB.

      posted in General Discussion
      Emilyundefined
      Emily
    • RE: Stepper motor Noob Here

      The maximum realistic current you want to run the motor at is going to be more like 70-80% of what the motor is rated for. You want to make sure in addition to this the motor is not getting too hot, and in general that your drivers are capable of this. Its pretty common to run stepper motors well below their rated current, so you could consider going lower if they are performing well.

      posted in Duet Hardware and wiring
      Emilyundefined
      Emily
    • RE: DuetWifi on a wood/alu router?

      I would suggest a 1/4" palm router like a DeWalt DWP 611 or Bosch Colt. That is about the bare minimum. They are basically turbo charged laminate trimmers.

      Speed does matter. You want to cut fast enough to maintain sufficient chip load, for the depth, and RPM. This cools the bit, and keeps it from burning up. You will also create more chips, less dust. The bit should be cool enough to touch (with the router unplugged) when your done cutting. Typical handheld wood routers have universal brushed motors so our minimum spindle RPM is limited due to poor speed control/torque at the low end of the speed range. So chip load is going to be controlled by feed rate.

      So with a 1/4" end mill in wood you would probably want to be able to cut at at least 1.5 IPS or 40mm/s. More ideal would be 3-5 IPS, or 80-120MM/S, while climb cutting at 1/4"-3/8" depth. I own a machine that does that but it also cost $15,000 and has a 3.5" hp router motor, so obviously thats out of the question here.
      Just an example of how CNC routers quickly get exponentially heavier and more expensive.

      posted in CNC
      Emilyundefined
      Emily
    • RE: Is my extruder skipping? I can't tell what is going; Thoughts?

      I have also had bad spools of PLA that will print like this no matter what you do.

      posted in Tuning and tweaking
      Emilyundefined
      Emily
    • RE: Build Log: Fun King 3D FK-1 3D Printer

      Looks like it could be fun. (Pun very much intended). As someone that can't look at any printer without wanting to tinker, I see some things I would want to change.

      Obviously such a large printer is going to have to be built with some compromises without cost getting insane. Otherwise we end up with a $500,000 milling machine.

      One of those compromises may be printing primarily with a large diameter nozzle, and tall layer heights. I would rule out printing with a .4mm nozzle. (Might work ok within a smaller portion of the bed), unless it turns out to be rigid enough. Tall layer heights could be more forgiving here.

      I think the Cartesian arrangement is fine. Core XY can be less moving mass, but it is frequently built in a way that it really isn't. With large nozzles appropriate for large format printing you may end up printing slower anyway.

      I figure you are already aware of this. Joining the extrusions with blind screw method here would be best. The corner brackets won't do much (Don't ask me how I know this).

      As mentioned earlier. I would go with either 3 or 4 lead screws on the Z axis. 3 is preferable if it works, but I would probably do 4. At this point you probably don't have to worry much about weight with 4 z motors.

      This design relies a lot on the 20x40 extrusions being perfectly straight with minimal deflection. So maybe this isn't a concern, deflection is acceptable and the extrusions you got are really straight. But this is something I would test.

      I would consider going with a 20x60 extrusion on the long axis. More costly option would be to add a linear guides to that. A possible budget oriented solution if the current design is just not working would be to add a second narrower extrusion on the inside of each side with holes drilled regularly along its length for adjustment. This would be kind of tedious to get adjusted but it could work.

      It will be fun to see this progress.

      posted in General Discussion
      Emilyundefined
      Emily
    • RE: Filament Jams

      I have had bad spools of PLA that will do this. Even right out of the box. I would get a fresh spool and try that. I typically print Hatchbox at about 205c, (not blue) no issues. I have had other brands of PLA that need higher temperatures, but with any decent PLA it should be pretty forgiving.

      Another thing to check is that sometimes these printers come with really cheap bowden couplings. Sometimes they can be fine, so I wouldn't run out and replace them, but that is something I would check because that can cause problems that would look like a clog.

      My experience is that actual clogs are usually caused by PLA crystallizing in the hot end when switching to higher temperature filaments. Or Residual high temperature firmaments that did not get fully purged when switching back to PLA. I purge the hot end with Esun cleaning filament when switching to and from PLA, to PETG, ABS, etc... since it has a very wide temperature range.

      posted in General Discussion
      Emilyundefined
      Emily
    • RE: Emergency Stop! Please wait while firmware is restarting

      I would tend to think a noise or ground loop problem would cause the device to lock up rather than cause it to send unintended commands over serial. That is unless there is an analog input somewhere for E stop that is getting affected. Not sure what the max spec is but 40" doesn't seem particularly long.

      posted in General Discussion
      Emilyundefined
      Emily
    • RE: Inconsistent trigger heights

      " First layer is always high on the back right side of the bed with mesh bed leveling unable to compensate correctly. "

      If you place something known to be flat on the bed (glass is ideal) can you level the bed at all 4 corners, manually?

      Is this a machine where the bed moves horizontally for the X or Y axis (i3 style)?

      If so and if one corner is always high/low when leveled manually it sounds like one of the two linear guides the bed rides on could be bowed, or out of alignment with the other.

      I had this exact problem with one of my printers. This was a DIY build that somewhat resembles a CR10. I had originally used 2 parallel vlot slot extrusions as linear guides for the bed.

      One of the two V slot extrusions was bowed. This caused the front right corner of the bed to be low, when moved to the nozzle. Adjusting it would then make that corner of the bed high, when moved away. Solution in my case was to remove the bowed rail, and just use the good one.

      Hope this helps.

      posted in Tuning and tweaking
      Emilyundefined
      Emily
    • RE: Need ideas for inline wire connectors for steppers

      @phaedrux said in Need ideas for inline wire connectors for steppers:

      JST kit on amazon I have used: https://www.amazon.ca/gp/product/B0188DMF3A/ref=s9_dcacsd_dcoop_bw_cr_x__a_w

      Molex KK:
      0_1531421719942_Molex-KK-connector.jpg

      Thanks for posting that JST kit. I had not been able to find a kit yet with both male, and female plug housings. (The one I have has PCB mount headers) . I will pick one of those up to use for fans etc... at the very least.

      posted in Duet Hardware and wiring
      Emilyundefined
      Emily