• Tags
  • Documentation
  • Order
  • Register
  • Login
Duet3D Logo Duet3D
  • Tags
  • Documentation
  • Order
  • Register
  • Login
  1. Home
  2. Sethipus
  • Profile
  • Following 0
  • Followers 0
  • Topics 17
  • Posts 135
  • Best 14
  • Controversial 0
  • Groups 0

Sethipus

@Sethipus

19
Reputation
5
Profile views
135
Posts
0
Followers
0
Following
Joined 19 Nov 2016, 13:27 Last Online 4 Sept 2019, 19:51

Sethipus Unfollow Follow

Best posts made by Sethipus

  • RE: Does pressure advance respect max speed/accel/jerk settings?

    Since pressure advance attempts to extrude even more plastic at the very start of a line, while the acceleration is happening, than usual, and since 20mm of filament is indeed a very large amount of filament to deposit in only three seconds (that's 6.67mm/s average) I'd guess you're seeing an instantaneous extrusion speed of higher-enough over 6.67mm/s at the very start of the line that the combination of your hotend and extruder simply can't keep up, and what you're hearing is the extruder motor complaining about being unable to advance as commanded, or else possibly your extruder hob's teeth grinding away at the filament.

    In my own experiments while setting non-linear advance, I found that at 265 C (that's pretty high for PETG) around the 5-6mm/s mark my hotend simply couldn't melt the plastic fast enough for my then-single-drive extruder to keep up and I got skipping. I've got a dual-drive extruder now, but the fundamental issue of simply not enough heat flux into the filament through the melt chamber would remain. So the question is, given a higher than 6.67mm/s instantaneous melt demand, why do you think it should actually succeed?

    You could test this in a few ways:
    Raise your hotend temp by 10-15 C and see if anything changes.
    Change your command to something like G1 Y30.0 E20 F300 and see if cutting in half the demanded flow rate completely mitigates this.

    Personally I think you're simply asking too much of your hotend and extruder. Phaedrux was too subtle in his comment.

    posted in General Discussion
    undefined
    Sethipus
    21 Aug 2019, 18:03
  • RE: Motor noise and print quality

    OK, my 0.9 degree steppers arrived today, so I ran a test. I have some good news and some bad news.

    I printed a small faceted vase with my original 1.8 degree steppers still installed. Swapped out the steppers for the new 0.9 degree ones, doubled my steps setting in the config.g, rebooted, then printed the exact same vase gcode file with the new 0.9 degree steppers running the show.

    1. Good news: There does seem to be subtle improvement in the surface quality of the vase printed with the 0.9 degree stepper, with a much smaller and more subtle fine vertical artifact that I could see if I looked really closely at the surface of the print from the 1.8 degree steppers being essentially eliminated.

    2. Bad news: the "corduroy effect" that I see on flat surfaces with reflected light on shiny filament printed structures did not go away, and that was more noticeable than the VFAs that did go away.

    Here's a photo showing the fine VFAs on the left-side vase, which was printed with the 1.8 degree steppers in my X/Y motion system. There are moire and other effects with my phone camera that make it difficult to photograph these things, but those VFAs are not visible in person in the vase on the right.

    alt text

    Here is a photo from further back and with a slightly different lighting angle that shows the coarser and more visible "corduroy effect" that I see on lots of flat surfaces that I print.

    alt text

    Bottom line is that my printed surfaces do look better at a more subtle level, and artifacts that I can in fact see in the 1.8 degree stepper prints do not show up with the 0.9 degree stepper print, but the more visible corduroy effect is still something which eludes me. Still not sure what that comes from.

    I doubt it's a an extruder stepper issue from the extruder still using 1.8 degree steppers, since the BMG clone I'm now using is around a 4:1 reduction, plus microstepping, so it's hard to believe that with the fairly large "wavelength" of this periodic effect this is caused by ideosyncrasies with the stepper during single steps. In fact I think I can prove that it isn't: I'll print the vase using .3mm layers and again using .2mm layers (these were with .25mm layers) and then see if the wavelength of this effect changes or stays the same. I believe from past prints I've done with different layer heights that in fact the wavelength will stay the same.

    posted in Tuning and tweaking
    undefined
    Sethipus
    19 Aug 2019, 06:52
  • RE: A Repeating Artifact

    @b0m0a0k said in A Repeating Artifact:

    @mrsdelish Thanks for this. I had been researching what I could do by way of an upgrade to the extruder or the hotend but was a little undecided because everyone has a different take.

    My options so far are;

    Micro Swiss Mk10 All Metal Hotend Kit with cooling block. (Straight replacement)

    E3D Titan Aero HotEnd and Extruder

    Various other suggested mods.

    Don't get me wrong, I enthusiastically modded and upgraded my Wanhao (Monoprice Maker Select actually; it's the same printer), but I would like to opine that whatever was causing the behavior you saw in your initial posting would not be improved by upgrading the hotend, or the extruder for that matter. There's nothing wrong with the hotend and extruder (it's direct drive) on that printer, unless you want to print at nozzle temps higher than around 240-245 C or so for very long. I printed tons of PETG on that printer (including all the parts for my initial build of my D-Bot), and eventually replaced the teflon tube in the hotend and found it fairly blackened and charred. The problems you are seeing are 100% settings issues.

    To that end, I would recommend against tweaking extrusion multiplier and whatnot as a fix to your problems. That's a kludge that should be used last, after everything else is dialed in to what they should be. I'd set your e-steps back to what they ought to be. Using e-steps to try to "fix" problems is the wrong approach. Do the measurements and actually measure how many steps it takes, and use that value. Measure your filament and input that value. If it's within a couple thousandths of 1.75mm then it doesn't really matter here or there, but I recently was printing with some filament that was so much smaller I could actually see it with my naked eye, and measured it out at 1.62mm, which is definitely enough to make a difference.

    Once you're printing with relative extrusion, then dial in your retraction. Once that's done, then modify your acceleration/max speed/jerk settings, and you should be printing really nicely. You can do all this with Cura too. There's nothing magical about Slic3r compared to Cura that caused the massive improvement in results you saw. It's just settings, and you can change whatever you need to in both and get pretty much the same results. Massive tweaking of the extrusion multiplier will just cause havoc from filament to filament and print to print.

    Btw, I think I paid like $250-300 for that Maker Select printer, and by the time I was done with little upgrades and mods and whatnot I don't doubt I'd paid upwards of $600-700 total, including the Duet Wifi, which means I could have just bought a $600-700 print to start and probably been better served (other than the Duet Wifi, which I consider mandatory on any printer I will use). Oh well, I learned a massive amount with that printer, and so in the end it served me well.

    posted in General Discussion
    undefined
    Sethipus
    30 Aug 2019, 08:03
  • RE: Motor noise and print quality

    @grizewald said in Motor noise and print quality:

    @sethipus said in Motor noise and print quality:

    I don't recall what printer you're using @grizewald, but is it using gt2 belts to drive the X/Y access? And if so, are there places where your toothed belts are running around idler pulleys, whether smooth or toothed?

    My printer is the V-Core from RatRig. They've just released version 2, so the pictures for version 1 are no longer present on the site, but it's big Core-XY based on OpenBuilds parts with a nominal 300 x 300 x 300mm build volume.

    It looks like this:

    It does use GT2 belts and apart from the pulleys, the belts go around OpenBuilds smooth idlers. It would be very difficult to arrange twists in the belts so that every idler had a smooth belt side running around it.

    I had a close look at my D-Bot's setup and a single twist (per belt) immediately after the stepper itself, on the outer belt run (ie: not the one that must remain parallel) will ensure that the back side of my belt runs against the idlers for the rest of the run. When I first tried addressing the corduroy effect, I swapped out the smooth idlers for toothed ones, but it didn't really help. There is this microscopic jump in the X and Y motion as each tooth engages (or each ridge on the belt hits a smooth idler) that results in very slight extrusion rate differences on a printed straight line, and that's what's causing this effect.

    Anyhow, CoreXY is CoreXY and I'd be surprised if your printer's belt runs are really any different than mine in this regard. Is there really no way to introduce a twist in the outer belt run away from each stepper, to get smooth belt backside against the idlers?

    ETA: I really wish I'd built my D-Bot to the 300x300x300 version. I built mine to the 200x300x300 version. In theory it wouldn't be too hard to change mine, just four lengths of v-slot rail and a new build platform, but I just can't bring myself to do it. What concerns me more than that extra 100mm of Y axis is getting my printer enclosed. I've tried printing PC and nylon and ASA and whatnot without an enclosure without a lot of success (well, had more success with the nylon than the other two). My biggest thing is that I've got things that would be inside the enclosure if I just put a large box over it that I don't really want heated, like the power supply, Duet Wifi controller, and steppers, plus the bowden tube is sticking up from the extruder, which is mounted to the top rear frame rail. One of my next big upgrade projects will be to move everything that might be heat sensitive out of the build volume area, and figure out some attachment points or whatever for some materials that can enclose the build volume itself.

    posted in Tuning and tweaking
    undefined
    Sethipus
    23 Aug 2019, 20:08
  • RE: Motor noise and print quality

    @grizewald , I replaced all my toothed idlers with smooth ones, put the flip in the belt on the first run from the stepper on the "outside" runs of my CoreXY system so that the flat side of the belt is always bearing on the idler pulleys, and just finished my first print with it.

    The flip made a ginormous difference in the surface quality, and utterly eliminated the "corduroy effect" I was seeing. I'm absolutely kicking myself that I didn't do this when I built the printer in the first place. It's unbelievable. Oh well, you live and learn.

    Here are two photos of a relatively innocuous portion of a particular figure. The blue one is the new print with the flipped belts and smooth idlers, the clear one is with the belts not flipped and the teeth rolling over toothed idlers.


    As you can see, in the photo of the blue print all of that corduroy effect is completely gone. That corduroy effect has afflicted every print I've ever made on this printer until now. On highly detailed models with no or few flat or relatively flat surfaces, or with filament that doesn't reflect light that much, it wasn't really noticeable. On shiny flat surfaces it was always highly obvious. I almost can't even believe how much of a difference it's made.

    posted in Tuning and tweaking
    undefined
    Sethipus
    26 Aug 2019, 11:50
  • RE: oops, updated wifi server bin and printer is now offline

    @deckingman said in oops, updated wifi server bin and printer is now offline:

    @sethipus If you scroll down the list in the link that @bearer provided, to RRF 1.19, you'll see this in the upgrade notes:

    "Important! On a CoreXY machine, if upgrading from a version prior to 1.19beta9, you need to reverse the Y motor direction in the M569 command. Similarly for CoreXYU machines."

    Do that and you X Y movement will be restored.

    Thanks! I suppose I probably should have read all of the release notes of all the versions of the firmware I just skipped over.

    Anyhow, that did it! Btw @deckingman I watched your video about your pressure advance and whatnot, and I was really astounded by your printer. That's just awesome. I just ran that pressure advance testing python gcode generator last night and got some funky results (massively chunky sections where the print speed was 5mm/s, and I mean massive, like 3 or 4 times as wide as when it was at 100mm/s). I'll post about it in that other thread.

    I gotta run a print now, just to make sure everything else is working right again. Guys, I appreciate the help. Thanks for helping me get my D-Bot/Duet Wifi back online and apparently functioning properly again after my update screwup from last night.

    posted in Firmware installation
    undefined
    Sethipus
    8 Aug 2019, 08:50
  • success with non-linear extrusion tuning

    After looking at the two recent posts here in this forum where users had uploaded Excel spreadsheets for calculating the A and B values for the M592 command, I spend several hours trying to measure the different speeds, run the spreadsheet, measure results after setting the M592 command, etc. I was getting nowhere. The values I was getting were leading to wierd results where the variation in what feeds I measured at different speeds was actually larger than the unmodified initial measurements. I did this so many times it's not funny.

    I'd decided not to try doing it with 50mm tests. I'd gone for 100mm tests. I wasted hours not noticing that I was using 50mm movement commands with 100mm extrusions, which means that my extrusions were happening twice as fast, and I was quickly getting to the point where my extruder would slip.

    I was about to give up, but I decided to try it one last time.

    1. I used 150mm movements with 150mm extrusions.
    2. I measured what I got with no non-linear adjustment at five feed rates, 1-5mm/s. At 6mm/s I was seeing slippage and getting a bogus result.

    The reason I did the 150mm extrusions was because I was marking with a sharpy and eyeballing my measurements against a 150mm metric ruler. I reckon my measurements were good to about .5mm. An error of .5mm on a 150mm extrusion is lower than a .5mm error on a 100mm or 50mm extrusion, so my input data for the spreadsheet would be better.

    It was. In my original measurement of the script running five test extrusions at those 1-5mm/s speeds during 150mm X-axis movements (so I knew that my feed rates were accurate minus some negligible acceleration at the start and end of the motion).

    Here's what I was seeing:
    1mm/s: 145mm used
    2mm/s: 144mm used
    3mm/s: 140.5mm used
    4mm/s: 137.5mm used
    5mm/s: 133.5mm used

    That's an extreme spread of 11.5mm. That's pretty huge. With no hotend involved (extruding into air) the extruder steps are perfect and will extrude as close to 150mm of filament as I can measure. With a hotend involved, even at 1mm/s, that drops to 145mm. That was an eye opener to me.

    Anyhow, plugging these values into the spreadsheet from this thread I got A=-0.00512, B=0.00496, by far the smallest values I'd yet seen in all my tests.

    So I punched in the M592 D0 A-.00512 B.00446 ; gcode and ran it, and redid my test script. Here's what I measured:
    1mm/s: 145mm measured
    2mm/s: 144.5mm measured
    3mm/s: 144mm measured
    4mm/s: 143.5mm measured
    5mm/s: 142.5mm measured

    That's an extreme spread of 2.5mm over a 150mm extrusion, for 1.7% difference, as opposed to 8.6% different extruded length for the same commanded extrusion length.

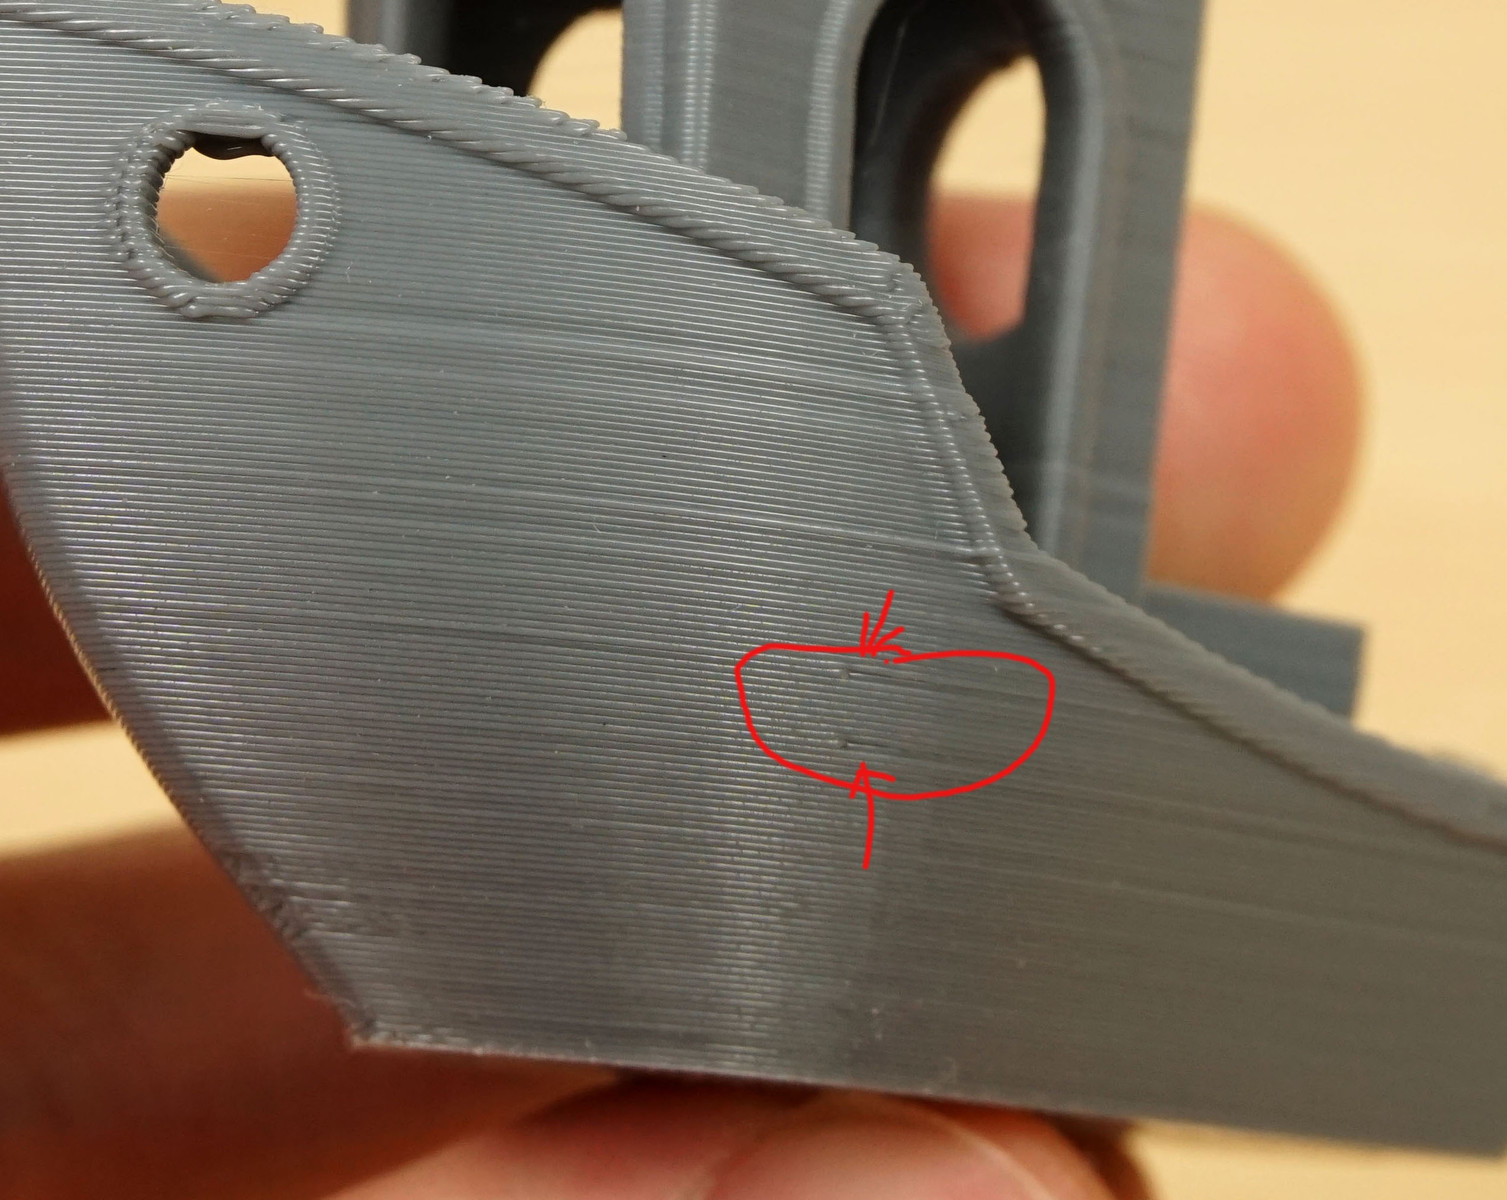
    Has it made a difference in my prints? Don't know yet. It did not make the fat slow sections go away while doing the pressure advance test script, though I think the difference is lower. Not sure what's the deal with that. I've done one print so far since tweaking the non-linear extrusion, and it came out pretty well. I've got some other things related to retraction and layer changes that I've got to work out, but so far so good.

    Anyhow, if you've tried tweaking non-linear extrusion and just gotten bizarre and unhelpful results, try running your tests at 150mm movement and 150mm extrusion at the different feed rates. You're likely to get more accurate results, and therefore more helpful M592 coefficients.

    posted in Tuning and tweaking
    undefined
    Sethipus
    9 Aug 2019, 08:10
  • RE: Motor noise and print quality

    Here's a classic example of FVAs in one of my old prints, a simple vase in PETG. You see this corrugated pattern all over the enter surface. I've looked at this with a high-power loupe, and it does appear to be an issue with a very slight pulsing in the lay-down of the filament. If I'm reading the article linked by Veti above correctly, this is caused by slight accelerations and decelerations of the X/Y steppers in the course of doing their steps, not by pulsation in the extruder. If this diagnosis is correct, a switch to 0.9 degree steppers could make that mostly disappear. One might think that the frequency of the pulsation would double and I'd simply get the corrugation at twice the frequency, but if the magnitude of the changes is also cut in half it's possible that the physical difference in how much filament is laid down in each layer per "pulse" is also cut in half, with the result that its effect drops below some threshold of visibility.

    Am I understanding this correctly?

    alt text

    posted in Tuning and tweaking
    undefined
    Sethipus
    16 Aug 2019, 16:40
  • RE: Motor noise and print quality

    @grizewald said in Motor noise and print quality:

    @sethipus said in Motor noise and print quality:

    I just ordered a pair of these .9 degree steppers which should be here Sunday, so I should be able to report back sometime Sunday evening.

    I'll pull out some dark-colored PETG (gotta see if I have enough of this same blue left) and print a vase like this before I do the swap, and then after with the new .9 degree steppers using the exact same g-code file, in order to compare. I will return and report. Fingers crossed.

    Exactly the same motors as I ordered earlier today, except mine are being shipped from Germany. I ordered direct from the manufacturer's web site and they only cost me $15.89 each, plus $11.57 shipping.
    I hope the price you paid wasn't anything like the $21.99 Amazon is showing me!

    I can't tell if there is sarcasm lurking in here ( ☺ 
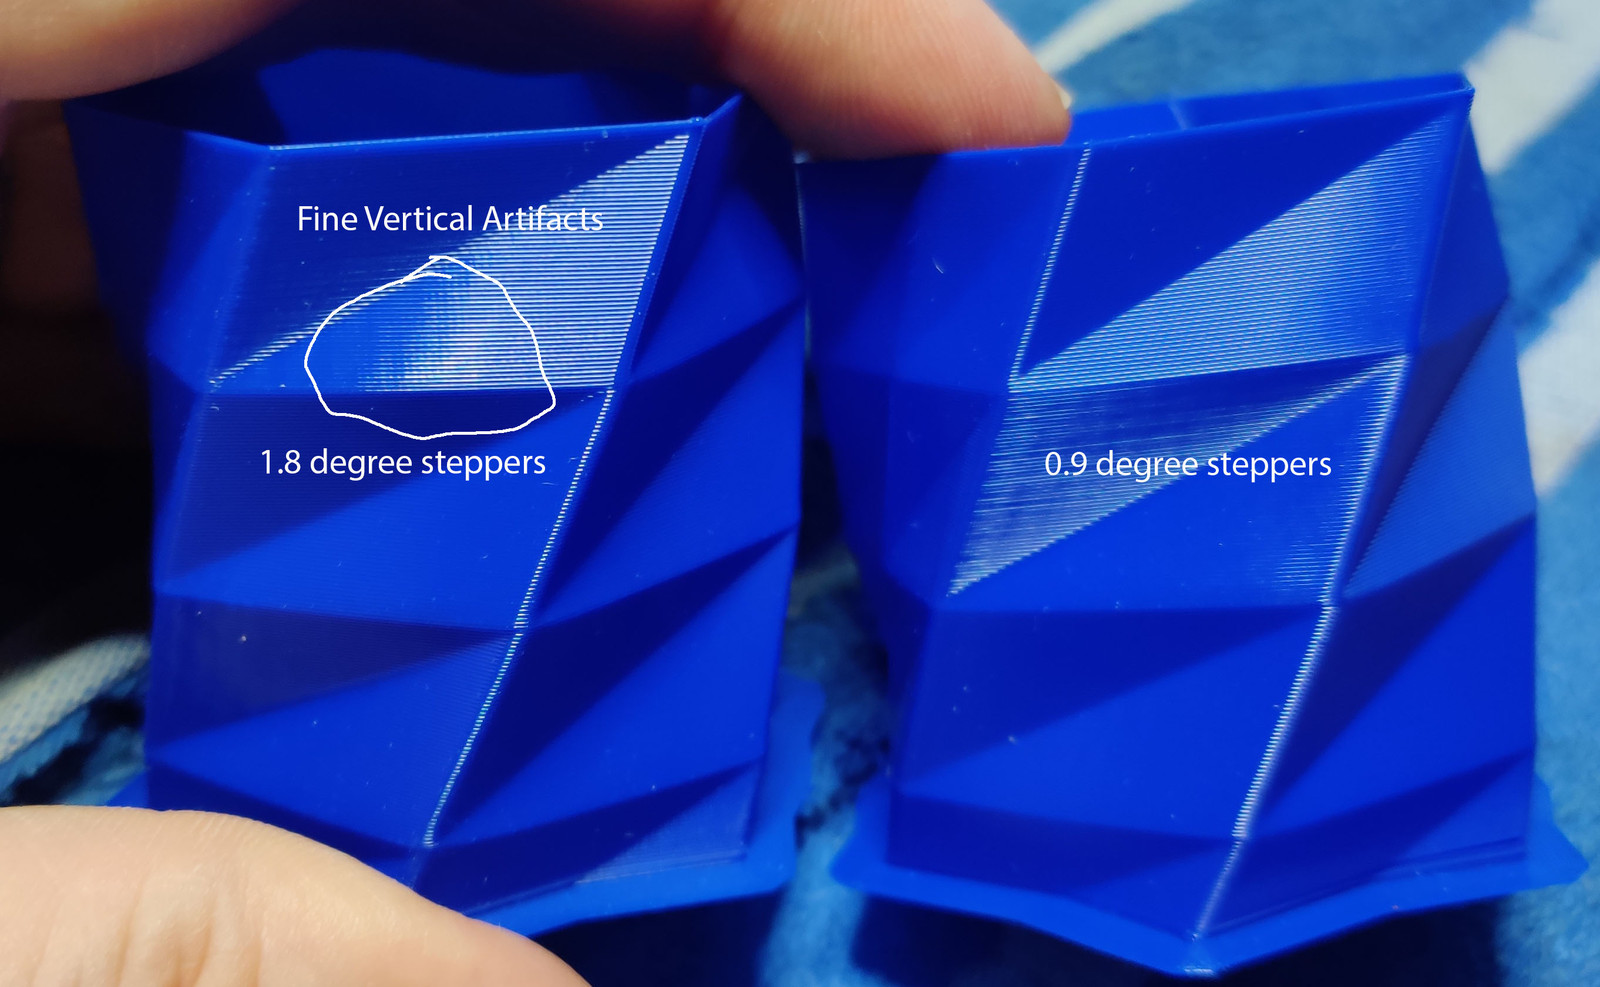
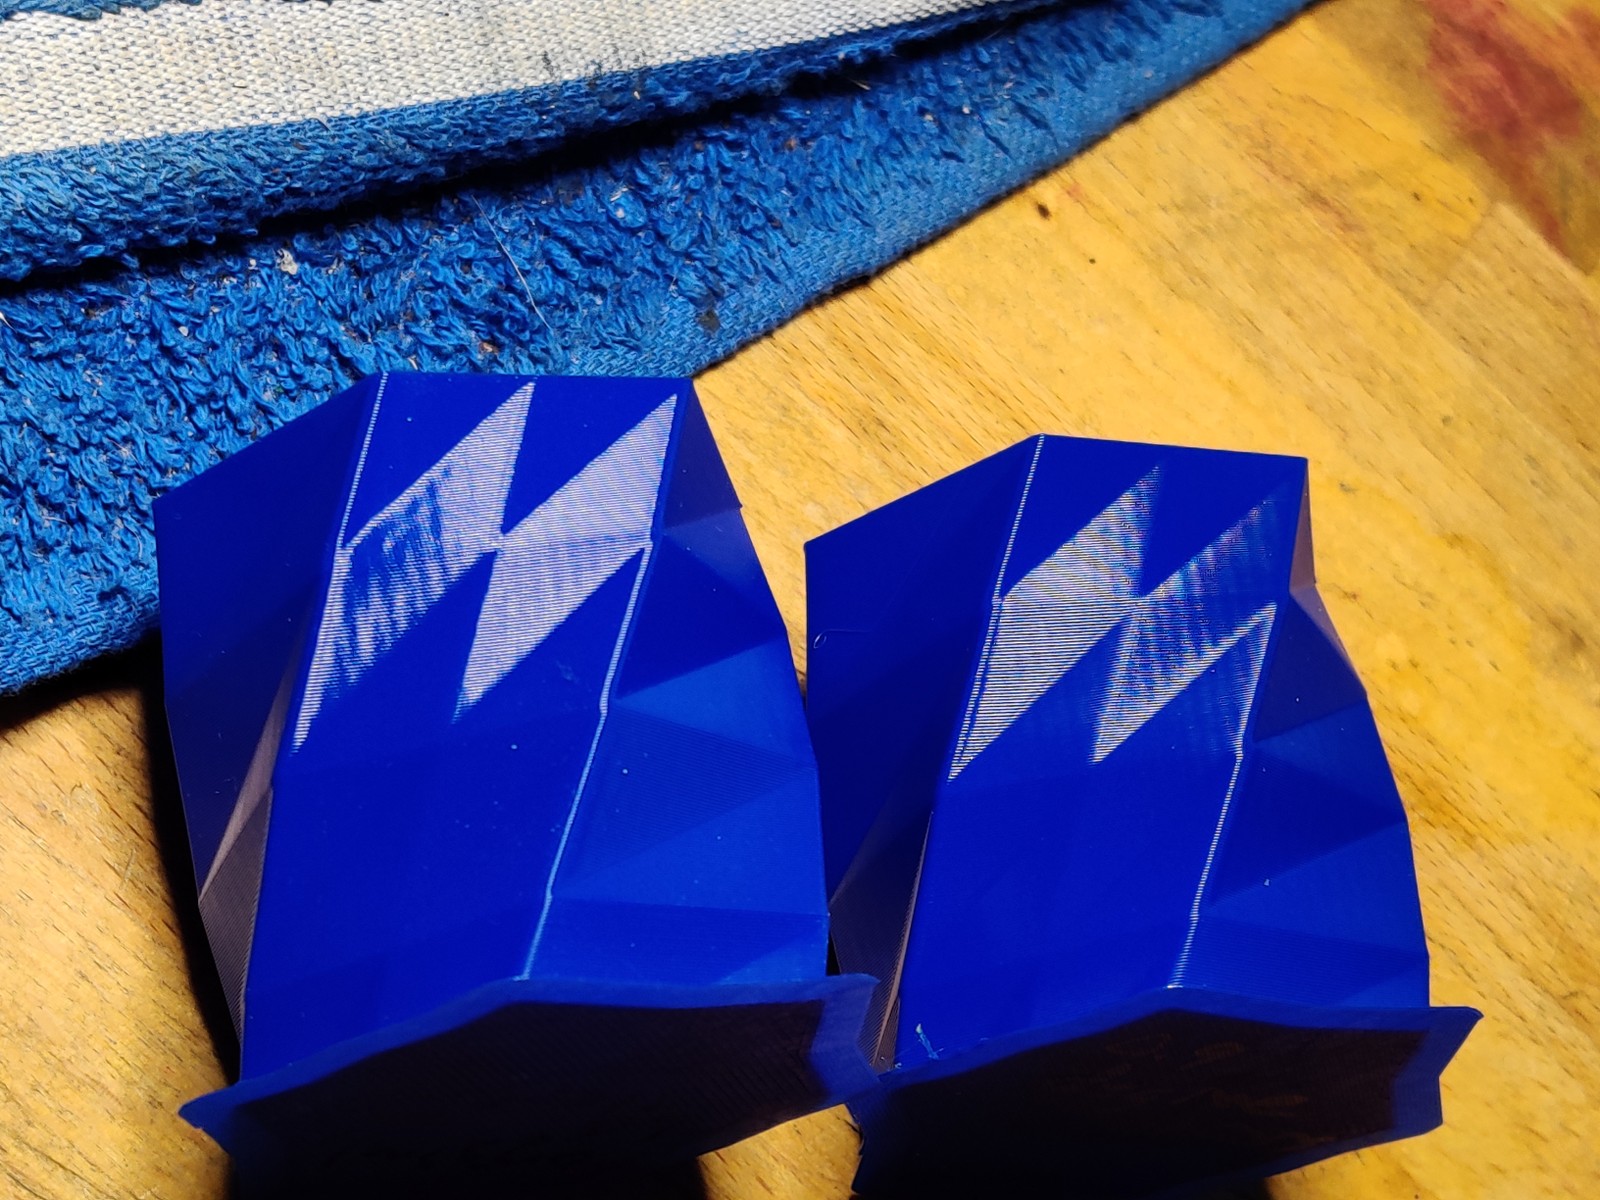
), but under the assumption that there isn't, I saw these steppers for like $13.something on the steppersonline website, but they'd be shipping from China, and there'd be some shipping charges. I did indeed pay the $21.99 each from Amazon, but I have Prime so the shipping was free, and I'll have them on Sunday instead of waiting a couple/few weeks. If you divide the $12 shipping charge for two steppers, add that to the $15 purchase price you paid, you're waiting for them to arrive from Germany for within pennies of what I paid to have them on Sunday.

    Of course, if you were just acknowledging that through some subtlety that doesn't come across well through text, the above is already understood. Either way, if I could have saved a couple bucks one way or another and had to wait a while versus having them nearly immediately, I found the tradeoff acceptable.

    One thing is I don't understand steppers well enough to know what specifications for them are important beyond 1.8 degree or 0.9 degree steps, the best matched to a printer, etc. I just know that if Phaedrux is using them already and they're fine, then they're fine, so those are the ones I went with. 👍

    posted in Tuning and tweaking
    undefined
    Sethipus
    16 Aug 2019, 20:42
  • RE: Motor noise and print quality

    Yeah, Prime is kind of a game changer for those who can access it. The free shipping, combined with it being free 2-day shipping, is pretty awesome. It's not always hard to find a lower price somewhere else, but if that other place adds shipping charges, it's usually hard to find something that's overall cheaper to my door than Amazon. In my case I probably could have saved a couple dollars in exchange for waiting for 2-4 weeks for the steppers to arrive from China, versus satisfying the natural desire for immediate gratification by getting them in two days. Not a hard choice.

    If it turns out the .9 degree versus 1.8 degree change in steppers, and the consequent reduction in the magnitude of any effects on print quality from the acceleration and deceleration of individual motor steps really does solve my "corrugated effect" surface artifacts, I will be overjoyed. This is a problem that's plagued many of my prints since I first built the D-bot. The texture is only very slightly tactile if you run your fingers over it. It's about 80% visual in that with shiny filaments like PETG, under the right lighting conditions, it just sticks out like a sore thumb and makes the surface look a lot less smooth than they really are.

    posted in Tuning and tweaking
    undefined
    Sethipus
    16 Aug 2019, 21:41

Latest posts made by Sethipus

  • RE: Inconsistent Extrusion?

    @petrzmax yes I'm using Capricorn tubing in fact. I recently replaced my single-drive extruder with dual drive, and replaced the bowden tube at the same time because the one I was using before was so short that when the print carriage was in certain regions of the build plate I got very tight radius curves, which causes other problems. When I replaced the tube I went deliberately long, with the plan to cut it down a little after I've got some other things taken care of. I think I can cut down the tube by a good 100-200mm without getting too-small curve radius, since I also re-oriented the tubing a little. Hopefully when I cut the tubing down my bowden problems will reduce a little. Btw, I just had to stop a print of this wing panel and start a new one. I thought that the 0.25 pressure advance had solved my problem, but the problem was back. It's a combination of factors. What I'm seeing specifically is this single-walled print having underextrusion in the first few centimeters after the start of a new layer, leading to the layers in that region being incomplete. It's not a problem I see in my solid prints, but these single-wall complicated sparse parts are really tough to print well.

    posted in Tuning and tweaking
    undefined
    Sethipus
    4 Sept 2019, 19:51
  • RE: Inconsistent Extrusion?

    Good luck with your rebuild. Note that 0.4 is a very high value for pressure advance. If you read this Duet FAQ article on pressure advance it says that moderate bowden systems might use 0.1, long bowden systems using 0.2, and direct systems as little as 0.05. Have you testing with settings in the 0.05-0.2 range?

    Also, I and many others prefer to align the seams so that most of the print looks good and fairly uniform, and only that one seam looks bad. In S3D I'll usually position a print so that either a corner or the back of an object is oriented with point I specify as the one to align on. Also makes it easy to run tests like pressure advance on an object like a single-walled cube, with the seam on one corner.

    Btw, I'm running some extremely challenging prints right now for a 3D-printed radio-controlled airplane, with complex parts using single-walled printing. After many test runs I've had to crank my pressure advance up to 0.25, which is higher than I've ever used before. I've got a very long (perhaps 650-700mm) long bowden tube. The bowden system is so "flexy" inside, given how much pressure is required for the filament to make the required flow rate, that I have to use a full 5.4mm of retraction. If you consider that a direct drive extruder would probably use maybe 1mm under similar conditions, that implies I get over 4mm of filament compression in my bowden tube, and all of that has to be retracted/unretracted with every nozzle move, complicating the start and ending of lines, etc. I've got my extruder speeds cranked up really high to help with this, and thankfully the BMG clone's dual extruder gears and my stepper seem up to the task. I really wonder how much easier (and better) my prints would be if I just went direct drive.

    posted in Tuning and tweaking
    undefined
    Sethipus
    4 Sept 2019, 19:04
  • RE: Inconsistent Extrusion?

    alt text

    If you consider this part right circled in red, where a perimeter wall started in these two places, especially in the upper one you can see the line a little thicker coming into the seam and a little thinner coming out of it. If the nozzle is moving from left to right in this photo (I don't know if it is or not) this looks like a classic example of where pressure advance may help. Assuming the nozzle is moving left to right at these seams, it looks like pressure could be a little too high as it decelerates into the end of the line, and too low as it speeds up out of the start of the line. Have you tried experimenting with pressure advance?

    If the slicer has different layers moving the nozzle in different directions (two layers left to right, two layers right to left, etc.) and there are effects that pressure advance could help with that could explain the alternating patterns you see in the first of the photos you showed.

    You could try creating a single hollow cube, with seams aligned, and print it, and every few layers input a higher pressure advance figure and see if your corners and the start/end seam point look different. Example pressure advance command would be "M572 D0 S0.15", with pressure advance set to 0.15. You might try printing the single-walled cube starting with pressure advance at 0 and then every few lines manually run the g-code to set pressure advance, incrementing by 0.05 or so, say from 0 - .20, and see how that effects the corner blobbing and the seam start/end points.

    posted in Tuning and tweaking
    undefined
    Sethipus
    4 Sept 2019, 17:27
  • RE: Does pressure advance depend on layer height?

    It's my understanding that acceleration of the extruder is the only thing it takes into consideration. With thinner layers (but same X/Y speed) your extruder velocity will be lower, so if your jerk is high enough you may see a different "acceleration profile" as it were, but then pressure advance would be multiplied by whatever acceleration there is. This assumes negligible non-linear extrusion effects, or well-correct non-linear extrusion at any rate.

    posted in General Discussion
    undefined
    Sethipus
    4 Sept 2019, 07:23
  • RE: Gap following a move without extrusion

    That seems to be a very high pressure advance for a direct drive. Have you tried it with something more like .1 or thereabouts?

    posted in Tuning and tweaking
    undefined
    Sethipus
    2 Sept 2019, 12:48
  • RE: A Repeating Artifact

    @b0m0a0k I almost got the Micro Swiss hotend at one point, but since I was successfully printing PETG through the stock hotend, I never actually bought it, and once I settled on building a new printer from plans the idea became redundant. There's nothing wrong with the stock hotend though. For people printing just PLA I'm not sure I see the point. I haven't looked at pricing on those things lately, but if the MicroSwiss hotend is in roughly the same ballpark as an E3D like the Titan Aero, I don't think you can beat the E3D. They're the gold standard. For one thing, the nozzles are nearly a universal standard, and the extruder is geared, which means (along with a great controller like the Duet Wifi) more steps/mm for finer and quieter control of extrusion, you can use a lighter extruder stepper, etc.

    I read about people getting clogs in their printer, and I simply never get them. I think I've gotten a legit clog maybe once ever in thousands of hours or printing, and if I recall it was an experiment with carbon fiber PETG filament, and the single-drive extruder I was using at the time had stripped out the filament so filament sat in the nozzle and cooked.

    I don't know if you've heard of this before, but most times when I'm reloading filament I'll do what's known as the "Atomic Pull." And when I switch between PLA and PETG or some other filament (ASA, nylon, etc.) I do this 100% of the time. Simply, an atomic pull is where I pull the existing filament out (leaving some melted filament down in the melt chamber) and push in a length of cleaning filament, until what's coming out is mostly the clear cleaning filament. It's not necessary for it to be 100% clear. In the Duet Wifi web control set the nozzle temp to 0. As the temperature falls below around 200 or so give one last little short push on the cleaning filament to push through another couple milimeters of it, then let it sit. As the temperature falls to around 90 C or so simply pull the filament out with a pair of pliers or whatever. If you do it with the temperature too high the cleaning filament will break off leaving the filament in the melt chamber, same if you let it cool too far below 90 C. If you pull it out in this sweet spot temperature zone you'll pull the cleaning filament out of the melt chamber, and you'll have a perfect "casting" of the melt chamber that will remove anything and everything in there, so the melt chamber is perfectly clear for putting in the new filament.

    Sorry to be so chatty, just got kind of enthused on the topic of that particular type of printer, and all the many upgrades and mods people do on them. With the Duet Wifi you've already done the best possible mod on that printer bar none. No more shuttling an SD card back and forth between the computer and printer, massively quieter printing, nearly unlimited configuration simplicity, etc. Good times.

    ETA: one other topic is on the extruder itself. With the Micro Swiss hotend you'd be stuck with the stock extruder, which is functional, or if you went Titan Aero you'd get a nice geared extruder along with the E3D hotend in a nice, compact package, but it's still single drive (one toothed gear pulling on the filament). I'm now using dual drive (two toothed gears pulling on the filament rather than one toothed gear with a flat bearing pushing the filament against it) and dual-drive is quite simply fantastic. I'm using a Bondtech BMG clone that works amaziningly. If you can find or design a print carriage for your printer that combines a Bondtech-style extruder with an E3D hotend in a compact-enough package you'd have the best of all solutions. With the Micro Swiss hotend you're locked in to their nozzles, and it's just a hotend, leaving you with a simplistic stock extruder. If you're gonna go, go big.

    posted in General Discussion
    undefined
    Sethipus
    30 Aug 2019, 16:23
  • RE: A Repeating Artifact

    @b0m0a0k said in A Repeating Artifact:

    @mrsdelish Thanks for this. I had been researching what I could do by way of an upgrade to the extruder or the hotend but was a little undecided because everyone has a different take.

    My options so far are;

    Micro Swiss Mk10 All Metal Hotend Kit with cooling block. (Straight replacement)

    E3D Titan Aero HotEnd and Extruder

    Various other suggested mods.

    Don't get me wrong, I enthusiastically modded and upgraded my Wanhao (Monoprice Maker Select actually; it's the same printer), but I would like to opine that whatever was causing the behavior you saw in your initial posting would not be improved by upgrading the hotend, or the extruder for that matter. There's nothing wrong with the hotend and extruder (it's direct drive) on that printer, unless you want to print at nozzle temps higher than around 240-245 C or so for very long. I printed tons of PETG on that printer (including all the parts for my initial build of my D-Bot), and eventually replaced the teflon tube in the hotend and found it fairly blackened and charred. The problems you are seeing are 100% settings issues.

    To that end, I would recommend against tweaking extrusion multiplier and whatnot as a fix to your problems. That's a kludge that should be used last, after everything else is dialed in to what they should be. I'd set your e-steps back to what they ought to be. Using e-steps to try to "fix" problems is the wrong approach. Do the measurements and actually measure how many steps it takes, and use that value. Measure your filament and input that value. If it's within a couple thousandths of 1.75mm then it doesn't really matter here or there, but I recently was printing with some filament that was so much smaller I could actually see it with my naked eye, and measured it out at 1.62mm, which is definitely enough to make a difference.

    Once you're printing with relative extrusion, then dial in your retraction. Once that's done, then modify your acceleration/max speed/jerk settings, and you should be printing really nicely. You can do all this with Cura too. There's nothing magical about Slic3r compared to Cura that caused the massive improvement in results you saw. It's just settings, and you can change whatever you need to in both and get pretty much the same results. Massive tweaking of the extrusion multiplier will just cause havoc from filament to filament and print to print.

    Btw, I think I paid like $250-300 for that Maker Select printer, and by the time I was done with little upgrades and mods and whatnot I don't doubt I'd paid upwards of $600-700 total, including the Duet Wifi, which means I could have just bought a $600-700 print to start and probably been better served (other than the Duet Wifi, which I consider mandatory on any printer I will use). Oh well, I learned a massive amount with that printer, and so in the end it served me well.

    posted in General Discussion
    undefined
    Sethipus
    30 Aug 2019, 08:03
  • RE: Motor noise and print quality

    @grizewald said in Motor noise and print quality:

    @sethipus That's a very conclusive result!

    My efforts to add a twist to the belts ran into a few snags. First I noticed that the clamp which holds my hot end had broken (at the rear where it wasn't visible until I took the printer apart in preparation for twisting the belts), so I had to print a new one in PETG this time to make it less likely to happen again.
    Then I needed to redesign my part cooling duct so that I could get better access to the eccentric nut which tightens the hot end carriage wheel against the v-slot profile.

    I ran into a huge snag too. When I replaced my toothed idlers with smooth ones, I also replaced the corner brackets with ones that allowed both pulleys to be replaced without disassembling the printer (for some reason the original D-Bot corner brackets require disassembly to swap out one of the pulleys). The remixed corners I used also stuck down about 20mm or so further along the frame rails. For some reason I overlooked the fact that my Z-axis end stop no longer would fit where it had previously been mounted. Long story short, some severe violence using a bandsaw and a drill allowed me to jerry-rig the z-stop mount enough to fit it in between the bottom of the new corner brace and the wheels of the Z-axis carriage and I'm printing, but the current z-stop mount is a total hack (literally), so I'll have to design a more graceful solution that moves the z-stop to a different location.

    As far as heat goes, I've only been running my steppers at 1.1-1.2 amps, and I haven't noticed heat to be much of a problem.

    @JuKu yeah I've studied my now-former corduroy effect problem under a loupe and could see that it was a very fine difference in wall thickness that's so slight as to barely effect any dimensions, but on shiny and flat objects (where they lines align) be quite visually noticeable. I'm glad that's now a former problem.

    @mrehorstdmd the idlers were 16t-sized. The original D-Bot uses a pair of stacked 623ZZ bearings (flanges outwards) to act as idler pulleys. When I swapped out my toothed idlers this weekend one of the corner braces got stacked 623ZZ bearings, the other one got actual smooth 16t-sized idlers that I happened to have. If I ever design or at least build a new printer I think I'd rather use 608-sized bearings or pulleys rather than these tighter-radius ones, or at least 20t-sized ones, for the larger radius.

    posted in Tuning and tweaking
    undefined
    Sethipus
    26 Aug 2019, 20:53
  • RE: Motor noise and print quality

    @grizewald , I replaced all my toothed idlers with smooth ones, put the flip in the belt on the first run from the stepper on the "outside" runs of my CoreXY system so that the flat side of the belt is always bearing on the idler pulleys, and just finished my first print with it.

    The flip made a ginormous difference in the surface quality, and utterly eliminated the "corduroy effect" I was seeing. I'm absolutely kicking myself that I didn't do this when I built the printer in the first place. It's unbelievable. Oh well, you live and learn.

    Here are two photos of a relatively innocuous portion of a particular figure. The blue one is the new print with the flipped belts and smooth idlers, the clear one is with the belts not flipped and the teeth rolling over toothed idlers.


    As you can see, in the photo of the blue print all of that corduroy effect is completely gone. That corduroy effect has afflicted every print I've ever made on this printer until now. On highly detailed models with no or few flat or relatively flat surfaces, or with filament that doesn't reflect light that much, it wasn't really noticeable. On shiny flat surfaces it was always highly obvious. I almost can't even believe how much of a difference it's made.

    posted in Tuning and tweaking
    undefined
    Sethipus
    26 Aug 2019, 11:50
  • RE: Motor noise and print quality

    @phaedrux said in Motor noise and print quality:

    @sethipus The DBot isn't a very good candidate for enclosure. It's way more work than it's worth IMO. I've made do with a plastic shroud that can hang around the entire printer on it's stand. It's like a loose curtain. At the top is an exhaust duct. It works fairly well with ASA, etc, both with chamber temp and fume exhaust, but it's not perfect. 40c at best.

    A design like the Voron2 or RailCore II that are designed from the ground up for enclosure would be perfect... if you want another new printer.

    I totally hear ya. I do want to move my power supply out of the build area, and I could design a new Duet Wifi controller box that hangs off the side rather than being centered within the left-side frame. I think I could get the bottom enclosed, the sides, front, and rear without too much trouble. The top might be "well enough" enclosed with a little plastic bag-like tent that is tall enough not to disturb the bowden tube. You're 100% right that it's not optimal at all, but I think it could be done. I've got parts (including parts on my printer) that are from ASA, but I've struggled a lot with it warping. My attempts at PC blends almost all ended in warped parts. I even had PC-blend parts that stuck to the bed throughout the print, were annealed in place by placing a cardboard box over the completed print and allowed to heat-soak on the build plate for a couple hours, cool down slowly, and then literally warped after I removed them from the build plate. Other than nylon, I've all but given up the other filaments other than PLA and PETG until I can get my printer enclosed.

    I'll have to look at those other designs and decide if I need to have another printer project in my future.

    posted in Tuning and tweaking
    undefined
    Sethipus
    24 Aug 2019, 17:07
Unless otherwise noted, all forum content is licensed under CC-BY-SA