Duet3D Logo Duet3D
    • Tags
    • Documentation
    • Order
    • Register
    • Login
    1. Home
    2. razrudy
    • Profile
    • Following 1
    • Followers 0
    • Topics 5
    • Posts 53
    • Best 1
    • Controversial 0
    • Groups 0

    razrudy

    @razrudy

    1
    Reputation
    13
    Profile views
    53
    Posts
    0
    Followers
    1
    Following
    Joined Last Online
    Location UK

    razrudy Unfollow Follow

    Best posts made by razrudy

    • RE: Duet 3 6HC Output_0 always on

      @fcwilt 1000W 40A PSU too much for the board

      @tpyoknig I am inclined to believe that most likely the mosfet on the board is the culprit for your problem

      From dozuki manual :
      "The ground side of OUT_0 is switched by the mosfet and the positive side is protected by a 15A fuse."

      posted in Duet Hardware and wiring
      razrudyundefined
      razrudy

    Latest posts made by razrudy

    • RE: Building a printer questions and help please

      New question. I am planning to use the Pulley V-Slot Build Gantry Plate from the picture but with 3 wheels only. The question is should I use 2 adjustable wheels and 1 fix or 2 fix and 1 adjustable?
      610Y14cq20L.SL1000.jpg

      I am using them on a " @Phaedrux D-Bot build style " with some minor differences.

      Also the PETG printed parts will be ok at temp of up to 60C for motion system ( the same part's like on D-bot build ) At least until I will get all the metal parts made.

      posted in 3D Printing General Chat
      razrudyundefined
      razrudy
    • RE: Building a printer questions and help please

      @engikeneer what's the thickness of the printed plate ( not sure if this is the proper term for that part) please?
      Thanks for the extra picture they will really help me.

      @mrehorstdmd this plate is what I am looking to find or something similar.
      There is almost nothing to fix the 2020 ( or2040) to the yellow part on the lead screw , except this Nut block
      I can move the smooth roads and the ball for bed plate to other location , but couldn't find any option to fix the extrusion to the lead screw.

      bed corner.PNG

      posted in 3D Printing General Chat
      razrudyundefined
      razrudy
    • Building a printer questions and help please

      So I decided to build for my self a new printer , cube style and I am getting stuck at some choice's so hope someone can help me.
      First problem is how to connect the threaded rod to v-slot for bed mounting.
      Can I find anywhere something similar with the red circled plate or how do I connect the green circled system to 2020 v-slot ?
      1613151503749-20210208_235917-1.jpg
      Picture "stolen" from another member because I may miss the exact name for this

      I prefer something metallic because this build will be inside an enclosure and mainly print ABS and other high temp materials.

      posted in 3D Printing General Chat
      razrudyundefined
      razrudy
    • RE: Duet 3 6HC Output_0 always on

      Can you see any damage or something on the mosfet on the board? Maybe one "leg" is not soldered properly
      1615243318265-pxl_20210308_221256774.jpg

      posted in Duet Hardware and wiring
      razrudyundefined
      razrudy
    • RE: Duet 3 6HC Output_0 always on

      @fcwilt 1000W 40A PSU too much for the board

      @tpyoknig I am inclined to believe that most likely the mosfet on the board is the culprit for your problem

      From dozuki manual :
      "The ground side of OUT_0 is switched by the mosfet and the positive side is protected by a 15A fuse."

      posted in Duet Hardware and wiring
      razrudyundefined
      razrudy
    • RE: Duet 3 6HC Output_0 always on

      @fcwilt said in Duet 3 6HC Output_0 always on:

      @razrudy said in Duet 3 6HC Output_0 always on:

      Also the OUT_0 output is controlling a mosfet ( that's the reason for that "thick" wires on output )
      I also have separate PSU for the bed controlled by the mosfet.

      Why is the OUT_0 output controlling a MOSFET?

      Frederick

      Separate PSU for bed. Is there any other way to control the mosfet?

      posted in Duet Hardware and wiring
      razrudyundefined
      razrudy
    • RE: Duet 3 6HC Output_0 always on

      This is my working config , not complete but everything works

       Configuration file for Duet 3 (firmware version 3) 
      ; Configuration for Chiron+Titan Aero+Volcano+BlTouch+ SBC Pi4
      ; executed by the firmware on start-up
      
      ; General preferences
      G21                                                        ; works in mm
      G90                                                        ; send absolute coordinates...
      M83                                                        ; ...but relative extruder moves
      M550 P"Chiron"                                             ; set printer name
      
      ; Drives
      M569 P0.0 S1                                               ; physical drive 0.0 goes forwards X
      M569 P0.1 S0                                               ; physical drive 0.1 goes backwards Y
      M569 P0.2 S0                                               ; physical drive 0.2 goes bacwards ZL
      M569 P0.3 S0                                               ; physical drive 0.3 goes backwards ZR
      M569 P0.4 S1 D2                                            ; physical drive 0.4 goes forwards E
      M584 X0 Y1 Z2:3 E4                                         ; set drive mapping
      M350 X16 Y16 Z16 E16 I1                                    ; configure microstepping with interpolation
      M92  X80 Y100 Z400 E400.96                                 ; set steps per mm
      ;M566 X1200 Y1200 Z12 E120                                  ; set maximum instantaneous speed changes (mm/min)
      M566 X600 Y360 Z24 E1200                                   ; in mm/min-Marlin values
      ;M203 X9000 Y9000 Z180 E1200                                ; set maximum speeds (mm/min)
      M203 X6000 Y6000 Z1200 E4800                               ; set maximum speeds-Marlin values transform to mm/m
      ;M201 X1000 Y800 Z250 E250                                  ; set accelerations (mm/s^2)
      M201 X350 Y350 Z50 E30000                                  ; set accelerations-Marlin values
      M906 X1100 Y1100 Z1100 E1100 I30                           ; set motor currents (mA) and motor idle factor in per cent
      M84 S30                                                    ; Set idle timeout
      
      ; Axis Limits
      M208 X-6.0 Y-9.0 Z-20 S1                                   ; set axis minima
      M208 X400 Y400 Z445 S0                                     ; set axis maxima-need to remeasure this
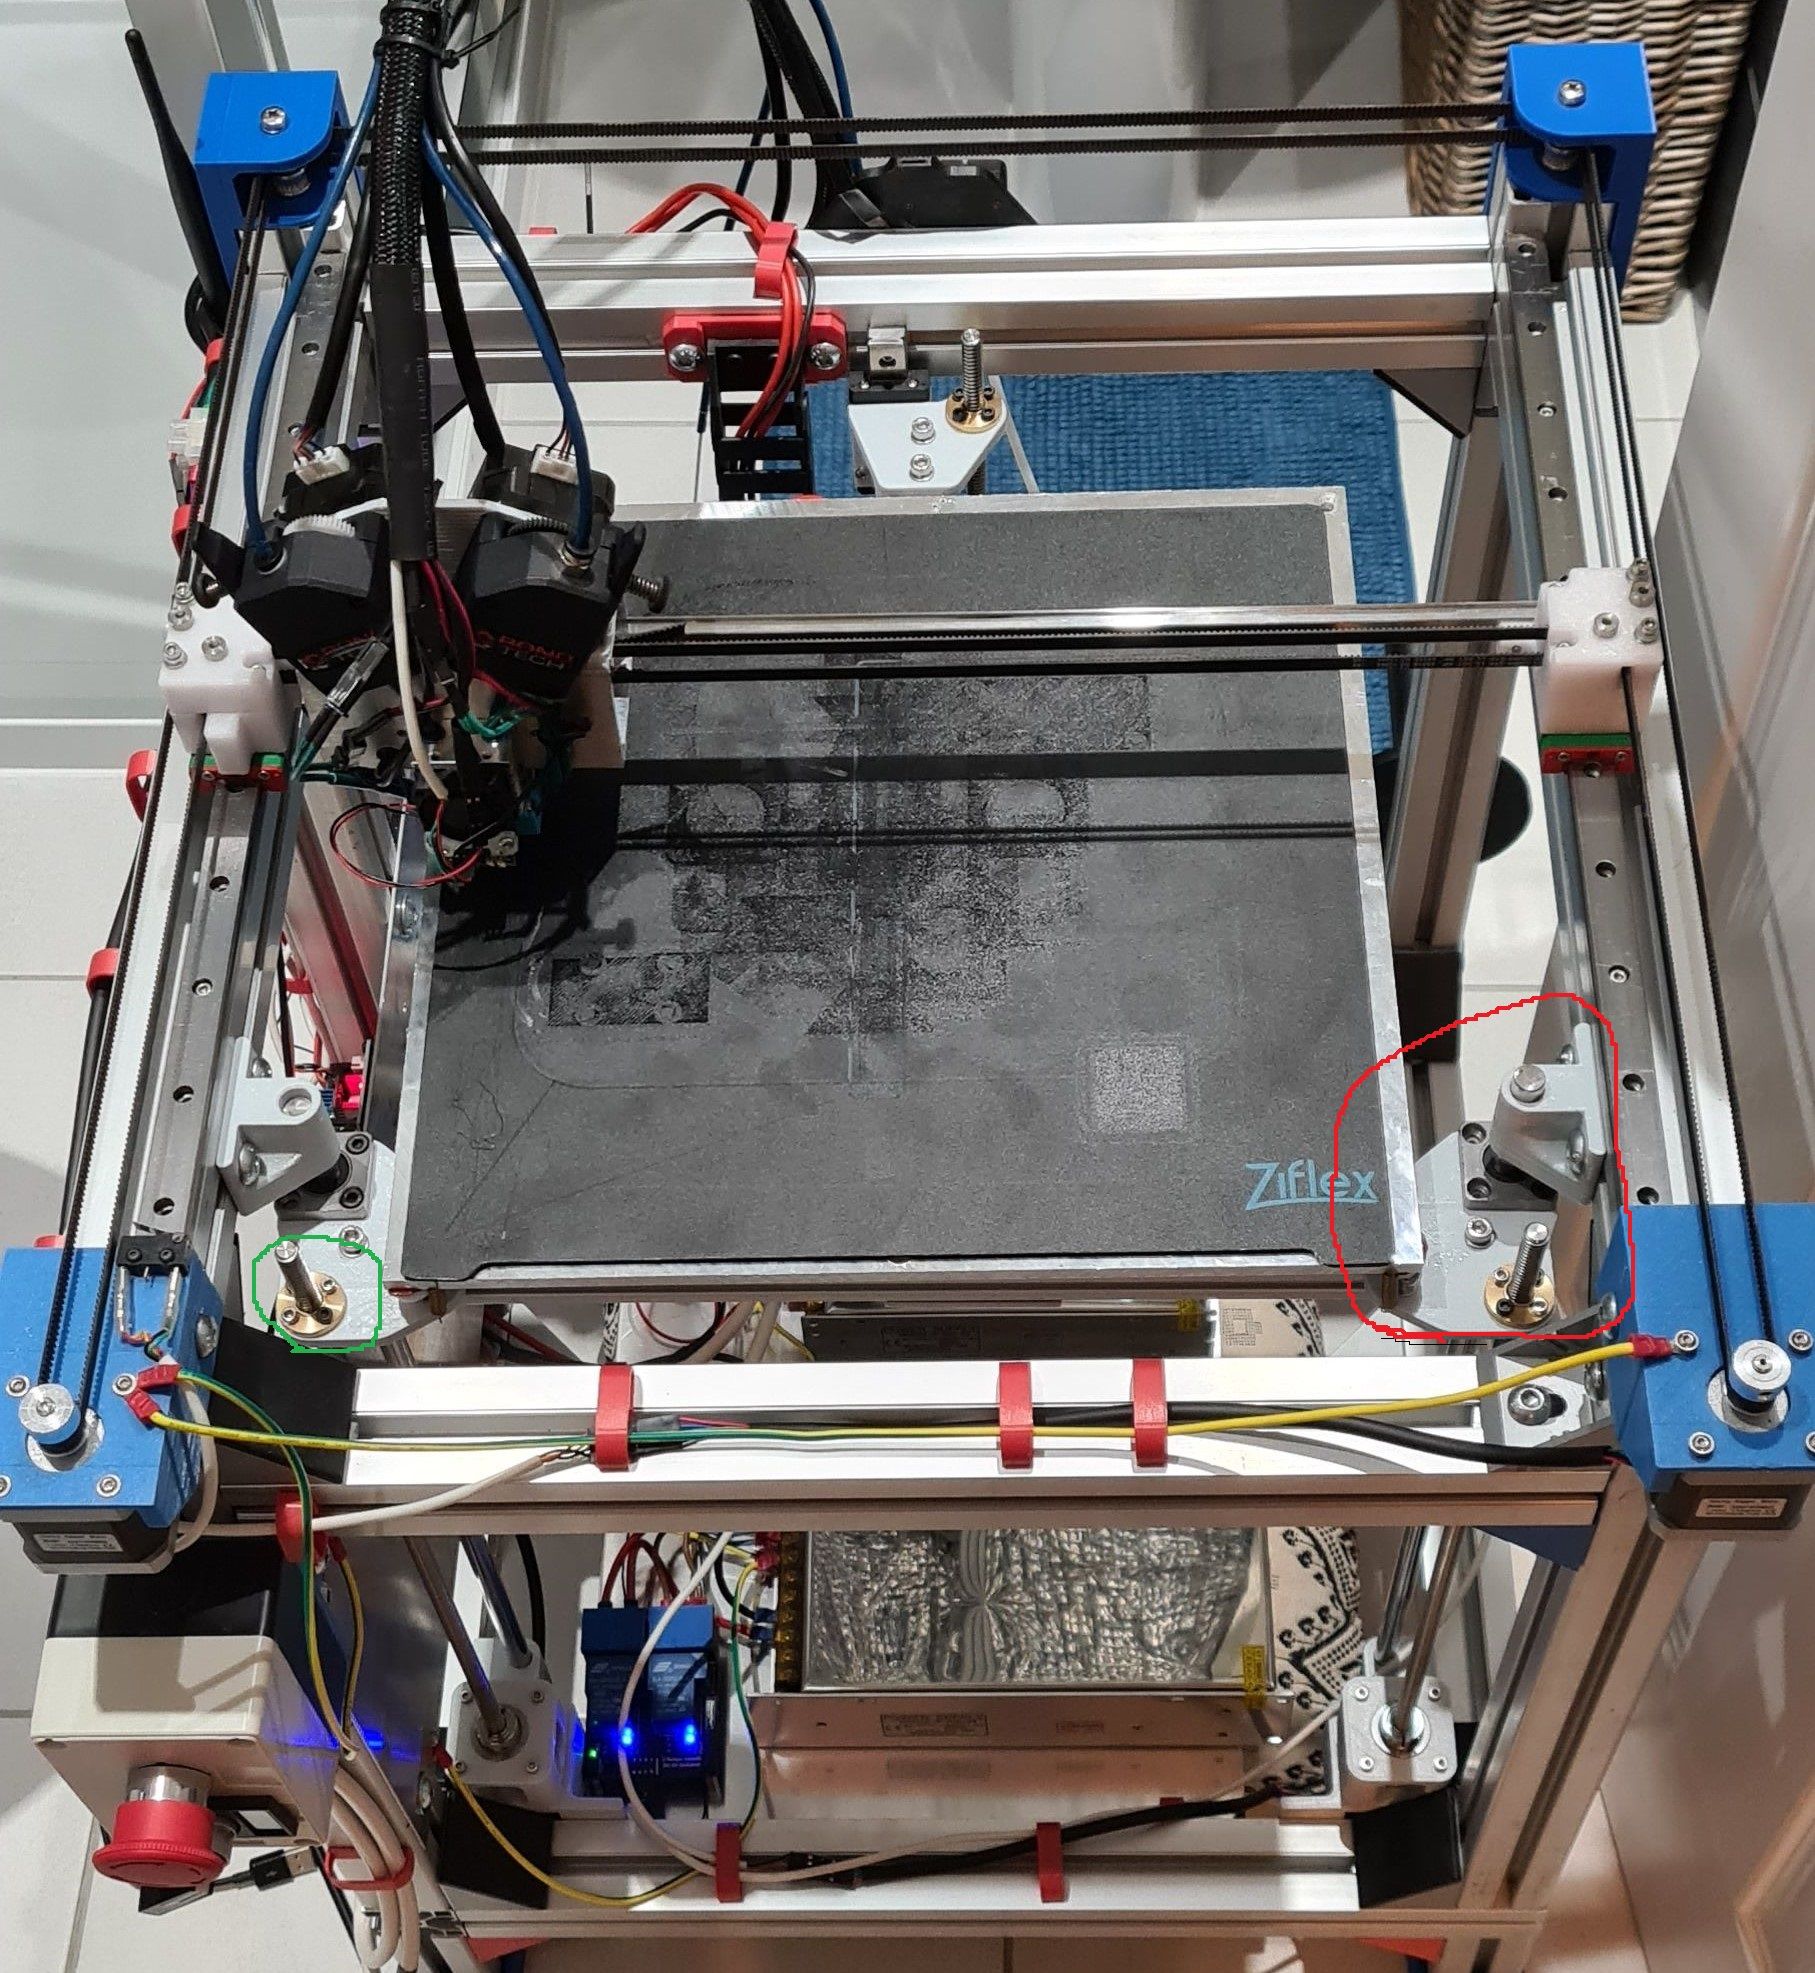
      M671 X-40:440 Y200:200                                     ; leadscrews position at right and left of the X axis
       
      ; Endstops
      M574 X1 S1 P"!io0.in"                                      ; configure active-high endstop for low end on X via pin io0.in    
      M574 Y1 S1 P"!io1.in"                                      ; configure active-high endstop for low end on Y via pin io1.in
      ;M574 Z1 S1 P"io2.in+io3.in"                               ; configure active-high endstop for low end on Z via pin-for original endstop's
      M574 Z1 S2                                                 ; endstop set to z-probe
      
      
      ;Stall Detection
      ;M915 P0 S-5 F0 H200 R0                                    ; P=drive motor , S= sensitivite , H=motorstep/sec ( check home file)
      
      ; Z-Probe
      M950 S0 C"io5.out"                                         ; create servo pin 0 for BLTouch
      M558 P9 C"^io5.in" H5 F60 T6000 R0.2 A10                   ; set Z probe type to bltouch and the dive height + speeds
      G31 P25 X41.13 Y2.69 Z1.537                                ; set Z probe trigger value, offset and trigger height
      M557 X40:400 Y0:400 S72:80                                 ; define mesh grid
       
      ; Piezo Z-probe 
      ;M558 P8 C"io5.in" I1 R0.4 F300 X0 Y0 Z1                   ;new piezo
      ;G31 X0 Y0 Z-0.1 P100                                      ;new piezo
      
      
      ; Heaters
      M308 S0 P"temp0" Y"thermistor" T100000 B4138               ; configure sensor 0 as thermistor on pin temp0
      M950 H0 C"out0" T0                                         ; create bed heater output on out0 and map it to sensor 0
      M307 H0 R0.286 C453.000:453.000 D1.10 S0.50 V24.0 B0       ; disable bang-bang mode for the bed heater and set PWM limit
      M140 H0                                                    ; map heated bed to heater 0
      M143 H0 S120                                               ; set temperature limit for heater 0 to 120C
      M308 S1 P"temp1" Y"thermistor" T100000 B4725 C7.06e-8      ; configure sensor 1 as thermistor on pin temp1
      M950 H1 C"out1" T1                                         ; create nozzle heater output on out1 and map it to sensor 1
      M307 H1 R1.840 C275.300:275.300 D4.10 S0.50 V24.0 B0       ; disable bang-bang mode for heater  and set PWM limit
      M143 H1 S285                                               ; set temperature limit for heater 1 to 285C
      
      ; Fans
      M950 F0 C"out4" Q25000                                     ; create fan 0 on pin out4 and set its frequency
      M106 P0 S0 H1 T45                                          ; set fan 0 value. Thermostatic control is turned on
      M950 F1 C"out5" Q25000                                     ; create fan 1 on pin out5 and set its frequency
      M106 P1 S0 H1 T45                                          ; set fan 1 value. Thermostatic control is turned on
      M950 F2 C"out7" Q25000                                     ; create fan 2 on pin out7 and set its frequency
      M106 P2 S0 H-1                                             ; set fan 2 value. Thermostatic control is turned off
      ;M950 F3 C"out8" Q500                                      ; create fan 3 on pin out8 and set its frequency
      ;M106 P3 S0 H-1                                            ; set fan 3 value. Thermostatic control is turned off
      
      ; Tools
      M563 P0 D0 H1 F0:2                                         ; define tool 0
      G10 P0 X-6.0 Y-7.0 Z0                                      ; set tool 0 axis offsets
      G10 P0 R0 S0                                               ; set initial tool 0 active and standby temperatures to 0C
      
      ; Custom settings are not defined
      
      M572 D0.4 S0.05
      
      ; Miscellaneous
      ;M911 S10 R11 P"M913 X0 Y0 G91 M83 G1 Z3 E-5 F1000"        ; set voltage thresholds and actions to run on power loss       
      ;M564 H0                                                   ; moving axes before/without homing
      ;M591 P1 C"io4.in" S1 D0                                   ; filament run out sensor - work in progress


      M308 and M950 are not on the same order. Not sure how important is

      posted in Duet Hardware and wiring
      razrudyundefined
      razrudy
    • RE: Duet 3 6HC Output_0 always on

      Remove the groung from OUT_0 input and leave only the V+ see what's happening.
      This is how is mine connected
      PXL_20210308_221256774.jpg

      Still building my enclosure so a little messy at this point.
      Also the OUT_0 output is controlling a mosfet ( that's the reason for that "thick" wires on output )
      I also have separate PSU for the bed controlled by the mosfet.

      Another idea.....connect the temp sensor for bed just to eliminate this from equation too

      posted in Duet Hardware and wiring
      razrudyundefined
      razrudy
    • RE: Duet 3 6HC Output_0 always on

      Ok that make sense somehow. But if you don't power the board how the board will send the command to open/close OUT_0. May sound stupid what I say but why you don't just power up everything the right way?
      Connect VIN and after that the bed PSU and test.
      No offense just an idea to try out.
      Also I am taking in consideration that the "GND" is the one giving the command and ( I may be wrong) but the V+ is "always on" between input and output on OUT_0 as long as the fuse is ok

      posted in Duet Hardware and wiring
      razrudyundefined
      razrudy
    • RE: Duet 3 6HC Output_0 always on

      You're wiring is wrong
      The input should be top first 2 pins

      posted in Duet Hardware and wiring
      razrudyundefined
      razrudy