Duet3D Logo Duet3D
    • Tags
    • Documentation
    • Order
    • Register
    • Login

    BL Touch

    Scheduled Pinned Locked Moved
    Tuning and tweaking
    8
    126
    6.9k
    Loading More Posts
    • Oldest to Newest
    • Newest to Oldest
    • Most Votes
    Reply
    • Reply as topic
    Log in to reply
    This topic has been deleted. Only users with topic management privileges can see it.
    • Gost101undefined
      Gost101
      last edited by

      @droftarts The Z probe is at 1000 when I turn it on to answer your question.

      1 Reply Last reply Reply Quote 0
      • fcwiltundefined
        fcwilt @Gost101
        last edited by fcwilt

        @Gost101 said in BL Touch:

        @fcwilt it originally didn't have the code line in it

        G1 X15 Y15 Z10 F9000
        

        I put that in there so the probe dosen't strike the edge of the bed as it sticks out over and under the bed by 2cm out and 2 cm down. So to get around that I tried to put that snippet there.

        Hi,

        Thanks. I guess you can understand why it doesn't work and is the source of the error message about un-homed axes.

        But what do you mean by 2 cm down?

        Frederick

        Printers: a E3D MS/TC setup and a RatRig Hybrid. Using Duet 3 hardware running 3.4.6

        1 Reply Last reply Reply Quote 0
        • Gost101undefined
          Gost101
          last edited by

          @fcwilt The probe is encountering some problems at the moment. Homing all the axis will leave the extruder and probe past and under the bed.

          The M303 command for auto tunning keeps canceling due to the bed taking to long to heat up and I'm unable to get the results using M500 due to the process not completing.

          fcwiltundefined 1 Reply Last reply Reply Quote 0
          • Gost101undefined
            Gost101
            last edited by

            @fcwilt I'm still getting the error even after commenting G1 X15 Y15 Z10 F9000 Homing Error.PNG line out.

            1 Reply Last reply Reply Quote 0
            • fcwiltundefined
              fcwilt @Gost101
              last edited by

              @Gost101 said in BL Touch:

              @fcwilt I'm still getting the error even after commenting G1 X15 Y15 Z10 F9000 Homing Error.PNG line out.

              You either have a configuration problem, a wiring problem or a defective probe.

              Let's work on that:

              When you first power up the printer:

              • does the probe perform it's power up sequence?
              • what does the DWC (web interface) report for the Z probe sensor status?

              Frederick

              Printers: a E3D MS/TC setup and a RatRig Hybrid. Using Duet 3 hardware running 3.4.6

              1 Reply Last reply Reply Quote 0
              • peter247undefined
                peter247 @Gost101
                last edited by peter247

                @Gost101
                @fcwilt is correct you can't move Z unless it is first homed.
                so G1 X15 Y15 Z10 F9000 will error because G30 should be before it .

                ; homeall.g
                ; called to home all axes
                ;
                ; generated by RepRapFirmware Configuration Tool v3.1.4 on Mon Sep 28 2020 07:45:49 GMT-0600 (Mountain Daylight Time)
                G91                      ; relative positioning
                G1 H2 Z5 F9000           ; lift Z relative to current position
                G1 H1 X-505 Y-505 F21600 ; move quickly to X and Y axis endstops and stop there (first pass)
                G1 H2 X5 Y5 F9000        ; go back a few mm
                G1 H1 X-505 Y-505 F7200  ; move slowly to X and Y axis endstops once more (second pass)
                G90                      ; absolute positioning
                G1 X15 Y15 Z10 F9000     ; go to first bed probe point and home Z
                G30                      ; home Z by probing the bed
                 
                ; Uncomment the following lines to lift Z after probing
                ;G91                     ; relative positioning
                ;G1 Z5 F150              ; lift Z relative to current position
                ;G90                     ; absolute positioning
                

                Ender 5 plus linear rail and hemera powered by duet 2 wifi , CR10s pro v1 with bltouch mostly stock , BLV mgn Cube slowly being built powered by duet 3 mini 5+

                1 Reply Last reply Reply Quote 0
                • Gost101undefined
                  Gost101
                  last edited by

                  @peter247 @fcwilt
                  Alrighty guys, to make sure we are all on the same page. I talked with @droftarts through the pm system on here. Wiring is verified in the correct position. The BL Touch is not defective. Because by unplugging the all connected wires to the BL Touch it will perform its power up sequence and status a solid red pin up status. After which by pressing the home all :

                  ; homeall.g
                  ; called to home all axes
                  ;
                  ; generated by RepRapFirmware Configuration Tool v3.1.4 on Mon Sep 28 2020 07:45:49 GMT-0600 (Mountain Daylight Time)
                  G91                      ; relative positioning
                  G1 H2 Z5 F9000           ; lift Z relative to current position
                  G1 H1 X-505 Y-505 F21600 ; move quickly to X and Y axis endstops and stop there (first pass)
                  G1 H2 X5 Y5 F9000        ; go back a few mm
                  G1 H1 X-505 Y-505 F7200  ; move slowly to X and Y axis endstops once more (second pass)
                  G90                      ; absolute positioning
                  G30                      ; home Z by probing the bed
                  G1 X15 Y15 Z10 F9000     ; go to first bed probe point and home Z
                  
                  ; Uncomment the following lines to lift Z after probing
                  ;G91                     ; relative positioning
                  ;G1 Z5 F150              ; lift Z relative to current position
                  ;G90                     ; absolute positioning
                  

                  The BL touch will status solid blue and pin down until contact with the build surface is made. After which the BL Touch will status solid red pin up. If home all is pressed again then the printer will home the X & Y axis in accordance with the home all gcode. Then the BL Touch will status solid blue and pin down while Z is trying to go down. However where it is trying to home is off the build platform here is the picture: IMG_20200928_132026.jpg
                  In doing so the Z Axis will continue to try and home z when it cannot. IMG_20200928_132030.jpg
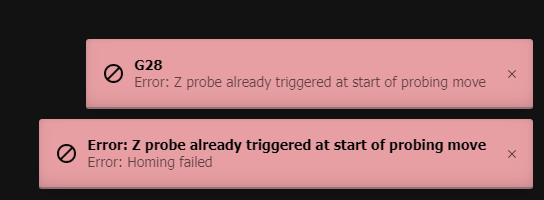
                  Once in this state if the printer is reset and home all is executed it will perform the X & Y Axis homing however in doing so the BL Touch will status the following error code:

                  G28 Z
                   
                  Error: Z probe already triggered at start of probing move
                  Error: Homing failed
                  

                  Due to the BL Touch striking the side of the bed.
                  Any recomendations? Or should I just throw the printer off the balcony and buy an i3 MK3S. Just kidding about throwing the printer and the i3 MK3S.

                  peter247undefined droftartsundefined 2 Replies Last reply Reply Quote 0
                  • peter247undefined
                    peter247 @Gost101
                    last edited by peter247

                    @Gost101

                    you keep missing the important bits .

                    So back to the 20 questions .

                    if you tell it to home does it stop if you press the pin ? , if it does that part is working ?.

                    Ender 5 plus linear rail and hemera powered by duet 2 wifi , CR10s pro v1 with bltouch mostly stock , BLV mgn Cube slowly being built powered by duet 3 mini 5+

                    1 Reply Last reply Reply Quote 0
                    • fcwiltundefined
                      fcwilt
                      last edited by fcwilt

                      OK you moved the G30 about the G1 that had the Z10 parameter in your home all file.

                      I think this is what you want to do.

                      G1 X213 Y250 ; this positions the probe near the center of the bed
                      G30
                      G1 Z10 ; this positions the nozzle at the desired height.

                      Frederick

                      Printers: a E3D MS/TC setup and a RatRig Hybrid. Using Duet 3 hardware running 3.4.6

                      1 Reply Last reply Reply Quote 0
                      • droftartsundefined
                        droftarts administrators @Gost101
                        last edited by

                        @Gost101 Looks like it's the bed limits that need to change now. M208 sets the where the bed is in relation to the endstops. For example, at the moment you have:

                        M208 X0 Y0 Z0 S1                                   ; set axis minima
                        ...
                        M574 X1 S1 P"xstop"                                ; configure active-high endstop for low end on X via pin xstop
                        ...
                        G31 P500 X37 Y0 Z2.5                               ; set Z probe trigger value, offset and trigger height
                        

                        The above effectively says "the X endstop is at the low end (this should be on the left of the X axis, defined by M574), and when the X endstop is triggered, X is set to 0 (defined by M208 X0 S1). The probe is at X37 when the nozzle is at X0 (defined by G31)"

                        But when the X carriage hits the endstop, the nozzle is off the bed, by what looks to be about 50mm? If you jog X until the nozzle is right on the edge of the bed, it'll be around X50. That's where you want X0, so set M208 X-50 Y0 Z0 S1. Then repeat for the Y axis. Position X0 Y0 should be with the nozzle on the front left corner of the bed.

                        Ian

                        Bed-slinger - Mini5+ WiFi/1LC | RRP Fisher v1 - D2 WiFi | Polargraph - D2 WiFi | TronXY X5S - 6HC/Roto | CNC router - 6HC | Tractus3D T1250 - D2 Eth

                        1 Reply Last reply Reply Quote 1
                        • Gost101undefined
                          Gost101
                          last edited by

                          @peter247 @fcwilt @droftarts The printer homes fine now in addition to making the mesh configuration. Is there any code that I have to put in cura so that it will print based of the bed mesh? This is what I was able to get it to: Screenshot_20200929-045821.png

                          droftartsundefined 1 Reply Last reply Reply Quote 0
                          • droftartsundefined
                            droftarts administrators @Gost101
                            last edited by

                            @Gost101 Great! No, just need to load the mesh before printing; you can put G28 then G29 S1 in the slicer start gcode to load the mesh. Best to probe the bed when it's at temperature, in case heating the bed causes it to change shape.

                            Not sure why the bed has got a 0.25 mm dip in it; you may want to check it really has. Sometimes it's actually caused by the cables pulling on a loose X carriage, and the bed isn't really that shape.

                            Ian

                            Bed-slinger - Mini5+ WiFi/1LC | RRP Fisher v1 - D2 WiFi | Polargraph - D2 WiFi | TronXY X5S - 6HC/Roto | CNC router - 6HC | Tractus3D T1250 - D2 Eth

                            1 Reply Last reply Reply Quote 0
                            • Gost101undefined
                              Gost101
                              last edited by

                              @fcwilt said in BL Touch:

                              G1 Z10

                              @droftarts I'm getting a heater fault notification every time the bed heats up past ~58C when it will heat up to ~70C before the firmware update. Is there a timer or something that I can remove to ignore the fault tripping in config?

                              ; Configuration file for Duet WiFi (firmware version 3)
                              ; executed by the firmware on start-up
                              ;
                              ; generated by RepRapFirmware Configuration Tool v3.1.4 on Mon Sep 28 2020 07:45:49 GMT-0600 (Mountain Daylight Time)
                              
                              ; General preferences
                              G90                                                ; send absolute coordinates...
                              M83                                                ; ...but relative extruder moves
                              M550 P"A.C.E."                                     ; set printer name
                              M918 P1 E4 F2000000                                ; configure direct-connect display
                              
                              ; Network
                              M551 P"SpaceForceHu2020!!"                         ; set password
                              M552 S1                                            ; enable network
                              M586 P0 S1                                         ; enable HTTP
                              M586 P1 S0                                         ; disable FTP
                              M586 P2 S0                                         ; disable Telnet
                              
                              ; Drives
                              M569 P0 S1                                         ; X physical drive 0 goes backwards
                              M569 P1 S1                                         ; Y physical drive 1 goes backwards
                              M569 P2 S0                                         ; Z One physical drive 2 goes forwards
                              M569 P2 S0                                         ; Z One physical drive 2 goes forwards
                              M569 P3 S0                                         ; E physical drive 3 goes backwards
                              M584 X0 Y1 Z2 E3                                   ; set drive mapping
                              M350 X16 Y16 Z16 E16 I1                            ; configure microstepping with interpolation
                              M92 X80.00 Y80.00 Z400.00 E415.00                  ; set steps per mm
                              M566 X1200.00 Y1200.00 Z24.00 E300.00              ; set maximum instantaneous speed changes (mm/min)
                              M203 X9000.00 Y9000.00 Z180.00 E6000.00            ; set maximum speeds (mm/min)
                              M201 X500.00 Y500.00 Z100.00 E5000.00              ; set accelerations (mm/s^2)
                              M906 X800 Y800 Z800 E1000 I50                      ; set motor currents (mA) and motor idle factor in per cent
                              M84 S30                                            ; Set idle timeout
                              
                              ; Axis Limits
                              M208 X0 Y0 Z0 S1                                   ; set axis minima
                              M208 X500 Y500 Z500 S0                             ; set axis maxima
                              
                              ; Endstops
                              M574 X1 S1 P"xstop"                                ; configure active-high endstop for low end on X via pin xstop
                              M574 Y1 S1 P"ystop"                                ; configure active-high endstop for low end on Y via pin ystop
                              M574 Z1 S2                                         ; configure Z-probe endstop for low end on Z
                              
                              ; Z-Probe
                              M950 S0 C"exp.heater7"                             ; create servo pin 0 for BLTouch
                              M558 P9 C"^zprobe.in" H5 F600 T9000                ; set Z probe type to bltouch and the dive height + speeds
                              G31 P500 X37 Y0 Z2.150                               ; set Z probe trigger value, offset and trigger height
                              M557 X30:470 Y30:470 S25                           ; define mesh grid
                              
                              ; Heaters
                              M308 S0 P"bedtemp" Y"thermistor" T100000 B4092     ; configure sensor 0 as thermistor on pin bedtemp
                              M950 H0 C"bedheat" T0                              ; create bed heater output on bedheat and map it to sensor 0
                              M307 H0 B1 S1.00                                   ; enable bang-bang mode for the bed heater and set PWM limit
                              M140 H0                                            ; map heated bed to heater 0
                              M143 H0 S70                                        ; set temperature limit for heater 0 to 70C
                              M308 S1 P"e0temp" Y"thermistor" T100000 B4092      ; configure sensor 1 as thermistor on pin e0temp
                              M950 H1 C"e0heat" T1                               ; create nozzle heater output on e0heat and map it to sensor 1
                              M307 H1 B0 S1.00                                   ; disable bang-bang mode for heater  and set PWM limit
                              
                              ; Fans
                              M950 F0 C"fan0" Q500                               ; create fan 0 on pin fan0 and set its frequency
                              M106 P0 S1 H-1                                     ; set fan 0 value. Thermostatic control is turned off
                              M950 F1 C"fan1" Q500                               ; create fan 1 on pin fan1 and set its frequency
                              M106 P1 S1 H1 T45                                  ; set fan 1 value. Thermostatic control is turned on
                              M950 F2 C"fan2" Q500                               ; create fan 2 on pin fan2 and set its frequency
                              M106 P2 S1 H1:0 T45                                ; set fan 2 value. Thermostatic control is turned on
                              
                              ; Tools
                              M563 P0 S"Hot end" H1 D0 F1:2                           ; define tool 1
                              G10 P1 X0 Y0 Z0                                    ; set tool 1 axis offsets
                              G10 P1 R0 S0                                       ; set initial tool 1 active and standby temperatures to 0C
                              
                              
                              ; Custom settings are not defined
                              
                              ; Miscellaneous
                              M911 S10 R11 P"M913 X0 Y0 G91 M83 G1 Z3 E-5 F1000" ; set voltage thresholds and actions to run on power loss


                              1 Reply Last reply Reply Quote 0
                              • Gost101undefined
                                Gost101
                                last edited by

                                The error is as follows:

                                Error: Heater 0 fault: temperature rising much more slowly than expected 1.8*C/sec
                                
                                1 Reply Last reply Reply Quote 0
                                • jay_s_ukundefined
                                  jay_s_uk
                                  last edited by

                                  PID tune the bed using

                                  M303 H0 S70
                                  

                                  Save the values using

                                  M500
                                  

                                  Then either copy the values from the config-override to your config.g or add M501 to the end of config.g

                                  Owns various duet boards and is the main wiki maintainer for the Teamgloomy LPC/STM32 port of RRF. Assume I'm running whatever the latest beta/stable build is

                                  1 Reply Last reply Reply Quote 1
                                  • Gost101undefined
                                    Gost101
                                    last edited by

                                    at around~63*C the M303 fails @jay_s_uk

                                    droftartsundefined 1 Reply Last reply Reply Quote 0
                                    • droftartsundefined
                                      droftarts administrators @Gost101
                                      last edited by droftarts

                                      @Gost101 See https://duet3d.dozuki.com/Wiki/Tuning_the_heater_temperature_control#Section_Troubleshooting_auto_tuning

                                      If auto tuning fails with a message that the temperature is not rising fast enough, this indicates that either you are using too low a P value in the M303 command, or the dead time in the existing model is much too low for your heater. You can increase the dead time using the M307 command. For example, sending M307 H0 D30 will increase the dead time to 30 seconds. The actual dead time will be known after a successful auto tuning.

                                      Edit: Send M307 H0 to see current settings.

                                      Edit2: Has the bed always heated really slowly?

                                      Ian

                                      Bed-slinger - Mini5+ WiFi/1LC | RRP Fisher v1 - D2 WiFi | Polargraph - D2 WiFi | TronXY X5S - 6HC/Roto | CNC router - 6HC | Tractus3D T1250 - D2 Eth

                                      1 Reply Last reply Reply Quote 1
                                      • Gost101undefined
                                        Gost101
                                        last edited by Gost101

                                        @droftarts The bed has always heated slowly

                                        	M307 H0
                                        Heater 0 model: gain 340.0, time constant 140.0, dead time 5.5, max PWM 1.00, calibration voltage 0.0, mode bang-bang
                                        
                                        droftartsundefined 1 Reply Last reply Reply Quote 0
                                        • droftartsundefined
                                          droftarts administrators @Gost101
                                          last edited by

                                          @Gost101 send M307 H0 D30 and try tuning again. Sounds like the bed heater is underpowered for the bed size.

                                          Ian

                                          Bed-slinger - Mini5+ WiFi/1LC | RRP Fisher v1 - D2 WiFi | Polargraph - D2 WiFi | TronXY X5S - 6HC/Roto | CNC router - 6HC | Tractus3D T1250 - D2 Eth

                                          1 Reply Last reply Reply Quote 0
                                          • Gost101undefined
                                            Gost101
                                            last edited by

                                            @droftarts said in BL Touch:

                                            M307 H0 D30

                                            Here is the image from the tuning:Temp.PNG

                                            1 Reply Last reply Reply Quote 0
                                            • First post
                                              Last post
                                            Unless otherwise noted, all forum content is licensed under CC-BY-SA