#- (hash) printer with super simple gantry
-
Another update.
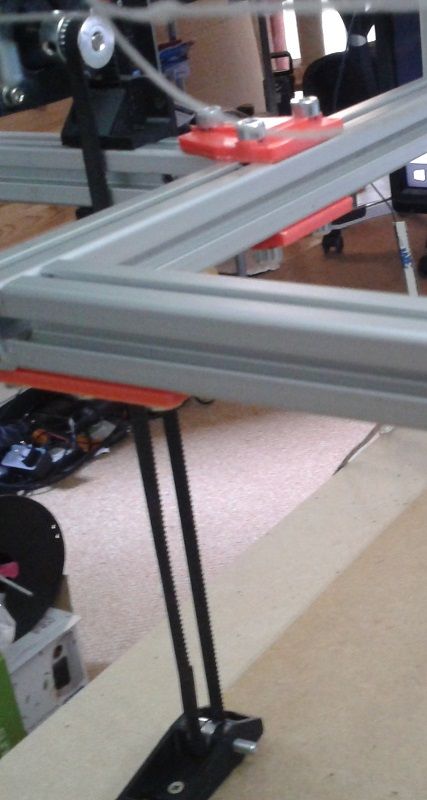
I thought the triple Z-axis/bed frame would be a piece of cake to build, but it was tricky to find a place for steppers and belt-idlers.
It ended up in an ugly mess, but I'd have to redesign almost the whole printer to get it right. It's working, so I keep it as is until I find a real reason to rebuild it.
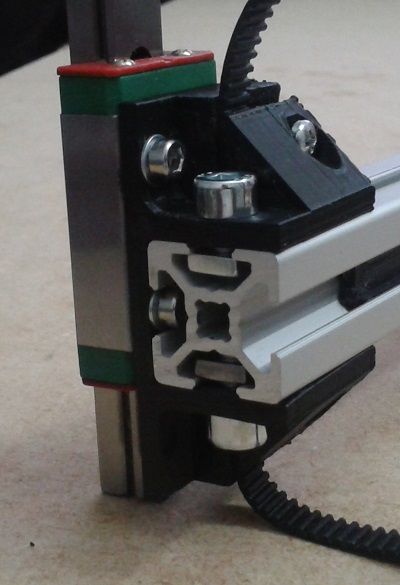
Pretty compact carrier
Top view. All tools are outside of the bed, which will be mounted above the frame. The 500x500 outside dimension shrinks to 300x300 working area, but that was expected.

The third Z-stepper needs an appendix to clear the tool path and still stabilize the far end of the cantilevered bed frame.
-
I want to design a tripod bed mount where the bed rests on three ballstuds sliding on dowel-pins to allow temp-expansion.
I"ve seen this on other printers, but I'm unsure about the angles of the dowel pins?Q: Should they aim to the bed-center, or should I place them at equal angles?
Here's a sketch of the angles in question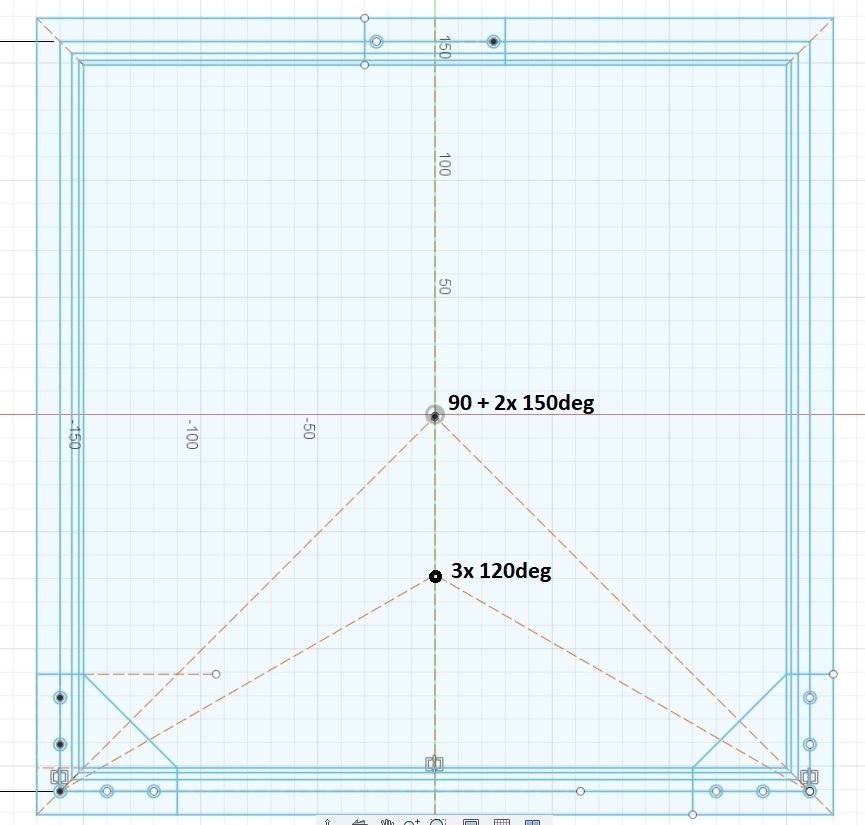
-
I went for Maxwell temp-expansion layout, simply because I couldn't make up a way to fix one side without melting the bracket.
Now I've used Haydn's ballstuds and 4mm PTFE tube as dowel pins. I guess that PTFE keeps the heat away from the brackets, better than (stainless) steel dowel pins.
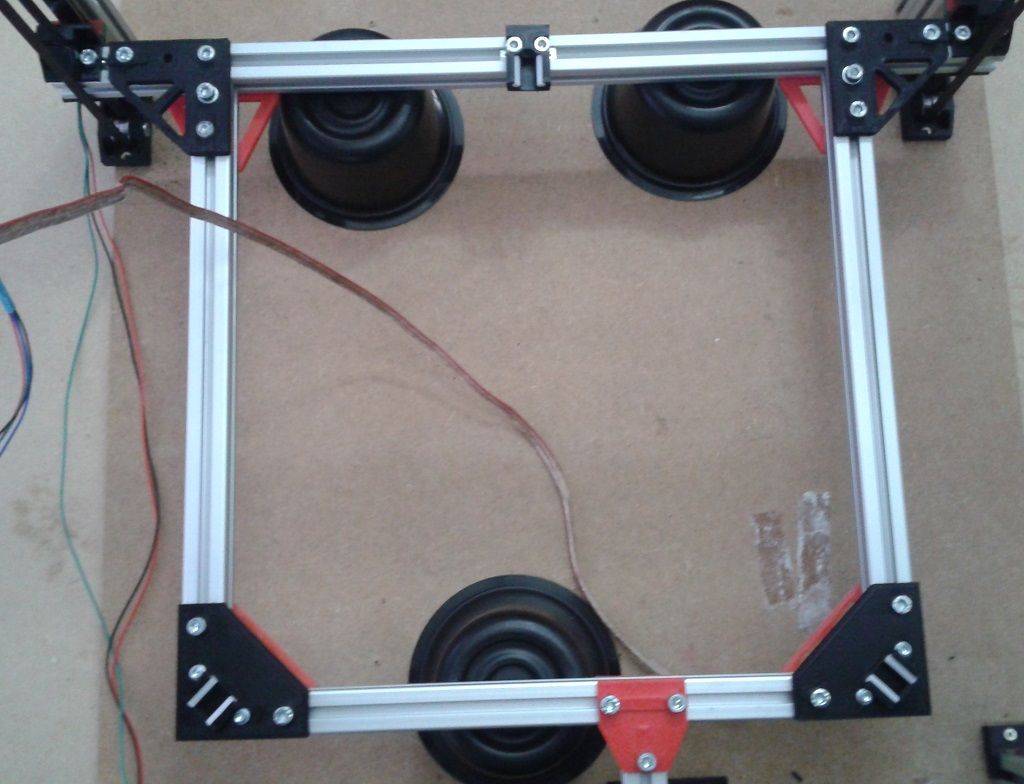
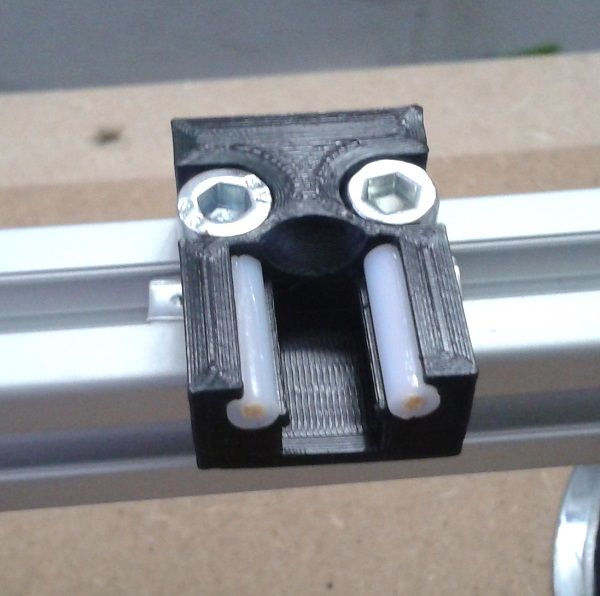
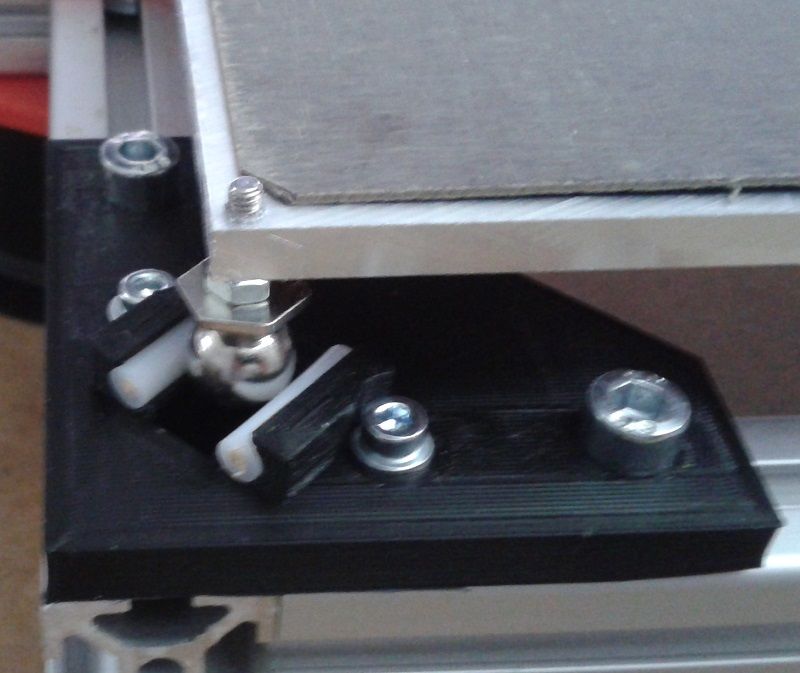
I also filled the PTFE tube with pieces of wooden toothpicks to avoid sinking balls (pun intended)
PS: magnets will arrive monday, I hope they fit in their pocket.
-
I did something like your setup but my rear support is a ball-stud sitting in a cup.
Frederick
-
We're using kinematic supports for the heated bed on a large printer we are designing at my local maker space. We started with the classic steel ball and parallel rod design, but questioned the steel rods. They provide a parallel point landings for the steel ball. This means that the round cross section is not important - the steel ball touches only at a point. After trying a few things we opted for two small rectangular steel plates (1.5mm thick) that we files a 45 degree slope on. We screw these to the bottom of the heated bed. Here's a sketch from our F360 design.
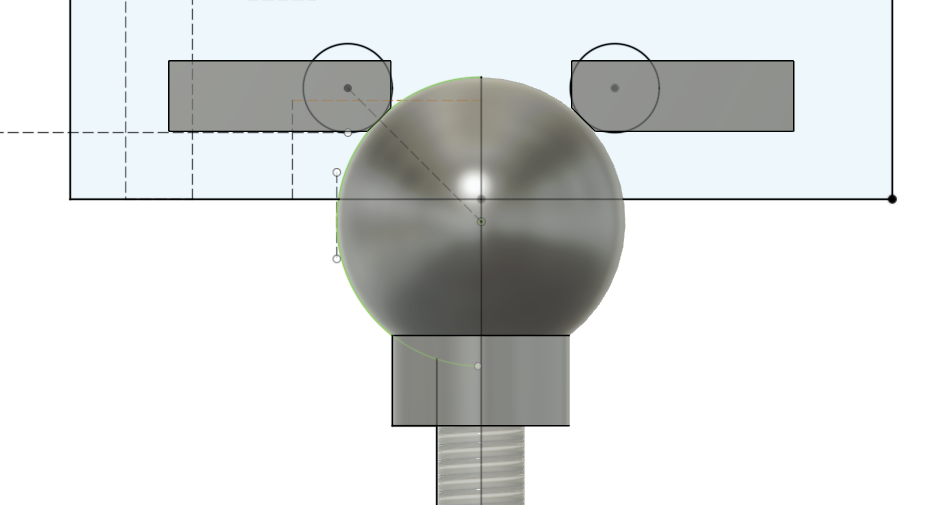
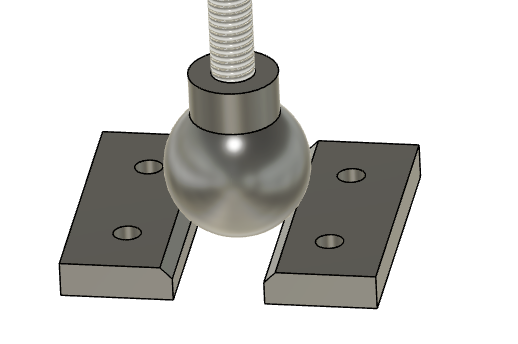
Next point - We are using the steel balls because we already bought them, but in the future I'd replace these with acorn nuts. I think just as good, easier to find, and much cheaper.
Next point - If one of your kinematic supports is a ball and cup, it locks in two directions of motion, but not rotation. The other two joints need to be different. One of the two should have one parallel sliding joint (with the sliding axis going through the center of the cup. This joint provides a lock to rotation. The last joint should be a ball sitting on a plane. It only provides a Z support. If you make either of these joints constrain more movement than this, you will not have a true kinematic connection. Sort of anal and pedantic, but if you go down the kinematic connection path...
Last point - I think keeping the balls on 120degree lines from a common center point, with the direction of sliding at each joint going through the center point, you will have the best solution.
-
@mikeabuilder @fcwilt
you both describe a Kelvin mount. I opted against it, because I wanted to have three identical ball-guides.A filed 45° corner would have to be perfectly machined. The Acorn nuts will drive you crazy, because they are only casted with high tolerances. (They are produced for the looks, not for accuracy)
The 120° approach would be easy to implement on a circular bed on a Delta frame, but a square bed frame ends in 90+2x150° angles. Not too bad, 'cause we don't need equal expansion.The whole build is experimental, I expect more trouble with the XY gantry. (and slicer/firmware issues)
-
I made a short demo video as appetizer for things to come.
It shows how two tools can draw different shapes at the same time. The other two tools can draw other shapes, but not at the same time.
Four tools could draw/print the same pattern simultaneously, eg. the four feet of The Eiffel tower. That would even be easier to slice and postprocess...
I'm using feltpens for now, but with extruders it would be ready to 3D print. (adjustment of individual Z-height per tool is important then) -
@o_lampe said in #- (hash) printer with super simple gantry:
@fcwilt
you both describe a *[Kelvin mount]After reading about the different kinds of mounts I decided to follow your lead.
I modified my printer to use a mount similar to yours.
My bed is supported by a frame made from 20x20 extrusions and the mounting points are on the frame well away from the heat of the bed.
I now have three one piece printed parts with a V for the ball to ride in.
They seem to be working fine.
Here is one of them:
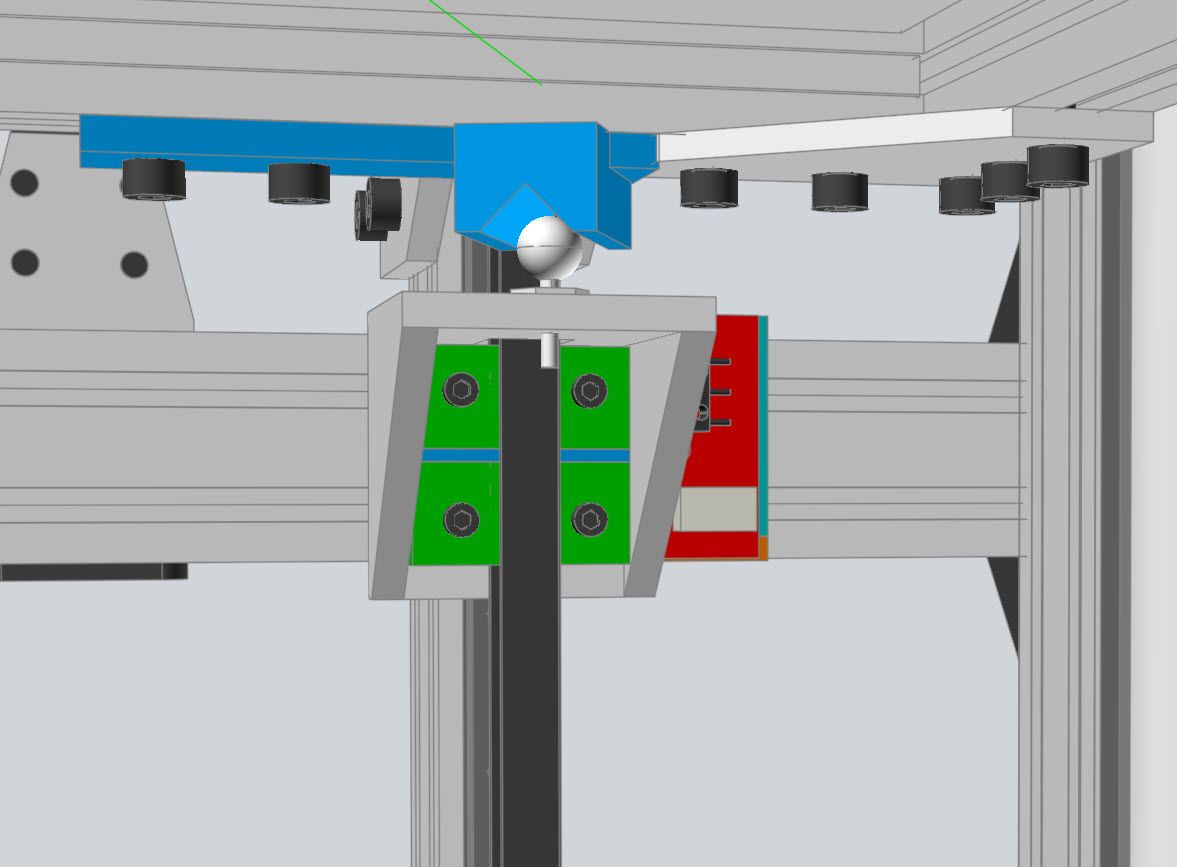
Thanks for leading me to a better design.
Frederick
-
@o_lampe looks very good! impressive that it can manage 2 different designs at once.
Looking forward to seeing this thing print! -
@jay_s_uk said in #- (hash) printer with super simple gantry:
impressive that it can manage 2 different designs at once.
Well, I cheated a bit since both objects have the same path-count.
circle vs square would be much harder to merge into one file.
Then I'd have to keep an eye on layer times. Probably have to slow down one tool to see them finish at roughly the same time.
I'd have to split long straights into short segments and sync them with the arc-moves (G2/G3 is another story)
And let's not forget the missing independant Z-adjustment, I'm still trying to figure out.sigh we will see feltpen-demos forever

-
@o_lampe I can see where that would be difficult. you'd also have to do something about ooze/moving a tool out the way as well
-
@jay_s_uk Oozing can be nasty on multitool printers. I have a parking-slot on my IDEX printer, which has a nylon part where the nozzle rests on.
The good thing about the hashPrinter is, they (could) have way less tool changes than the classic toolchangers. (in the future) -
@fcwilt said in #- (hash) printer with super simple gantry:
Thanks for leading me to a better design.
To be honest, in the end I wasn't sure if it's better. The arguments about misaligned guides made me think. But from a 3D perspective, the Maxwell design is easier to build. (How would I drill a really round hole with my cheap drillpress? They tend to be triangular)
-
@o_lampe said in #- (hash) printer with super simple gantry:
(How would I drill a really round hole with my cheap drillpress? They tend to be triangular)
try to use a reamer?!
-
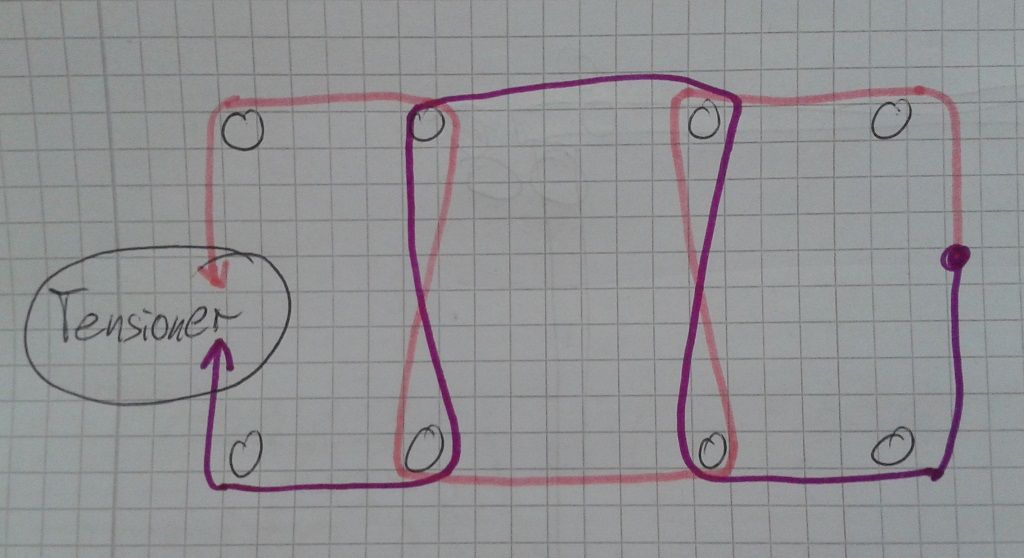
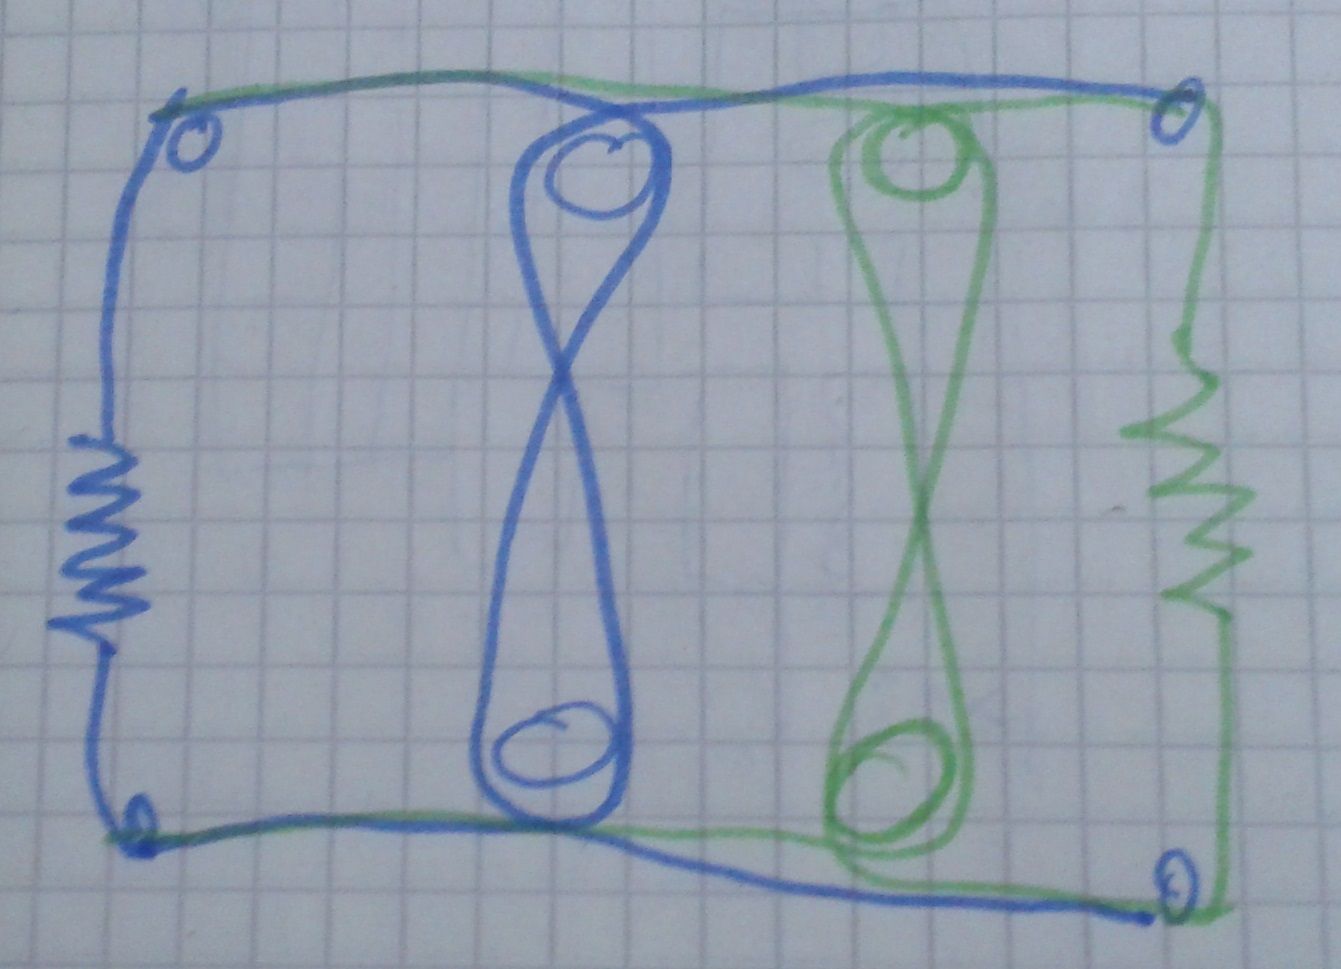
More and more test hours for the gantry and it is beginning to show an issue. The dual-dual roller constraint fails sometimes.
I think, I have to split the Aramid-line into two parts and fix the ends. Which means, I have to disassemble the whole gantry
Before/after:
-
Just for the record, I have configured bed leveling (G32) and mesh leveling with the mini-IR probe.
It's blazing fast, the first G30 to set Z=0 always scares me
-
@o_lampe Almost forgot to mention that it runs with the split dual roller constraint now and it never failed yet.
It's time to add some extruders and print some benchies.
-
It's ALIVE...
Actually no big things to report here, it just finished the first print. With only a single nozzle and without a fancy mini-Z axis. I just want to see if the two smooth rods are stable enough to carry a direct drive sherpa mini and to gather some experience with the new_to_me pertinax build plate. (feel free to share your findings with yours and PLA, PETG)The result reminds me a bit of my first prints on a Prusa i3...there's room for improvement


Sorry for the blurry pic, it's a screenshot from a short video
-
@o_lampe
I have to add more tie-raps (*), just doubling up the drylin bearings doesn't help much.*) can you believe it, German hardware stores are running out off supplies?
-
I use 0.5mm FR2 (pertinax) on flex steel sheet, needs a good sanding and then works pretty well and is very resistant to abuse (-;