Issues with pressure advance since RRF 3.4
-
Unfortunately M400 does not help.
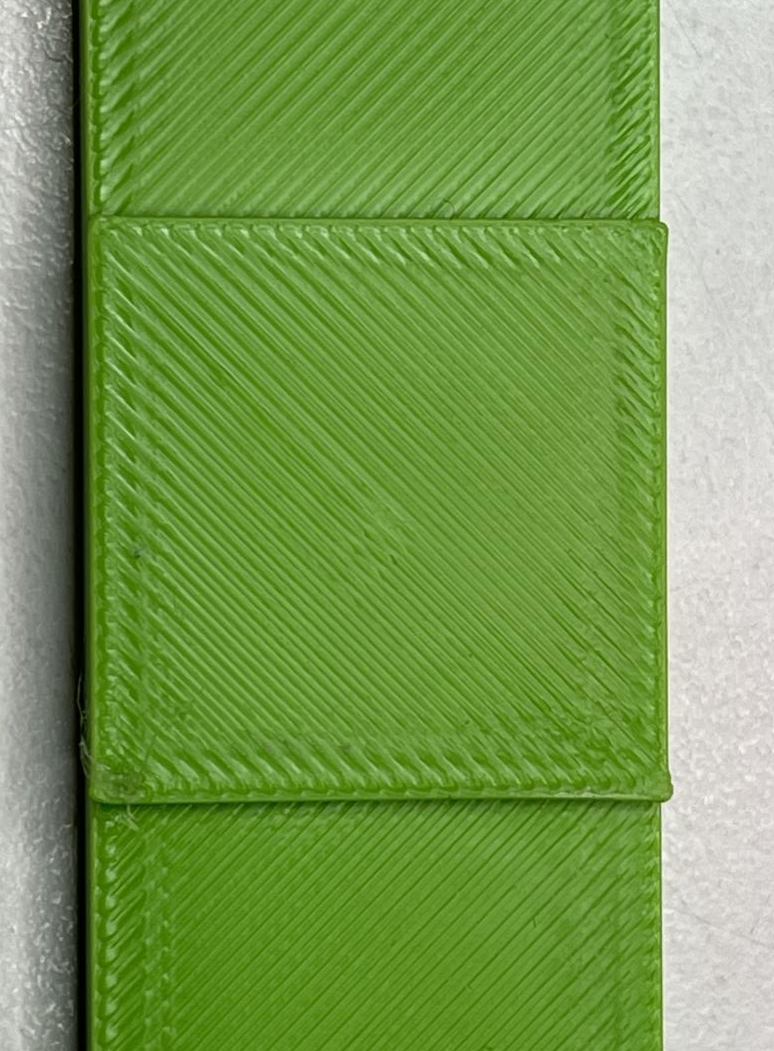
I also found a another issues that comes with high PA values for external perimeter:
The marked area is where the seam is. This is expected with a PA value of 0.08 - 0.09 but needed for nice sharp corners.
Result with PA 0.05 (everything except perimeter) and PA 0.085 for perimeter with M400 usage. Bottom left corner is still bulging:

At least we see now what effect pressure advance has with different settings at the same printed object.
Maybe a post processing script might improve the quality even further with a logic that analyzes the gcode file for sharp corners so that the high PA value isn’t used for all perimeter segments (to prevent defects at round sections) but only for sharp corners. -
I can confirm that this flaw does exist in 3.4:
-
@Chriss Do you have an example of a setup that does not have this overshoot? So for instance are you saying that you did not have the problem with 3.3 (with all other settings the same)?
-
@gloomyandy Well, what can I say here? It was fine with 3.3 back than. I printed enough test cubes etc.
I print mostly technical parts. This overshooted corners are na no go with them.
-
Here pic from a 90° corner with rrf 3.3:
(Yes PA was not very well tuned, but you get an idea) -
@Chriss So the real test is to switch back to 3.3 change nothing and see if you get the same results, I realise this is a pain to do, but so far we have not been able to identify an example of a change between 3.3 and 3.4...
-
@Chriss Oh and if you do run this test, you may need to disable any input shaping you have added in 3.4, I'm not sure what having a 3.4 input shaping command will do to a 3.3 setup... The goal is to have two prints one with 3.3 one with 3.4 using identical config.g and identical gcode files, one has the problem the other does not. That will hopefully give others things to work with to identify the problem...
-
@gloomyandy if you don't have 3.3 try a higher Z jerk and acc. flash 3.4 and the axis runs much more aggressively. could this also be the case for x and y?
-
@Heartleander81 If you think there has been a change between how Z jerk and acceleration works in 3.3 and 3.4, then I think you should probably create a new thread to discuss that. Are you using CAN boards for your Z axis?
-
Just for science. I made a huge cable mess with my printer as I flashed the machine to Klipper with a BTT toolboard and Duet 3 Mini as mainboard.
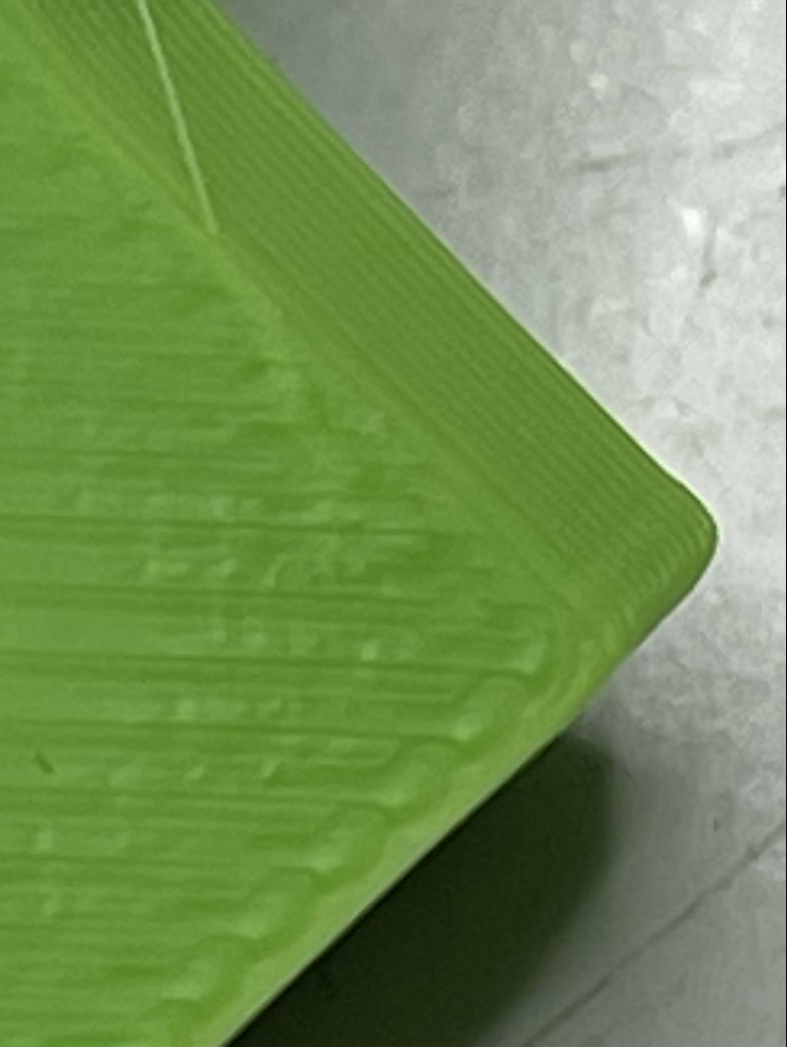
I did not really fine tune the printer so the flow is a little bit too high as you can see but the pressure advance was set to 0.05. Maybe 0.053 would be even better as the corners could use a tiny bit more BUT I don't have to use the extrusion role feature to print perimeter with 0.08 pressure advance.
Result with PA 0.05 (Klipper, same machine) without much tuning.

At least now I know it's not the machine...
Time to tidy up the machine again as this was only a test with all cables just clipped to the tool board
-
@Argo Flipper on a RRF board is a kind of a disgrace.
")
-
@Argo Well there certainly seems to be a bulge on the top right corner in that test print. It also looks like you are using a different filament.... Is this using the same gcode as the RRF case becuase the seam looks like it may be in the bottom right corner, I thought it was in a different place in the RRF prints?
Unfortunately I don't think you can run RRF with the same hardware setup, so again it is going to be hard to compare like for like....
-
Bottom left and top right have a small bulge.
PA was set to 0.05 which is a little bit too low. For RRF I need 0.08 to get similar results and the SuSl feature to switch between PA values whilst printing because PA 0.08 would cause defects all over the place which I'm still getting.The hardware / printer was the same except for the tool board. Unfortunately Klipper can't communicate with the 1LC that's why I had to make a mess in my room and needed 2m of cables or so to wire up the BTT tool board.
I just wanted to rule out a hardware issue and show that is has to be somehow software related.Things we tried or can rule out:
- extruder (I tried LGX and LDO Orbiter 2.0)
- tool board (someone tried with and without in this thread)
- nozzle (I switched from Bondtech CHT to E3D V6)
- stepper motors (I switched the motor when switching from LGX to Orbiter 2.0)
- RRF 3.3 and RRF3.4 (same results for me and others)
I have another printer (bed slinger) that's also running a Duet 3 Mini with RRF 3.4. This printer has no issues with bulging corners.
Could it be a issue with the CoreXY logic RRF uses? -
@gloomyandy no, on Duet 3 6hc.
I think that not only z but all axles brake harder. But I'll record it and open another topic and ask if Duet wanted it that way.
-
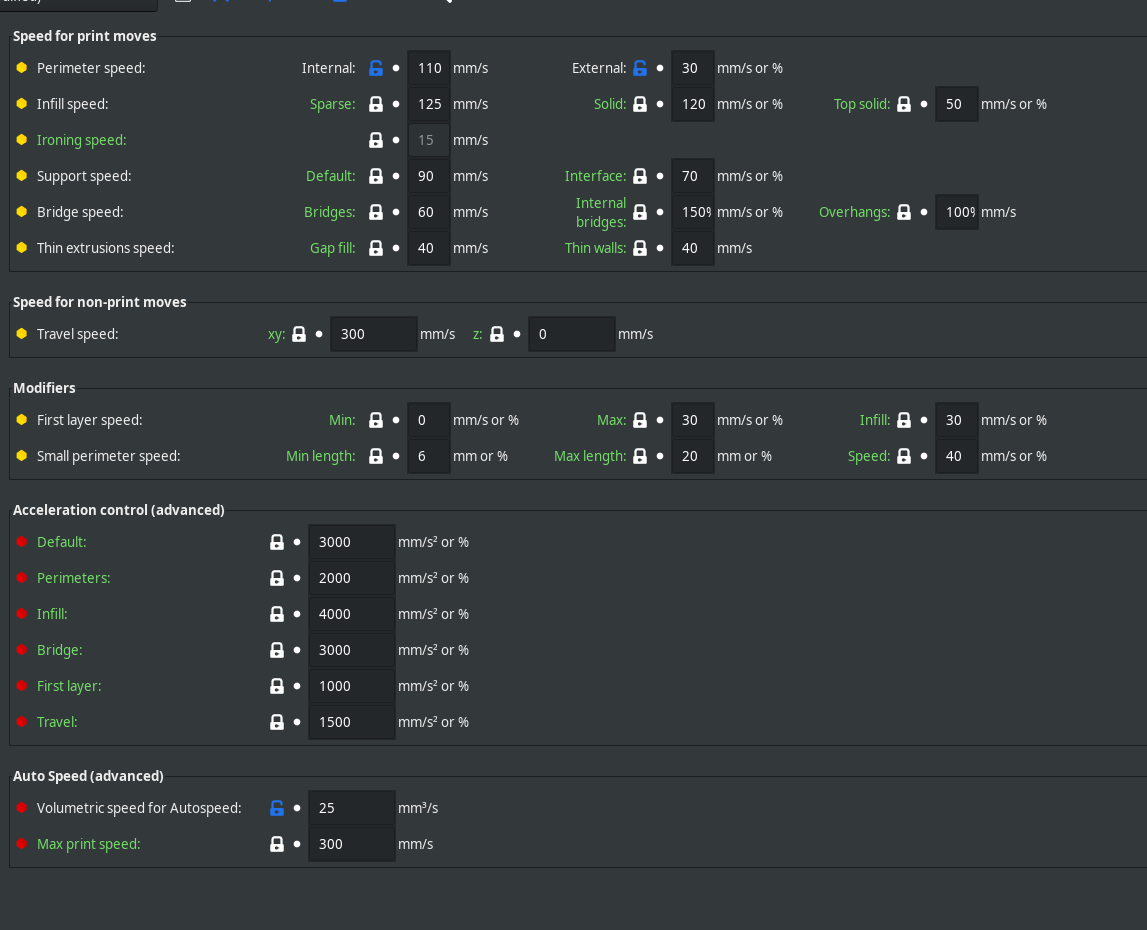
@Argo Was the Klipper setup using the same speeds/accelerations as your RRF configuration? Have you printed the test using the same filament? It really is important to try and keep as many things the same if possible. I suspect that PA values do not map 1:1 between Klipper and RRF. I think if you really want to rule out hardware you probably need to connect the extruder directly to the main board (because that way you can use both Klipper and RRF with the same hardware), but I can uderstand why that would be a total pain....
If you are going to test further I'd suggest getting the Klipper setup as good as you can (probably without input shaping for now). Then once you have what you think are two setups that are as close as possible to each other and you think there is a significant difference between them, ideally using the same filament, gcode settings etc, post photos of both along with the klipper and RRF configurations and slicer settings. Hopefully @jay_s_uk can have a go at reproducing the problem as he has a setup that can be switched between RRF and Klipper pretty easily. I think for this test it might be best just to use a single PA setting for RRF rather than the dynamic stuff that gives better results.
-
@Heartleander81 Yes please start a new thread and provide details of what you think the change is, though honestly if there was a change in something like this I would have expected to see lots of comments about it already....
-
@gloomyandy its probably the change between stealthchop being default to spreadcycle being default...
and I better run some more tests. @Argo do we have a consensus on the test piece? your one with curves and a square in the middle or just a 40 x 40 x 2 cube?
-
I've made a more efficient version of the model to save time and filament:
I would set the seam to rear. Otherwise it'll be at one of the corners.
@gloomyandy
Yep it's a total pain as I would need to rewire all the chains. My Klipper test was just a dirty hang all wires along the frame to the top and to the tool head method. And during the test I held the wires to they don't get caught lol. -
@Argo Does that mean you can't easily run any further Klipper tests?
-
I can but not for weeks as it’s quite the mess here and not really safe to print unattended.
I can print the test again with adjustments to flow and PA. I’ll post the results soon.
Inputshaping does not decrease print quality with Klipper as long you stay within the recommended acceleration settings.