Sovol SV08 Multiple Motion System Upgrade.
-
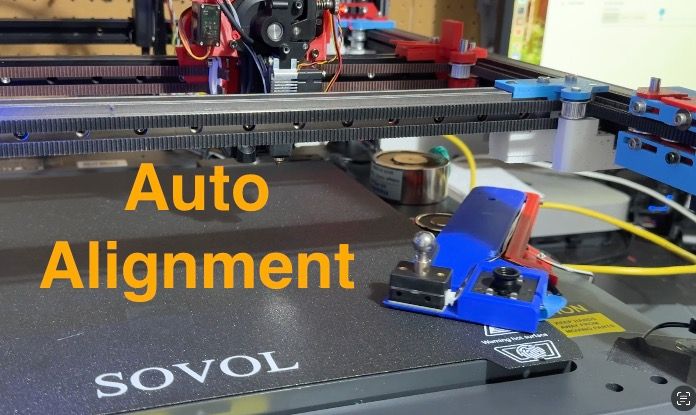
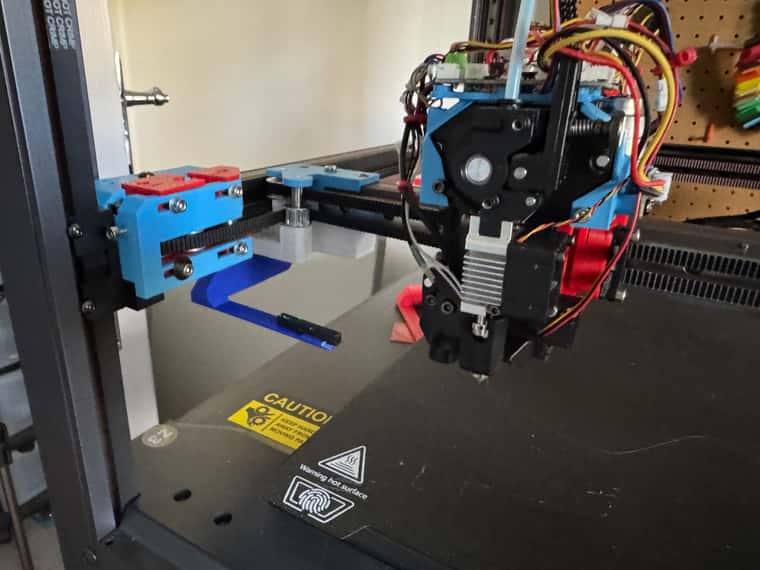
Auto alignment with ball probe complete.
Original plan was to use the electro magnet on the bed - but it is quite weak - despite specs being near to the permanent magnet that works very well.
So switched to having the magnet off the bed grabbing a big circular plate.
Not sure how much it is really needed.
Also ordered a bigger magnet - but not sure if I will need to use it.
Demo video of homing, levelling, deployment of probe and alignment attached.
-
@dwuk3d Nice video, but I watched it without sound.
The problem with any nozzle touch probes is, you have to make sure the surface is completely clean. (and conductive too?)
I hope your homing macros are ready for "murphy's law" -
@o_lampe Thanks - sorry about the music - will have to get a bit more creative with that - and maybe think about some narration.
Agreed about the nozzles needing to be clean, will have to add in some auto cleaning as part of my start up phase. I've put a cleaning pad on the swing out arm - but haven't done the automation for this yet.
The ball probe is mechanical - so no worries about conductivity.
I think my ultimate solution is likely to be a 3 stage approach - with the inductive probe or an eddy probe to find the ball probe and do some basic alignment, then using a cleaned nozzle pressing on the ball probe for a 2nd phase of alignment, with then a final check using the camera for fine adjustments,
There is some software to do the camera based adjustments automatically - but I suspect that it will be hard to get that to work reliably too - especially in different lighting conditions and with different bits of waste on the nozzle.
-
@dwuk3d Added Nozzle cleaning into alignment process, also decided to start making use of Daemon.g for timeouts of things like magnets, servo's, hot ends - which seems to be working ok.
Only issue is with the hot ends - where if the process is left on when a print is about to start then the daemon.g could drop in and switch tools - so will need to disable any tool based timers when prints are started.
Example switch on Servo and Magnet - in Probe Deploy Macro.
M42 P5 S1 ; Servo On

if exists(global.servo5Off) == false
    global servo5Off = 0

set global.servo5Off = state.upTime + 120

M42 P4 S255 ; Magnet on


if exists(global.magnetOff) == false
    global magnetOff = 0

set global.magnetOff = state.upTime + 200
Example Daemon.g
;daemon.g if exists(global.servo5Off) if global.servo5Off != 0 && global.servo5Off < state.upTime M42 P5 S0 ; Servo Off set global.servo5Off = 0 echo "daemon.g servo5 switched off" if exists(global.magnetOff) if global.magnetOff != 0 && global.magnetOff < state.upTime M42 P4 S0 ; Magnet off set global.magnetOff = 0 echo "daemon.g magnet switched off" if exists(global.T1Off) if global.T1Off != 0 && global.T1Off < state.upTime M596 P0 T1 M109 S0 set global.T1Off = 0 echo "daemon.g T1 switched off" if exists(global.T0Off) if global.T0Off != 0 && global.T0Off < state.upTime M596 P1 T0 M109 S0 set global.T0Off = 0 echo "daemon.g T0 switched off" -
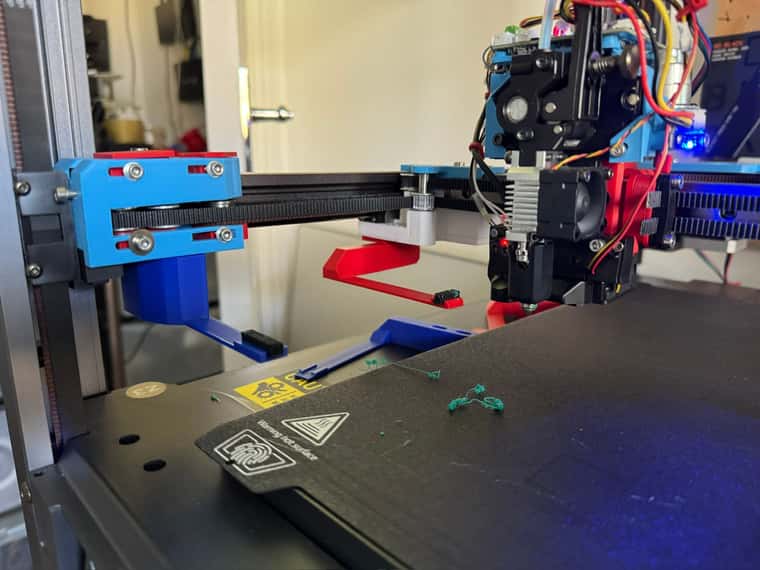
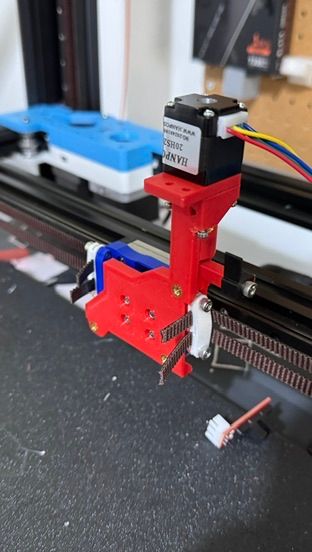
@dwuk3d Trying out various different options for head cleaner location while still waiting for Nema8 and Nema11 Z lifters to arrive.
Not sure whether to put the cleaner at the front of the gantry - so that it can be wiped in 2 dimensions,
or just on the end of the Y gantry - so can only be wiped in the X direction.I suppose I could add another servo at the end of the Y gantry, or some sort of 3d printed mechanism to make the Y wiper move backwards and forwards a little bit.
Long thin arms working quite well on low Z heights - as they bend slightly rather than fouling on the bed.
-
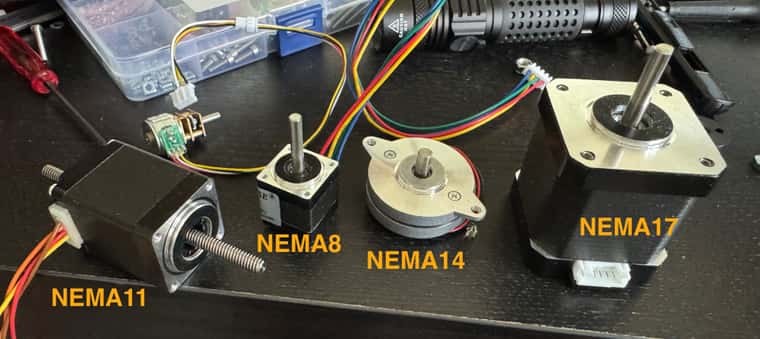
@dwuk3d NEMA11 stepper arrived.
Doesn't work quite like I expected as there is a thread inside the motor - so the lead screw has to be held for the motor to move.
Also quite heavy and bit big - so think I will hold off until the lead screw NEMA8 arrives.
Motor size comparison
-
I think Nema8 might end up working quite well for the Z hoppers.
Decided to try and create some sort of lead screw for the existing NEMA8 I got a few weeks ago.
Took quite a few iterations - but ended up doing my first ever 'captive print' - with an M4 Hex Headed Bolt captured inside a coupler print.
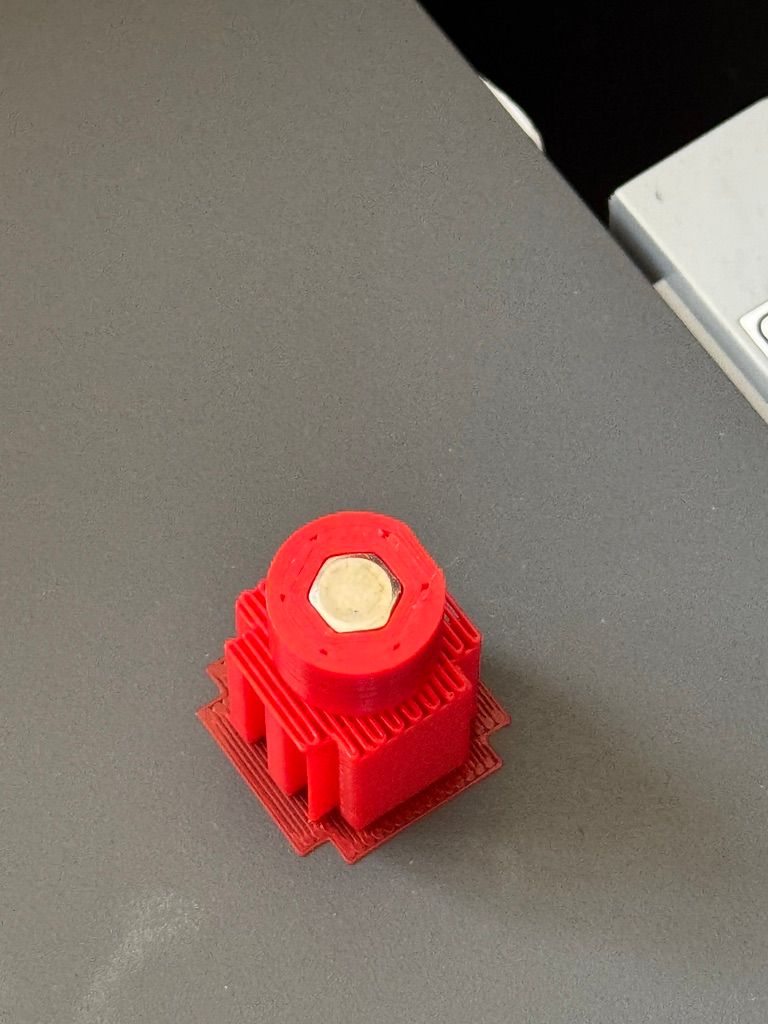
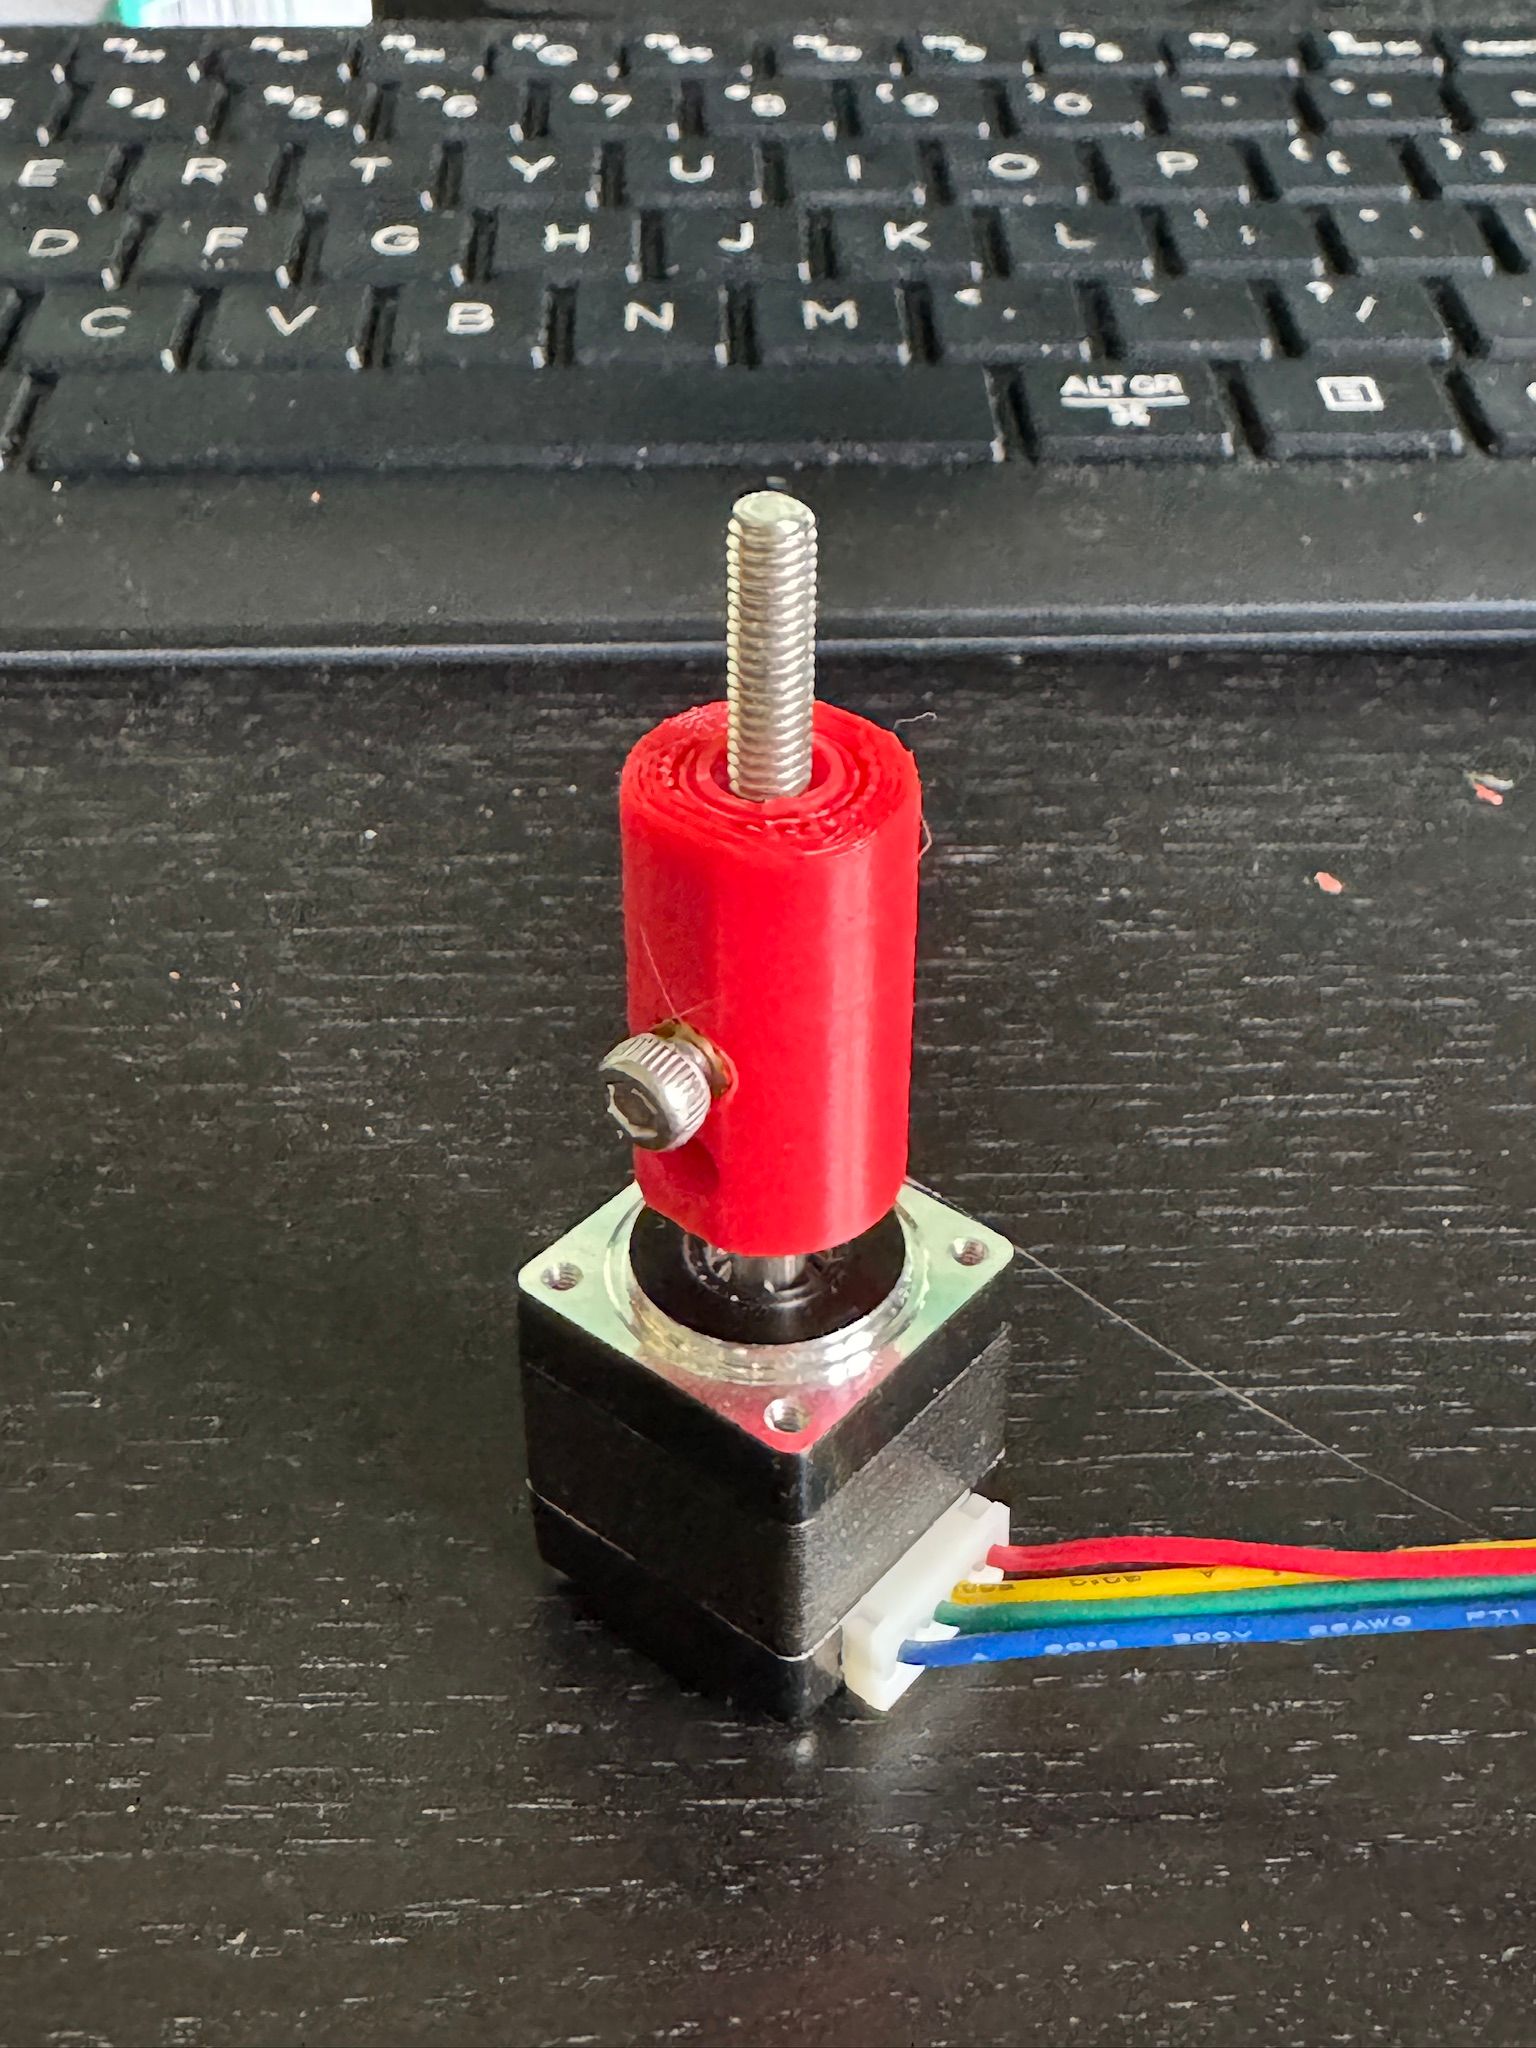
As its a bolt rather than lead screw then it is quite sloppy - but might be able to use that as a slight advantage as will hopefully be able to use a single optical end stop for both
a) The homing of the Nema8 based Z hopper
b) The X axis
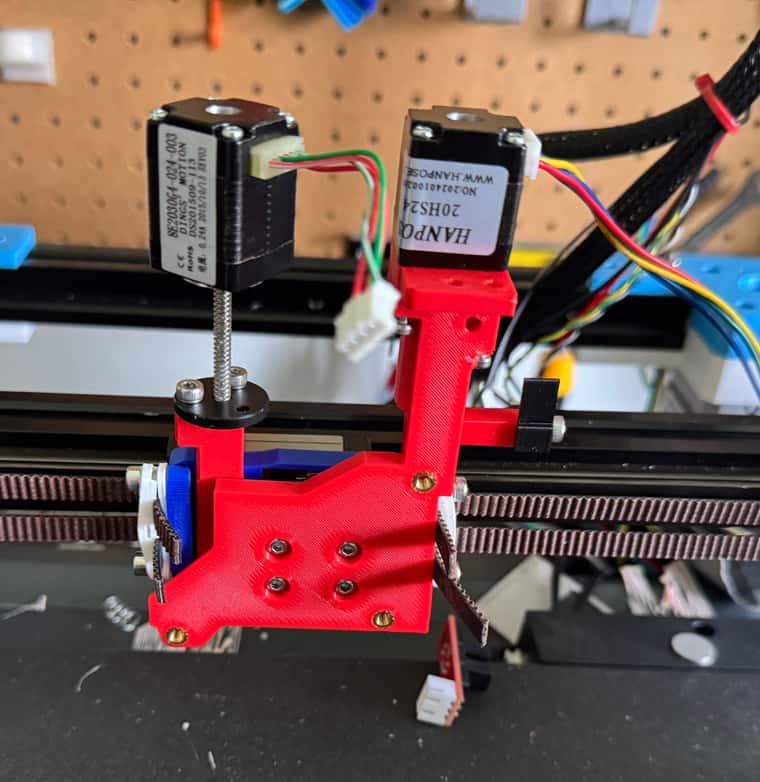
c) Z Axis tapping too.Have replaced Servo on the rear gantry with the Nema8 motor and it is looking good so far.
Comparison photo with the slow soon to be replaced front gantry stepper, rear gantry with almost completely installed NEMA8, with 3 way optical end stop below, plus the NEMA11 motor also included.
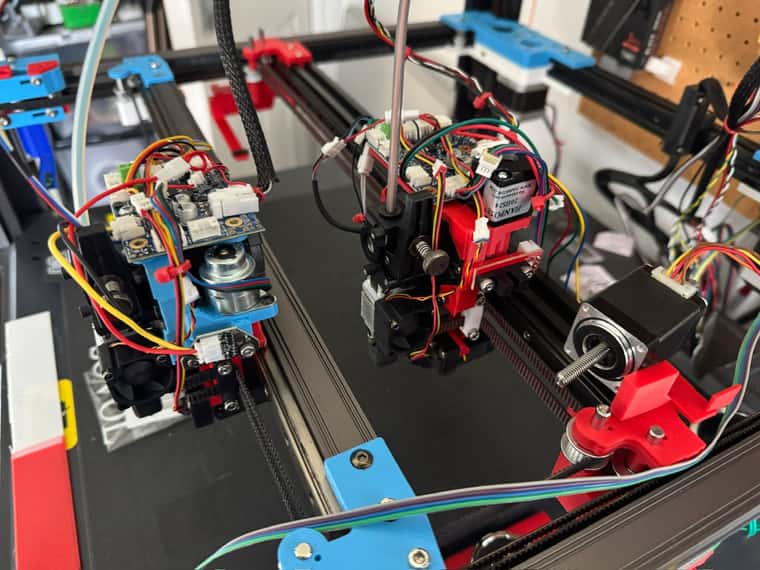
Had to move the 1LC tool board about 16mm to the left to accommodate the taller stepper/lead screw combination.
-
@dwuk3d said in Sovol SV08 Multiple Motion System Upgrade.:
As its a bolt rather than lead screw then it is quite sloppy - but might be able to use that as a slight advantage
Vertical slop is a 1st layer killer.
Although it might have advantages with other stuff, you sure don't want to risk bad adhesion to the bed.
Maybe you can add a spring to reduce backlash? -
@o_lampe Thanks will try a spring over the bolt.
Will be interesting to compare the 'bolt' version with the proper lead screw Nema8 version I have ordered.
-
Nema8 motor working quite well as a zlifter on rear gantry - so have ordered a few more for other extruders.
Will create a short video next showing use of a single optical endstop for U,A and Z Axis.
In the meantime - another interesting video from teaching tech with a comparison between Marlin, Klipper and RRF - with another little mention of this project in the RRF section about 9mins30 in.
-
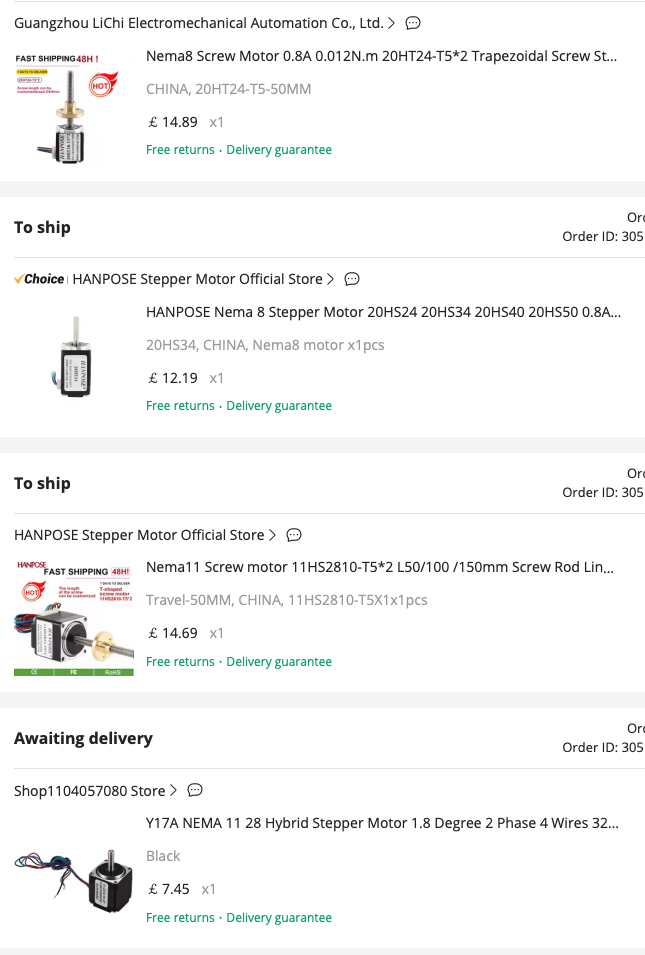
@dwuk3d Initially I was finding that the Nema 8 motors were not powerful enough to reliably lift the gantry.
The Non Lead screw one was I thought rated at 0.4a and the Lead Screw one at 0.24A.
However it looks like on further investigation that the Non lead Screw one is actually rated at 0.8A - and when I set it to 0.6A in Config.g it is working very reliably.
Before I found this out I ordered some smaller (28mm) Nema11-s however as the Nema8's look ok I have ordered two more of those too
Short video attached of Nema8 in operation, and also showing what may or may not be a good idea - using the same (very cheap) optical sensor for
- MicroZ (A Axis)
- U Axis
- Z Axis tapping
In order to swap the 122.io2.in pin between the 3 axis - I found I had to first swap the other axis to dummy IO pins - so that they would release 122.io2.in - so that it could be assigned to the correct axis using M558 commands.
-
Little time saver GCode command created,
M98.1 - For running Macro's - without needing to specify the full path, or .G suffix
M98.1 A"ClearAllocs"
Instead of
M98 P"0:/macros/ClearAllocs.g";m98.1.g - Run Macro if exists(param.A) var P ="0:/macros/"^{param.A} if fileexists(var.P) M98 P{var.P} else var P2 =var.P^".g" if fileexists(var.P2) M98 P{var.P2} else echo "M98.1 Macro file not found",{var.P} else echo "M98.1 Macro Parameter A not found" -
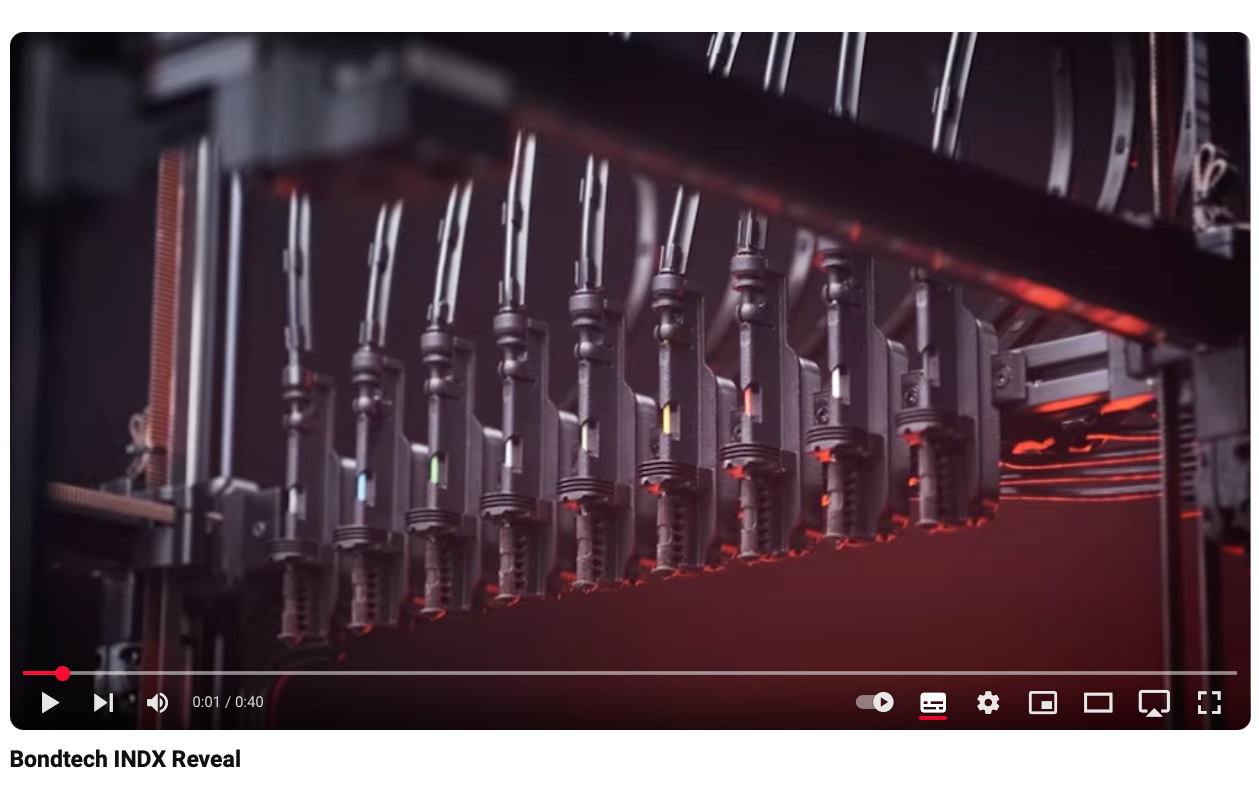
Got a bit distracted today by the BondTech INDX - which looks like a very interesting Nozzle Changing solution - although I suspect it might end up being a bit expensive to be practical for my Proof of Concept.
https://youtu.be/BCmGoP0uNlM?si=9z8oPViQpQ6cfGIo
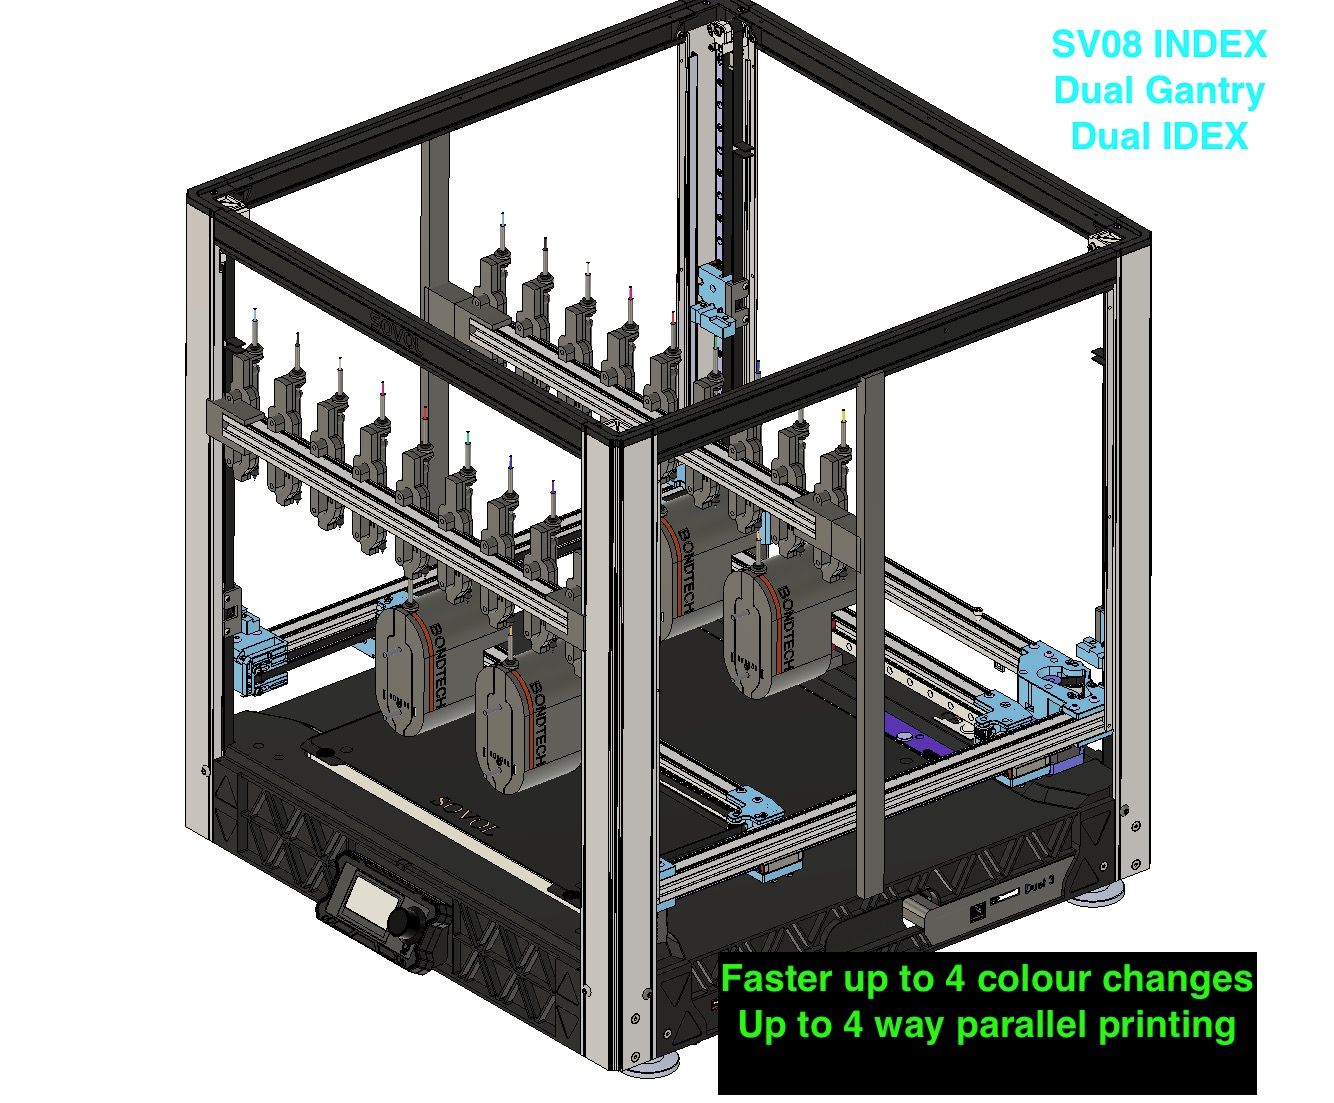
Double Gantry SV08 - with 9 way INDX on each gantry - for parallel tool changes and parallel printing
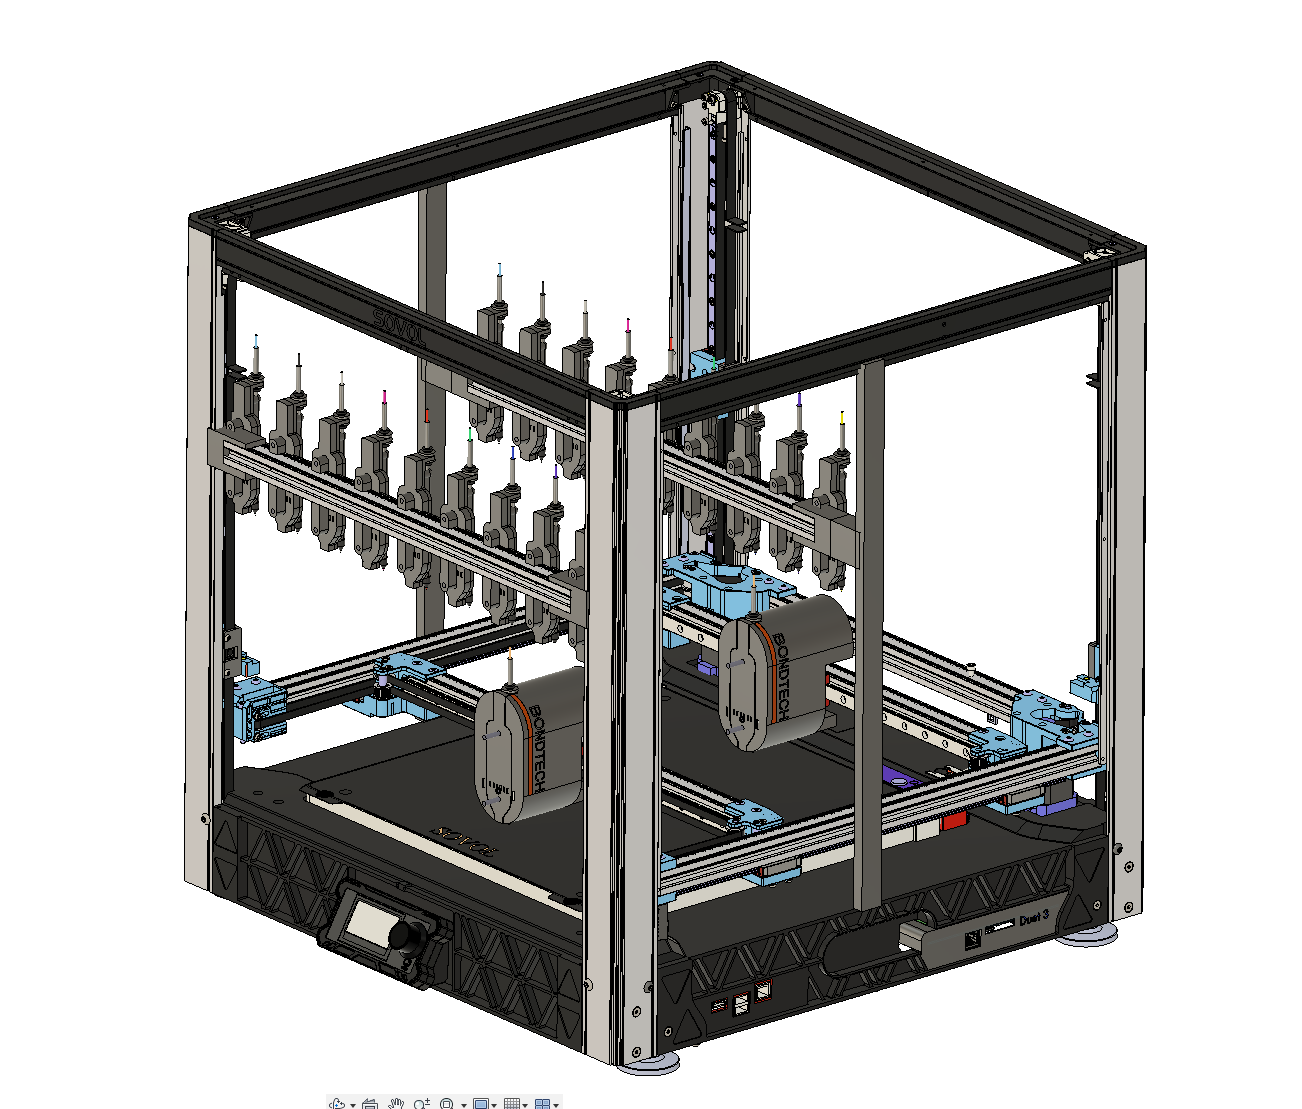

Double IDEX version ultimate parallel printing / multi colour solution

-
@dwuk3d I played around with multicolor prints, but they all looked like (R)designed by Toys'R'us.
It was hard to find decent colors and mixing hotends where a fail, too. -
@o_lampe thanks for all of your input on my project.
I've not tried any colour mixing - but agree that it would be good if they come up with a really good way of doing full colour printing without needing masses of different pre-coloured filaments.
The ink injection method recently featured by teaching tech looks like it has some potential - but I was put off trying it by the slightly washed out look, and high postage costs quoted for the prototype.
I've tried a few different non mixing methods such as Prusa MMU2, Mosaic Palette and IDEX plus combinations- but didn't really have anything I wanted to print until I decided to start doing ship modelling, plus when Bambulab finally came out with a reliable solution that can produce some surprisingly detailed results
- lots of stuff about my multi colour printing stuff here if anyone is interested https://forum.bambulab.com/t/cruise-ship-print/5122
The multi colour challenge I am trying to address is print time - as even tool changers are quite slow when you have 1000s of colour changes in a model - especially when the printing and tool changing are single threaded.
I'm also though trying to get the print time of big objects single or multi colour down too without needing them to be split into multiple parts.
I think massive printers like the Elegoo Orangestorm Giga would really benefit from having 4, 9 or even 16 heads.
-
Still working on Z hoppers - taking longer than I expected to get working well.
I've moved the Z hopper off of the tool board holder onto the main extruder holder - which has the advantage that it doesn't need to be offloaded when I get to the tool changer stage. Will need two sets of wires going to each extruder - one for the Z Hopper, and one for the Tool with the 1LC board and PTFE.
Not completely sure they will be strong enough - they are not very heavy - so I could put a 2nd one on the other side - and run them in parallel - with double the current. Would also be better to be lifting from both sides - but does seem a bit excessive to have 2 motors.
Another option is to switch the 'lead bolt' from M4 0.7mm pitch to M3 0.5mm pitch - as that will increase the gearing.
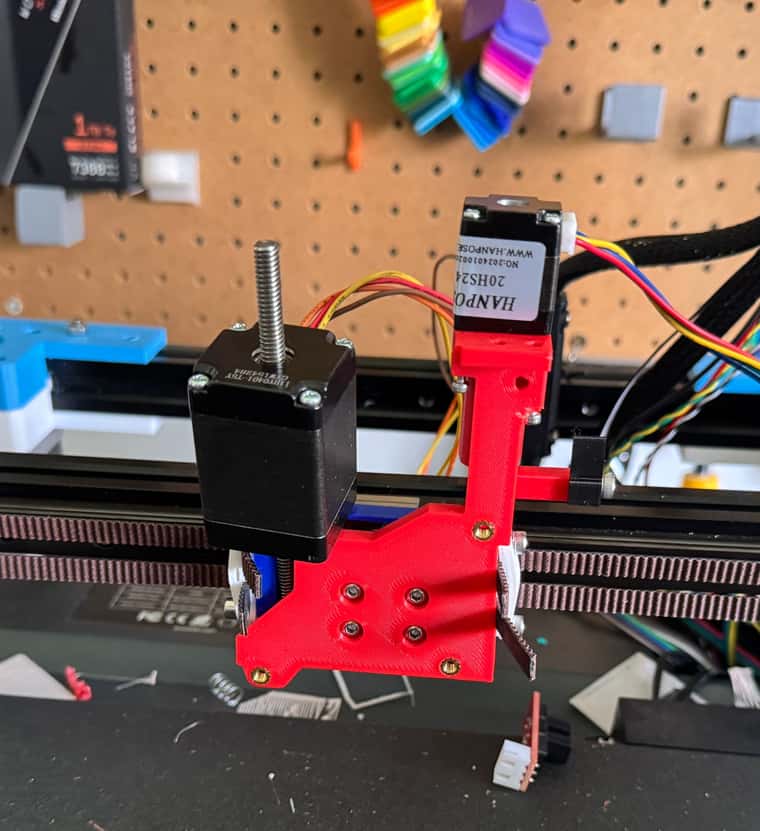
Size comparison with the larger NEMA11 motor - I'm still waiting for shorter ones to be delivered.
Also had a nasty accident with my alignment camera - accidentally took the gantry down to 5mm nearly over the top of it.
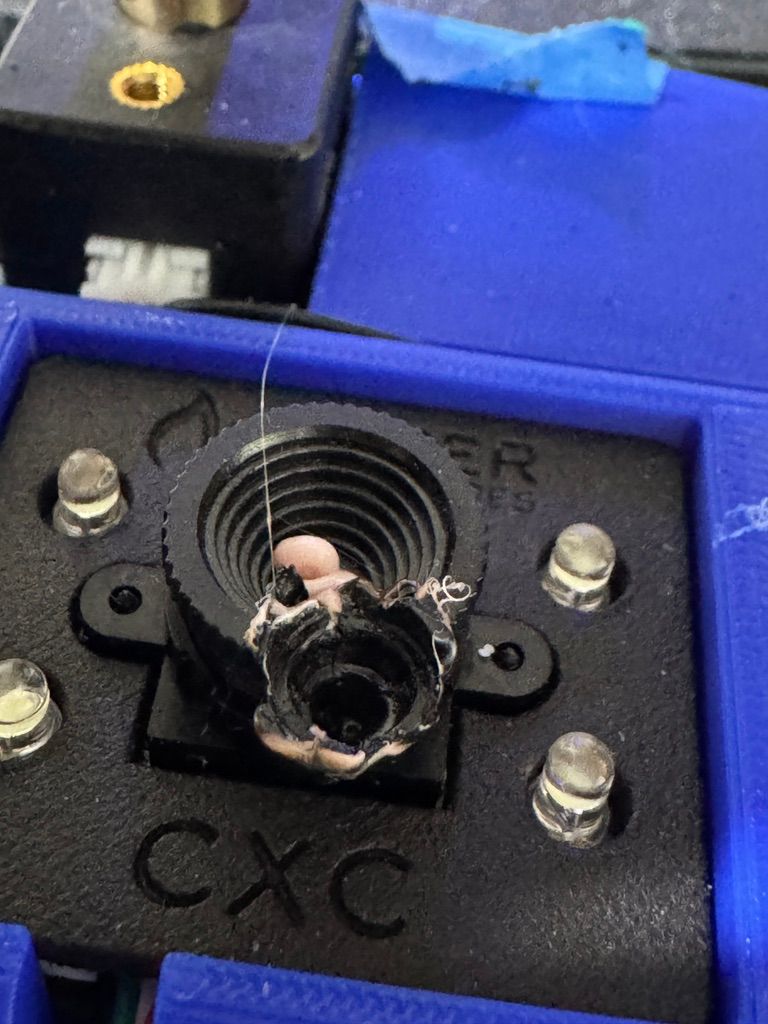
Luckily it still seems to workNew 3.6.0.rc1+3 looks like it solves my motion system non release issue - so should hopefully be able to proceed with further testing now on that version. Will be good to turn on head avoidance, plus will probably switch the XY gantry into M596 P0 now that the UV no longer has the servo on it.
-
Nema8 update - spent quite a lot of time yesterday (in between looking at Bambulab H2D videos) trying to get my improved Nema8 design to work.
Either the motors are getting weaker or my design has introduced more resistance - as the motors no longer seem to be able to lift the extruders despite a few changes to the 3d printed components and oiling up the linear rail.
Also managed to mess up firmware on Mini5+ and 6HC board again as I thought 3.6.0 Rc1+3 might be having some impact on Nema8 motor power -
Accidentally downgraded to 3.4.0 instead of 3.5.4 - which the Mini5 board doesn't like moving up from.
Had to manually update the Mini5+ again via SD card, and erase a reflash the firmware on the 6HC board too. Luckily I followed my own instructions on how to overcome the Mini5+ 3.4.0 upgrade issue earlier in this thread.
Same Nema8 lifting power issue with 3.5.4 though - so will move back to 3.6.0rc1+3.
I think I am probably wasting too much time on Z hoppers trying to keep the extruders as light as possible - will drop the Nema8's for now and try to over-engineer instead by trying some of the heavier more powerful motors and thicker support structures next.
Probably best to get everything working functionally and with good print quality up to at least the double IDEX phase - then worry about optimising weight as part of later speed tuning phase.
-
@dwuk3d The NEMA8s can be pretty quick (eg. 3000RPM vs ~300RPM of a NEMA17)
They also have a long leadscrew. You could place them vertically and use an 90° arm to translate speed into force (long leg /short leg ratio) The arms anchor point could be above the center of the package to reduce sideload to the linear rail. -
@o_lampe thanks i hadn't spotted that nema8's are faster.
I have been toying with the idea of doing some sort of lever based force amplification as you suggest - perhaps backed up by some sort of springs or counterbalance.
Will probably be more efficient if I set up some sort of off gantry force testing mechanism to better investigate the options.
One concern I do have with adding lever type mechanisms though is play in the extra linkages / pivot points.
Could also be an idea for a fairly interesting video comparing different linear motion options - with different motor sizes / gearing . movement translation mechanisms - to show how they stack up in terms of speed, strength and weight.
-
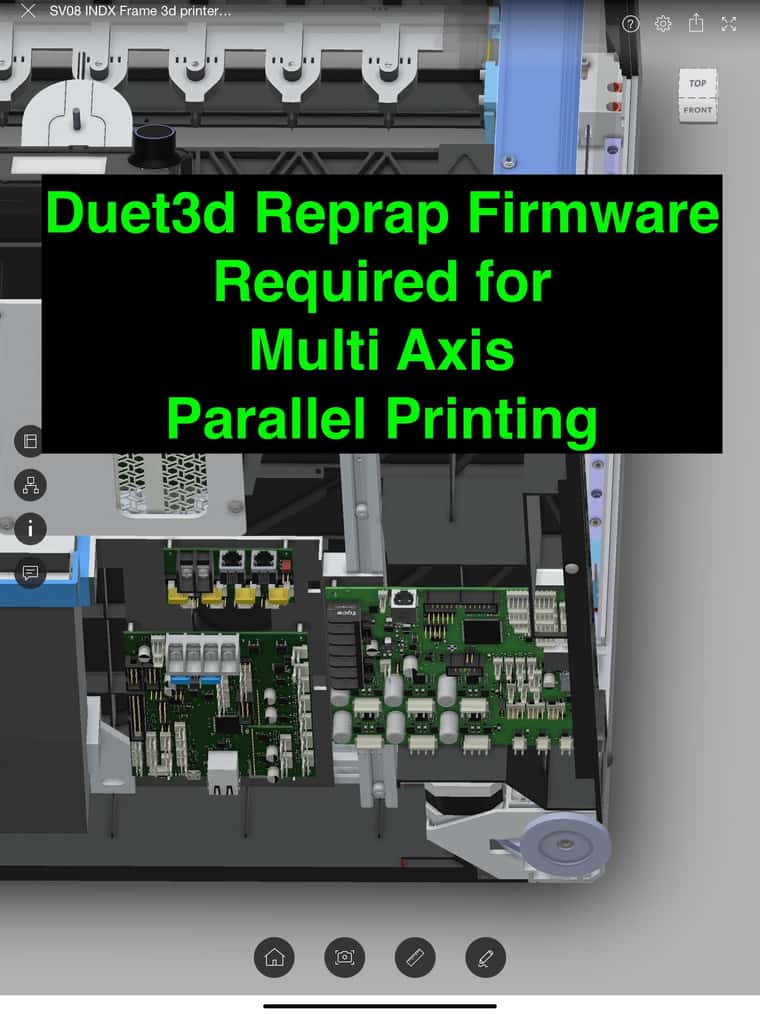
Created short slideshow about the Bondtech INDX vs my Parallel printer - whether it is the answer for going beyond 4 colours depends a lot on the price....