Core-XY based on Rat Rig V-Core and Duet 2 Ethernet
-
@snoozer said in Core-XY based on Rat Rig V-Core and Duet 2 Ethernet:
Are you actually using shielded cable on your machine ? Just wondering if you had issues with noise from the stepper motors and probes etc ?
No and No - (with a couple of caveats). I twist the motor wires but they are unshielded. I'm not sure of the source but I used to get a noisy signal when I used a PT100 on my bed. Not much but enough that the temperature reading had about +_ 0.5 degree "oscillation" in the signal. However, this happened regardless of whether the motors were moving or not so I doubt that the motors were the cause. Changing the PT100 to a simple thermistor fixed the problem.
-
On my ToDo list I now have:
This WE
- Macro for Z-Max
- Part cooling
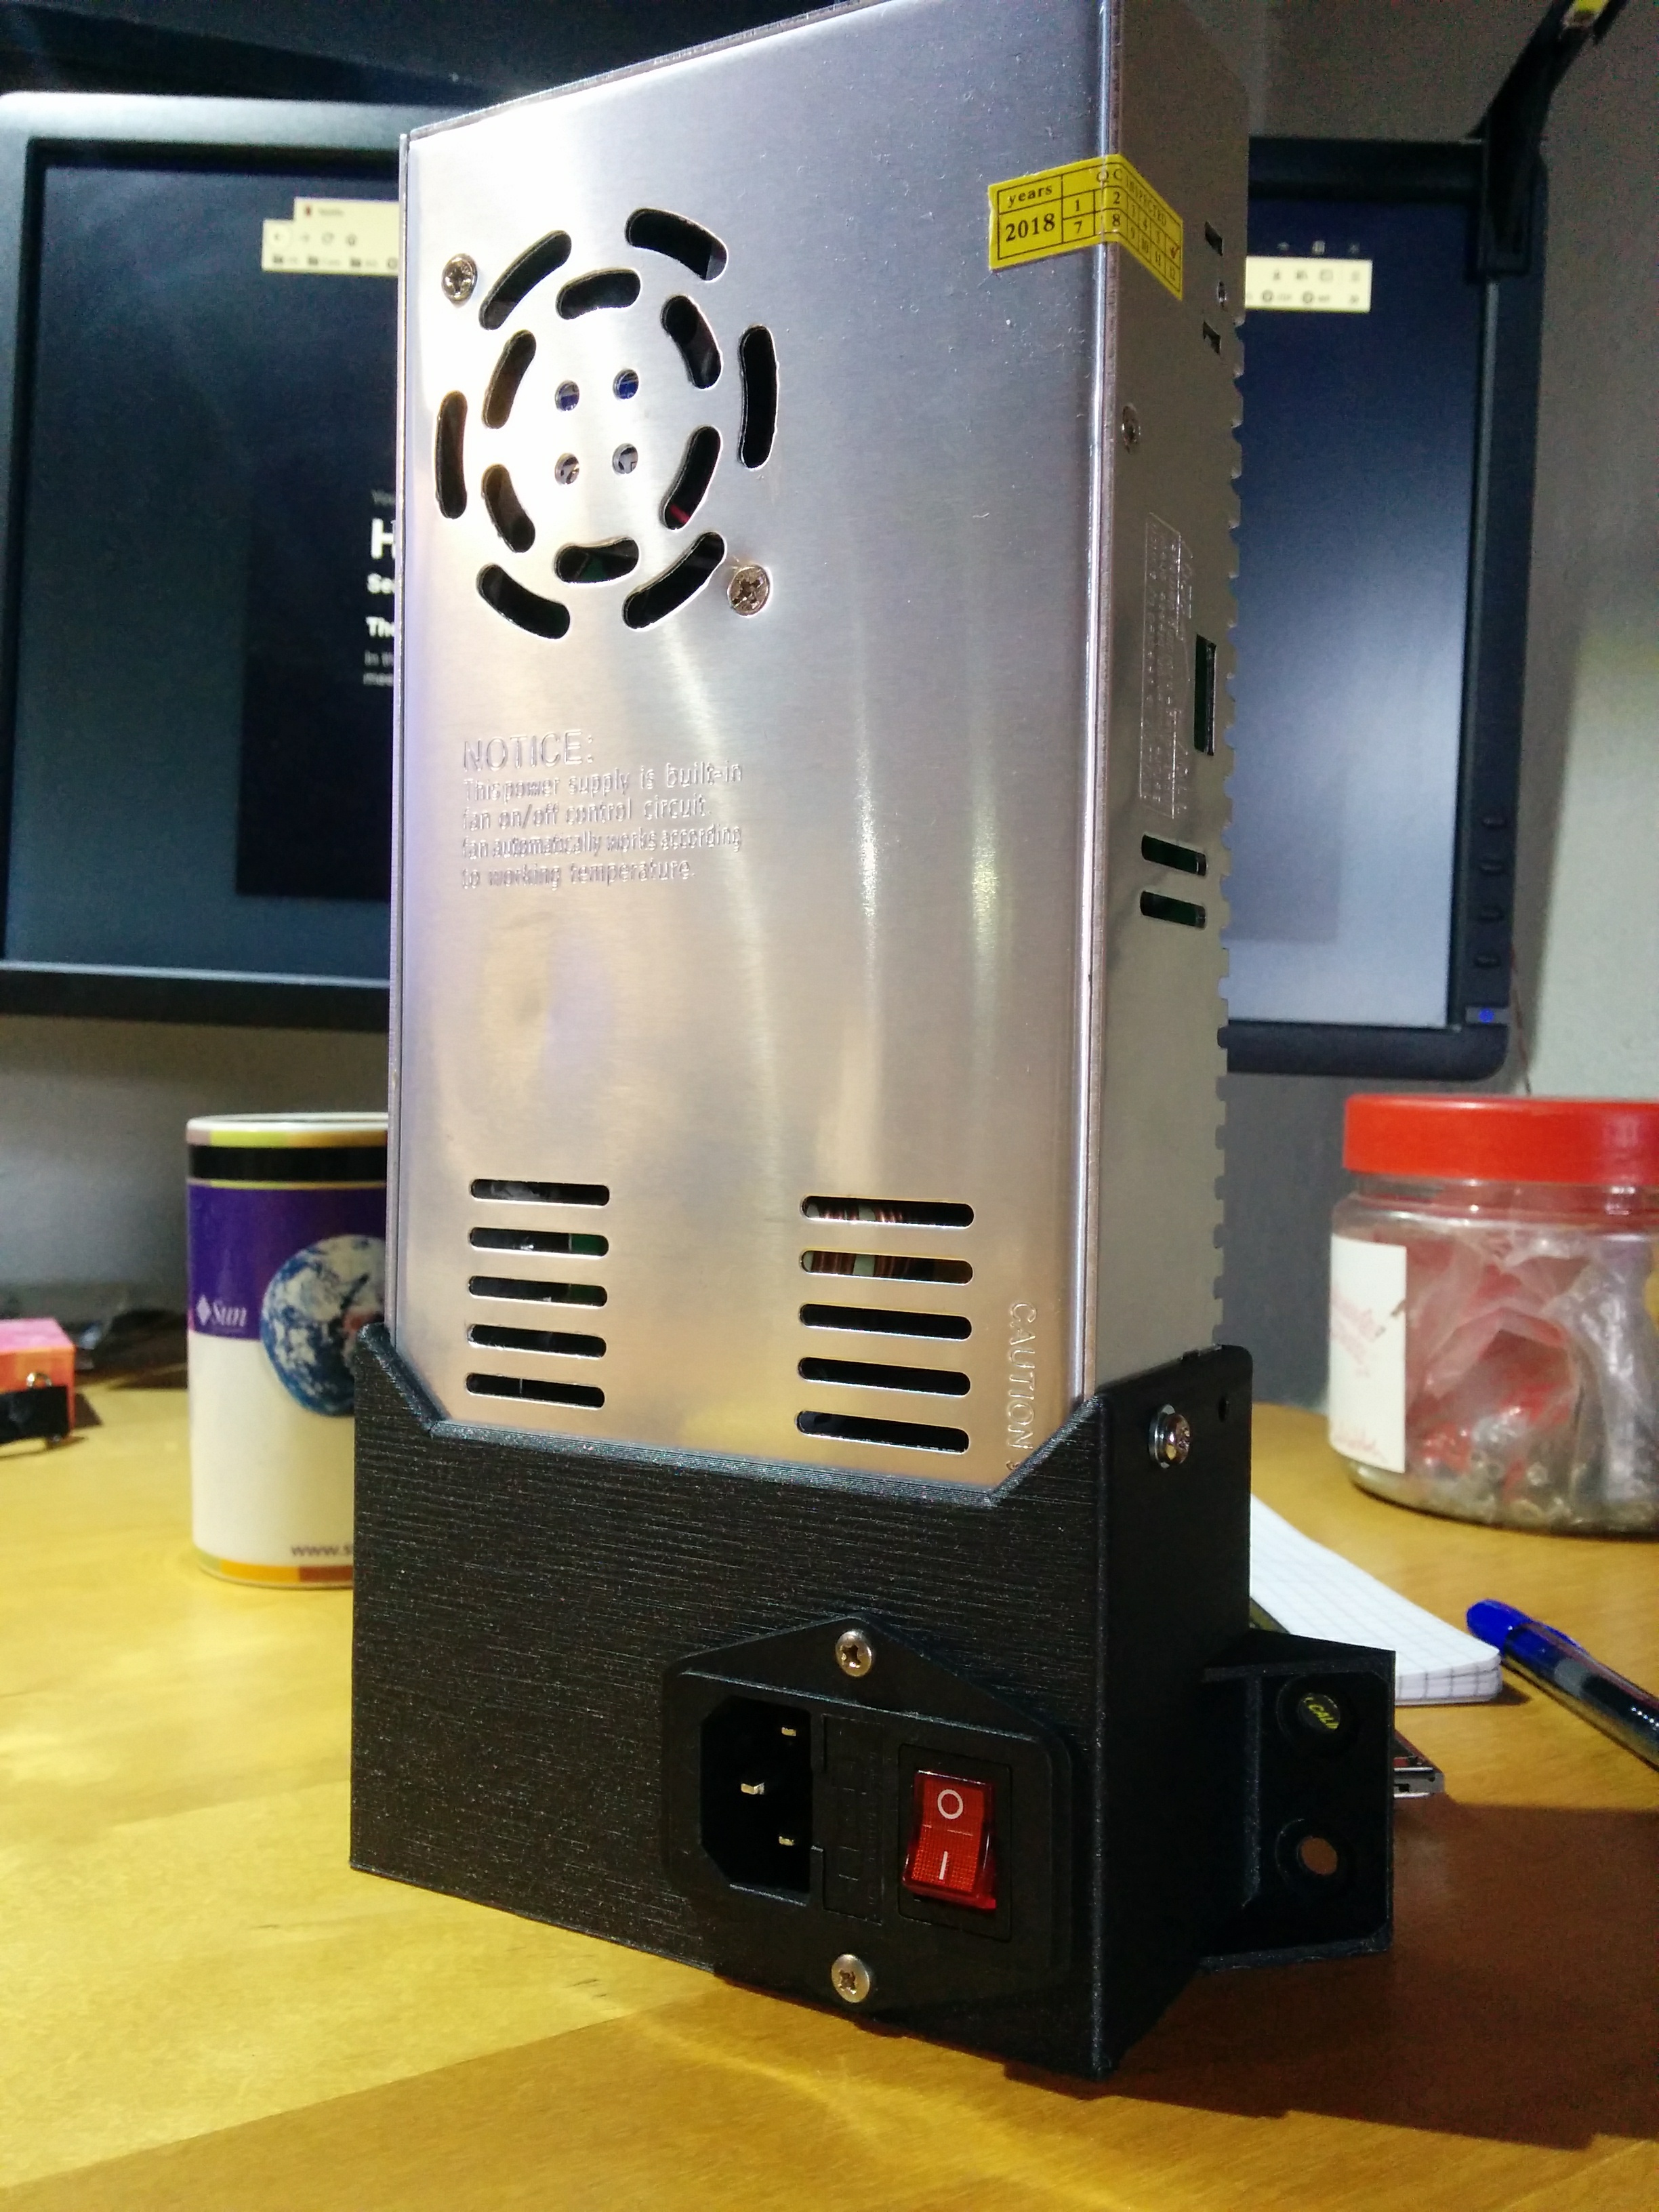
- PSU Mount
- Temporary fix bad spring steel surface
Following Weeks
- Piezo Probe
- Wiring harness support
- Tooling Plate Alu Bed
- 230V AC Heater with Solid State Relay
- Bed heater insulation (thermal)
- Push buttons to call macros (Fast to Z-Max, Home XY, Home Z, Load and unload filament, E-Stop
-
@snoozer I am currently building a rat rig V-Core too , did you flip your belts somewhere to run on the smooth belt side on the idlers ? Looks like there isn't enough space to twist them anywhere.
-
Hi,
no I have not flipped them over anywhere, the smooth side is not running on the idlers everywhere, just on the inner idlers on the X gantry.
Regards
Jan -
Here a couple more links to Thingiverse with my bed spring mount and the strain relieve for the bed heater wires (Fusion 360 links included).
https://www.thingiverse.com/thing:3636671
https://www.thingiverse.com/thing:3636679Also a box for the PSU I use till I have my mains AC bed heater.
https://a360.co/2VL0WOC
Consider these quick and dirty designs, I am all about functional, not "nice looking".
Have FuN!
Jan -
@scachi I have read that people dislike running the teeth on plain idler. I can imagine on a very small diameter idler that could be an issue but the idlers in the V-Core are pretty big actually. Once I get printing I shall be on the lookout for issues I guess.
Jan
-
@snoozer
Yes, I guess it would be fine. I finished building the printer today. Runs smooth during a short test without printing. I am waiting for some 24v parts to arrive before I can start printing/the real fun. -
@scachi what is your plan regarding the print surface and bed ? Will you use the aluminium plate that came with it ? Wil you use a z-probe and if yes what kind ?
Jan
-
@snoozer Thank you for sharing your models, I will print your "Bed Heater Strain Relieve" as a real print test then.
I have a thick and heavy (2kg) aluminium bed from my old printer that I am using now on this one. It has a magnetic sheet / switch plate system attached. I use some thin sheet of gfk as a print surface. Worked fine on my old printer.
For the Z probe I am using some more parts from my old printer, a precision piezo (screw mount version), my x carriage:
https://www.thingiverse.com/thing:3637202 -
I have the temporary PSU mounted to the frame now. It is actually not bad so far, the fan is temp controlled and even with the bed heating for hours it only gets hand warm and the fan is pretty quiet.
The macro is also done now to move all axis out of the way quick for easy access to the print bed. Using a Z max endstop for that.
Here is the content of my macro
; Move-Clear.g ; Move axis out of the way to get maximum possible room for access to print ; M574 Z2 S1 ; Set active high endstops at the HIGH end of X G91 ; Relative positioning G1 S1 Z+320 F2000 ; Move bed down until the endstop is triggered (1st pass) G1 Z-3 F2000 ; go back a few mm G1 X250 Y270 F30000 ; Move the hotend out of the way but leave Z-probe above bed G1 S1 Z+20 F100 ; move bed down until the endstop is triggered (2nd pass) G92 Z305 ; set Z position to axis maximum M574 Z1 S2 ; Set endstops controlled by probe G90 ; absolute positioning I am not clear how I can show code here in this forum as fixed width text.......
Thanks @phaedrux, fixed that now.
Jan
-
@snoozer said in Core-XY based on Rat Rig V-Core and Duet 2 Ethernet:
I am not clear how I can show code here in this forum as fixed width text.......
-
@phaedrux Thanks for that !!!
-
This cheap sh** spring steel bed is killing me. Its warped and so flimsy that it wont lay flat. The magnets I have are not strong enough to hold it down through the aluminium bed. I was impressed with the trigger height difference, never thought it made such a difference. The aluminium bed alone was 0.38 mm with the steel sheet its 1.78 mm.
Jan
-
@snoozer
Your springs mounted to adjust the bed will cause it to bend too as it isn't located at a good position. The screw should better be inside of the spring I think.My aluminium bed is 8mm thick
-
@scachi, this is a temp setup only. The springs cause minimal deflection, its the spring steel sheet having issues. The proper bed I get will be somewhere between 6-8mm and the bolts will pass through the springs then on a 3-point mount. Once my piezo probe has arrived I will try glass and also keep looking for a PEI coated proper spring steel sheet.
PS: Just tried printing now....... I am not getting anywhere with this sheet. I'd say I repurpose that as spatula or what ever...... I check if I can somehow use the Prusa sheet, that's at least in shape.
-
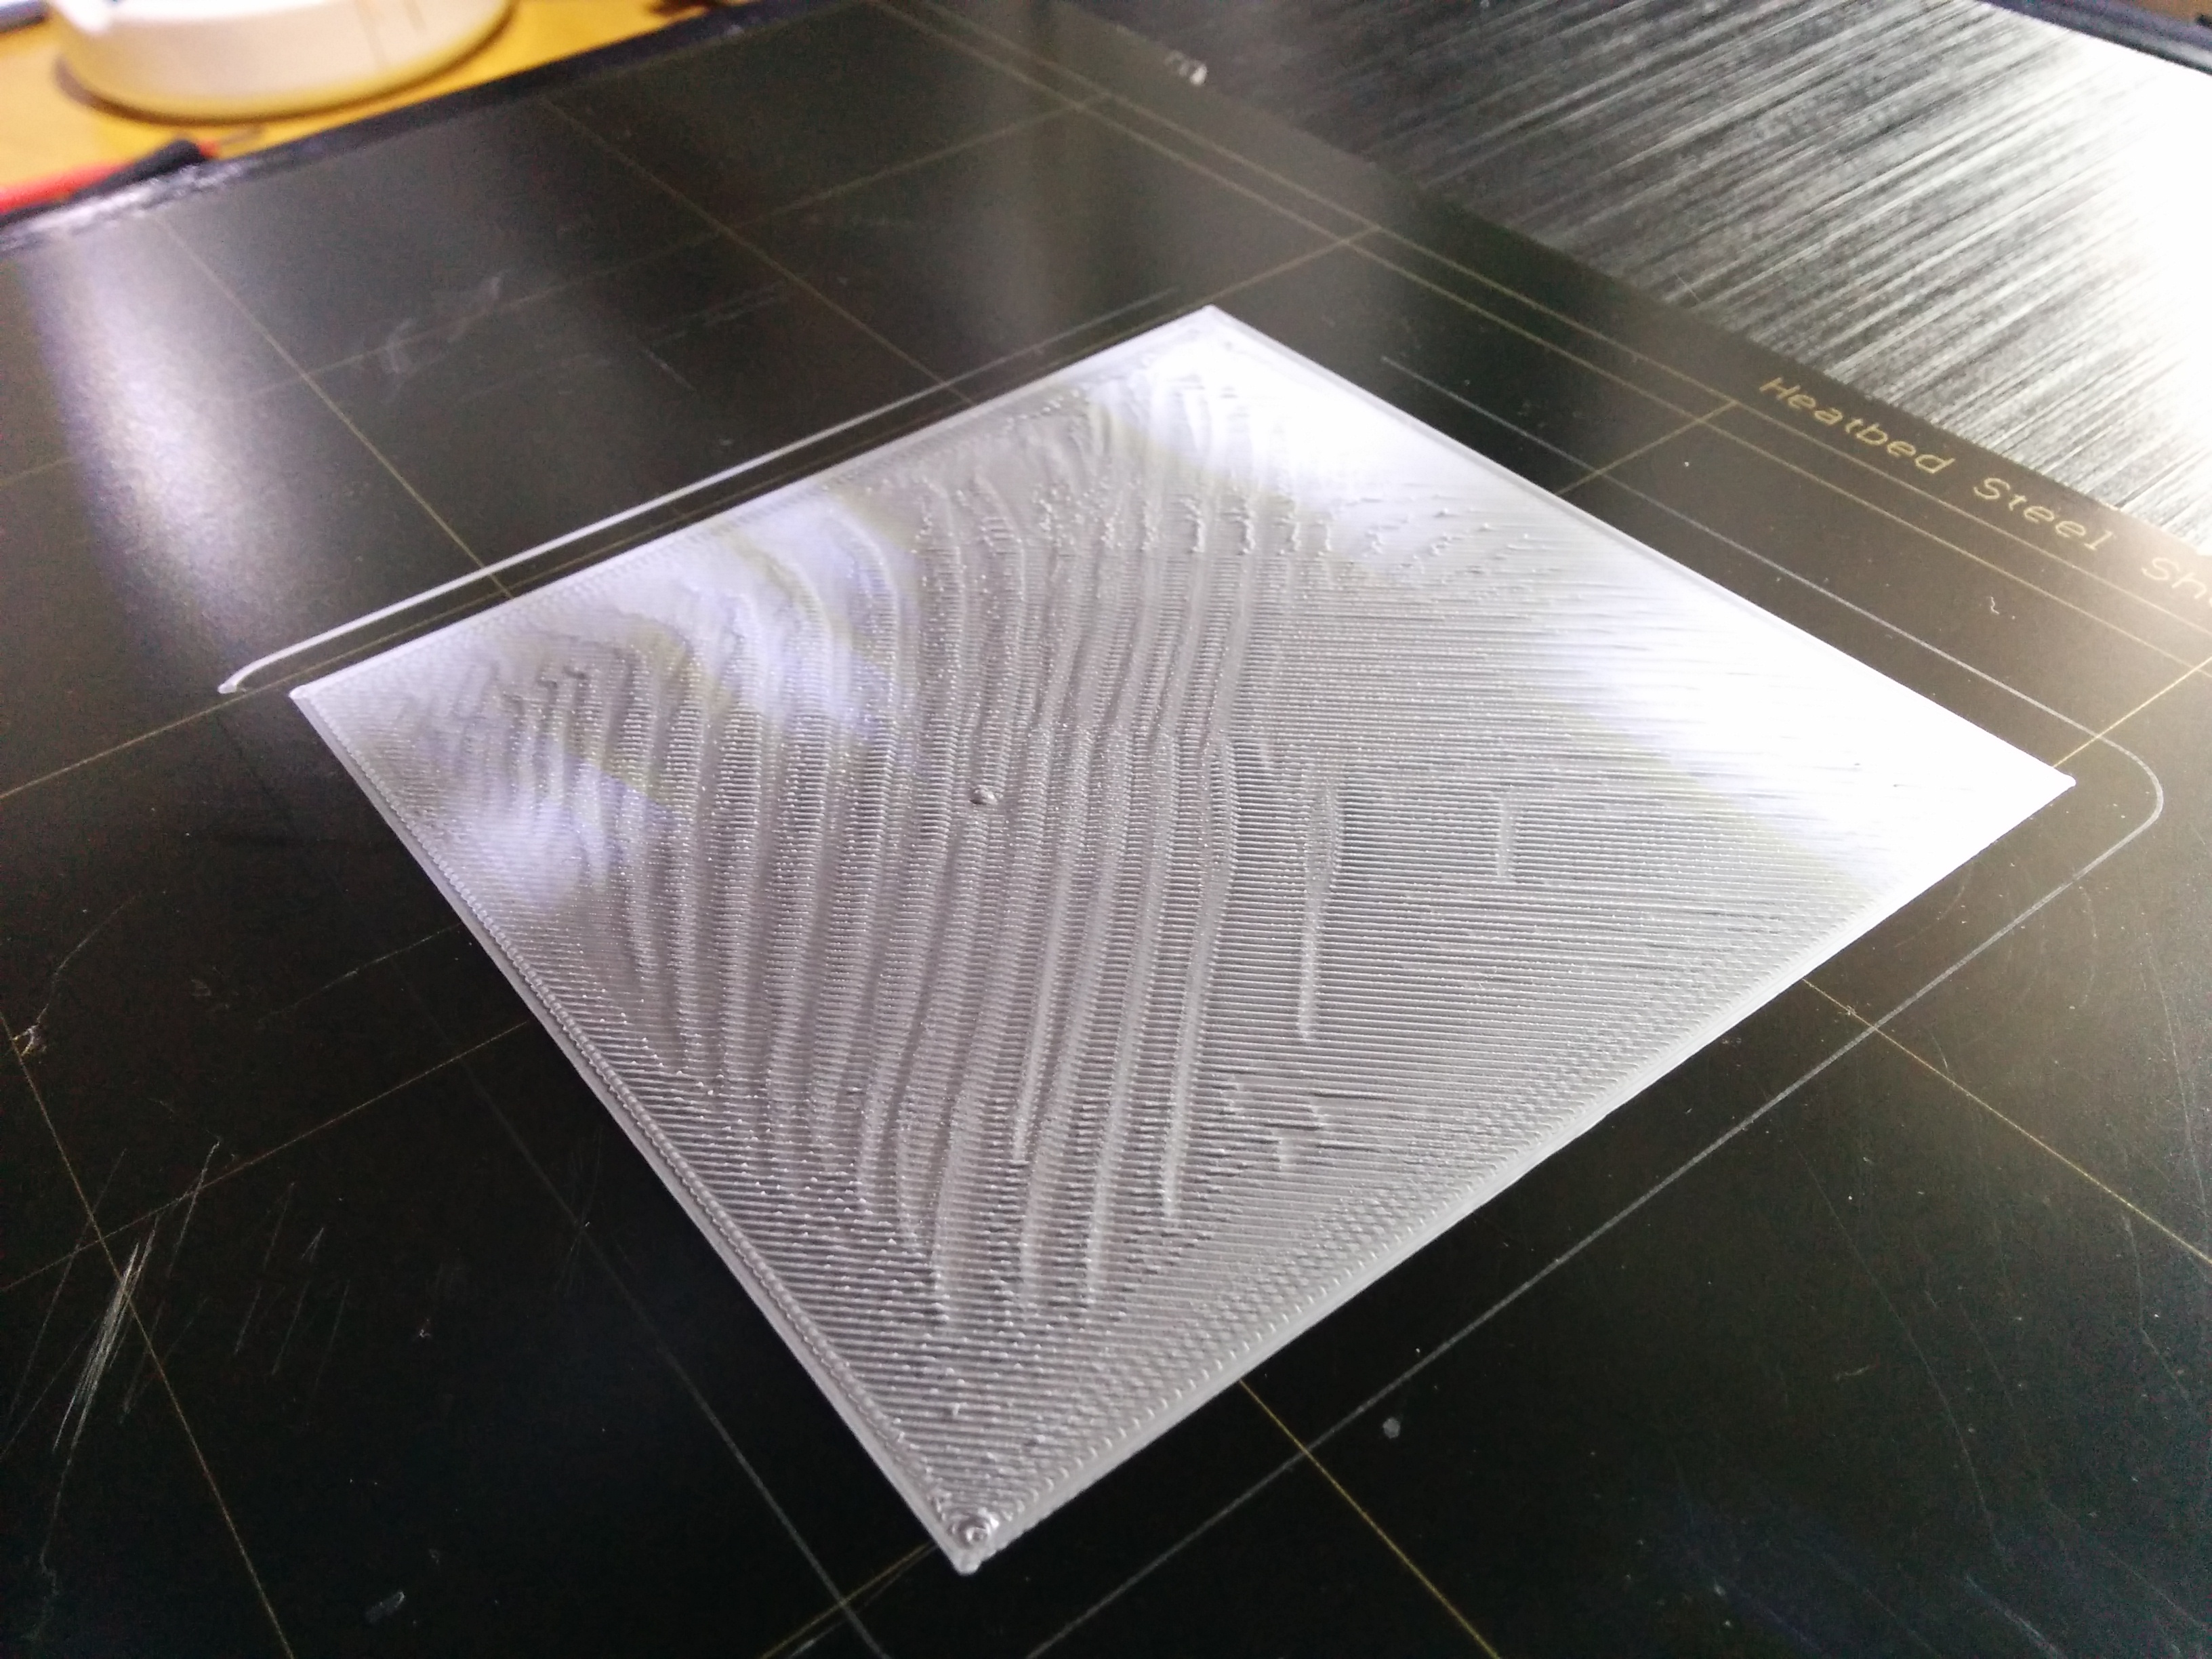
Got my VERY first layers down now. Took me some time to finally acknowledge the the low cost Spring Steel Sheet was a waste of money. Its way to thin and wont lay flat at all. So I have used the PEI surface from the Prusa and clamped it down in a crude way.
I now have a trigger height of 2.12 mm. I was surprised by that. Here is how I figured that out.
I heated the bed to 65 degree.
M564 S0 ;Disable limitsThen I jogged the bed to just clamp a piece of paper under the nozzle
G92 Z0 ;Set Z=0
G1 Z10 ;Move Z away a bit
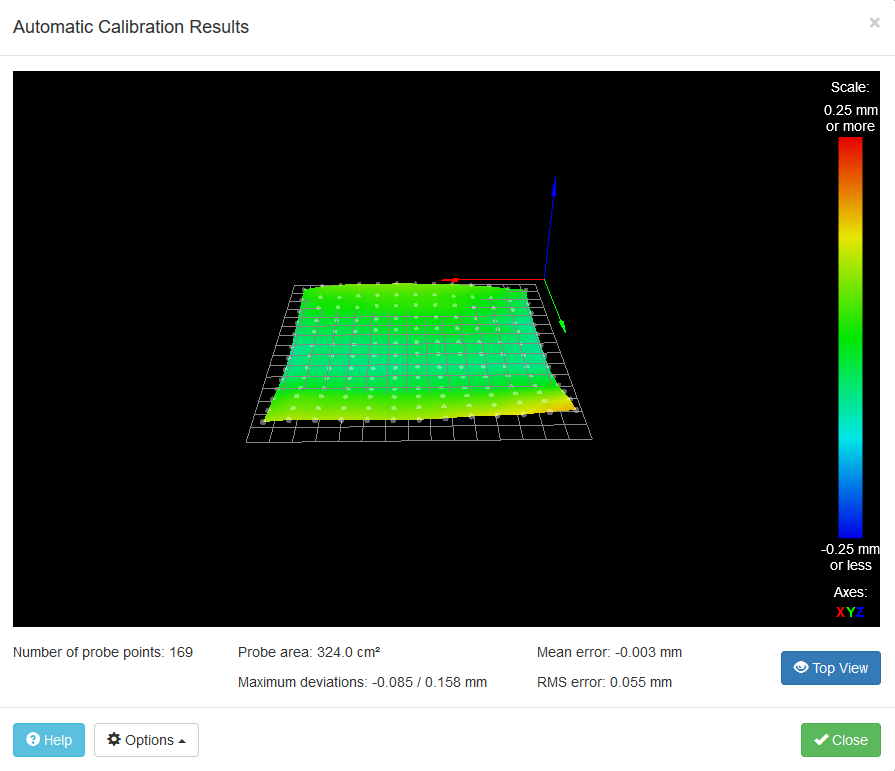
G30 S-1 ;Lower Z till probe triggersThe Z reading I would use in the config.g, homex.g and homeall.g as trigger height. Then I ran Auto Bed Compensation and the print after.
Here a short clip of the machine printing:
And here the result without ANY tuning done at all, just as it came out 1st time.

I have to look into another matter now with an Ethernet Switch, done what I wanted to do for today. I am looking into fine tuning tomorrow and also figure out a part cooling fan mount.
Jan
-
I have tried for a number of hours now to get it level as much as I can. The curve in the middle is just a combination of the Prusa sheet and the non presence of magnets I suppose.

The auto compensation works real well, the 1st layers now look better and better. Still have no part fan, only had 12V fans around and apparently a buck converter is a bad idea on the PWM output. Have a couple of 24V on order now.
I am well happy so far how this turned out. Really well made Kit the V-Core and Duet 2 is a delight so far.
Jan
-
The buck converter supplied a 12v input to the vfan pin which powers the fans. The duet switches PWM on the negative side.
-
To late now, I have 24V fans ordered now from Radionics, they will arrive at work before I am back home here on Thursday. Cant do anything till then anyway, at work for the duration. But thanks for the tip, much appreciated.
Jan
-
@deckingman, I ask you cause you seem to have a lot of knowledge when it comes to practical mechanical engineering. I am still not all that clear how I go about fixing glass and flex plate surfaces to a aluminium print bed. I have settled for 340x340 in size but thickness I am not yet clear. Given is a rather large bed I would almost think 15mm but is that realistic to get heated ? For a glass plate I think I would have 4 holes on the sides with knurled M6 or M5 bolts to clamp down an aluminium angle to hold it down. For spring steel I was thinking to make a pattern of holes, example a 5.5mm hole and a M3 thread in the center to have round countersunk magnets bolted to the plate BUT flush with the surface or even 0.5mm below. Do you think the stainless M3 bolts for the magnets and the magnets as such would cause warping of the aluminium plate when heated due to different expansion of aluminium and stainless bolts ? Would the hole pattern itself cause significant warping when heating ?
Its a lot f questions, but given the price and work involved I'd rather get this right the 1st time. I am even thinking of sending a CAD file to a factory, Weerg for example can make such a plate for approx 450 Eur including all the magnet pattern (25 holes and center holes with M3 thread etc.).
Jan