Inconsitent extrusion - Duet 2 Wifi - Custom CoreXY
-
This is the third printer I have built - and the first which I have used a duet board on. I cannot seem to get the print quality I want out of it after literally hundreds of hours of printing and troubleshooting. I gave up on using a bowden setup on this one as it produced wild inconsistencies in extrusion.
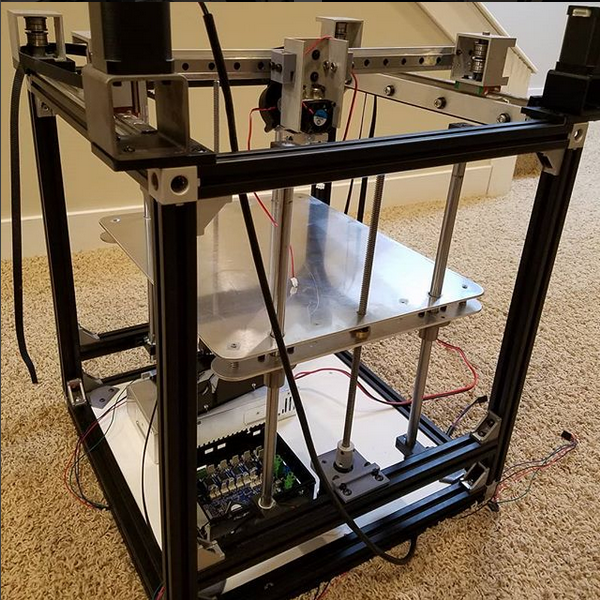
Below I have listed my printer specs, current config which produces the best results, as well as what I have tried and tested so far. At the bottom I have posted a picture of the best results I can get out of a simple 20mm test cube as well as the printer (before wiring was complete).
The build seems very solid compared to my previous printers which produced WAY better results using ramps boards and bowden filament drives.
Is my build just bad or is there something I am missing here? Any help would be greatly appreciated.
Printer specifications
- Brand – Custom
- Motion System – CoreXY
- Power – 24V
- Controller
a. Firmware Name - RepRapFirmware for Duet 2 WiFi/Ethernet
b. Firmware Electronics: Duet WiFi 1.02 or later
c. Firmware Version: 2.04RC1 (2019-07-14b1) - Bed
a. Bed Heater – Silicon 120V resistive element controlled via SSR at 5Hz switching
b. Bed Material – 6061 custom cut aluminum - Zaxis drive – t8 threaded rod (pulled off anet a8)
- Belts – Fiber reinforced 10mm
- Motors
a. XY - e3D super whopper motors (1.8deg step angle)
b. Z – Standard nema17
c. Extruder – Standard nema17 - Motor mounts – 1x custom cut aluminum / 1x PLA (Haven’t bought new aluminum tubing)
Current Relevant Firmware Configuration
• Filament Drive – Direct drive via gregs wade
• Microstepping – (X16 Y16 E16 I1) Z256
• Motor Currents - X1500.00 Y1500.00 Z900.00 E1600.00
• Acceleration - X1000.00 Y900.00 Z200.00 E3000.00
• Jerk - X12000.00 Y12000.00 Z1500.00 E2000.00
• Pressure advance – 0.0Troubleshooting progress
- Extrusion Hardware (Extruder calibrated for all)
a. Bowden Tubes
i. Capricorn tube (1.75mm)
ii. Standard tube(1.75mm)
b. Drive method
i. Gregs Wade to bowden
ii. Gregs Wade to direct drive
iii. Ender 3 extruder drive to bowden
c. Hotends
i. Genuine e3d v6
ii. Clone e3d v6
iii. Clone Chimera
d. Throat tubes
i. All metal genuine e3d and clone
ii. PTFE lined clone
e. Nozzles
i. E3d “nozzle-X” (0.4mm)
ii. E3d copper (0.4mm)
iii. Clone brass (0.3 – 0.8mm)
f. Part cooling fan – 0-100% - Firmware
a. Duet Pressure advance feature – no change for any value of pressure advance
b. Microstepping on all axis including extruder – 16/32/64/128/256/Interpolation
c. Extruder Drive Current 0.7A – 1.8A - Software (Cura / Slic3r / Craftware)
a. Filament temp from 190 – 230
b. Filament brand – Hatchbox / 3D solutech / various no names
c. Retraction distance (0-6mm)
d. Retraction speed (10-70mm/s)
e. Line width increase and decrease
f. Extrusion multiplier 90% - 110%
g. Combing Modes – all
h. Prime after retraction – Craftware slight improvement in some cases
i. Print speed - Z axis
a. Measured error of 32 individual steps at 0.1mm = 4% error per step
Issues with direct drive - poor wall consistency
Issues with bowden - ...everything
-
With your description, I am not sure if you are using a Bowden tube or not. If you are then most of your problems are related to pressure advance (or lack thereof)
-
I would take the leadscrews out and check for friction at any point on the z axis. you have it constrained at 4 points, which is possibly overkill (imo) and definitely makes it harder to align.
If youve gotten the same results with multiple extruders and have troubleshooted them as much as you say you have, I would bet money its something mechanical related and not the software's fault.
A bent frame is also definitely possible, and i had the same issue with my build until i reassembled it on a marble countertop (to insure flatness)What mine looked like before reassembling
Is the cube the correct height within .01mm or so? Are those missed steps on the z affecting it in any way or are you compensating some way in software?
Cant stop tuning wont stop tuning.
Dbot, Custom i3, Voron 0&2 -
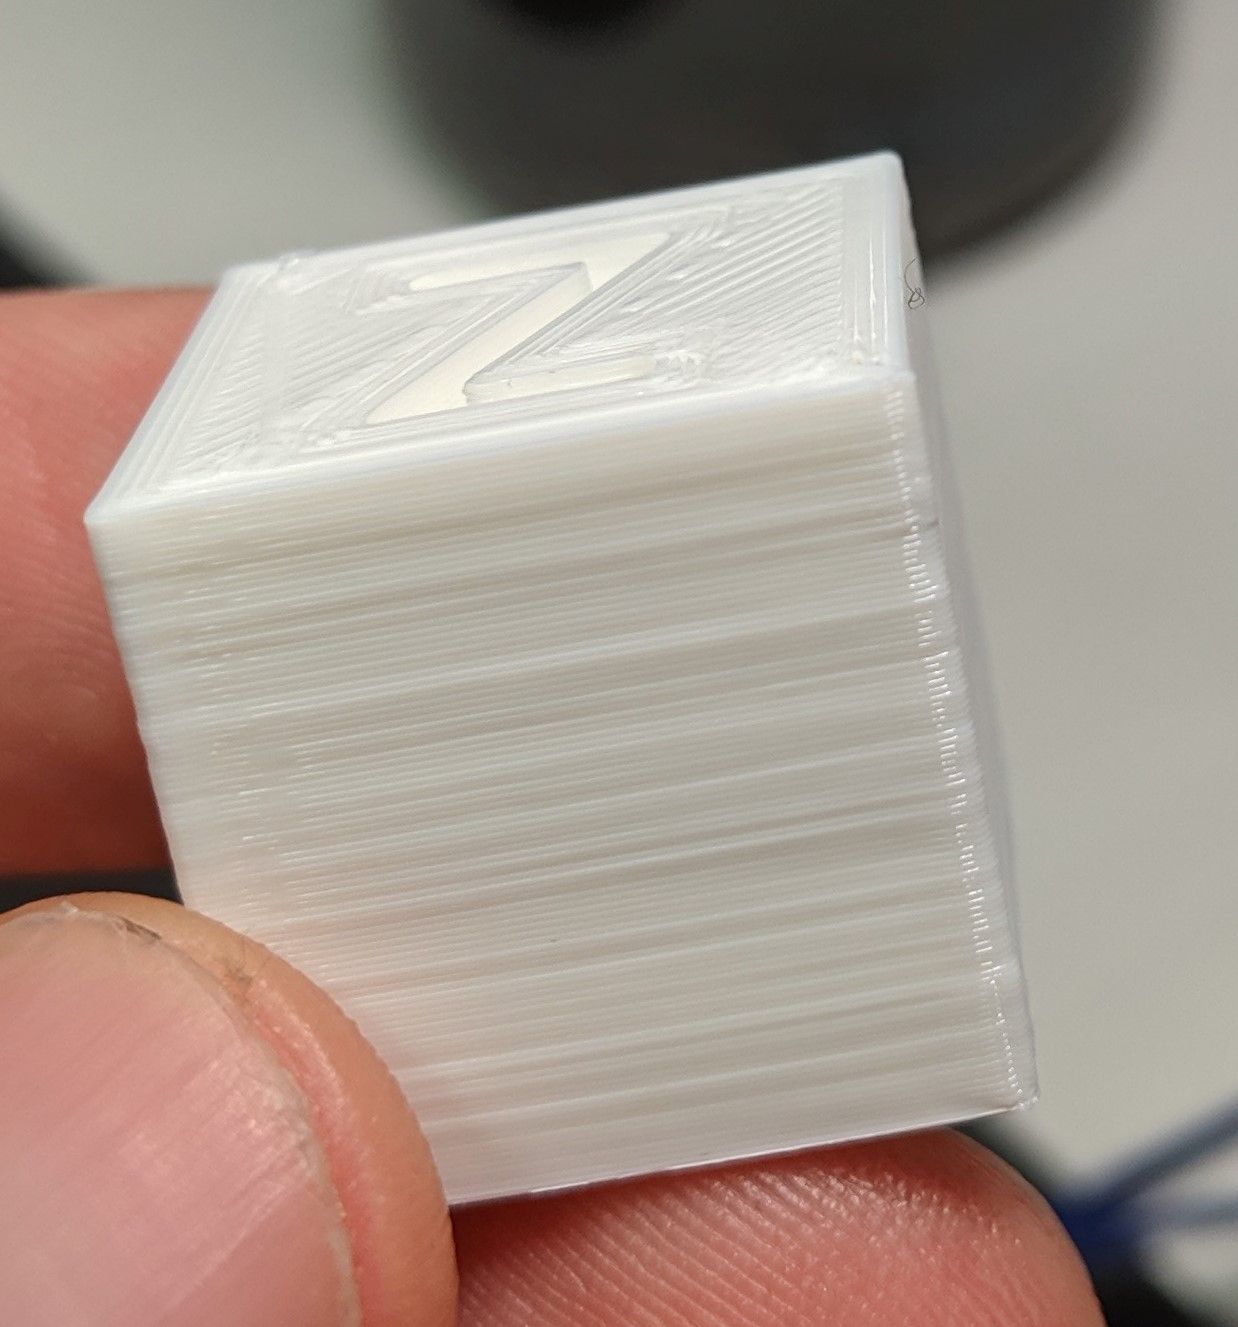
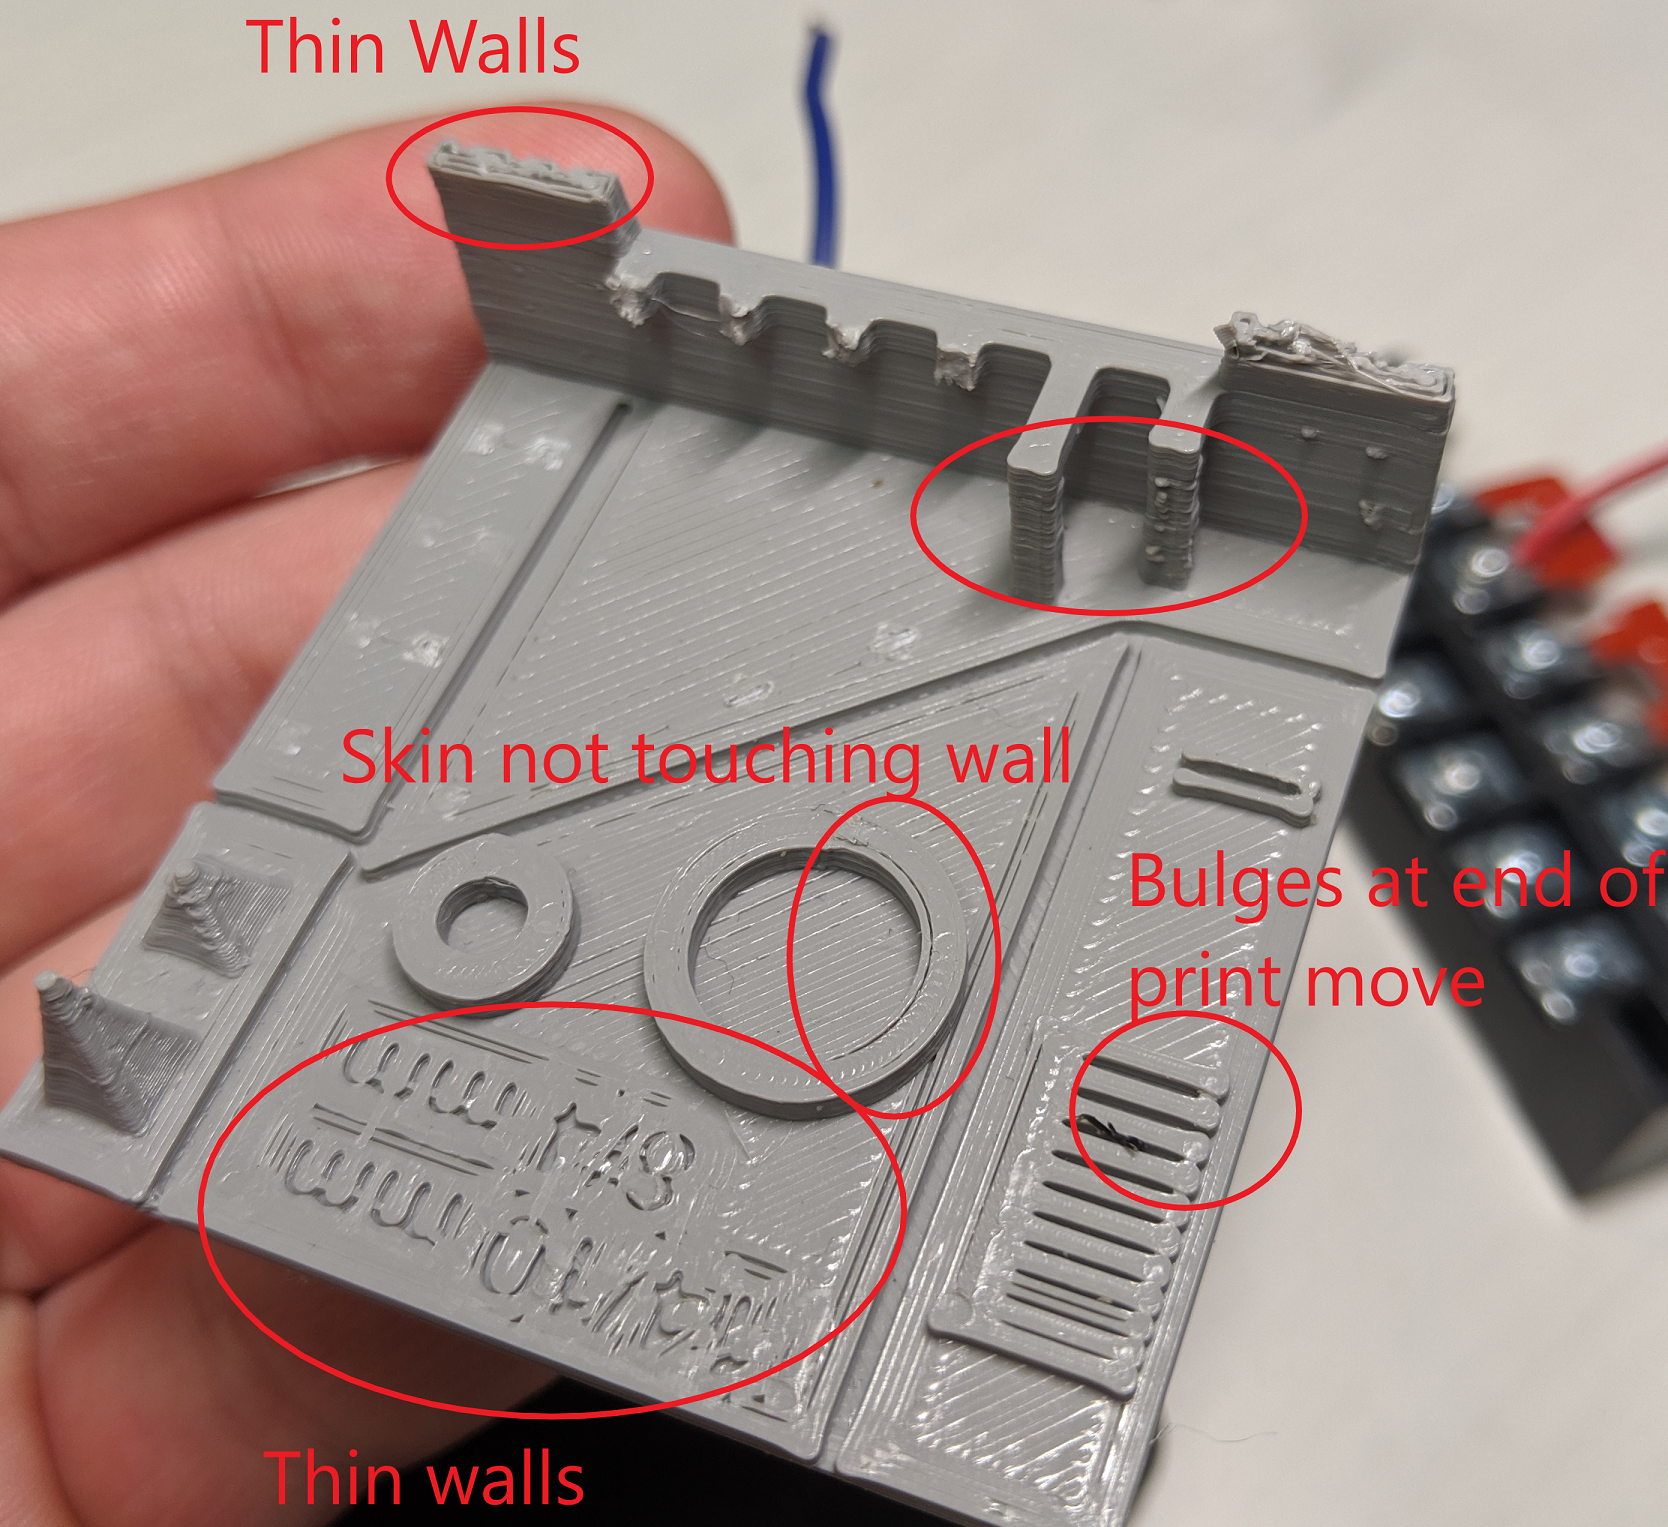
@jens55 My apologies for the inconsitency. The white cube is printed with a gregs wade direct drive configuration. Direct drive resolved most of the issues shown in the second picture (grey filament). Any level of pressure advance seemed to slightly help in areas where there was bulging at the end of a print move, but created more issues during short print moves creating under extrusion.
-
Ah, that makes sense as I can't really see much wrong with the white print but the grey print(s) show the pressure advance issues.
Can't comment on missed steps in Z but chances are it is mechanical as mentioned. -
Thanks for the reply. Z height = 20.05, X = 20.13, Y = 20.03.
There is no software compensation that I am aware of. Though I am curious which software compensation you may be referring to as it may be interesting to play with.
That is a really interesting picture you uploaded. It seems to match my cubes Z inconsistencies.
-
jerk 12000?
-
@mrehorstdmd I realized after I posted this that I set that value to allow the extruders acceleration to not be limited by jerk settings. Great catch though because that is definitely an absurd value.
-
I was afraid I would have to rebuild the Z-axis but based on the comments I have received so far that seems like the first step to fixing the inconsistent wall problem.
-
@Ljbleam all you should have to do to test for friction is take out the leadscrews and move it by hand
Also whats your steps/mm for all axis'?
Have you tried lowering the z microstepping to 16 with interpol? -
@Turbo When I first put the thing together I tested the Z axis and it was SUPER jumpy when traveling up and down. Lots of binding happening. I reassembled and it was better (less jumpy) but I had a problem where at a certain height it would bind (squishing the layers together) and then release quickly on the next step down. I put a dial indicator on the bed and stepped it down 0.1mm at a time and got an average error of around 4% per step ([measured step - expected step] / expected step). Curious if that 4% error is enough to create the effects shown in the white test cube. I suppose it must be.
Microstepping – (X16 Y16 E16 I1) Z256. I have tried interpolation on Z axis as well.
-
@Ljbleam Assuming you used a calculated value for the z axis steps/mm, then the error wouldn't have a great effect, since your cube is still 20.05 tall. If you adjusted it manually, you couldve overcompensated.
Whats the steps/mm on each axis, not the microstepping config.Cant stop tuning wont stop tuning.
Dbot, Custom i3, Voron 0&2 -
Micro stepping produces very low power steps between full steps and any binding whatsoever will cause you nothing but grief!
-
M92 X100.00 Y100.00 Z6400.00 E940.00
Thats with 256microstepping. So that is a calculated (non compensated) value.
6400/256 = 25 full steps per mm. 25steps * 1.8degrees = 45 degrees / 1mm step. 360 degrees / 45 degrees = 8 mm/revolution
-
@jens55 Great input. This is something I did not consider. Before rebuilding Z axis I will try lower microstepping to give the motors more power and hopefully overcome the binding.
-
@Ljbleam, that's the wrong approach! Fix the binding !
-
@jens55 said in Inconsitent extrusion - Duet 2 Wifi - Custom CoreXY:
@Ljbleam, that's the wrong approach! Fix the binding !
I agree it is a bandaid fix. But that would certainly confirm the binding problem
")
-
@Ljbleam I would go back to 16 microsteps with interpol on the z axis. Your steps/mm should be 800 with that.
-
@Ljbleam, not necessarily .... each micro step has a certain amount of drive to it. If the stepper is commanded to go 5 steps there is more power there than 1 step. If the problem is stiction then there is a good probability that you can overcome the issue with larger steps. With binding, what's to say that microstep 1 and 2 perform perfectly but that steps 3,4 and 5 are not stepping properly.
Let's say you half the microsteping .... Step 1 will work perfectly (previously step 1 and 2) and step 2 binds (previously step 3,4,5).
Yes, it might show the issue but then it might not ..... -
Mhh interesting ... I have a similar issue.
Have you checkt die filament diameter?
How is your role of filament guided? Is it hard to turn it?
What about the temperature of your extruder (did the change in current do anything?)? is it getting very hot?
How is your bowden tube guided? is it twisted (and maybe therefore the filament causing inconsistent extrusion)?
How is your part cooling? Maybe you are cooling the heatblock and therefore the extruder having troubles extruding a constant amount of filament?
Have you tried playing with the acceleration of the Extruder?The strang thing is, that I ran into this issue just recently. but it looks exactly the same ... in the most part I have constant extrusion but then a bit under and a bit overextrusion causing the walls not being consistant.
![20200405_103830[1].jpg](/assets/uploads/files/1586076124937-20200405_103830-1-resized.jpg)
![20200405_103839[1].jpg](/assets/uploads/files/1586076156064-20200405_103839-1-resized.jpg)