Sovol SV08 Multiple Motion System Upgrade.
-
@o_lampe Agreed Automated alignment, homing, maintaining perfect z-height are all essential, plus also speed, reliability, filament colour/material management & slicing.
In terms of niche MMU - I use the AMS on my BL printers 99% of the time - always for filament selection for single colour prints - but also pretty often for 4-11 colour prints -
I wasn't sure how much use I would get out of a 2nd identical multi colour printer (which I bought to double my printing speed) -
In my usage scenarios when I am using one of the printers I find I end up using the second one too for at least half of the time. It's usually only filament management that stops me from using the 2nd one even more often. i.e. Not having two sets of every filament needed. I've got a few ideas on how to solve this problem too - with some sort of automatic on demand filament roll splitter.
Tool changers I agree are more niche - probably due to the expense of having so much print head hardware sitting around unused for 99% of the time, plus also being limited on the number of colours supported. I think MMU/AMS type multiplexers are more practical for prints with many colours in them - but 2 to 4 extra 'tool changer' print heads I think could help speed up print times and reduce waste quite a bit without adding massively to the cost. A solution that only changes the nozzle and hot end would be even more useful too.
Building and Commissioning I would see as a separate problem - which would ideally be solved by a manufacturer taking up the idea.
-
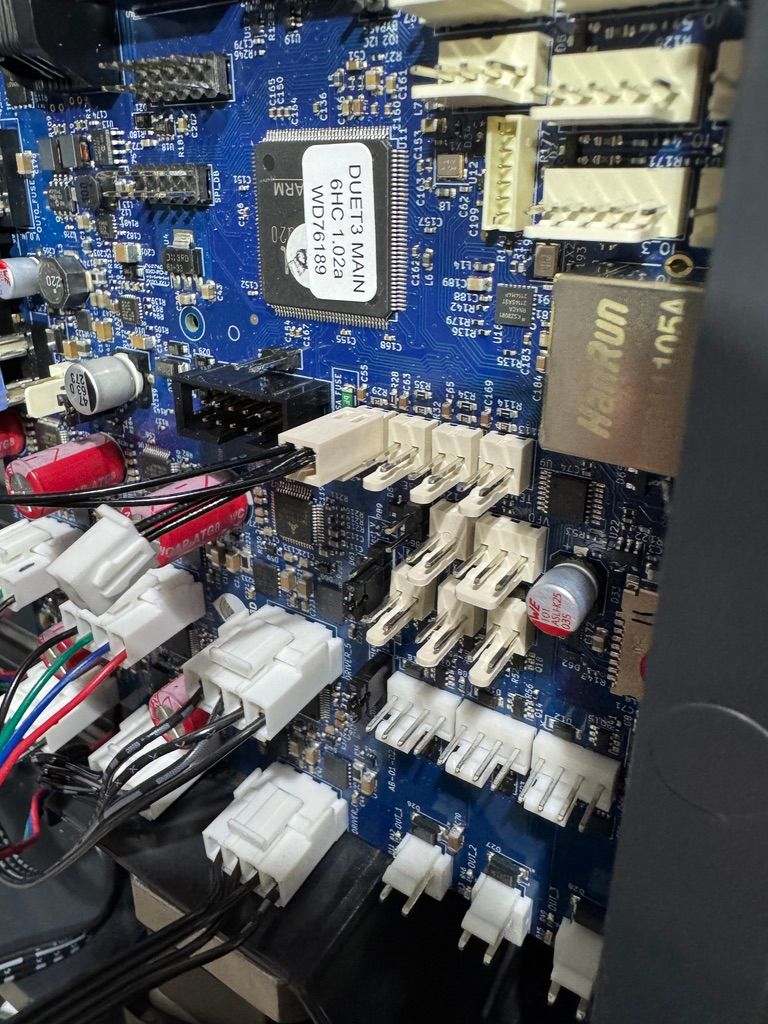
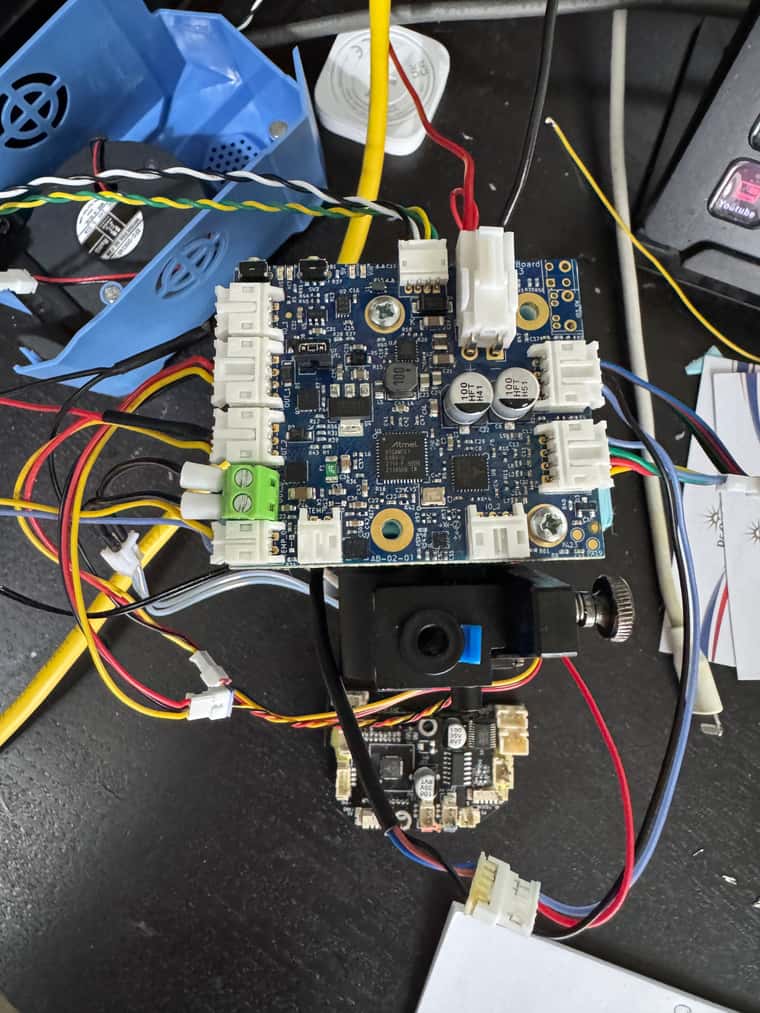
Other boards now installed.
Biggest issue was finding Duet3_CANiap32_Mini5plus.bin - it isn't in the current release - and GitHub search didn't find it. Eventually found it in previous release.Just about every cable from the printer is a different size to the Duet boards.
Hardest ones are the tiny extruder connections. I've ordered some male versions of the existing connections which are 1.25mm - so I can make up adaptors. For the bed thermistor I decided to leave both connectors attached.
-
@dwuk said in Sovol SV08 Multiple Motion System Upgrade.:
- it isn't in the current release - and GitHub search didn't find it. Eventually found it in previous release
thanks. I have added them to the 3.5.4 release.
-
Thanks.
Update from today - is that I thought I have updated the firmware on the Mini5+ board yesterday - but actually there was a timeout and it didn't update.
I could check the firmware etc. and run other commands - but firmware updates wouldn't work
The main 6HC board was on 3.5.4 and the Mini5+ on 3.4.0.
I spent most of the morning checking cables and making up two more cables - which I tried running from the tool expansion board but still got the same error.
Eventually though I figured out the problem - which was related to 3.4.0 not seeming to like being updated via CAN-FD
So I manually upgraded the Mini5+ board via SD card and usb terminal to 3.5.1 - and downgraded the main system - and all was then ok.
I then upgraded them both to 3.5.4 and they worked ok.
Motors for first gantry now all connected up - and X,Y & Z movement now working.
Mains Heatbed basic function also working. I had forgotten to install the in power initially - but figured it out after a while. Will have to do PID tuning at some point.
I was going to configure sensorless homing next - but based on the Duet documentation mentioning how inaccurate that method is I think I will add some limit switches and use them instead for the homing.
-
@dwuk sensorless homing isn't as good as homing with a limit switch, but it's OK if you don't need the facility to resume a print that has been interrupted due to power failure. I still use sensorless homing for the X and Y axes of my tool changer.
Duet WiFi hardware designer and firmware engineer
Please do not ask me for Duet support via PM or email, use the forum
http://www.escher3d.com, https://miscsolutions.wordpress.com -
@dc42 Thanks - Will get the printer working on Sensorless first as you suggest and leave looking into limit switches until a bit later.
Update: Got X and Y Sensorless homing working in about 10 mins - its much easier to do than it was on Klipper.
-
@dwuk Sensorless homing will do for now, but with more and more toolheads involved you'll need perfect homing positions relative to each other.
Otherwise it'll look like that:
-
@o_lampe good point, I'd forgotten that it was an IDEX machine.
-
@o_lampe Agreed - I would if possible like to include auto head alignment in the design - so it could work in that case I suppose if you auto align every time you power on, or for every print.
The other issue is the fact that after quite a few goes at trying to get sensorless homing working on the 2nd Gantry (the U & V axis) I have found out that it doesn't work on Mini5+'s used as a tool board - even with the latest 3.6 firmware.
So will add switches for U&V initially, and eventually X&Y too.
-
@dwuk that's one for @dc42 to look at then with sensorless homing on CAN boards being a new feature
-
@dwuk said in Sovol SV08 Multiple Motion System Upgrade.:
The other issue is the fact that after quite a few goes at trying to get sensorless homing working on the 2nd Gantry (the U & V axis) I have found out that it doesn't work on Mini5+'s used as a tool board - even with the latest 3.6 firmware.
I thought the 3.6.0-beta.3 release had it partially working on the Mini5+ as-expansion, possibly only on drivers 0, 1 and 5. I’ve been testing this, and @dc42 has supplied me with fixed firmware that fully works. Let me know if you would like to try it.
Ian
-
@dwuk said in Sovol SV08 Multiple Motion System Upgrade.:
The other issue is the fact that after quite a few goes at trying to get sensorless homing working on the 2nd Gantry (the U & V axis) I have found out that it doesn't work on Mini5+'s used as a tool board - even with the latest 3.6 firmware.
There's a build at https://www.dropbox.com/scl/fo/bx70c7u0bshq79ez83mnn/AKMj4UCEimtQuGYxRj_d0ew?rlkey=7yiq3x5fcae3v2ogslfocx1op&dl=0 in which this is fixed.
Duet WiFi hardware designer and firmware engineer
Please do not ask me for Duet support via PM or email, use the forum
http://www.escher3d.com, https://miscsolutions.wordpress.com -
@dc42 Thanks will try that out this afternoon - will use sensorless just for testing purposes - and move over to switches at some point.
-
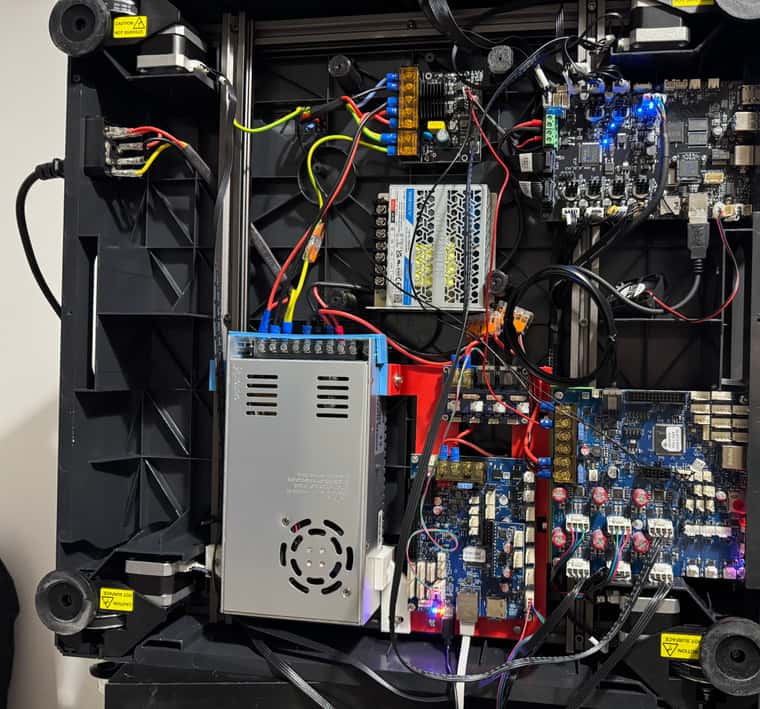
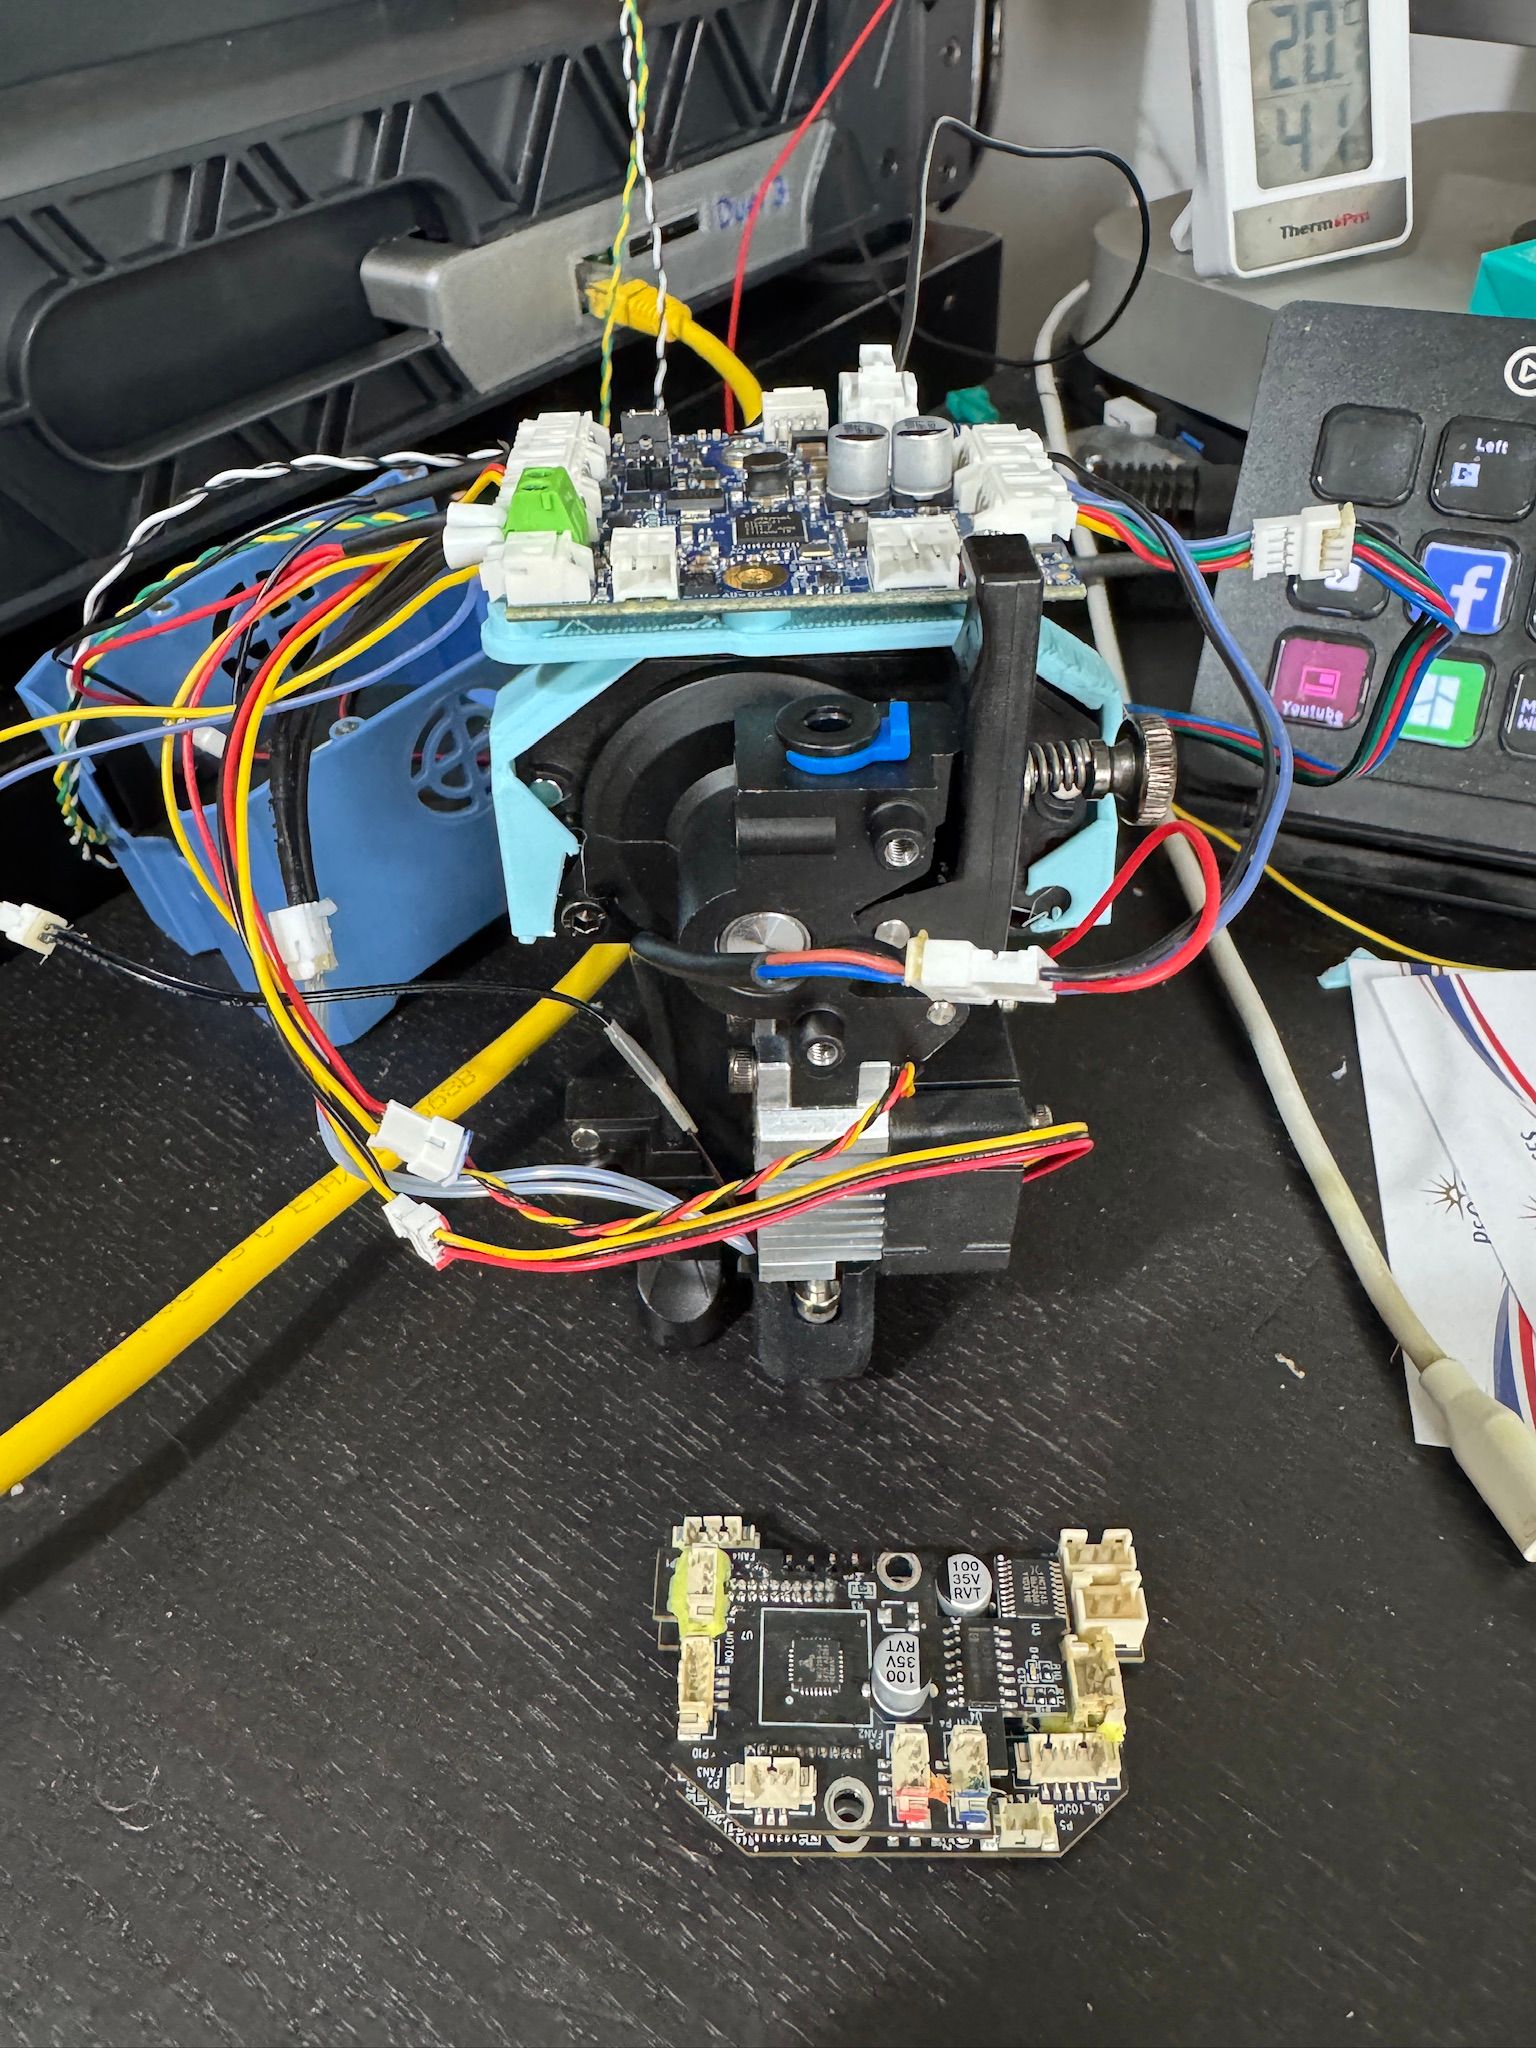
Good progress made on wiring up first extruder.
Main issues I faced were:
- Sizes of connectors - 95% of the Sovol connectors are tiny 1.25mm Female, and most of the Duet are 2mm Female. So made up some adaptors 1.25mm Male to 2mm Female - found a nice kit with pre-crimped 1.25mm wires and sockets and plugs.
Didn't want to cut off existing connectors as may want to go back, plus wires a bit short to reach board too.
-
Inductive Probe 24V power - ended up splicing in an extra plug on the VIN power feed - but not ideal as it means two plugs to disconnect
-
Blower fans - The extruder has two - one of which is 3 pin and the other 2 pin - so wired them together, and - with VOUT and Tacho In on Out_2. and GND from unused IO1.
-
Heater power is a 2mm Female - whereas the 1LC is a screw connector. Didn't have any 2 way Male Sockets - so cut down 5 way temporarily - have order some pre-crimped from the same place as the 1.25mm ones as a more permanent solution. Also had trouble getting the crimped cable to fit into the screw connector.
Overall though - ready for a test this afternoon.
Wiring still a bit messy - and adaptors longer than they need to be - but not 100% where I am going to end up placing the 1LC board - so left them long for now.
-
@dc42 Thanks tried firmware but couldn't get it to work. I got a message about changing to StealthChop - which I did for the two drivers on the Mini5+ - everything else is on Spreadcycle.
Then it just kept saying that my speed was either too fast or too slow.
Reread the documentation here a few times - but can't really figure out what I need to change to get it to work.
Current relevant settings are:
; Smart Drivers
M569 P0.0 S1 D2 ; driver 0.0 goes forwards (Z axis)
M569 P0.1 S1 D2 ; driver 0.1 goes forwards (Z axis)
M569 P0.2 S0 D2 ; driver 0.2 goes backwards (Z axis)
M569 P0.3 S1 D2 ; driver 0.3 goes forwards (X axis)
M569 P0.4 S0 D2 ; driver 0.4 goes backwards (Y axis)
M569 P0.5 S0 D2 ; driver 0.5 goes backwards (Z axis)
M569 P1.0 S0 D3 V2000 ; driver 1.0 goes backwards (U axis)
M569 P1.1 S0 D3 V2000 ; driver 1.1 goes backwards (V axis)
M569 P121.0 S1 D2 ; driver 121.0 goes forwards (extruder 0); Motor Idle Current Reduction
M906 I30 ; set motor current idle factor
M84 S30 ; set motor current idle timeout; Axes
M584 X0.3 Y0.4 Z0.1:0.2:0.0:0.5 U1.0 V1.1 ; set axis mapping
M350 X16 Y16 Z16 U16 V16 I1 ; configure microstepping with interpolation
M906 X800 Y800 Z800 U800 V800 ; set axis driver currents
M92 X80 Y80 Z533.33 U80 V80 ; configure steps per mm
M208 X0:200 Y0:200 Z0:200 U0:200 V0:200 ; set minimum and maximum axis limits
M566 X900 Y900 Z12 U900 V900 ; set maximum instantaneous speed changes (mm/min)
M203 X6000 Y6000 Z180 U6000 V6000 ; set maximum speeds (mm/min)
M201 X500 Y500 Z20 U500 V500 ; set accelerations (mm/s^2); Endstops
M574 X2 S3 ; configure X axis endstop
M574 Y1 S3 ; configure Y axis endstop
M574 Z1 S4 ; configure Z axis endstop
M574 U2 S3 ; configure U axis endstop
M574 V1 S3 ; configure V axis endstop; Custom settings
M915 X Y U V R0 F0; homeu.g
; called to home the U axis
;
; generated by RepRapFirmware Configuration Tool v3.5.10 on Thu Jan 23 2025 15:02:10 GMT+0000 (Greenwich Mean Time)
M913 U40 V40
M400; increase Z
G91 ; relative positioning
G1 H2 Z5 F12000 ; move Z relative to current position to avoid dragging nozzle over the bed
G90 ; absolute positioning; home U
G91 ; relative positioning
var maxTravel = move.axes[0].max - move.axes[0].min + 5 ; calculate how far X can travel plus 5mm
G1 H1 U{var.maxTravel} F2000 ; coarse home in the +U direction
G1 U-5 F6000 ; move back 5mm
G1 H1 U{var.maxTravel} F700 ; fine home in the +U direction
G90 ; absolute positioning; decrease Z again
G91 ; relative positioning
G1 H2 Z-5 F6000 ; move Z relative to current position
G90 ; absolute positioningM400
M913 U100 V100
M400 -
@dwuk please read https://docs.duet3d.com/en/User_manual/Connecting_hardware/Sensors_stall_detection. The TMC2209 drivers on the Mini5+ are quite finicky as regards getting stall detection to work. You need to at least reduce the M569 V parameter to a lower value (at least during stall homing) to avoid the "too slow" error message,
Duet WiFi hardware designer and firmware engineer
Please do not ask me for Duet support via PM or email, use the forum
http://www.escher3d.com, https://miscsolutions.wordpress.com -
@dwuk said in Sovol SV08 Multiple Motion System Upgrade.:
will use sensorless just for testing purposes
Mirror or copy mode should work OK, but optical sensors are the best.
-
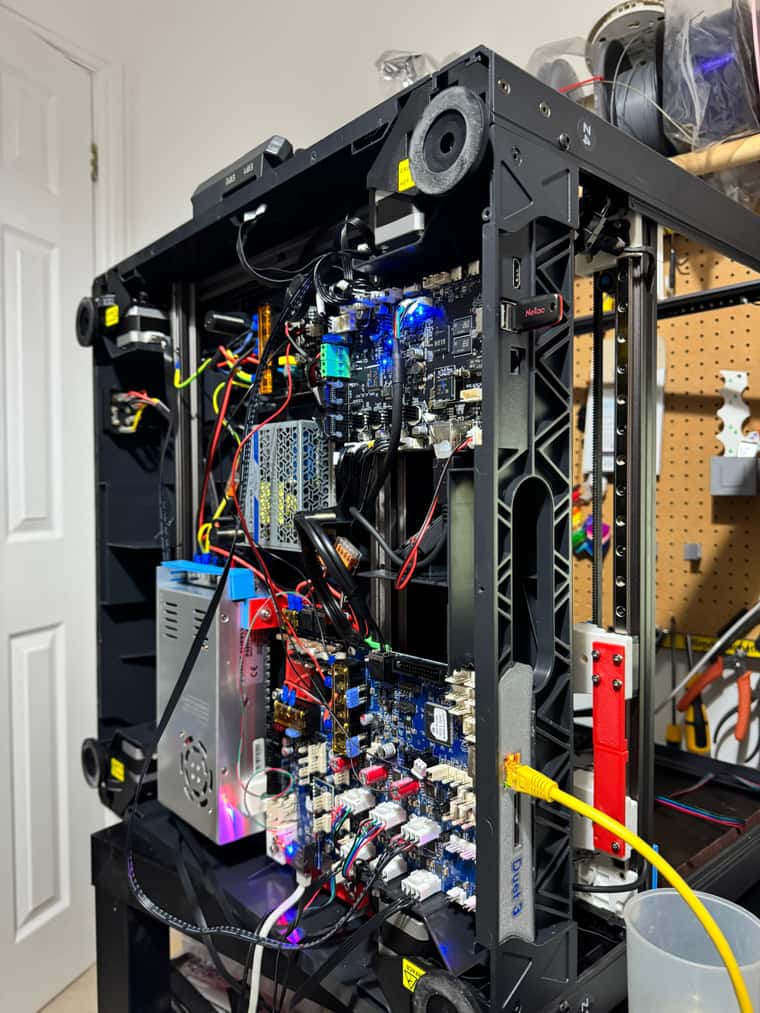
Progress update.
Upgraded Axis with proper Pulley Posts and Proper Linear Rail Carriage on the UV gantry.
Just need to upgrade UV gantry pulley posts.
The 5mm linear rail for the pulley posts was pretty hard to cut - had to use angle grinder.All Axis working and Homing working on X,Y & Z.
I will pursue getting sensorless homing working on U & V - but will also install switches or optional sensors on X,Y,U & V before going too much further.
Z Inductive probe working with logic shifter - but waiting to see if there is a better solution.
Heated bed, Extruder and 2 of 3 fans all working - but I haven't done any heater tuning yet.
Next step tomorrow is to work out how to do Z Offets - as I followed the commissioning instructions - but it keeps setting Z to zero at the trigger height.
Will then do some distance and extrusion length calibration before hopefully trying my first print on the XYZ gantry tomorrow.
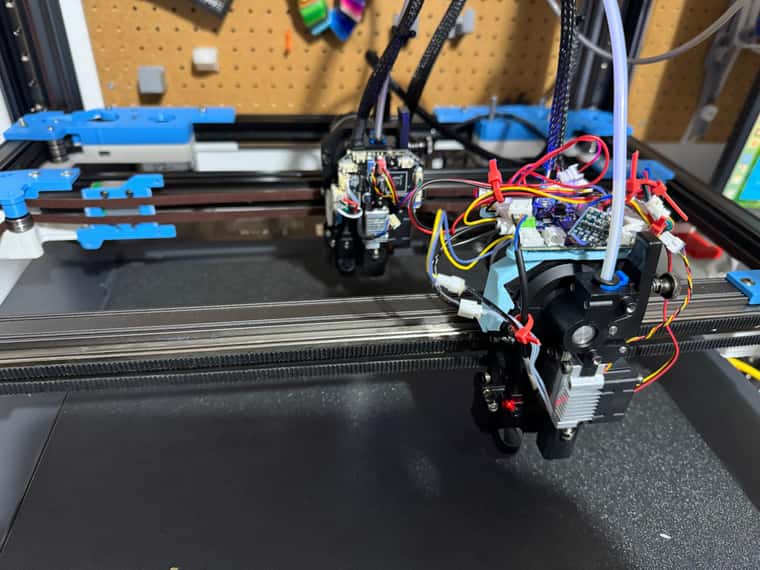
Next step after that and end stops is the upgrades to the 2nd Extruder on the UV gantry - which is currently still connected to the Klipper board.

-
@dwuk One thing I noticed in an earlier picture was some scratching belts:
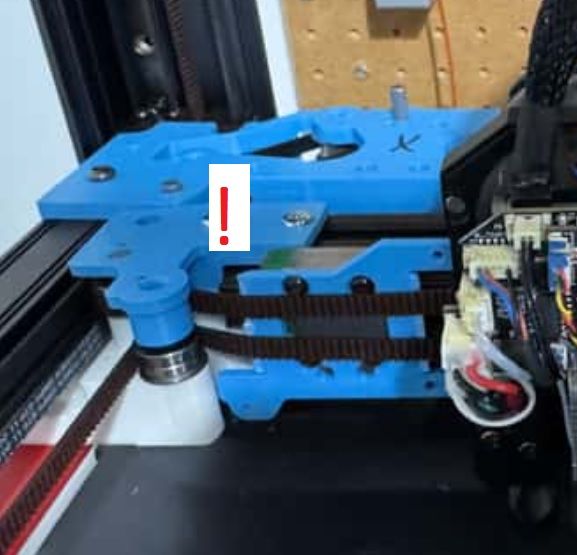
I thought it was just temporary, but it still seems a problem.
-
@o_lampe Well spotted - yes it is due to the extra IDEX carriage I left on the rear gantry.
If I take off the plastic coupler from the carriage there is a risk of the carriage falling off the end of the rail and I think it is that which is clashing with the belts.For the IDEX phase I am going to need to move the pulley positions slightly forward to avoid the problem you spotted - but in the meantime I don't think it is causing any great issues other than limiting travel - but will find out when I do some more testing.
I am starting to think about Reprap IDEX kinematics -
I was pleasantly surprised to find that CoreXYUV seems to support two CoreXY gantries ok - but for IDEX on top of CoreXYUV I think I am going to have to work out how you define completely new Kinematics (if thats possible) otherwise it is going to end up with loads more fairly complicated post-processing.
I think what I would really need is to be able to have an X and 'x' axis for each gantry that I can specify both coordinates for in G0-G3 commands (or Macro replacements) I.e. For mirror mode / duplicate mode etc.- Rather than using a command to change the mode between Toolchange/Duplicate and Mirror - it should be fairly easy to work out and send two X coordinates in the same G0-G3 command to achieve the desired effect.
So what I will be looking for is something like CoreXxYUuV for dual gantry IDEX.
With .Zabcd - for the Z hoppers, and then finally. CoreXxYUuVy - for the occasionally moving bed phase (5).My current thinking on IDEX too is that I will stick with the Ratrig VCore4 approach of two extra Y motors per gantry initially (although it would be nice to reduce this down to one extra per ganty) - but I think I will try putting them at the front rather than the back to help balance the weight on my flying gantries.