Status update,
The machine is now up and running, yet not completed but good for now running some experiments
Test move:
https://youtube.com/shorts/3CKMNepaWuw?si=1G-3YxQf6VK5Lics
Probing:
https://youtube.com/shorts/EADCz_VwGls?si=ZgHFzYnbh_czCJaQ

Status update,
The machine is now up and running, yet not completed but good for now running some experiments
Test move:
https://youtube.com/shorts/3CKMNepaWuw?si=1G-3YxQf6VK5Lics
Probing:
https://youtube.com/shorts/EADCz_VwGls?si=ZgHFzYnbh_czCJaQ
Nevermind, stupid me found the issue while posting up the codes. I've adjusted the F value but not the T value. It now does indeed work 
Nevermind, stupid me found the issue while posting up the codes. I've adjusted the F value but not the T value. It now does indeed work
Status update,
The machine is now up and running, yet not completed but good for now running some experiments
Test move:
https://youtube.com/shorts/3CKMNepaWuw?si=1G-3YxQf6VK5Lics
Probing:
https://youtube.com/shorts/EADCz_VwGls?si=ZgHFzYnbh_czCJaQ
Hey Guys,
I'm struggling with the same issue, my maximum axis speed is set to 36000mm/min which equals 600mm/s, but no matter what I input as T value it's still traversing at 33.3 mm/s which is awfully slow for 90 points one a 1000*1000 build plate.
Hey guys!
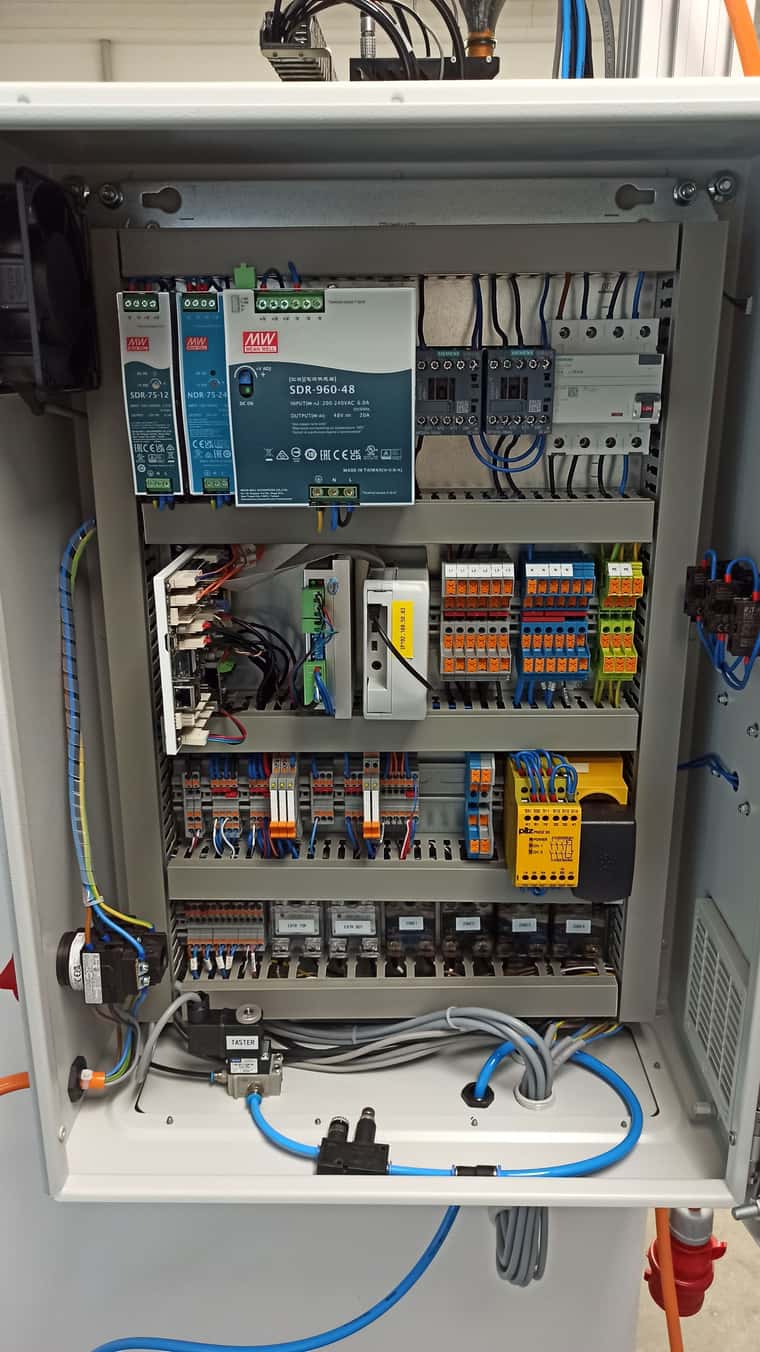
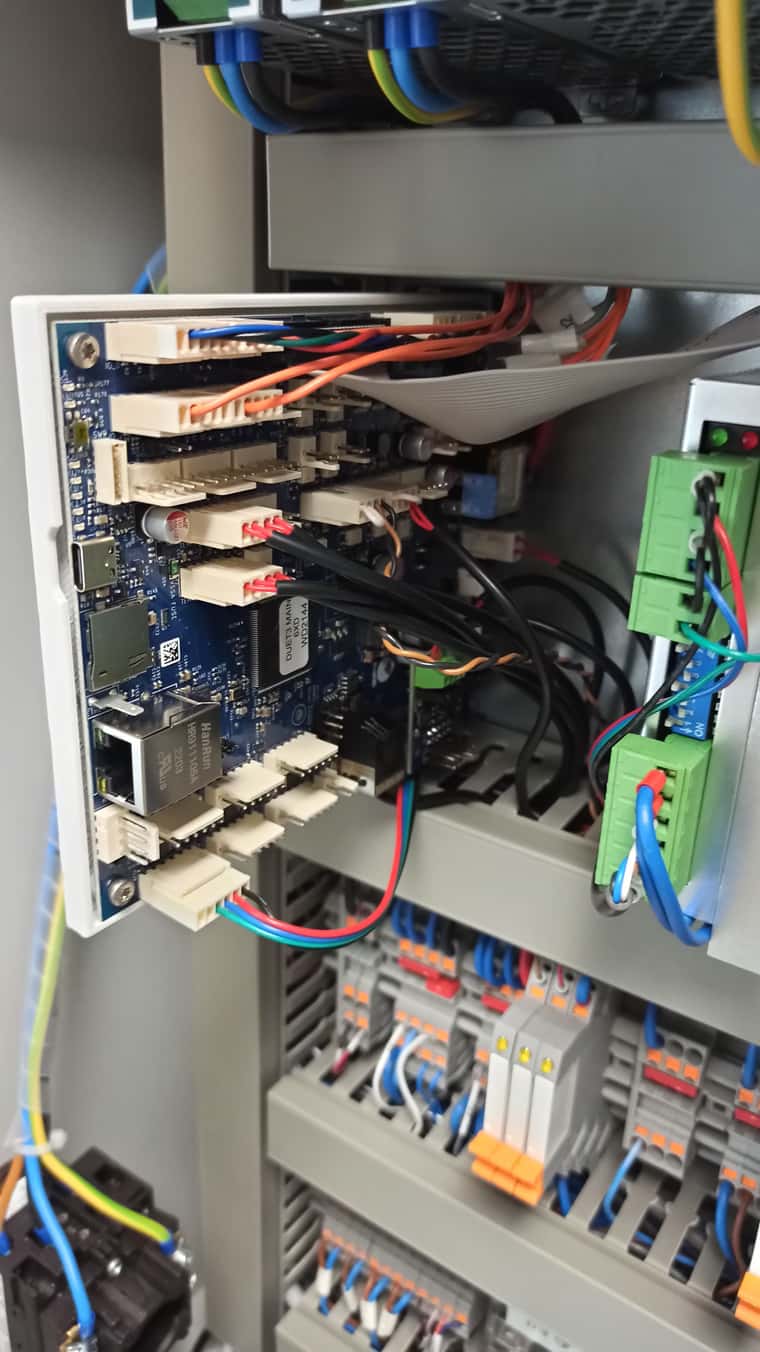
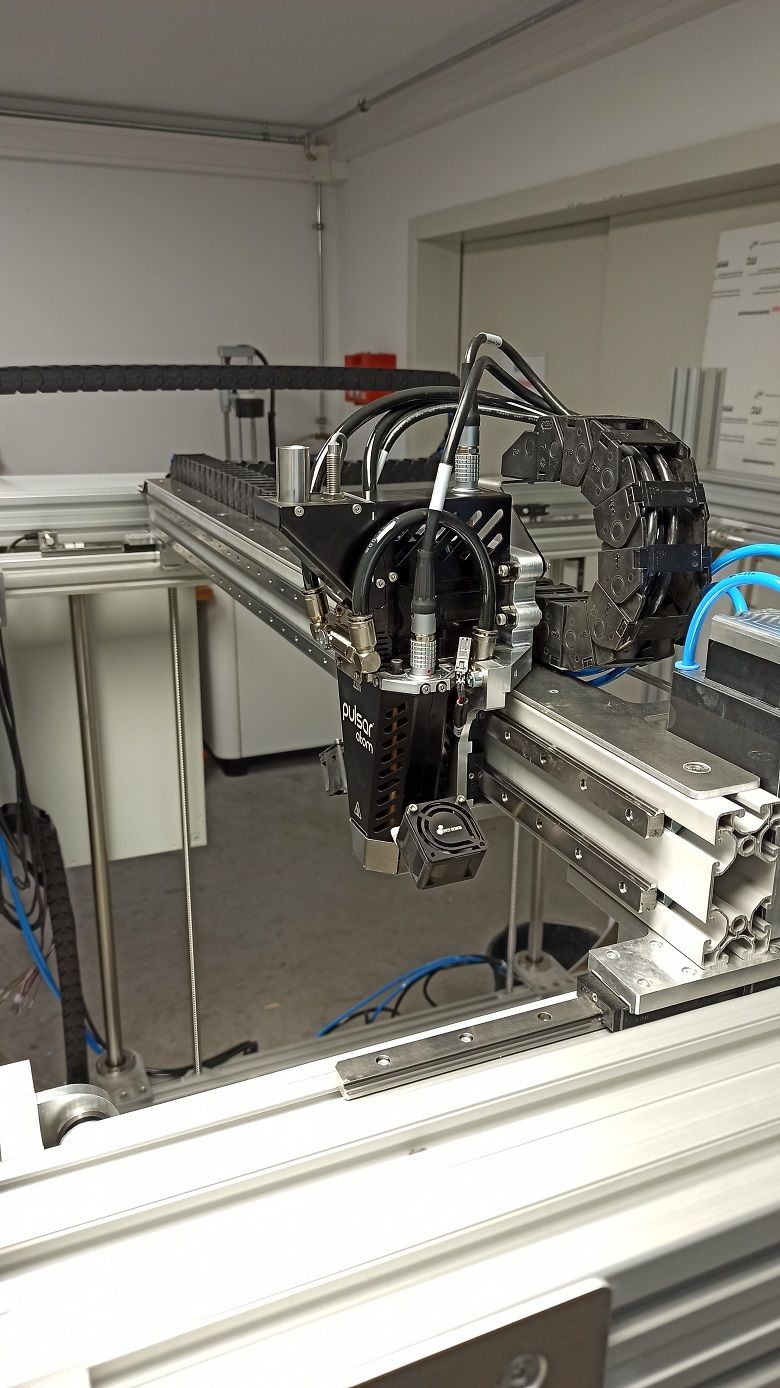
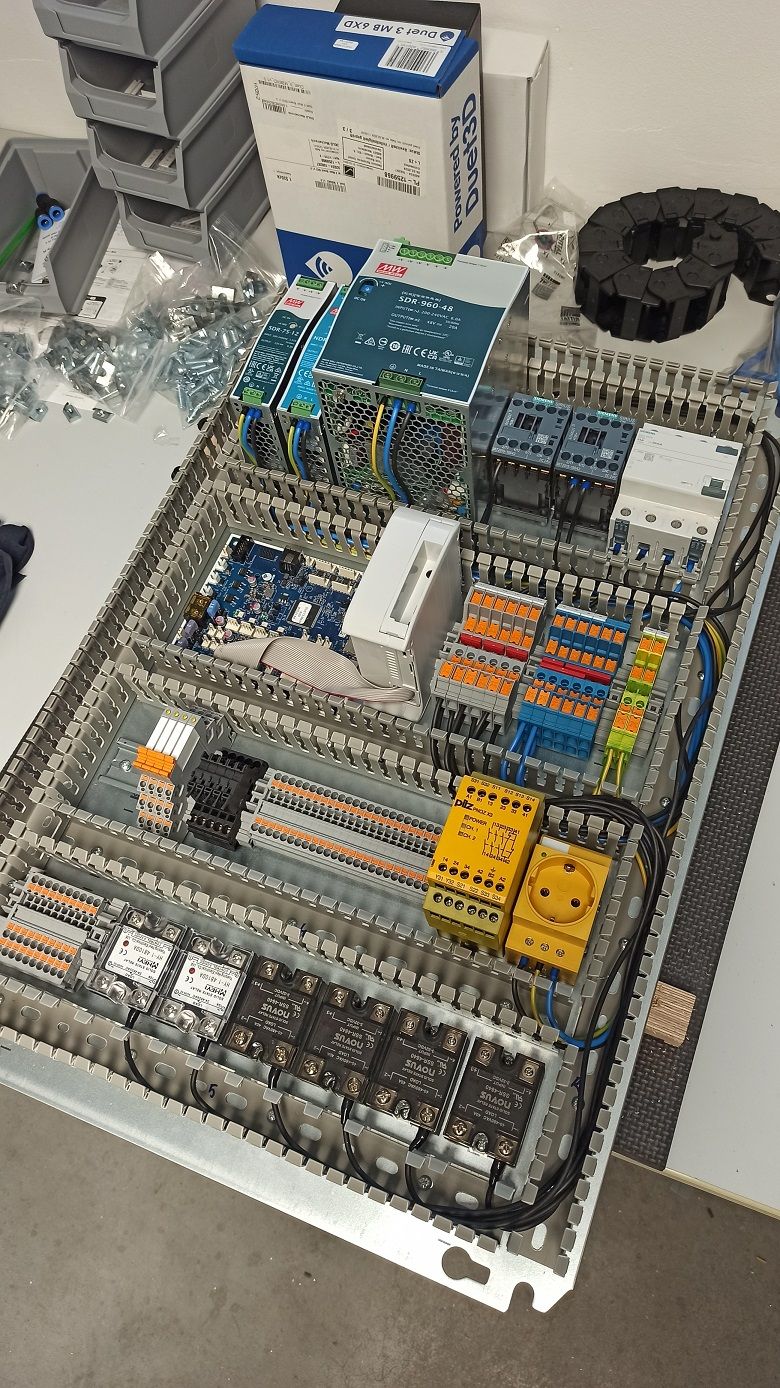
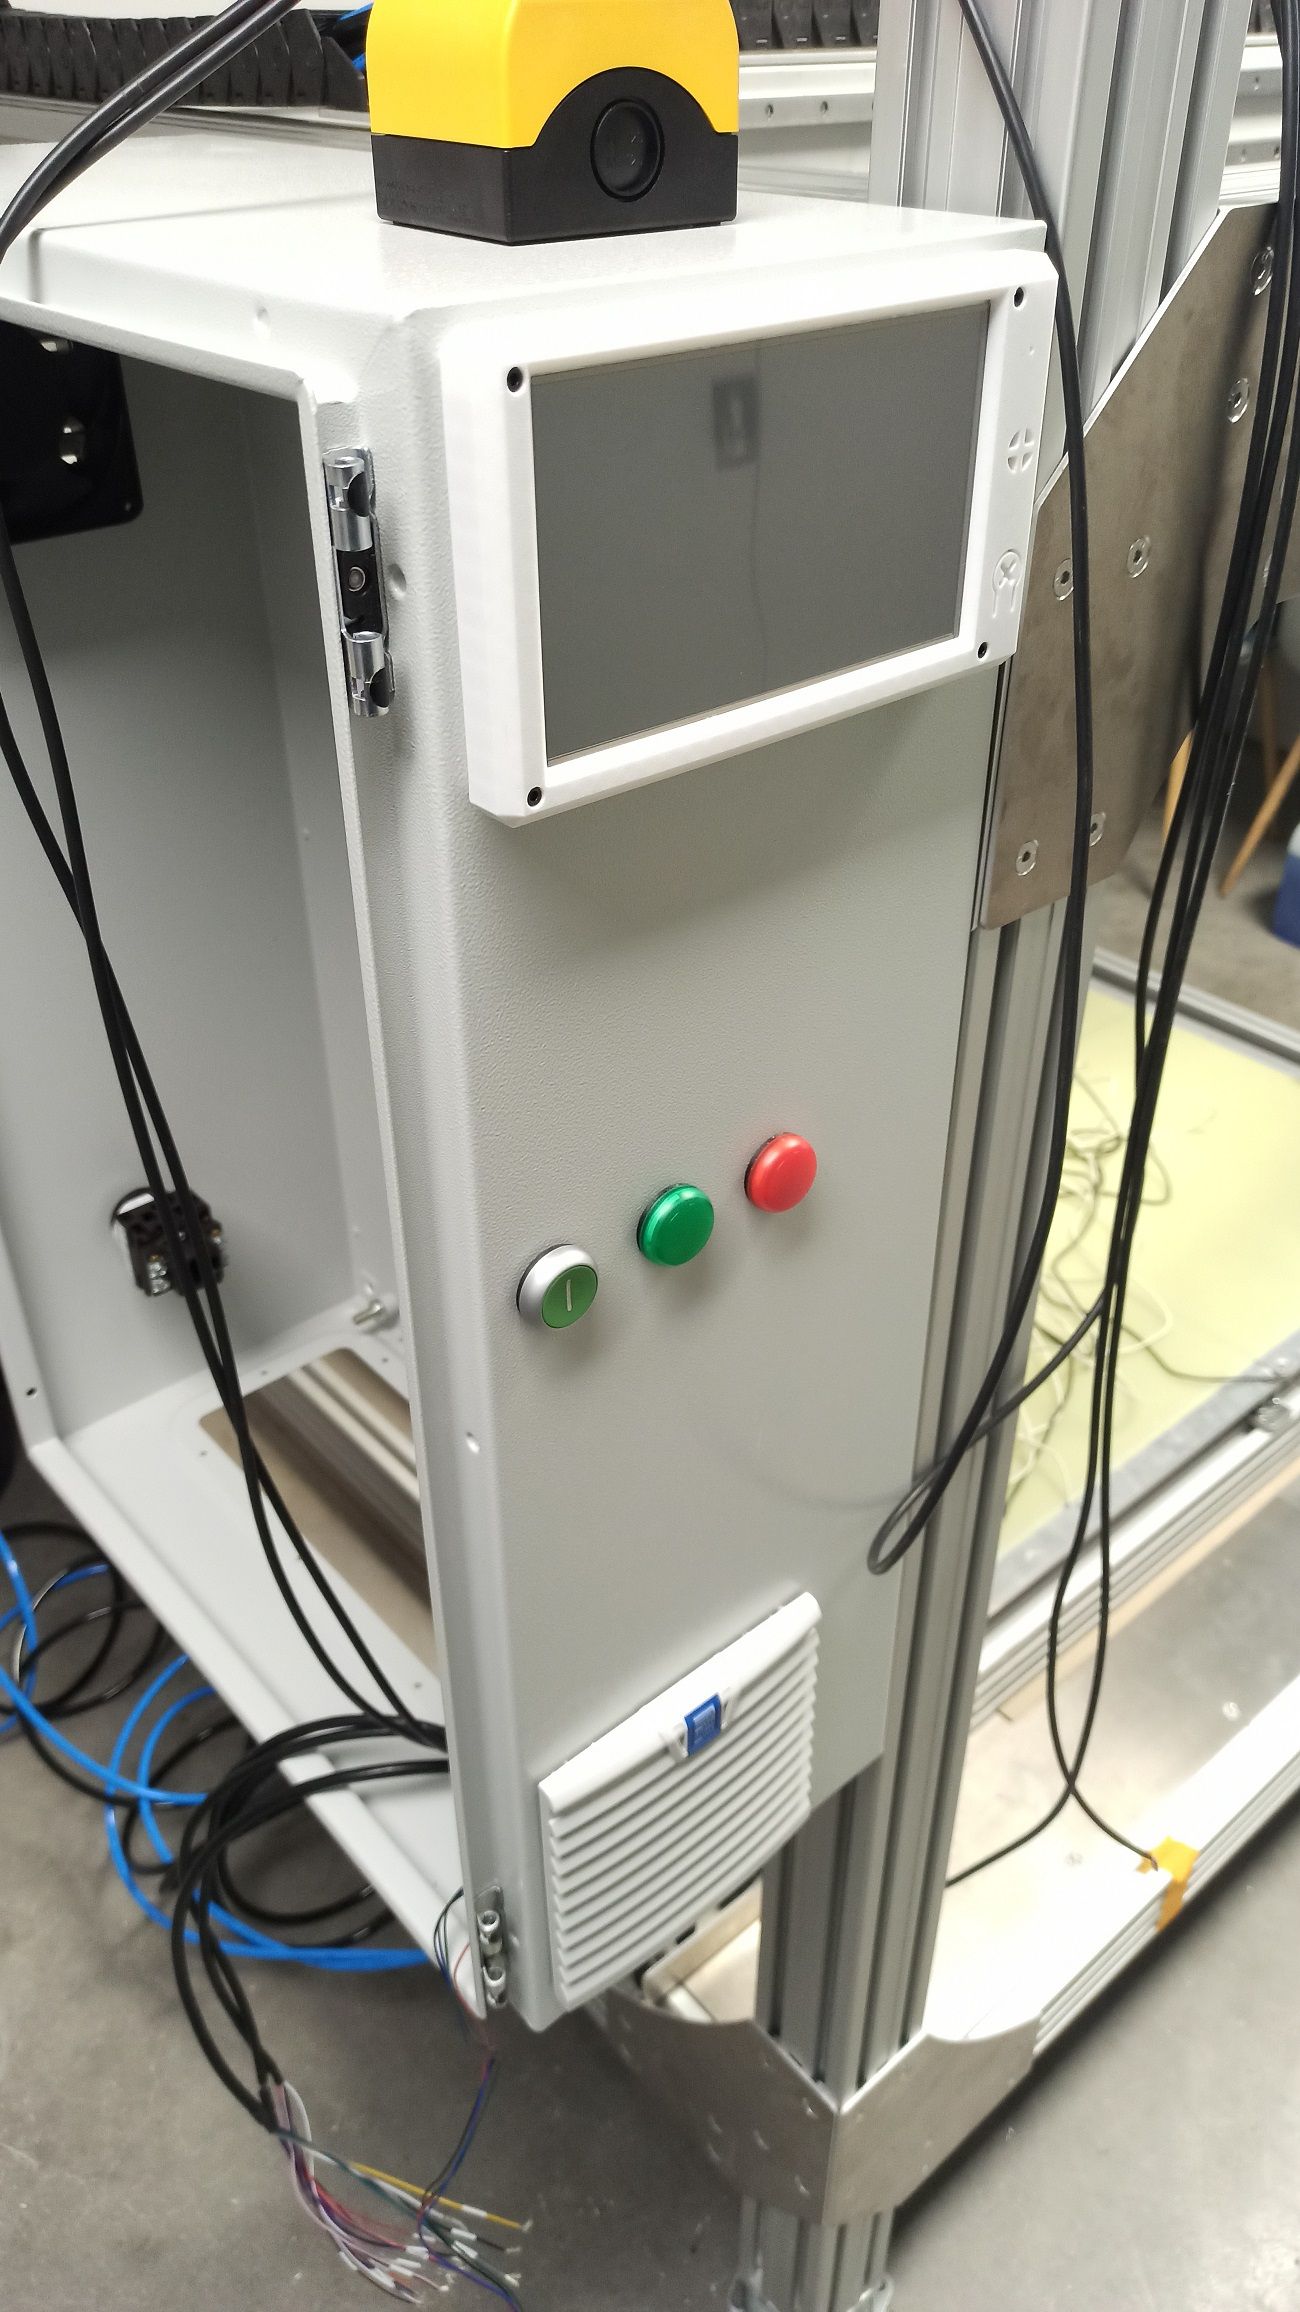
Jumping right in to post some update pictures of the current state, it's pretty close to the final wiring ( yuck!)
Does anybody know how far the Duet inductive bed probe does travel in terms of distance to a metal surface?
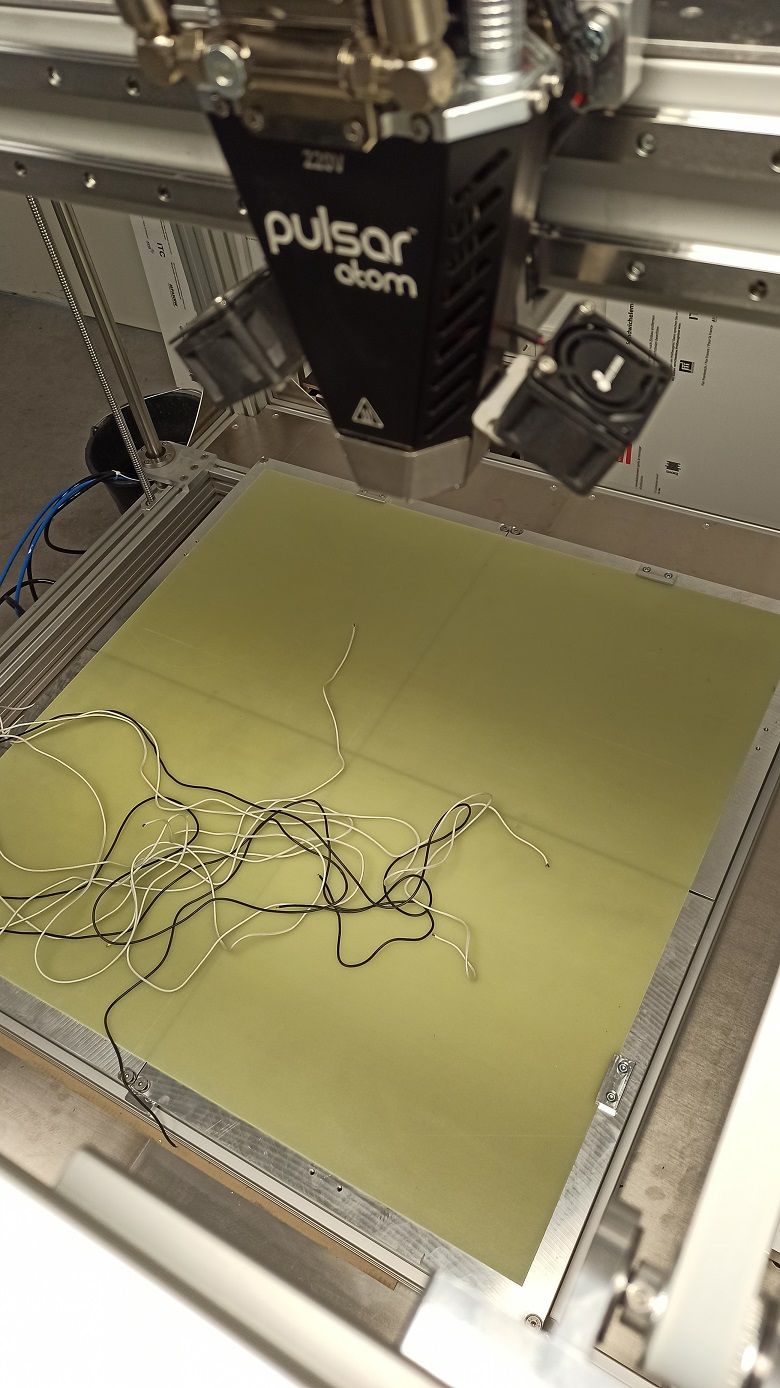
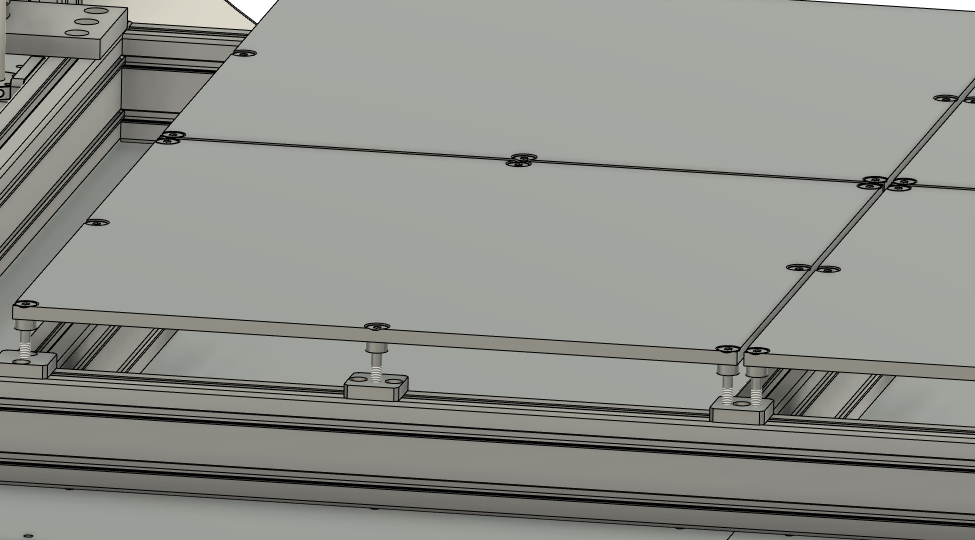
@mrehorstdmd I'm gonna implement that, quite adaptable to the current design. The plates are 530mm, 10 thick, quite large actually.
@dc42 Thanks, the chamber may go up to 80° C. My current sensors are rated up to 50 deg. Of course I could just use simple clicky switches. But that's pretty basic
@mrehorstdmd Well I've used the term `flexible´ as kind of a stretch. They're stainless M8 shanked bolts which, considering how far they stick out, provide some radial give for the few tenths of expansion whilst being stiff in Z direction. At least that seems theoretically plausible. I'll need to check for flatness when everything's heated up properly. In the end, when everythings chambered in and heated equally, there should be little concern of parts binding up. Yet, I haven't worked with such material lengths and amounts before to be eventually an 'oven' (stretch) in the end.
Could anyone provide an insight, if sensorless homing is an option on Duet paired with Duet closed loop steppers?
That way I don't need to look out for endstop sensors that can cope with higher temps!
I kinda did, firstly because I'm lazy and belts solve a lot of points at once with little parts count. On the other hand, I wasn't too sure about flex, and temperature expansion, considering possibly very heavy prints to an extend. So I went with the ´missionary´-way of things, haha. Just works that way.
Do you have any pictures of your design ?
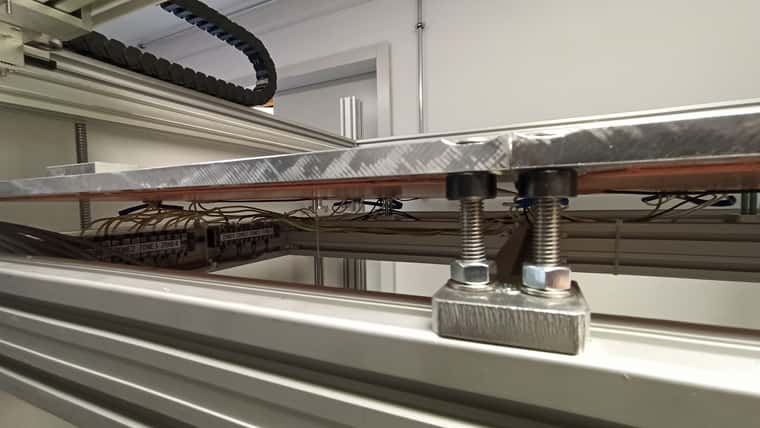
That's why I split up the bed into 4 zones; And installed them on comparably ´flexible´studs, which also allow for a precise first leveling. There will be nuts down at the thread to secure them once set.
Your method of installation seems very appealing to me!
Hi there,
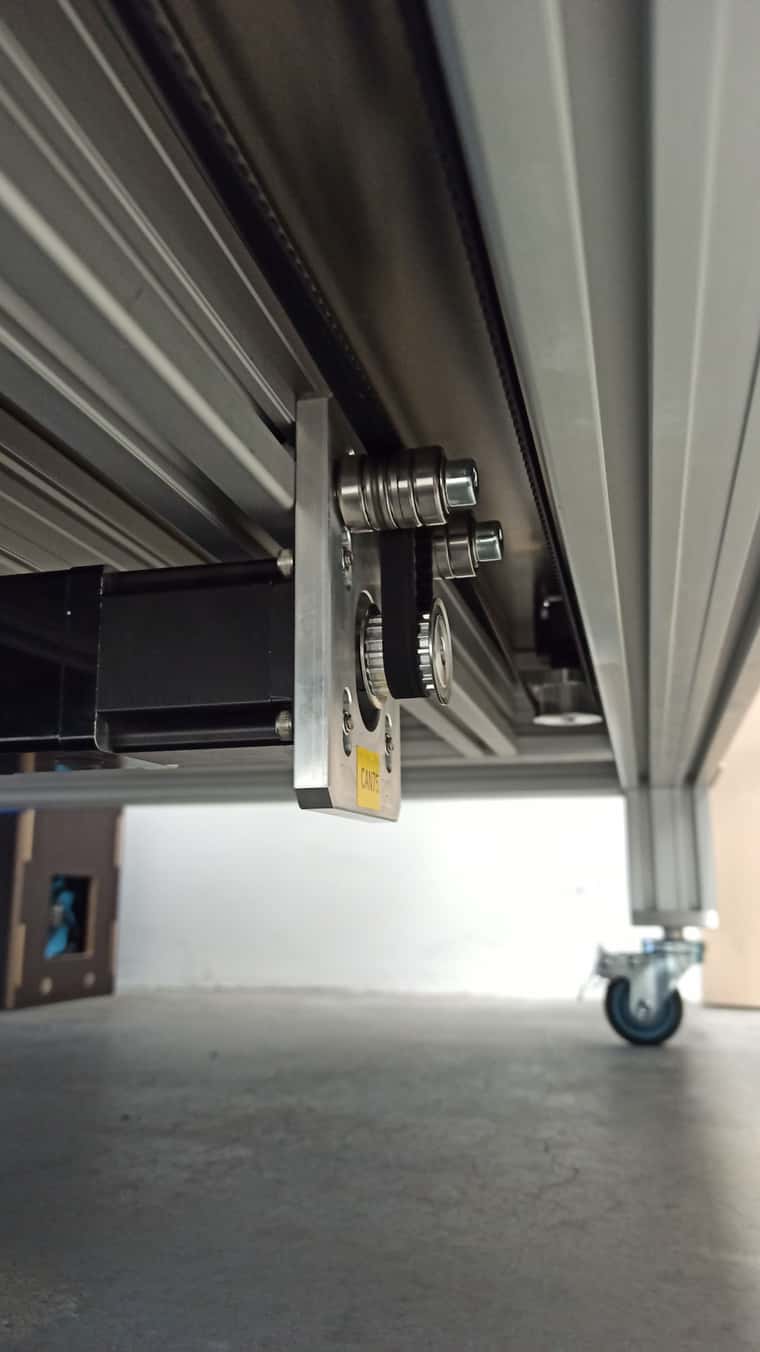
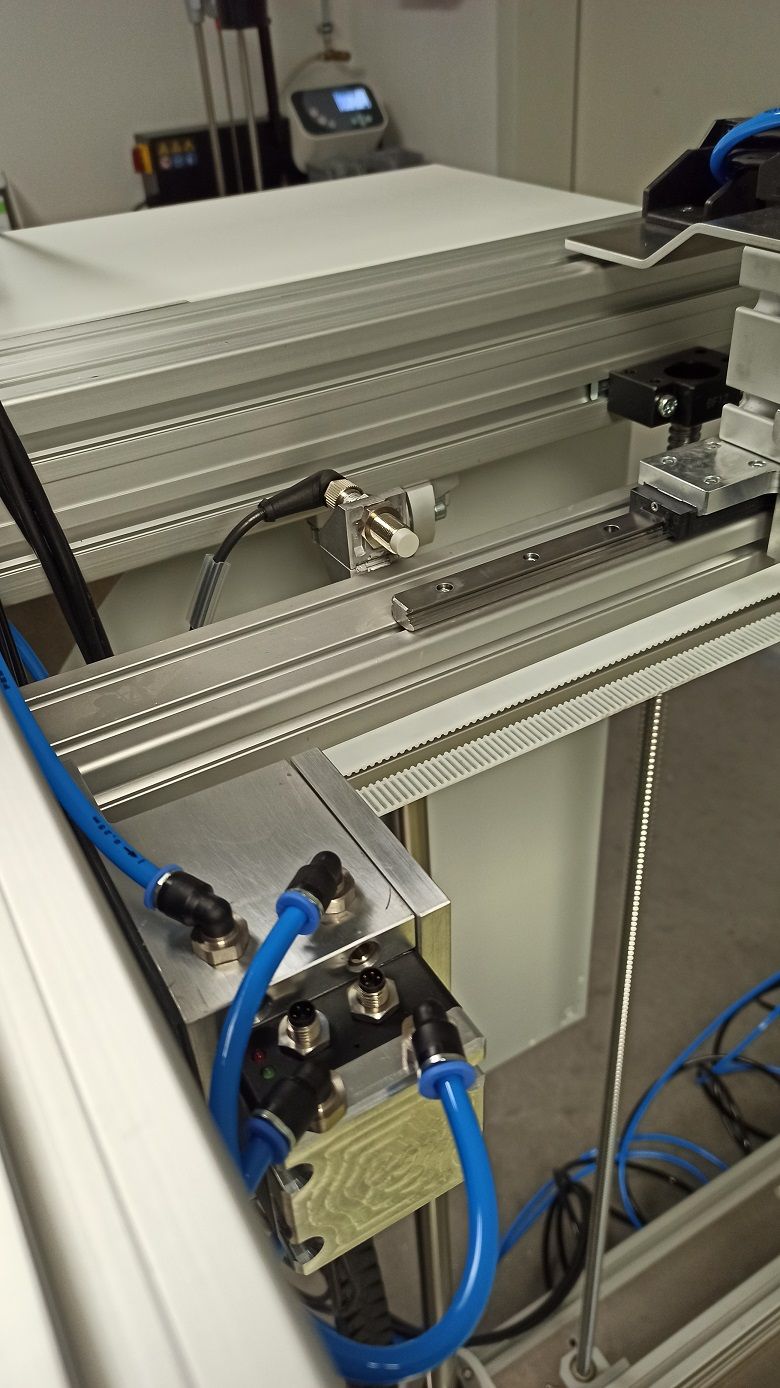
Thanks for the replies! I'm going to add a bottom view picture of the Z drive :
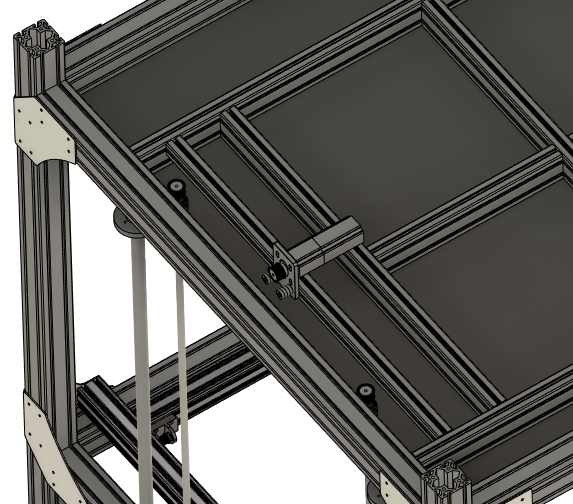
There will be a GT belt synchronizing two ballscrews, with the motor sideways (twisted belt) to accomodate this chonker down there. I wanted to keep them at the bottom, because I'm already going to have to deal with proper cooling of the XY drives up in the chamber. This way they can mind their own business down there at room temperature ")
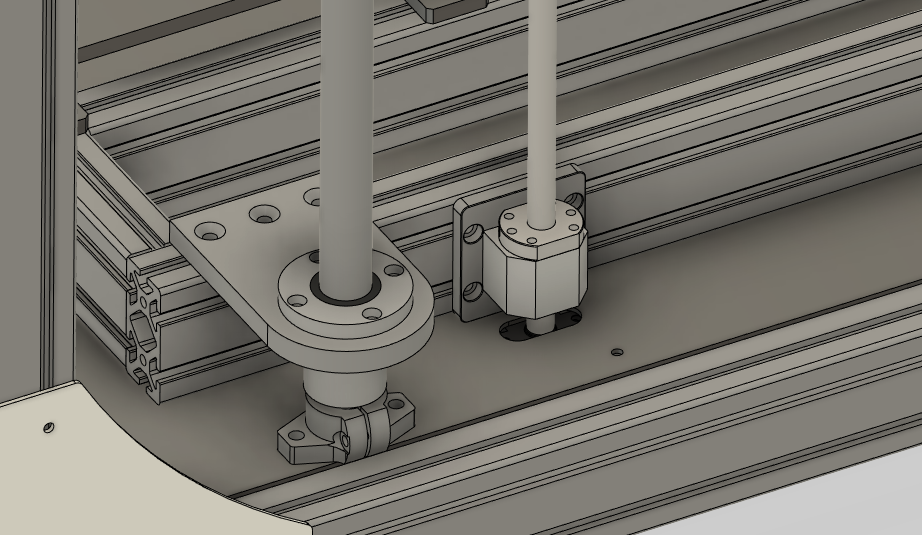
The slots at the base plate allow for belt tensioning. Don't mind the rudimentary axial roller installation too much; it'll be neatly cnc'ed once it's confirmed working (i'll swear  )
)
Dan
@T3P3Tony said in Large 3D printer build! Hardware discussion and ideas:
@Danny-Jay said in Large 3D printer build! Hardware discussion and ideas:
My first nagging question would be, how I could possibly manage the four heating zones via the Duet, of course each one gets his own feed via SSR and each has it's own temp. probe (and fuse of course)
its is possible to setup multiple heated beds using M140 P0 H0, M140 P1 H1 etc up to 4. The UI (DWC) has the option to group these beds into one "logical" bed to make it easier for the user. That is not the case on PanelDue though.
That sounds like we're in the right ballpark so I'm kinda relieved
Thanks