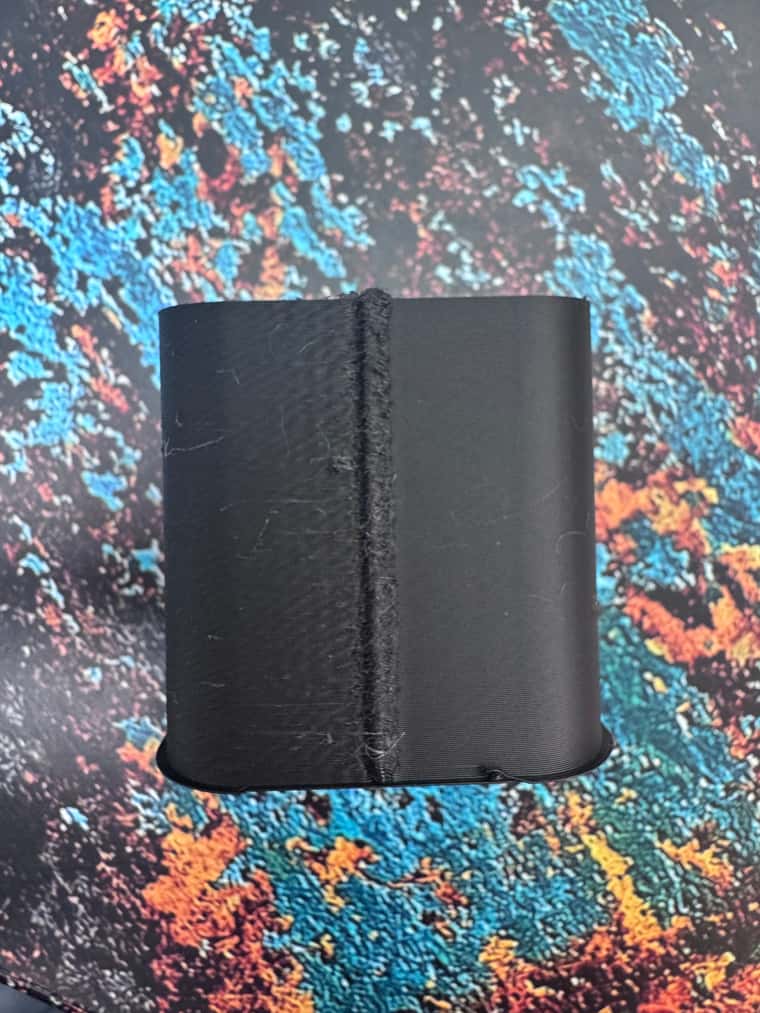
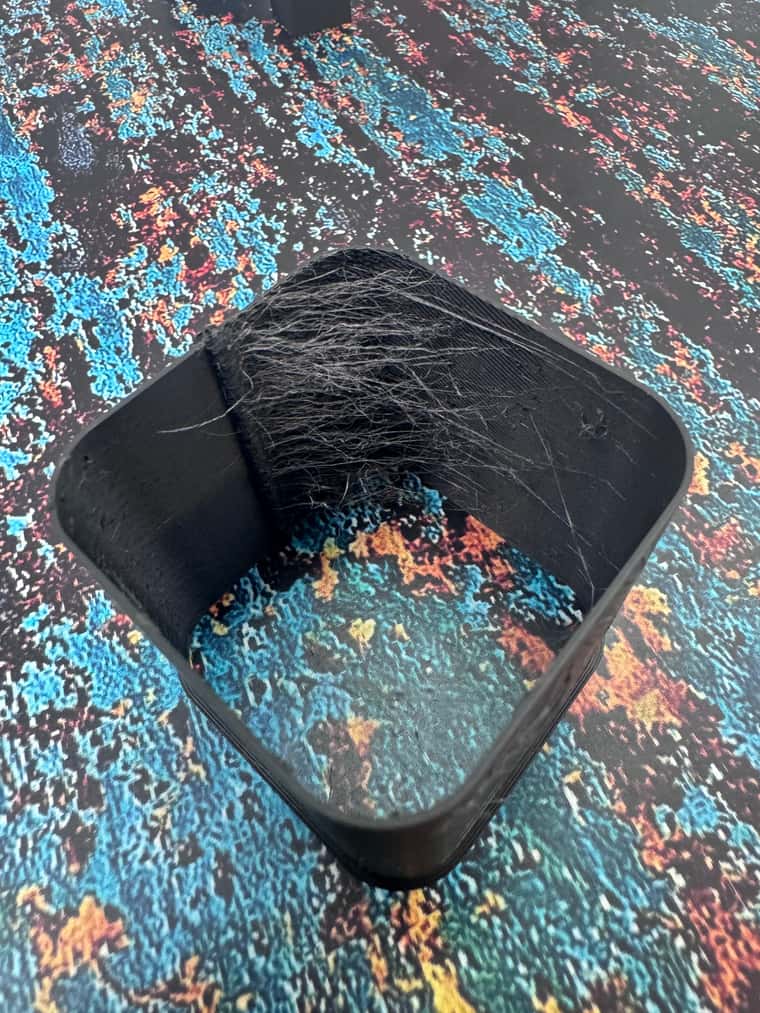
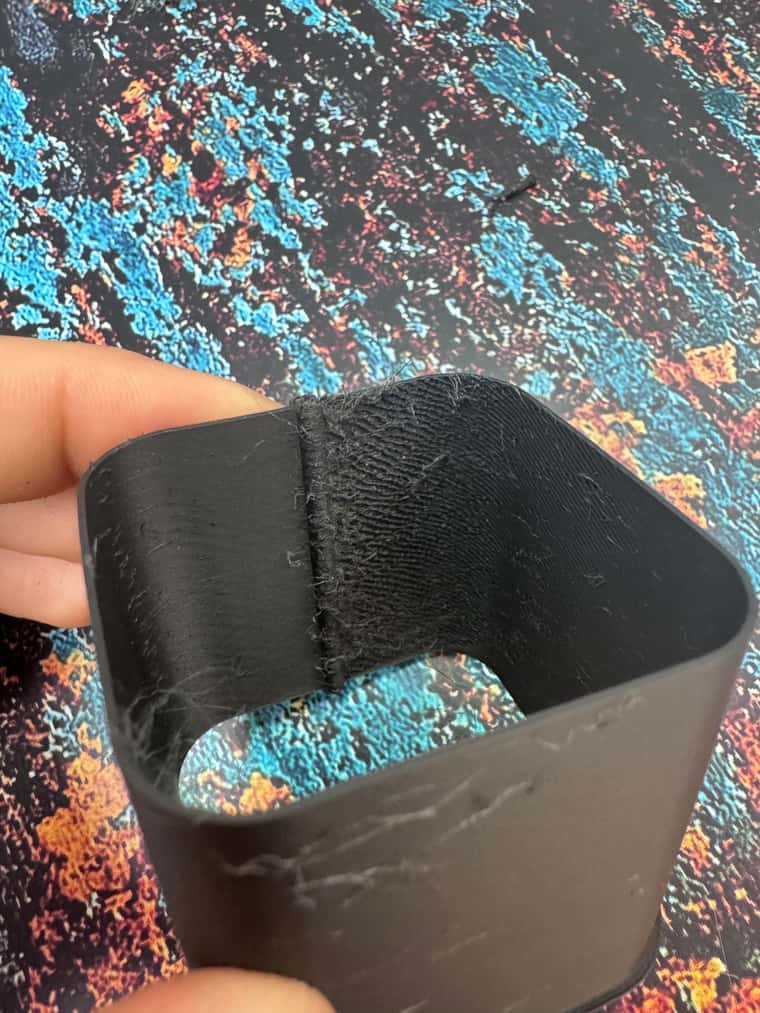
@droftarts Yeah its strange, still got to tweak the settings as im getting a very large seam still, but its not pausing now.
Posts made by JJJJ
-
RE: Printer pausing at start of each layer.
-
RE: Printer pausing at start of each layer.
@droftarts Apparently if z hop speed is 0 that's what causes that pause. I changed that number and it changed that gcode line to actually have a speed so I think that's what was causing it.
I think I just forgot to add a number when I was setting up the profile.
Thanks for your help as I would of never spotted that in the gcode.
-
RE: Printer pausing at start of each layer.
@droftarts That very helpful thank you. I will adjust those settings and I will try octoprint and see what happens.
-
Printer pausing at start of each layer.
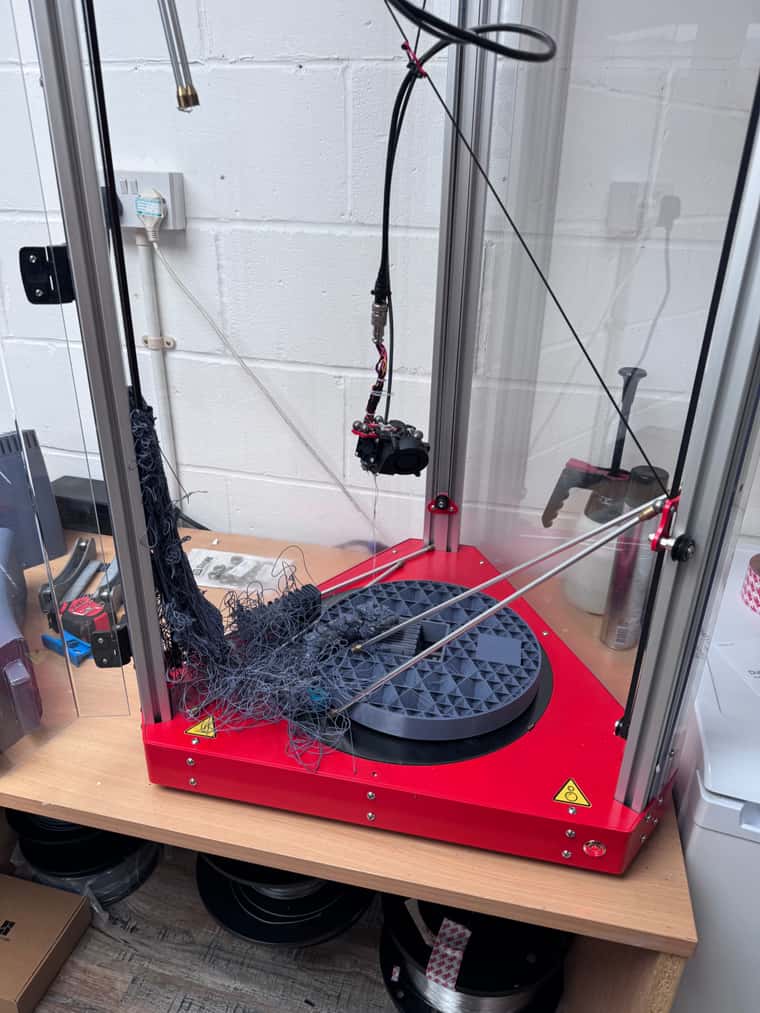
Hi, the printer keeps pausing at the start of each layer and causes massive blobs on the z seam.
Hardware:
-
Tractus T1250, 1m boden tube is around 1 metre long and it is old and I'm going to replace it. Hemera extruder.
-
E3D v6 hot end.
-
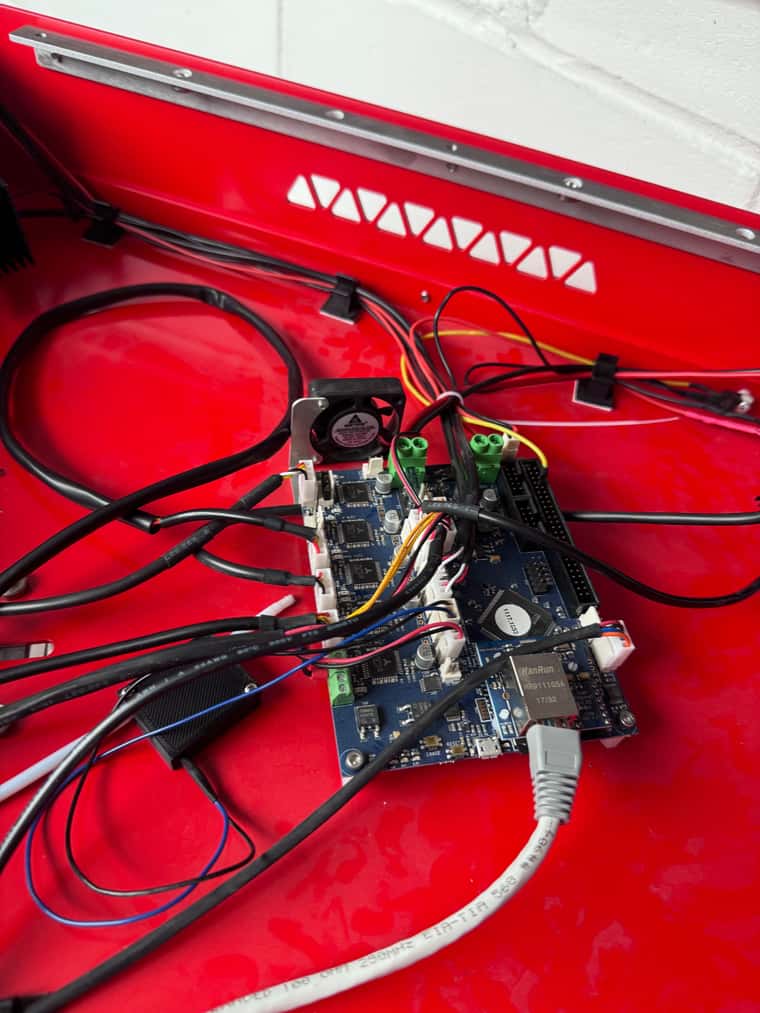
Duet2 v1.03
Firmware:
-
RepRapFirmware for Duet 2 WiFi/Ethernet FIRMWARE_VERSION: 3.5.1 ELECTRONICS: Duet Ethernet 1.02 or later FIRMWARE_DATE: 2024-04-19 14:40:46
-
Paneldue 1.21.3
I am not sure what is causing it, I thought it might be something to do with power loss recovery saving a reference point but I don't think I have that enabled in my config.
I thought it could be related to retraction but I have retract at layer change turned off and when the printer stops moving so does the extruder so I don't think it is that.
The minimum layer time is 0.1s. Retraction distance 5mm, speed 60
I also printed in vase mode and it worked fine, no blobs. But obviously, in vase mode, there is no stopping for each layer.
I have not turned on Pressure Advance.
No matter what speed I print at the printer will pause for the same amount of time, but on faster prints, the blob is much bigger.
I have attached pictures and a video. In the pictures it looks like it's under-extruding at the start of the layer and then by halfway around its back to normal.
So does anyone have any idea what could be causing it? I am probably missing something fairly obvious. Thanks
; Configuration file for RepRapFirmware on Duet 2 Ethernet ; executed by the firmware on start-up ; ; generated by RepRapFirmware Configuration Tool v3.5.4 on Fri Aug 16 2024 12:20:56 GMT+0100 (British Summer Time) ; General G90 ; absolute positioning M83 ; relative extruder moves M550 P"T1250" ; set hostname ; Accessories M575 P1 S0 B57600 ; configure PanelDue support ; Network M552 P0.0.0.0 S1 ; configure Ethernet adapter M586 P0 S1 ; configure HTTP ; Smart Drivers M569 P0 S1 D2 ; driver 0 goes forwards (extruder 0) M569 P2 S0 D2 ; driver 2 goes backwards (X axis) M569 P3 S0 D2 ; driver 3 goes backwards (Z axis) M569 P4 S0 D2 ; driver 4 goes backwards (Y axis) ; Motor Idle Current Reduction M906 I40 ; set motor current idle factor M84 S30 ; set motor current idle timeout ; Axes M584 X2 Y4 Z3 ; set axis mapping M350 X16 Y16 Z16 I1 ; configure microstepping with interpolation M906 X1700 Y1700 Z1700 ; set axis driver currents M92 X160 Y160 Z160 ; configure steps per mm M566 X30000 Y30000 Z30000 ; set maximum instantaneous speed changes (mm/min) M203 X36000 Y36000 Z36000 ; set maximum speeds (mm/min) M201 X4000 Y4000 Z4000 ; set accelerations (mm/s^2) ; Extruders M584 E0 ; set extruder mapping M350 E16 I1 ; configure microstepping with interpolation M906 E1100 ; set extruder driver currents M92 E357.14286 ; configure steps per mm M566 E18000 ; set maximum instantaneous speed changes (mm/min) M203 E18000 ; set maximum speeds (mm/min) M201 E4000 ; set accelerations (mm/s^2) ; Kinematics M665 L457.600 R267.060 B175 H678.996 ; set delta radius, diagonal rod length, printable radius and homed height M208 Z0 S1 ; set minimum Z M666 X-0.23 Y0.20 Z0.03 A0 B0 ; endstop adjustments and XY tilt, can be determined using auto calibration as well ; Probes M558 K0 P8 C"e0stop" H5 F300 T18000 R0.2 A3 ; configure digital probe via slot #0 G31 P100 X0 Y0 Z-0.3 ; set Z probe trigger value, offset and trigger height ;Bed Mesh M557 R170 S80 ;bed probe grid ; Endstops M574 X2 P"xstop" S1 ; configure X axis endstop M574 Y2 P"ystop" S1 ; configure Y axis endstop M574 Z2 P"zstop" S1 ; configure Z axis endstop ; Sensors M308 S0 P"bedtemp" Y"thermistor" A"Heated Bed" T100000 B4725 C7.06e-8 ; configure sensor #0 M308 S1 P"e0temp" Y"thermistor" A"Nozzle" T100000 B4267 C7.06e-8 ; configure sensor #1 ; Heaters M950 H0 C"bedheat" T0 ; create heater #0 (bed) M143 H0 P0 T0 C0 S140 A0 ; configure heater monitor #0 for heater #0 M307 H0 R0.337 K0.353:0.000 D2.69 E1.35 S1.00 B0 ; configure model of heater #0 M950 H1 C"e0heat" T1 ; create heater #1 (Nozzle) M143 H1 P0 T1 C0 S285 A0 ; configure heater monitor #0 for heater #1 M307 H1 R2.43 D5.5 E1.35 K0.56 B0 ; configure model of heater #1 ; Heated beds M140 P0 H0 ; configure heated bed #0 ; Fans M950 F0 C"fan0" ; create fan #0 M106 P0 S0 L0 X1 B0.1 ; configure fan #0 M950 F1 C"fan1" ; create fan #1 M106 P1 S0 B0.1 H1 T50 ; configure fan #1 M950 F2 C"fan2" ; create fan #2 M106 P2 S1 L0 X0.6 B0.1 ; configure fan #2 ; Tools M563 P0 D0 H1 F0 ; create tool #0 M568 P0 R0 S0 ; set initial tool #0 active and standby temperatures to 0C
-
-
RE: Inconsistent Trigger Height
@droftarts Thank you for your reply, that's very helpful I will try changing the speed then.
This is the printer they have at work and when I joined a few other people had already tried to get it working with no luck. When I went to update it I forgot to save the original config, it was on version 1. something. But it wasn't really working then anyway, so my plan was to start again so I did the config from scratch.
I have also struggled to find any information about the printer, so that explains why then.
I've managed to get some prints from it now I rewired the hot end and added a new extruder but it's just the first layer and z offset causing issues now.
I will try the things you have said, thanks again for your help.
-
Inconsistent Trigger Height
Hi, I can't get consistent trigger heights for my delta printer and it throws up constant errors when auto-calibrating and auto-bed levelling. It does not print a consistent first layer.
Printer: Tractus t1250 delta printer
Firmware:
-
RepRapFirmware for Duet 2 WiFi/Ethernet FIRMWARE_VERSION: 3.5.1 ELECTRONICS: Duet Ethernet 1.02 or later FIRMWARE_DATE: 2024-04-19 14:40:46
-
Paneldue 1.21.3
Hardware:
-
Duet2 v1.03
-
E3d v6 hot end, hemera boden extruder
I was following the calibration guide for delta printers and got to the auto-calibration step. When I got to the step to find the z-trigger height I could not get a consistent reading. I am not sure if this is hardware-related or software-related.
I have a range of measurements from -0.283mm to - 0.471mm. But each reading is different and a random number in this rang
e.I am not sure what to do and what to check. So far I have:
-
Tried doing it hot and cold and I got the same inconsistencies.
-
Checked that the carriage wheels move freely.
-
I am not sure how to check the motor current.
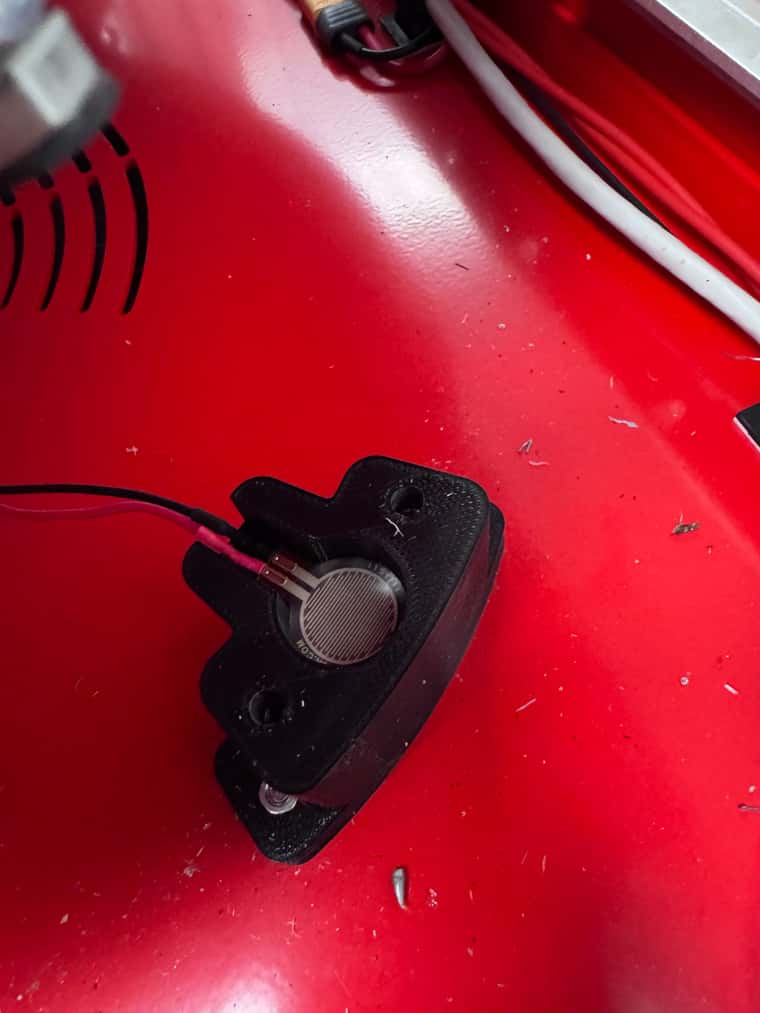
But it could be due to how the bed probe system is set up, I am not entirely sure how it works. It uses the nozzle so I assume it is a pressure sensor as it is a glass bed.
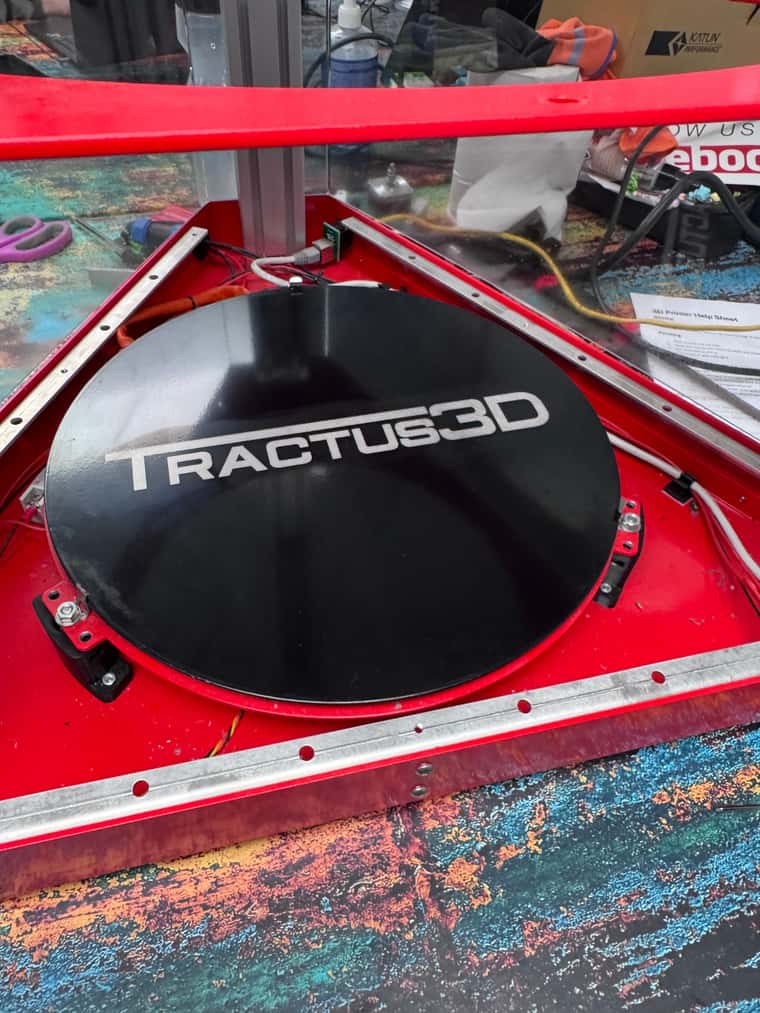
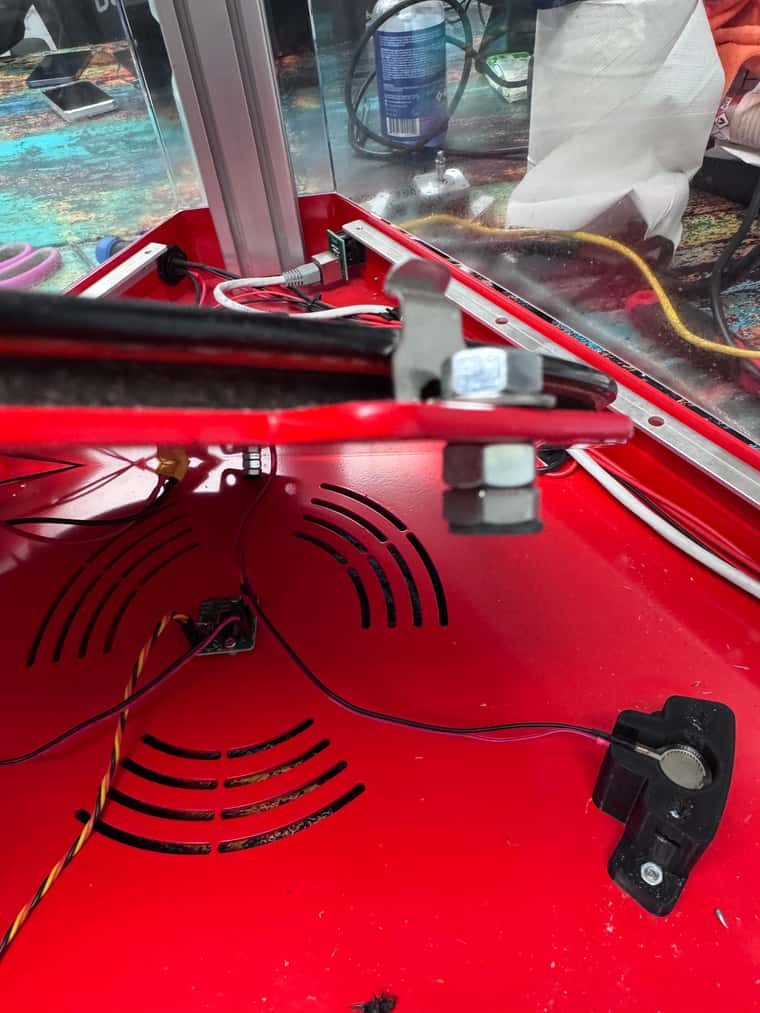
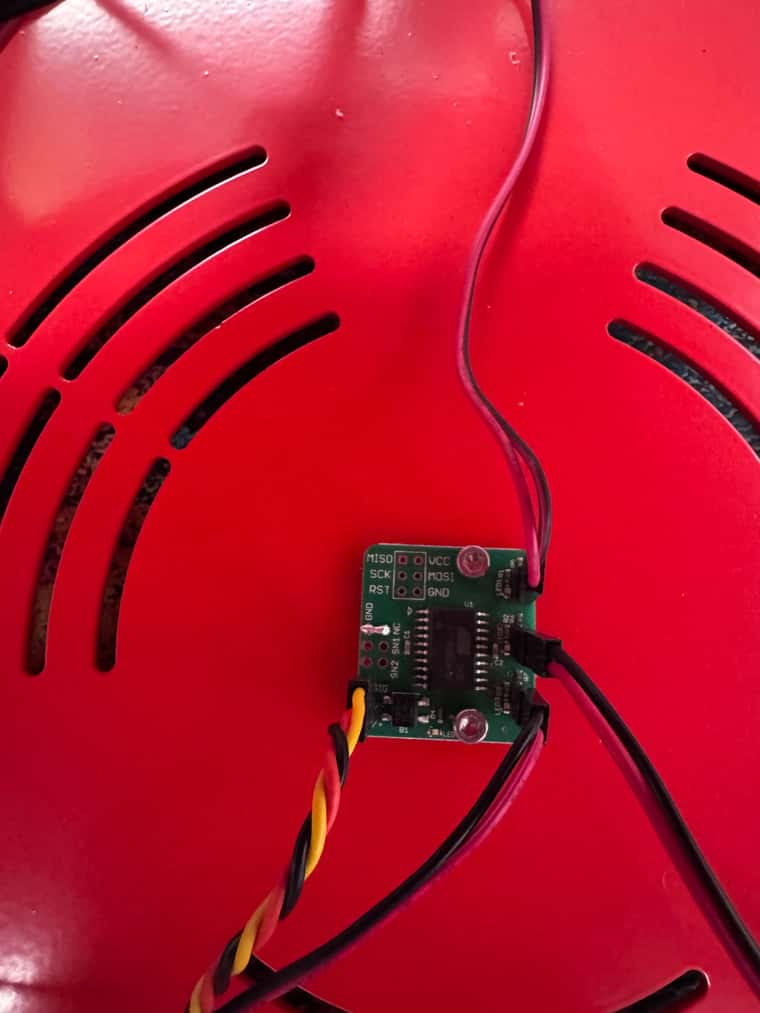
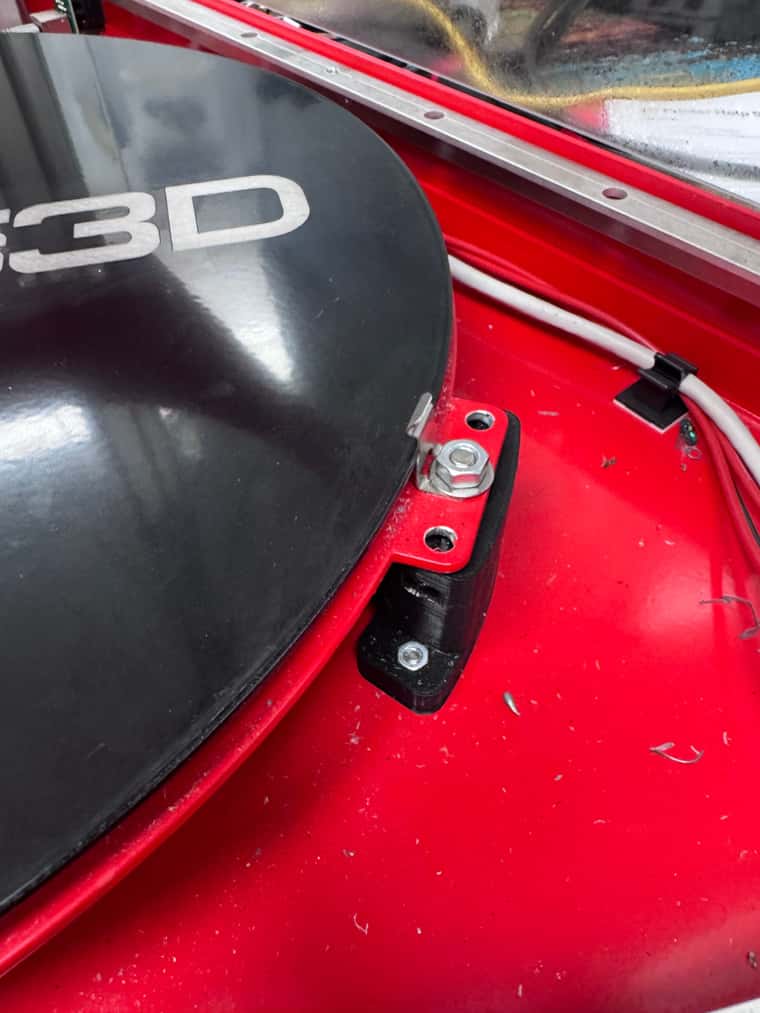
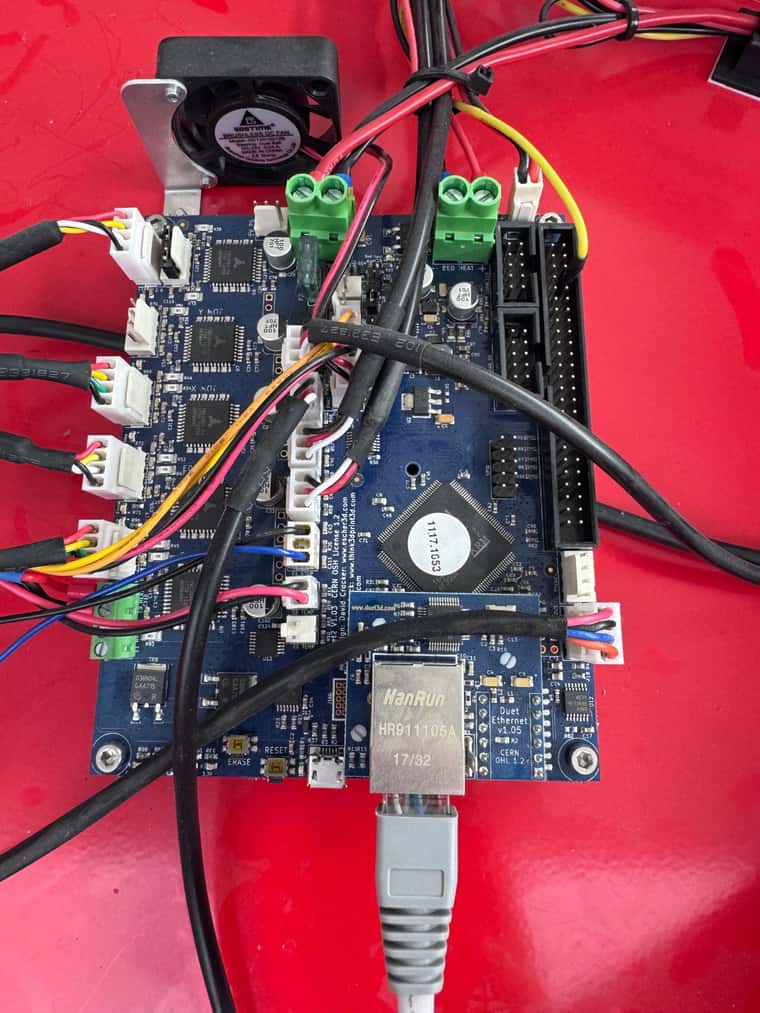
I am not sure how to check if this is working properly and what I would need to do to fix it. I have attached some pictures of the printer and the bed.
Is there anything I can do with the software to reduce this inconsistency? I am really stuck and not sure what to do.
Any help would be much appreciated. Thanks
; Configuration file for RepRapFirmware on Duet 2 Ethernet ; executed by the firmware on start-up ; ; generated by RepRapFirmware Configuration Tool v3.5.4 on Fri Aug 16 2024 12:20:56 GMT+0100 (British Summer Time) ; General G90 ; absolute positioning M83 ; relative extruder moves M550 P"T1250" ; set hostname ; Accessories M575 P1 S0 B57600 ; configure PanelDue support ; Network M552 P0.0.0.0 S1 ; configure Ethernet adapter M586 P0 S1 ; configure HTTP ; Smart Drivers M569 P0 S1 D2 ; driver 0 goes forwards (extruder 0) M569 P2 S0 D2 ; driver 2 goes backwards (X axis) M569 P3 S0 D2 ; driver 3 goes backwards (Z axis) M569 P4 S0 D2 ; driver 4 goes backwards (Y axis) ; Motor Idle Current Reduction M906 I40 ; set motor current idle factor M84 S30 ; set motor current idle timeout ; Axes M584 X2 Y4 Z3 ; set axis mapping M350 X16 Y16 Z16 I1 ; configure microstepping with interpolation M906 X1700 Y1700 Z1700 ; set axis driver currents M92 X160 Y160 Z160 ; configure steps per mm M566 X30000 Y30000 Z30000 ; set maximum instantaneous speed changes (mm/min) M203 X36000 Y36000 Z36000 ; set maximum speeds (mm/min) M201 X4000 Y4000 Z4000 ; set accelerations (mm/s^2) ; Extruders M584 E0 ; set extruder mapping M350 E16 I1 ; configure microstepping with interpolation M906 E1100 ; set extruder driver currents M92 E357.14286 ; configure steps per mm M566 E18000 ; set maximum instantaneous speed changes (mm/min) M203 E18000 ; set maximum speeds (mm/min) M201 E4000 ; set accelerations (mm/s^2) ; Kinematics M665 L457.600 R267.126 B175 H679.885 ; set delta radius, diagonal rod length, printable radius and homed height M208 Z0 S1 ; set minimum Z M666 X0 Y-0 Z-0 A0 B0 ; endstop adjustments and XY tilt, can be determined using auto calibration as well ; Probes M558 K0 P5 C"e0stop" H5 F120 T18000 R0.2 A3 ; configure digital probe via slot #0 M558 H5 ;*** Remove this line after delta calibration has been done and new delta parameters have been saved G31 P500 X0 Y0 Z-0.555 ; set Z probe trigger value, offset and trigger height ;Bed Mesh M557 R150 S50 ;bed probe grid ; Endstops M574 X2 P"xstop" S1 ; configure X axis endstop M574 Y2 P"ystop" S1 ; configure Y axis endstop M574 Z2 P"zstop" S1 ; configure Z axis endstop ; Sensors M308 S0 P"bedtemp" Y"thermistor" A"Heated Bed" T100000 B4725 C7.06e-8 ; configure sensor #0 M308 S1 P"e0temp" Y"thermistor" A"Nozzle" T100000 B4267 C7.06e-8 ; configure sensor #1 ; Heaters M950 H0 C"bedheat" T0 ; create heater #0 (bed) M143 H0 P0 T0 C0 S140 A0 ; configure heater monitor #0 for heater #0 M307 H0 R0.337 K0.353:0.000 D2.69 E1.35 S1.00 B0 ; configure model of heater #0 M950 H1 C"e0heat" T1 ; create heater #1 (Nozzle) M143 H1 P0 T1 C0 S285 A0 ; configure heater monitor #0 for heater #1 M307 H1 R2.43 D5.5 E1.35 K0.56 B0 ; configure model of heater #1 ; Heated beds M140 P0 H0 ; configure heated bed #0 ; Fans M950 F0 C"fan0" ; create fan #0 M106 P0 S0 L0 X1 B0.1 ; configure fan #0 M950 F1 C"fan1" ; create fan #1 M106 P1 S0 B0.1 H1 T50 ; configure fan #1 M950 F2 C"fan2" ; create fan #2 M106 P2 S1 L0 X0.6 B0.1 ; configure fan #2 ; Tools M563 P0 D0 H1 F0 ; create tool #0 M568 P0 R0 S0 ; set initial tool #0 active and standby temperatures to 0C
; bed.g ; called to perform automatic delta calibration ; ; generated by RepRapFirmware Configuration Tool v3.5.4 on Fri Aug 16 2024 12:20:56 GMT+0100 (British Summer Time) G28 ; home the towers first ; Probe the bed at 12 peripheral and 6 halfway points, and perform 6-factor auto compensation ; Before running this, you should have set up your Z-probe trigger height to suit your build, in the G31 command in config.g. G30 P0 X0 Y84.9 H0 Z-99999 G30 P1 X42.45 Y73.53 H0 Z-99999 G30 P2 X73.53 Y42.45 H0 Z-99999 G30 P3 X84.9 Y0 H0 Z-99999 G30 P4 X73.53 Y-42.45 H0 Z-99999 G30 P5 X42.45 Y-73.53 H0 Z-99999 G30 P6 X0 Y-84.9 H0 Z-99999 G30 P7 X-42.45 Y-73.53 H0 Z-99999 G30 P8 X-73.53 Y-42.45 H0 Z-99999 G30 P9 X-84.9 Y0 H0 Z-99999 G30 P10 X-73.53 Y42.45 H0 Z-99999 G30 P11 X-42.45 Y73.53 H0 Z-99999 G30 P12 X0 Y42.4 H0 Z-99999 G30 P13 X36.72 Y21.2 H0 Z-99999 G30 P14 X36.72 Y-21.2 H0 Z-99999 G30 P15 X0 Y-42.4 H0 Z-99999 G30 P16 X-36.72 Y-21.2 H0 Z-99999 G30 P17 X-36.72 Y21.2 H0 Z-99999 G30 P18 X0 Y0 H0 Z-99999 S6 ; Use S-1 for measurements only, without calculations. Use S4 for endstop heights and Z-height only. Use S6 for full 6 factors ; If your Z probe has significantly different trigger heights depending on XY position, adjust the H parameters in the G30 commands accordingly. The value of each H parameter should be (trigger height at that XY position) - (trigger height at centre of bed)
-